

How to: 2000+ radio light fix tutorial (45pics)
-
harofreak00
- Administrator

- Posts: 26022
- Joined: Mon May 19, 2008 6:04 pm
- Year and Trim: 2004 GXP - plus a handful of other Bonnevilles
- Location: Browerville, MN
- Contact:
Re: How to: 2000+ radio light fix tutorial (45pics)
Yes, but they aren't as bright.
Andrew - owner/operator of Bonnevilles Unlimited

2004 Bonneville GXP | 60k | White Gold Tricoat | custom built supercharged 3800 hot rod | garage queen
1997 Corvette | 57k | Silver Metallic | Z06 wheels | Date-night Hauler/Parts runner
2014 Town & Country Limited | Cashmere Pearl | 115k | Family Hauler
2002 Ram 1500 Quad Cab Sport | Black| 280k | Official Bonneville Hauler
-
locowbl
- SLE Member

- Posts: 72
- Joined: Wed May 25, 2011 5:52 pm
- Year and Trim: 2000 SE
- Location: Valley Mills, Tx.
Re: How to: 2000+ radio light fix tutorial (45pics)
I just replaced the bulbs per your tutorial. I wish that I had found this information years ago. Everything was exactly as you showed. One note for anyone else who might want to try this is to make sure that the ends of the T1 bulbs are not sticking out of the back side of the circuit board too far. They can ground out on the metal case of the radio.
LocoWBL
-
Ken_W
- Posts like an L27

- Posts: 634
- Joined: Sat Aug 14, 2010 9:54 pm
- Year and Trim: 2000 SSEi
- Location: Lake Orion, MI
Re: How to: 2000+ radio light fix tutorial (45pics)
What about the 20-or-so little red bulbs that go behind various radio buttons (such as 1-2-3-4-5-6)? I've got a few of those that are out. The tutorial shows how to open the radio to access them, but where can you get the actual bulbs and how do you change them out?
(Am posting to the main radio light fix thread because somebody, someday, is bound to have the same question.)
Ken_W
(Am posting to the main radio light fix thread because somebody, someday, is bound to have the same question.)
Ken_W
Last edited by Ken_W on Fri Jun 24, 2011 11:08 pm, edited 1 time in total.
2000 SSEi "Gypssei" - 206k miles - Light Bronzemist Metallic - stock
1999 Grand Am GT - 168k miles - Red - stock DEAD -- transmission died
2004 Pontiac Montana Ext 2WD - 207k miles - Blue Black Metallic - stock
1999 Grand Am GT - 168k miles - Red - stock DEAD -- transmission died
2004 Pontiac Montana Ext 2WD - 207k miles - Blue Black Metallic - stock
-
harofreak00
- Administrator
- Posts: 26022
- Joined: Mon May 19, 2008 6:04 pm
- Year and Trim: 2004 GXP - plus a handful of other Bonnevilles
- Location: Browerville, MN
- Contact:
Re: How to: 2000+ radio light fix tutorial (45pics)
LED's don't typically burn out. I have a couple radios here that have some of the LED's not working. I took them out and was going to replace them but when I removed them, I tested them and they worked fine. It seemed like it was a problem with the circuit board, not the LED. Going to be hard to fix that one.
Andrew - owner/operator of Bonnevilles Unlimited
2004 Bonneville GXP | 60k | White Gold Tricoat | custom built supercharged 3800 hot rod | garage queen
1997 Corvette | 57k | Silver Metallic | Z06 wheels | Date-night Hauler/Parts runner
2014 Town & Country Limited | Cashmere Pearl | 115k | Family Hauler
2002 Ram 1500 Quad Cab Sport | Black| 280k | Official Bonneville Hauler
-
crash93ssei

- Retired Moderator

- Posts: 7671
- Joined: Mon May 19, 2008 6:08 pm
- Year and Trim: 2002 SE
- Location: Midland, Michigan
Re: How to: 2000+ radio light fix tutorial (45pics)
Excellent writeup.
Just replaced six burnt out bulbs in the radio for the 03. I used all radio shack bulbs 272-1092 as pictured on page one, replaced the three behind the LCD and the three along the bottom.
All said and done it took me about 45 minutes from start to finish, definitely not bad. I am very happy with the end result, though the LCD is slightly dimmer then stock, but honestly not bad and definitely not enough to make me want to spend $20 for the right bulbs.
This cost me about $6.50 for the six bulbs.
Ryan
2003 Bonneville SSEi - The Black Mirror SOLD!
2002 Bonneville SE - The Mutt Complete 2004 SLE interior, drivetrain, and body harness swap, ECC swap, HUD swap, black GXP wheels, GXP headlights and tinted tails - SOLD
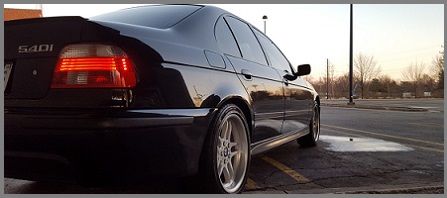
2003 BMW 540i M Sport, 2001 BMW X5 4.4i, 2010 GMC Acadia, 2017 Grand Design Imagine 3150BH
1982 Cutlass Supreme - The fun one
2003 Bonneville SSEi - The Black Mirror SOLD!
2002 Bonneville SE - The Mutt Complete 2004 SLE interior, drivetrain, and body harness swap, ECC swap, HUD swap, black GXP wheels, GXP headlights and tinted tails - SOLD
2003 BMW 540i M Sport, 2001 BMW X5 4.4i, 2010 GMC Acadia, 2017 Grand Design Imagine 3150BH
1982 Cutlass Supreme - The fun one
MattStrike wrote:It was the worst week of my life! *pause, drinks beer... smiles* But I'm better now!
-
edonop
- LE Member
- Posts: 1
- Joined: Mon Oct 17, 2011 8:35 pm
- Year and Trim: 2004 Pontiac Bonneville GXP
Re: How to: 2000+ radio light fix tutorial (45pics)
Excellant!
Just replaced all 7 bulbs as per the tutorial. No issues whatsoever. Thanks for that very informative writeup.
Just replaced all 7 bulbs as per the tutorial. No issues whatsoever. Thanks for that very informative writeup.
Re: How to: 2000+ radio light fix tutorial (45pics)
Do any of you know the polarity of each of the lights or which pins are +12v and ground for the illumination on the circuit board? I'm going to see if I can come up with an LED solution, but LEDs, being diodes, only work in one direction. Therefore, I figured that if any of you knew, that would save me a little time. Polarity for any of the other switches, knobs or appliances using incandescent bulbs would be handy too, but aren't necessary, since the radio is the only component other than the instrument cluster that are complicated enough to cost me more than a few seconds to figure out.
Thanks in advance if anyone knows.
Thanks in advance if anyone knows.
-
Bryan_leonard
- LE Member
- Posts: 1
- Joined: Fri Jan 13, 2012 10:15 am
- Year and Trim: 2003 SSEI
Re: How to: 2000+ radio light fix tutorial (45pics)
This helped out so much. Thanks. Replaced every bulb and uber satisfied... 
-
jackdoherty5@comcast.net
- LE Member
- Posts: 1
- Joined: Wed Mar 21, 2012 11:14 am
- Year and Trim: 2002 SSI
Re: How to: 2000+ radio light fix tutorial (45pics)
Excellent post! Your attention to detail is fantastic. Thanks for the great pics.
-
bradkerbick
- LE Member
- Posts: 5
- Joined: Tue Oct 28, 2008 4:18 pm
- Year and Trim: 2000 SE
Re: How to: 2000+ radio light fix tutorial (45pics)
Wow, its amazing what the right information can do for us.... Just did this fix yesterday and having no clock or radio station readout for about 3 years!!! Thanks 
-
tyler.avis

- SLE Member
- Posts: 27
- Joined: Mon Aug 30, 2010 1:05 am
- Year and Trim: Metallic Grey 2002 SSEI
- Location: Cedar Falls, Iowa
Re: How to: 2000+ radio light fix tutorial (45pics)
Just finished this little project. Thanks for the writeup.
2002 SSEi. Cold Air Intake. Autolite 605's. Hi-Flow Cat. 12" Alpine Type-R Ported Box + Power Acoustic OV1-2000 at 2ohm with 0 Gauge Wire Running at 600 RMS
-
heather.christian83
- LE Member
- Posts: 5
- Joined: Wed Jun 13, 2012 4:34 pm
- Year and Trim: 2003 ale
Re: How to: 2000+ radio light fix tutorial (45pics)
Ok. All of my lights are out on radio except display. I'll get Hubby to try try this. What about the dash lights behind the gauges? Mine appears to have a blown bulb...only part of it is lit.
-
spoiledred94

- Posts like a Northstar

- Posts: 1844
- Joined: Thu May 22, 2008 8:52 pm
- Year and Trim: Black 2001 Bonneville SSEi
- Location: Pacific Northwest
Re: How to: 2000+ radio light fix tutorial (45pics)
I didn't scour the whole thread, but the display on my 01 SSEi is NOT "LCD" it apparently a multisegment LED. That's just my guess. The display you're calling LCD is the red display that scrolls some info along the bottom and channel, vol etc.? Mine lights fully on the left and gradually fades into nothing toward the right. Is this the right fix for me?
Kris
Kris
2001 Bonneville SSEi. 1598xx mi.
great car. Wrecked
Burnt Bonny.
Note if you pull the injectors to obserbe fuel delivery...make sure you leave the plugs in and disconnect the ign. Believe me
great car. Wrecked
Burnt Bonny.
Note if you pull the injectors to obserbe fuel delivery...make sure you leave the plugs in and disconnect the ign. Believe me
-
harofreak00
- Administrator
- Posts: 26022
- Joined: Mon May 19, 2008 6:04 pm
- Year and Trim: 2004 GXP - plus a handful of other Bonnevilles
- Location: Browerville, MN
- Contact:
Re: How to: 2000+ radio light fix tutorial (45pics)
This is an LCD (liquid crystal display), not an LED (light emitting diode).
This is your fix.
This is your fix.
Andrew - owner/operator of Bonnevilles Unlimited
2004 Bonneville GXP | 60k | White Gold Tricoat | custom built supercharged 3800 hot rod | garage queen
1997 Corvette | 57k | Silver Metallic | Z06 wheels | Date-night Hauler/Parts runner
2014 Town & Country Limited | Cashmere Pearl | 115k | Family Hauler
2002 Ram 1500 Quad Cab Sport | Black| 280k | Official Bonneville Hauler
2004 Bonneville GXP | 60k | White Gold Tricoat | custom built supercharged 3800 hot rod | garage queen
1997 Corvette | 57k | Silver Metallic | Z06 wheels | Date-night Hauler/Parts runner
2014 Town & Country Limited | Cashmere Pearl | 115k | Family Hauler
2002 Ram 1500 Quad Cab Sport | Black| 280k | Official Bonneville Hauler
-
gold_xero

- SLE Member
- Posts: 30
- Joined: Tue Oct 18, 2011 9:38 am
- Year and Trim: '03 Pontiac Bonneville SE
- Location: Augusta, ME
- Contact:
Re: How to: 2000+ radio light fix tutorial (45pics)
would it be possible to solder in a led strip behind the lcd and buttons? http://www.alpena.ca/category.aspx?catid=31
-
harofreak00
- Administrator
- Posts: 26022
- Joined: Mon May 19, 2008 6:04 pm
- Year and Trim: 2004 GXP - plus a handful of other Bonnevilles
- Location: Browerville, MN
- Contact:
Re: How to: 2000+ radio light fix tutorial (45pics)
Everyone always asks that, but nobody has ever tried it. It is discussed in the beginning of this thread. Try it and post back.
Andrew - owner/operator of Bonnevilles Unlimited
2004 Bonneville GXP | 60k | White Gold Tricoat | custom built supercharged 3800 hot rod | garage queen
1997 Corvette | 57k | Silver Metallic | Z06 wheels | Date-night Hauler/Parts runner
2014 Town & Country Limited | Cashmere Pearl | 115k | Family Hauler
2002 Ram 1500 Quad Cab Sport | Black| 280k | Official Bonneville Hauler
2004 Bonneville GXP | 60k | White Gold Tricoat | custom built supercharged 3800 hot rod | garage queen
1997 Corvette | 57k | Silver Metallic | Z06 wheels | Date-night Hauler/Parts runner
2014 Town & Country Limited | Cashmere Pearl | 115k | Family Hauler
2002 Ram 1500 Quad Cab Sport | Black| 280k | Official Bonneville Hauler
-
gold_xero
- SLE Member
- Posts: 30
- Joined: Tue Oct 18, 2011 9:38 am
- Year and Trim: '03 Pontiac Bonneville SE
- Location: Augusta, ME
- Contact:
Re: How to: 2000+ radio light fix tutorial (45pics)
I'm surprised no one has done it. I'll probably give it a shot after the Taurus is done at the body shop (walmart parking lot  ). the good thing about the strips is they have resistors already in them.
Last edited by gold_xero on Wed Aug 01, 2012 12:23 pm, edited 1 time in total.
-
gold_xero
- SLE Member
- Posts: 30
- Joined: Tue Oct 18, 2011 9:38 am
- Year and Trim: '03 Pontiac Bonneville SE
- Location: Augusta, ME
- Contact:
Re: How to: 2000+ radio light fix tutorial (45pics)
are the 2000-2005 slightly different with the wiring to the radio or the same?
-
harofreak00
- Administrator
- Posts: 26022
- Joined: Mon May 19, 2008 6:04 pm
- Year and Trim: 2004 GXP - plus a handful of other Bonnevilles
- Location: Browerville, MN
- Contact:
Re: How to: 2000+ radio light fix tutorial (45pics)
The pinouts are the same, but the type of wiring changed from a printed circuit to standard wiring in 02.
Andrew - owner/operator of Bonnevilles Unlimited
2004 Bonneville GXP | 60k | White Gold Tricoat | custom built supercharged 3800 hot rod | garage queen
1997 Corvette | 57k | Silver Metallic | Z06 wheels | Date-night Hauler/Parts runner
2014 Town & Country Limited | Cashmere Pearl | 115k | Family Hauler
2002 Ram 1500 Quad Cab Sport | Black| 280k | Official Bonneville Hauler
2004 Bonneville GXP | 60k | White Gold Tricoat | custom built supercharged 3800 hot rod | garage queen
1997 Corvette | 57k | Silver Metallic | Z06 wheels | Date-night Hauler/Parts runner
2014 Town & Country Limited | Cashmere Pearl | 115k | Family Hauler
2002 Ram 1500 Quad Cab Sport | Black| 280k | Official Bonneville Hauler
-
Roadrunner

- Posts like an LN3

- Posts: 496
- Joined: Thu Jun 05, 2008 11:58 am
- Year and Trim: 03SSEI, 00SSEI, 92SE(sold), 93SSE/SC, 87GTA, 01TA
- Location: Cincinnati OH
Re: How to: 2000+ radio light fix tutorial (45pics)
I found another bulb that works behind the display - a 2162.
I bench tested good OEM bulbs from Bose & Monsoon HU's and measurements were:
.093 to .097 Amp @ 12.2V
.102 to .106 Amp @ 14.1V
OEM bulb is 0.162" dia X 0.42" long
On web, I found "2162 miniature bulb, wire terminal base" rated 0.1 Amp @ 14V and size 0.52" max OAL X 5.6 mm dia
I ordered bulbs from here: http://www.bulbtown.com/2162_MINIATURE_ ... p/2162.htm (there are other sources and rated life varies.)
Current measurements for the 2162 bulbs I got were:
.096 to .107 Amp @ 12.2V
.105 to .116 Amp @ 14.1V
In regard to size, they are .025" larger in diameter and length is pretty much identical to OEM.
The slightly larger diameter made the opaque condoms fit very tightly compared to original and since they were stretched they didn't cover as much length.
Otherwise, these bulbs work well and seem to be as bright as OEM.