Leather restoration
Posted: Mon Feb 09, 2015 11:09 pm
This isn't on a Bonneville, but I figured this may be of use to some of you - it sure revived the nasty interior of my project Suburban.
Backstory, I picked up this '04 Suburban Z71 for dirt cheap as it needed bodywork, interior work, and a couple non-op accessories fixed. Currently has 151k, had belonged to a family of 7 since 30k if that gives you any indication of the interior condition...
Anyhoo, after a fair amount of research online, I decided to use the Magic Mender leather repair kit (leatherrepairkits.com), which provides color charts with exact match dyes to your interior. I used 1 leather repair kit plus 1 additional bottle of dye ("Color Flex") to do the first 2 rows of seats.
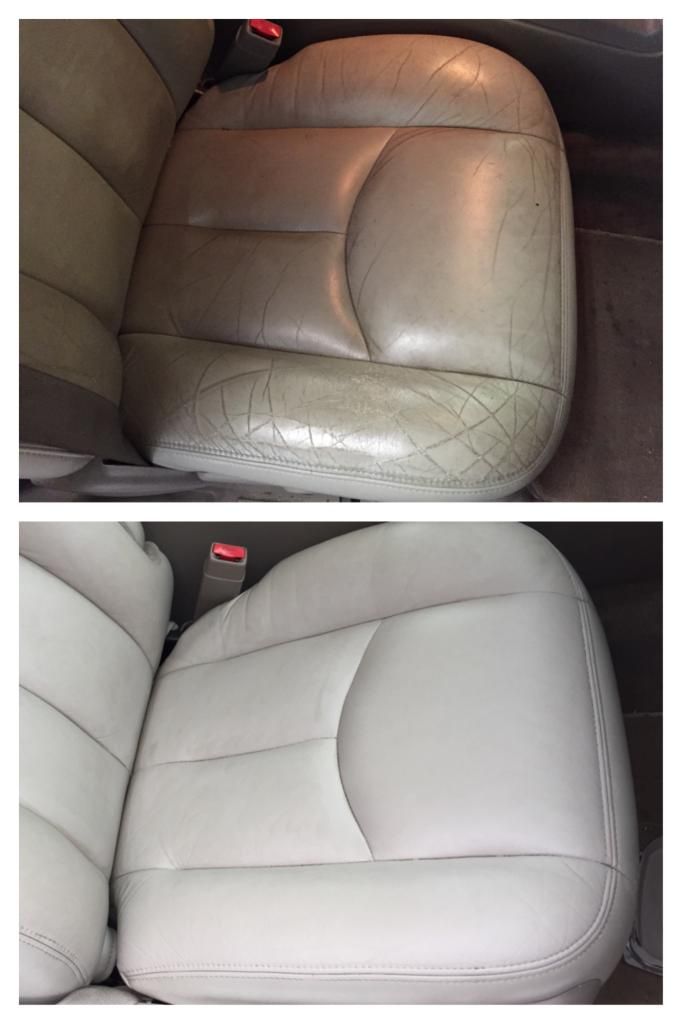
First I had to cut through the grunge with a cleaning. I tried something new I learned from a leather repair shop online - Scrubbing Bubbles + scrub brush. These seats were GROSS. Then condition the seats before proceeding.
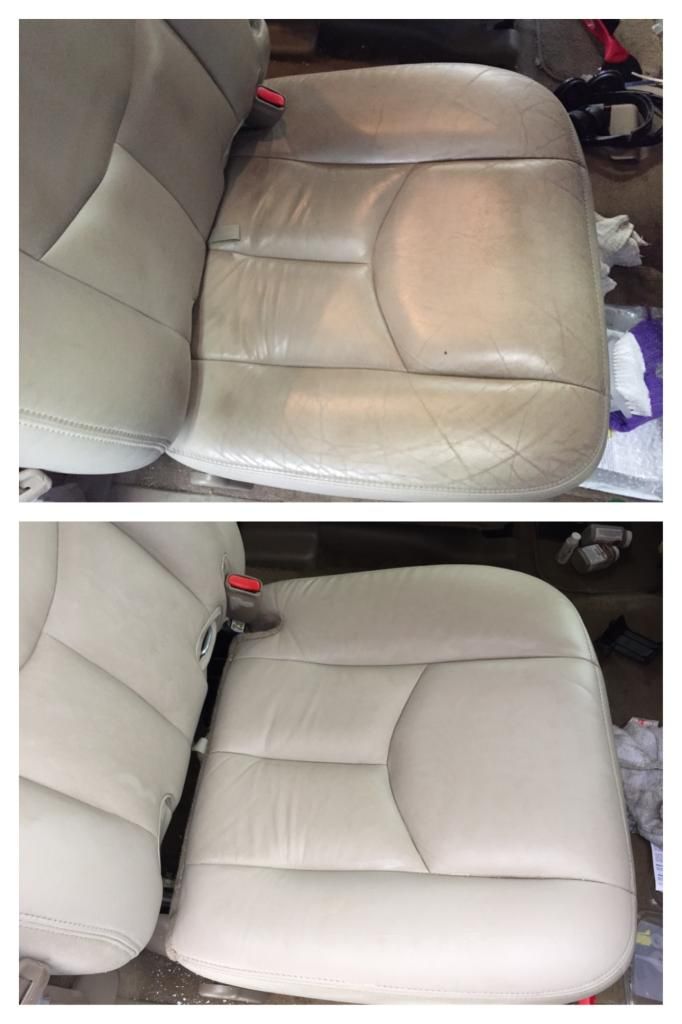
Original vs cleaned vs refinished:
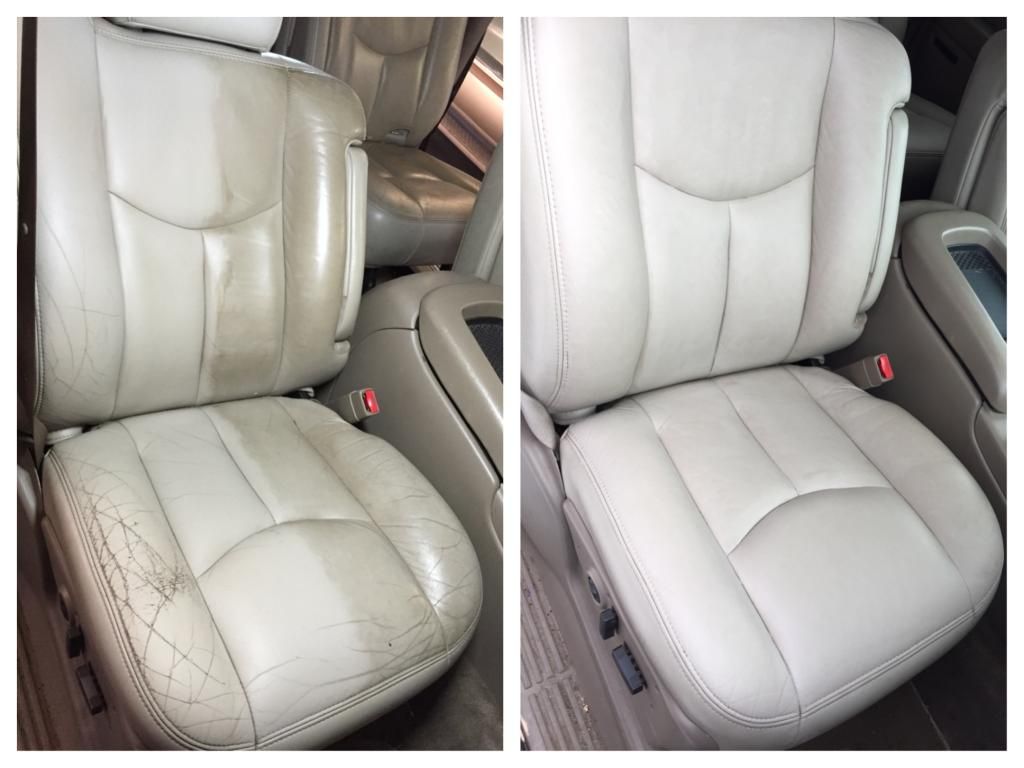
Then, sand lightly with 320 grit to get rid of any rough edges, apply filler if needed (and dry for 20 min), if so, then sand smooth afterward. Use the provided alcohol cleaner to get rid of any dust. Then shake the Color Flex (dye/paint) VERY thoroughly for a couple minutes. What you'll realize is that the original dye is really a paint/coating on top of the leather itself, so "repainting" the leather via this method isn't anything new. This was news to me.
Pour a fair amount of Color Flex into the provided paint tray, and smear the first coat on thinly with the provided sponge - wet it lightly before using. Allow 10-15 min to dry, then apply the second coat by dabbing - just like sponge painting. Just go light on each coat - not too thick or else risk cracking in the future. Allow drying time in between coats, and do more coats until you see the result you like. I did 2-3 coats. You'll need more over any areas that required filler.
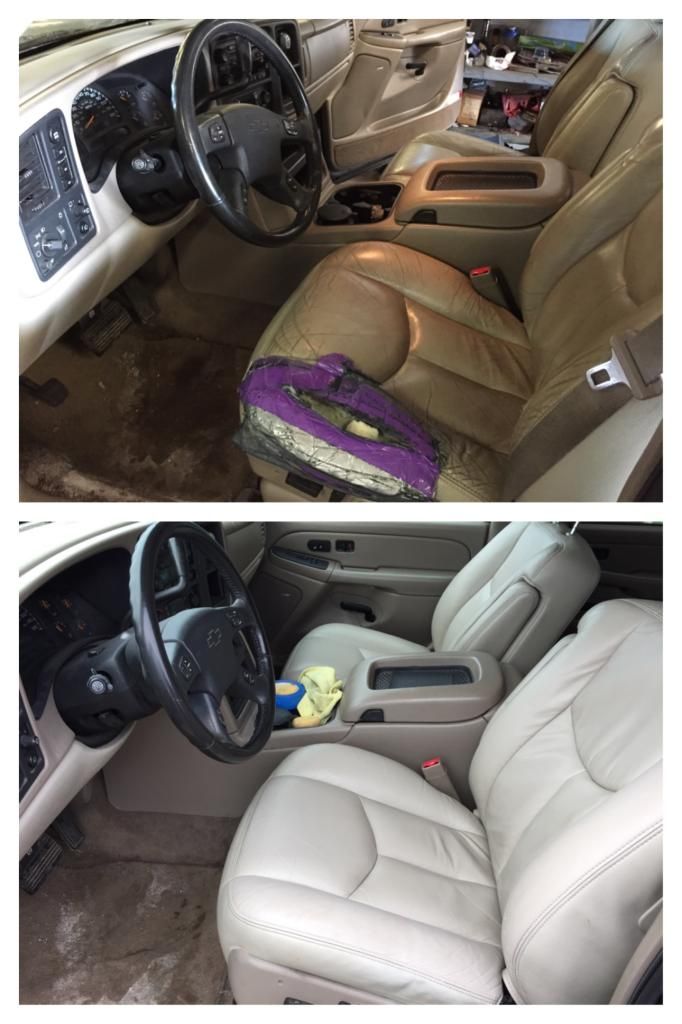
I let it dry in a heated shop overnight, and voila!
The driver's seat covers and foam were replaced with used covers from a donor seat, along with replacing the heated seat pads. On the driver's seat I experimented further by only dyeing the outside (door side) bolsters and you can see how well the color matches (Light Shale). Results are amazing! It's recommended to recondition the seats again after this.
Now onto detailing the rest of this mess...
Backstory, I picked up this '04 Suburban Z71 for dirt cheap as it needed bodywork, interior work, and a couple non-op accessories fixed. Currently has 151k, had belonged to a family of 7 since 30k if that gives you any indication of the interior condition...
Anyhoo, after a fair amount of research online, I decided to use the Magic Mender leather repair kit (leatherrepairkits.com), which provides color charts with exact match dyes to your interior. I used 1 leather repair kit plus 1 additional bottle of dye ("Color Flex") to do the first 2 rows of seats.
First I had to cut through the grunge with a cleaning. I tried something new I learned from a leather repair shop online - Scrubbing Bubbles + scrub brush. These seats were GROSS. Then condition the seats before proceeding.
Original vs cleaned vs refinished:

Then, sand lightly with 320 grit to get rid of any rough edges, apply filler if needed (and dry for 20 min), if so, then sand smooth afterward. Use the provided alcohol cleaner to get rid of any dust. Then shake the Color Flex (dye/paint) VERY thoroughly for a couple minutes. What you'll realize is that the original dye is really a paint/coating on top of the leather itself, so "repainting" the leather via this method isn't anything new. This was news to me.
Pour a fair amount of Color Flex into the provided paint tray, and smear the first coat on thinly with the provided sponge - wet it lightly before using. Allow 10-15 min to dry, then apply the second coat by dabbing - just like sponge painting. Just go light on each coat - not too thick or else risk cracking in the future. Allow drying time in between coats, and do more coats until you see the result you like. I did 2-3 coats. You'll need more over any areas that required filler.
I let it dry in a heated shop overnight, and voila!
The driver's seat covers and foam were replaced with used covers from a donor seat, along with replacing the heated seat pads. On the driver's seat I experimented further by only dyeing the outside (door side) bolsters and you can see how well the color matches (Light Shale). Results are amazing! It's recommended to recondition the seats again after this.
Now onto detailing the rest of this mess...


