


I finally got around to replacing the dieing fuel pump in my '97 Bonnie. After we got the pump and tank all put back into place we tried to start it up to check for leaks. We had a few, but managed to recheck all the fittings and got them all tight and pretty. Now the car will not run, the power windows do not work, the power seat does not work, and the power locks work intermittently. We checked all the fuses and relays and all the above problems still persist. We believe there is some faulty wiring somewhere between the relay center under the hood to one of the fuse boxes under the dash. I've searched the internet and have yet to find a free downloadable wiring diagram so we can start the process of checking all wires and connections. Any help would be appreciated!
Thanks!
Need a wiring diagram for a 1997 SE
-
willwren

- Retired Admin

- Posts: 65489
- Joined: Sun May 18, 2008 11:07 pm
- Year and Trim: .
93 SSEi
95 SLE (SC)
97 Buick LeSabre - Location: Oregon WCBF'04, '05, '06, '07, '08, '09, '10, '11 Survivor
- Contact:
Re: Need a wiring diagram for a 1997 SE
While you're waiting, check this:
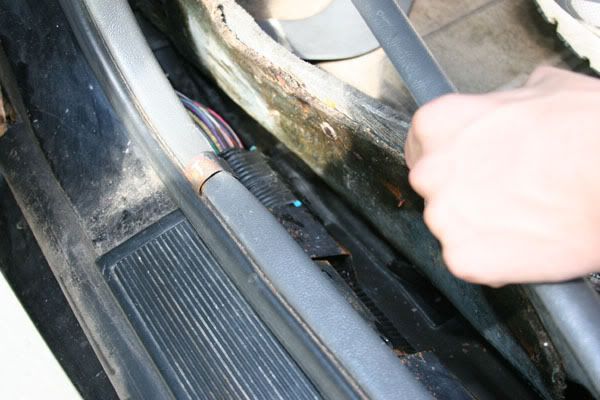
Your symptoms point to this as a possibility, and it's a common problem. Even out West here where I rarely see any kind of corrosion, I've had this. Nearly every 92-99 has it to some extent or another. Almost all the grounds in the car run through there.bonnevillain wrote:Mechanical Mike wrote:Here's a few pics showing the location of the ground bus & the metal bar that can corrode. There's a bus on the driver's & passenger side. Let us know what you find.


Click here for mod list for both cars
93 SSEi, 95 SLE (supercharged) 97 Buick LeSabre Limited
PontiacDad at WCBF '04: Cruise control? That's like surrendering!
Comprehensive guide to troubleshooting, rebuilding, and modifying Eaton Superchargers
-
StraTact
- SSE Member

- Posts: 104
- Joined: Wed Jul 29, 2015 12:30 pm
- Year and Trim: 1997 Pontiac Bonneville SE
Re: Need a wiring diagram for a 1997 SE
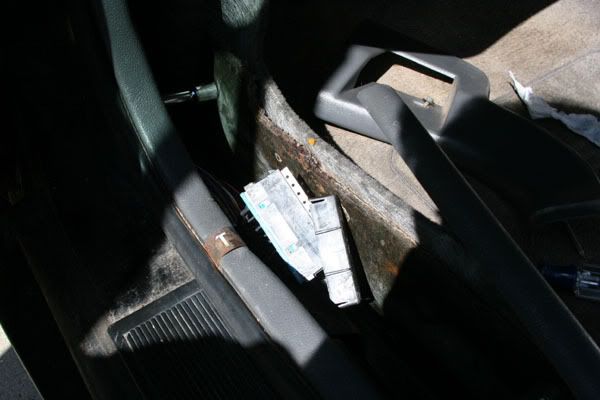
The comb-like thing in your diagram is solid copper, and its "fingers" connect to all the ground wires via female clip-on connectors that wear out and are impossible to find online because they're super-high quality. Instead, I used easy-to-find parts to fix it, and has lasted many years without any problems.
Here's how: I removed all the clip-on connectors, stripped their ends to expose about 3/4" of wire, and then used 4 large electrician's wire nuts and three 4" pieces of 12 gauge wire to connect all the ground wires together, as follows:
1) Used 1 large wire nut to connect any 3 ground wires, plus one end of a 4" piece of 12 gauge wire.
2) Repeated step 1 for another group of 3 ground wires.
3) Repeated step 1 for the remaining ground wires.
4) Used the 4th large wire nut to connect the other ends of the three 4" piece of 12 gauge wire.
5) Wrapped the above in electrical tape.
Alternatively, you might try soldering the wires to the copper comb and then wrapping it with electrical tape.
Note that one of the wires connects to the chassis somewhere. You can use a DVM to find out. Also, there may be another (or more) ground bus(s) elsewhere in your vehicle that may be corroded.