Page 5 of 10
Re: Project Luxury S10
Posted: Thu Oct 21, 2010 11:10 pm
by ChilinMichael
I can hear the "like a rock!" song playing in my head. Looks great.
Re: Project Luxury S10
Posted: Fri Oct 22, 2010 11:44 am
by LeSabreUltra
Haha, thanks man.
It's working great...interesting that the factory tachometer is far more accurate than the $100 Autometer is. I guess it has to do with the 4.3's odd fire pattern.
.
.
.
Re: Project Luxury S10
Posted: Fri Oct 22, 2010 4:45 pm
by JimmyFloyd
Looks great! lots of progress on it. The console looks so much better than the bench. Do you know if the leather door panels from a blazer would work on the front doors?
I have a Factory CD plater out of a 95 or 96 I believe that works if you are interested.
Re: Project Luxury S10
Posted: Fri Oct 22, 2010 6:52 pm
by LeSabreUltra
Thanks! And yeah, they would fit perfectly. Actually I'd really like to have them in there, the cloth inserts stand out, to me at least. Only problem is that I'd have to swap over to power windows before I did it. No crank holes on those, and I'm not entirely sold on whether I really want power windows or not. More to break lol.
Kinda the same problem with the CD player too...I actually would like to use it, but then it wouldn't match the rest of my dash trim and I'd have to buy a whole new set lol. All these little roadblocks. Sorta why progress has been slow lately, seems like I'm at the point now where I can't do something without having to do something else related but pricy at the same time.
.
.
.
Re: Project Luxury S10
Posted: Sat Oct 23, 2010 7:29 am
by Jrs3800
It looks good... You have everything you need....
But I would add the Chevy CD Player... It will match the truck and look like it was meant to be there( because it was )....
If you ever have a problem with the unit, just rip it out and install the stock unit...LOL
Re: Project Luxury S10
Posted: Thu Oct 28, 2010 1:38 pm
by SLEking
you want my LT1? lol it should fit
Re: Project Luxury S10
Posted: Mon Nov 08, 2010 1:32 pm
by LeSabreUltra
V8 will come someday when the 4.3 dies, which by their track record and this one's level of care won't be for a long time lol.
I had hoped to be posting a fairly major modification update but unfortunately the yard was completely devoid of what I needed at this SEBF. I MAY still do it with ebay parts but I can't say for sure yet.
I did make a few small changes. I'll post up a couple of my favorite pics of my truck from SEBF this year.


As you can see from the above pictures, my aftermarket tach on the A-Pillar is gone. I found an unmolested but dirty A-pillar in my color at the yard, cleaned it up, and put it in. It looks much cleaner without the tack on the pillar.
One other tiny change I'll throw in here just cuz...

My power outlet cover was missing so I pulled this old school one off of a late 80s/early 90s GM car. I like it better than the black plastic kind with the cigarette emblem on it since I don't smoke anyway.
So just a couple of small new things. We'll see about the big one.
.
.
.
Re: Project Luxury S10
Posted: Tue Nov 30, 2010 1:31 am
by LeSabreUltra

???????????
Coming soon.
.
.
.
Re: Project Luxury S10
Posted: Wed Dec 01, 2010 7:21 pm
by LeSabreUltra
Everything is ordered now with express shipping and some stuff has already started arriving (nothing exciting yet though). I expect to have this done in less than two weeks.
On a side note, and after a lot of searching it seems this is going to be the first ever D2S bixenon S10 in a 4x6 housing. Figures lol...but with most anything there's a reason why, and in this case it's because it's probably near the top of the list of difficult retrofits...
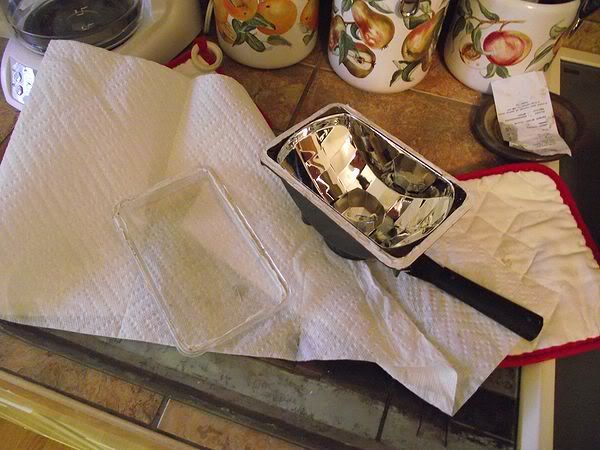
Here's why. I'm gonna put this stuff up here now so when I'm working on it later you'll know why, and what needs to be changed.
Here's what the housings look like, first off...
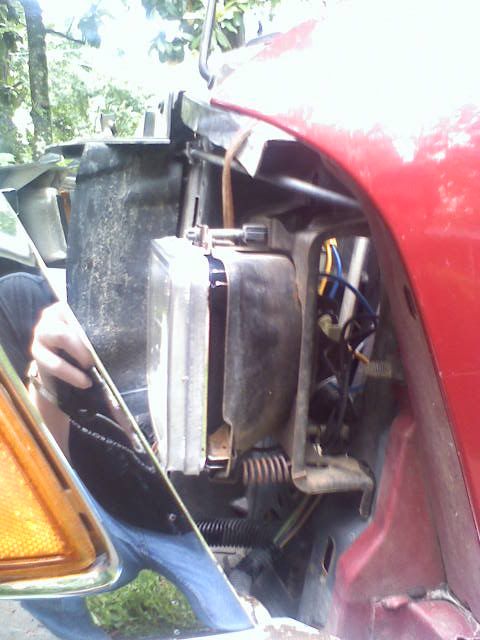
Not much space. That *dang* bucket behind the headlamp housing is one problem. It pinches down at the rear opening like so:

Which is far narrower than the rear part of any projector is going to be. It will have to be cut, a lot.
But that's not nearly as much of a problem as the rear clearance on the passenger's side:

While not pictured, there is exactly 5" from the front of the headlamp to the nearest rear obstruction (the battery/tray). The current world's shortest D2S bixenon projector (the one I'm getting) is exactly 5" long. However the bulb and connector also stick out the rear by about another inch, meaning everything is going to have to come forward. This will also involve modifying the grille slightly to allow for the adjustment. For me, moving the battery isn't an option as I have nowhere to move it to.
None of this is impossible to overcome, but it does make things a fair amount harder than the average retro. The main problem is the information just isn't out there, leaving people to have to figure it out for themselves.
By the way, I HIGHLY recommend sourcing your retrofit parts from theretrofitsource.com. If you contact them by email they will bundle your order and give you a highly reduced price. I had a $185 order before shipping from them and they quoted me at $150 with free shipping. They're also happy to provide advice anytime you need it.
All total I have about $260 into this retrofit. That's likely to increase as I still need some hardware (mostly bolts, washers, and aluminum tape) but I still expect to be well under $300 at the end. That makes this the least expensive retrofit I've ever done.
More later...
.
.
.
Re: Project Luxury S10
Posted: Mon Dec 06, 2010 6:32 pm
by LeSabreUltra
Projectors, bulbs, and the shrouds I'm gonna use arrived in the mail today.

Also got a measurement on these. From tip of the projector to the base of the bulb connector is about 6" exactly.
The last part, the housings, are due to arrive in the mail tomorrow. More then, might start working on them then too.
.
.
.
Re: Project Luxury S10
Posted: Mon Dec 06, 2010 6:39 pm
by 00Beast
Can't wait to see it Dan!!!
Re: Project Luxury S10
Posted: Mon Dec 06, 2010 8:12 pm
by gonzo4191
i vote v8 AND cam...like im doing

Re: Project Luxury S10
Posted: Mon Dec 06, 2010 8:24 pm
by LeSabreUltra
Lol me either Ed...hopefully it all comes together smoothly.
And Juan, no V8 for me, at least not now lol. Doesn't seem right to take out a low mile 4.3 that has been pampered it's whole life and runs perfect. It gets out of it's own way well enough for me, lol.
I think I must be getting old...my go fast phase is gone D:
.
.
.
Re: Project Luxury S10
Posted: Tue Dec 07, 2010 10:27 pm
by LeSabreUltra
Big updates today.
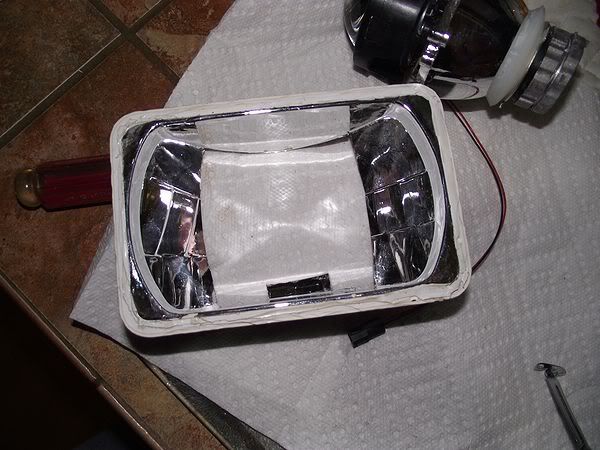
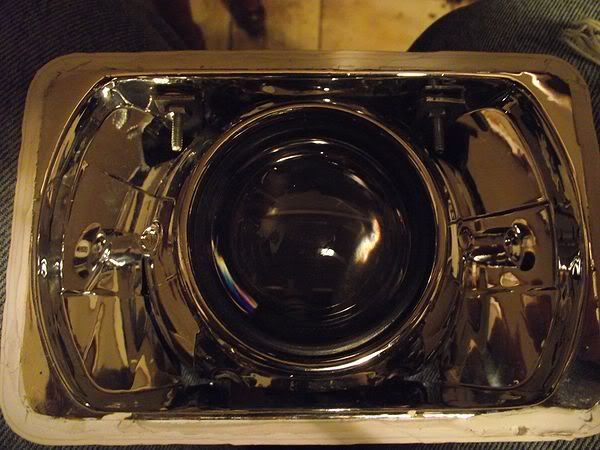
Housings arrived. Not much to say on those other than they are just the generic ebay 4x6 clear housings. These were not the 'projector' versions.
I could not, no matter how much heat I applied, get the glass lenses to come off. I ended up cracking one of the glass lenses (though the housing itself was okay) trying to get it off. Eventually, I just cut the glass off. Here's what I did:
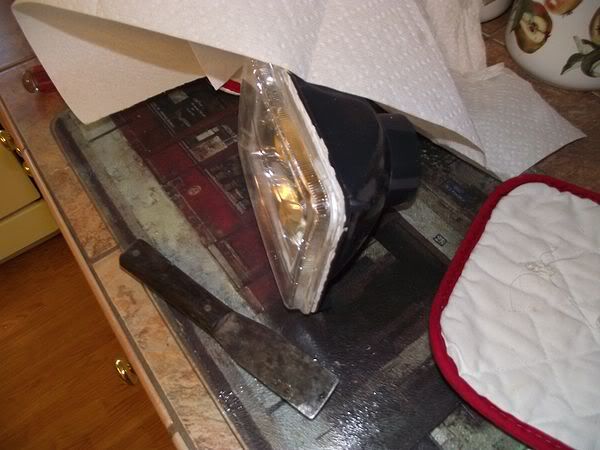
It's hard to see, but I cut around the outside until I had just barely reached the bottom of the glass. By then, I was able to easily stick my gasket scraper in and scrape the lens off. Unfortunately it was too late to save the glass, but I'll know what to do for the next one. I ended up ordering another set so I could replace the glass. Make sure you wear a dust mask when cutting the housings.
But, here it is with the glass off.
Next, it's time to cut the back of the housing to fit the projector. I ended up realizing that the projector was just too huge to do anything but cut out a hole exactly it's size.
Just resting in there:


Next it's time to fab up some mounting brackets. I just used some 90 degree brackets that I believe are cabinet hardware, and it worked perfectly.
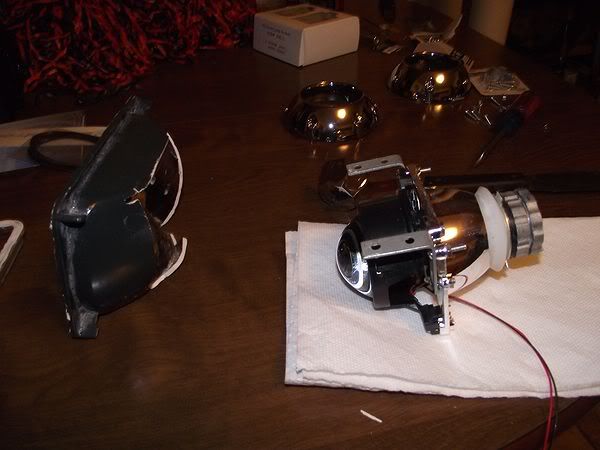
Drilled holes then bolted in:
Checked the alignment, and everything seems fine including rotation.
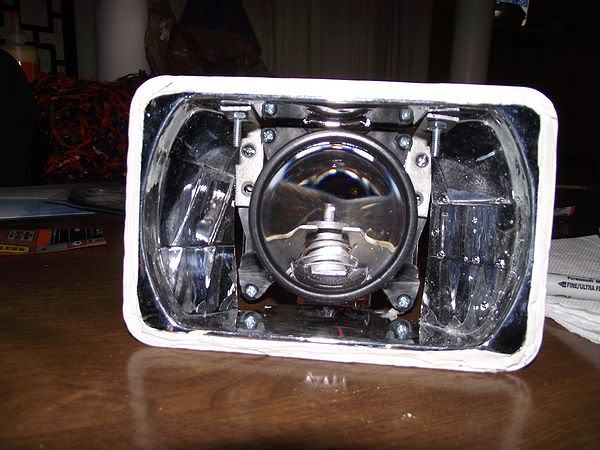
Next it's time to cut the shroud to fit.
Shroud in.

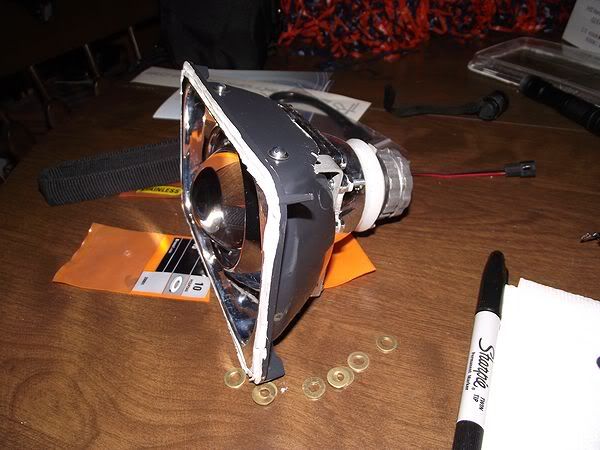
Unfortunately because of the incredibly tight space I have to work with in here I could not get the shroud to hide the mounting bolts. Oh well. It hides the rest of the hardware well.
That makes one side 98% done. All I have to do is seal up the rear, which I will do with lots of 3M aluminum foil tape.
Now I need to do the other side and begin modifying my truck to fit these housings. More later.
.
.
.
Re: Project Luxury S10
Posted: Tue Dec 07, 2010 11:32 pm
by sandrock
I'd use aluminum pop rivets instead of the bolts. The less to see....the better.
Looks good!
Re: Project Luxury S10
Posted: Tue Dec 07, 2010 11:38 pm
by 00Beast
I'd at least cut the bottom of the bolts off Dan. Make it as clean as possible.

Re: Project Luxury S10
Posted: Tue Dec 07, 2010 11:42 pm
by PRD2BDF
I would at least invert the bolts and cut it at the top.
Re: Project Luxury S10
Posted: Tue Dec 07, 2010 11:59 pm
by LeSabreUltra
Thanks for the constructive comments guys...
1. Don't have a rivet gun, sadly.
2. I might do that, but I haven't yet because there may be some reason I have to remove the projector from this housing and if I cut the bolts off after the nut I may not be able to.
3. Can't because of clearance issues with the headlight bucket.
I may very well do #2 though. I only haven't as I haven't even test fitted it to the truck yet. Once I do and everything looks okay, I might buzz off the part of the bolt below the nut.
.
.
.
Re: Project Luxury S10
Posted: Wed Dec 08, 2010 2:14 pm
by LeSabreUltra
More fast progress for you guys.
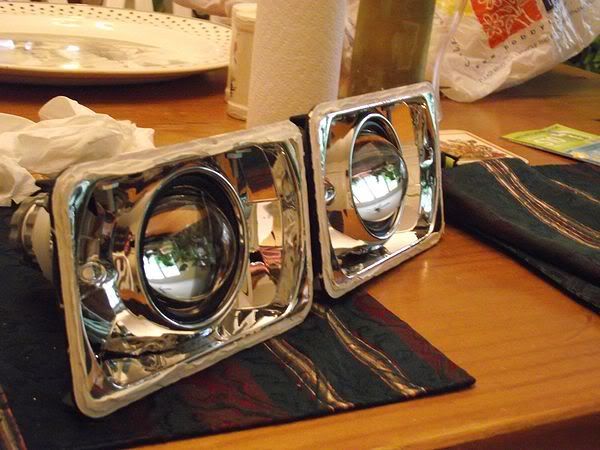
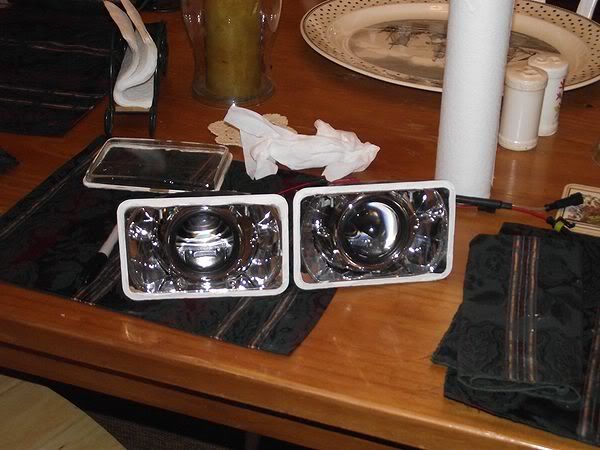
Other side is all caught up. Now it's time to start modifying the truck to fit them. Hopefully I will be done today.
.
.
.
Re: Project Luxury S10
Posted: Wed Dec 08, 2010 2:53 pm
by Jrs3800
At least we can tell whats for dinner tonight, and it involves 12v.... Looks great Dan..