Page 4 of 8
Re: 1997 LeSabre project L67
Posted: Tue Oct 28, 2014 12:46 pm
by tytotheler92
Having the engine out makes that much simpler i take it? haha.
Re: 1997 LeSabre project L67
Posted: Tue Oct 28, 2014 9:44 pm
by MattStrike
I struggle to not replace an entire front end every time I pull an engine and trans.
Re: 1997 LeSabre project L67
Posted: Tue Oct 28, 2014 10:07 pm
by Zeik75
I know your pain, my tranny rebuild went much too far....
Re: 1997 LeSabre project L67
Posted: Fri Oct 31, 2014 9:11 pm
by MattStrike
Brake lines are done!
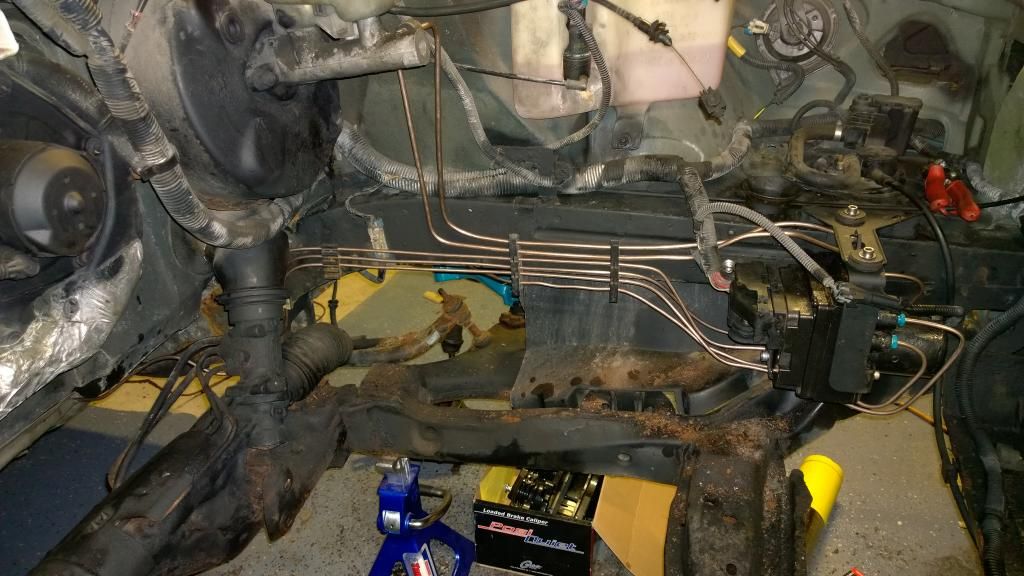
I've got a lot of the gas tank area all cleaned up, just a few more things to hit with the wire wheel and de-rustify and paint.
Depending on how my junkyard run goes, I should be able to wrap up the rest of the rust detail and fuel lines and get back to the transmission this weekend.
Re: 1997 LeSabre project L67
Posted: Sat Nov 01, 2014 7:28 am
by 1oldman
As usual, really good looking work! - BC
Re: 1997 LeSabre project L67
Posted: Sat Nov 01, 2014 9:48 am
by dadofone2011
That looks really good, glad to see all necessary steps are being taken on such a beautiful car.
Re: 1997 LeSabre project L67
Posted: Sat Nov 01, 2014 9:54 pm
by MattStrike
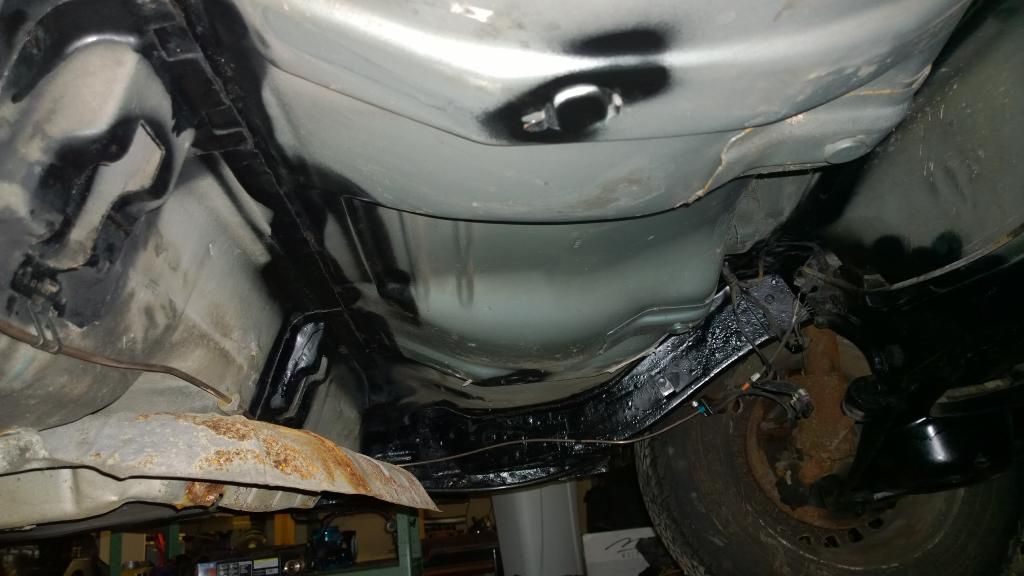
Gas tank is back in. Just have to finish the fuel lines and clamp the filler tube.

Re: 1997 LeSabre project L67
Posted: Sun Nov 02, 2014 8:05 pm
by MattStrike
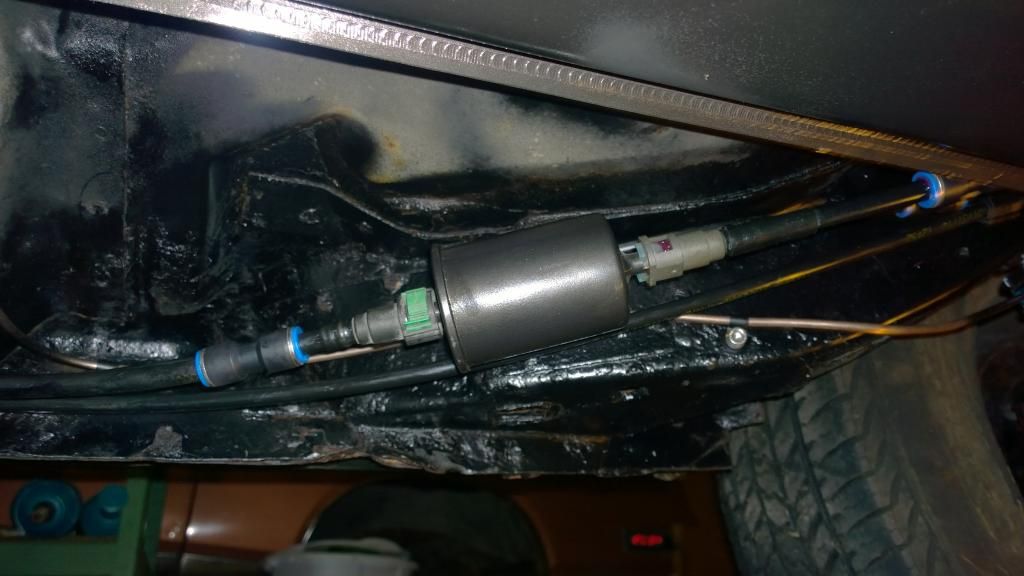
Fuel lines are done. Lines are all nylon now, grabbed some quick disconnects from the junkyard off a fuel tank from some random GM car, and using the fuel filter from a '93 SSEi I spliced everything together. I'll try to get a writeup later, but it was interesting to note that the EVAP line is 5/16" nylon, and the steel line off the sending unit is also 5/16, so it was really simple to convert that to nylon as well.
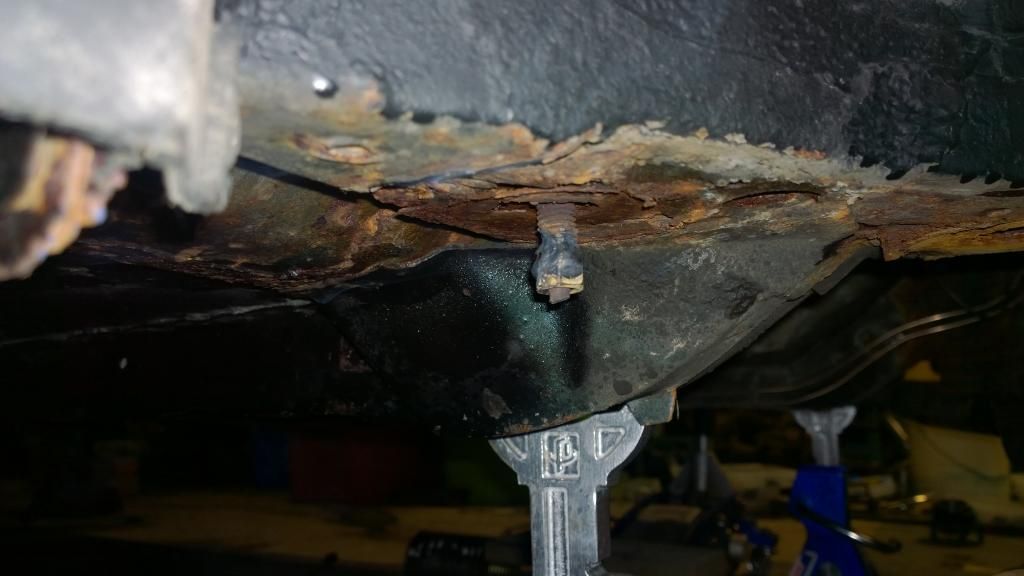
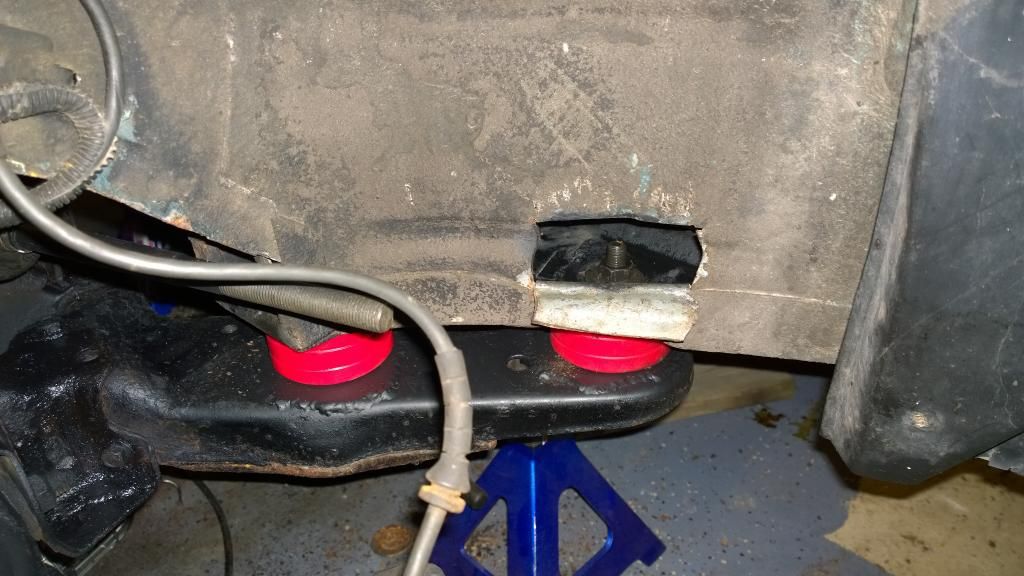
And on to the next battle:
Yes, the rear-most subframe mount bolt wasn't even really attached to anything, and none of the rear mounts had intact bushings. HEY RYAN I FOUND THAT CLUNKING NOISE!!
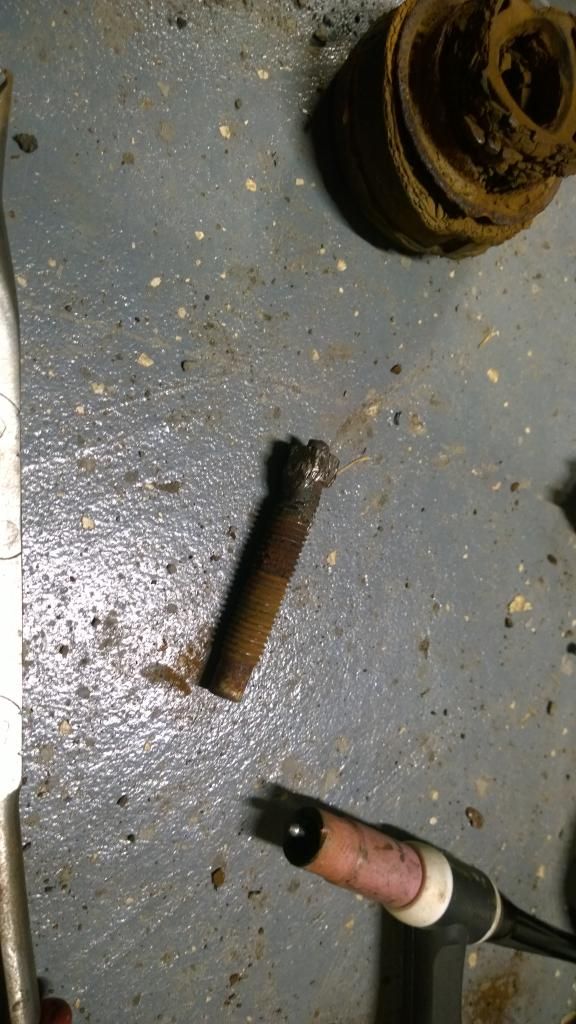
Now to extract the rest of that bolt:

Weld a nut on to the end:
Use the big pipe wrench (The BFH of wrenches), and magic!
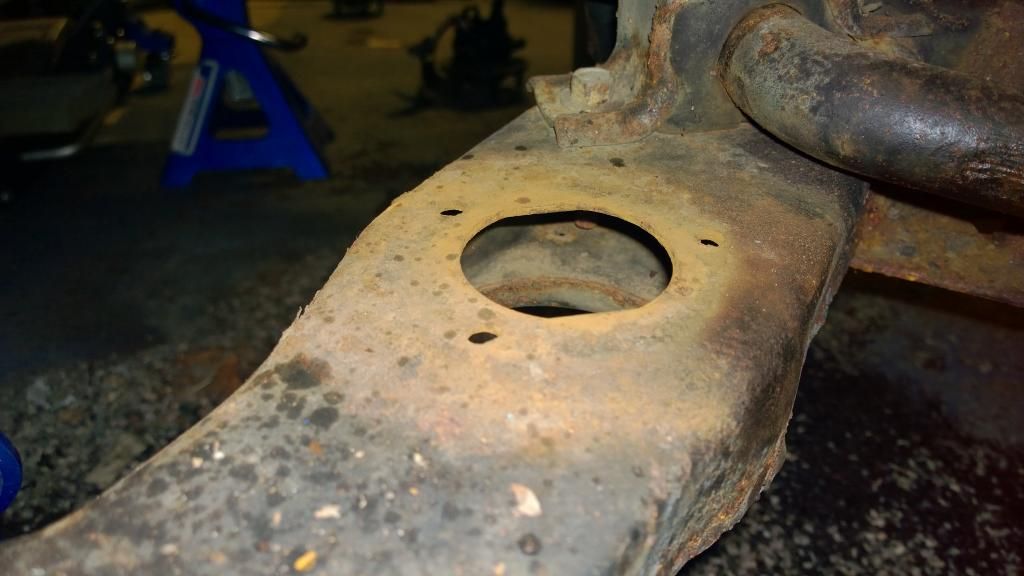
Most of the mount points just need to be cleaned up:
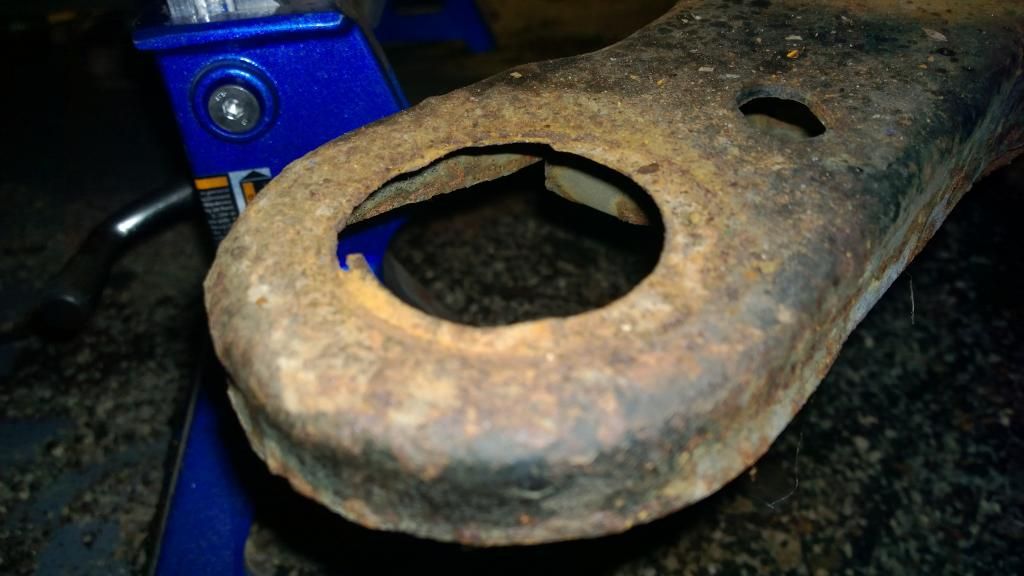
This one need to be cut out and replaced entirely:
I'll get a write-up for those fancy bushings as well.
Re: 1997 LeSabre project L67
Posted: Sun Nov 02, 2014 8:57 pm
by haro1225
Holy crap, I can't believe with all the places that car went in that condition before you got it nobody got killed.
Re: 1997 LeSabre project L67
Posted: Sun Nov 02, 2014 9:57 pm
by MattStrike
Does anybody know where I can get a the upper and lower washers for a '99 suburban body mount? Can't find them in the GM parts catalog.
Re: 1997 LeSabre project L67
Posted: Sun Nov 02, 2014 10:06 pm
by 1oldman
This thread is great for those that are saving their rusted out Bonnevilles and Buicks. It's almost a total "How to Repair/Replace Anything Rusted" on a GM H body. Before you're through it will probably will be a "How to Repair/Replace Anything Rusted" on a GM H body. - BC
Re: 1997 LeSabre project L67
Posted: Sun Nov 02, 2014 10:33 pm
by MattStrike
haro1225 wrote:Holy crap, I can't believe with all the places that car went in that condition before you got it nobody got killed.
Not sure if it was luck or that the H-body is such a bad-ass platform...

Re: 1997 LeSabre project L67
Posted: Thu Nov 06, 2014 4:56 am
by tytotheler92
Thats one disturbing thing about the way the bushings are on these subframes..you really can't see whats under them.
Re: 1997 LeSabre project L67
Posted: Mon Nov 17, 2014 11:58 pm
by MattStrike
Lot of things have been going on.
Subframe bushing mounts, only 2 were still in good condition. So I decided to make all 6 a direct fit for the bushings I got. I'm still waiting for the lower washers to come in, before I verify that everything works out. But, looks like for the cost of a single upper washer I was able to put together a stainless steel solution for all 6 mounts without any fabrication required that does the same thing...
Here are some pictures!
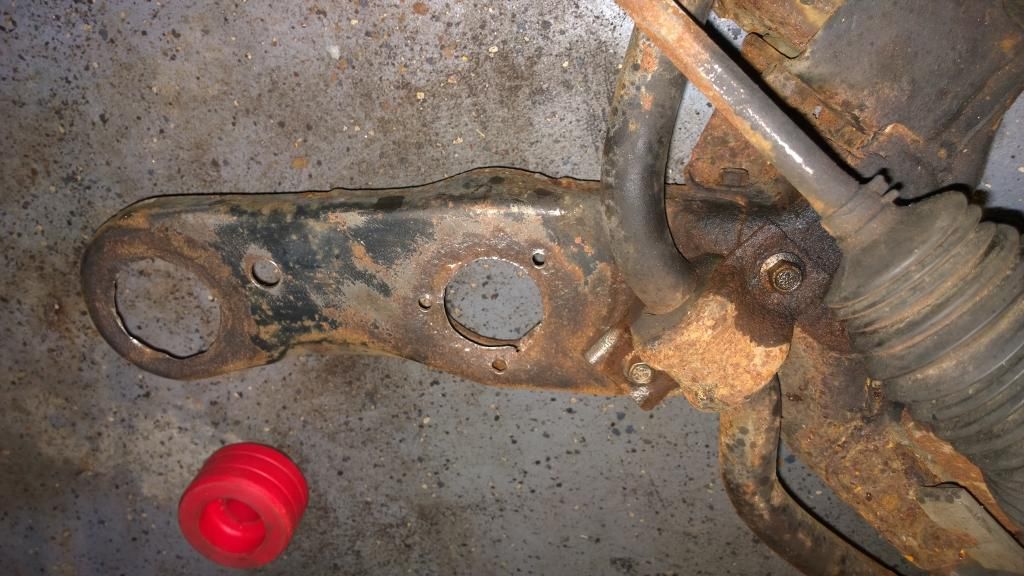
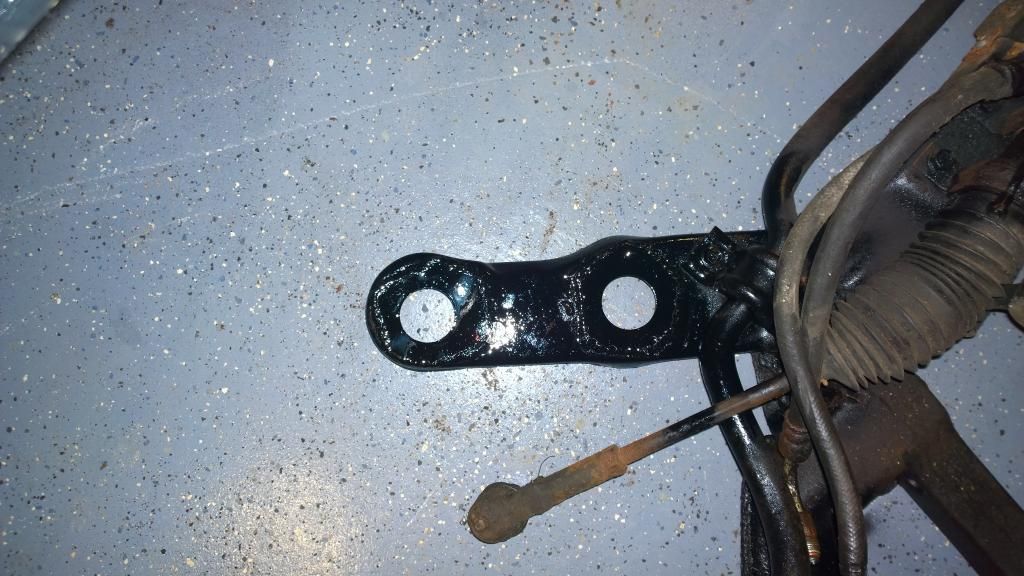
Ryan, I know we said this before, but whomever tried to fix this car should be avoided at all costs... They cut that access hole in the wheel well, and used a class 8.8 (junk) nylon lock nut on the two DS rear bushings with plain steel washers, all of which was far more rusted out than everything else partially because they didn't bother to re-seal the opening they cut in the wheel well...The other thing, they didn't bother fixing the subframe mount points:
Here's a quick overview of where I'm going with this:
Total cost for a set of these PU bushings, if you have 2 vehicles to split the bushing kit, is about the same as the cost of a single OE set of bushing, washers, and bolt.
So after all those nasty rusty pictures, it's time to show some progress. The subframe mounts are all set now:
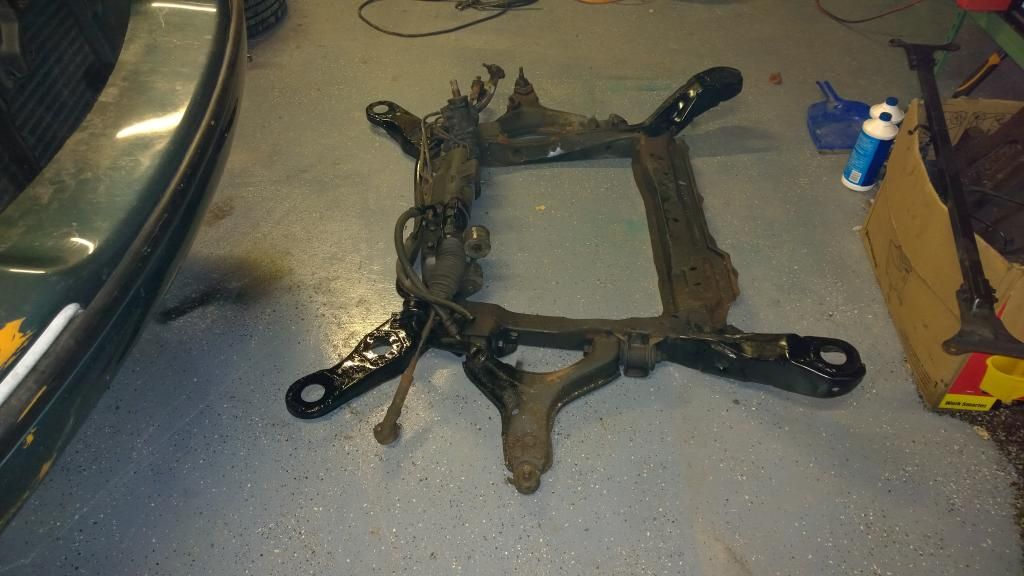
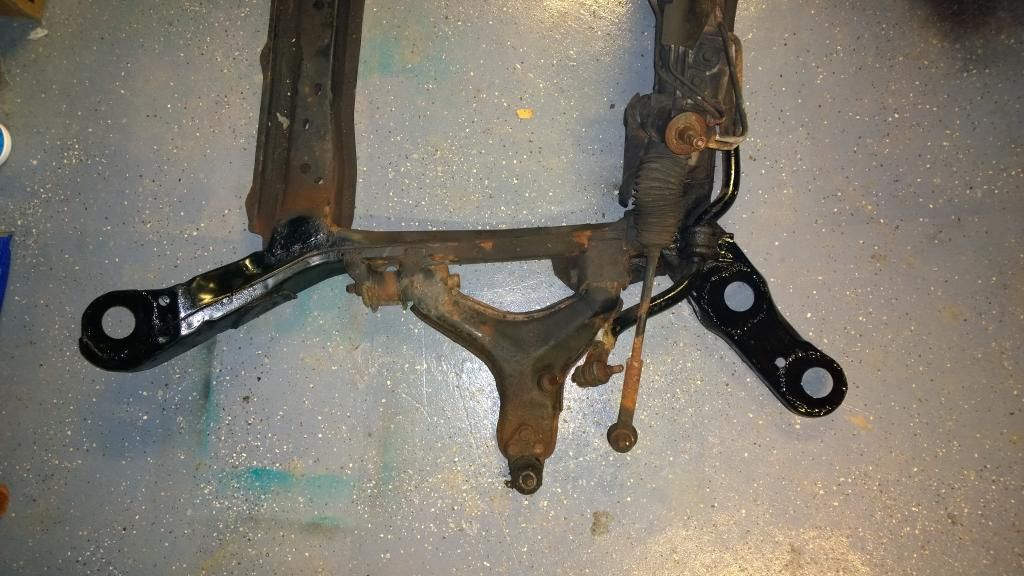
Aside from the mounting points, the subframe need some minor surface rust repair in several areas, but that should be able to be fixed without too much trouble at this point.
Re: 1997 LeSabre project L67
Posted: Tue Nov 18, 2014 10:28 am
by Wes
Are the poly bushings the ones you mentioned in the 93's build thread? Think it was the 3.4148 set from Energy.
Re: 1997 LeSabre project L67
Posted: Tue Nov 18, 2014 11:23 am
by MattStrike
Yes. The basic setup is the lower washer from the suburban (1/2 the cost of the H-body washer) although the H-body washer will work if yours can be re-used, a 3/4" stainless pipe nipple 2.5" unthreaded, a 1/2" stainless washer, and some 1/2" ID high pressure rubber hose to act as a bushing inside the pipe and keep the bolt centered. The bushings fit exactly the hole made by a 1-7/8" hole saw which makes the subframe repair plates a lot simpler to make.
Re: 1997 LeSabre project L67
Posted: Tue Nov 18, 2014 8:26 pm
by MattStrike
Ran across a demod sale:
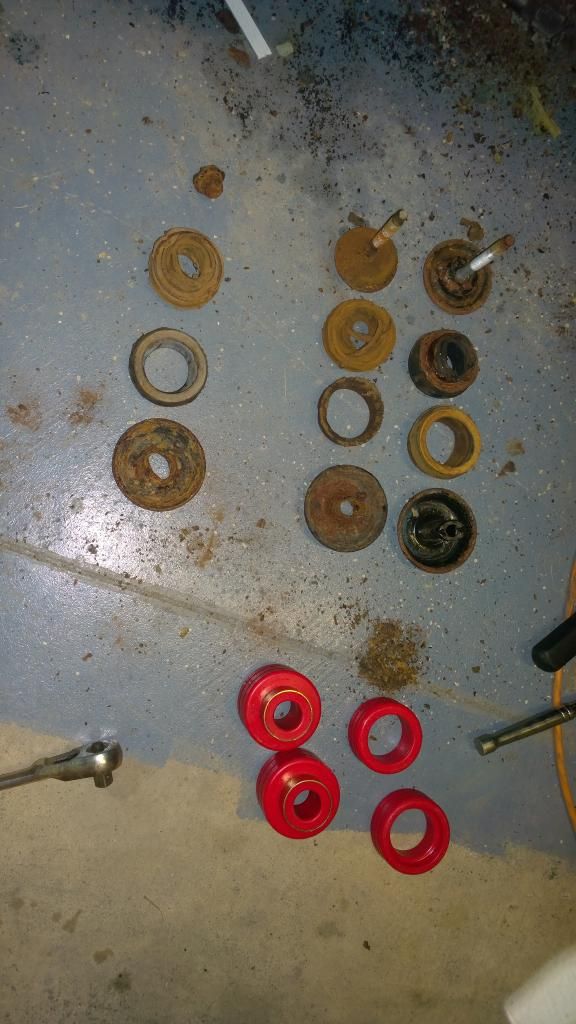
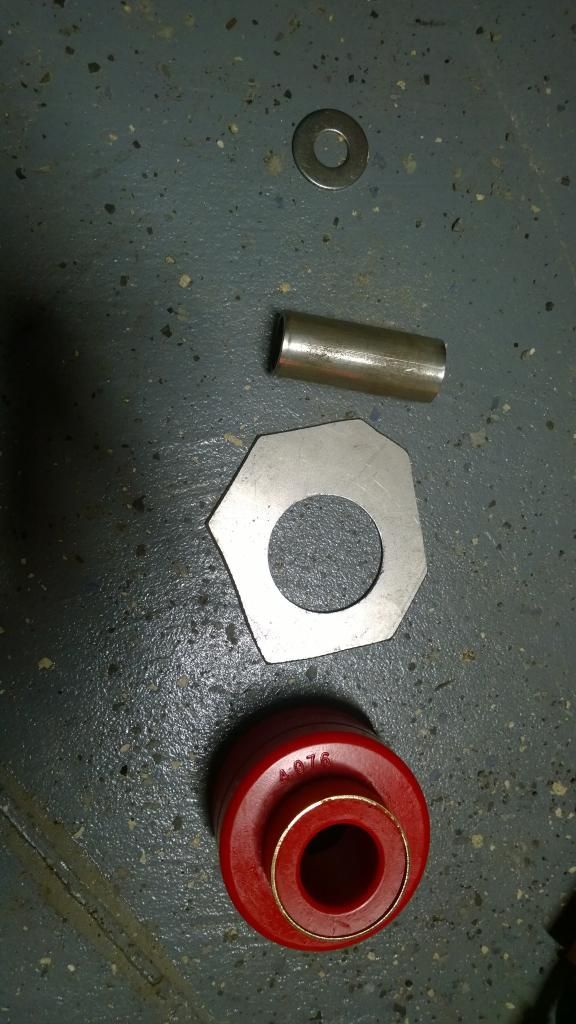
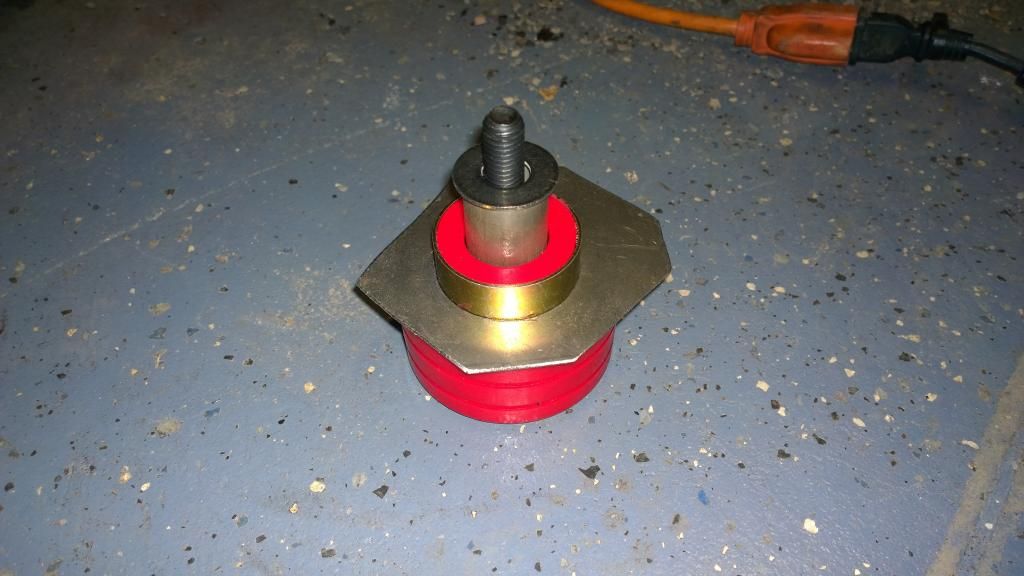
Here's the poly subframe bushing setup:

Top to bottom on the right:
Class 10.9 or 12.9 M12x1.75 @ 100mm
GM 15799131 Retainer
McMaster-Carr 1947K45 3/4" schedule 40 pipe, 2.5" long
-Inside the pipe is a ~2" length of 53115k73 hose to act as a centering/additional bushing
Regular 1/2" ID flat washer, stainless, that fits into a recess in the frame.
If you have to replace the nut inside the frame at any location, you need 1 each of these:
M12x1.75 locknut.
Don't use stainless steel nut or bolt on the subframe, but other than that everything can be stainless.
Re: 1997 LeSabre project L67
Posted: Mon Nov 24, 2014 11:07 pm
by MattStrike
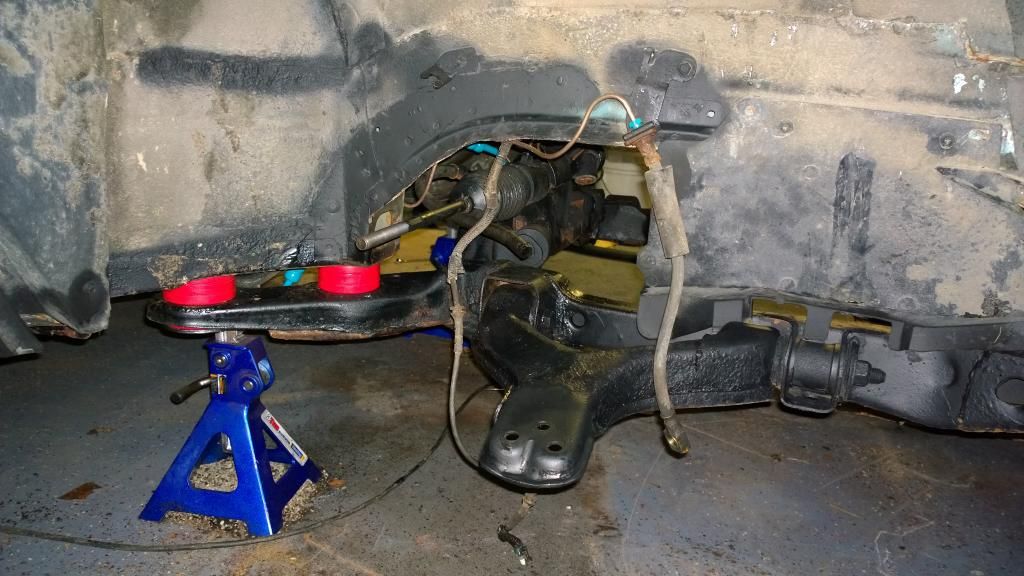
Update time!
Got the subframe re-mounted to the car:
And back on to the trans - first up is our favorite seal:
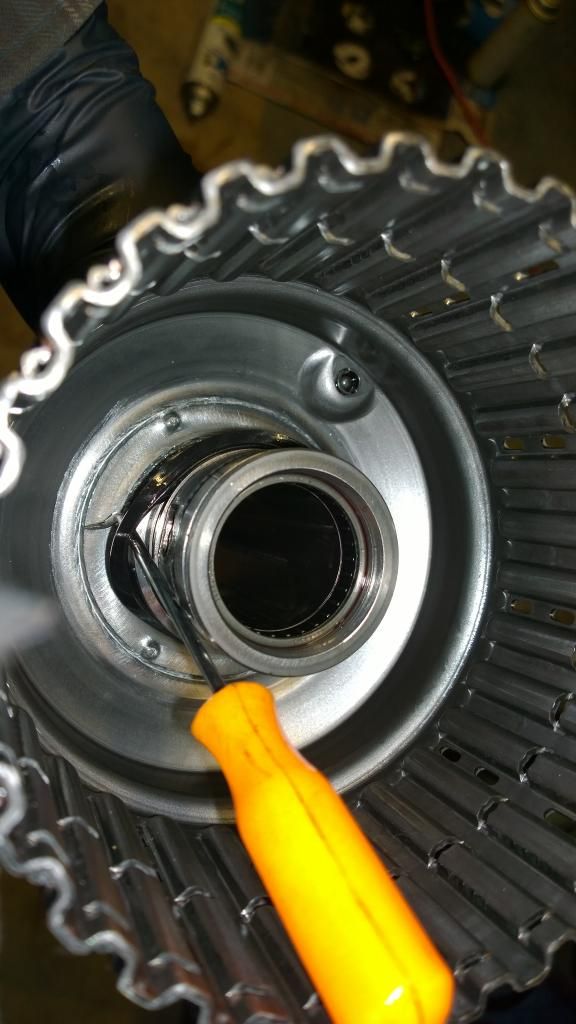
Not exactly easy to see in this picture, but done just right the seal will seat correctly on the first try.
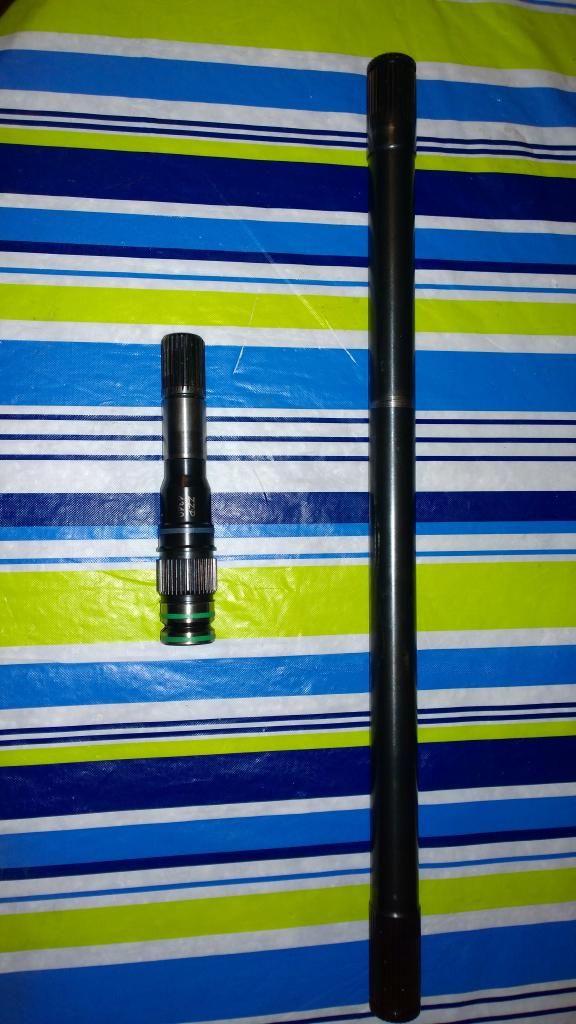
And the first performance part is in!
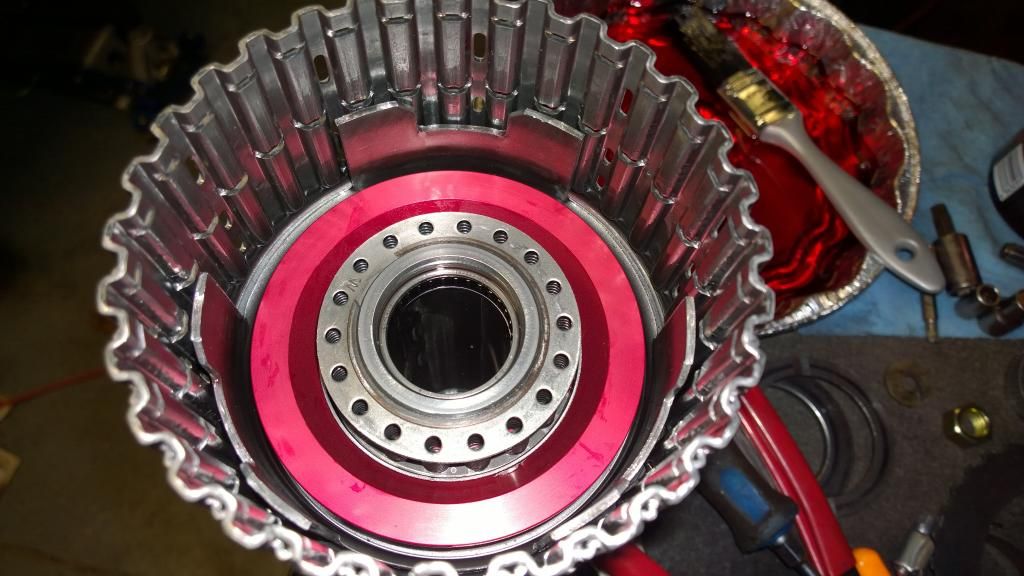
I got both of the clutch packs re-assembled today. Still in process of re-sizing the 2nd drum shaft seals, it's taking longer due to the cold. But the hard part is out of the way, what's left is mostly re-assembly.
Re: 1997 LeSabre project L67
Posted: Tue Nov 25, 2014 11:06 pm
by MattStrike
Trans was going together fine, until I found that the 35/35 sprocket set uses a different drive sprocket thrust washer than the OE 37/33...
Re: 1997 LeSabre project L67
Posted: Wed Nov 26, 2014 2:54 am
by tytotheler92
How do you cover the access hole that you made for the outer subframe bushings? That's a much better ideas then what I've seen people do which is go though the floor.
Looks good man.