Page 17 of 24
Re: Some pics of my 95 SLE (4/28 Update)
Posted: Sun Apr 30, 2017 1:31 am
by 95naSTA
I hear ya. My i30 fenders are a little shaky down there.. If you wanted to fix it without welding, some home depot/lowes sheet metal, tin snips, a drill and some rivets and you're pretty much there. The body cladding would hide it.
Re: Some pics of my 95 SLE (4/28 Update)
Posted: Fri May 05, 2017 10:24 pm
by 95naSTA
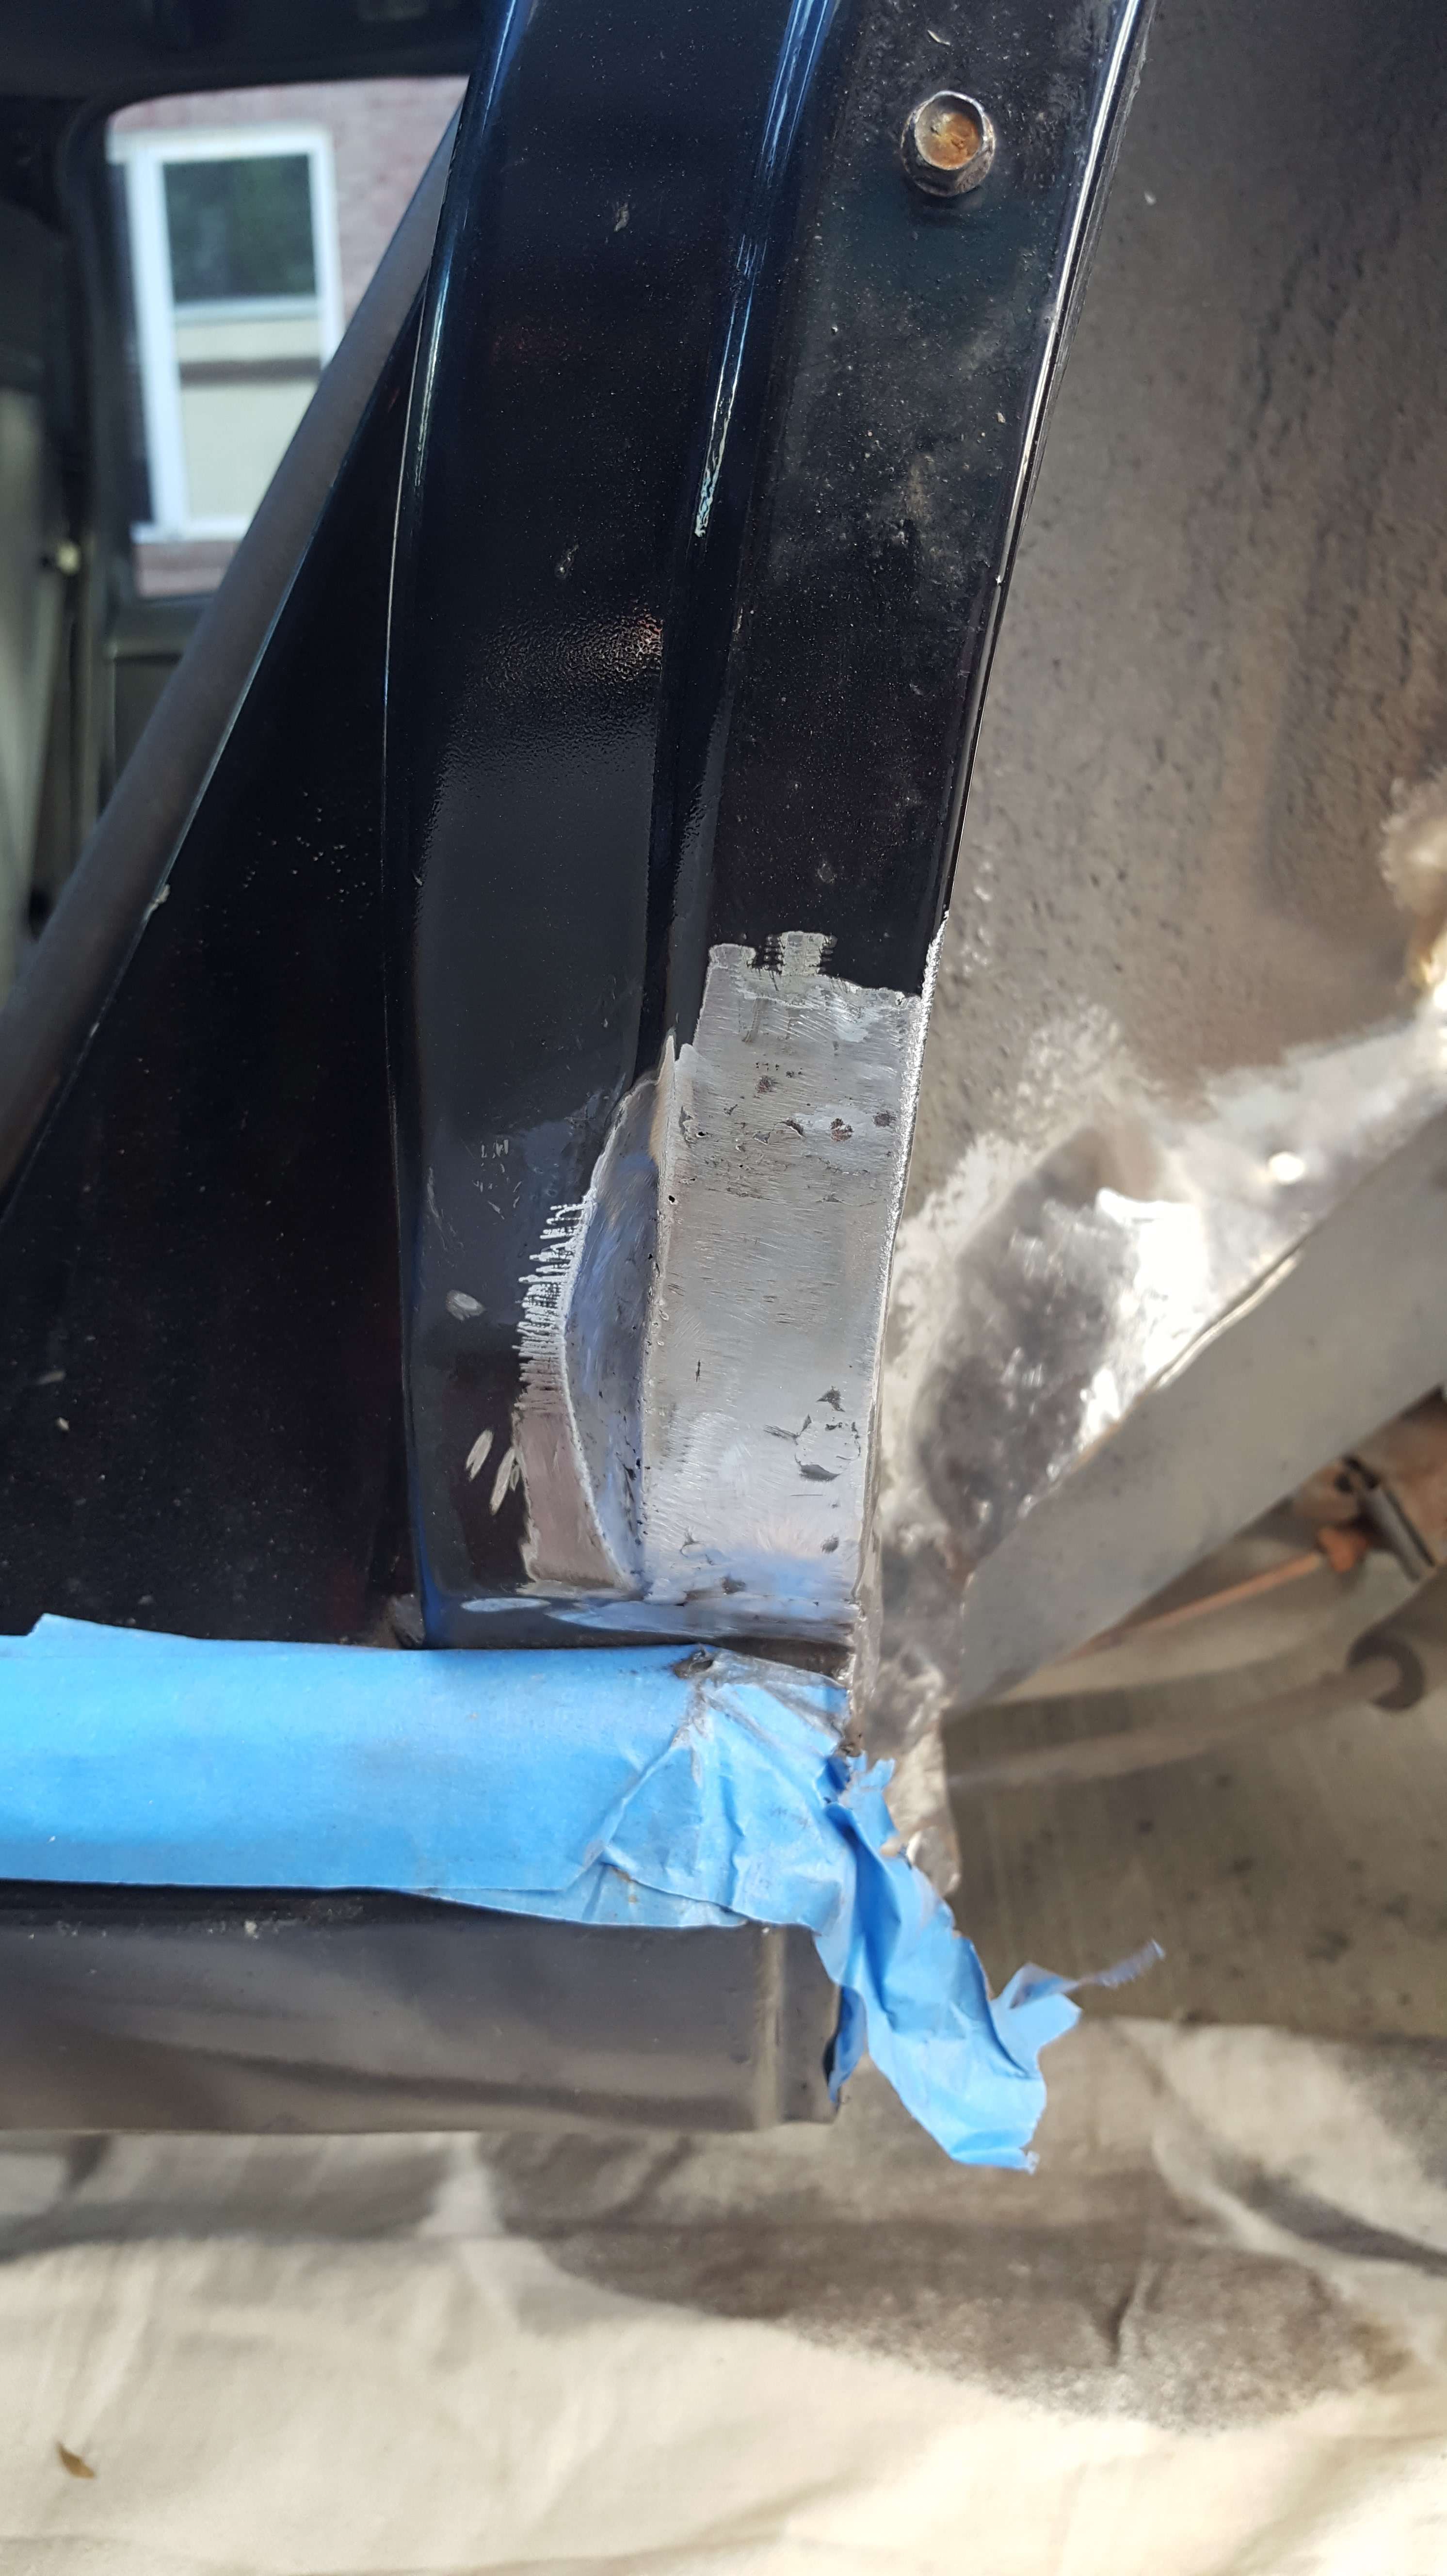
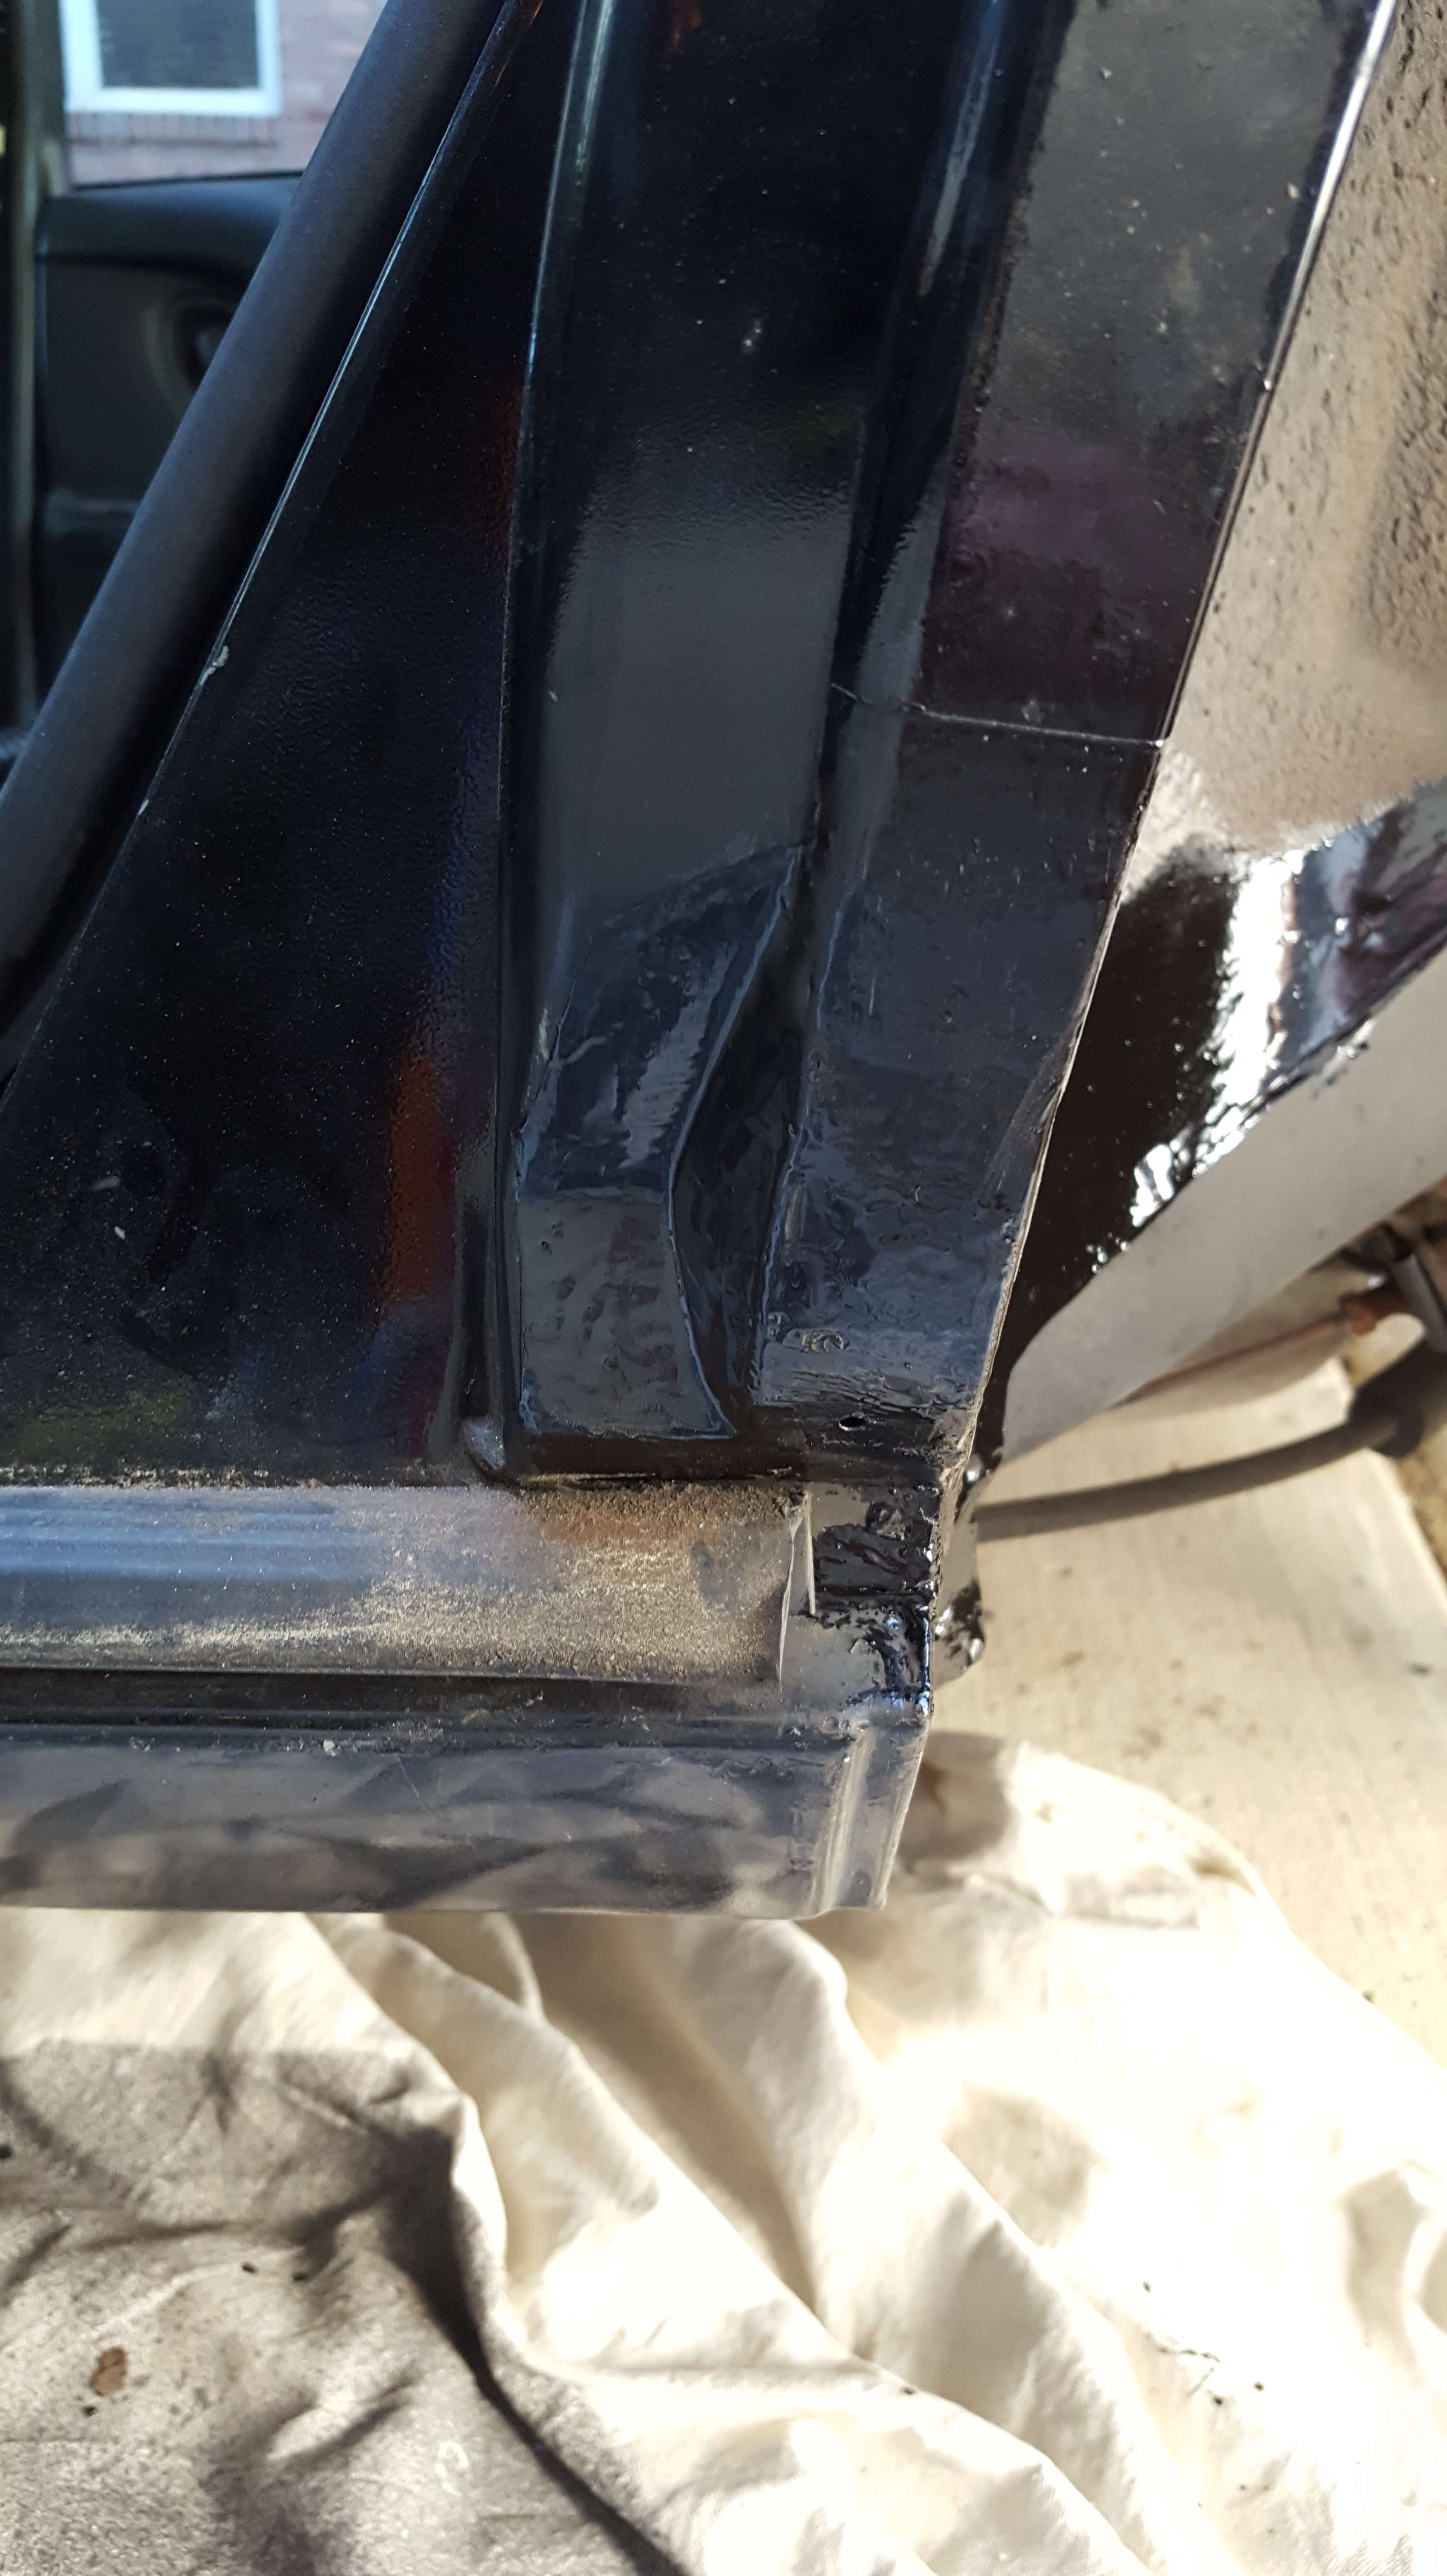
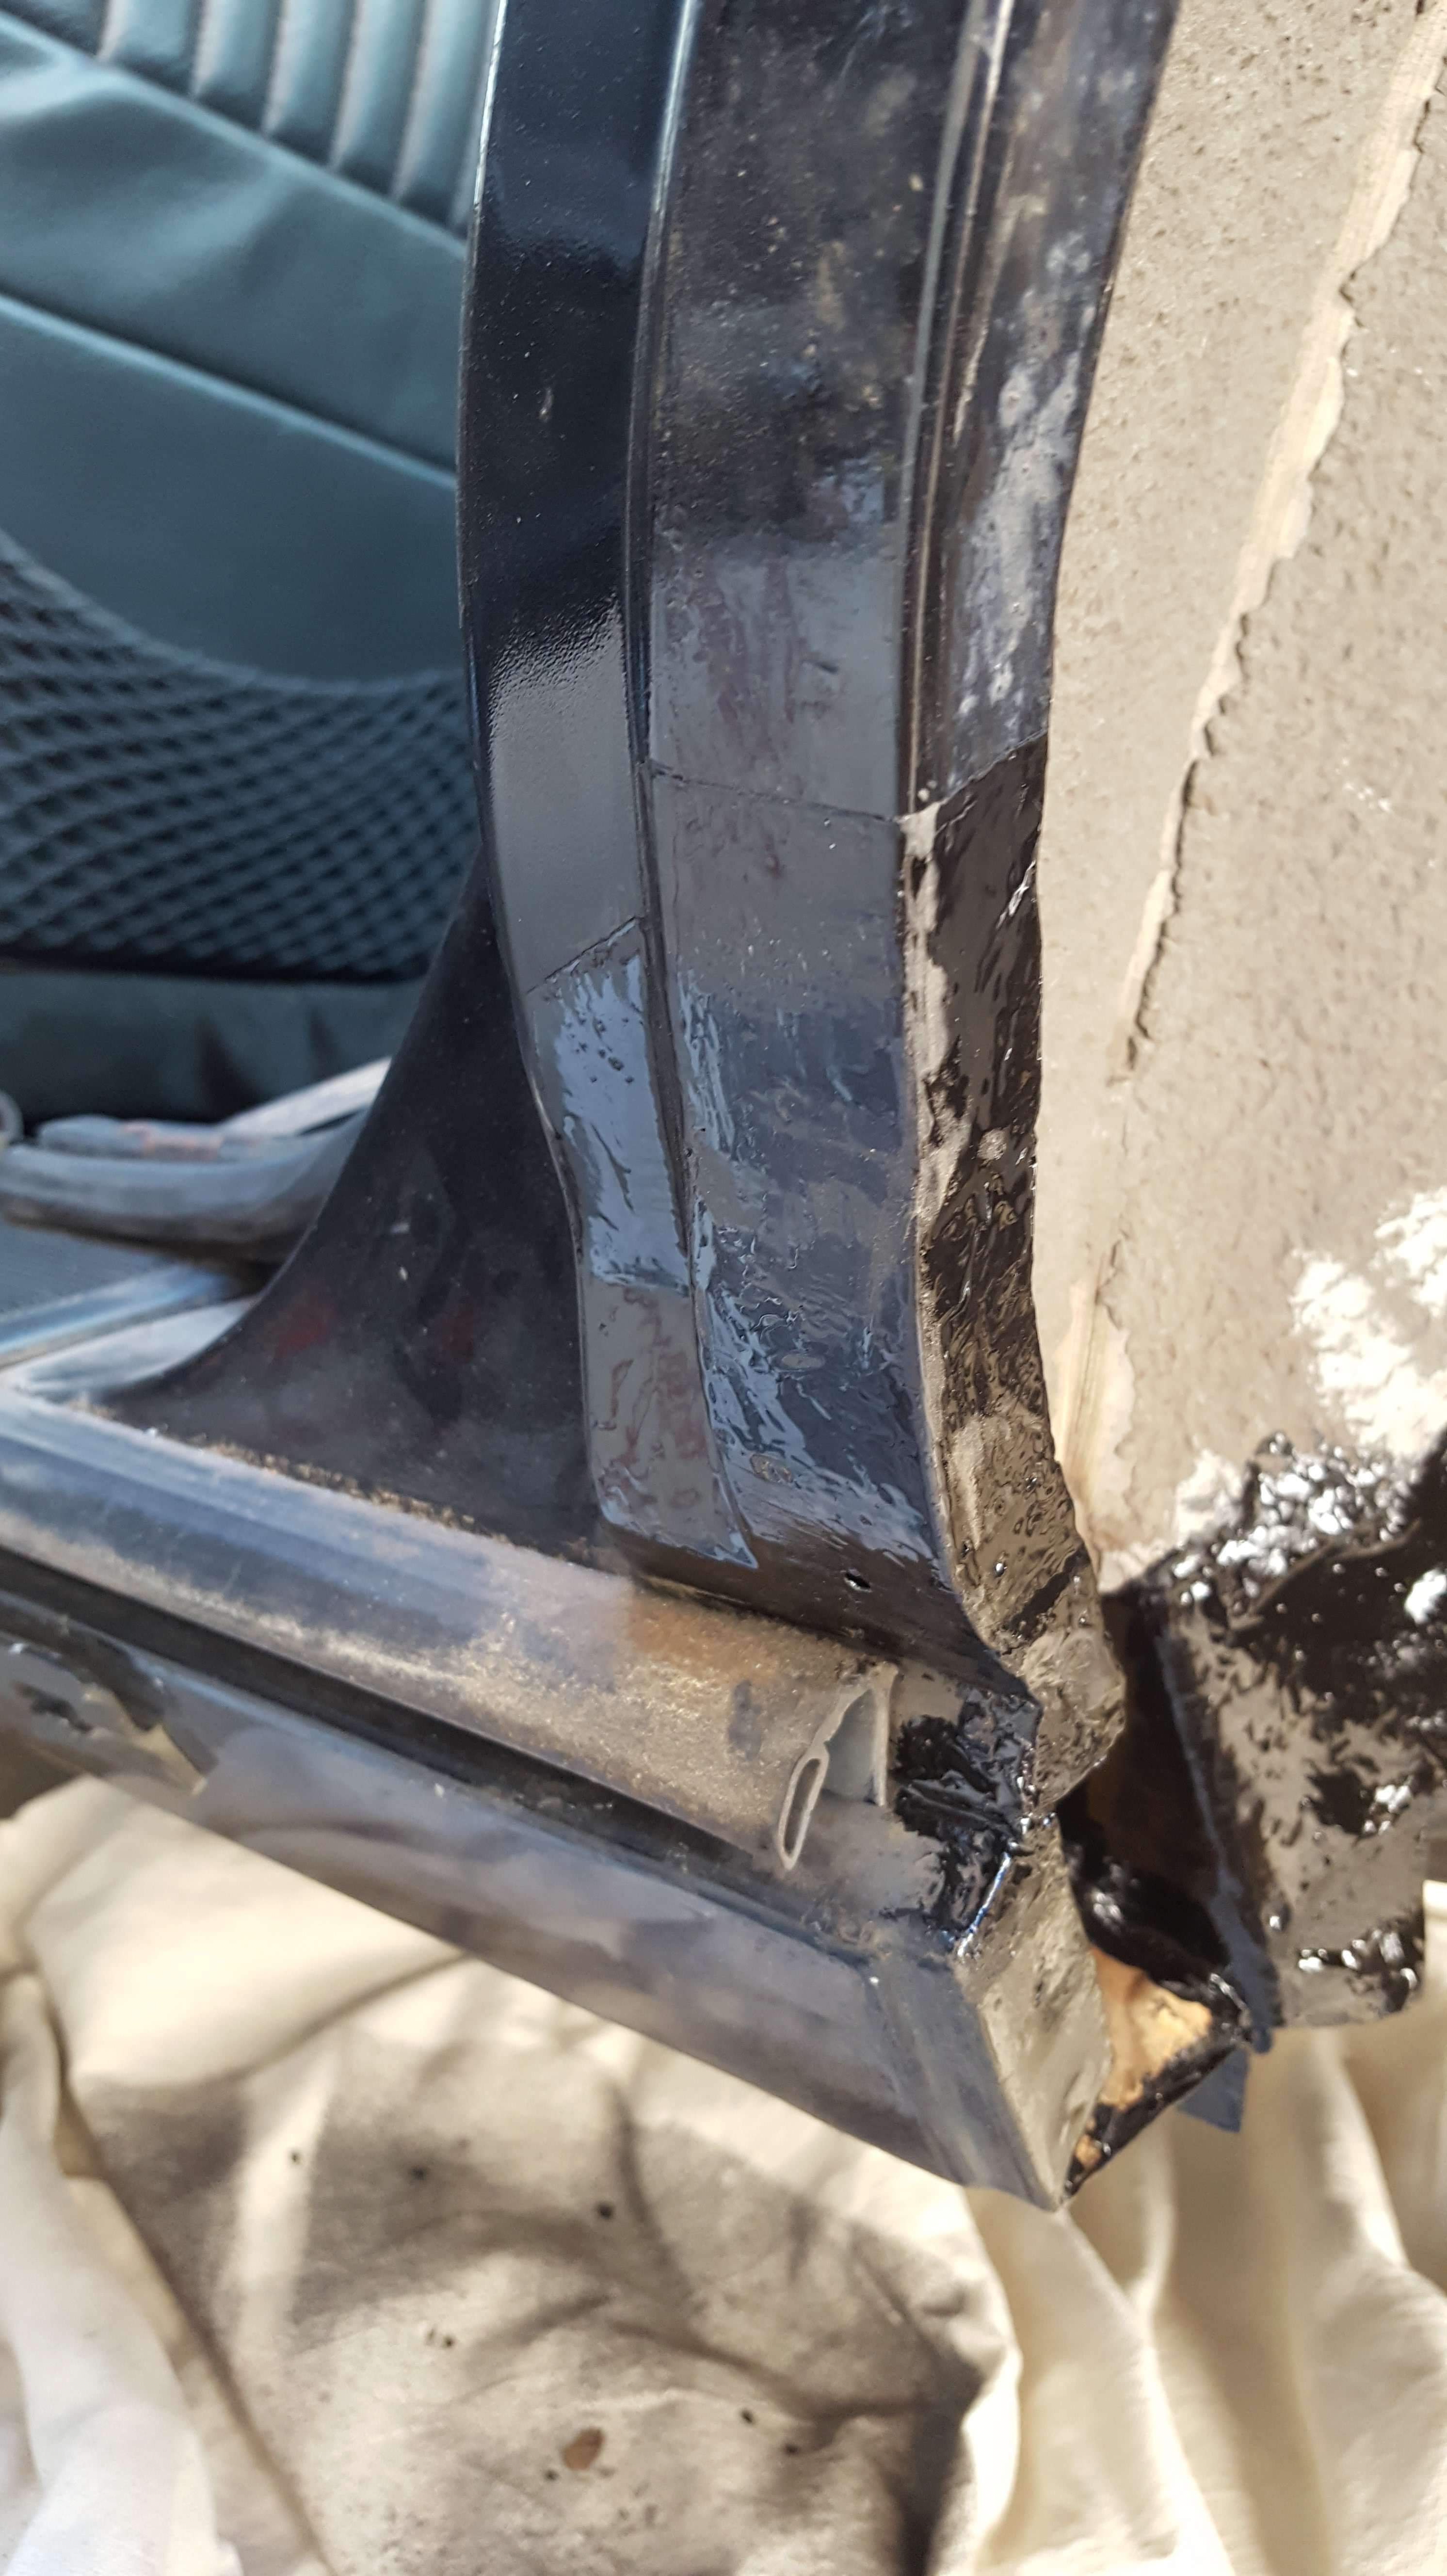
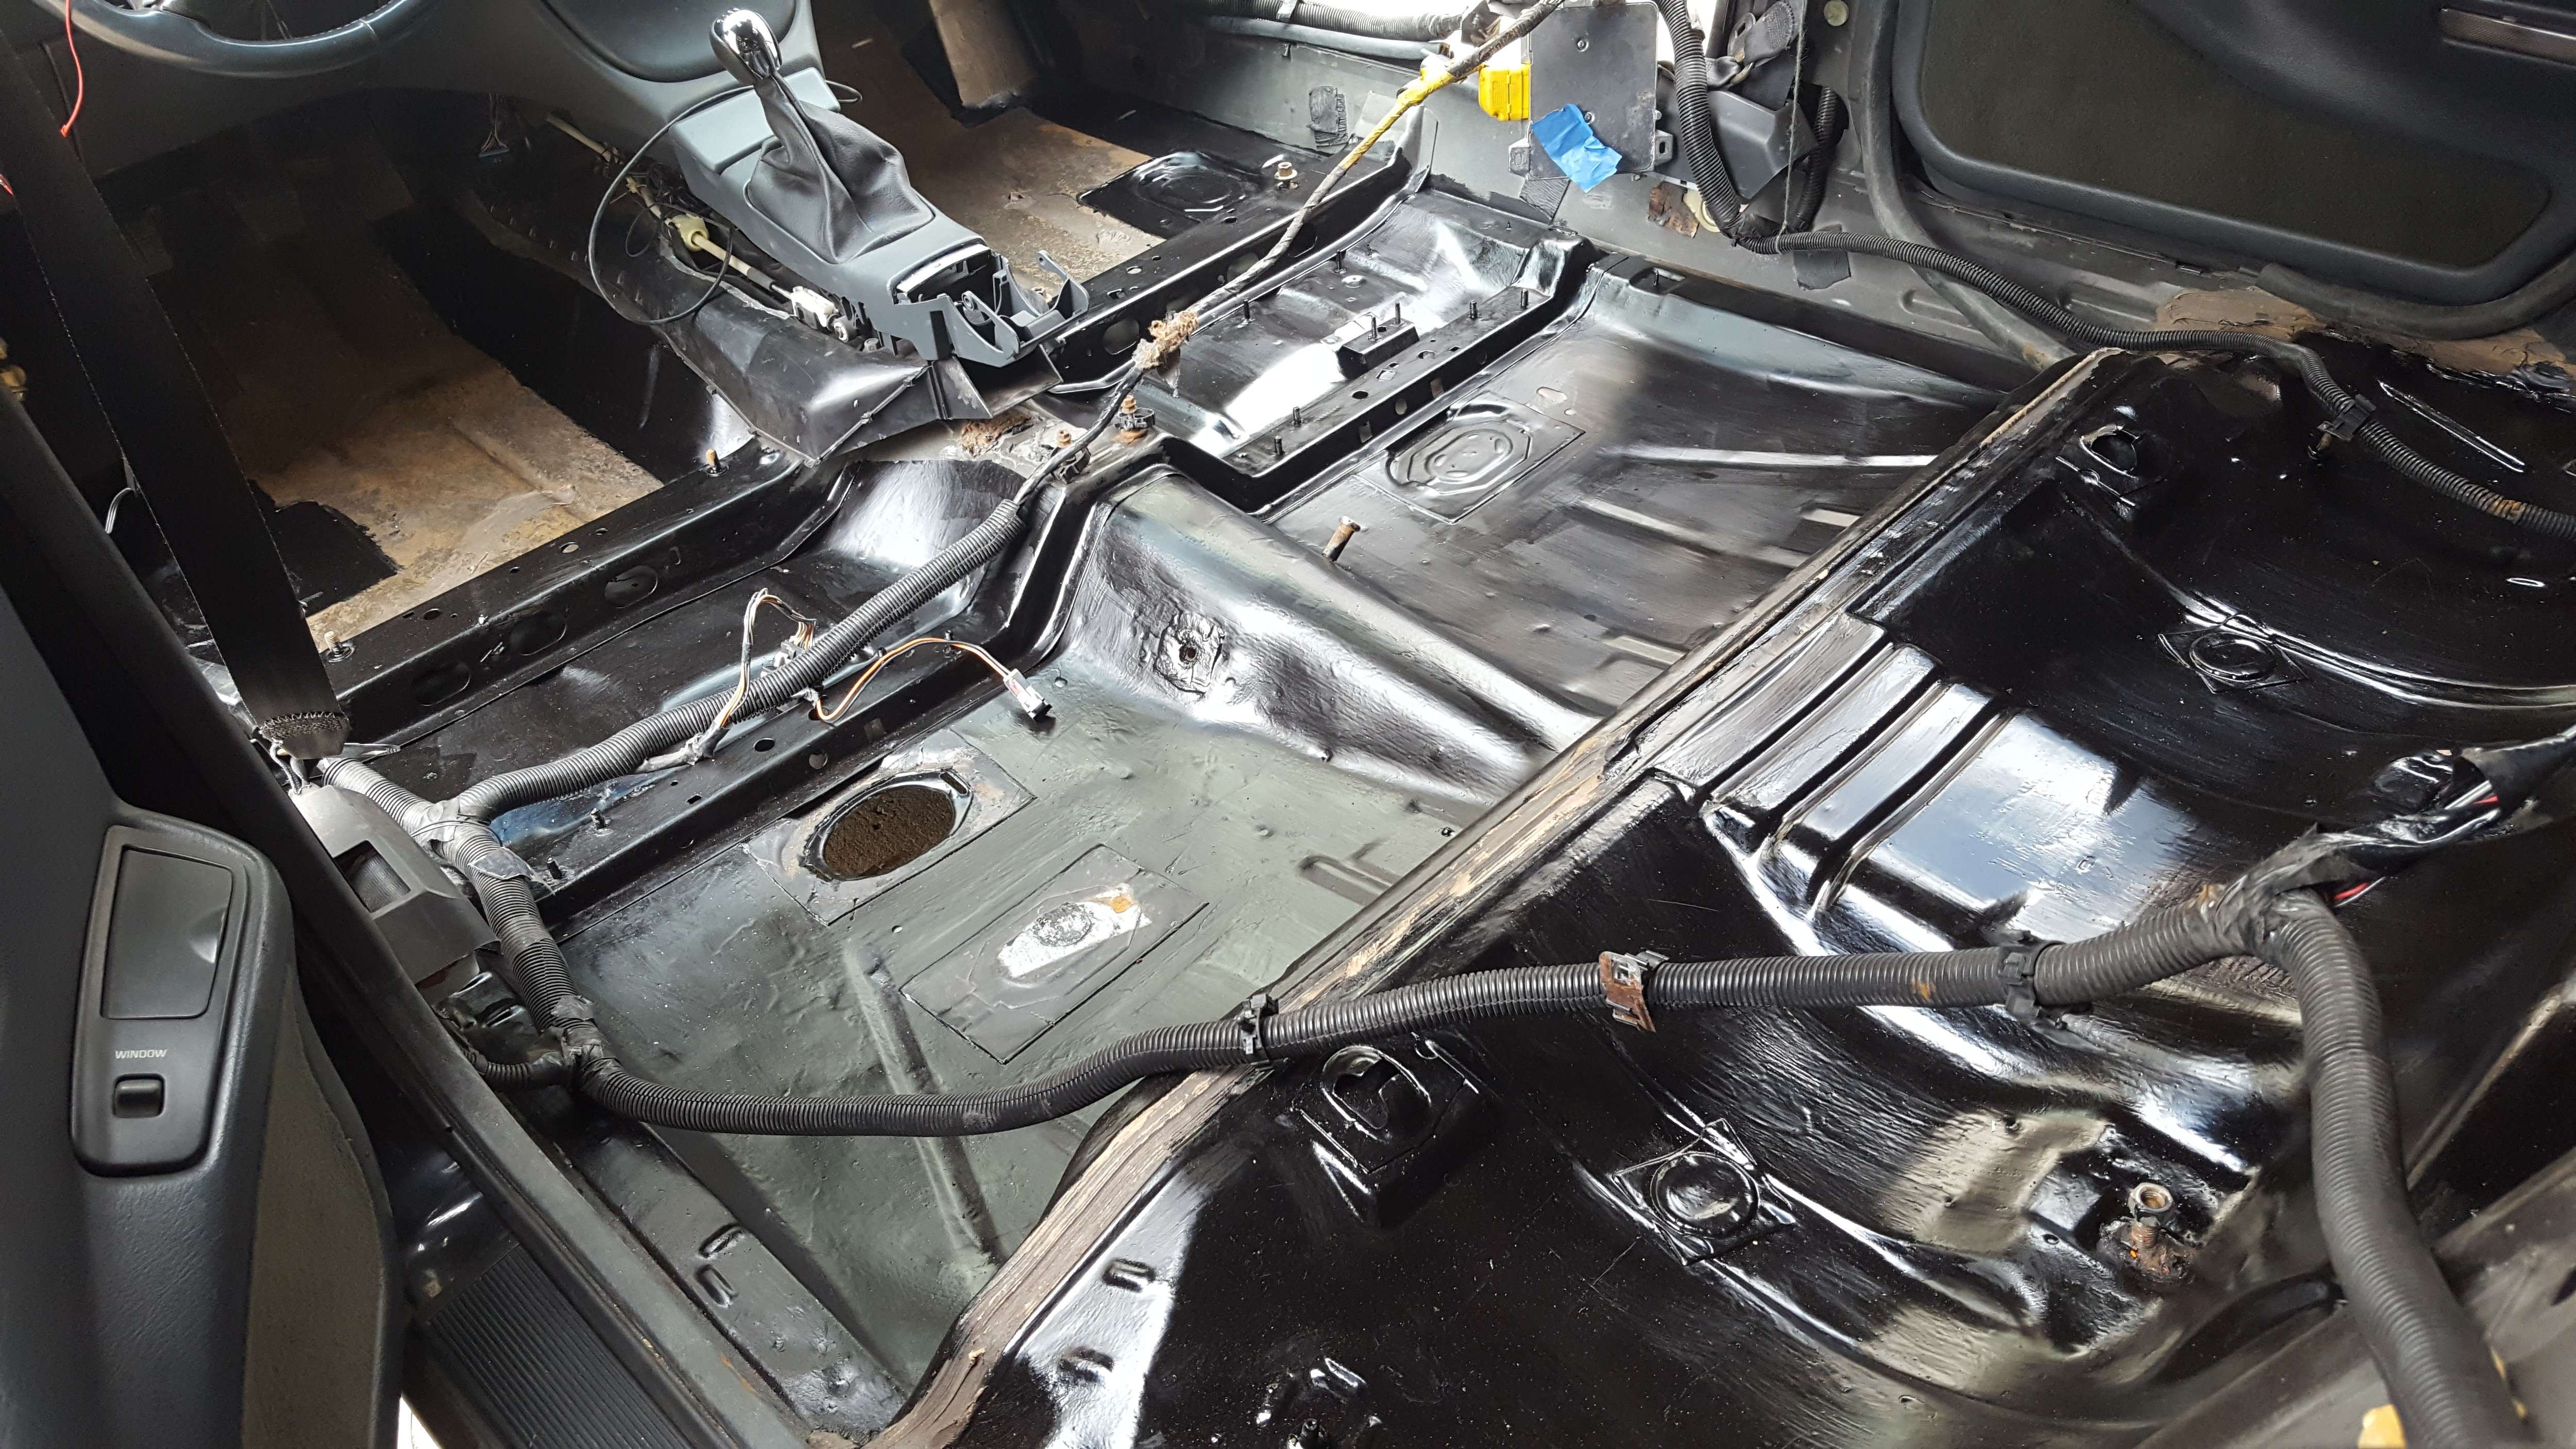
The interior patch is seam sealed up, the B pillars are covered in suede, and I repaired a crack in the driver's side drip molding today.
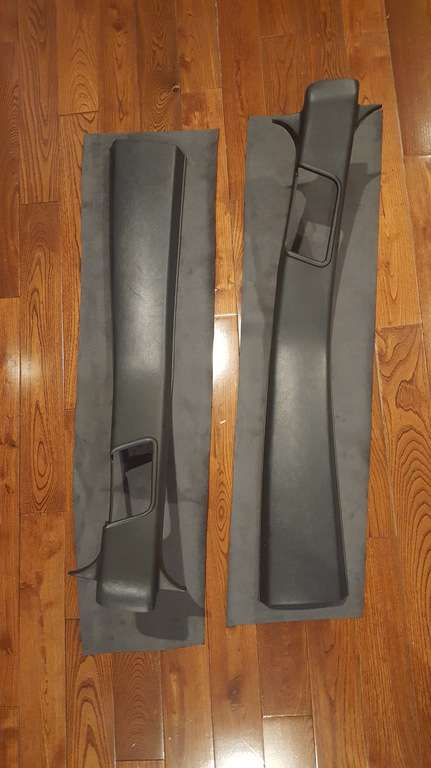
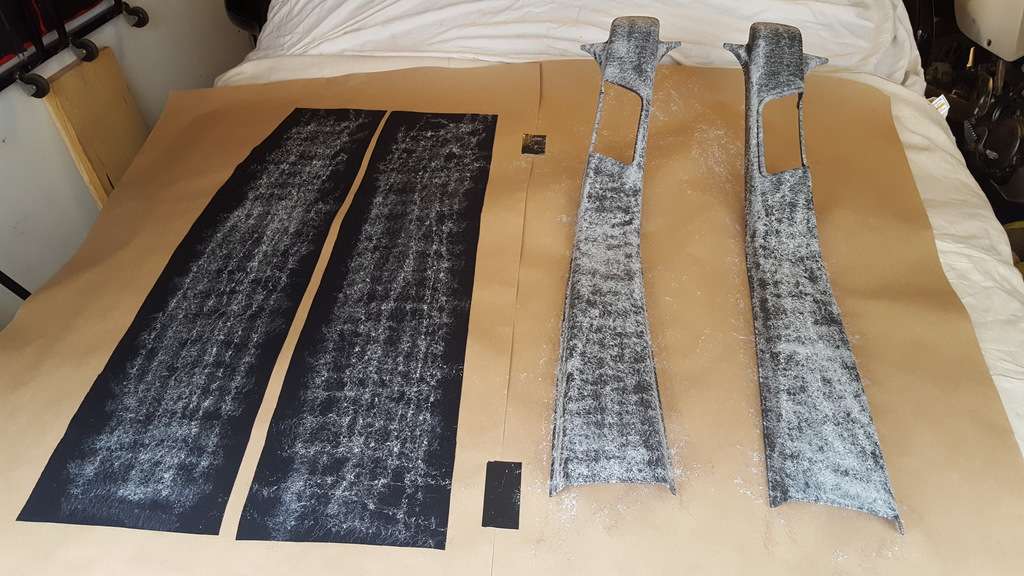

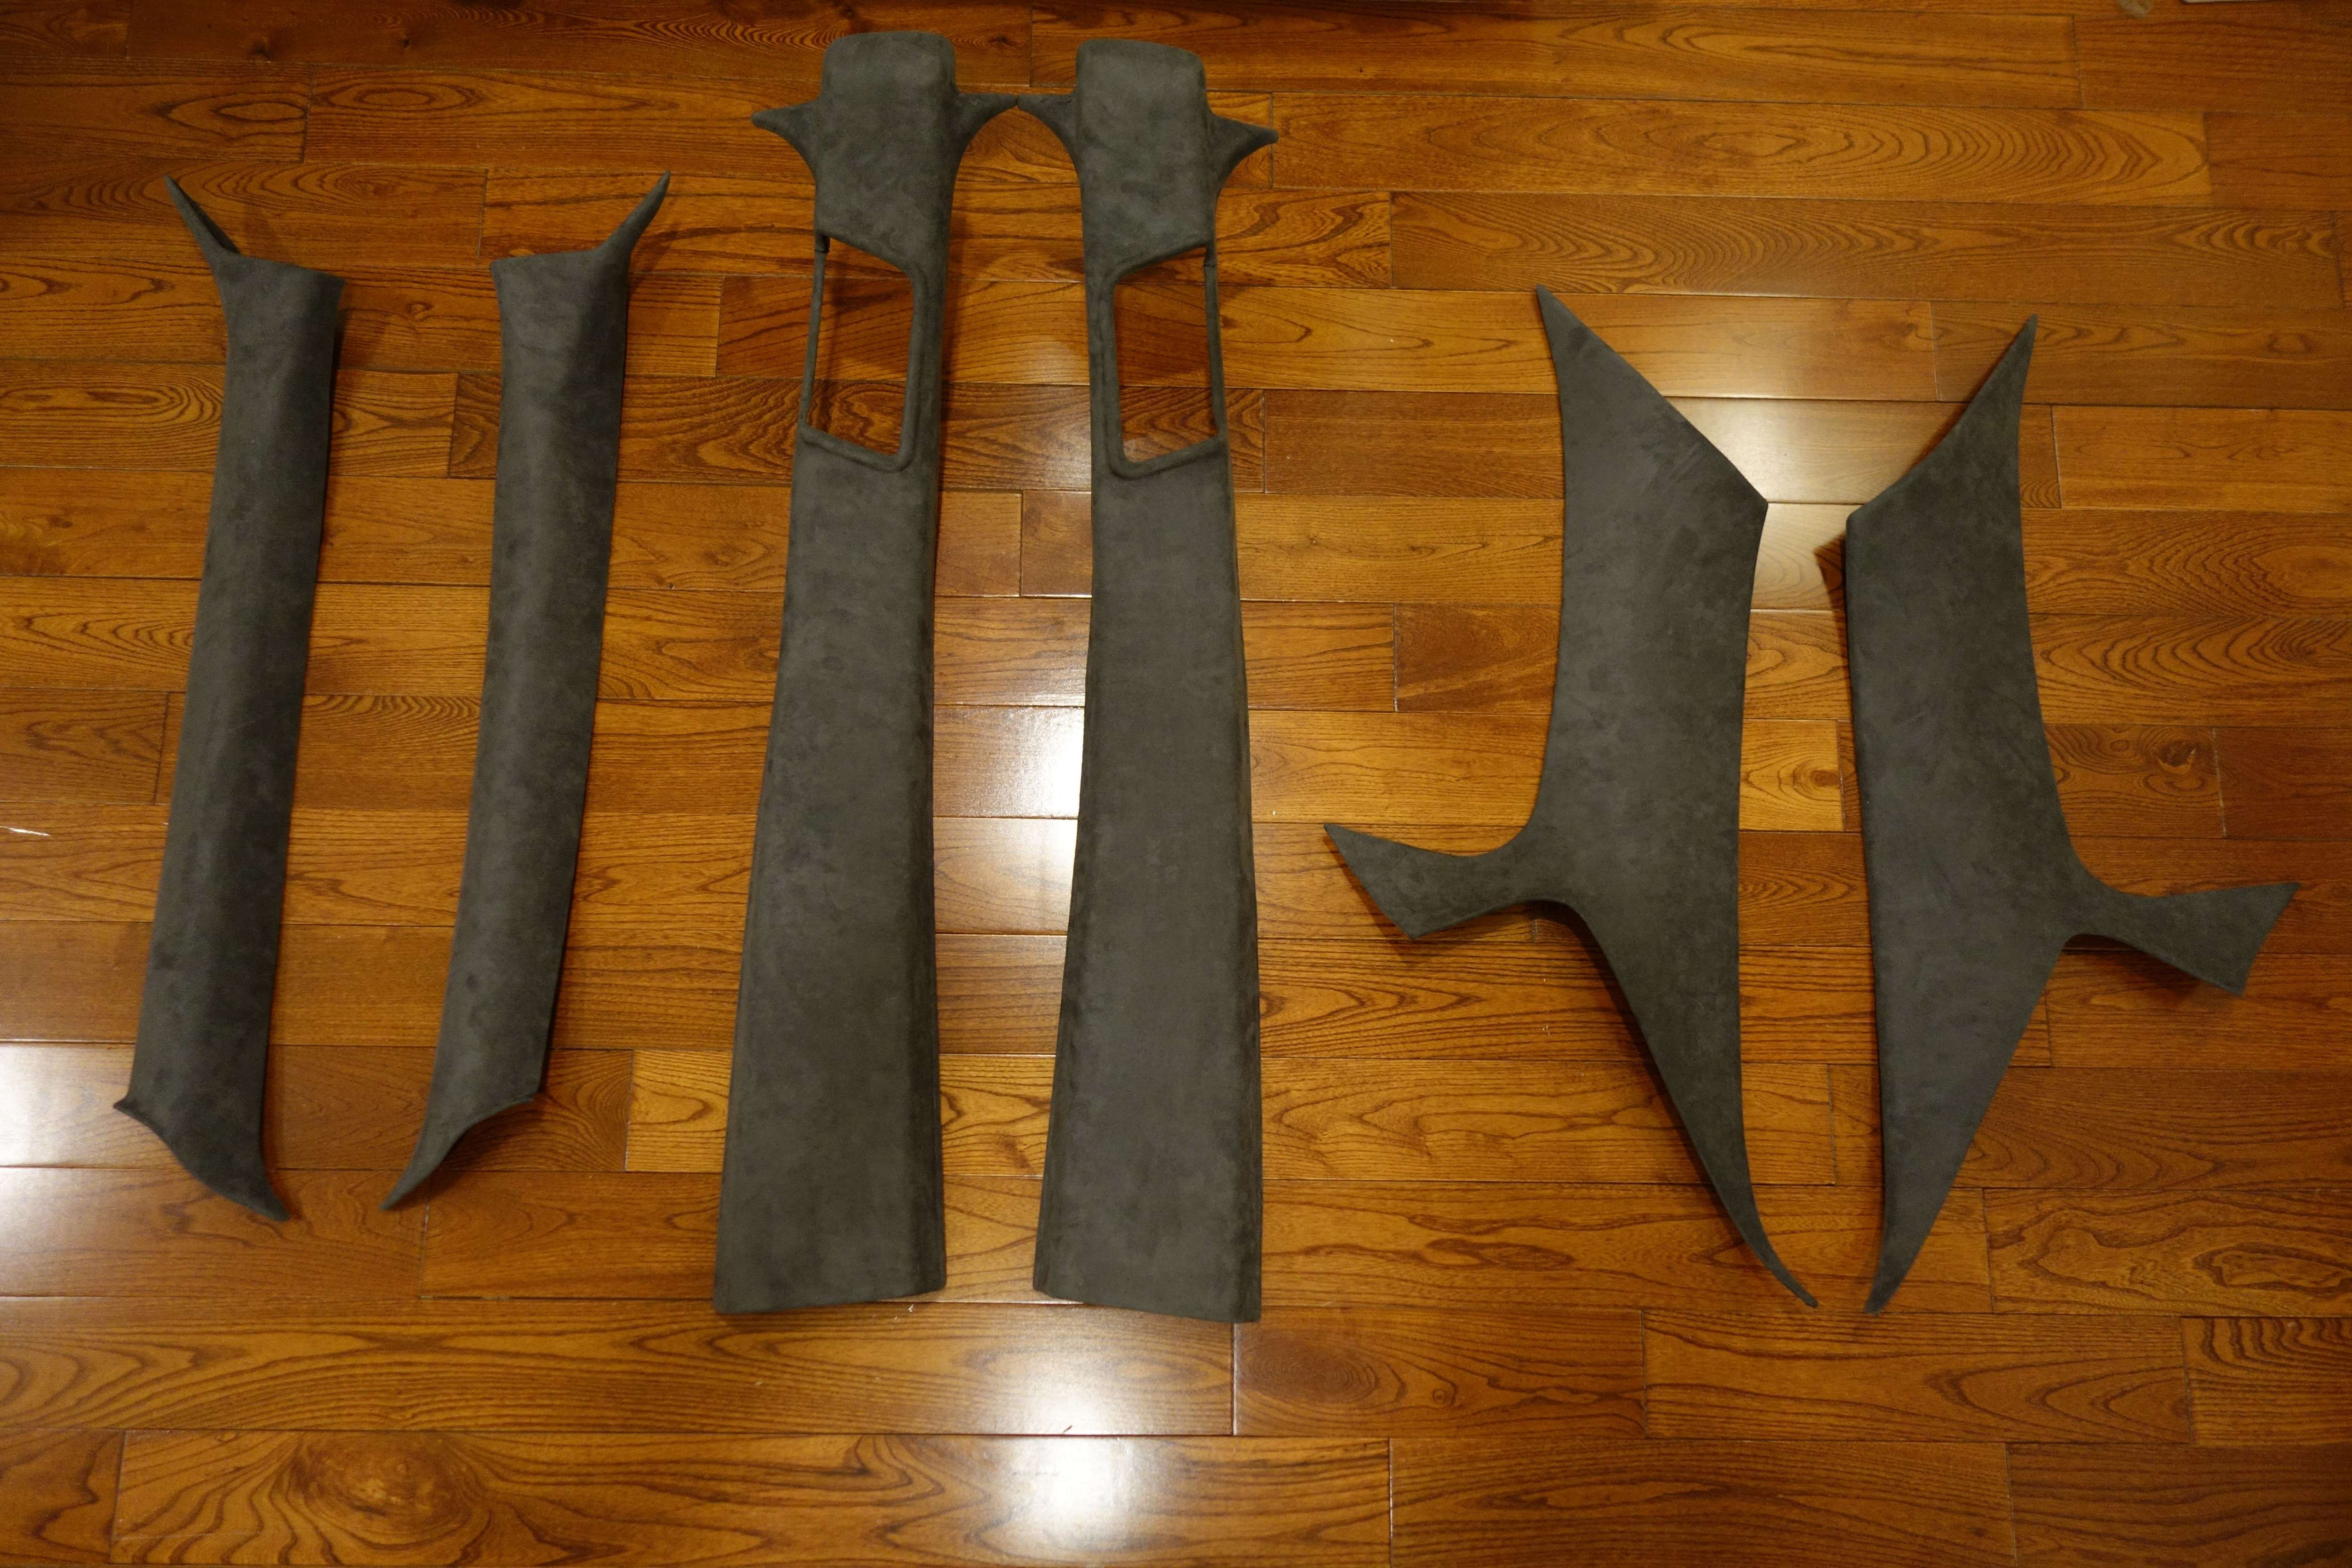
A B C pillars.
There are only a few things left preventing me from putting the interior back in the car. I still need to:
Weld in the patch in the rear seat pan
Put a second coat of Zero Rust over the whole floor
Pull the windshield again (probably could get away with not but might as well)
Paint the upper windshield frame. Right now there's only primer behind the front reveal molding
Install new OEM headliner board redone in suede.. Still need to redo it
Install windshield
Ok.. More than a few. But that's the order of operations at least.
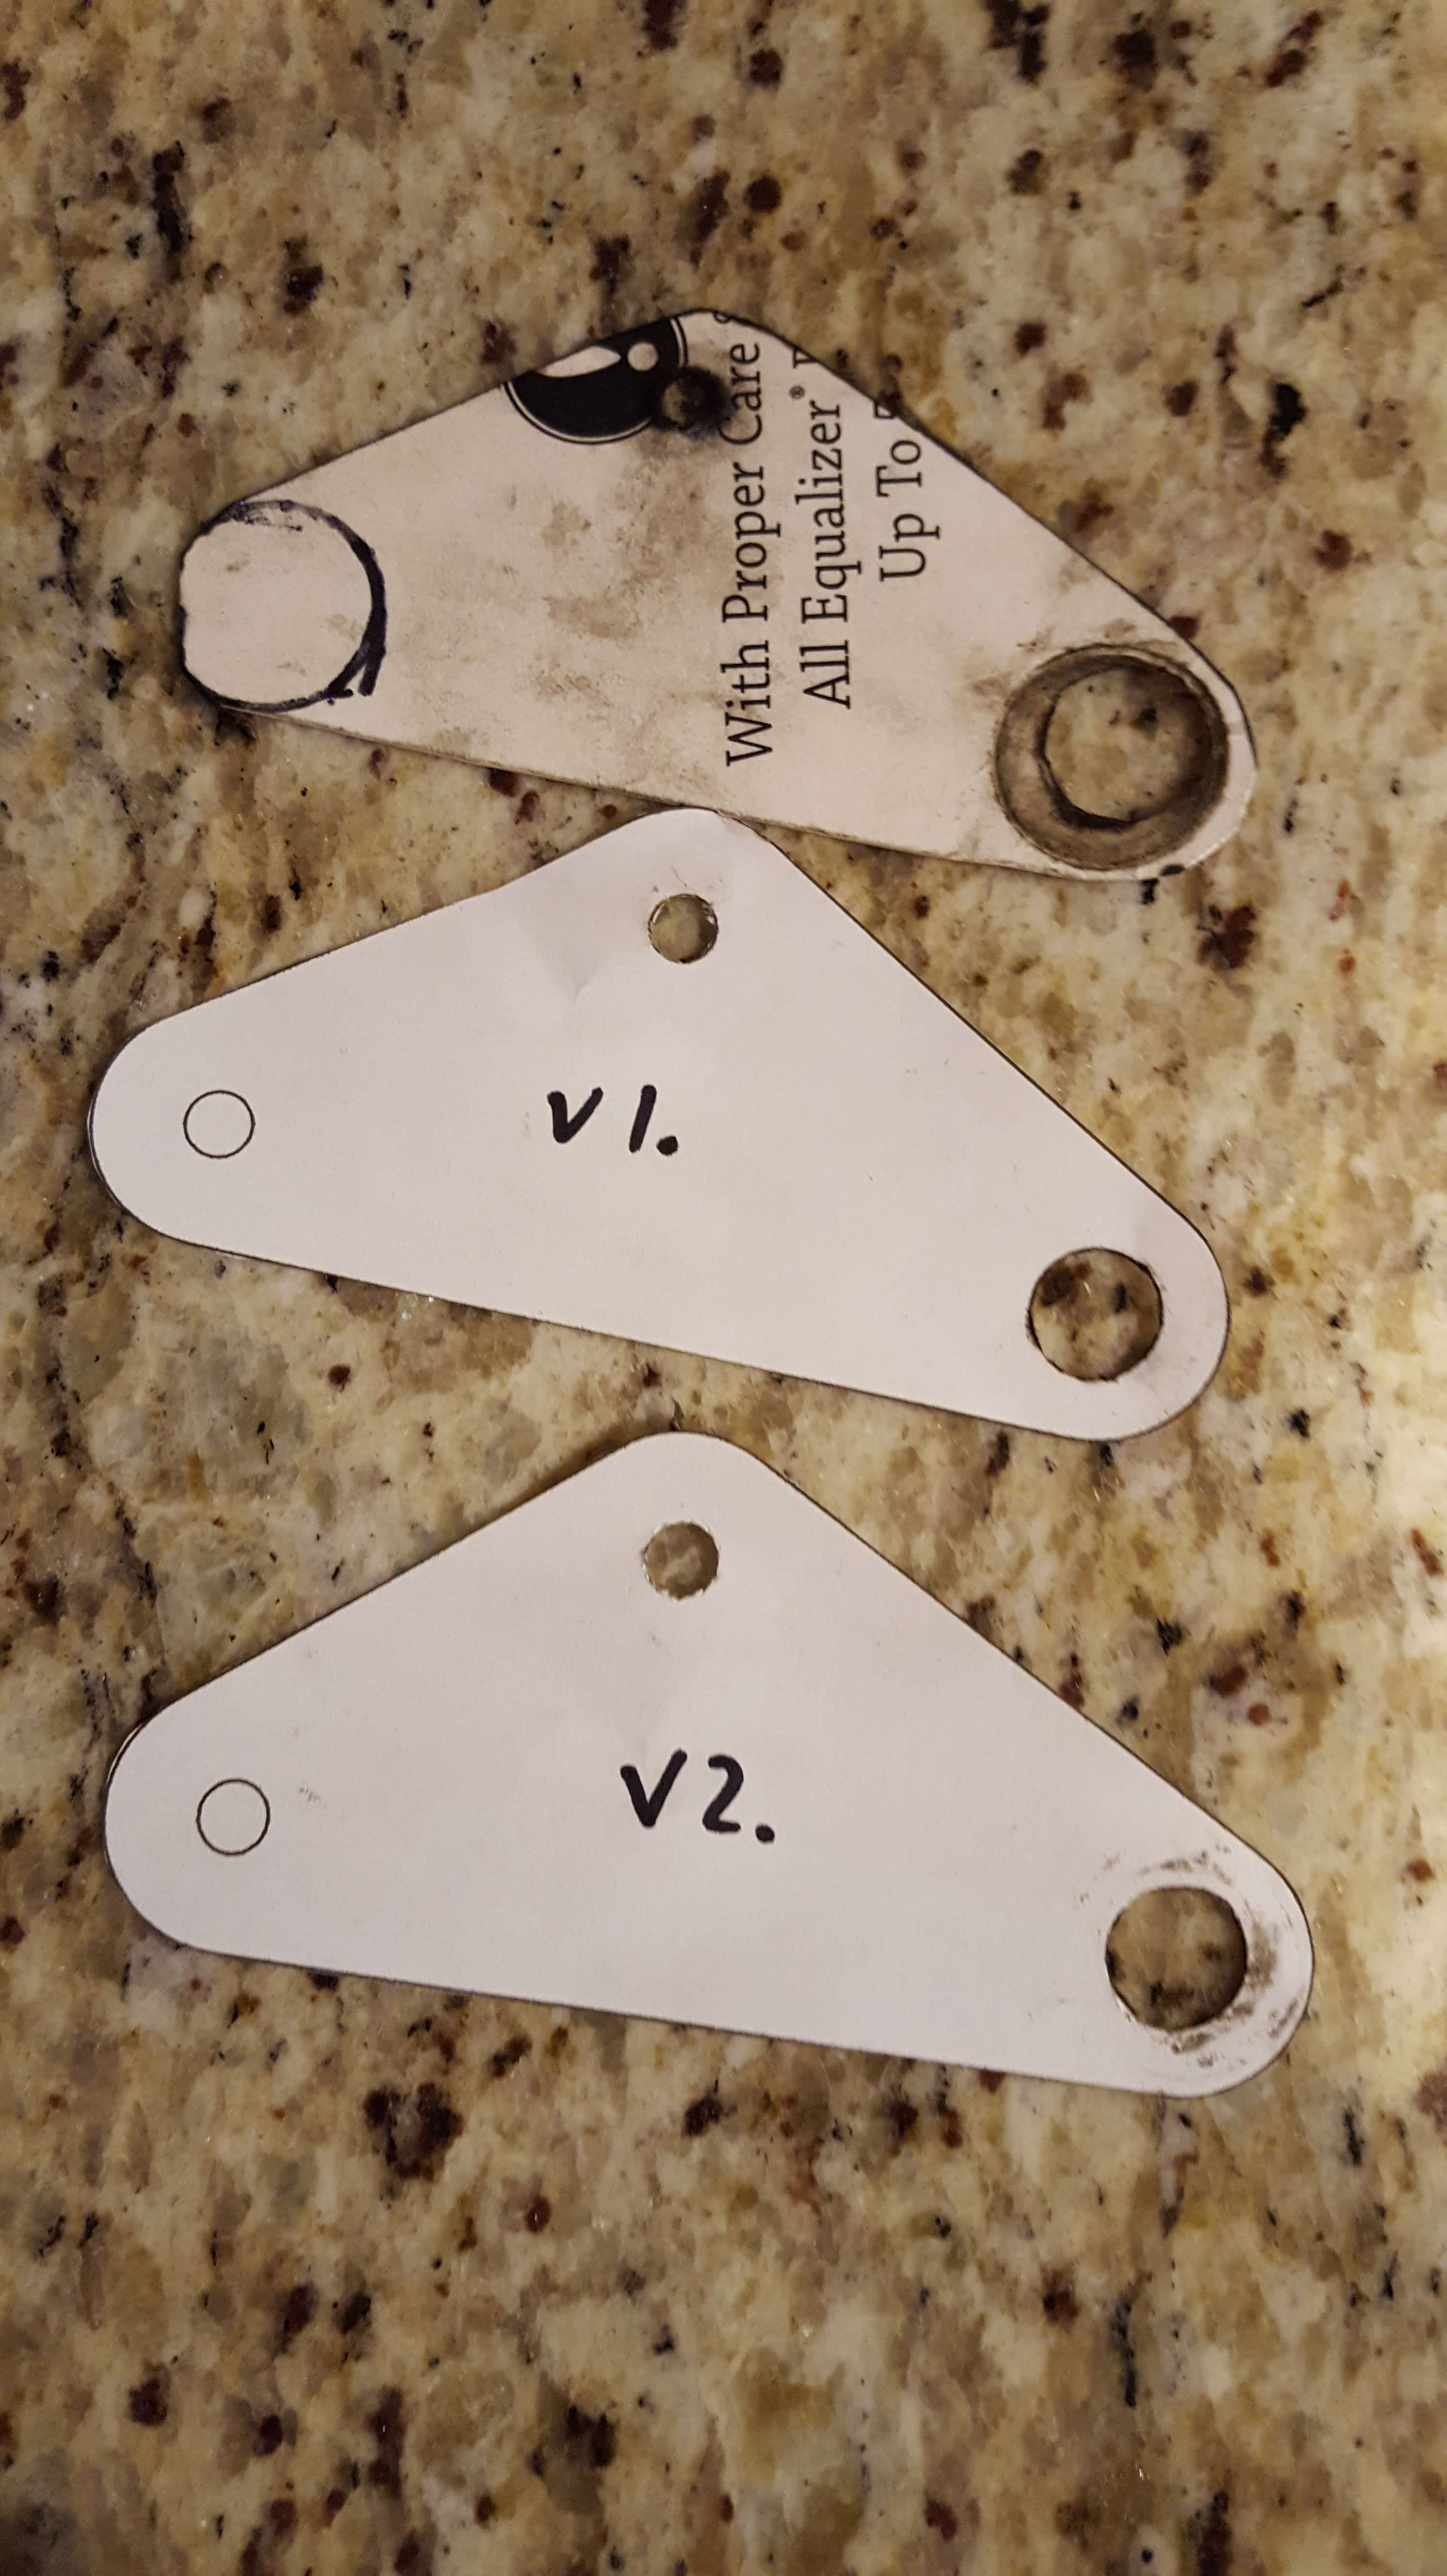
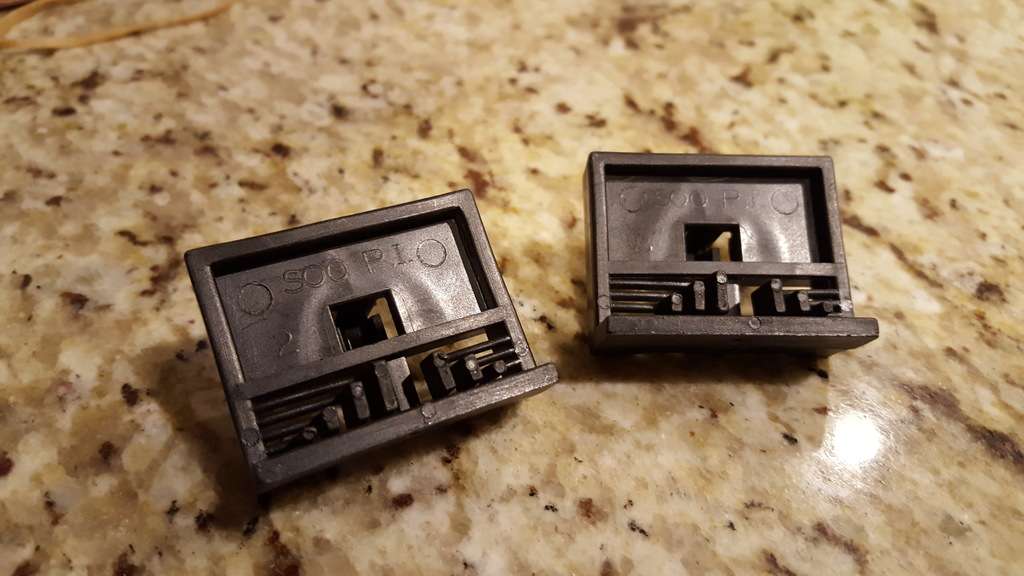
Since I can't do the same thing twice without figuring out a way to do it better, I found the windshield plastic locating supports to help reinstallation. p/n 25654094. My original ones were broken and window welded in place.
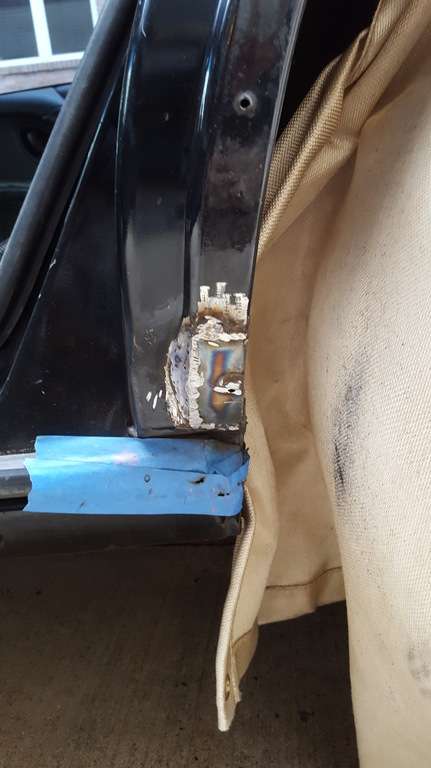
Re: Some pics of my 95 SLE (Cinco de Mayo Update)
Posted: Sun May 07, 2017 10:23 am
by 95naSTA
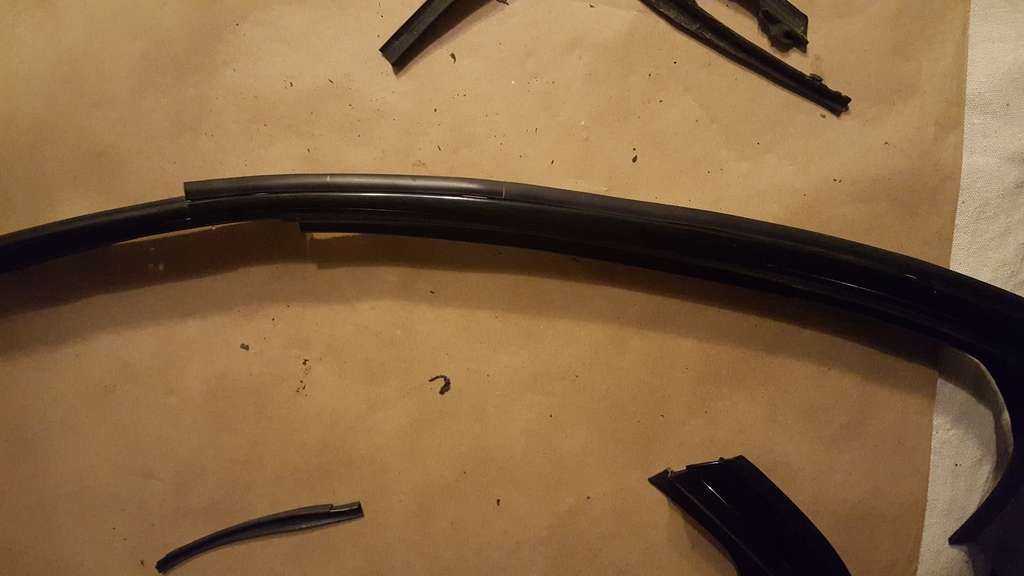
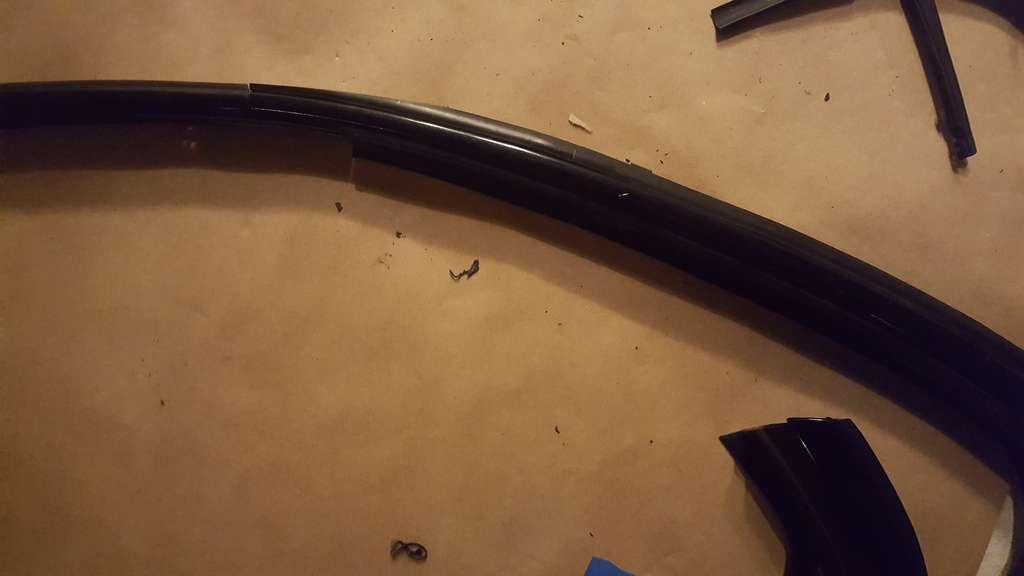
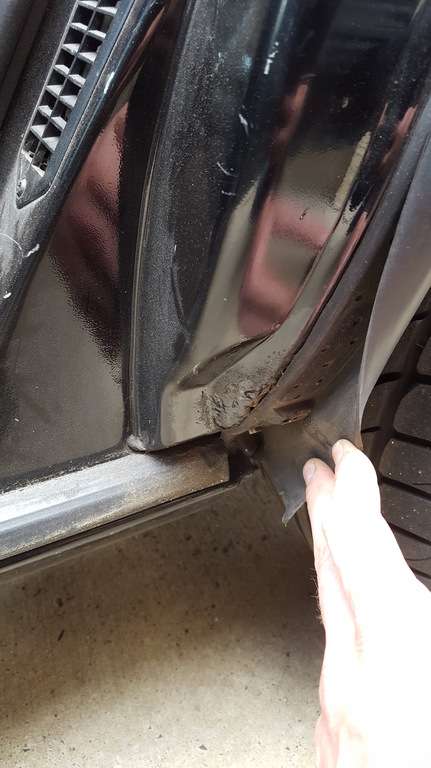
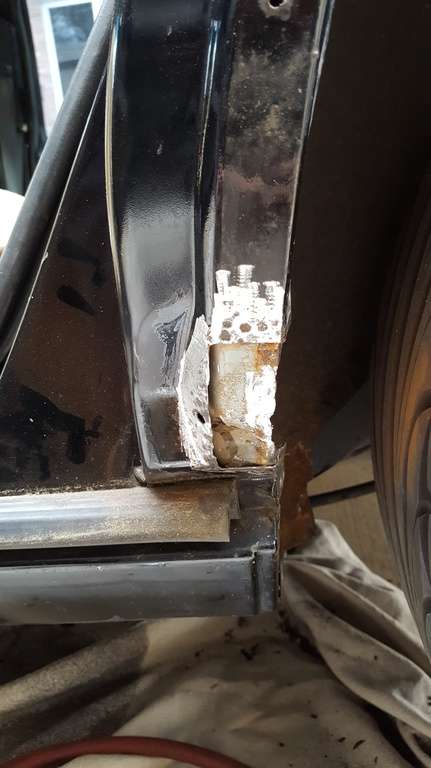
Not too long ago I picked up a NOS passenger drip molding (p/n 25649720) but the driver's side (p/n 25649721) is no longer available. The driver's side is of course in worse shape. It's mainly the rubber strip that attaches to the rear portion of the molding. It shrinks and pulls away. I decided to use a section of the old passenger side rubber to stitch in and repair the driver's.
Here you can see the shriveled part cut off here:
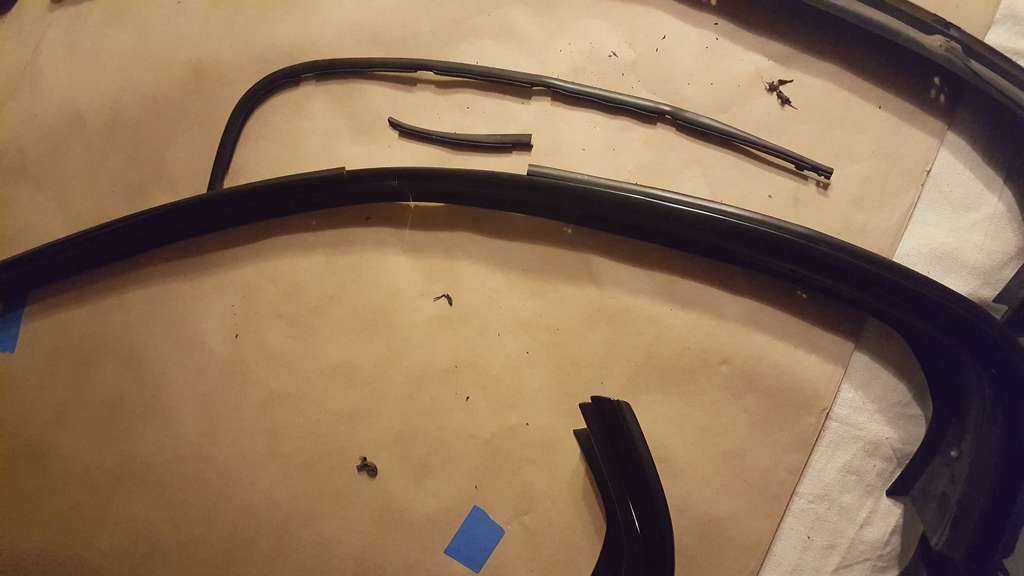
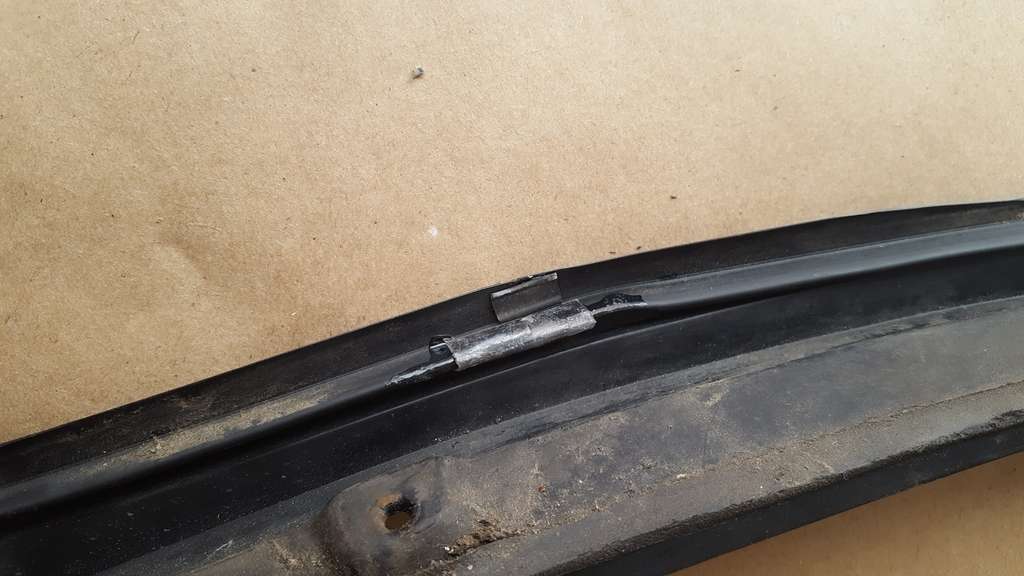
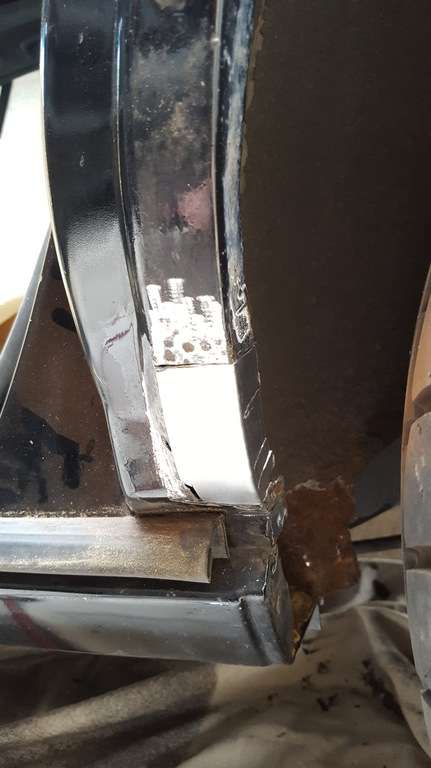
Sacrificial part cut to length
Cut down to match the contour of the other side
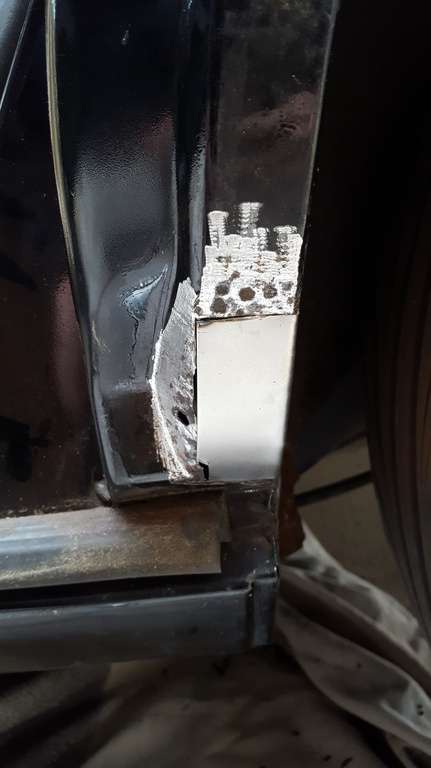
Epoxied and supported from the back. I ended up adding more epoxy over all this.
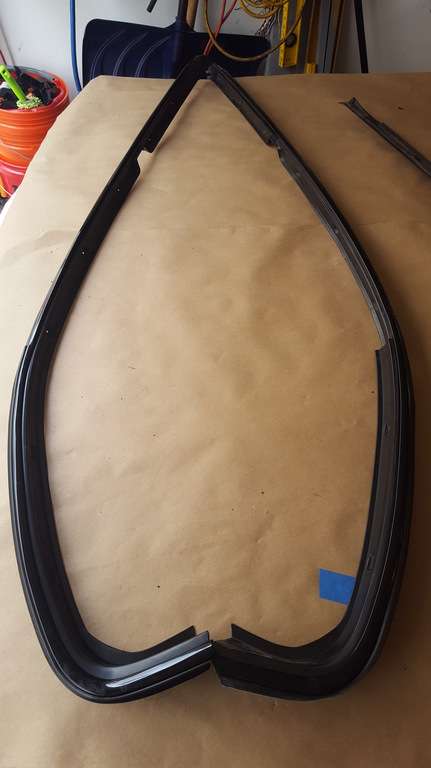
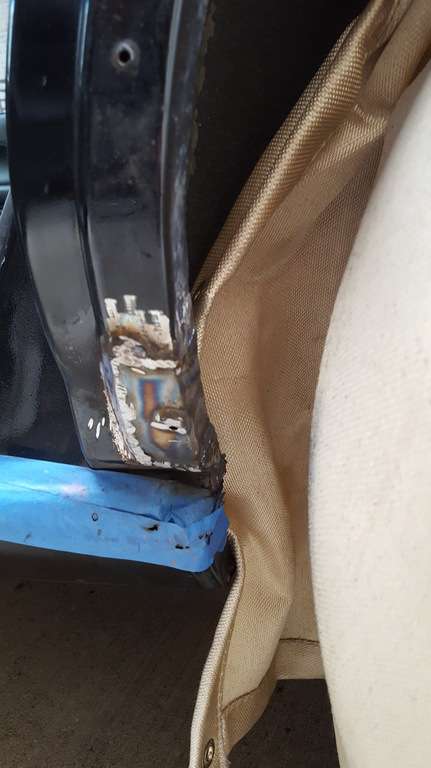
Passenger and Driver's
Re: Some pics of my 95 SLE (5/7 Update)
Posted: Fri May 12, 2017 7:11 pm
by zuper8
So, I know I've asked this before, but it's been a few years so.... what are your goals with this project? Obviously, one of your goals is perfection since you're splicing and repairing window moldings, but what else? Car shows? I still think it should get a magazine spread. I loved that fix, by the way, it's something that I would never notice but I know how those details combine to make the car look even more outstanding on the whole.
Re: Some pics of my 95 SLE (5/7 Update)
Posted: Sat May 13, 2017 12:34 am
by 95naSTA
zuper8 wrote:So, I know I've asked this before, but it's been a few years so.... what are your goals with this project? Obviously, one of your goals is perfection since you're splicing and repairing window moldings, but what else? Car shows? I still think it should get a magazine spread. I loved that fix, by the way, it's something that I would never notice but I know how those details combine to make the car look even more outstanding on the whole.
Rachel, as always, I appreciate the kind words.
Power goals while n/a were 13.9 with slicks. I have no idea if that is even realistic but it should be a mid-14s car all day. It's not going to be a fast car but it should have enough power to not suck with a 6 speed.
Aesthetics goals is just to have a good looking car.. But have most people scratching their head as to why they're now into a 1995 Bonneville. And for those that know how the car should look to notice maybe 20% of what I did. I'm basically my worst enemy. I want to look at everything I do and never wish I did it any better or different.
Shows? Yeah eventually but I'm still quite a ways off.
I also want the car to be dead reliable. Aside from the electrical gremlins I might have made for myself by re-wiring the whole front end, this goal is the easiest.
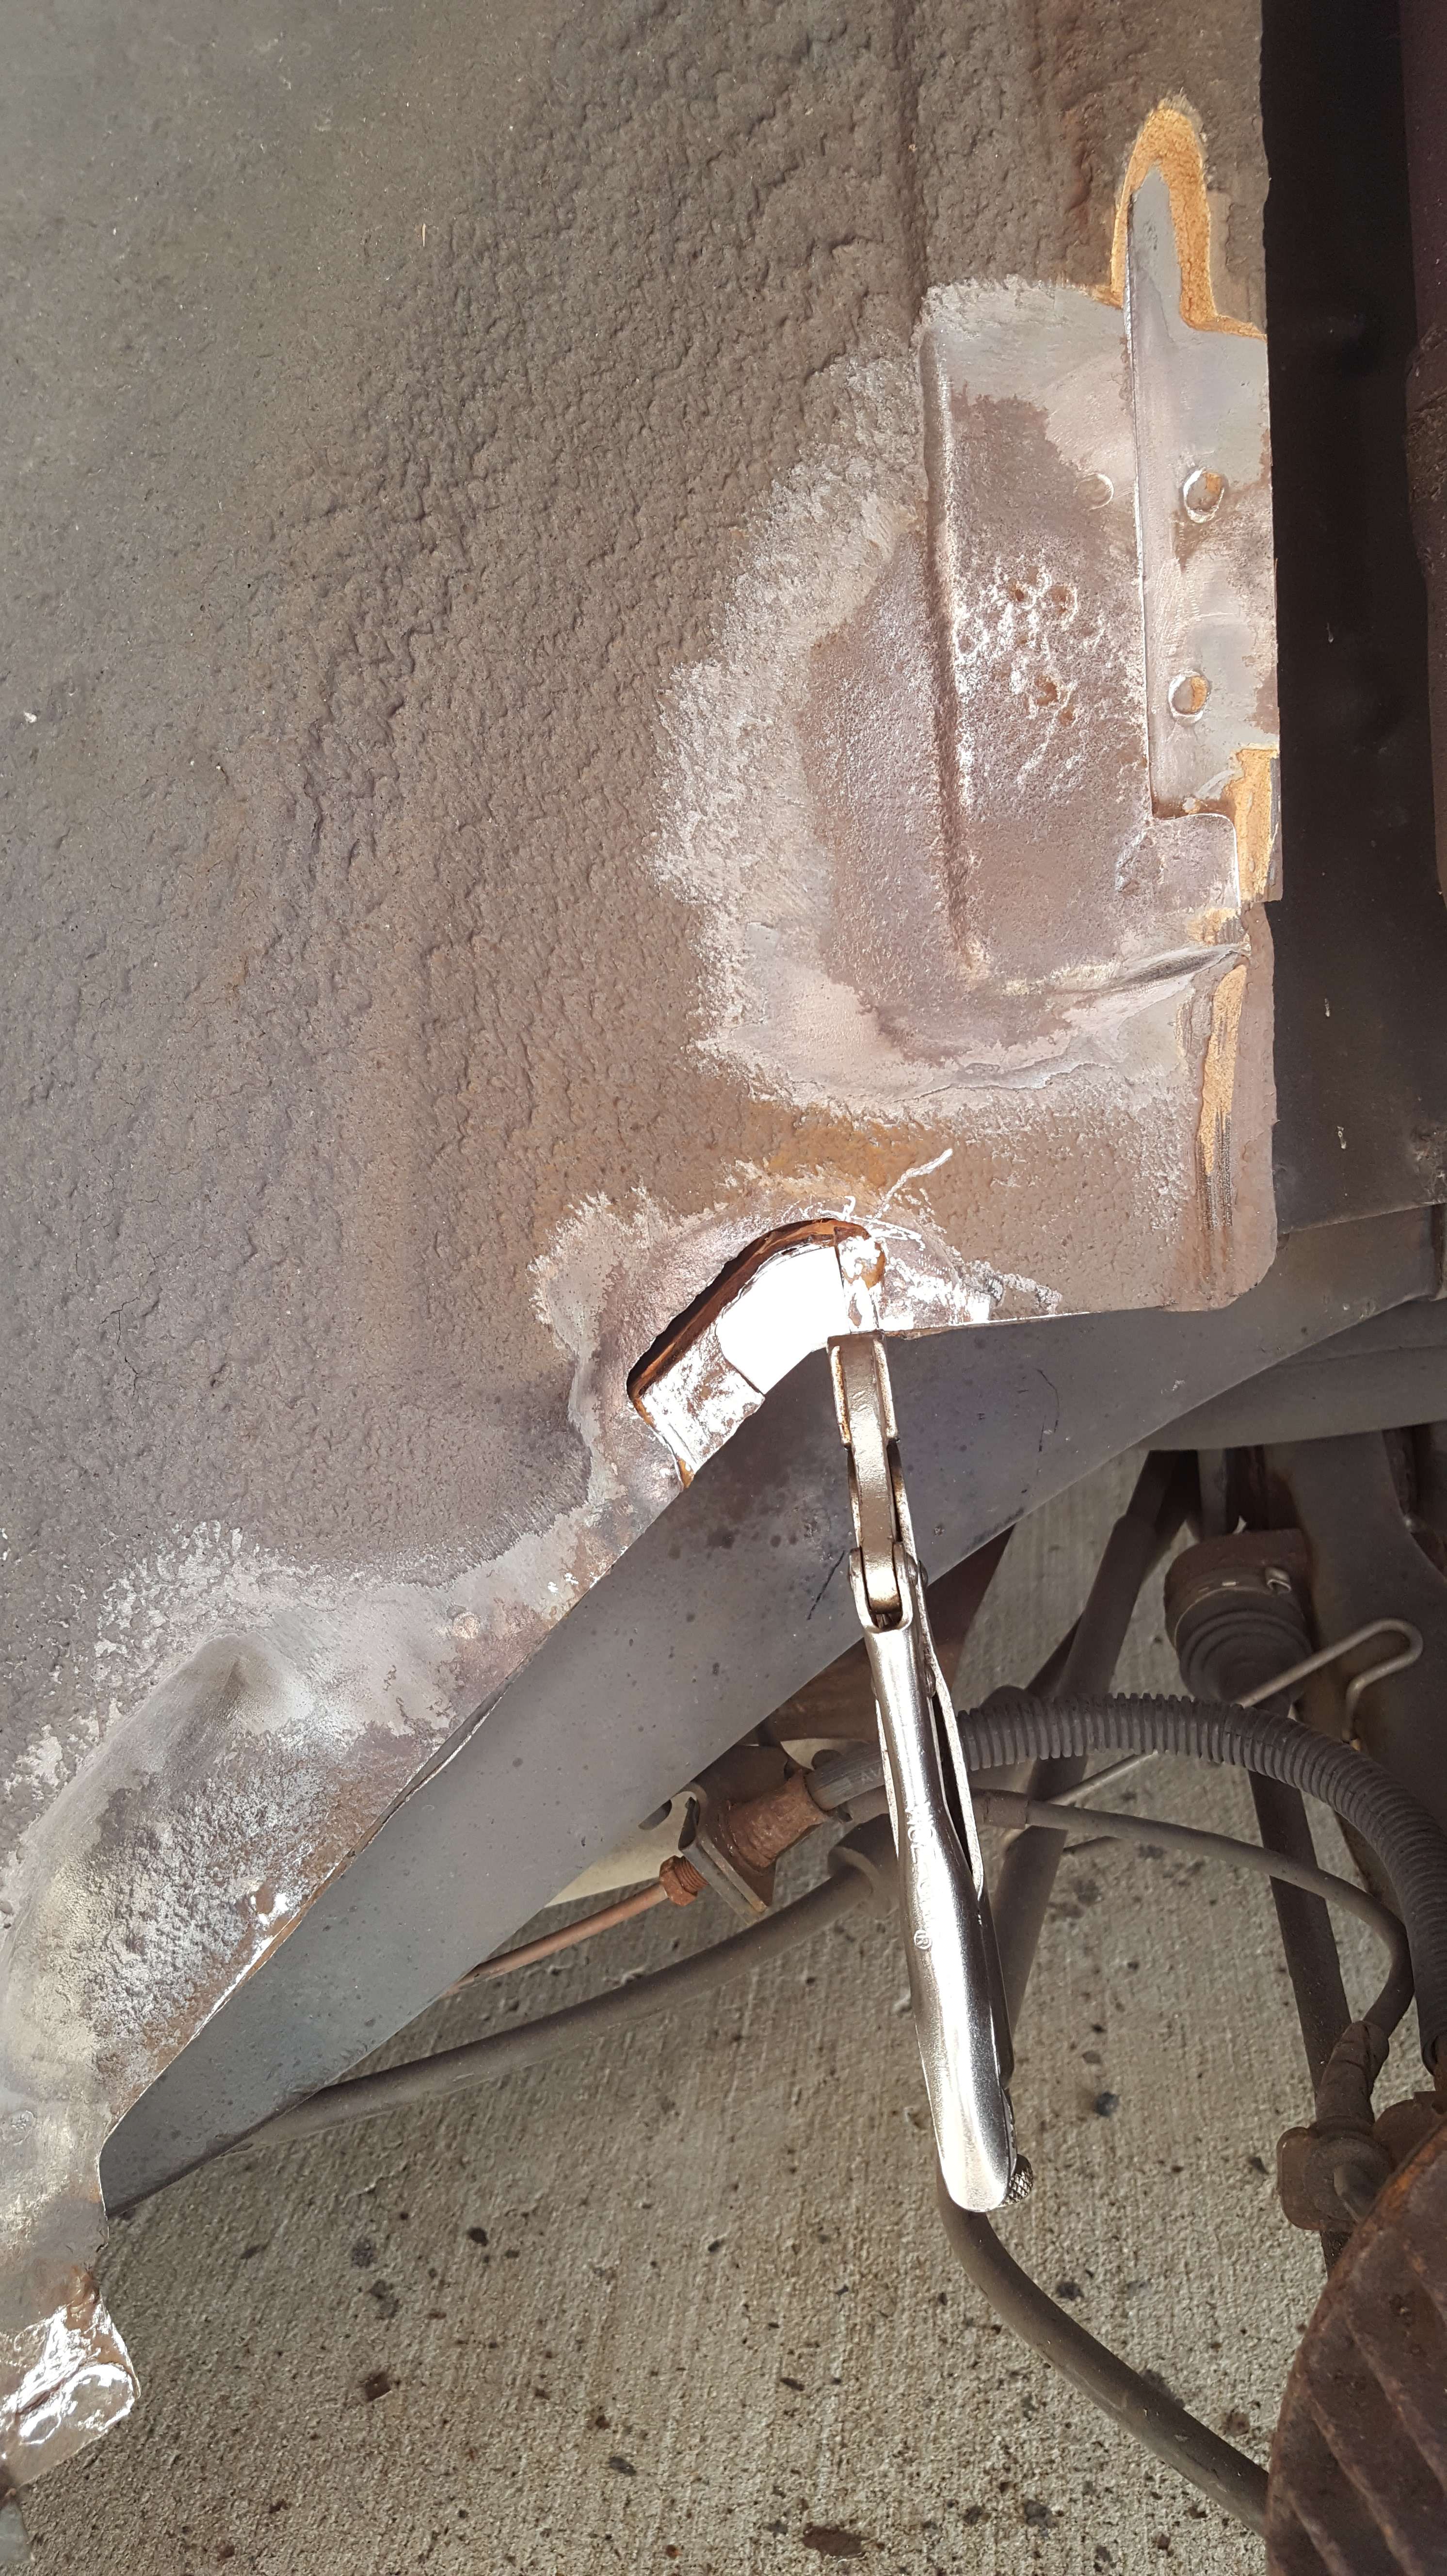
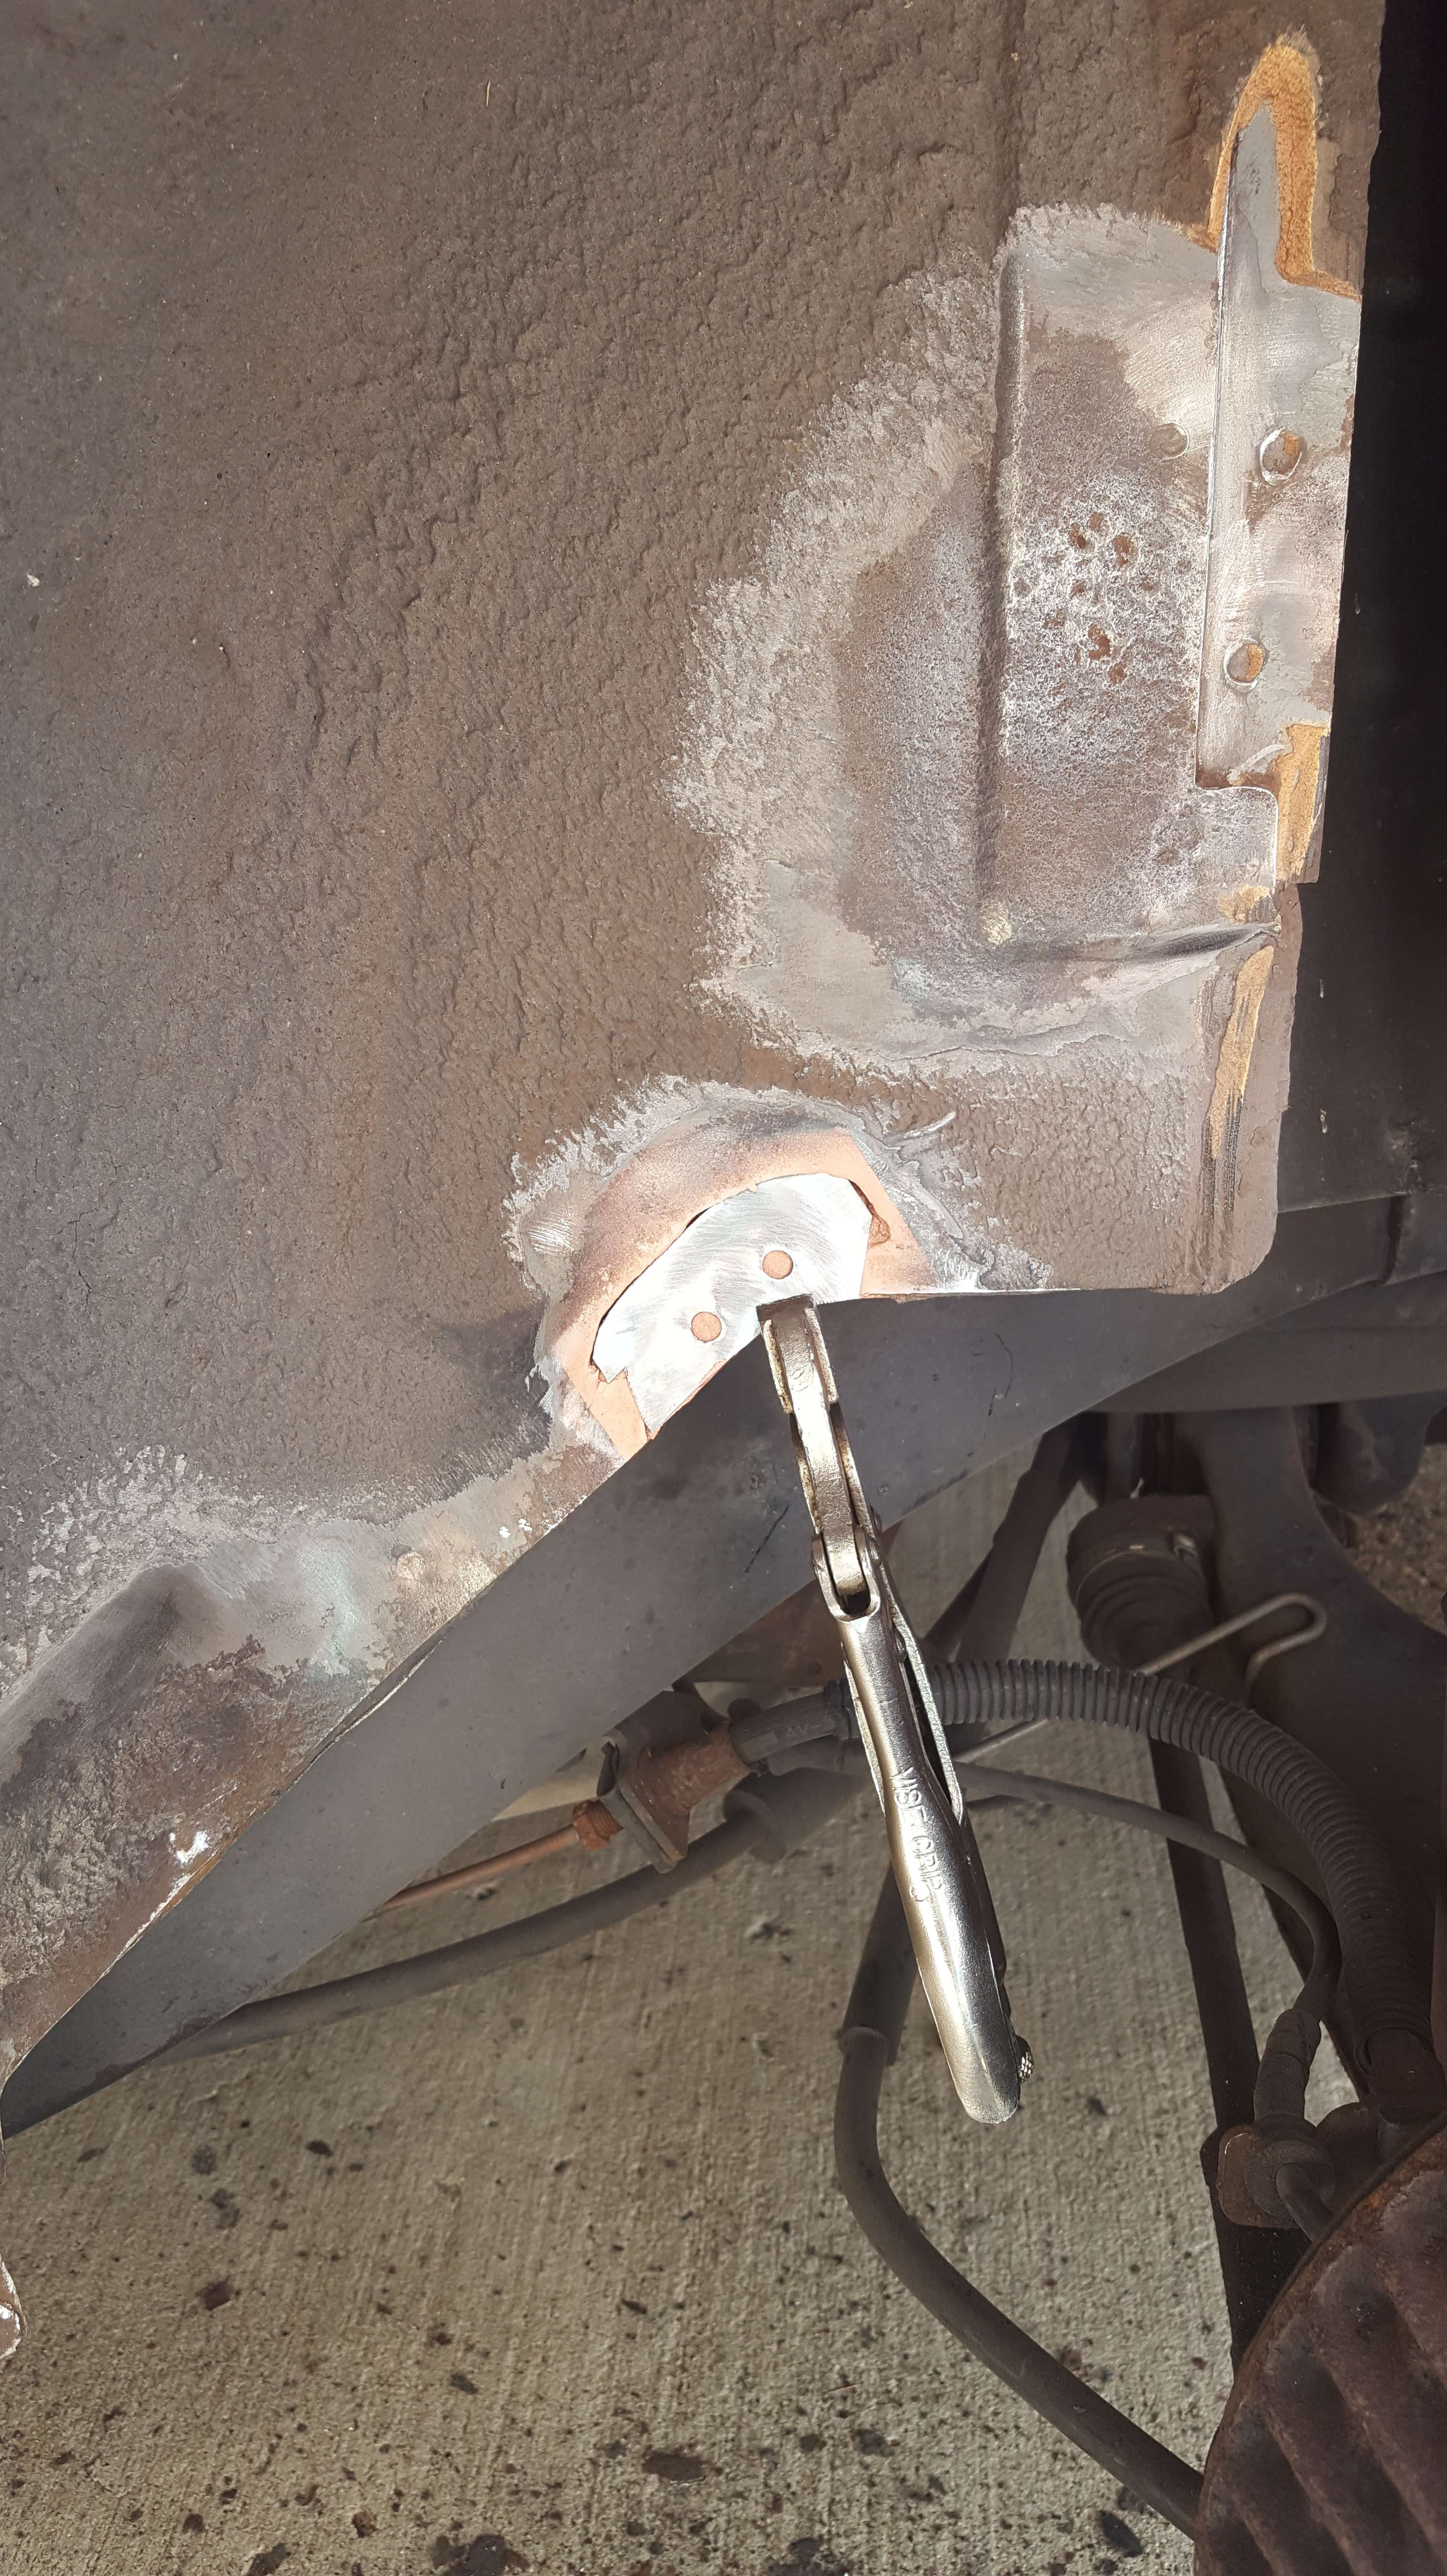
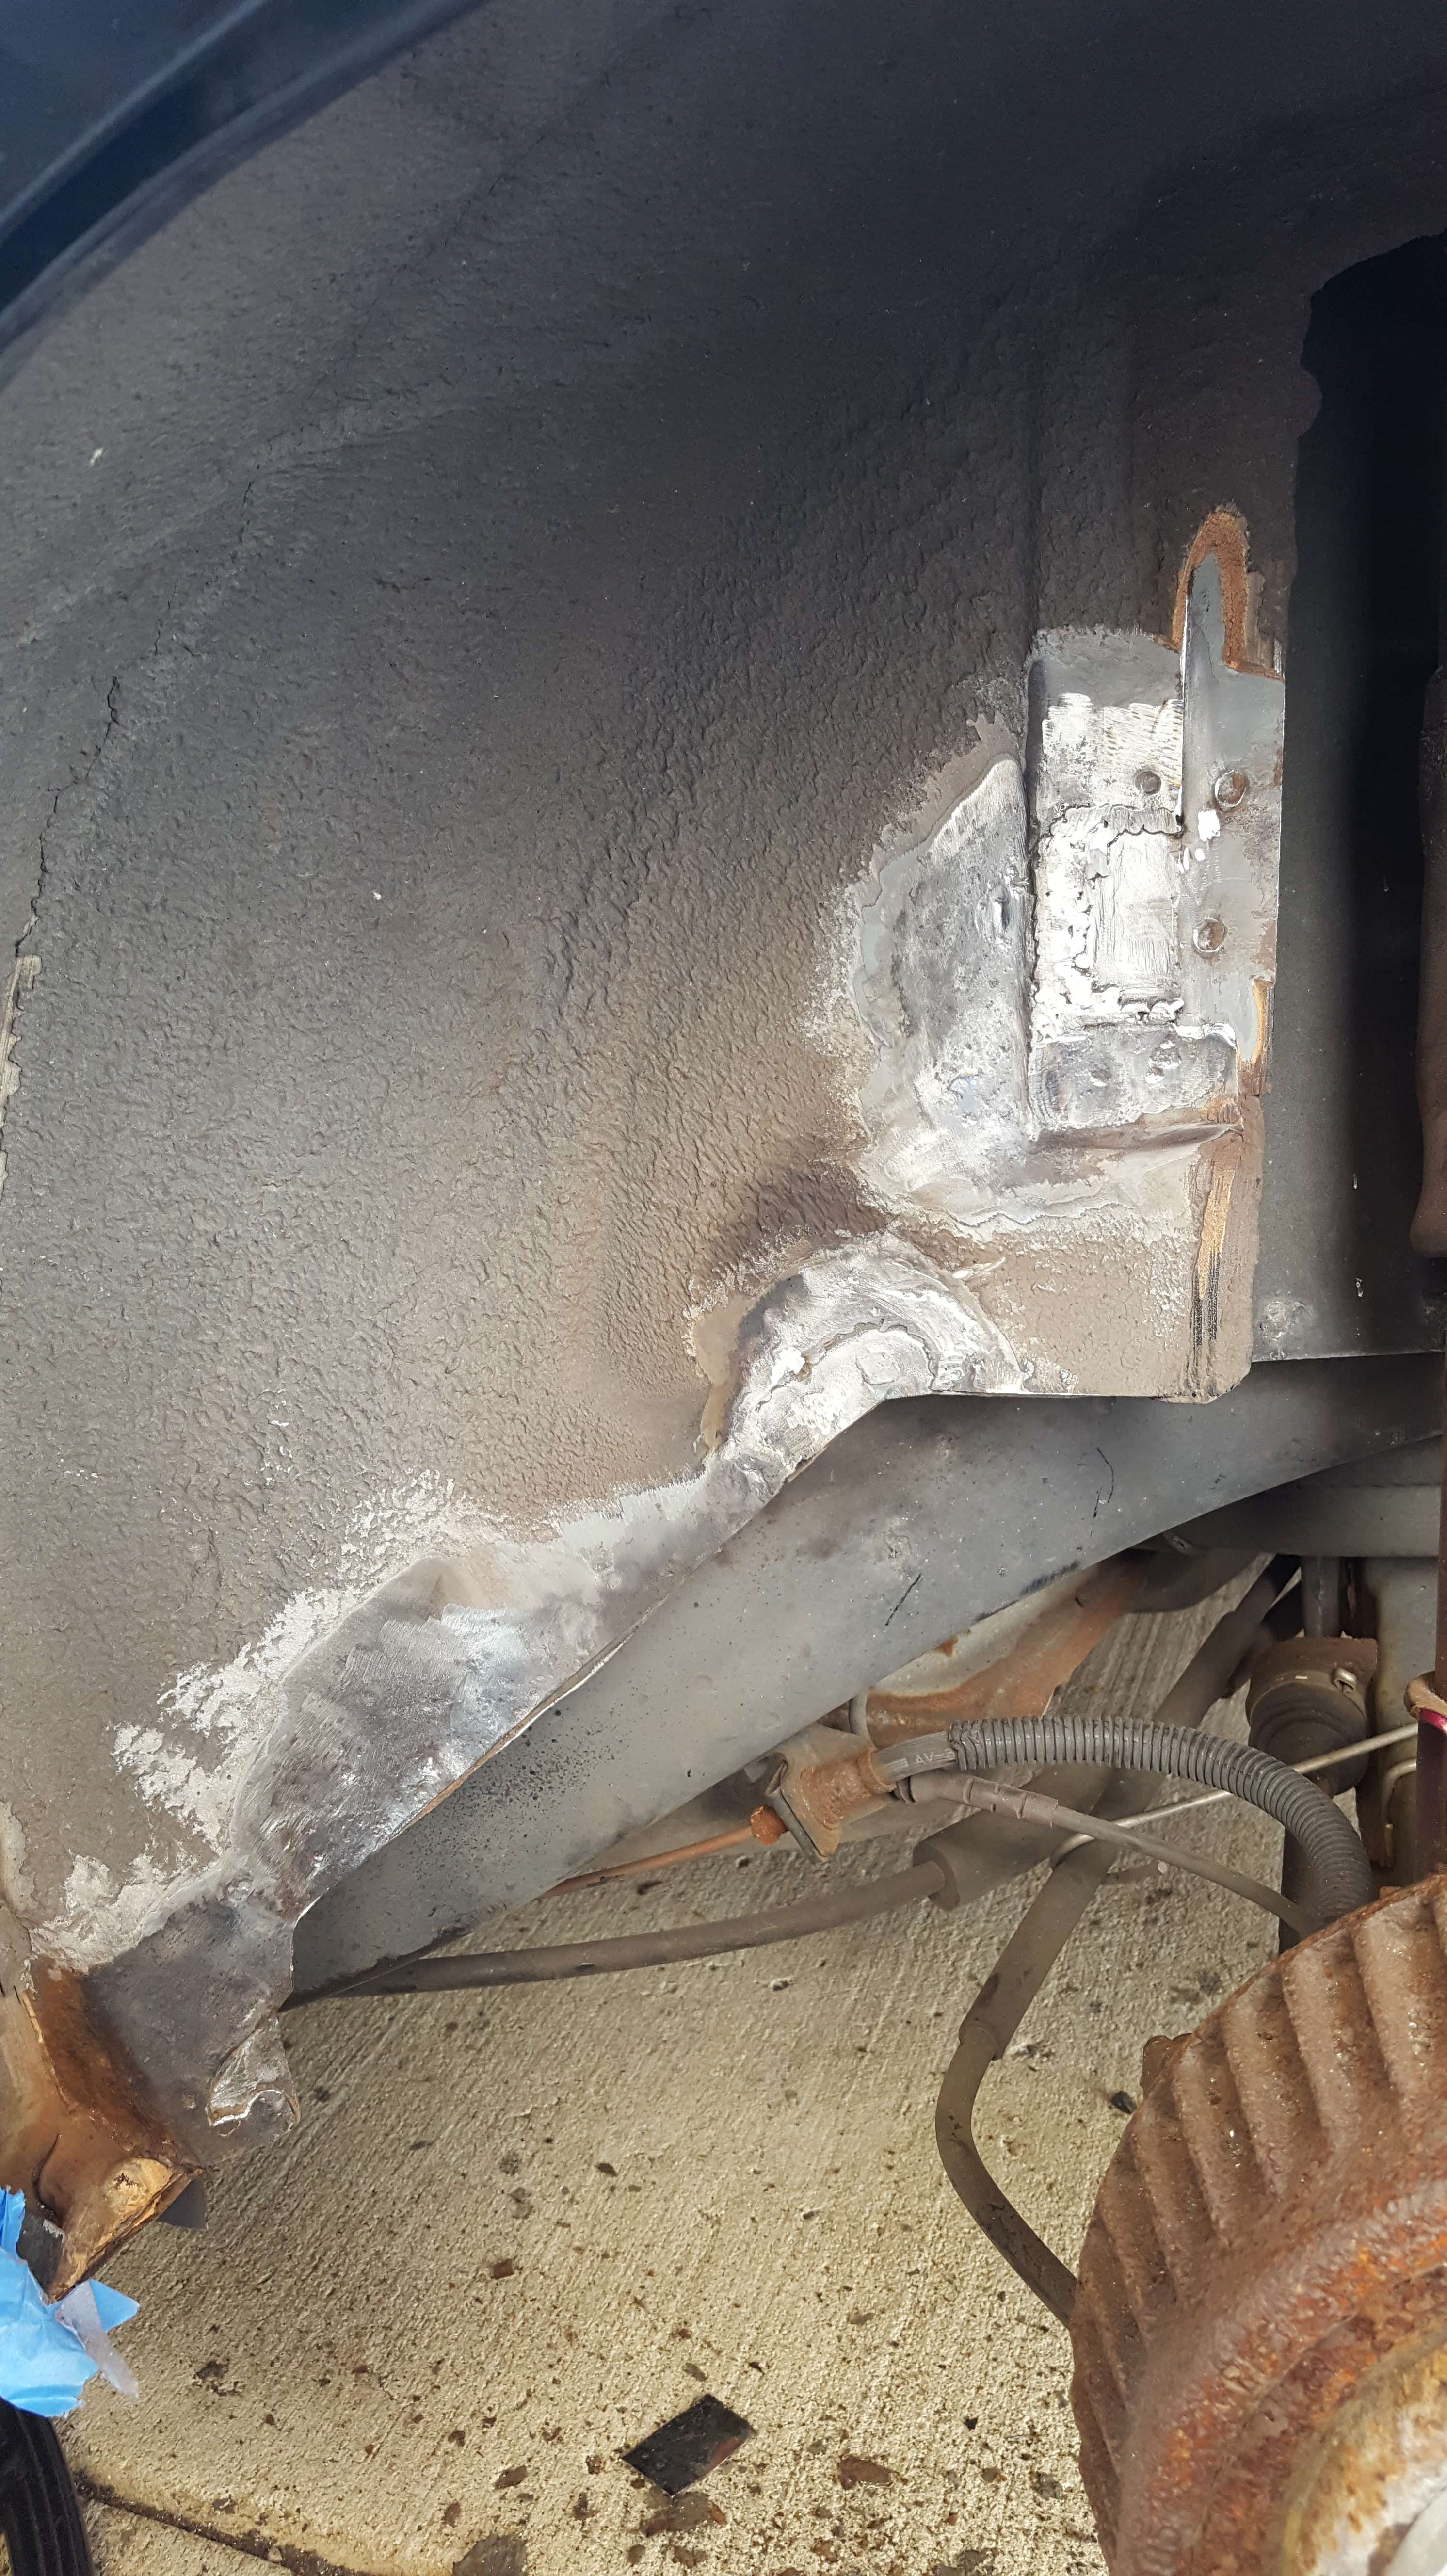
Some more updates from today.
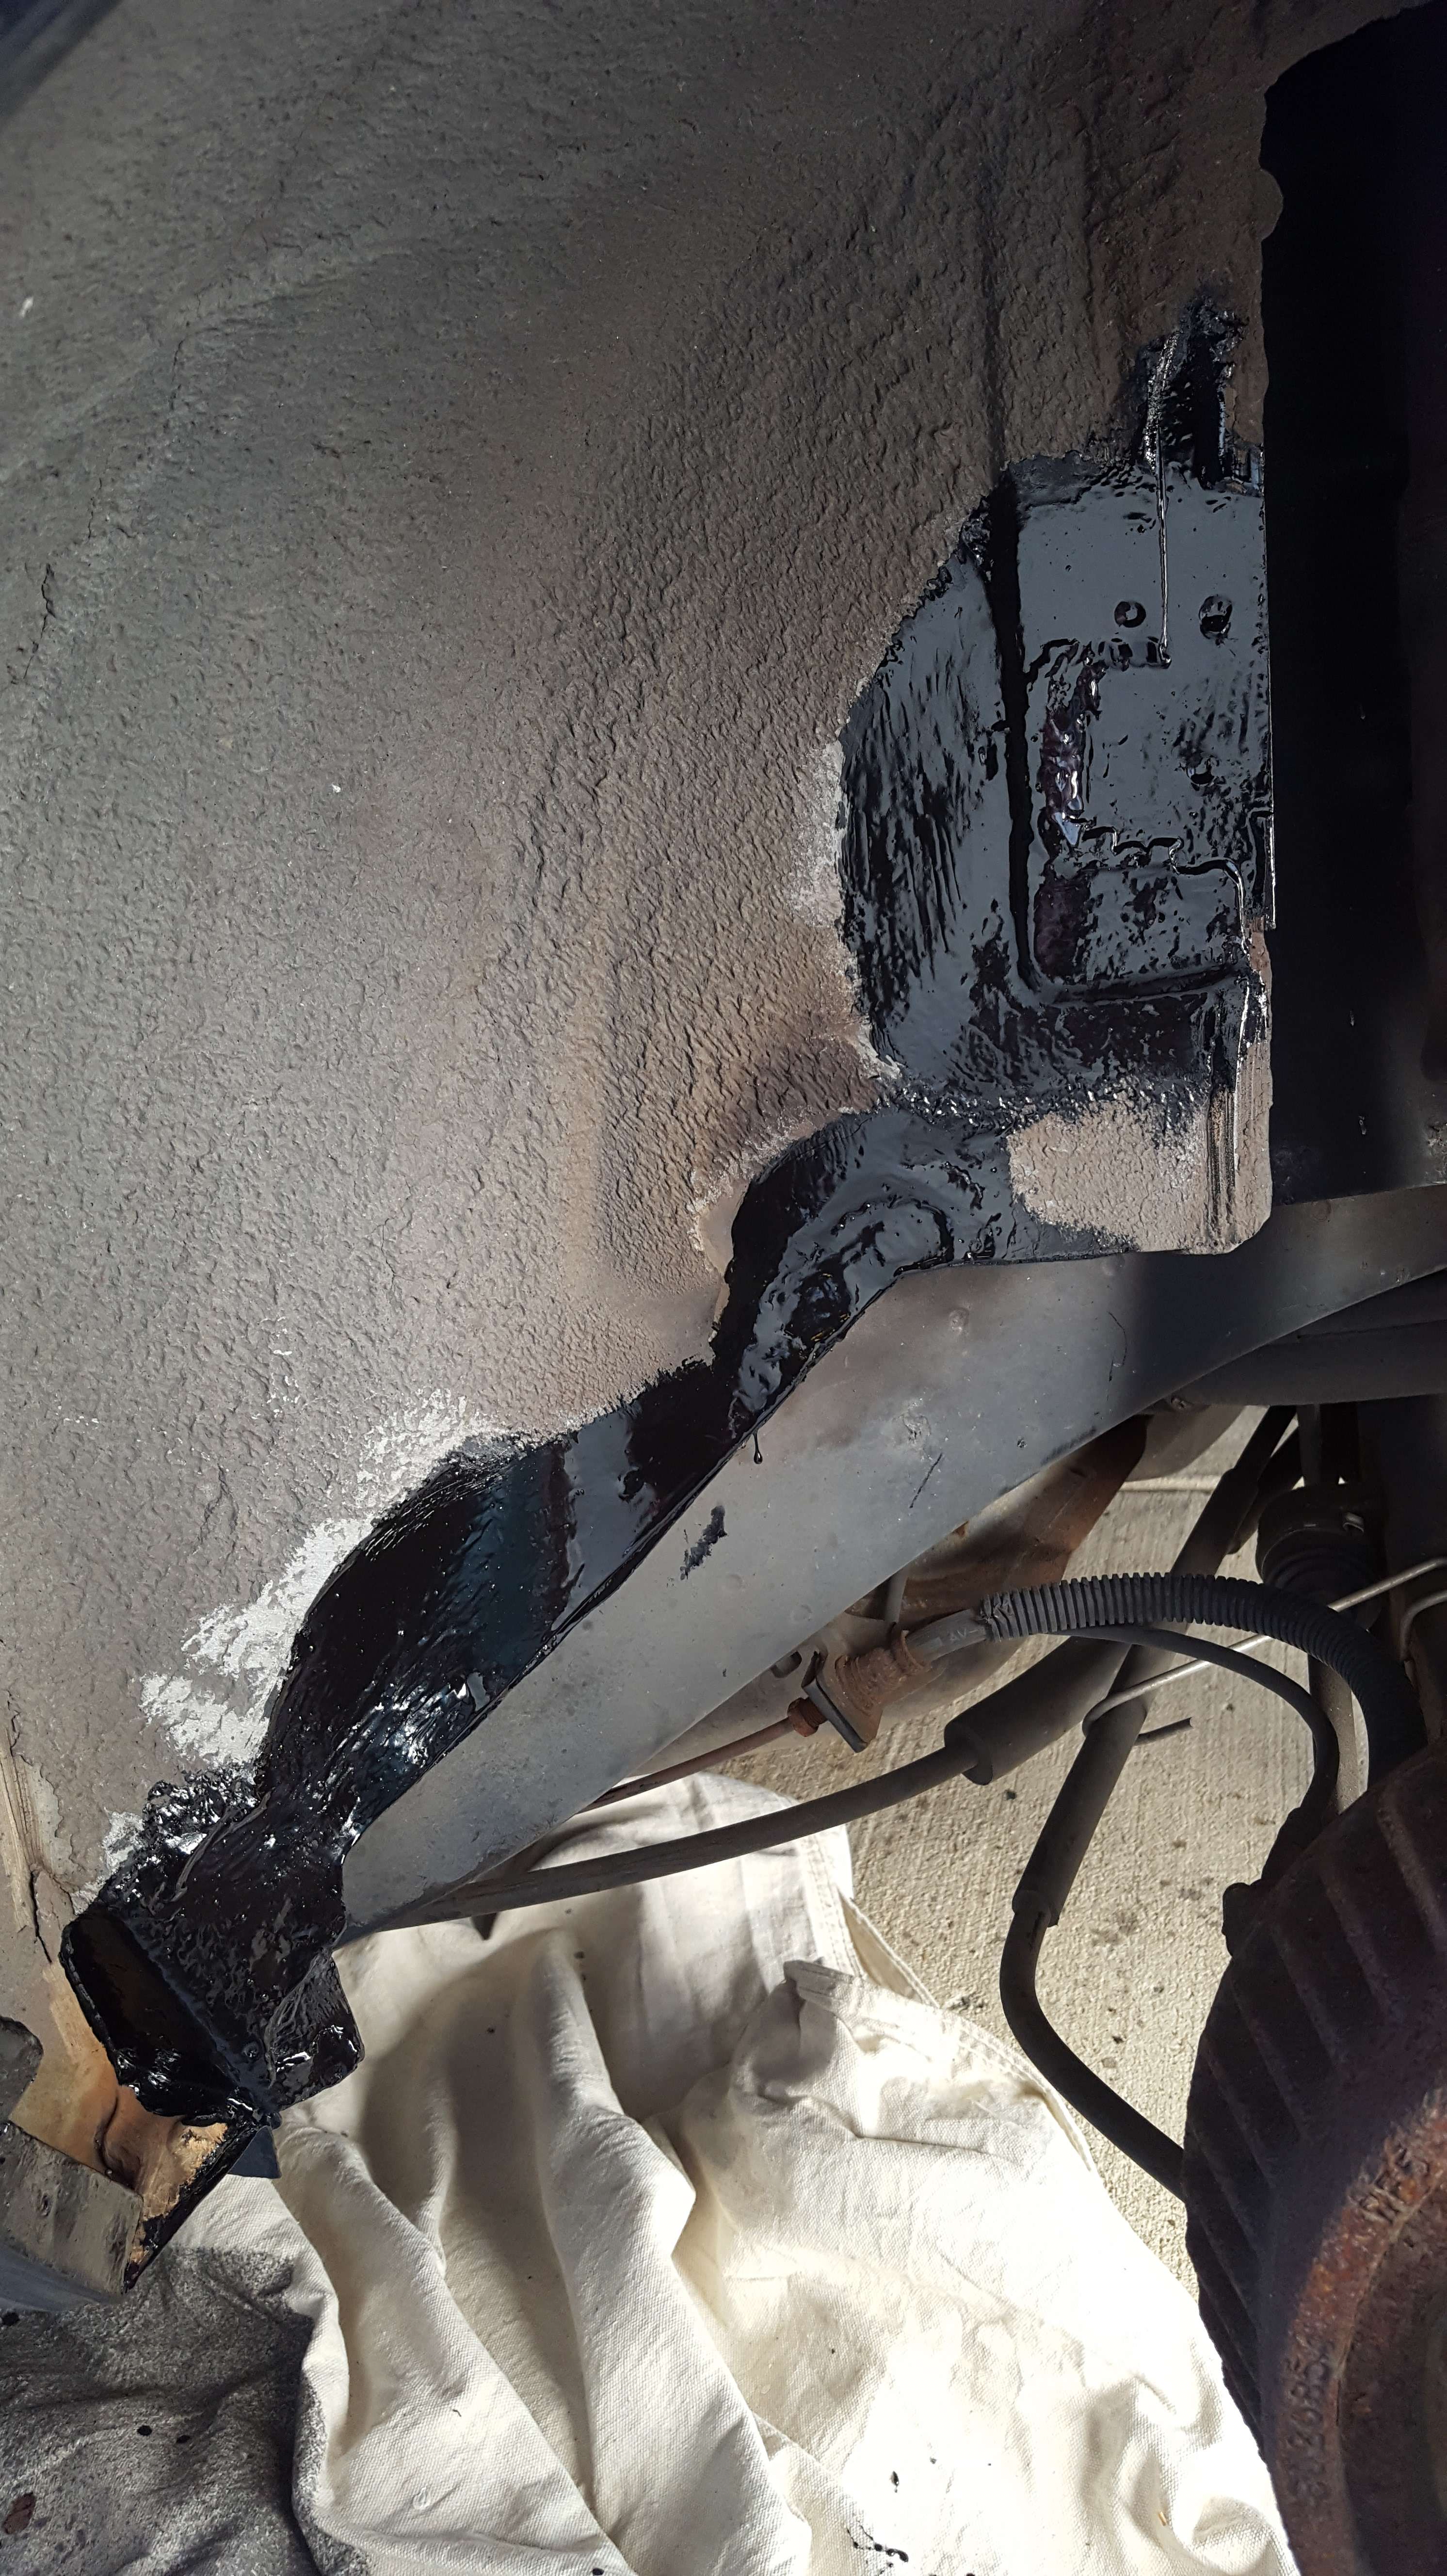
I got the hole in the seat pan welded up. It's Zero Rust coated from underneath but I still have to do a second coat. The frame rail actually had decent access to the underneath.
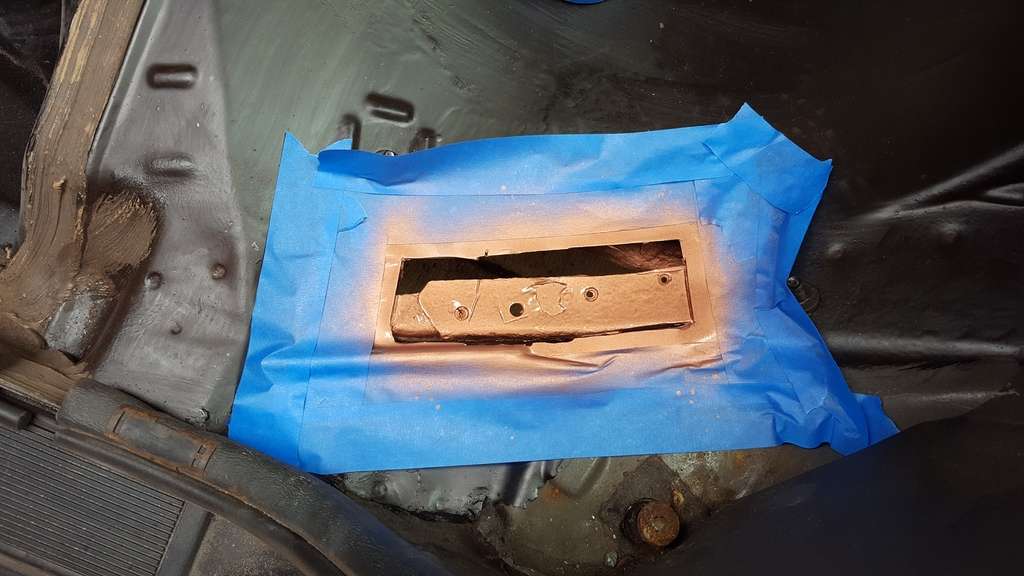
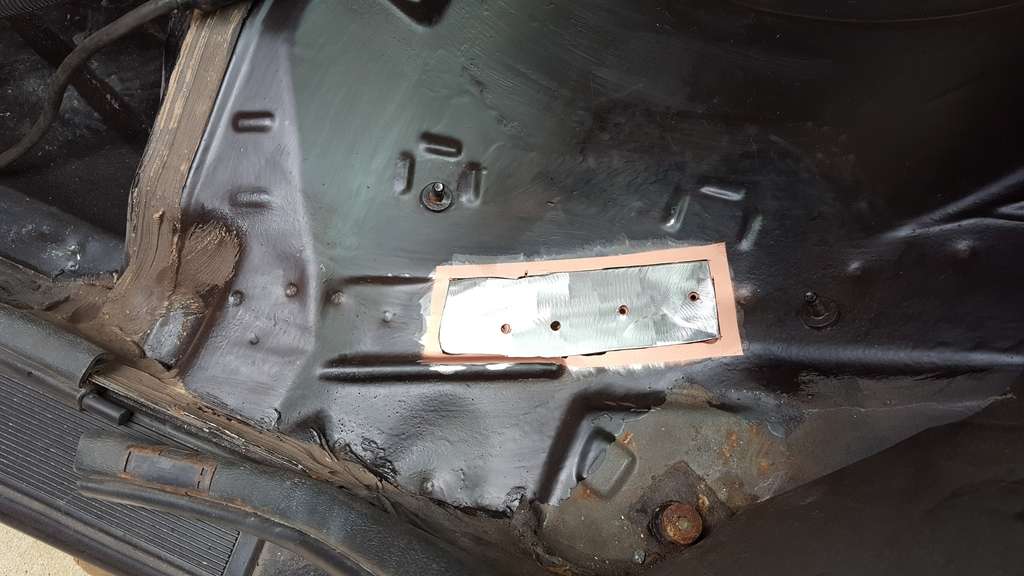
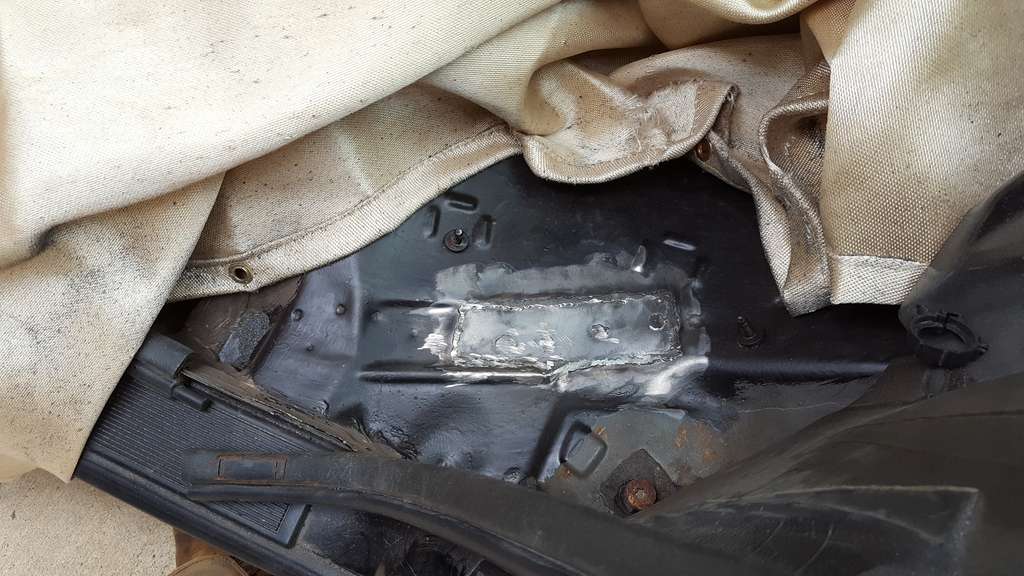
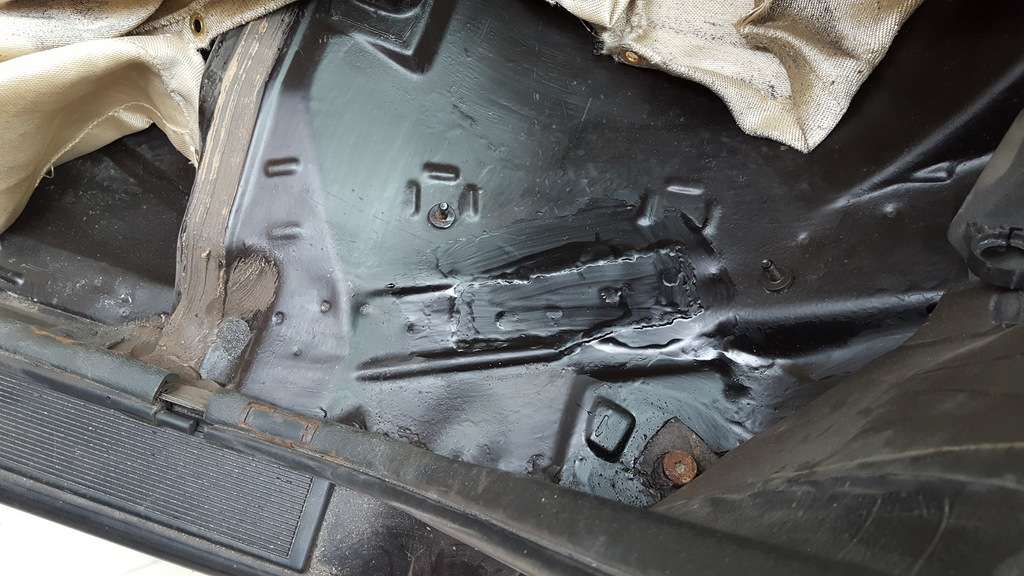
While fixing the seat pan I saw more rust and I started to fix it.

I need to clean that up a bit more before paint. I also need to drill a hole for the lower rubber screw and the plan is to cavity wax through that hole. I'll seam seal it from the back in the wheel well too.
Re: Some pics of my 95 SLE (5/12 Update)
Posted: Sat Jun 03, 2017 6:57 pm
by BonnSSEi_Lass
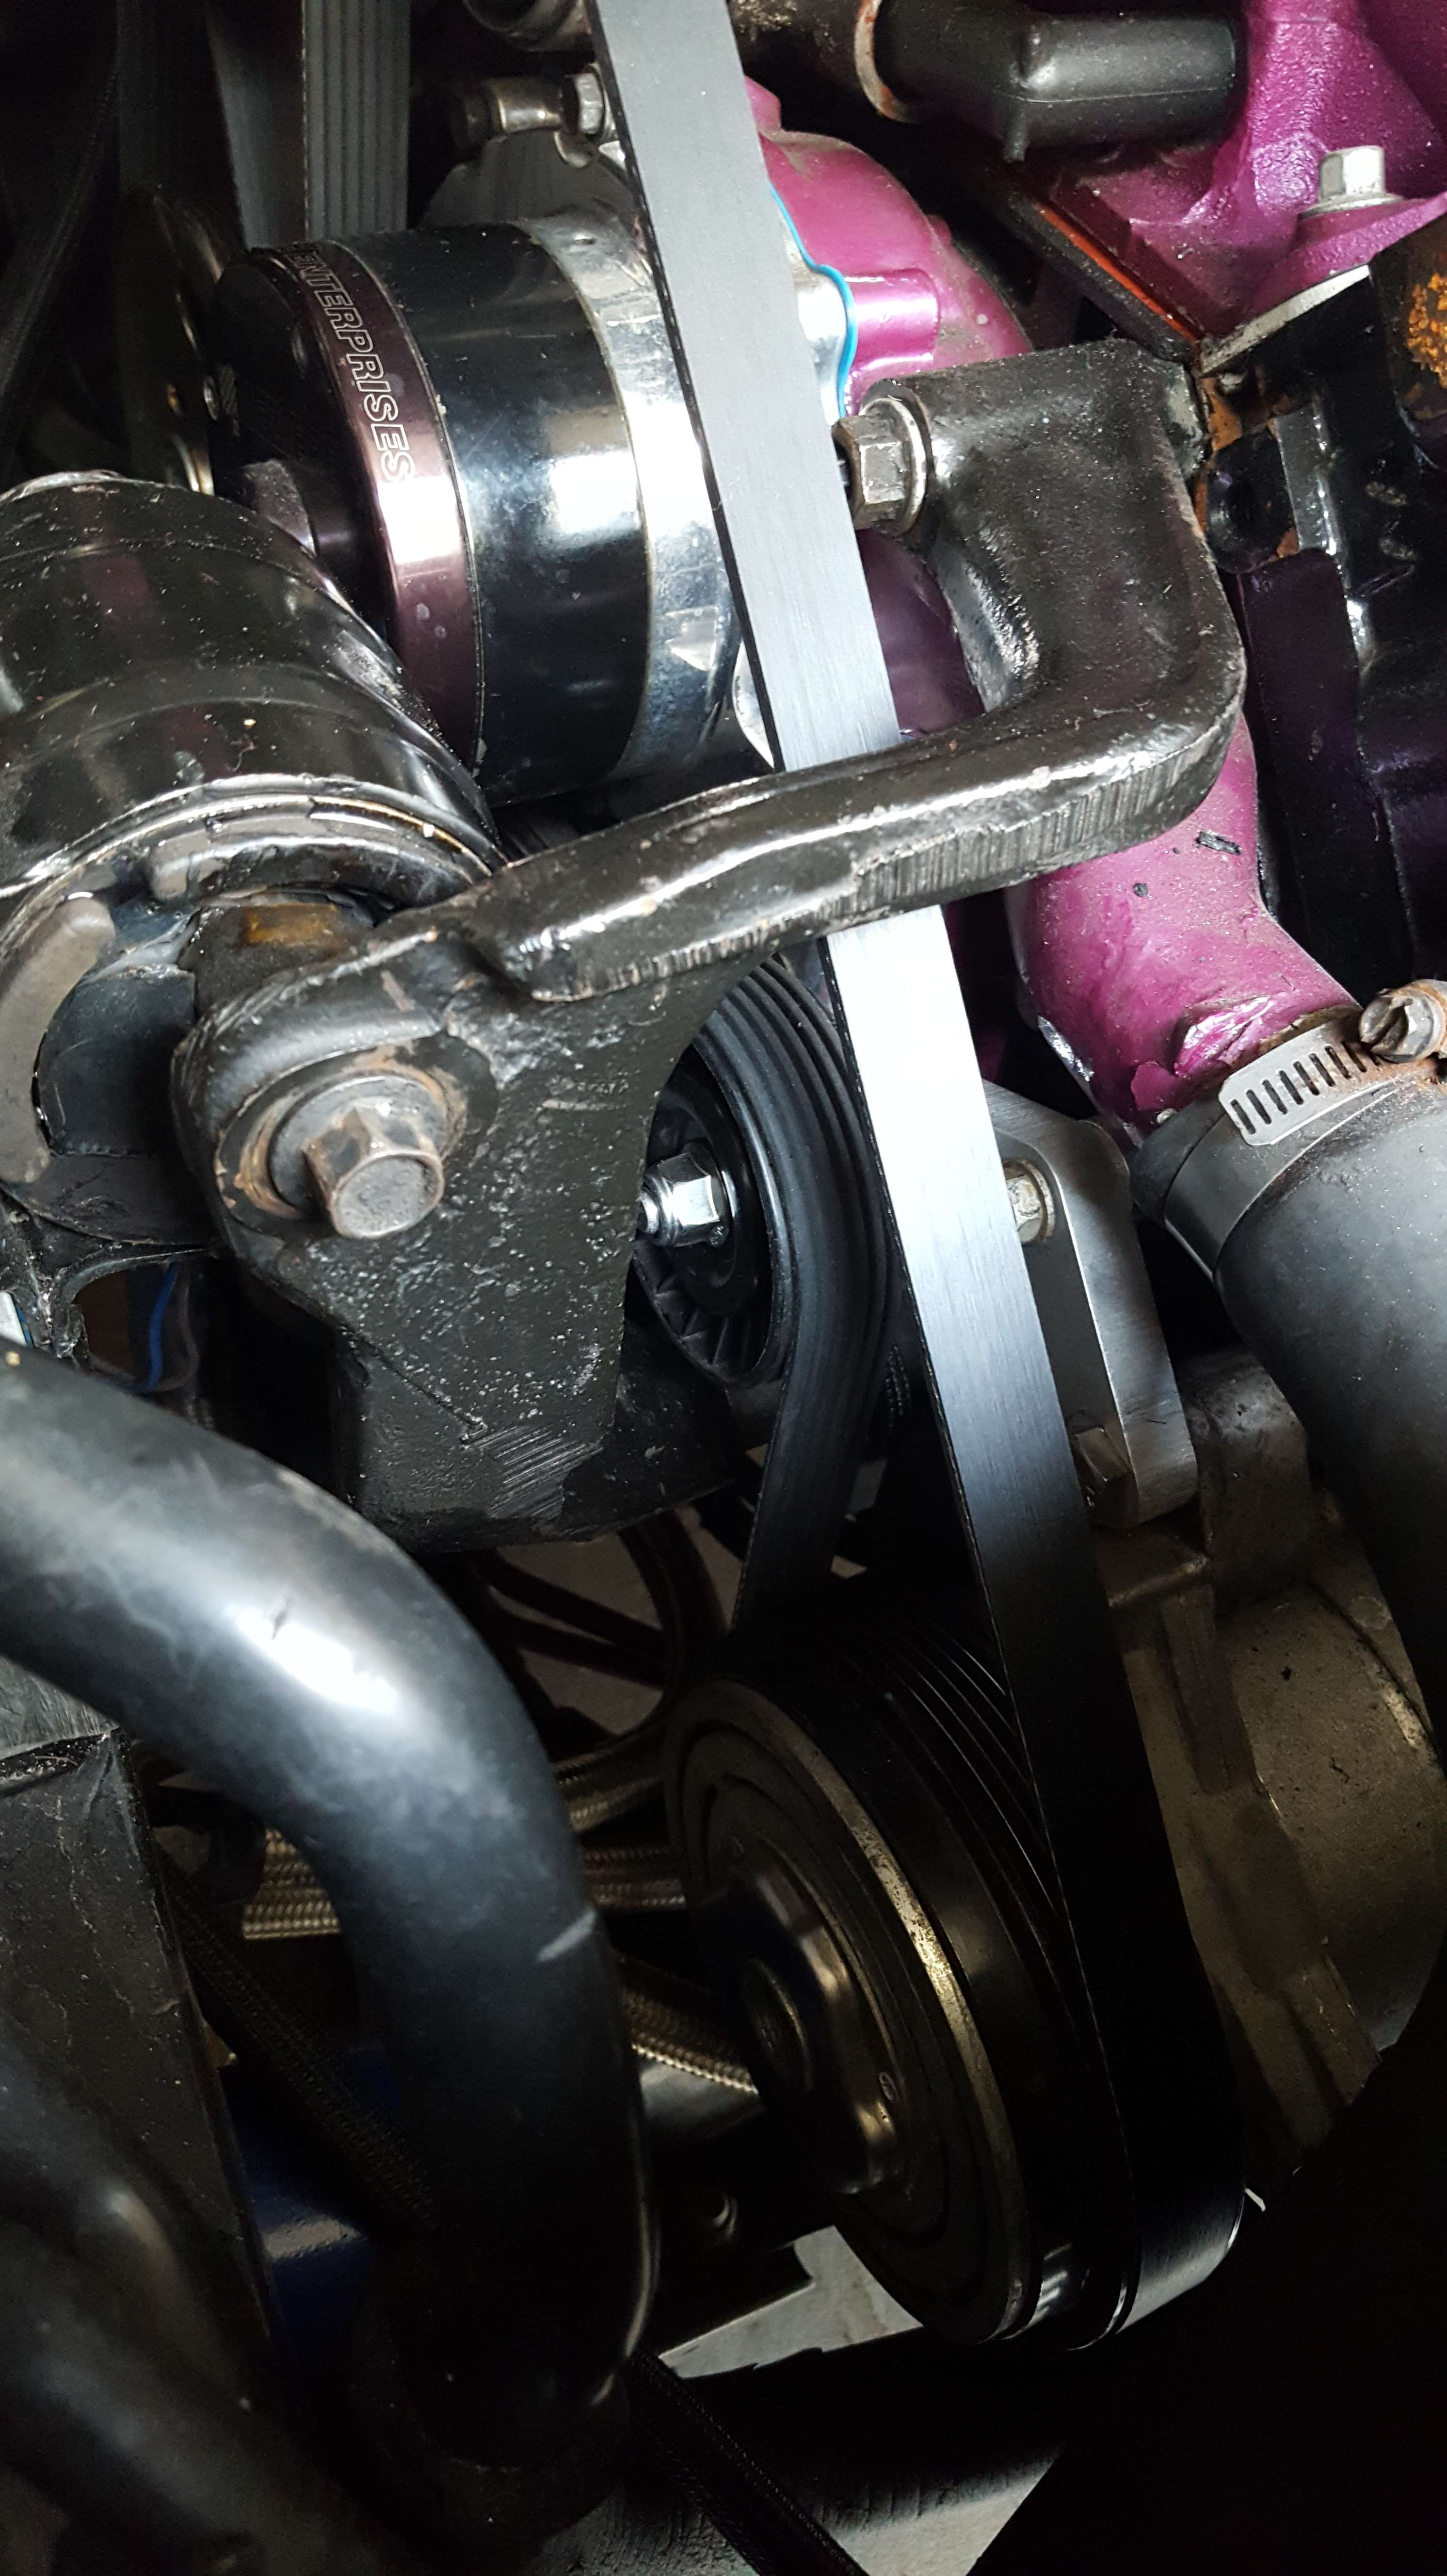
nice ride I have a 95 SSEi black on black. I am seriously considering just giving it away parking it in the yard with a free sign on it. I'm having trouble routing all of the vacuum lines, and I mean every single one from the canister to the throttle body stuff up on the supercharger and back to the firewall I was hoping that maybe you could post a couple of pictures of how they run all the way through there, because your car is the closest I have found to mine. I would greatly appreciate it thank you. you can text them to me if you would like or you can email them to me or send them on here. My # 740-577-5683. Email
gratefuldude2001@gmail.com
Bonnie lass has been setting for far too long
Re: Some pics of my 95 SLE (5/12 Update)
Posted: Sat Jun 03, 2017 11:46 pm
by 95naSTA
BonnSSEi_Lass wrote:nice ride I have a 95 SSEi black on black. I am seriously considering just giving it away parking it in the yard with a free sign on it. I'm having trouble routing all of the vacuum lines, and I mean every single one from the canister to the throttle body stuff up on the supercharger and back to the firewall I was hoping that maybe you could post a couple of pictures of how they run all the way through there, because your car is the closest I have found to mine. I would greatly appreciate it thank you. you can text them to me if you would like or you can email them to me or send them on here. My # 740-577-5683. Email
gratefuldude2001@gmail.com
Bonnie lass has been setting for far too long
Email, texting, and private messages won't help other people. That, and I'm far from the best option for input on S1 L67 vacuum routing.
Here's a post in the proper section and I'm sure other people will help out more.
http://www.pontiacbonnevilleclub.com/fo ... 50639.html
Re: Some pics of my 95 SLE (5/12 Update)
Posted: Fri Jun 09, 2017 11:53 pm
by 95naSTA
Re: Some pics of my 95 SLE (6/9 Update)
Posted: Mon Jun 19, 2017 12:13 am
by 95naSTA
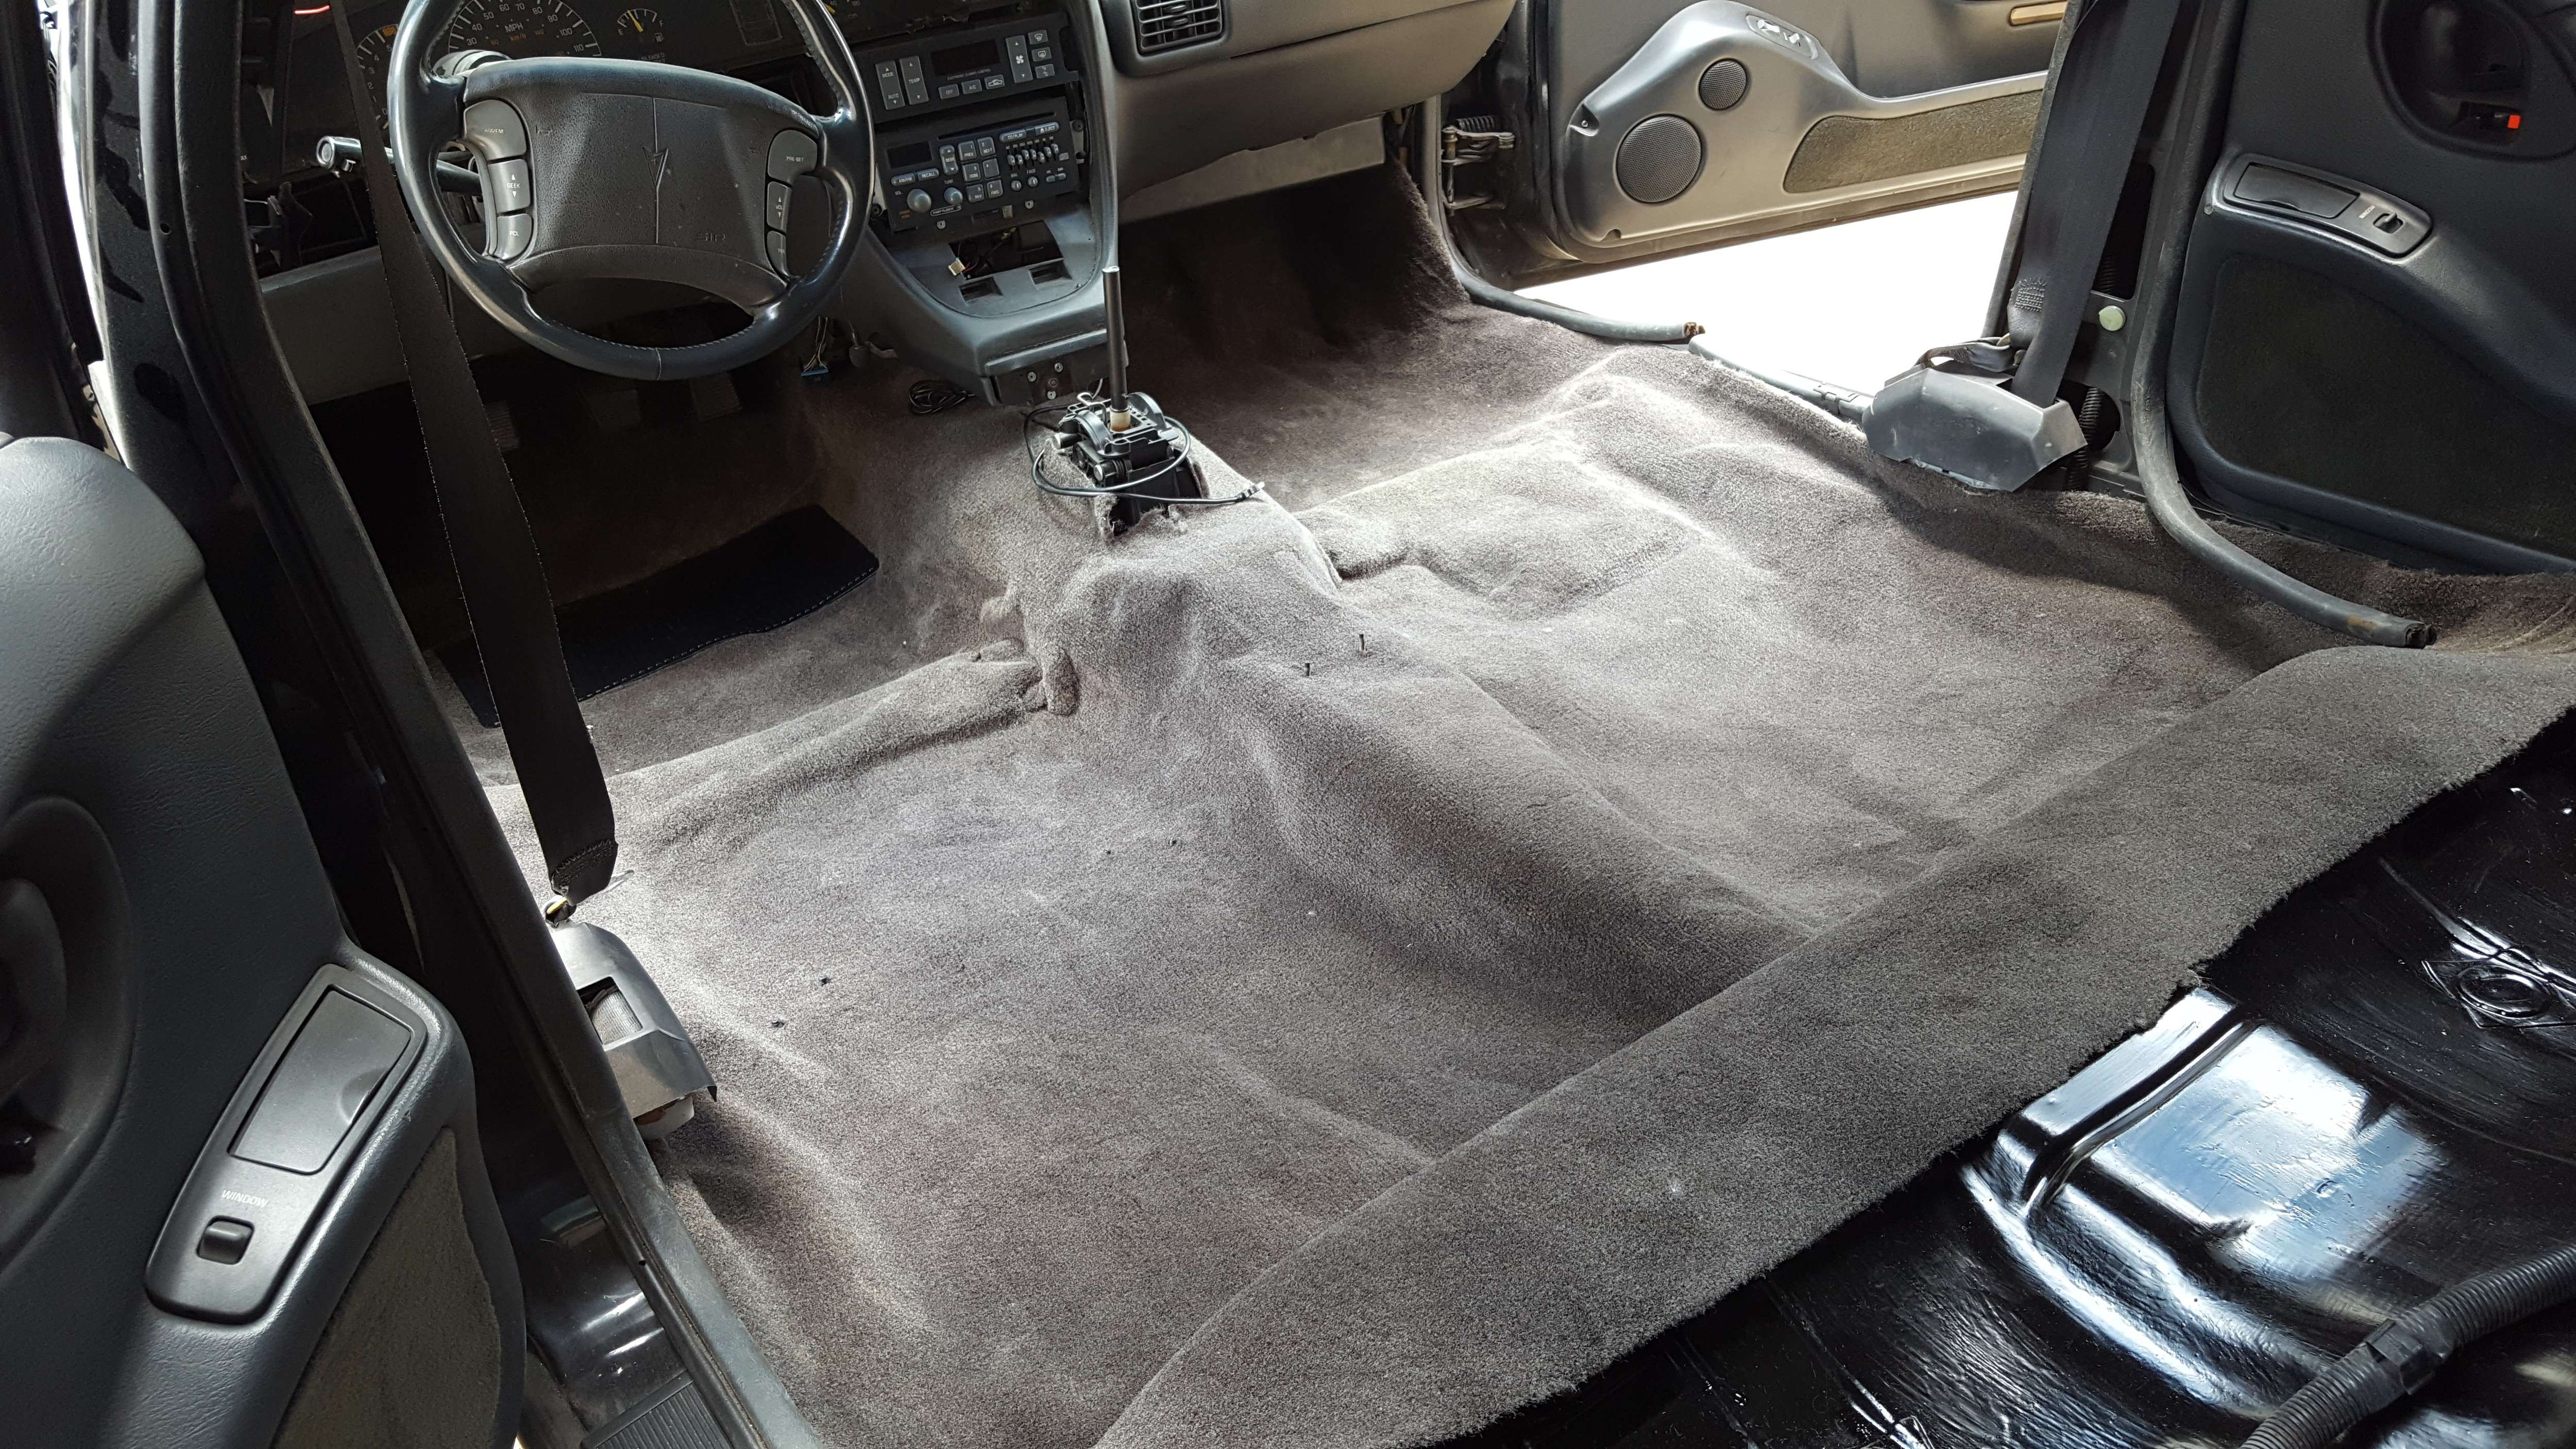
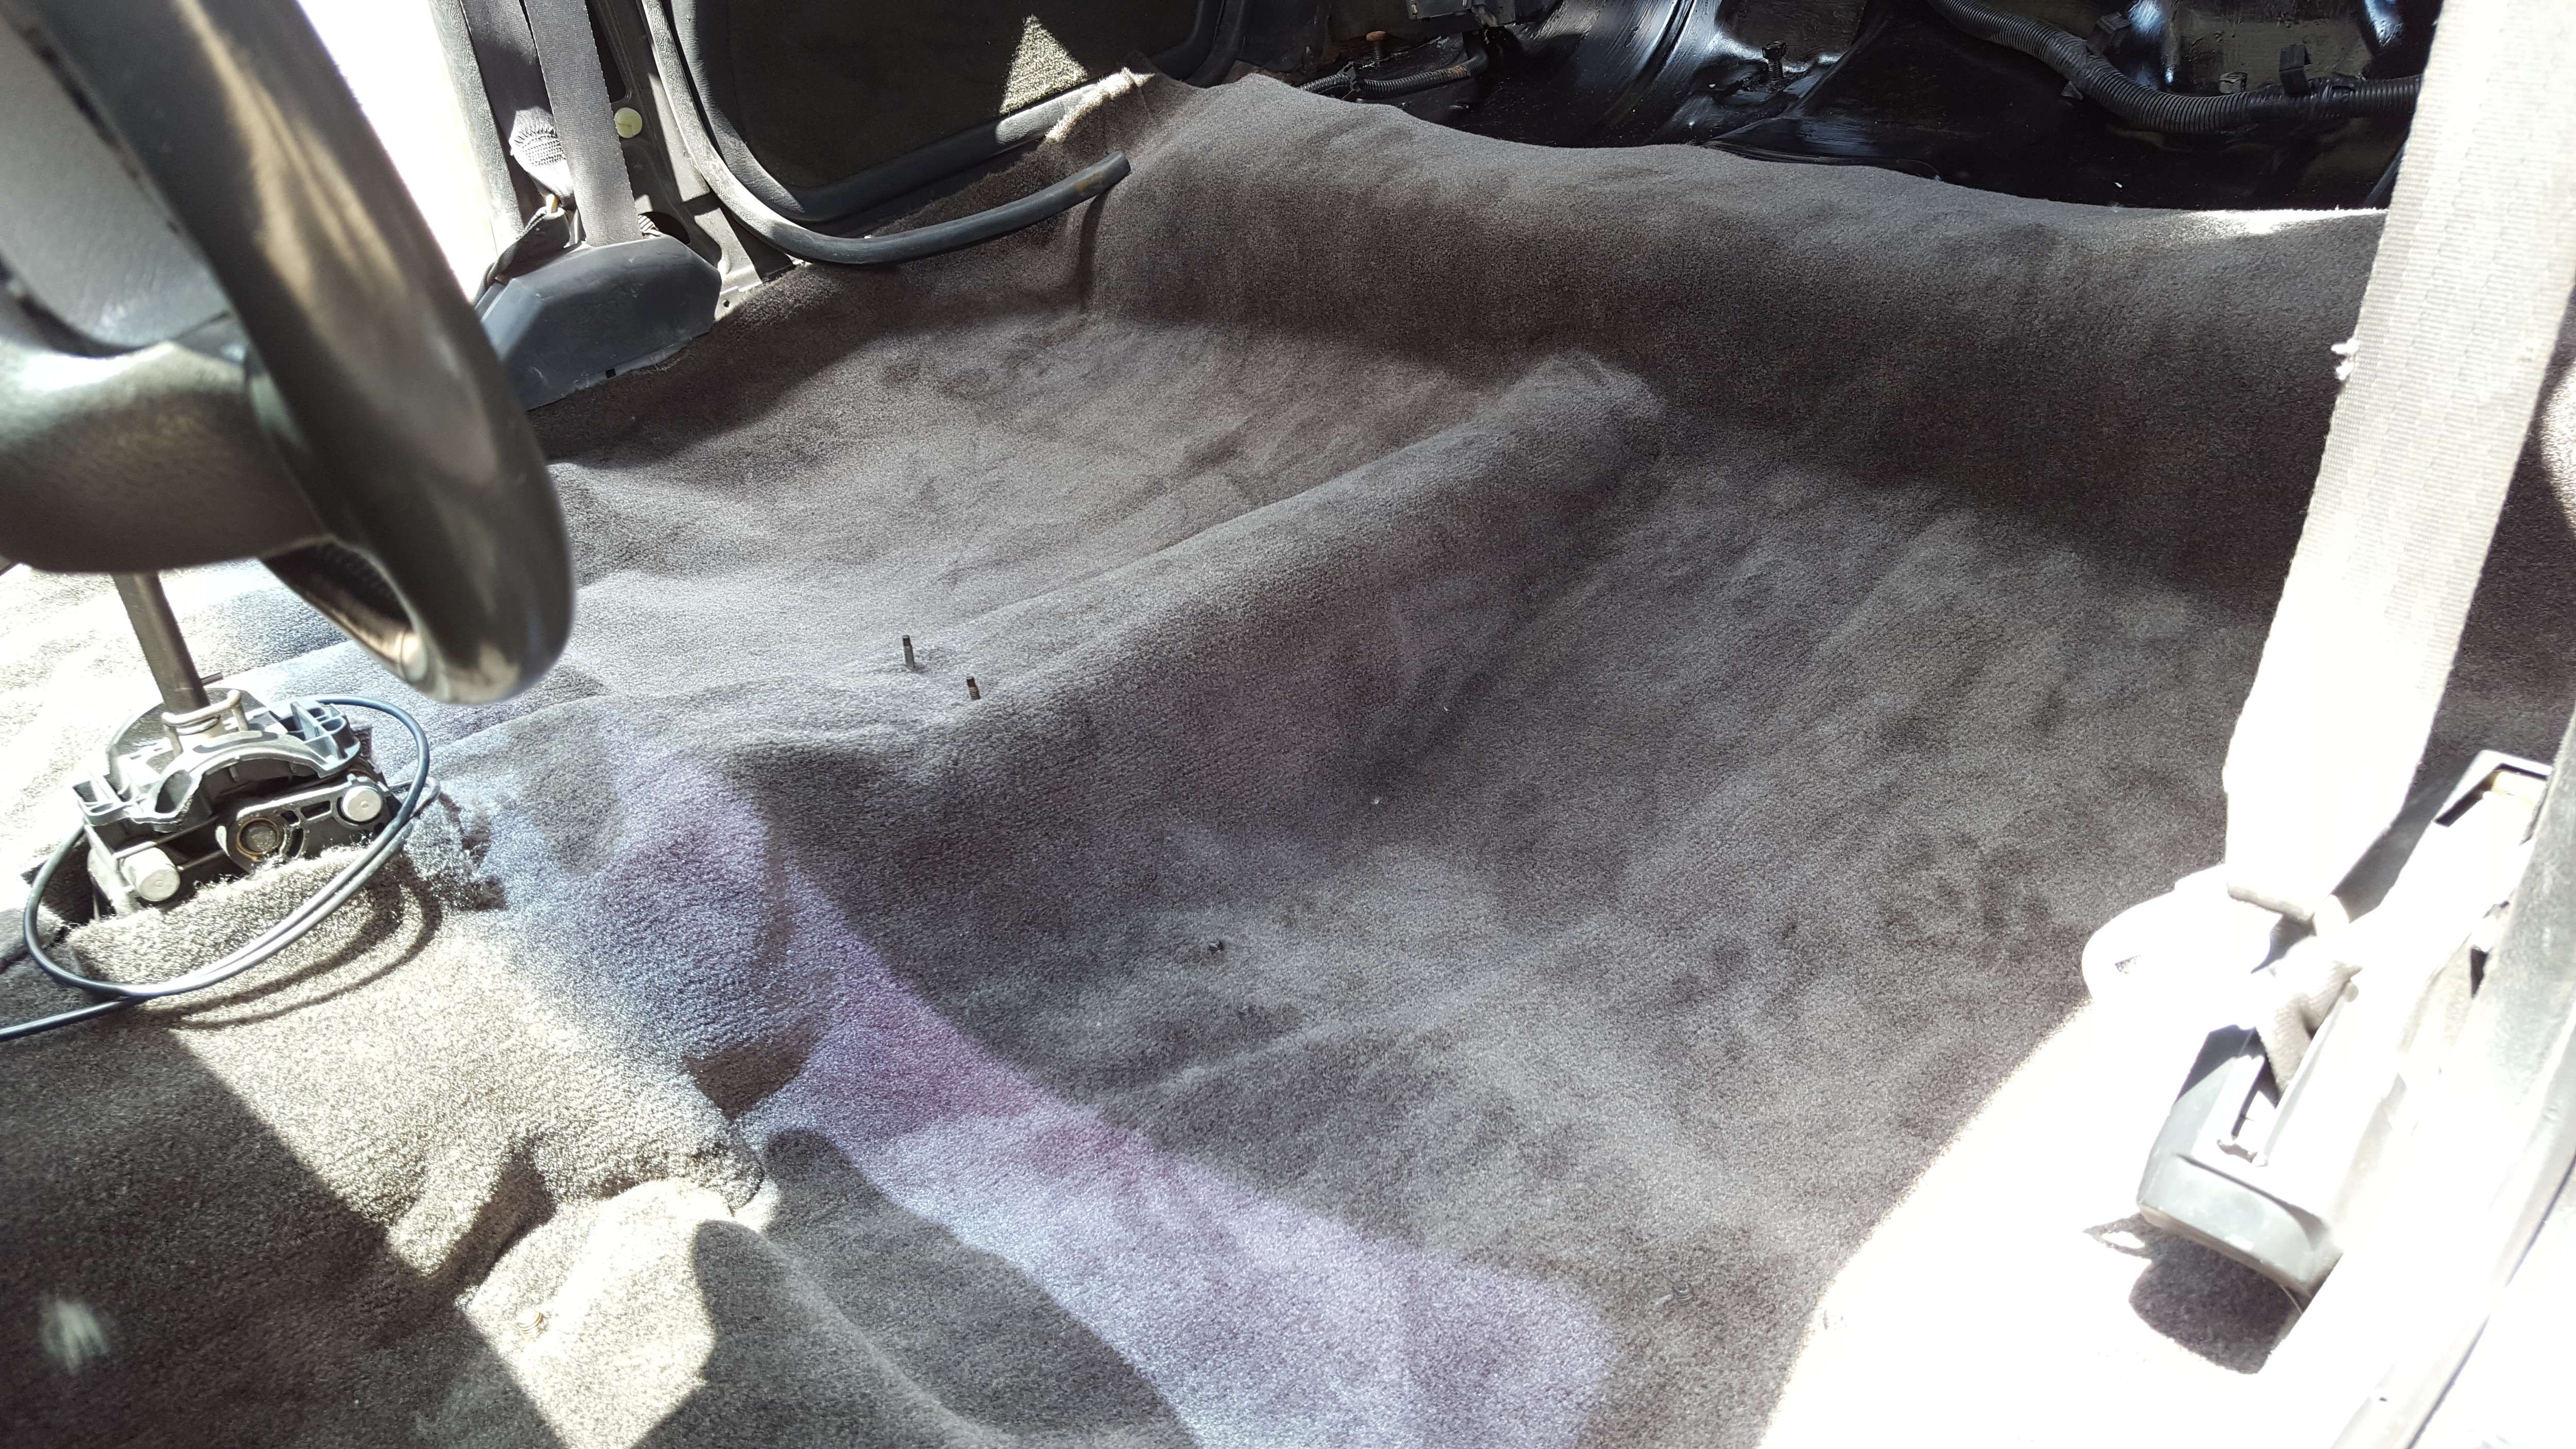
There's not many pics but I actually spent a fair amount of time on the car over the past few days.
The breakdown:
-Threw a 2nd coat of Zero Rust over the interior floor
-Wired in the rear SSEi speakers I got at the yard
-Installed SSEi rear deck
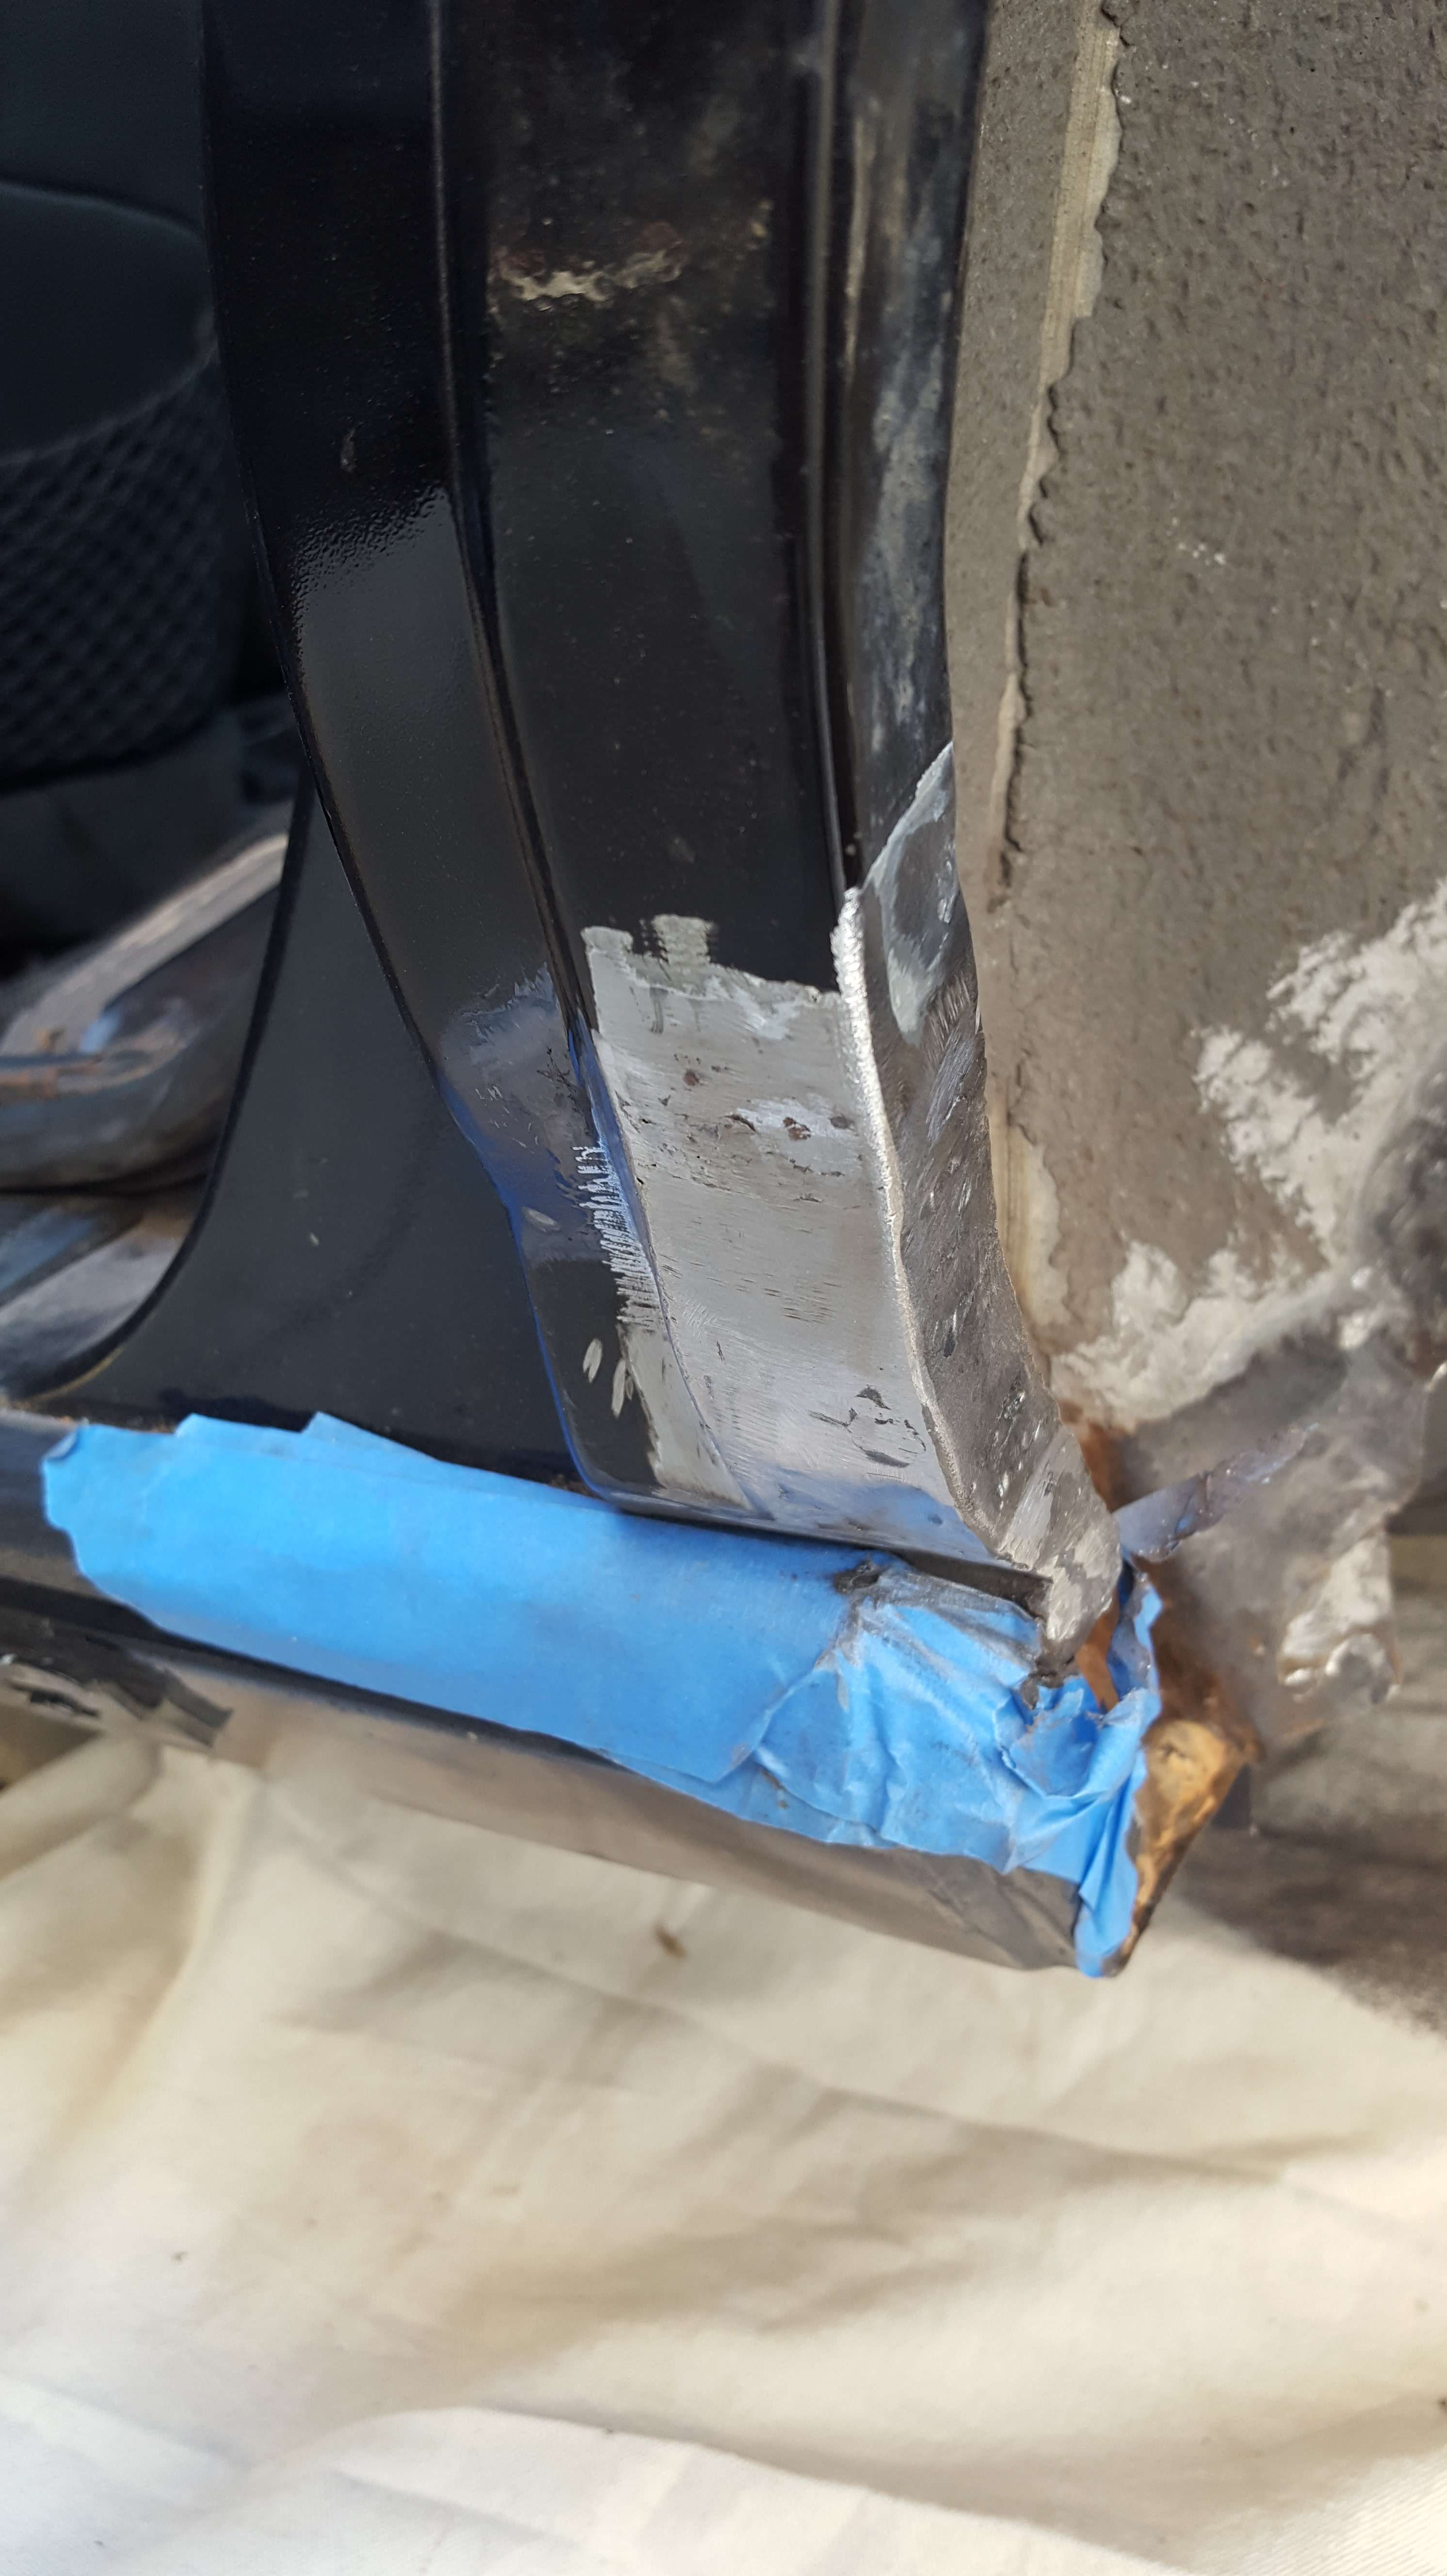
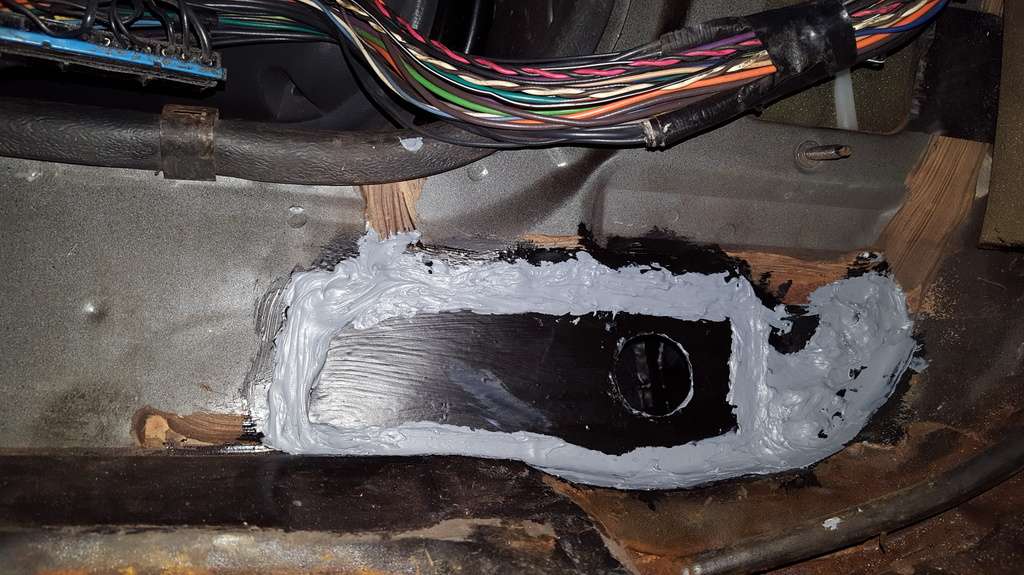
-Saw one driver's side floor access panel pushed through the rubber/tar sealing mat. No corrosion luckily. So I removed the metal, painted it, and installed Hush Mat over it to seal. (You can see the hole on the one pic below)
-Hush Mat'd the hole in the front driver's patch panel
-Laid the new carpet out inside for a couple days to let it settle
-Started to install the carpet. Driver's seat is in.
I still need to cut the carpet for the passenger seat and down the sides yet. The last time I installed a carpet with the nose higher than the rear and it ended up with slack at the end of the exhaust tunnel. I also ended up trimmed the one side a little to far. So, I did the install this time with the nose lower and worked the carpet from the rear seat forward. I'll leave the sides long until it settles.
I haven't had carpet in the car for like 6 years because of water leaks.. It might not seem like a big thing but it's a nice milestone for me.
The rest of the interior will go in easy enough. The A/B/C pillars will stay out till I redo the NOS headliner board and pull the windshield.
Slowly but surely.
Re: Some pics of my 95 SLE (6/19 Update)
Posted: Sat Jun 24, 2017 7:54 pm
by 95naSTA
Re: Some pics of my 95 SLE (6/24 Update)
Posted: Sun Jun 25, 2017 11:32 am
by J Wikoff
I like it.
Re: Some pics of my 95 SLE (6/24 Update)
Posted: Tue Jun 27, 2017 9:21 pm
by 95naSTA
Thanks!
I'm hoping to work on the headliner next.
Re: Some pics of my 95 SLE (6/24 Update)
Posted: Wed Jun 28, 2017 12:04 am
by bs009
You're doing amazing work! It's really giving me more motivation to fix some of the smaller issues on my projects!
Re: Some pics of my 95 SLE (6/24 Update)
Posted: Wed Jun 28, 2017 8:36 am
by 95naSTA
That's awesome. Anymore I feel like OCD has me working at a snail's pace. It's very cool to hear what little I do get done still motivates.
Re: Some pics of my 95 SLE (6/24 Update)
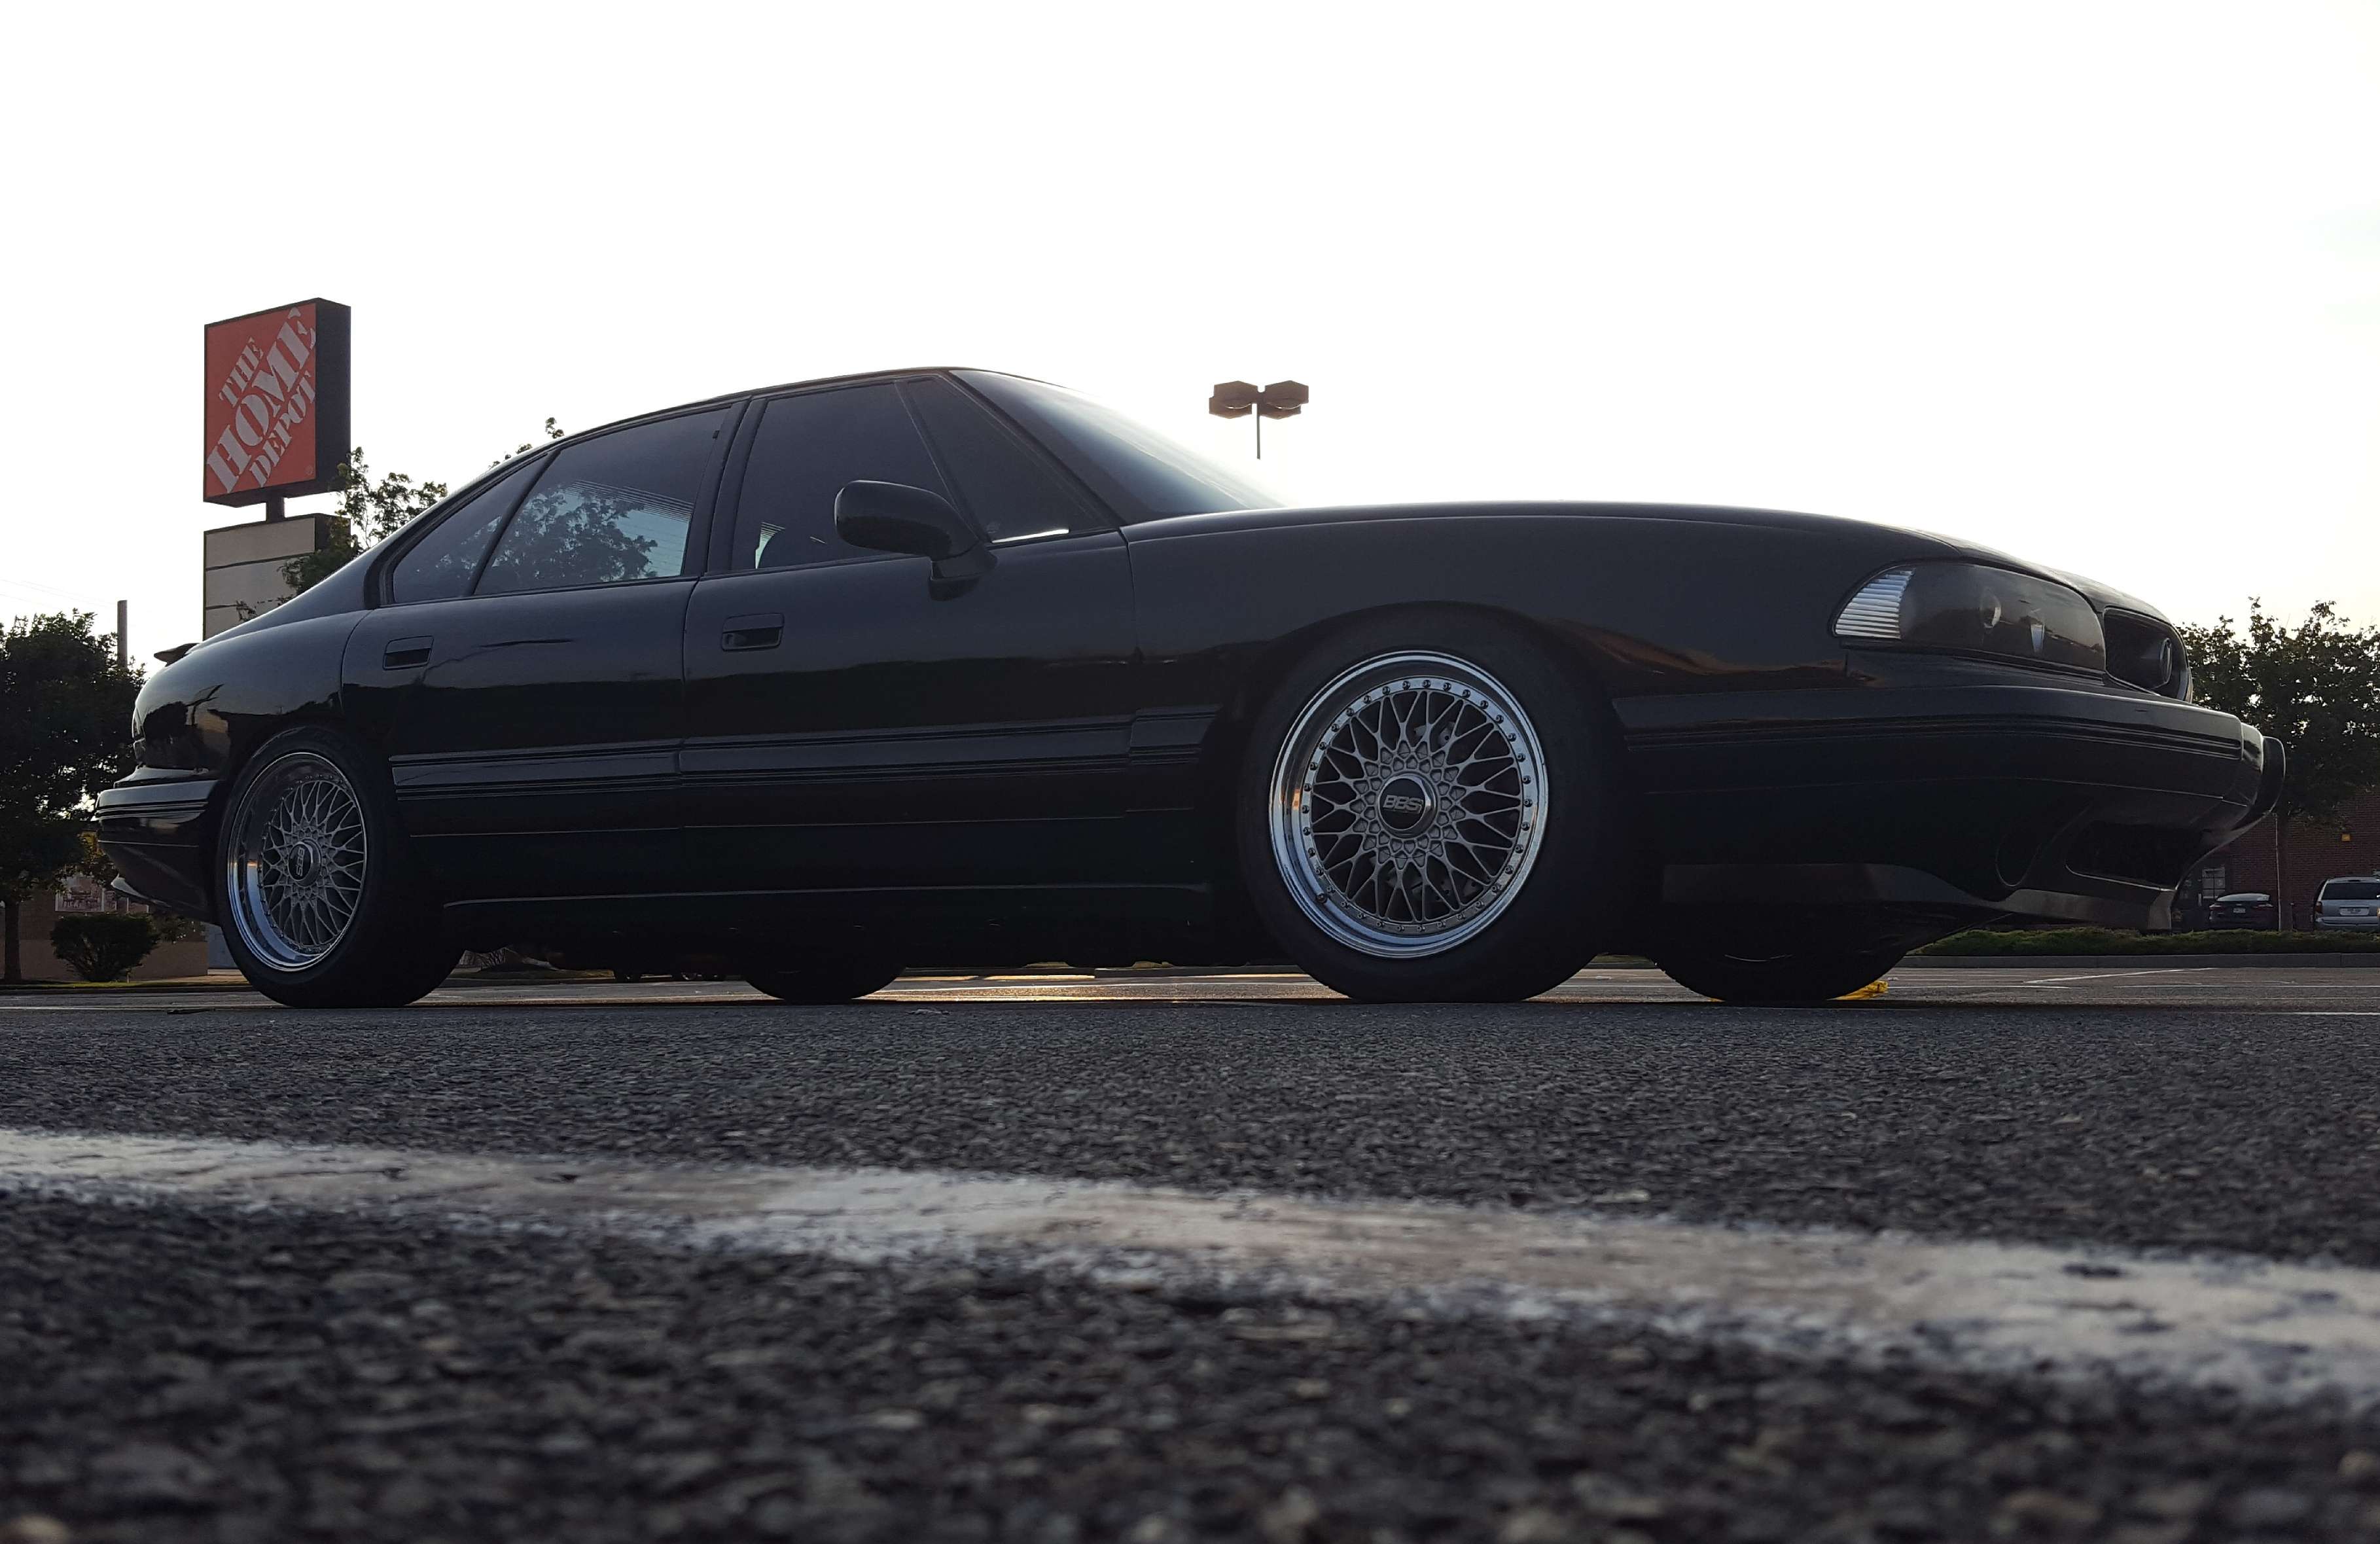
Posted: Thu Jun 29, 2017 9:25 pm
by 95naSTA
From earlier today on a Home Depot run.
Re: Some pics of my 95 SLE (6/24 Update)
Posted: Fri Jun 30, 2017 5:42 pm
by 98SSE
Looks great.

Re: Some pics of my 95 SLE (6/24 Update)
Posted: Mon Jul 03, 2017 1:01 am
by Mickman
Man, I haven't been on this forum in ages but awesome to see you're still working on/driving the car. Amazing. I love the car!
Re: Some pics of my 95 SLE (6/24 Update)
Posted: Mon Jul 03, 2017 10:58 am
by 95naSTA
Thanks guys!
Re: Some pics of my 95 SLE (6/24 Update)
Posted: Fri Jul 14, 2017 1:45 am
by driverjohn2005
Great to see how far this car has come! Awesome work!
Re: Some pics of my 95 SLE (6/24 Update)
Posted: Sat Jul 15, 2017 5:50 pm
by jonnevilleSSEi
I'm totally biased here but GO USA!! Bonnie's got it going on.