Page 16 of 24
Re: Some pics of my 95 SLE (1/15 Update)
Posted: Tue Jan 17, 2017 10:23 am
by harofreak00
Ok that makes sense. Most customers won't pay $200 to ship a used $100 headliner.
Re: Some pics of my 95 SLE (1/15 Update)
Posted: Thu Jan 19, 2017 1:38 am
by zuper8
Very jelly of that beautiful new headliner board. My car badly needed one, but couldn't justify the cost. My cheap rusty DD is not in the same class as your specimen, though I love it so! Very satisfying to see the lovely work you are doing on the floor pans. I had to repair those same areas on my 92, and I hope I didn't already tell you how I did it. If I didn't, I'm so not telling you.
Re: Some pics of my 95 SLE (1/15 Update)
Posted: Thu Jan 19, 2017 10:26 am
by 95naSTA
Lol. Rach, if it makes you feel any better I started to see the ground with the rear seat out of my i30.. and I have no intention of fixing it.
Re: Some pics of my 95 SLE (1/15 Update)
Posted: Mon Jan 23, 2017 10:57 pm
by 95naSTA
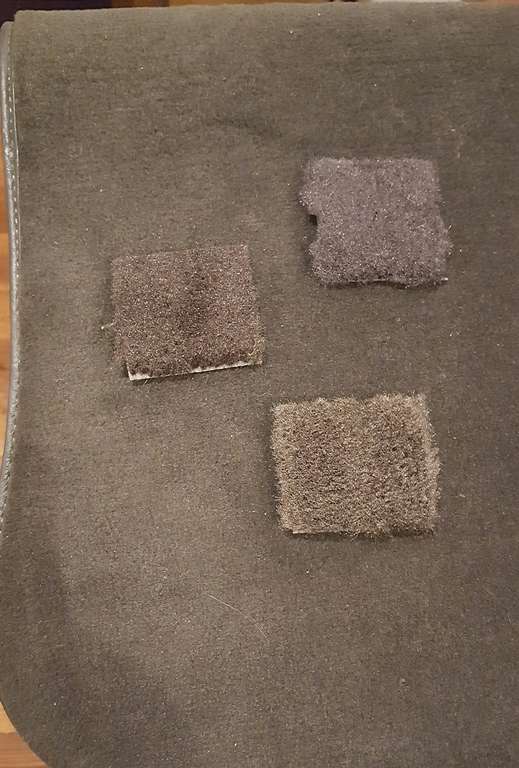
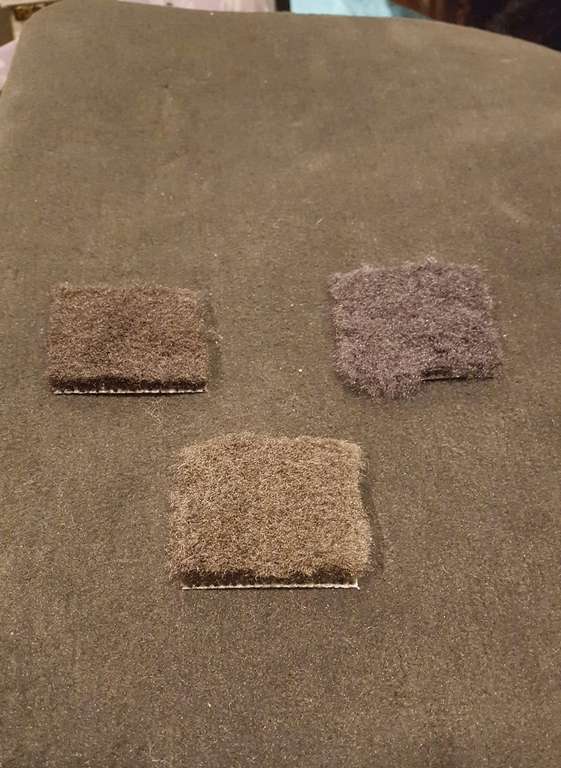
The StockInteriors.com samples came in. I'm going to go with the bottom color in both pics: 1097 Charcoal, Ultra Plush. To be honest, it's probably as off as my last carpet but it's as close as I'm going to get. The graphite sample and ACC carpet are too off, and the black sample is too. The other thing is my headliner and pillars will be charcoal too..
Re: Some pics of my 95 SLE (1/15 Update)
Posted: Wed Jan 25, 2017 12:10 am
by 1oldman
I hope to see your 95SLE Keeper some day. One great looking Bonneville! - BC
Re: Some pics of my 95 SLE (1/15 Update)
Posted: Tue Jan 31, 2017 11:03 pm
by 95naSTA
Thanks!
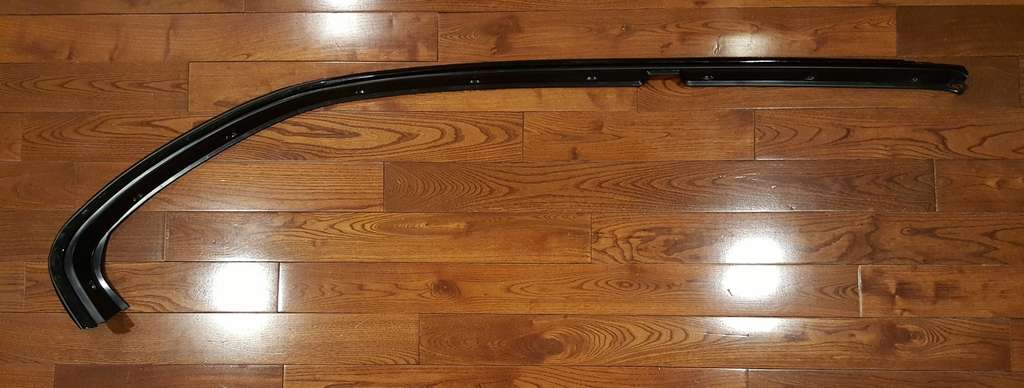
Some more NOS action. It needs a little cleanup from sitting in a bag for 18-25 years but it's one less thing to fix. The driver's side is no longer available.
Re: Some pics of my 95 SLE (1/15 Update)
Posted: Wed Feb 01, 2017 10:14 am
by nos4blood70
Love all the little details and all the work you put into the car. I, too, hope I get to see it one day. That interior looks simply immaculate.
Re: Some pics of my 95 SLE (1/15 Update)
Posted: Fri Feb 03, 2017 6:33 pm
by 95naSTA
Re: Some pics of my 95 SLE (2/3 Update)
Posted: Sun Feb 05, 2017 7:49 pm
by 95naSTA
Re: Some pics of my 95 SLE (2/5 Update)
Posted: Mon Feb 06, 2017 7:51 pm
by 98SSE
Re: Some pics of my 95 SLE (2/5 Update)
Posted: Wed Feb 08, 2017 5:10 pm
by MattStrike
That looks familiar.
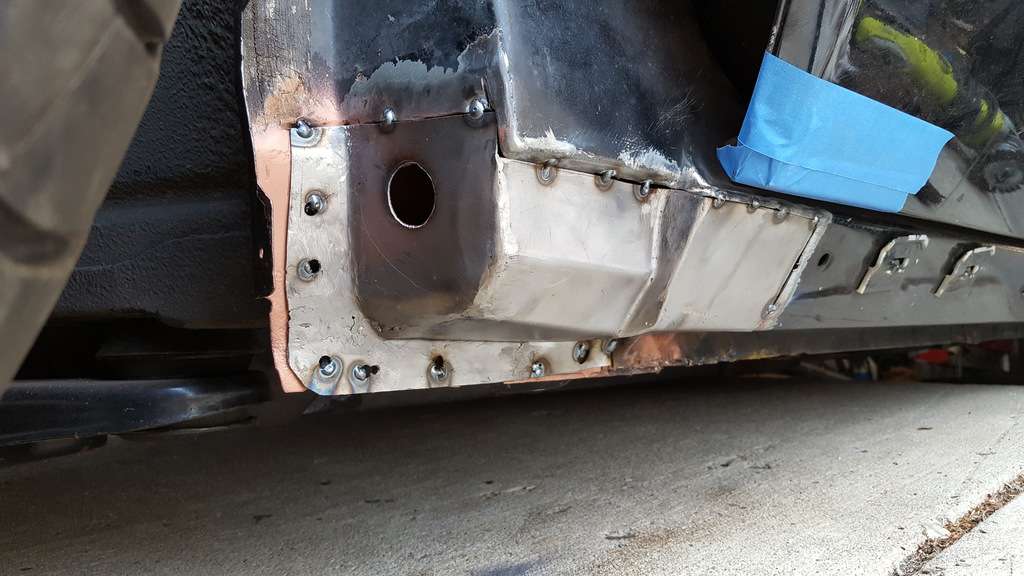
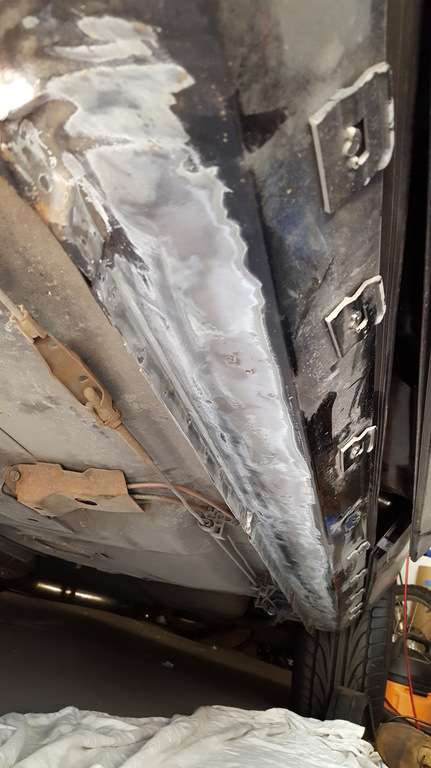
Nice fab and welds there.
I've been thinking about figuring out a DIY method of ecoating patch panels and the welds after the repair, OEM's just dip the whole body before paint, not sure how else to do it. If it could be done it would give that added layer of protection against new corrosion. The other option is to let it flash then POR-15 it.
Re: Some pics of my 95 SLE (2/5 Update)
Posted: Wed Feb 08, 2017 5:24 pm
by 95naSTA
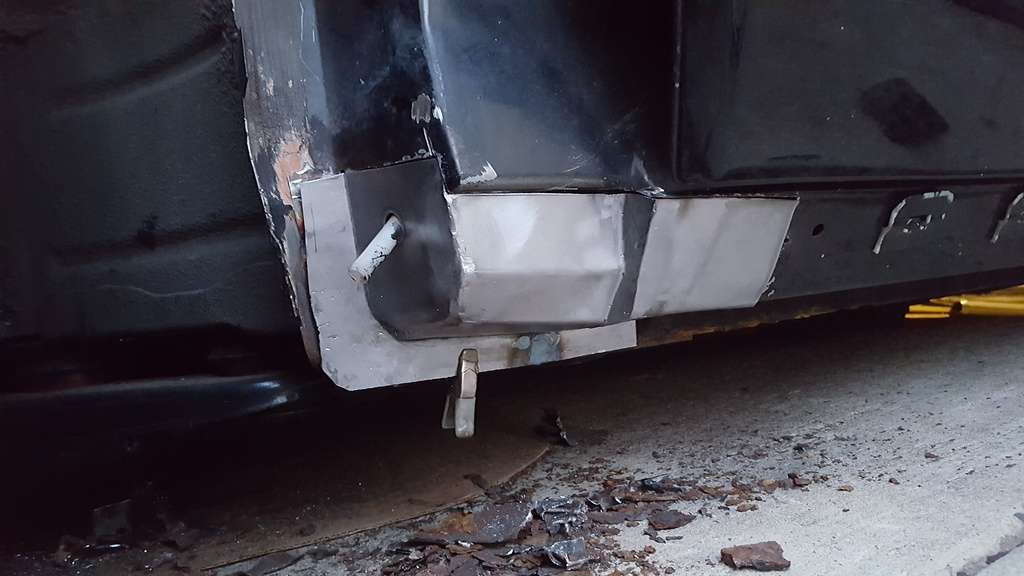
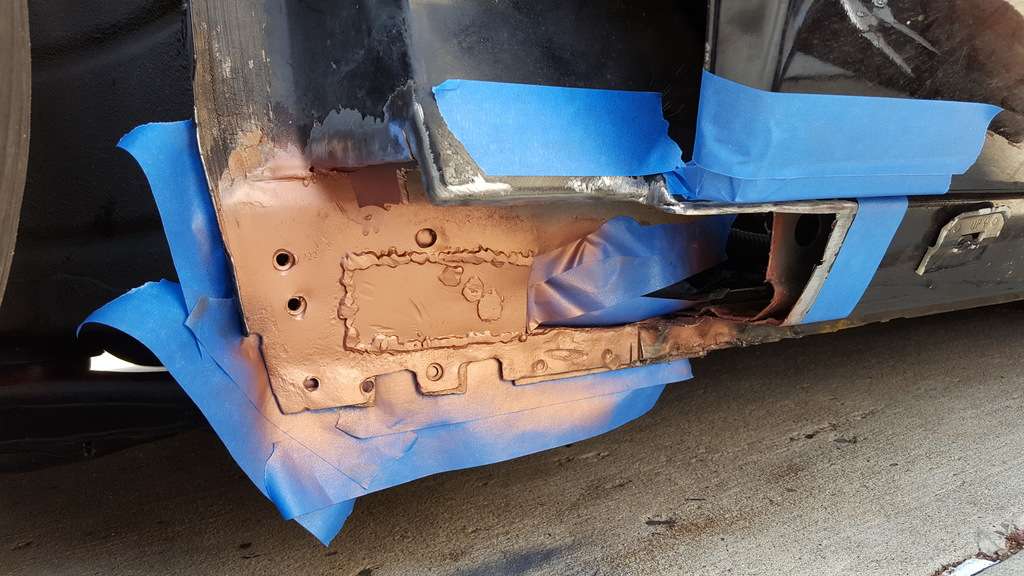
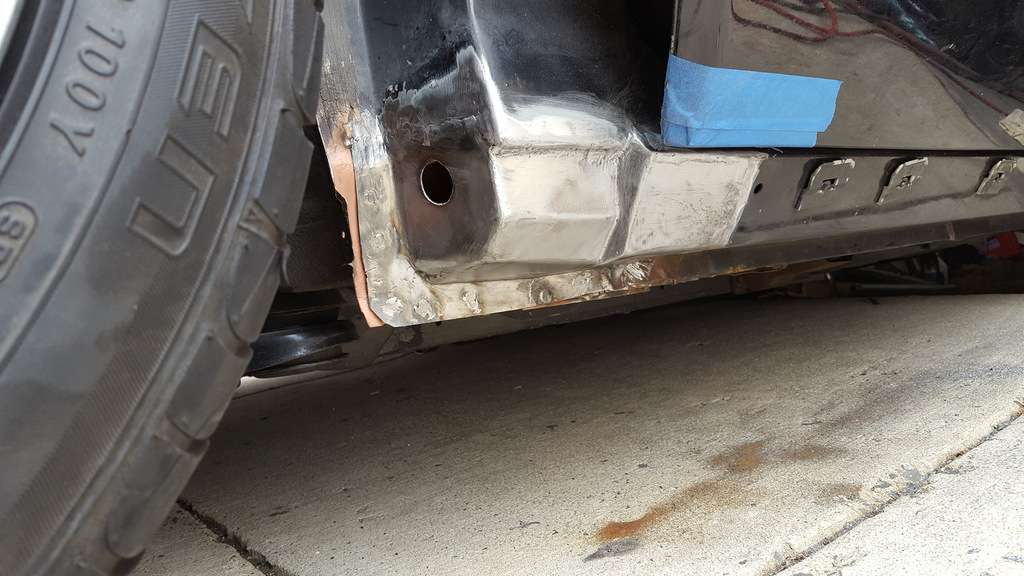
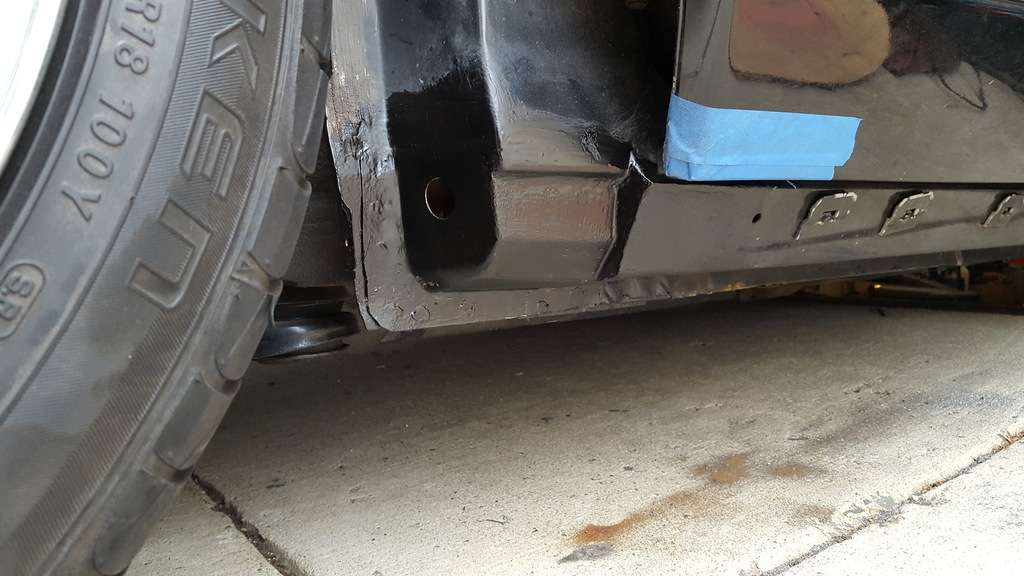
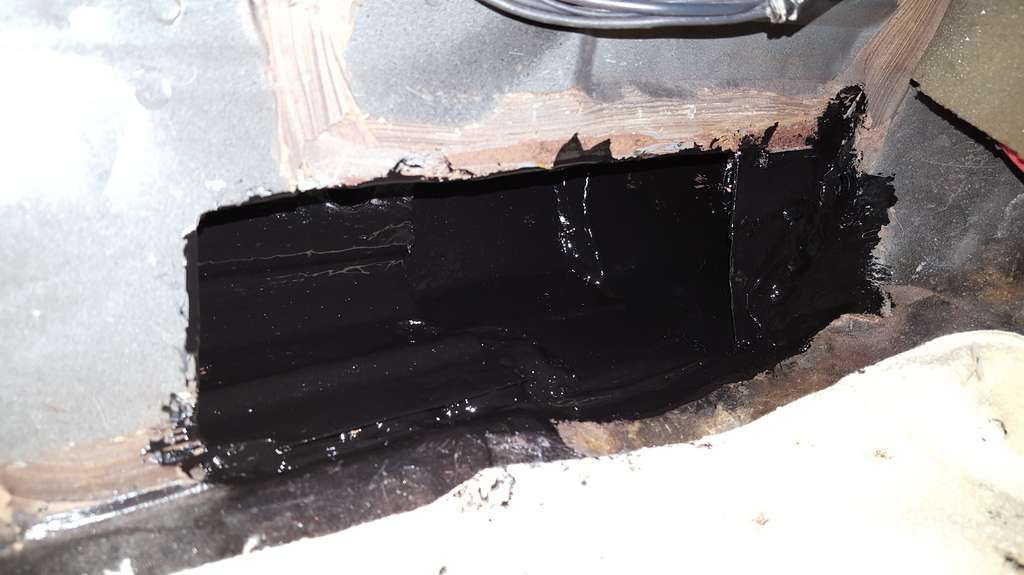
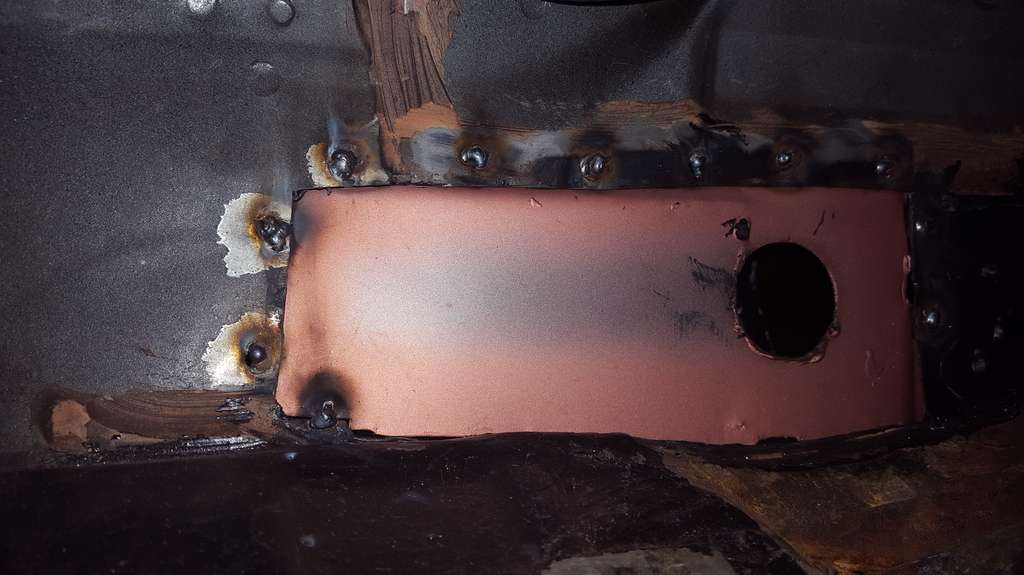
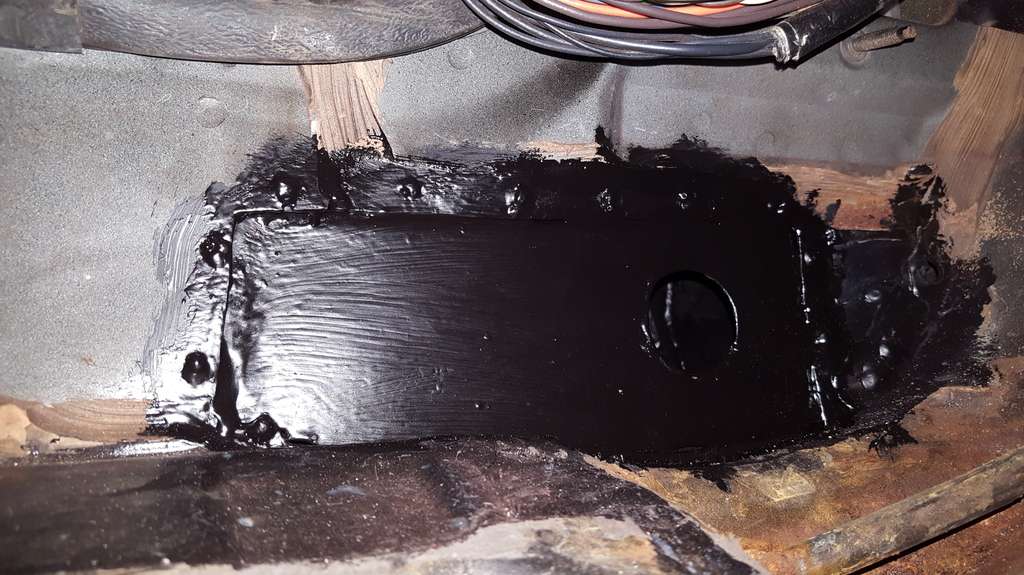
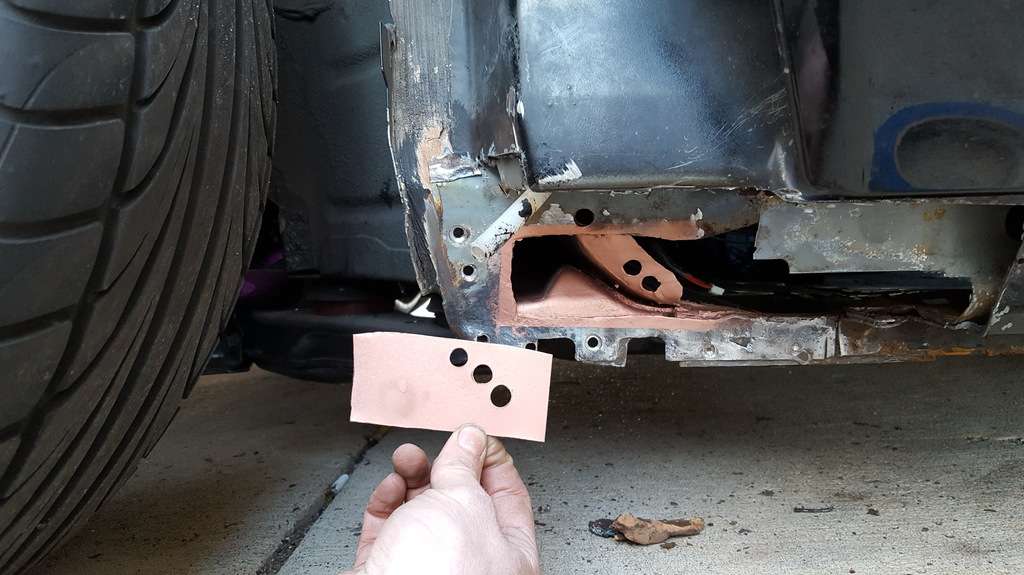
Similar to what I did with my unibody rail and window channel repair, I'm going to spray the mating surfaces I can't get to after welding with copper primer. I'll still have good access to the back of the outer rocker once I weld it in, so I'll paint from the inside. Then after I stitch in the interior panel, and seam seal, I'll cavity wax or oil it through an OEM style access.
Re: Some pics of my 95 SLE (2/5 Update)
Posted: Mon Feb 20, 2017 9:44 pm
by 95naSTA
Slowly but surely..
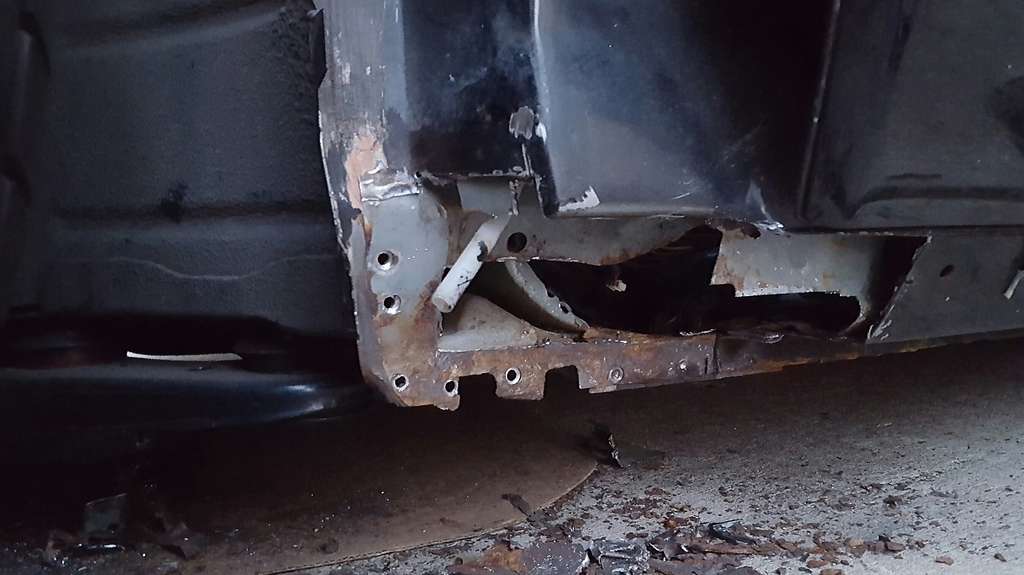
I did some final tweaks to the patch corner and started buttoning up the area for it to go on. I wanted to get the area forward of the sheet metal near the e-brake isolated from the rocker before I welded in the patch. That's what that small section is for. I'm keeping the rest open to the cabin until I paint and seal from the inside. My MIG wire ran out and I was cut a little short unfortunately.. I picked up some wire so I'll be ready whenever I have free time next.
Re: Some pics of my 95 SLE (2/20 Update)
Posted: Sun Apr 09, 2017 7:46 pm
by 95naSTA
Not much of an update but an update.
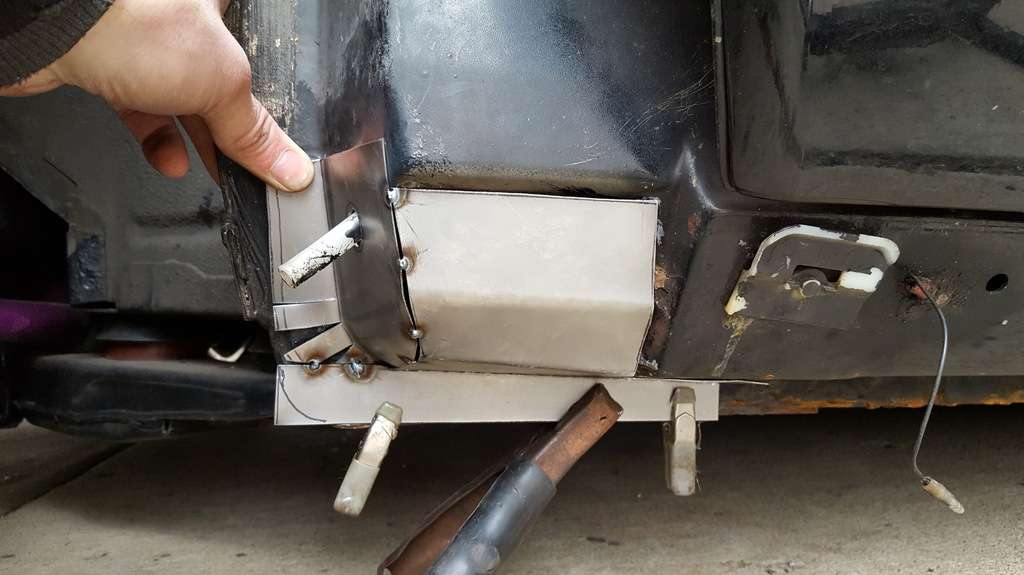
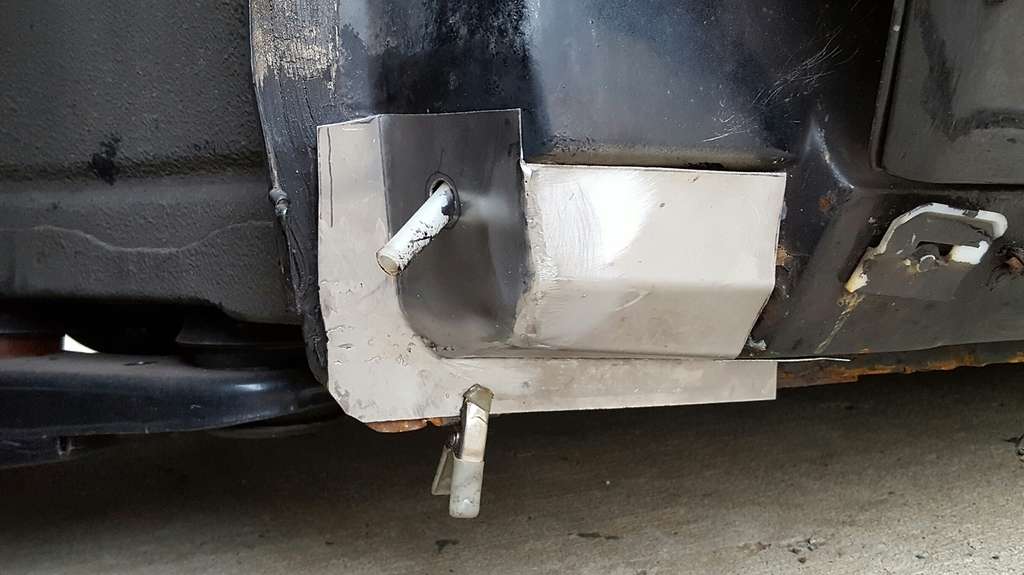
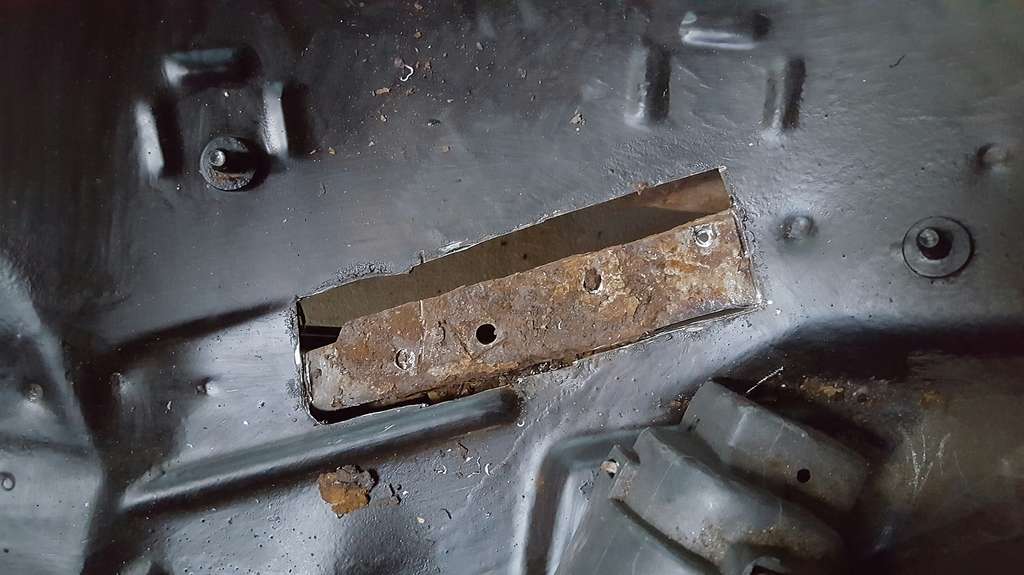
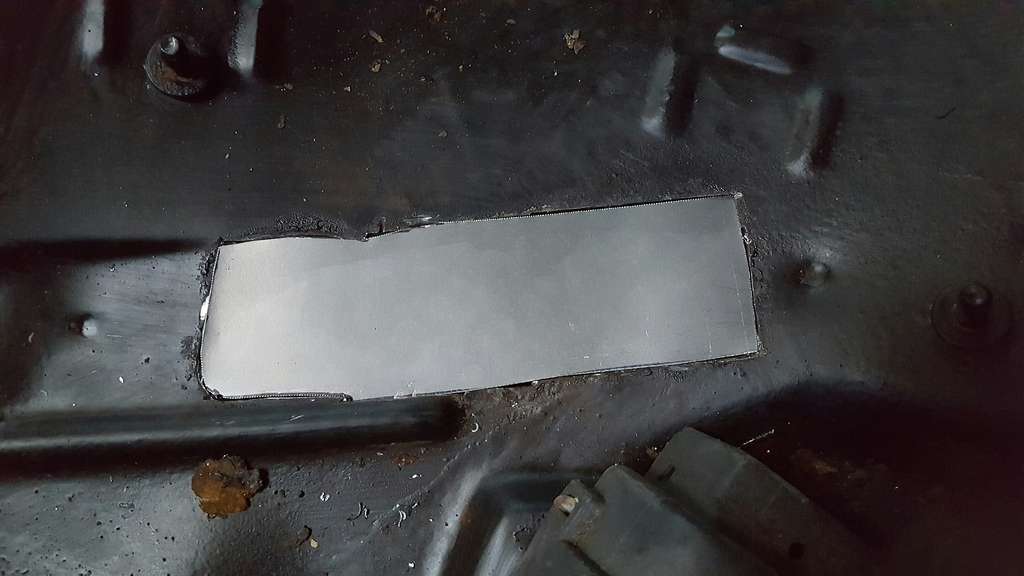
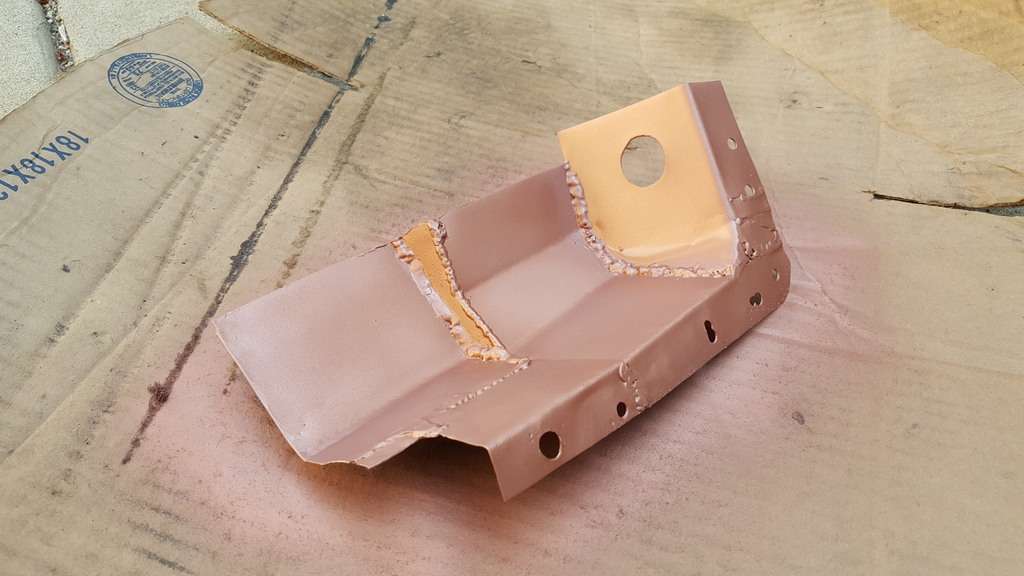
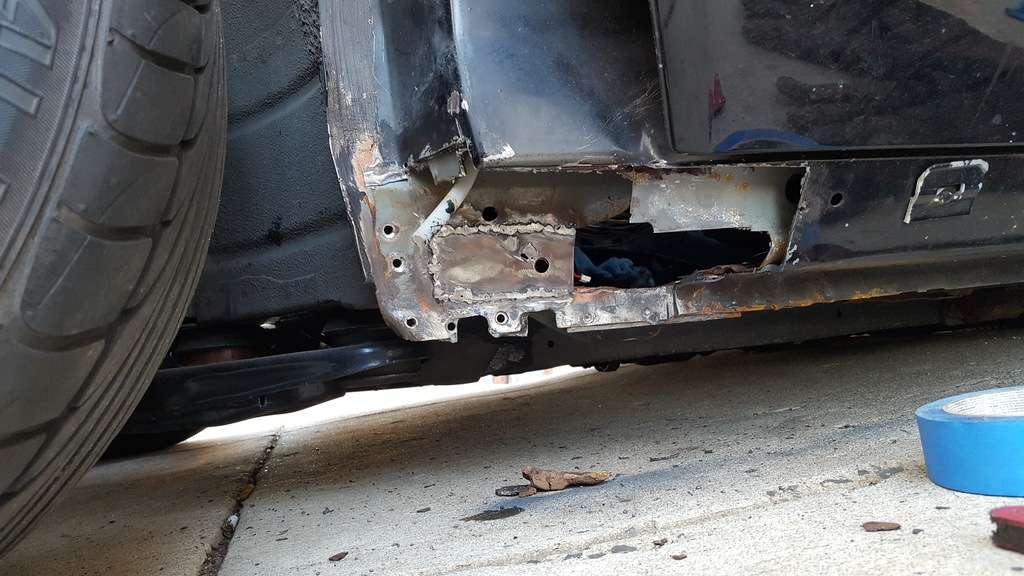
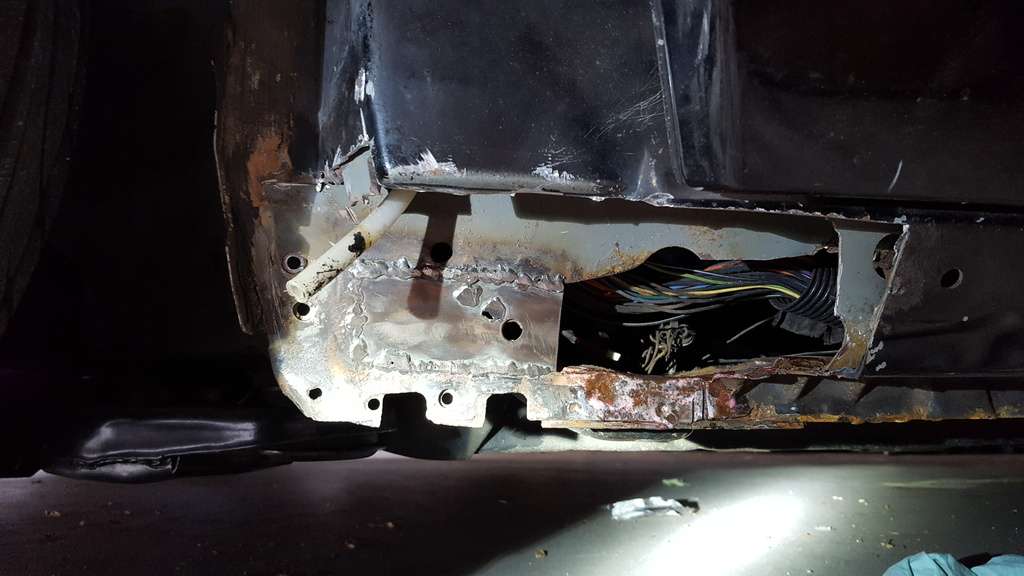
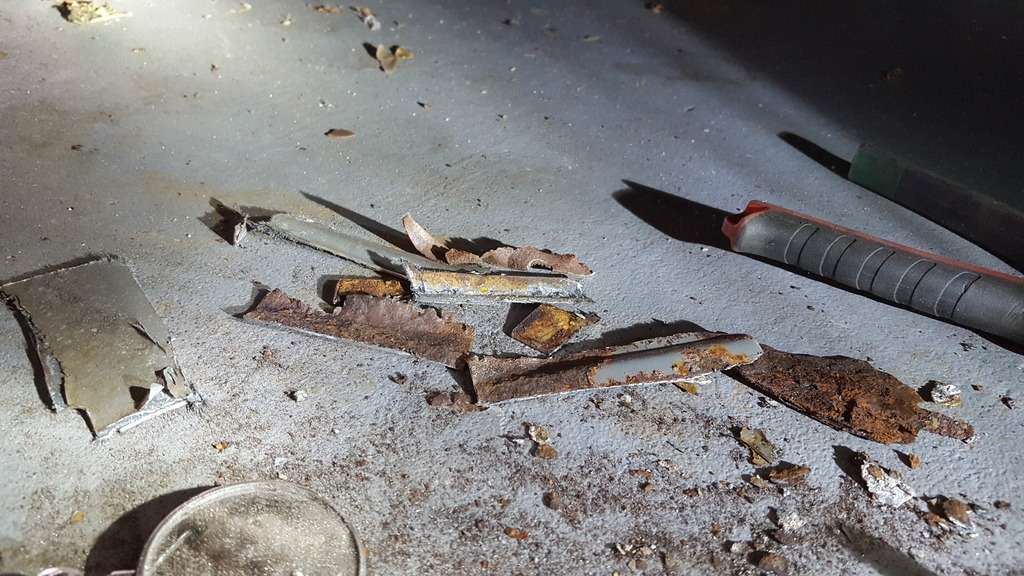
There was some more rust behind good metal that was bothering me. I wanted to get that out before it was all welded up. It as a PITA to get to without cutting out more exterior metal so I ended up using a dremel.
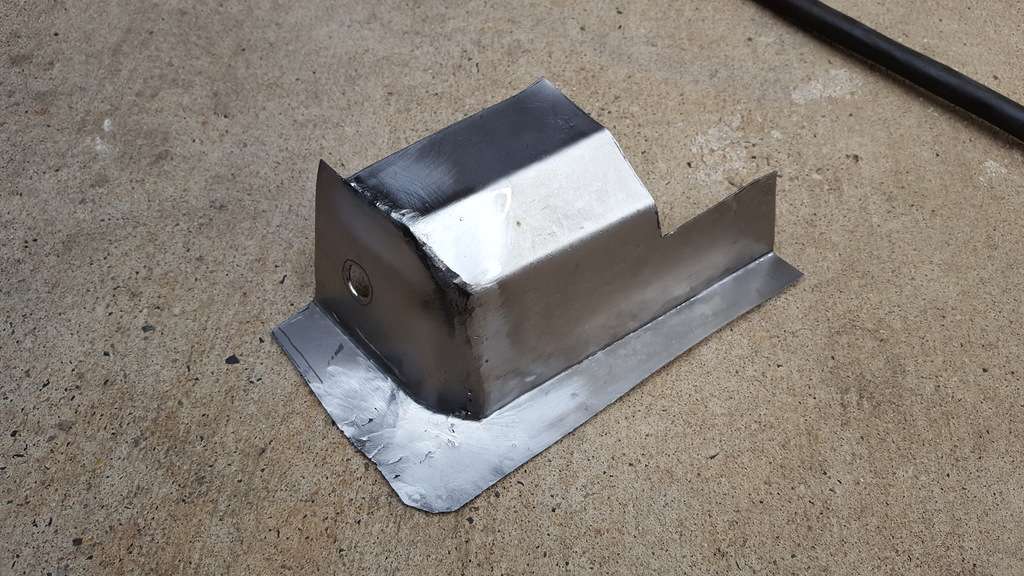
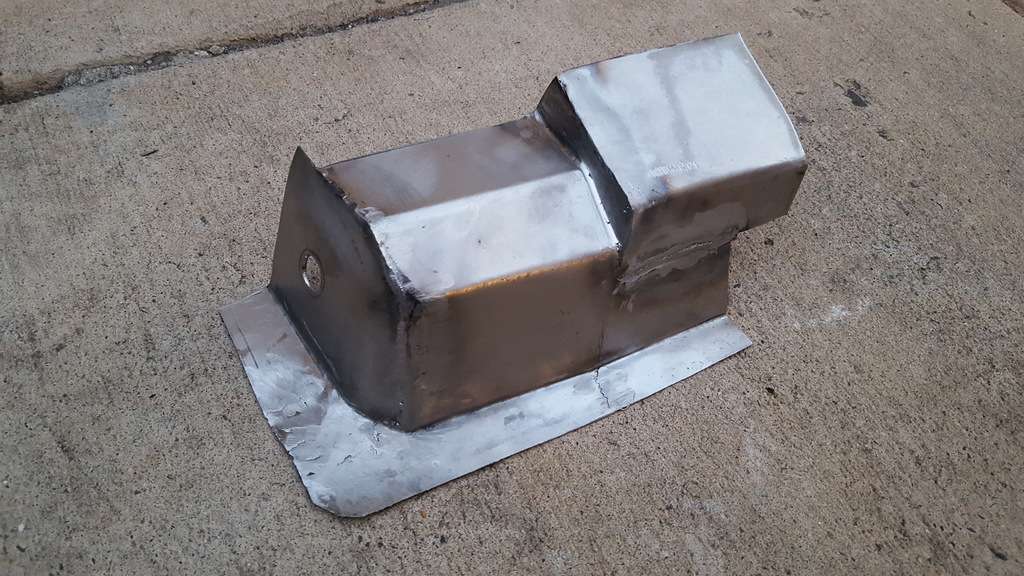
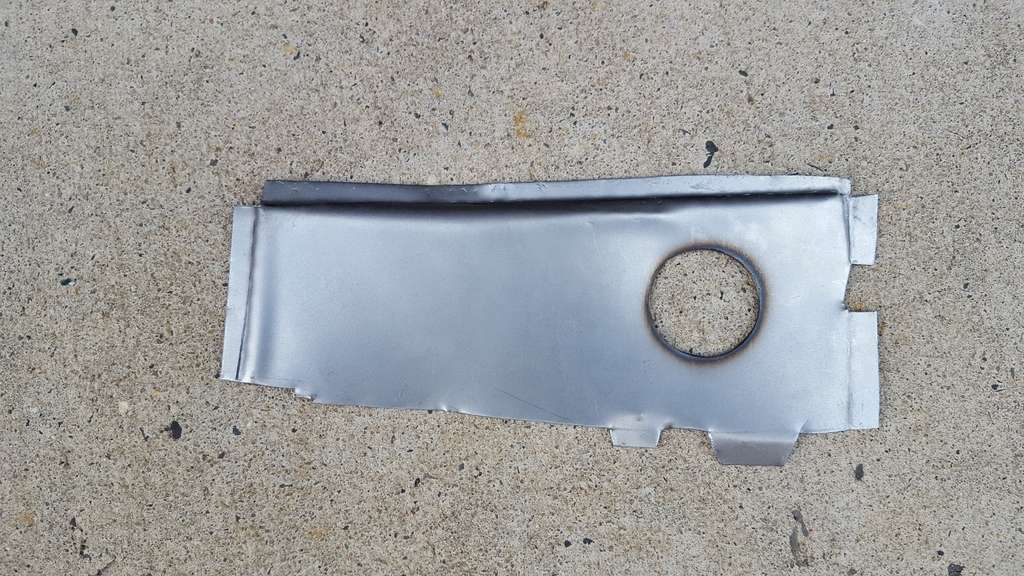
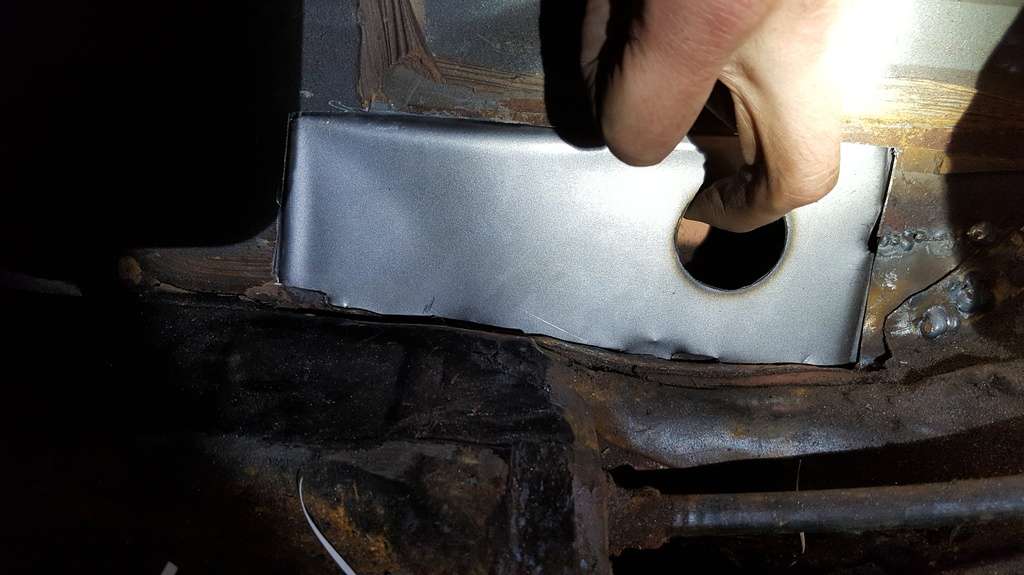
Aside from drilling some plug weld holes and some welding surface prep, the dog leg I made is ready to be welded on.
Re: Some pics of my 95 SLE (4/9 Update)
Posted: Fri Apr 14, 2017 6:24 pm
by 95naSTA
Re: Some pics of my 95 SLE (4/14 Update)
Posted: Fri Apr 21, 2017 8:44 pm
by 95naSTA
Re: Some pics of my 95 SLE (4/21 Update)
Posted: Sat Apr 22, 2017 8:43 pm
by 95naSTA
I switched gears and plumbed in the ELC pump and replaced the SE/SLE truck latch trim with SSEi trim. The trim has the inflator valve and on/off buttons. I picked that stuff up at the yard in Nov as mentioned in
this post.
It's super slow but it seems to be working as it should. I wasn't expecting much with a 25 year old pump and 1/8" line. The main driver for doing this is to make it easier to keep from scraping my exhaust parking in the garage.
https://youtu.be/YnuymDYh1LY
I still need to wire it in permanently. You can hear me using the power probe to test it. I'll run key-on +12v to it and ground both the pump and deflate solenoid through a rocker switch. Probably a heated seat switch. I'm pretty OCD so it'll probably take me a while till I'm happy with a permanent switch placement.
Re: Some pics of my 95 SLE (4/22 Update)
Posted: Thu Apr 27, 2017 7:53 pm
by zuper8
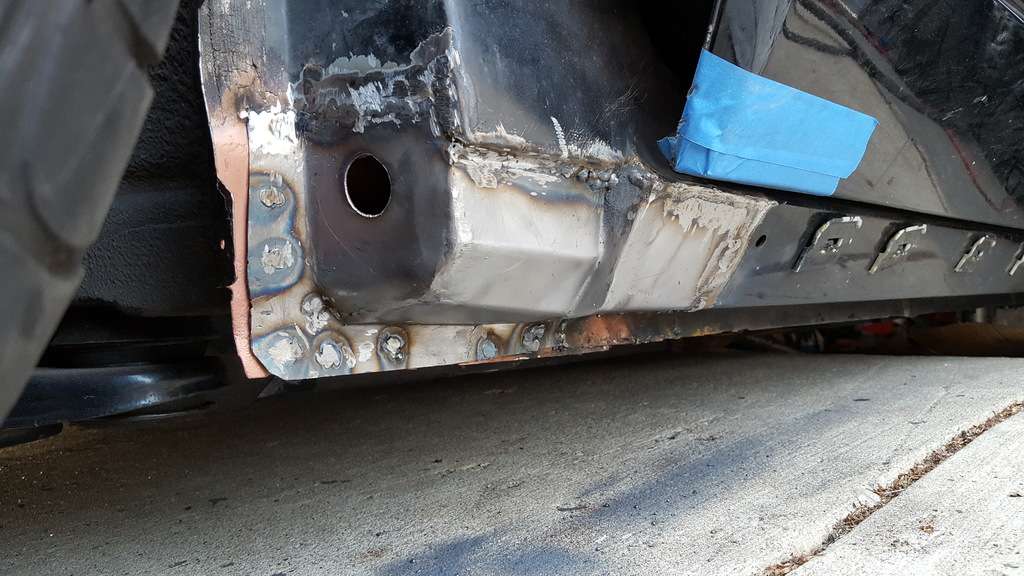
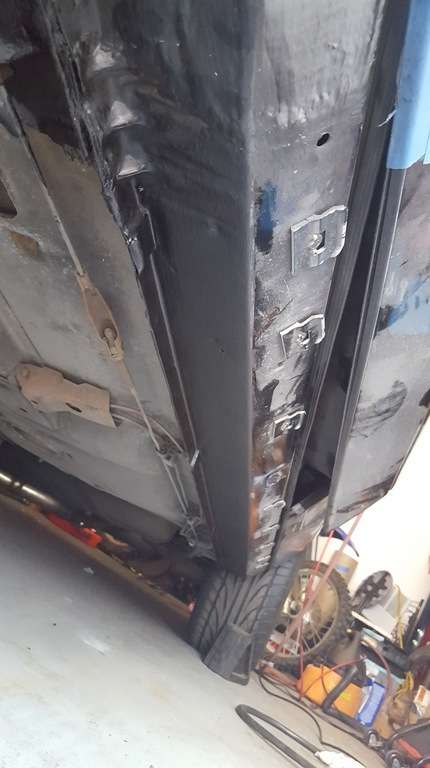
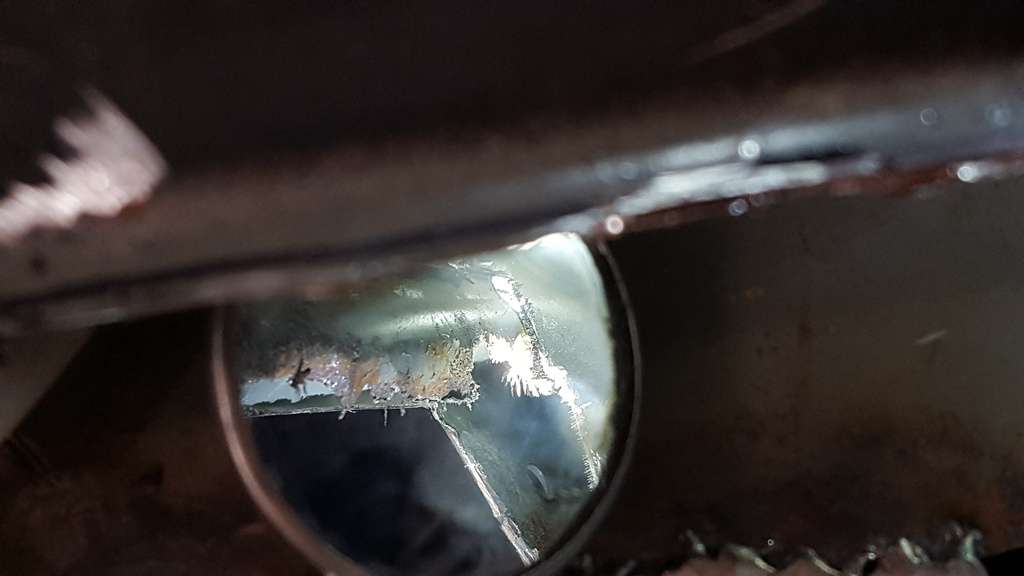
Heyyy, you've been needing that!! That rust repair sequence was so satisfying to go through, by the way. It's amazing how much has to be taken off, and how hard it is to get into those tight areas. Loved the mirror shot, that bit of rust would have driven me nuts too after going to such lengths to beautifully repair the other areas.
Re: Some pics of my 95 SLE (4/22 Update)
Posted: Fri Apr 28, 2017 9:21 pm
by 95naSTA
Re: Some pics of my 95 SLE (4/28 Update)
Posted: Fri Apr 28, 2017 11:15 pm
by zuper8
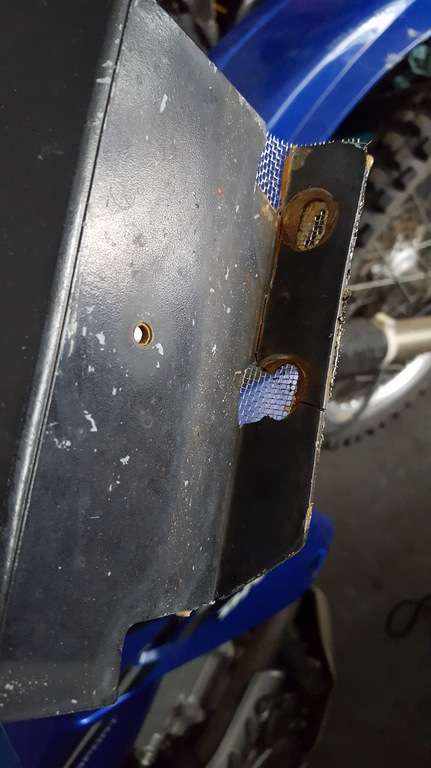
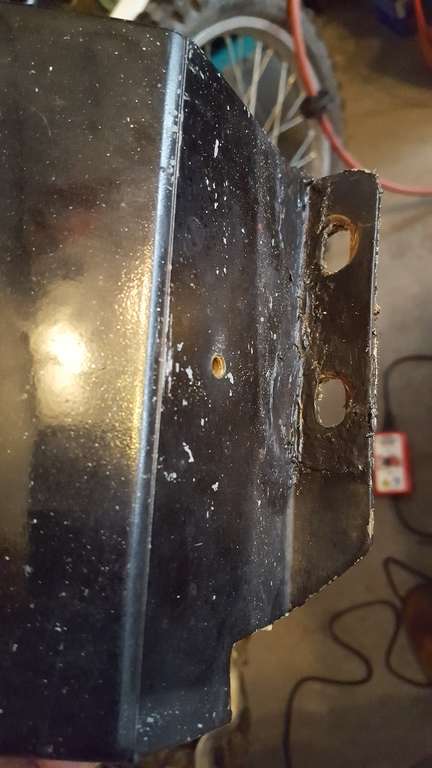
Ahhh, what I wouldn't give for plastic fenders! When replacing the driver's fender, I literally could not find one that still had the bolt holes. I had to stuff it in there and hide the sloppiness with the cladding. Love the rocker panel repair, too!!