


Tools Required
J 36796 Clip Zip Tool
J 38778 Door Trim Pad Clip Remover
Removal Procedure
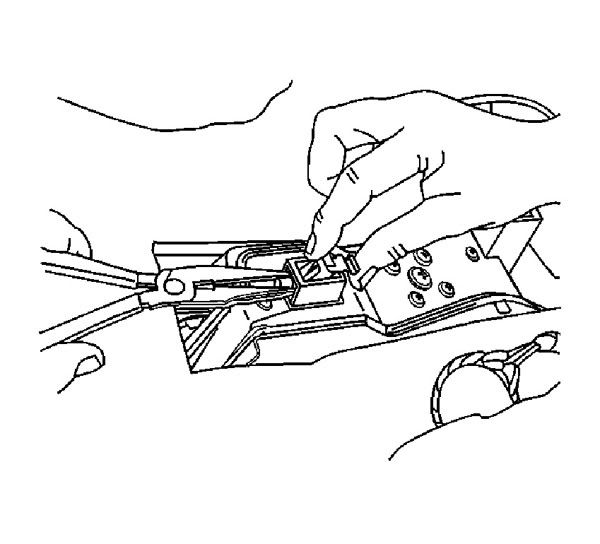
Remove the inside door handle bezel. The front inside door handle bezel has electrical connectors, the rear does not.
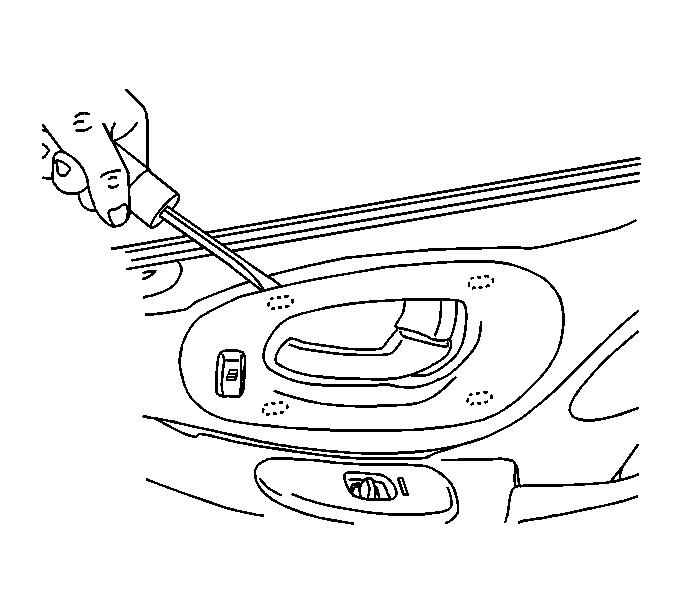
Insert a flat bladed tool behind the forward upper edge of the door handle bezel.
Gently pry the upper portion of the bezel away from the door trim panel.

Pull the bezel forward over the inside door handle.
Disconnect the electrical connector.

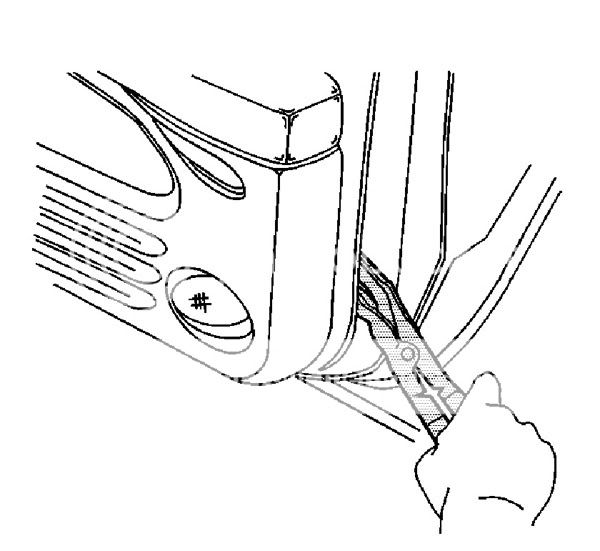
Remove the upper door trim panel.
Use the J 38778 in order to release the retainer at the top of the upper door trim panel.
Lift the upper door trim panel upwards in order to remove.
Disconnect the wire harness to the tweeter.
Use the J 36796 in order to release the retainers around the outside edges of the door trim panel. Start at the bottom and work around.
Starting at the bottom rear of the door trim panel pull inwards, while lifting upwards in order to remove.
Disconnect the door trim panel wiring harness.
Remove the armrest pull cup retainers from the inside of the door trim panel.
Use needle nose pliers to compress the 360 clip.
Pull the 360 clip out of the nylon nut on the door trim panel.
Installation Procedure
Install the 360 clip retainers into the nylon nuts on the inner door panel.
Connect the door wire harness to the door trim panel wire harness.
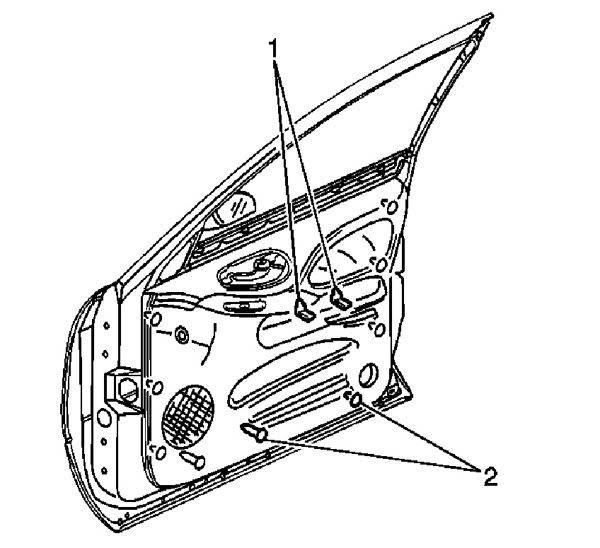
Starting at the bottom, secure the door trim panel around the outside edges with the retainers (2).
Align the door trim panel to the 360 clip retainers (1).
Snap the retainers in to secure the center of the door trim panel to the inner door panel.
Pull on the armrest to assure proper fit.
Push outwards near the top of the door trim panel in order to snap the top door trim panel retainer into the channel in the window inner belt seal strip.
Install the inside door handle bezel.

Connect the electrical connectors, if any, to the inside door handle bezel.
Guide the inside door handle through the opening in the door handle bezel.
Snap the door handle bezel into place.
Work the rubber around and behind both the manual lock knob and the inside door handle.
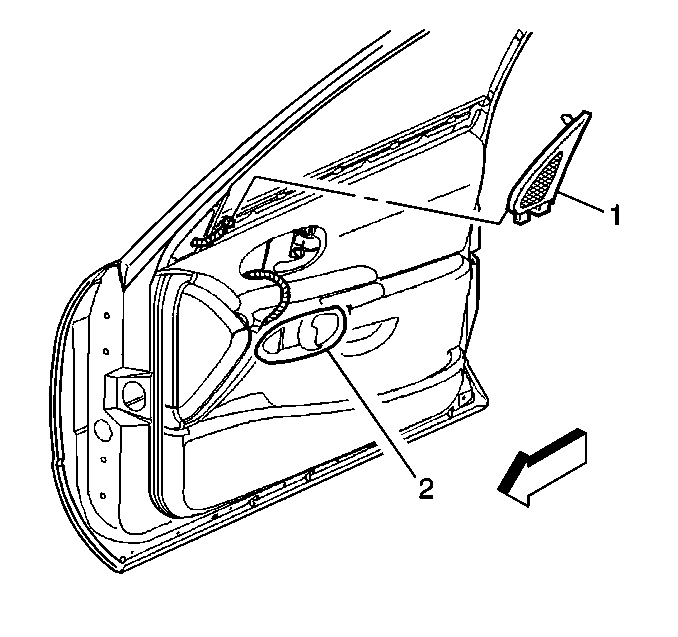
Install the upper door trim panel (1).
Connect the wire harness to the tweeter.
Insert the tabs into the slots on the door trim panel.
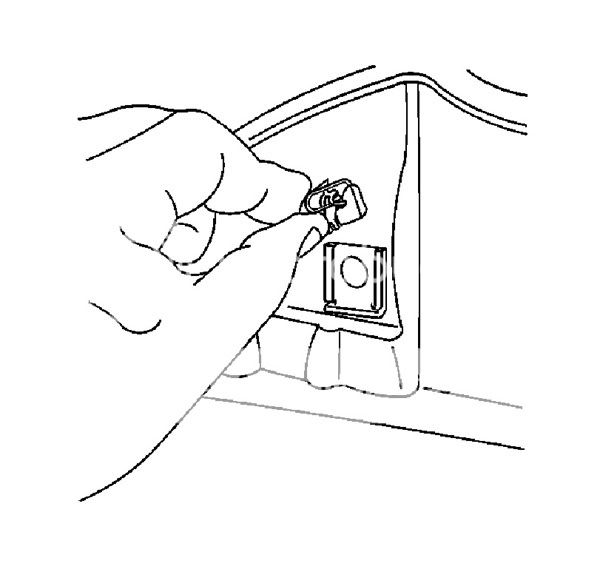
Insert the retainer into the hole in the door frame.
Trim Panel Replacement - Side Rear Door
Tools Required
J 36796 Clip Zip Tool
Removal Procedure
Remove the inside door handle bezel. The front inside door handle bezel has electrical connectors, the rear does not.
Insert a flat bladed tool behind the forward upper edge of the door handle bezel.
Gently pry the upper portion of the bezel away from the door trim panel.
Pull the bezel forward over the inside door handle.
Disconnect the electrical connector.

Use the J 36796 in order to release the retainers around the outside edges of the door trim panel.
Rock the door trim panel (1) upwards, starting at the rear, while lifting upwards to remove.
Disconnect the door trim panel wiring harness.
Remove the armrest pull cup retainers from the inside of the door trim panel.
Use needle nose pliers to compress the 360 clip.
Pull the 360 clip out of the nylon nut on the door trim panel.
Installation Procedure
Install the 360 clip to the nylon nuts on the inner door panel by sliding the 360 clip down into the grooves in the nylon nuts.
Connect the trim panel electrical connector to the door wiring harness connector.
Starting at the bottom, secure the door trim panel around the outside edges with the retainers (2).
Align the door trim panel to the armrest pull cup retainers (1).
Snap the retainers in to secure the center of the door trim panel to the inner door panel.
Pull on the armrest to assure proper fit.
Push outwards near the top of the door trim panel in order to snap the top door trim panel retainer into the channel in the window inner belt seal strip.
Install the inside door handle bezel.
Connect the electrical connectors, if any, to the inside door handle bezel.
Guide the inside door handle through the opening in the door handle bezel.
Snap the door handle bezel into place.
Work the rubber around and behind both the manual lock knob and the inside door handle.
Install the upper door trim panel (1).
Connect the wire harness to the tweeter.
Insert the tabs into the slots on the door trim panel.
Insert the retainer into the hole in the door frame.


