

Found out the problem to my Antifreeze leak.
-
Sirhc

- SLE Member

- Posts: 35
- Joined: Fri Oct 15, 2010 2:33 pm
- Year and Trim: 2002 SSEi
- Location: Ypsilanti, Mi
Found out the problem to my Antifreeze leak.
After looking around to see where my car was leaking antifreeze from, I pressurized the radiator to find out. The leak is coming from an elbow plastic joint from the Water Pump to the Engine Block. Does anyone know exactly what this part is? If so, do you know the part number for it on Rock Auto?
|| 2002 Bonneville SSEi :: 116k ||
-- Current Mods :: Drop In K&N Air Filter, Rockford Fosgate 6x9's, Code Alarm CA550
-- Upcoming Mods :: 15% Tint, Replace Stock Speakers, Aftermarket HU, Intense FWI
-- Current Mods :: Drop In K&N Air Filter, Rockford Fosgate 6x9's, Code Alarm CA550
-- Upcoming Mods :: 15% Tint, Replace Stock Speakers, Aftermarket HU, Intense FWI
-
Archon

- Resident Gearhead

- Posts: 8781
- Joined: Mon May 19, 2008 10:30 pm
- Year and Trim: 2014 Cadillac XTS Vsport.
- Location: Grand Rapids, Michigan
Re: Found out the problem to my Antifreeze leak.
You can get them at virtually any auto parts store.
*Gone, but not forgotten* - Black 2000 SSEi, HIR Headlights, Angel Eyes fogs, 3rd brake light overlay, hi-flo cat, 180 degree thermostat, HS 1.9 rockers, LSx yellow springs, Intense FWI, PCM, shift kit, push rods, and 3.4 Pulley. ZZP Power Log.
-
00Beast
- Retired Site Developer

- Posts: 20960
- Joined: Tue May 27, 2008 10:30 pm
- Year and Trim: '17 Silverado 1500
- Location: MN/IA
- Contact:
Re: Found out the problem to my Antifreeze leak.
They're not worth ordering from RA alone, just get them at Autozone. They're like $8.
Bye Bye:

RIP sandrock
RIP sandrock
Sirius wrote:Think about it. You’re tooling down the road in your Prius, knowing full-well that this thing being green is as big a sham as federally mandated ethanol-enriched gas, Russia pulling out of Ukraine, and Obamacare.
-
LeSabre in Buffalo
- Certified Bonneville Nut

- Posts: 3177
- Joined: Fri May 23, 2008 1:15 am
- Year and Trim: 2012 Eco
- Location: Corning, NY
Re: Found out the problem to my Antifreeze leak.
$4 at Advance.
2012 Chevrolet Cruze Eco - Current car


1999 Buick LeSabre Custom - Former car
Learn from the mistakes of others, that way when you mess up you can do so in new and interesting ways.
1999 Buick LeSabre Custom - Former car
Learn from the mistakes of others, that way when you mess up you can do so in new and interesting ways.
-
azu

- Posts like an L27

- Posts: 614
- Joined: Wed May 21, 2008 10:00 pm
- Year and Trim: 03 SE
- Location: Sellersville, PA
Re: Found out the problem to my Antifreeze leak.
Is this the same one I need for my 95 NA? I believe that is the cause of my leak as well.Archon wrote:You can get them at virtually any auto parts store.
13 Chevy Malibu LS 73K
The only dumb question is the one you didn't ask.
The only dumb question is the one you didn't ask.
-
willwren

- Retired Admin

- Posts: 65489
- Joined: Sun May 18, 2008 11:07 pm
- Year and Trim: .
93 SSEi
95 SLE (SC)
97 Buick LeSabre - Location: Oregon WCBF'04, '05, '06, '07, '08, '09, '10, '11 Survivor
- Contact:
Re: Found out the problem to my Antifreeze leak.
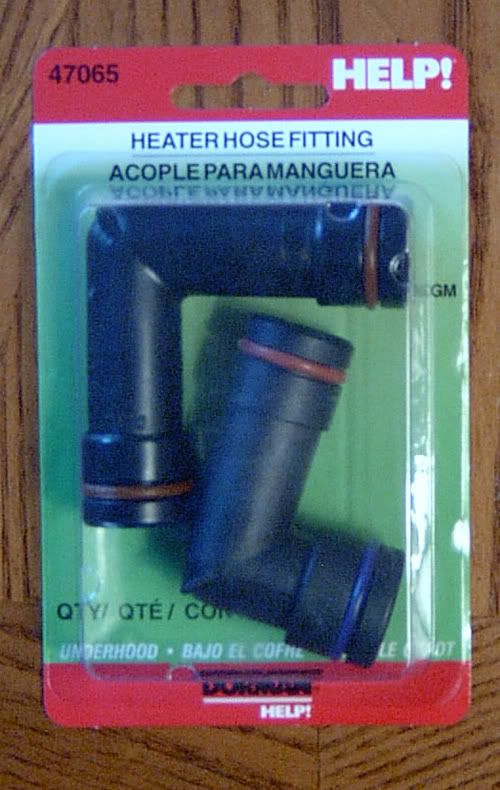
Azu, yes. The longer one with the two orange o-rings is the one you need for the end of the LIM.

Click here for mod list for both cars
93 SSEi, 95 SLE (supercharged) 97 Buick LeSabre Limited
PontiacDad at WCBF '04: Cruise control? That's like surrendering!
Comprehensive guide to troubleshooting, rebuilding, and modifying Eaton Superchargers
-
Sirhc
- SLE Member
- Posts: 35
- Joined: Fri Oct 15, 2010 2:33 pm
- Year and Trim: 2002 SSEi
- Location: Ypsilanti, Mi
Re: Found out the problem to my Antifreeze leak.
What all do I need to remove to put it that fitting in or is it possible to put it on without having to take off a lot parts?
|| 2002 Bonneville SSEi :: 116k ||
-- Current Mods :: Drop In K&N Air Filter, Rockford Fosgate 6x9's, Code Alarm CA550
-- Upcoming Mods :: 15% Tint, Replace Stock Speakers, Aftermarket HU, Intense FWI
-- Current Mods :: Drop In K&N Air Filter, Rockford Fosgate 6x9's, Code Alarm CA550
-- Upcoming Mods :: 15% Tint, Replace Stock Speakers, Aftermarket HU, Intense FWI
-
00Beast
- Retired Site Developer
- Posts: 20960
- Joined: Tue May 27, 2008 10:30 pm
- Year and Trim: '17 Silverado 1500
- Location: MN/IA
- Contact:
Re: Found out the problem to my Antifreeze leak.
You just have to remove the alternator and the bracket that it attaches to. Suck enough coolant out of the radiator so that the level is below the LIM, about halfway down should be enough. Then it all unbolts after removing both belts.
Bye Bye:
RIP sandrock
RIP sandrock
Sirius wrote:Think about it. You’re tooling down the road in your Prius, knowing full-well that this thing being green is as big a sham as federally mandated ethanol-enriched gas, Russia pulling out of Ukraine, and Obamacare.
-
LeSabre in Buffalo
- Certified Bonneville Nut
- Posts: 3177
- Joined: Fri May 23, 2008 1:15 am
- Year and Trim: 2012 Eco
- Location: Corning, NY
Re: Found out the problem to my Antifreeze leak.
The tensioner needs to come off, at least on my 99 it did.
Be warned, there may be enough corrosion in the metal parts that they may not seal well at all. I'm running into that with my Buick where the tensioner is pitted around the O-ring, and causing coolant to leak out when the engine cools down. I'll try some RTV sealant on the O-rings to seal off the pitting. Otherwise the tensioner assembly will need replacing.
Be warned, there may be enough corrosion in the metal parts that they may not seal well at all. I'm running into that with my Buick where the tensioner is pitted around the O-ring, and causing coolant to leak out when the engine cools down. I'll try some RTV sealant on the O-rings to seal off the pitting. Otherwise the tensioner assembly will need replacing.
2012 Chevrolet Cruze Eco - Current car
1999 Buick LeSabre Custom - Former car
Learn from the mistakes of others, that way when you mess up you can do so in new and interesting ways.
1999 Buick LeSabre Custom - Former car
Learn from the mistakes of others, that way when you mess up you can do so in new and interesting ways.
-
olblueeyesbonne

- Retired Moderator

- Posts: 6146
- Joined: Wed May 21, 2008 9:44 pm
- Year and Trim: 99 SSEi
01 SLE
02 GTP40th
02 SSEi
06 GP GT - Location: Sauk Centre, MN
- Contact:
Re: Found out the problem to my Antifreeze leak.
Here's a quick write-up on doing the coolant elbows:
Supplies needed:
Coolant elbows ($3.69 @ OReilly, $4 @ Autozone, $4.09 @ Auto Value -should be no more than $5 at other parts stores)
Antifreeze (1 gallon -you won't need it all)
Water (1/2-1 gallon)
Di-electric grease or some other lubricant
Brake Cleaner (1 can should be enough)
Tools:
8mm socket/wratchet
10mm socket
13mm socket
15mm socket
3/8" drive wratchet
1/4" drive wratchet (or 3/8" ->1/4" drive adapter)
Pliers or channel locks
Long screw driver or something long, thin and strong enough to pry with
Large Drain pan
Jack & jackstand or ramp (these aren't needed but can aid in limiting coolant displacement)
The work:
1. Drive right front wheel onto ramp or jack right front of car up and put jackstand under the passenger side of the cradle or control arm. With the right front of the car hoisted up it will limit the amount of coolant that will bleed out of the engine with the coolant elbows off.
2. Shake car if on jack/jackstand to ensure it is stable and will not fall off jackstand.
3. Place drain/catch pan underneath car between the engine and the passanger wheel, or as directly below the harmonic balancer as you can.
4. With the hood open disconnect the negative battery cable from the battery.
5. Using the 15mm socket and wratchet remove the Accessory belt by wratcheting the tensioner and pulling belt aside (make note of belt routing prior to removing the belt)
6. Locate the altenator bracket bolts -there are three:
1. The bottom bolt that secures the alternator to bracket also secures the bracket to the engine -remove that bolt (13mm or 15mm -varies from car to car)
2. The 2nd bolt is directly below the first one.
3. The 3rd bracket bolt is at the back edge of the bracket, hidden so you may need a mirror or just feel for it (13mm or 15mm)
This is a 1999+ W-body alternator bracket, but is essentially the same as any 3800 bracket, except 1995-1999 H/C and 1997-1998 W-body brackets have the elbow into the timing cover is actually part of the bracket so you will need the blue O-ring from the fat end of smaller coolant elbow.

7. Use the pliers or Channel Locks to remove the heater hoses from the top of the alternator bracket.
8. With the alternator bracket unbolted use the screw driver or whatever you have to get behind the upper coolant elbow that goes into the lower intake manifold. Pry the elbow out from the LIM -the elbow may not come out in one piece and will take a little convincing to come out far enough to twist the bracket upwards, pivoting it on the lower elbow which is still in place.
9. With the upper elbow out rotate the alternator bracket (with alternator still attached) back and forth while pulling away from the engine until the lower elbow pops out.
10. With the alternator & bracket unbolted from the engine use a 13mm socket/wratchet to disconnect the power cable from the battery.
11. Disconnect the wiring harness from the alternator (use screwdriver if needed)
12. With alternator bracket/alternator removed from the engine pull the old coolant elbows out of it.
13. Compare the use elbows to new ones to determine if there are chunks left of the old elbows still in the timing cover, lower intake manifold, or in either port on the alternator bracket. Use a screw driver or hooked tool to remove the pieces still in the ports. This can be a little tough as some may be corroded into the port
14. Double check ports -BE SURE ALL 4 PORTS ARE CLEAN OF OLD PARTICLES & CORROSION!!
15. Remove new coolant elbows from package and put Di-electric grease/oil or whatever lubricant you have available to apply to all the o-rings and be liberal with the application (you don't want to tear an o-ring and have to do it again right away). It will be easiest/cleanest to apply to the o-rings going into the bracket ports.
16. Insert coolant elbows into alternator bracket.
17. Now lube the two exposed o-rings on the coolant elbows.
18. Reattach the wiring harness to the alternator.
19. Reattach the power cable from battery with 13mm socket/wratchet.
20. Align lower coolant elbow with the port into the timing cover and insert it slightly.
21. With lower elbow partially in place align upper elbow with port into the lower intake manifold and insert slightly.
22. Push whole alternator/bracket into engine so both elbows slide all the way into place.
23. Inspect to make sure both elbows are in all the way.
24. Reinstall the three 13mm or 15mm bolts that secure the alternator bracket to engine.
25. Lube heater hose connections and reattach heater hoses using pliers/channel locks for the heater clamps.
26. Reinstall the belt using 15mm socket on the tensioner.
27. Open radiator cap and fill with 50% coolant/50% water (up to 65% coolant/35% water in extreme cold climates where temps can reach -25*F or colder)
28. Spray Brake Clean around the coolant elbows to displace old coolant that may be in the immediate vicinity of the elbows.
29. Top coolant off again as it will slowly drain from radiator into engine.
30. Inspect engine bay to make sure there are no tools under the hood.
31. Start engine and inspect around the coolant elbows for signs of leaks.
32. If there is a squeak from the accessory belt spray brake clean on front and back of it until it stops squeaking.
33. After initial start up let the engine idle for 2-3 minutes and top the radiator off.
34. Check level of coolant in overflow tank and top it off if needed paying attention to the markings on the side of the tank.
35. Take car for a 5-20 minute drive (keep an eye on temp gauge in case it starts running warm) and recheck coolant elbows for leakage, and radiator and overflow tank levels.
36. Pop your 3rd beer and toast yourself on a job well done.
Supplies needed:
Coolant elbows ($3.69 @ OReilly, $4 @ Autozone, $4.09 @ Auto Value -should be no more than $5 at other parts stores)
Antifreeze (1 gallon -you won't need it all)
Water (1/2-1 gallon)
Di-electric grease or some other lubricant
Brake Cleaner (1 can should be enough)
Tools:
8mm socket/wratchet
10mm socket
13mm socket
15mm socket
3/8" drive wratchet
1/4" drive wratchet (or 3/8" ->1/4" drive adapter)
Pliers or channel locks
Long screw driver or something long, thin and strong enough to pry with
Large Drain pan
Jack & jackstand or ramp (these aren't needed but can aid in limiting coolant displacement)
The work:
1. Drive right front wheel onto ramp or jack right front of car up and put jackstand under the passenger side of the cradle or control arm. With the right front of the car hoisted up it will limit the amount of coolant that will bleed out of the engine with the coolant elbows off.
2. Shake car if on jack/jackstand to ensure it is stable and will not fall off jackstand.
3. Place drain/catch pan underneath car between the engine and the passanger wheel, or as directly below the harmonic balancer as you can.
4. With the hood open disconnect the negative battery cable from the battery.
5. Using the 15mm socket and wratchet remove the Accessory belt by wratcheting the tensioner and pulling belt aside (make note of belt routing prior to removing the belt)
6. Locate the altenator bracket bolts -there are three:
1. The bottom bolt that secures the alternator to bracket also secures the bracket to the engine -remove that bolt (13mm or 15mm -varies from car to car)
2. The 2nd bolt is directly below the first one.
3. The 3rd bracket bolt is at the back edge of the bracket, hidden so you may need a mirror or just feel for it (13mm or 15mm)
This is a 1999+ W-body alternator bracket, but is essentially the same as any 3800 bracket, except 1995-1999 H/C and 1997-1998 W-body brackets have the elbow into the timing cover is actually part of the bracket so you will need the blue O-ring from the fat end of smaller coolant elbow.
7. Use the pliers or Channel Locks to remove the heater hoses from the top of the alternator bracket.
8. With the alternator bracket unbolted use the screw driver or whatever you have to get behind the upper coolant elbow that goes into the lower intake manifold. Pry the elbow out from the LIM -the elbow may not come out in one piece and will take a little convincing to come out far enough to twist the bracket upwards, pivoting it on the lower elbow which is still in place.
9. With the upper elbow out rotate the alternator bracket (with alternator still attached) back and forth while pulling away from the engine until the lower elbow pops out.
10. With the alternator & bracket unbolted from the engine use a 13mm socket/wratchet to disconnect the power cable from the battery.
11. Disconnect the wiring harness from the alternator (use screwdriver if needed)
12. With alternator bracket/alternator removed from the engine pull the old coolant elbows out of it.
13. Compare the use elbows to new ones to determine if there are chunks left of the old elbows still in the timing cover, lower intake manifold, or in either port on the alternator bracket. Use a screw driver or hooked tool to remove the pieces still in the ports. This can be a little tough as some may be corroded into the port
14. Double check ports -BE SURE ALL 4 PORTS ARE CLEAN OF OLD PARTICLES & CORROSION!!
15. Remove new coolant elbows from package and put Di-electric grease/oil or whatever lubricant you have available to apply to all the o-rings and be liberal with the application (you don't want to tear an o-ring and have to do it again right away). It will be easiest/cleanest to apply to the o-rings going into the bracket ports.
16. Insert coolant elbows into alternator bracket.
17. Now lube the two exposed o-rings on the coolant elbows.
18. Reattach the wiring harness to the alternator.
19. Reattach the power cable from battery with 13mm socket/wratchet.
20. Align lower coolant elbow with the port into the timing cover and insert it slightly.
21. With lower elbow partially in place align upper elbow with port into the lower intake manifold and insert slightly.
22. Push whole alternator/bracket into engine so both elbows slide all the way into place.
23. Inspect to make sure both elbows are in all the way.
24. Reinstall the three 13mm or 15mm bolts that secure the alternator bracket to engine.
25. Lube heater hose connections and reattach heater hoses using pliers/channel locks for the heater clamps.
26. Reinstall the belt using 15mm socket on the tensioner.
27. Open radiator cap and fill with 50% coolant/50% water (up to 65% coolant/35% water in extreme cold climates where temps can reach -25*F or colder)
28. Spray Brake Clean around the coolant elbows to displace old coolant that may be in the immediate vicinity of the elbows.
29. Top coolant off again as it will slowly drain from radiator into engine.
30. Inspect engine bay to make sure there are no tools under the hood.
31. Start engine and inspect around the coolant elbows for signs of leaks.
32. If there is a squeak from the accessory belt spray brake clean on front and back of it until it stops squeaking.
33. After initial start up let the engine idle for 2-3 minutes and top the radiator off.
34. Check level of coolant in overflow tank and top it off if needed paying attention to the markings on the side of the tank.
35. Take car for a 5-20 minute drive (keep an eye on temp gauge in case it starts running warm) and recheck coolant elbows for leakage, and radiator and overflow tank levels.
36. Pop your 3rd beer and toast yourself on a job well done.
Last edited by olblueeyesbonne on Mon Jan 24, 2011 2:09 am, edited 1 time in total.
DHP Powrtuner & Tech 2
1998 GTP Coupe
1999 SSEi 70k miles
2000 Silverado 2500 Ext Cab 4x4/6.0L/4L80E
2000 Trans Am WS6 LQ3 (LQ4 w/LS3 top end) 4L60E
2001 SLE
2002 Monte Carlo SS Top-swapped FSIC Gen V TOG's, Mezeire.....
2002 GTP 40th Anniv Ed Coupe
2004 GTP Comp G 'Bottom-swapped'
1998 GTP Coupe
1999 SSEi 70k miles
2000 Silverado 2500 Ext Cab 4x4/6.0L/4L80E
2000 Trans Am WS6 LQ3 (LQ4 w/LS3 top end) 4L60E
2001 SLE
2002 Monte Carlo SS Top-swapped FSIC Gen V TOG's, Mezeire.....
2002 GTP 40th Anniv Ed Coupe
2004 GTP Comp G 'Bottom-swapped'
-
Sirhc
- SLE Member
- Posts: 35
- Joined: Fri Oct 15, 2010 2:33 pm
- Year and Trim: 2002 SSEi
- Location: Ypsilanti, Mi
Re: Found out the problem to my Antifreeze leak.
Fixed that heater hose and everything was good. Driving to school today, after I just filled the radiator 2 days ago of antifreeze, I have no heat again. I popped the hood and noticed all around where you pour the oil into, is wet. Checked where the 2 leaks before were and they are dry. So, all of the antifreeze is going somewhere, I twisted and pulled out the oil spout and saw that the oil around it was yellow, almost the consistency of snot. Any ideas? Cracked head? something?
|| 2002 Bonneville SSEi :: 116k ||
-- Current Mods :: Drop In K&N Air Filter, Rockford Fosgate 6x9's, Code Alarm CA550
-- Upcoming Mods :: 15% Tint, Replace Stock Speakers, Aftermarket HU, Intense FWI
-- Current Mods :: Drop In K&N Air Filter, Rockford Fosgate 6x9's, Code Alarm CA550
-- Upcoming Mods :: 15% Tint, Replace Stock Speakers, Aftermarket HU, Intense FWI
-
LeSabre in Buffalo
- Certified Bonneville Nut
- Posts: 3177
- Joined: Fri May 23, 2008 1:15 am
- Year and Trim: 2012 Eco
- Location: Corning, NY
Re: Found out the problem to my Antifreeze leak. Now LIM gas
That's your lower intake manifold (LIM) gaskets that just failed on you. Stop driving the car NOW, change the oil NOW, and get the parts you need to repair everything. It should be only aluminum LIM gaskets, SC gasket, and a few other odds/ends, like a few cheap (like Wal-Mart cheap) oil changes to flush out the antifreeze that first oil change won't get out. Otherwise you'll be killing the engine.
Last edited by LeSabre in Buffalo on Wed Feb 23, 2011 4:30 pm, edited 1 time in total.
2012 Chevrolet Cruze Eco - Current car
1999 Buick LeSabre Custom - Former car
Learn from the mistakes of others, that way when you mess up you can do so in new and interesting ways.
1999 Buick LeSabre Custom - Former car
Learn from the mistakes of others, that way when you mess up you can do so in new and interesting ways.
-
00Beast
- Retired Site Developer
- Posts: 20960
- Joined: Tue May 27, 2008 10:30 pm
- Year and Trim: '17 Silverado 1500
- Location: MN/IA
- Contact:
Re: Found out the problem to my Antifreeze leak.
Yup, your LIM gaskets took a crap. Fix them now or prepare to buy a new engine.
Bye Bye:
RIP sandrock
RIP sandrock
Sirius wrote:Think about it. You’re tooling down the road in your Prius, knowing full-well that this thing being green is as big a sham as federally mandated ethanol-enriched gas, Russia pulling out of Ukraine, and Obamacare.
-
1oldman
- Certified Bonneville Nut
- Posts: 3975
- Joined: Tue May 04, 2010 11:21 pm
- Year and Trim: 2017 Hyundai Santa Fe Sport
- Location: Lone Star State
Re: Found out the problem to my Antifreeze leak.
Just curious, is there anything that can be put on the plastic elbows to increase their life? - BC
In Memory of Brad - 1/21/1977 .. 10/23/2013 ...... Aaron - 1977 .. 2017 .....
2017 Hyundai Santa Fe Sport ..... 1992 Bonneville SSE 1SB 170 HP L27 4T60E retired/sold to MattStrike ..... 2005 Bonneville SE 1SC 205 HP L36 4T65E - retired/salvage yard ..... PBCF user 2321
2017 Hyundai Santa Fe Sport ..... 1992 Bonneville SSE 1SB 170 HP L27 4T60E retired/sold to MattStrike ..... 2005 Bonneville SE 1SC 205 HP L36 4T65E - retired/salvage yard ..... PBCF user 2321
-
00Beast
- Retired Site Developer
- Posts: 20960
- Joined: Tue May 27, 2008 10:30 pm
- Year and Trim: '17 Silverado 1500
- Location: MN/IA
- Contact:
Re: Found out the problem to my Antifreeze leak.
You can put RTV on the o-rings and that will help keep them from seeping. That's about it.
Bye Bye:
RIP sandrock
RIP sandrock
Sirius wrote:Think about it. You’re tooling down the road in your Prius, knowing full-well that this thing being green is as big a sham as federally mandated ethanol-enriched gas, Russia pulling out of Ukraine, and Obamacare.
-
Sirhc
- SLE Member
- Posts: 35
- Joined: Fri Oct 15, 2010 2:33 pm
- Year and Trim: 2002 SSEi
- Location: Ypsilanti, Mi
Re: Found out the problem to my Antifreeze leak.
Great, just what I needed. So what all parts do I need to get so I can just order them up from Rock Auto and fix my baby.
|| 2002 Bonneville SSEi :: 116k ||
-- Current Mods :: Drop In K&N Air Filter, Rockford Fosgate 6x9's, Code Alarm CA550
-- Upcoming Mods :: 15% Tint, Replace Stock Speakers, Aftermarket HU, Intense FWI
-- Current Mods :: Drop In K&N Air Filter, Rockford Fosgate 6x9's, Code Alarm CA550
-- Upcoming Mods :: 15% Tint, Replace Stock Speakers, Aftermarket HU, Intense FWI
-
1oldman
- Certified Bonneville Nut
- Posts: 3975
- Joined: Tue May 04, 2010 11:21 pm
- Year and Trim: 2017 Hyundai Santa Fe Sport
- Location: Lone Star State
Re: Found out the problem to my Antifreeze leak.
Sirhc wrote:Great, just what I needed. So what all parts do I need to get so I can just order them up from Rock Auto and fix my baby.
Okay, I'm not sure how close this will come. I do know from personal experience this post is spot on in my case. The only suggestion I have is after you are finished and before you start the engine is, drop the oil pan, clean everything up before re-installing it and starting the engine. Don't ignore the oil pickup screen. Be sure and change the oil filter and fill the crankcase with the correct amount of oil before starting the engine. Bill did a fantastic job on this tech post. Had I followed Bill's tech post (& my son's advise) instead of the GM FSM's, I would have saved myself a lot of grief.
Thread to follow: viewtopic.php?f=53&t=3591
Good luck, and there is plenty of good, free advise here if you are in trouble - BC
Last edited by 1oldman on Fri Feb 25, 2011 12:26 pm, edited 1 time in total.
In Memory of Brad - 1/21/1977 .. 10/23/2013 ...... Aaron - 1977 .. 2017 .....
2017 Hyundai Santa Fe Sport ..... 1992 Bonneville SSE 1SB 170 HP L27 4T60E retired/sold to MattStrike ..... 2005 Bonneville SE 1SC 205 HP L36 4T65E - retired/salvage yard ..... PBCF user 2321
2017 Hyundai Santa Fe Sport ..... 1992 Bonneville SSE 1SB 170 HP L27 4T60E retired/sold to MattStrike ..... 2005 Bonneville SE 1SC 205 HP L36 4T65E - retired/salvage yard ..... PBCF user 2321
-
mefloump

- SLE Member
- Posts: 42
- Joined: Wed Apr 03, 2013 4:54 pm
- Year and Trim: 2001 SLE
- Location: Baltic, SD
Re: Found out the problem to my Antifreeze leak.
I thought I read this some where on here but there are improved elbows made of aluminum Dorman #47065HP $11.99 at Autozone. FYI
http://www.dormanproducts.com/p-52351-47065hp.aspx
http://www.dormanproducts.com/p-52351-47065hp.aspx

'01 Bonneville SLE
'93 Grand Prix SE Coupe 3.4L Twin dual overhead cam
-
00Beast
- Retired Site Developer
- Posts: 20960
- Joined: Tue May 27, 2008 10:30 pm
- Year and Trim: '17 Silverado 1500
- Location: MN/IA
- Contact:
Re: Found out the problem to my Antifreeze leak.
Yes, there have been tons of threads about the new elbows. Please don't dig up old posts...
Not sure how you found this thread without tripping over all of these: http://www.pontiacbonnevilleclub.com/fo ... mit=Search
Not sure how you found this thread without tripping over all of these: http://www.pontiacbonnevilleclub.com/fo ... mit=Search
Bye Bye:
RIP sandrock
RIP sandrock
Sirius wrote:Think about it. You’re tooling down the road in your Prius, knowing full-well that this thing being green is as big a sham as federally mandated ethanol-enriched gas, Russia pulling out of Ukraine, and Obamacare.
-
mefloump
- SLE Member
- Posts: 42
- Joined: Wed Apr 03, 2013 4:54 pm
- Year and Trim: 2001 SLE
- Location: Baltic, SD
Re: Found out the problem to my Antifreeze leak.
You know 00Beast I found this in the stick at the top where all pertinent information about common problems are kept. I did not intend to "dig up old threads" but felt it necessary to post that a better option was available. Why chastise me for looking in the common problems and following the link with more information? If this is where everyone else will look, is it not pertinent information?
Leaking/Cracked Coolant Elbows
Problem: You are noticing a loss of coolant. You determine its coming from the passenger side of the engine where the plastic coolant elbow goes from the LIM to the tensioner bracket. The elbow is either cracked, or is leaking past the o-rings.
Solution: The elbows need to be replaced. You need to remove the alternator, and the tensioner assembly to get to them. Apply some silicone RTV to the ends of the elbows before installing them.
Part number: Dorman HELP! 47065: http://www.dormanproducts.com/p-19917-47065.aspx
More info: viewtopic.php?f=18&t=23252
Where to put the RTV: viewtopic.php?f=19&t=25473&p=259394
Estimated Cost: $5 for the elbows, plus $5 for some silicone RTV
'01 Bonneville SLE
'93 Grand Prix SE Coupe 3.4L Twin dual overhead cam