Alright so this is copy pasted from the G20 forums that I just posted, so granted some things are simplified that I know would be obvious to members here hahaha. One note, these projectors gave me one hell of a time getting the rotation right. Since they use an H4 adapter, that automatically sets the rotation. When I test fitted things, the rotation was spot on, but once I got the lock rings tightened and the bulbs properly shimmed, I guess that slightly changed things, so I do still need to pull the right light apart to get things perfect. It's close, but still bugging the hell out of me, I just had to get the car driveable as I couldn't have it down any longer. I've "hidden" this imperfection by keeping the projector aligntment slightly off from each other, but when they're the same height it's pretty obvious that the rotation is kinda off. I need to trim the H4 adapter plate more and get a new lock ring before I can do that though.
anyway, here's the copy and paste gigantor thread.
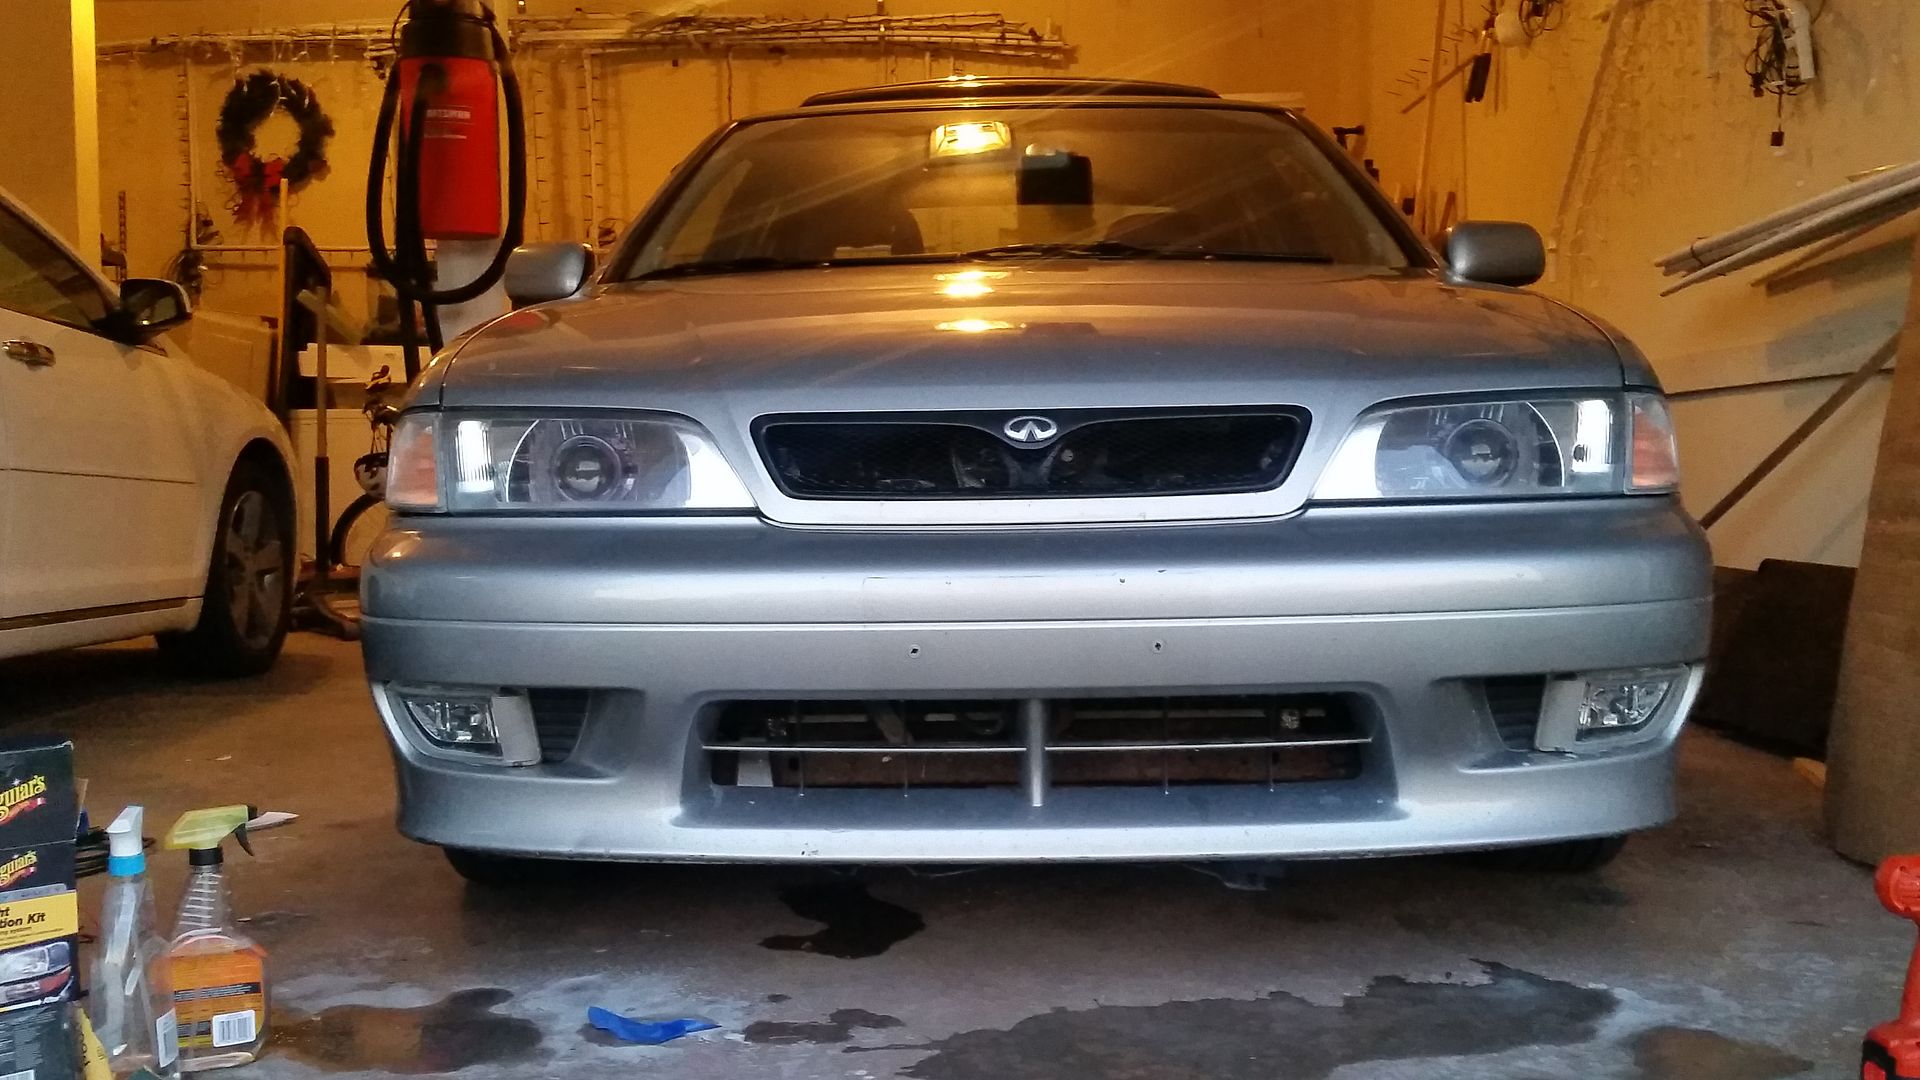
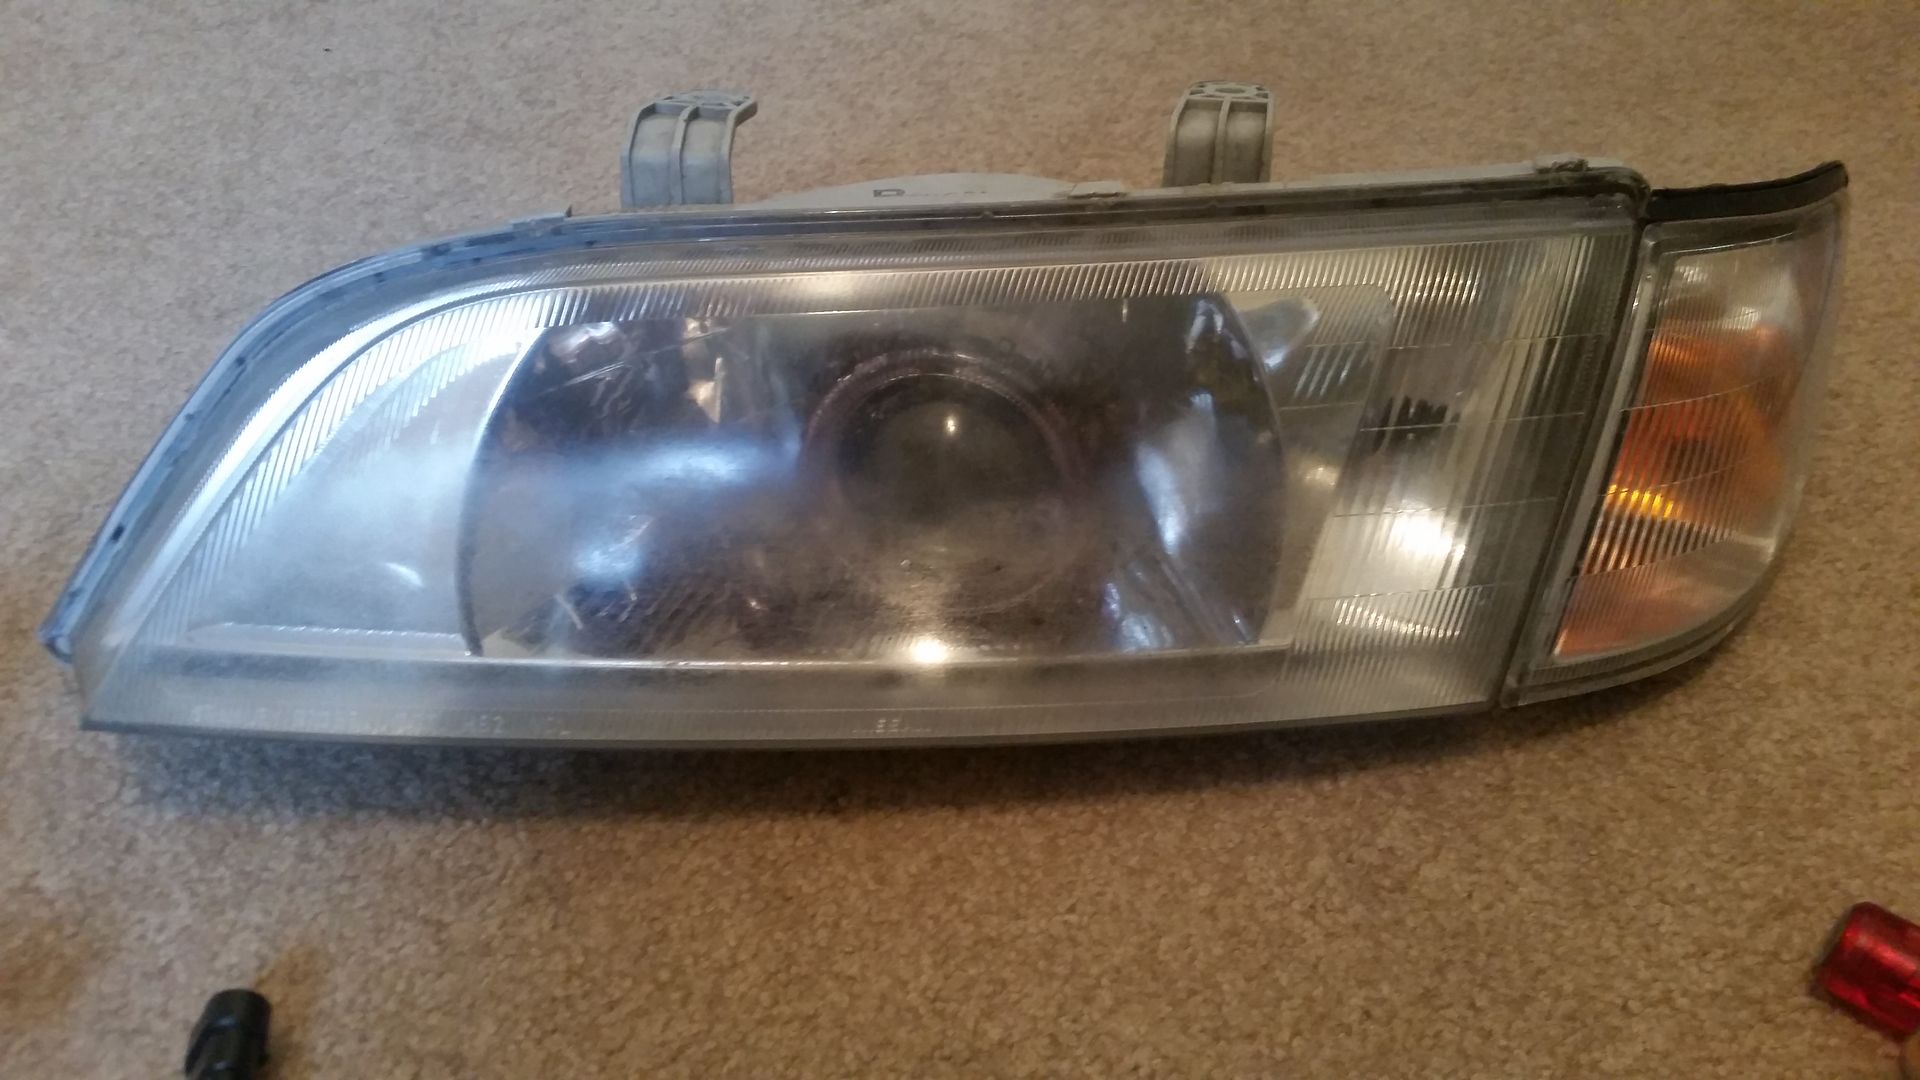
Alright, so this is going to be pretty pic heavy, but I figured I would contribute my first how-to on my new P11. This is on a 99 G20t, but will work on all P11's that use a 9003/h4 bulb. Mods feel free to move this if need be
 First, I am NOT responsible if you damage your vehicle in any way doing this modification. All installs of this are done at your own risk.
This project took me 2 days working from 4pm to about 8pm. If you've never done a retrofit before, I'd set aside 2 full days to give yourself time to be careful and pay attention to detail. Messing up this mod can be dangerous, as it can inhibit your night driving.
Yes, there are cheaper projector kits out there, but I've used The Retrofit Source on my other cars in the past, and their products and customer service are worth the extra cost. This kit comes with the projectors, a semi plug and play relay harness, bulbs, shrouds, amp igniters, and ballasts. It's nice because you don't have to try and piece everything together yourself.
Here is the link of the kit that I purchased -
https://www.theretrofitsource.com/complete-retrofit-kits/universal-kits/bi-xenon-morimoto-mini-stage-3-kit-h1.html?preselect=50325%2C47372%2C49455%2C50560%2C47390#.V78djPkrJMwMake sure you select the Motocontrol 9003/H4 wiring harness when ordering your kit. I also went with 5500k bulbs for my install, I wouldn't recommend any higher as the 6500k territory is too blue and makes it harder to see imo, but of course order what color bulb you prefer. I find that the 5500k is a great medium between brightness, color, without being too harsh on the eyes.
You may also want to add on shroud-centric rings if you order the graphite or mini-gatling gun shrouds. These aren't necessary, but make installing the shrouds much easier.
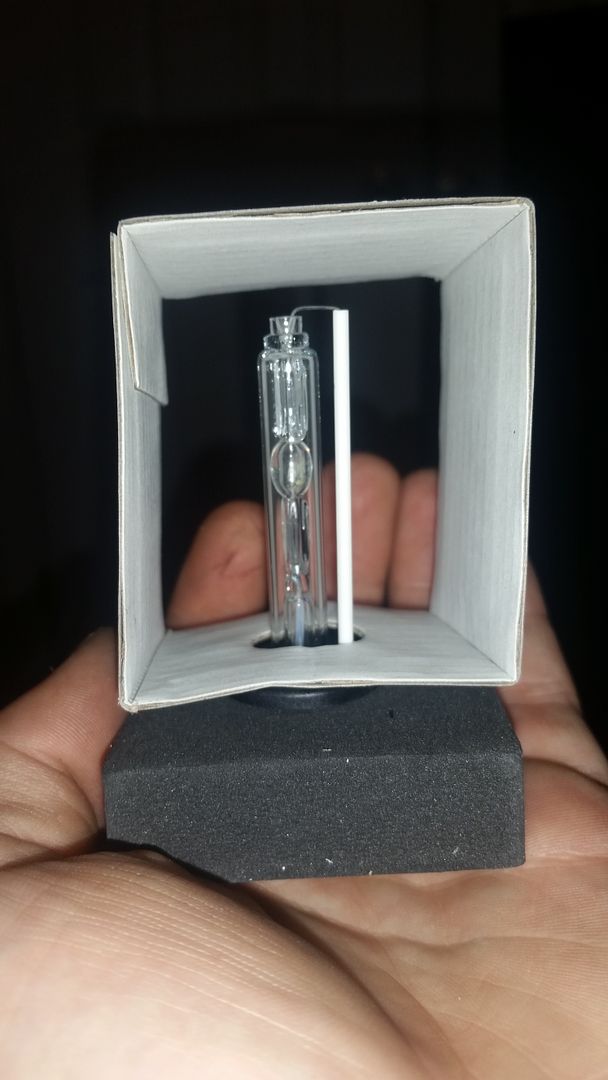
You'll also want to order a pack of Silica gel, which TRS also sells. It's about $5 for a 4 pack, which is plenty.
Alright, now on to the good stuff!
Here's my P11 when I started. I've only had the car for about 2 weeks, so I haven't had a chance to really clean it up or make it pretty, so pardon the rust, fogged lights, and scrape marks from where the old front plate was. That will all be taken care of in the next few weeks.

1. First, if you're not familiar with aiming headlights, find a nice flat area with a wall. Pull the car up as close to the wall as you can get, and use tape to mark directly in front of the headlight bulbs on each side. Then, pull the car back 25ft from the wall, and mark the "steps" in the beam pattern. This will be a starting point when we're aiming the projectors. It doesn't have to be perfect, as we can still use the adjusters later on to move the lights up/down, left or right.
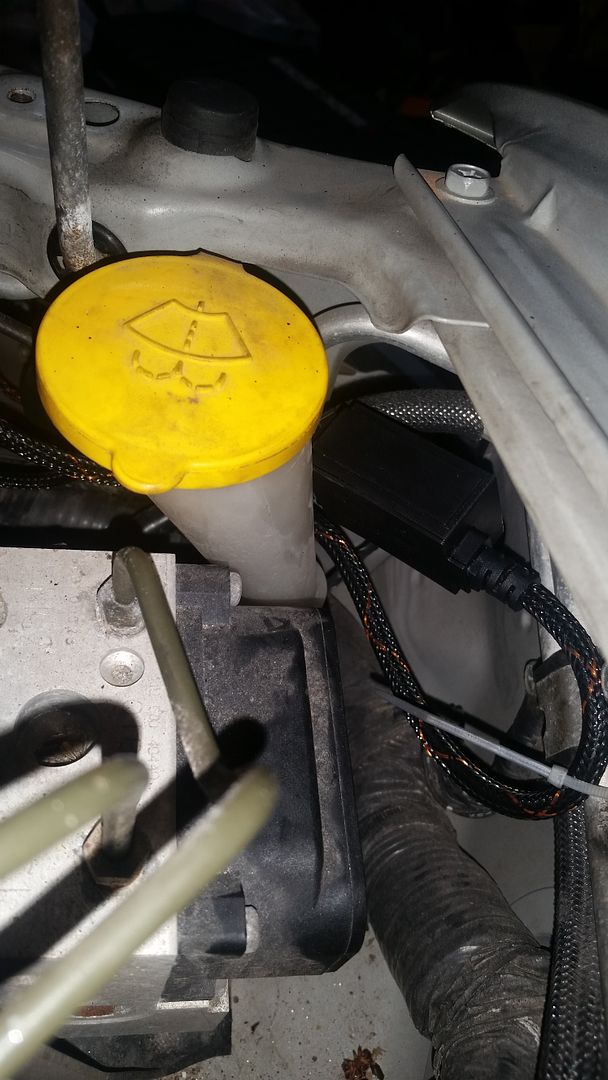
2. Once the wall is marked, turn the vehicle off, disconnect the positive and negative battery cables, unbolt the battery hold down, and remove the battery. It's not 100% necessary to take the battery out, but will give you more room for running the wiring harness.
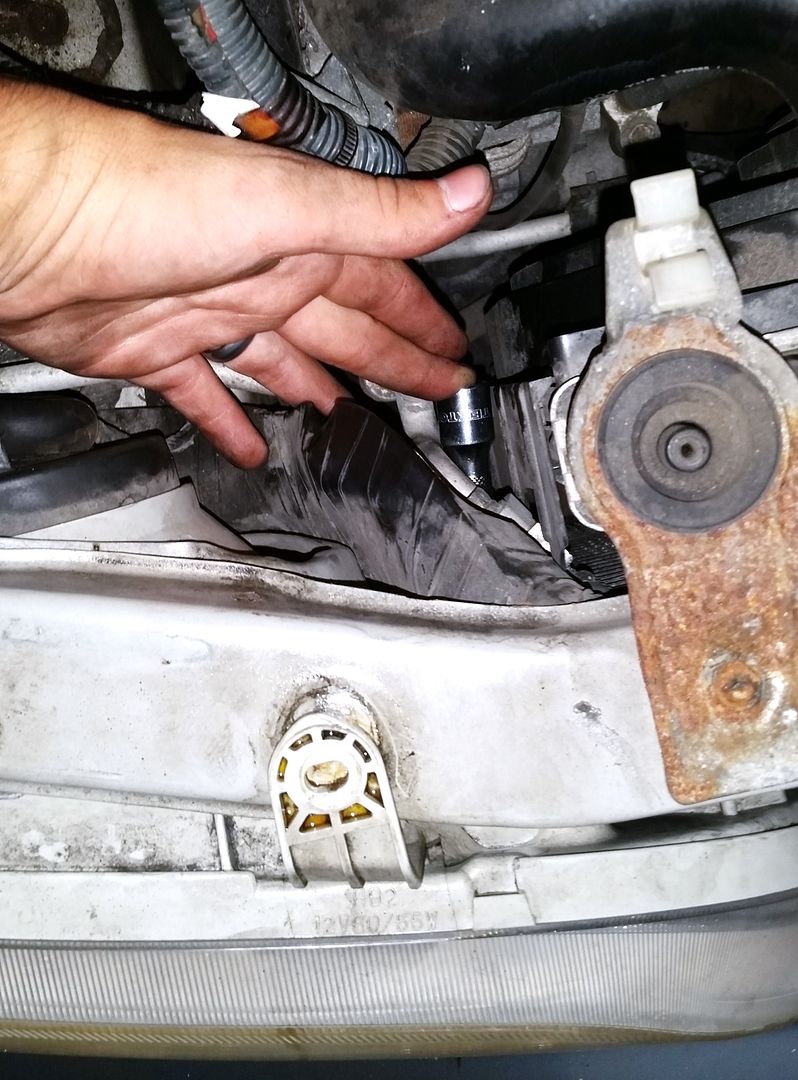
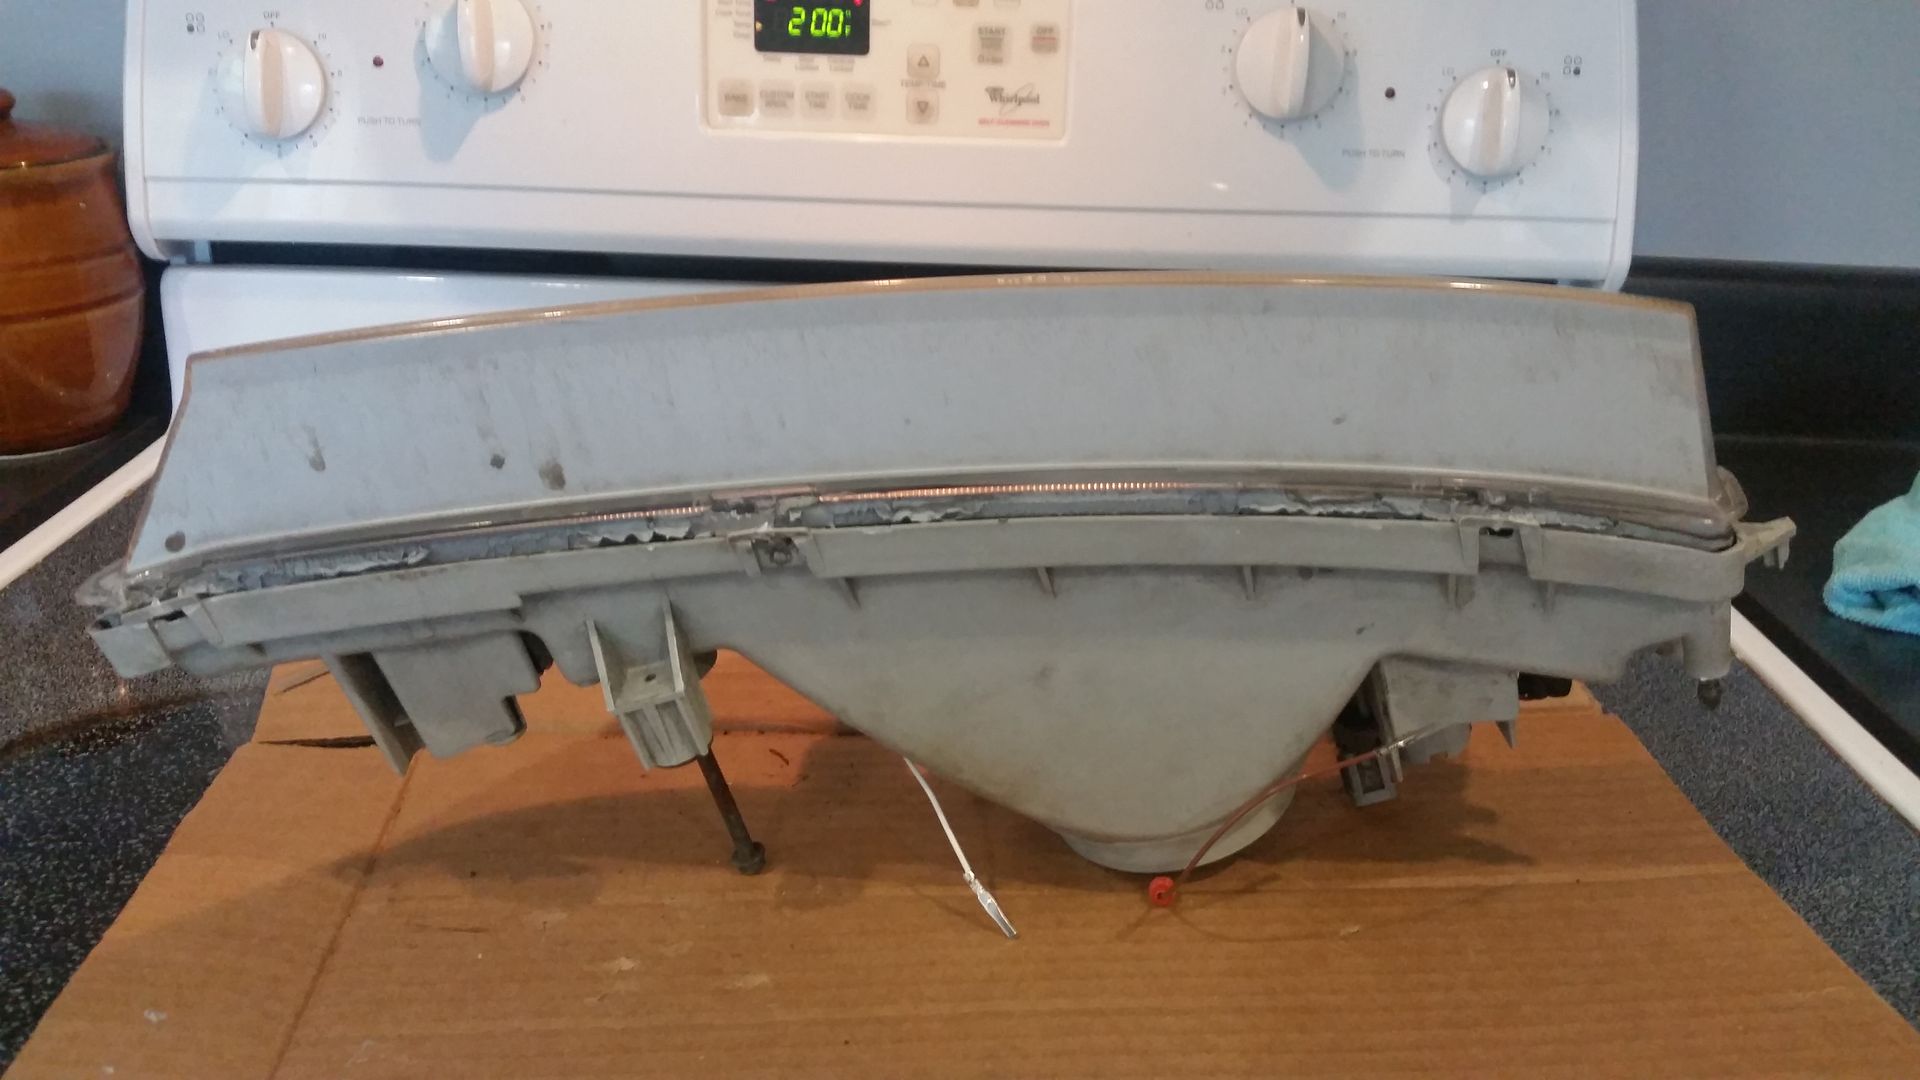
3. Now we can remove the headlight assemblies. Start by removing the two bolts on top of the headlights. Mine were rusted, so I used some PB blaster before I started to help them along. One bolt still wound up breaking due to rust, so I had to drill it out and use a larger bolt to reinstall the light.
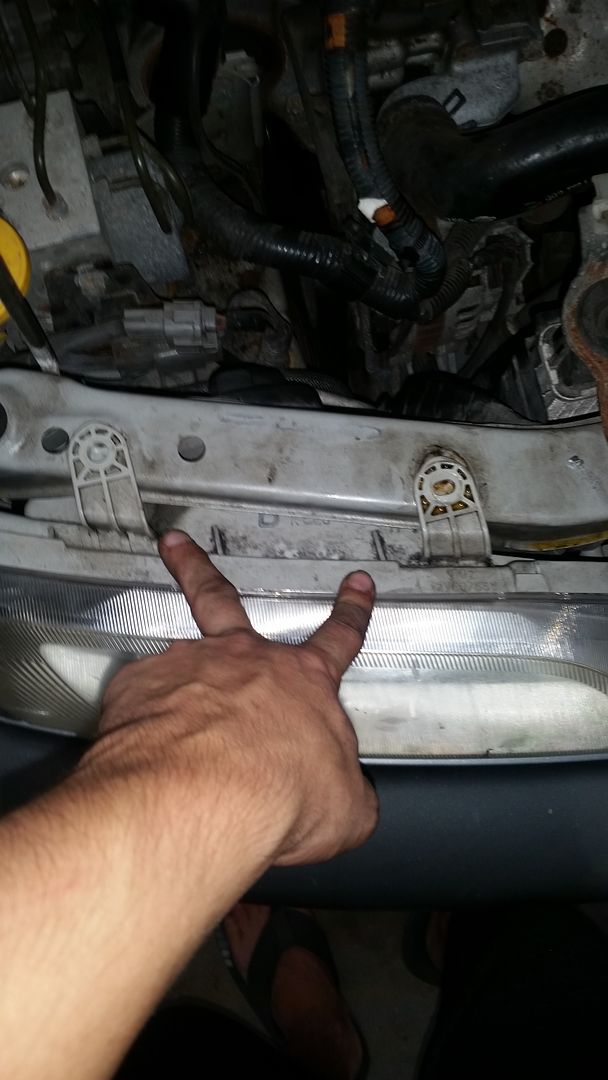
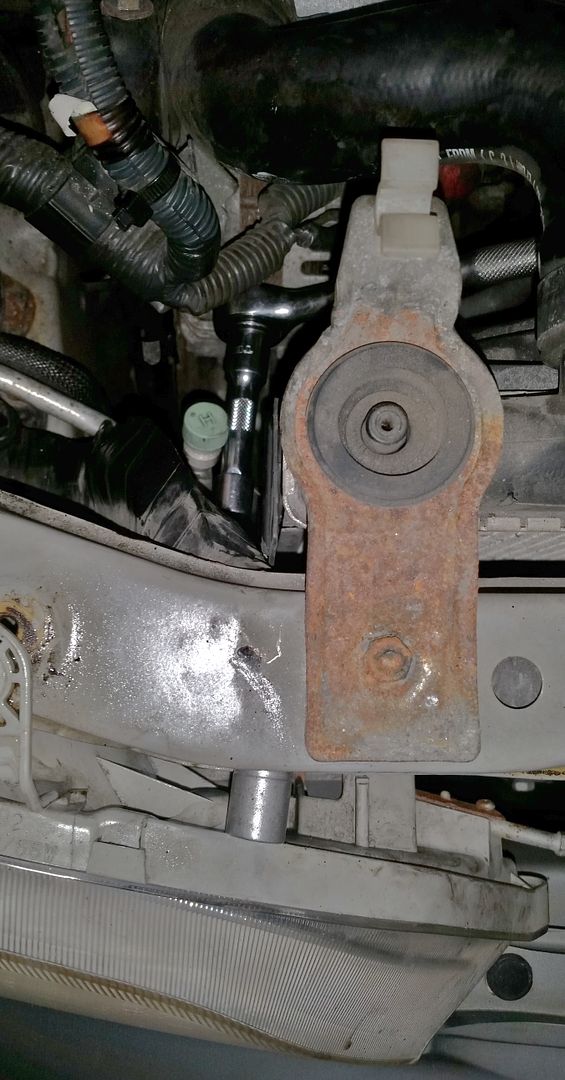
4. Now comes the most unpleasant job of this repair, the rear bolts for the headlight. Again, hit these with penetrating oil before you start, but pretty much expect these to snap off if your car has ever seen snow/salt. On the drivers side, this bolt is going to be directly underneath the top radiator mount. It is a 10mm socket, and you'll have to feel for the bolt to get your socket on there. I used a short extension on my ratchet to get to it. It snapped off after 3 or so turns with the ratchet. These are not crucial to ensure your headlight is secured. There are still 3 other points that the lights will be held in, so it's not a big deal if these break (plus you don't have to fight to get them back on).
The passenger side bolt is nearly impossible to get out. It's tucked underneath the wiring harness that runs under the upper core support, and again under the passenger side upper radiator mount. Here is a shot of my extension showing just how buried this one is. I wound up using 2 extensions to get this.
The lower AC line makes it pretty difficult to keep the socket on this bolt, and the alternator is in the way if you use too long of an extension. It will take a lot of patience, hundreds of curse words, and likely selling your soul to someone to get this bolt out. Mine wound up spinning and pulling the actual threads out of the headlamp assembly, so I had to cut the stud off once the headlight assembly was out. Since the stud was spinning but not coming out of the headlamp, I had to shove a socket in between the headlamp and core support to keep pressure outwards on the headlight while I used my other two hands to hold the socket onto the bolt and use the ratchet. The pressure outward helped pull the stud the rest of the way out of the headlight. Again, you have to get creative with these things.
Again, this aren't important to put back in, so feel free to take some anger out on the suckers when you get them off.
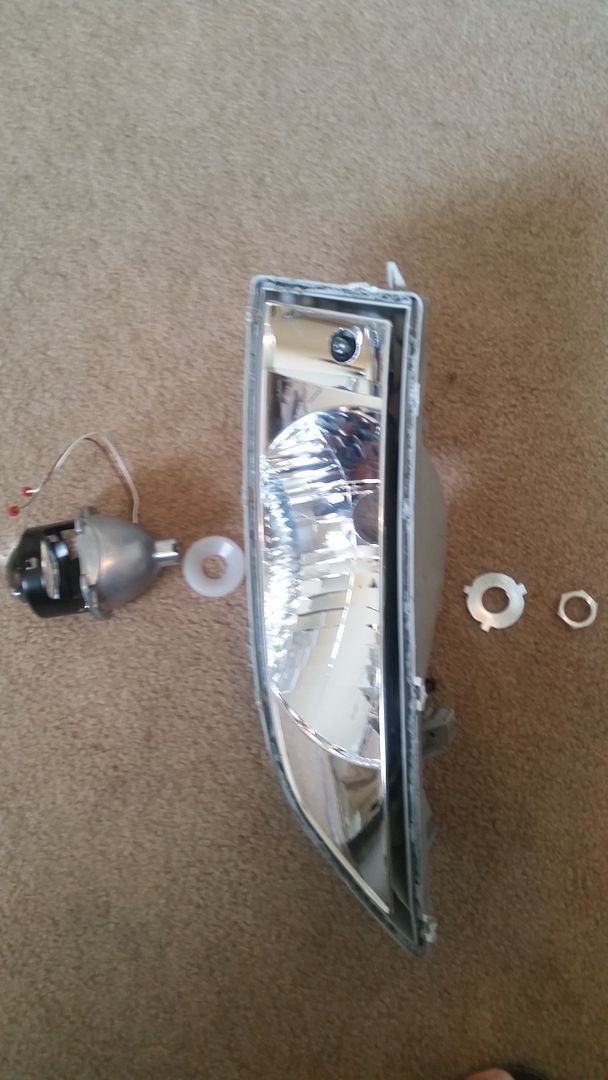
5. Once you have these bolts out, place one hand on the back of the corner marker, and your other hand right on the seam where the headlight and corner marker meet each other. There is a green clip that is holding the headlight in. Once you place your hands here, pull the headlight towards the front of the car. You'll have to use some force, but they should pop out of the clips. Once the assembly is free, remove the 3 electrical connectors for the bulbs, and remove the main H3 bulb.
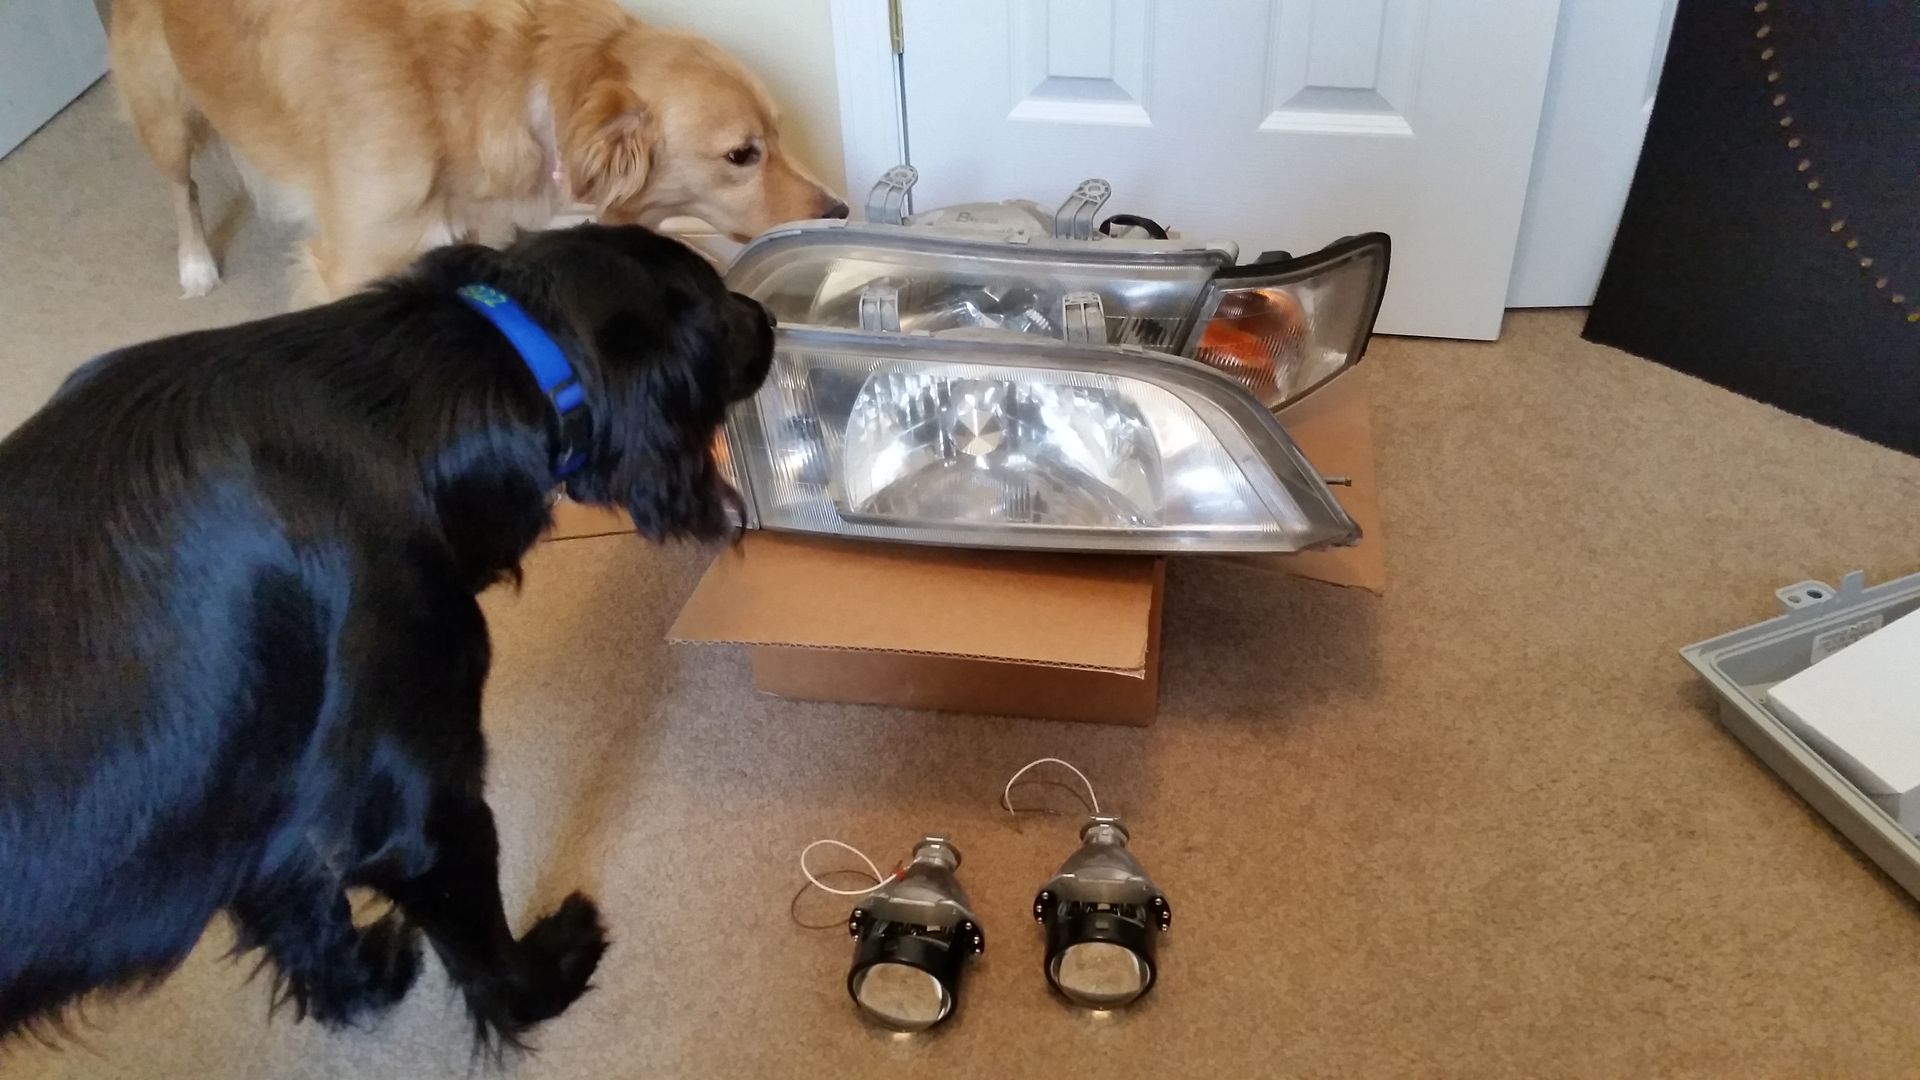
6. Once the headlights are out and disconnected, clean them off so you don't bring grease inside. I used some clorox wipes, but you can use soap/water and rags. This will help you not die quite as badly when your wife finds out you're about to cook headlights for dinner. Once the lights are cleaned up, bring them inside and let your furry friends investigate them!
7. Now it's time to get the lenses off. Before we do that, you'll want to remove the corner markers. These are held on by 2 8mm bolts. You can also use a phillips head screwdriver, but a socket is much quicker. Remove the corner markers, and pre-heat your oven to 200 degrees F. Sorry celsius folks, not sure what that converts to hahah. I baked the headlights one at a time so I could take my time with each one to get the lenses off. I put a piece of cardboard on the oven rack, with the rack as low as possible (to keep the headlight from touching the upper heating elements). Cardboard won't catch on fire at this temp, so we're fine here. Now place the headlamp on the cardboard, and bake it at 200 Deg. for about 10 minutes. After 10 minutes, WEARING THICK GLOVES remove the headlight. Take a flat-head screwdriver and pry between the lens and housing at the indents until the lens starts to separate. The Butyl glue that holds the lens in is pretty strong, so you'll have to carefully peel the lens off the housing. Be VERY CAREFUL doing this, as you don't want to crack the lens. I didn't photograph this part as it requires 2 hands at all times, but there is another write-up on the forum for removing the lenses.
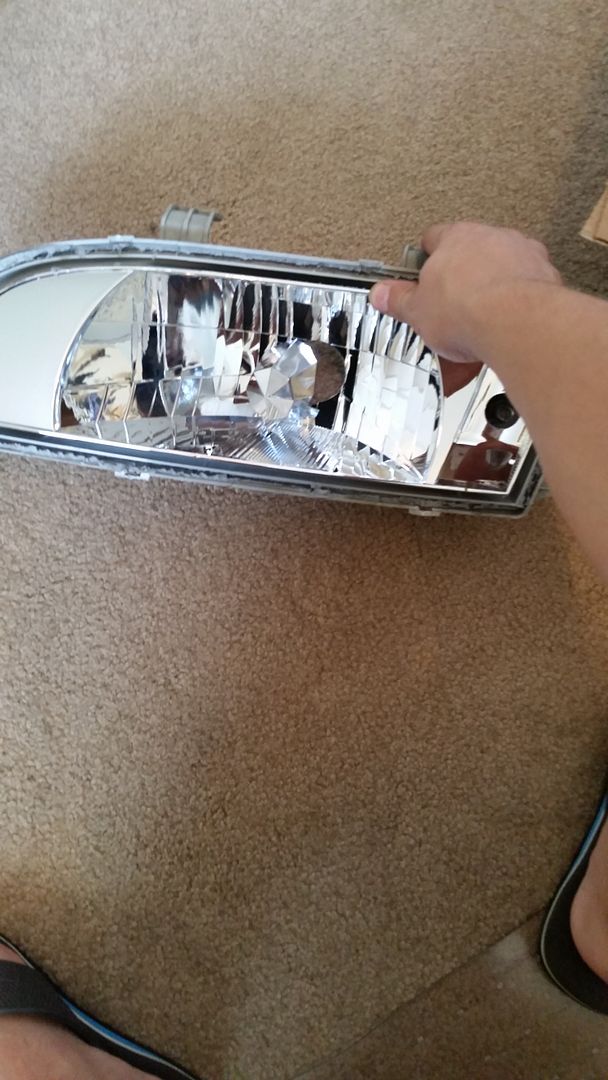
Once your lenses are off, the lights should look like this
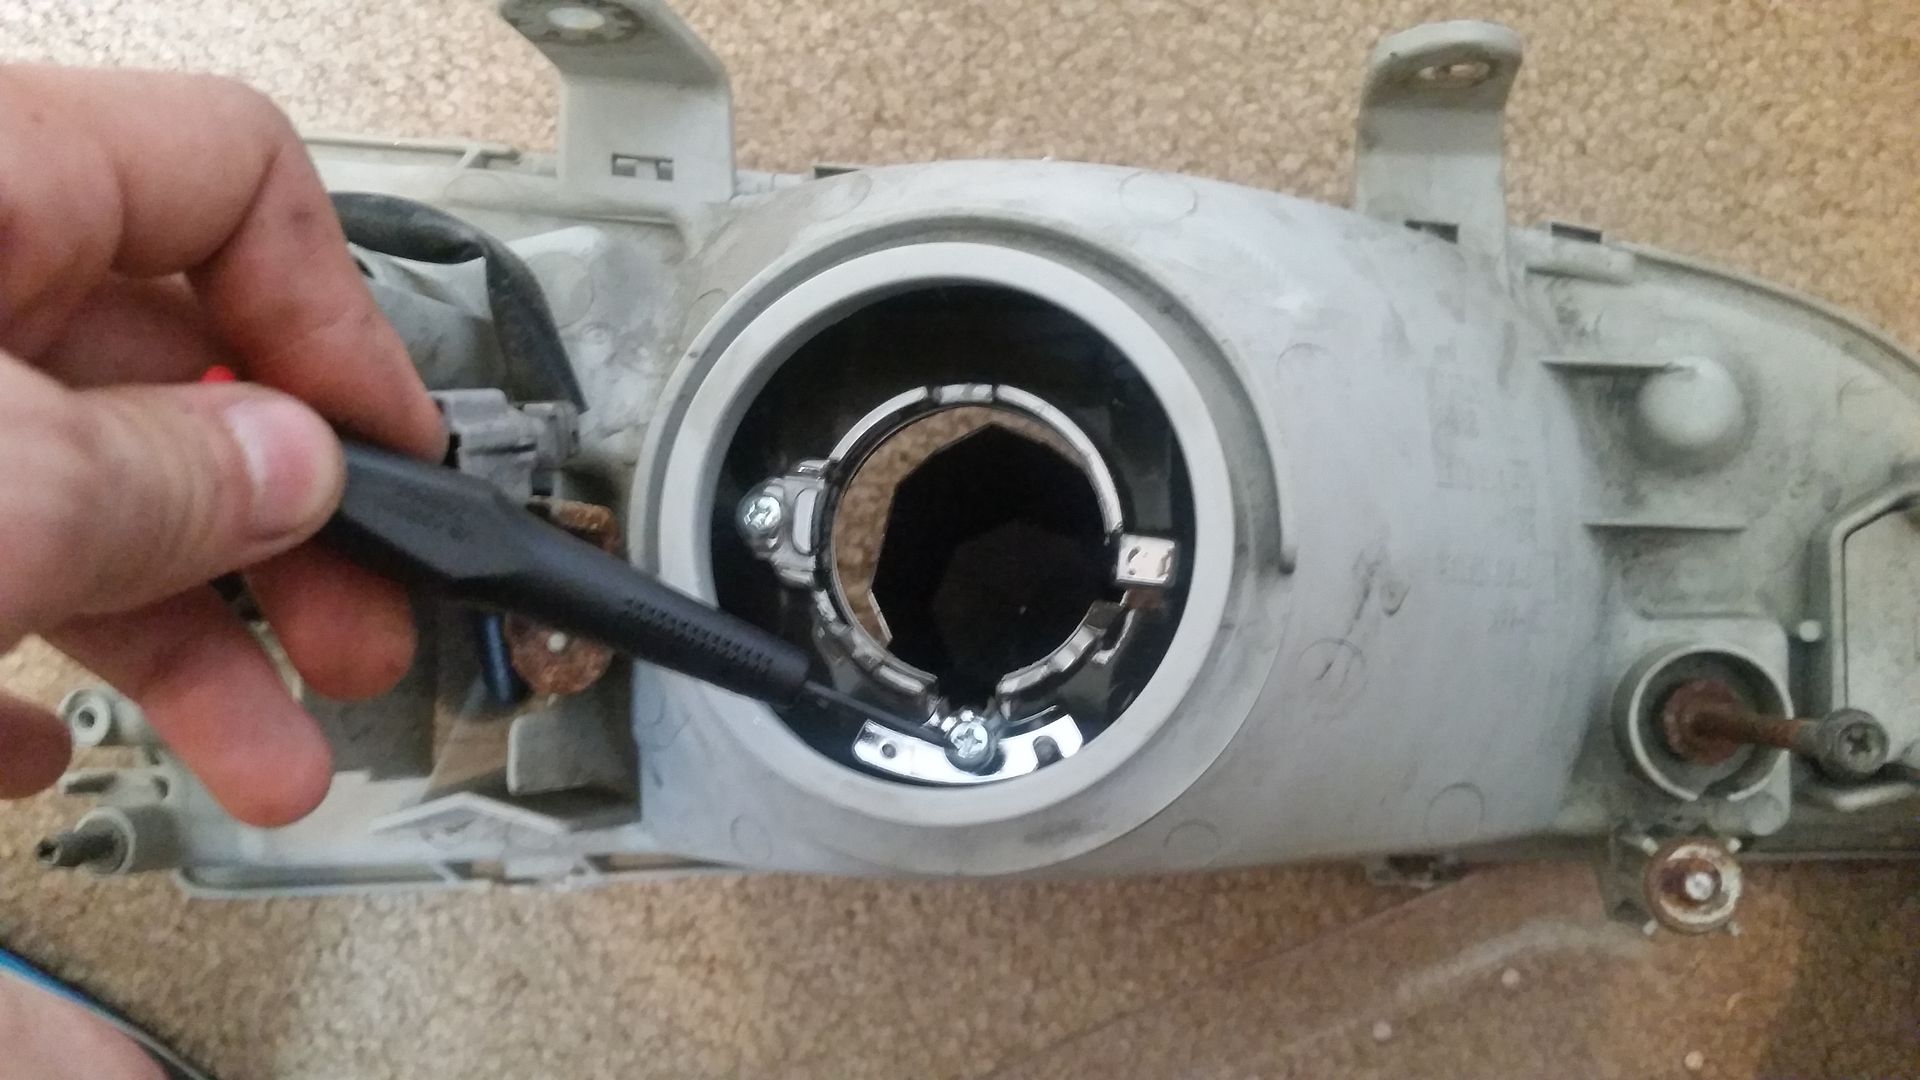
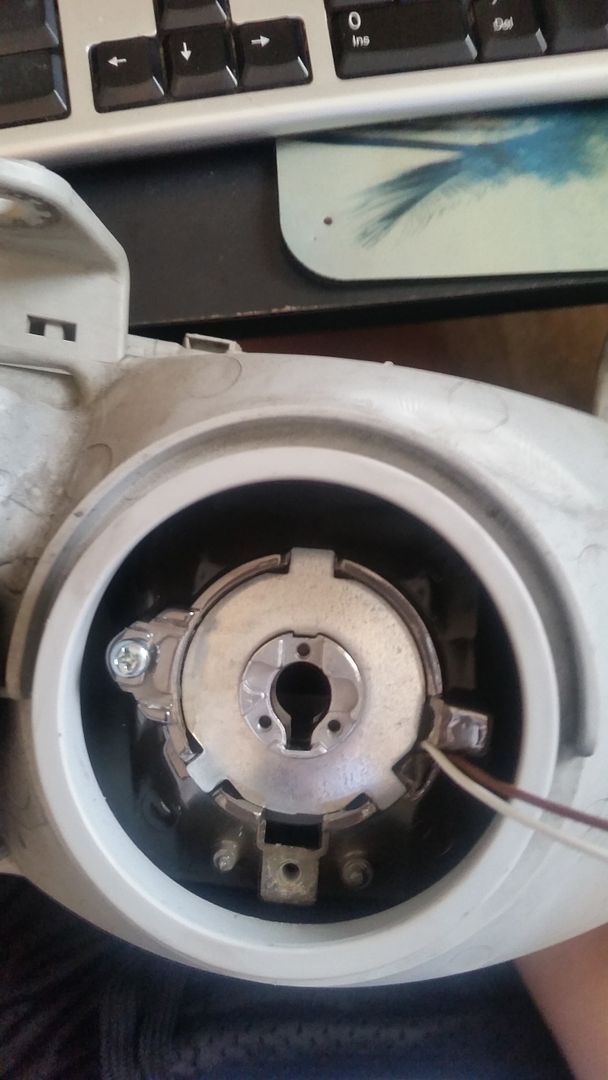
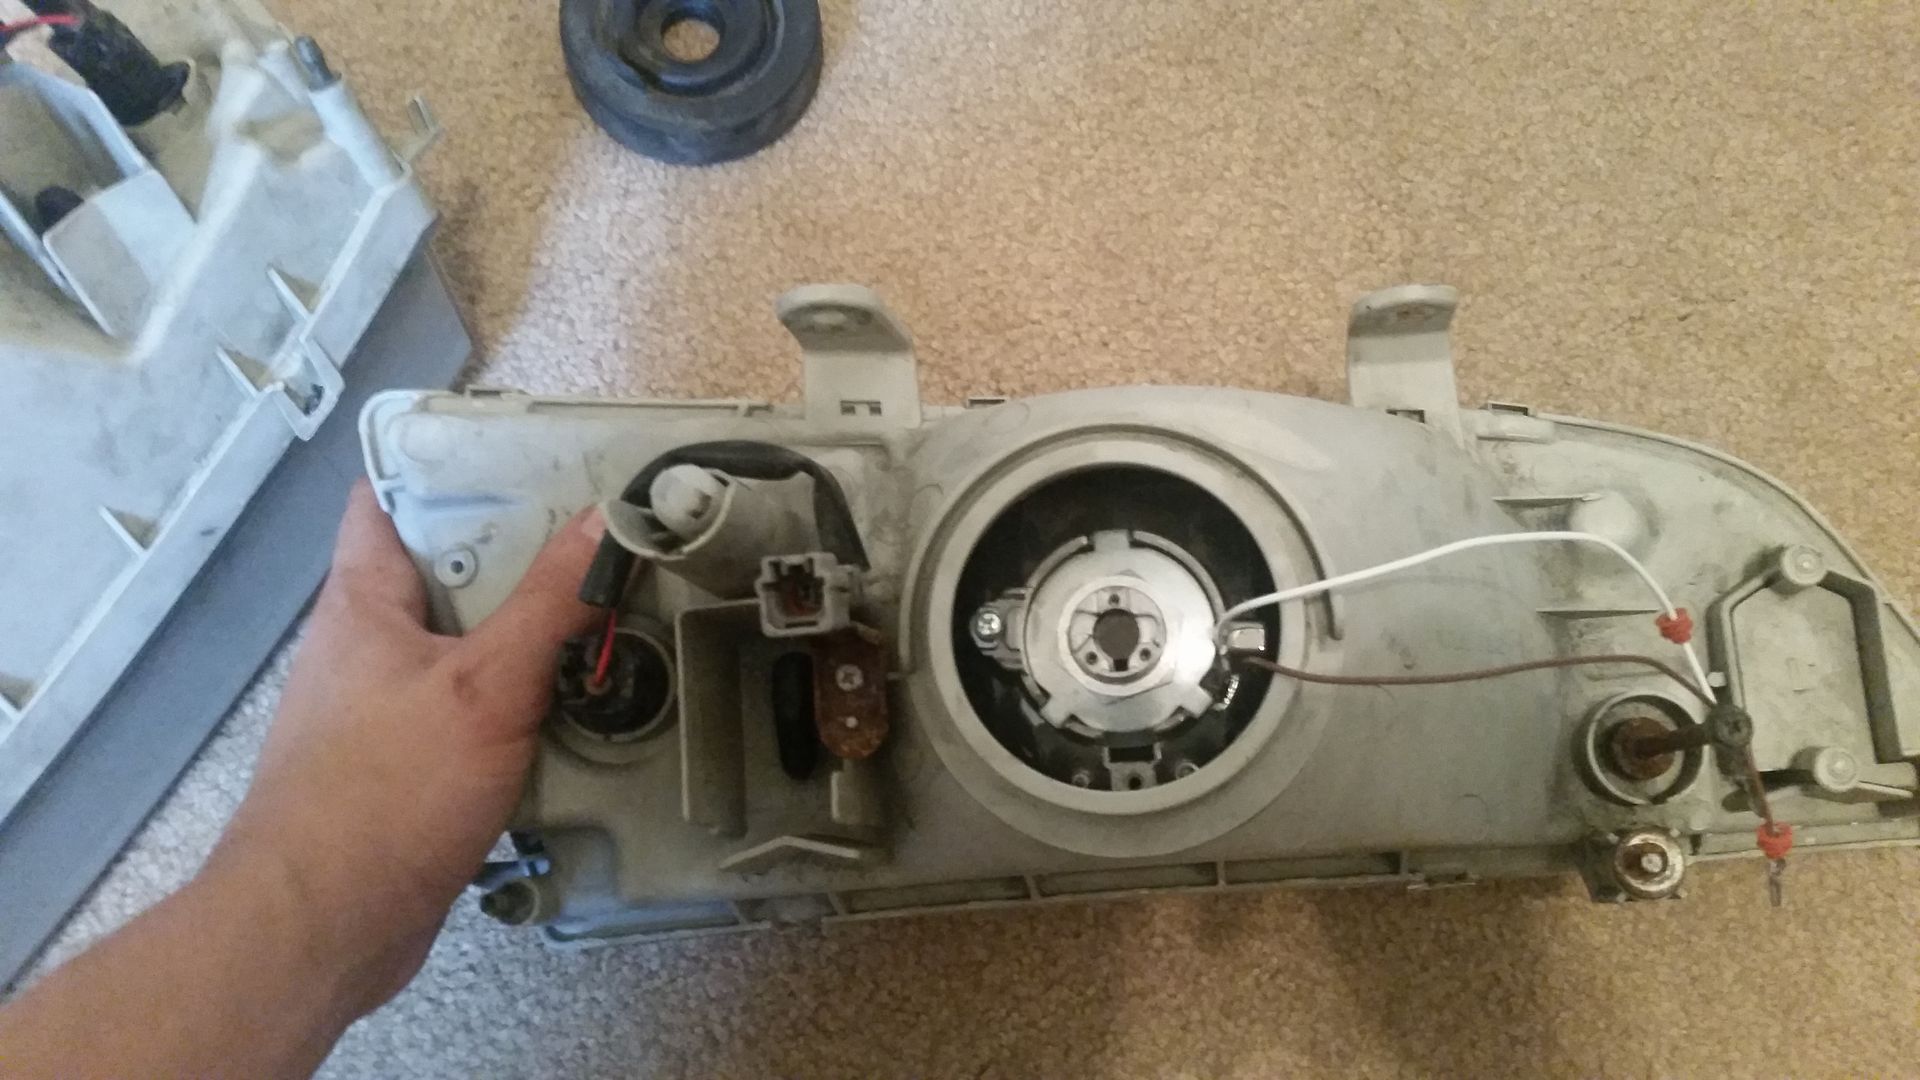
8. Once the lens is off, we need to remove the reflector cap that helped direct light from the old 9003/H4 bulb. This is held in by one screw on the back of the housing. Remove this screw, and the cap will slide up and out through the front.
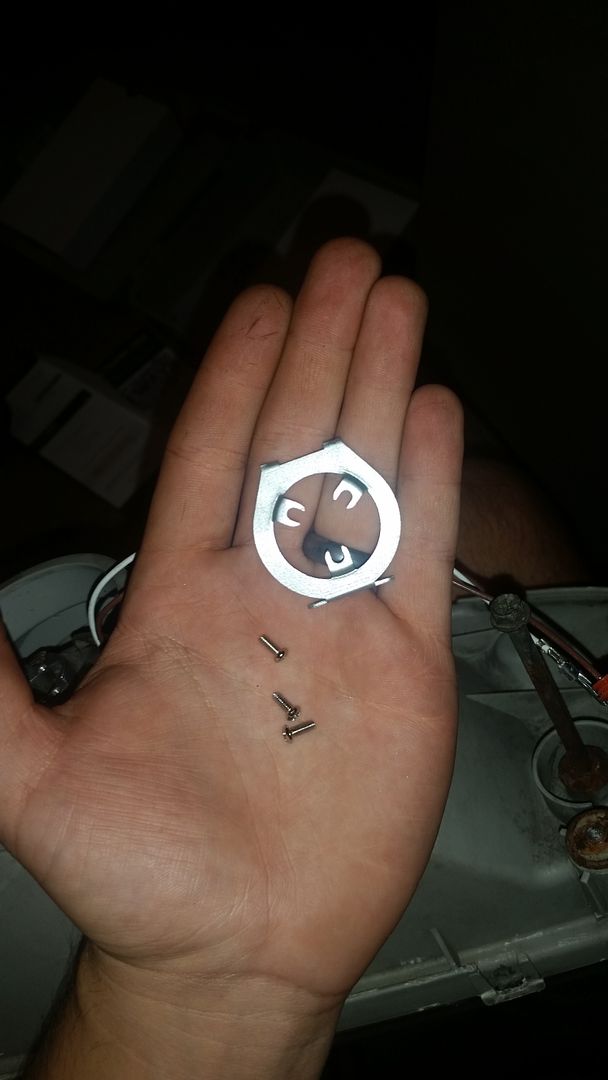
9. Now we can start preparing the projectors for assembly into the housing. First, remove the 3 small screws holding the bulb retainer to the projector. DO NOT LOSE THESE SCREWS!!!!!! The projectors come with a ziplock bag with other parts you'll need. Put these screws in there, along with the bulb retainer ring.

The, remove the lock ring off the projector. Again, put this in a safe spot so you don't lose it if you aren't assembling the projectors at this time.

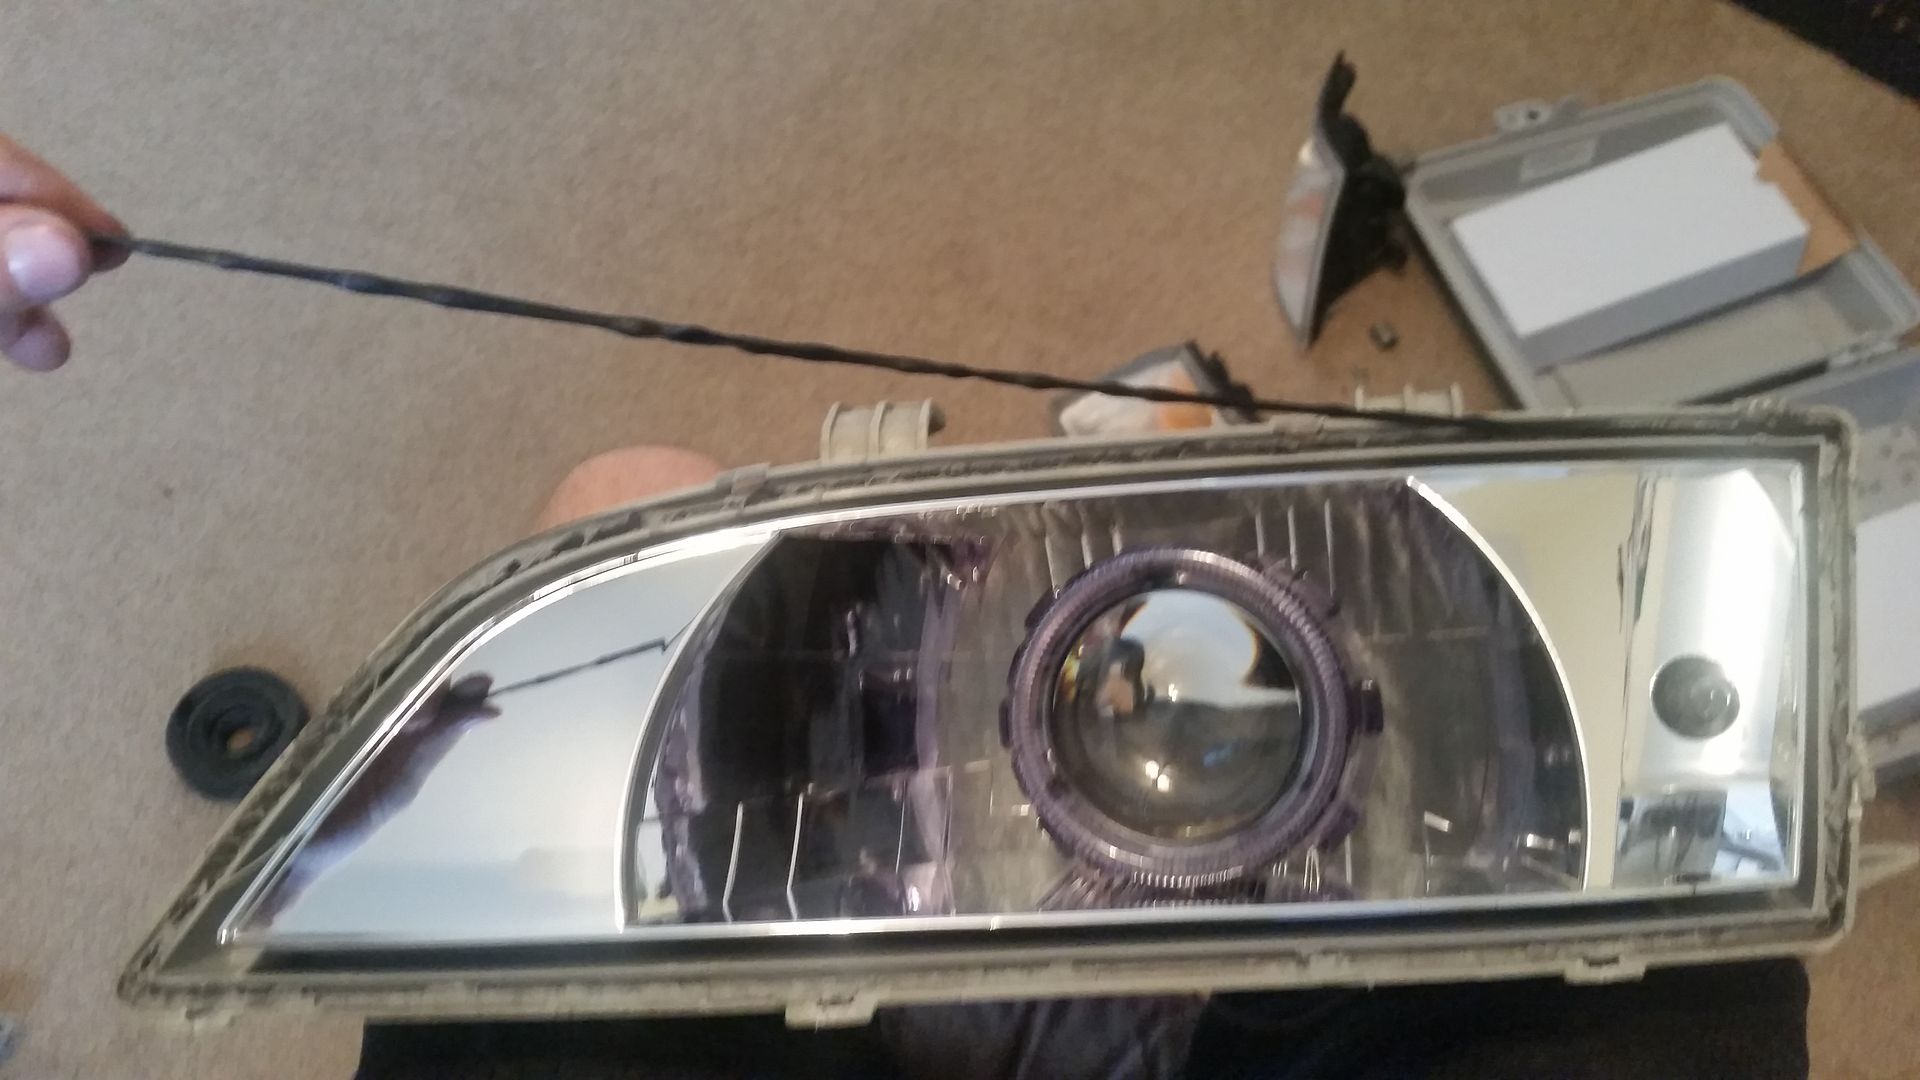
10. Now that the projector is disassembled, it's time to start test fitting. Lay out the parts in order of install like I have here. In order, it will go Projector, large grommet, H4 adapter plate, and Lock ring.
DO NOT TIGHTEN THE LOCK RING ALL THE WAY YET!!!!! The lock ring is designed to deform once it's fully tightened to lock the projector in place, We will need to remove the projector a few times before final assembly, so only hand tighten it at this point with NO tools.
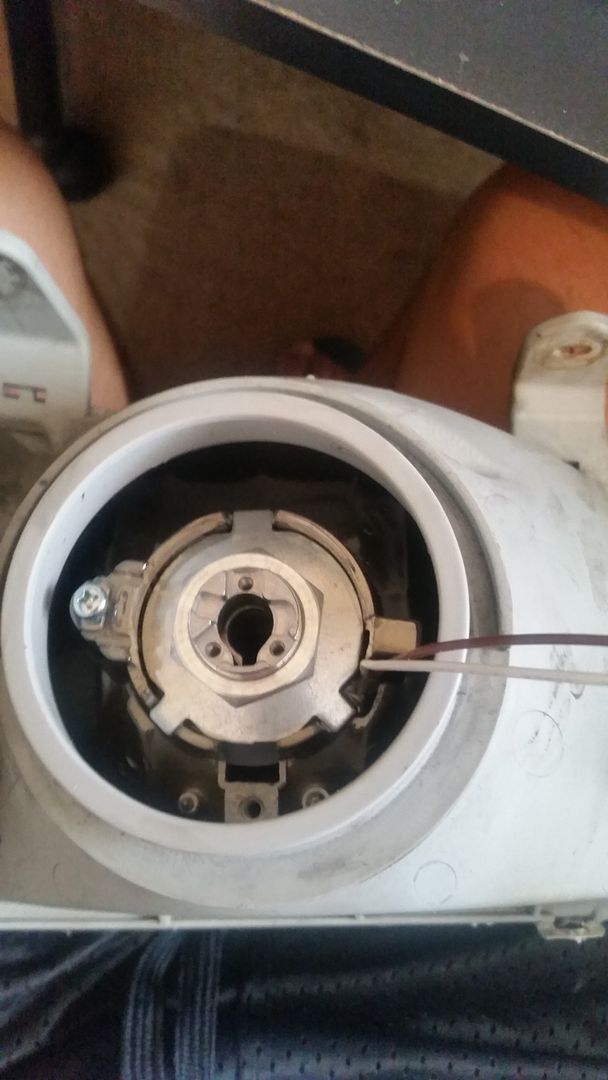
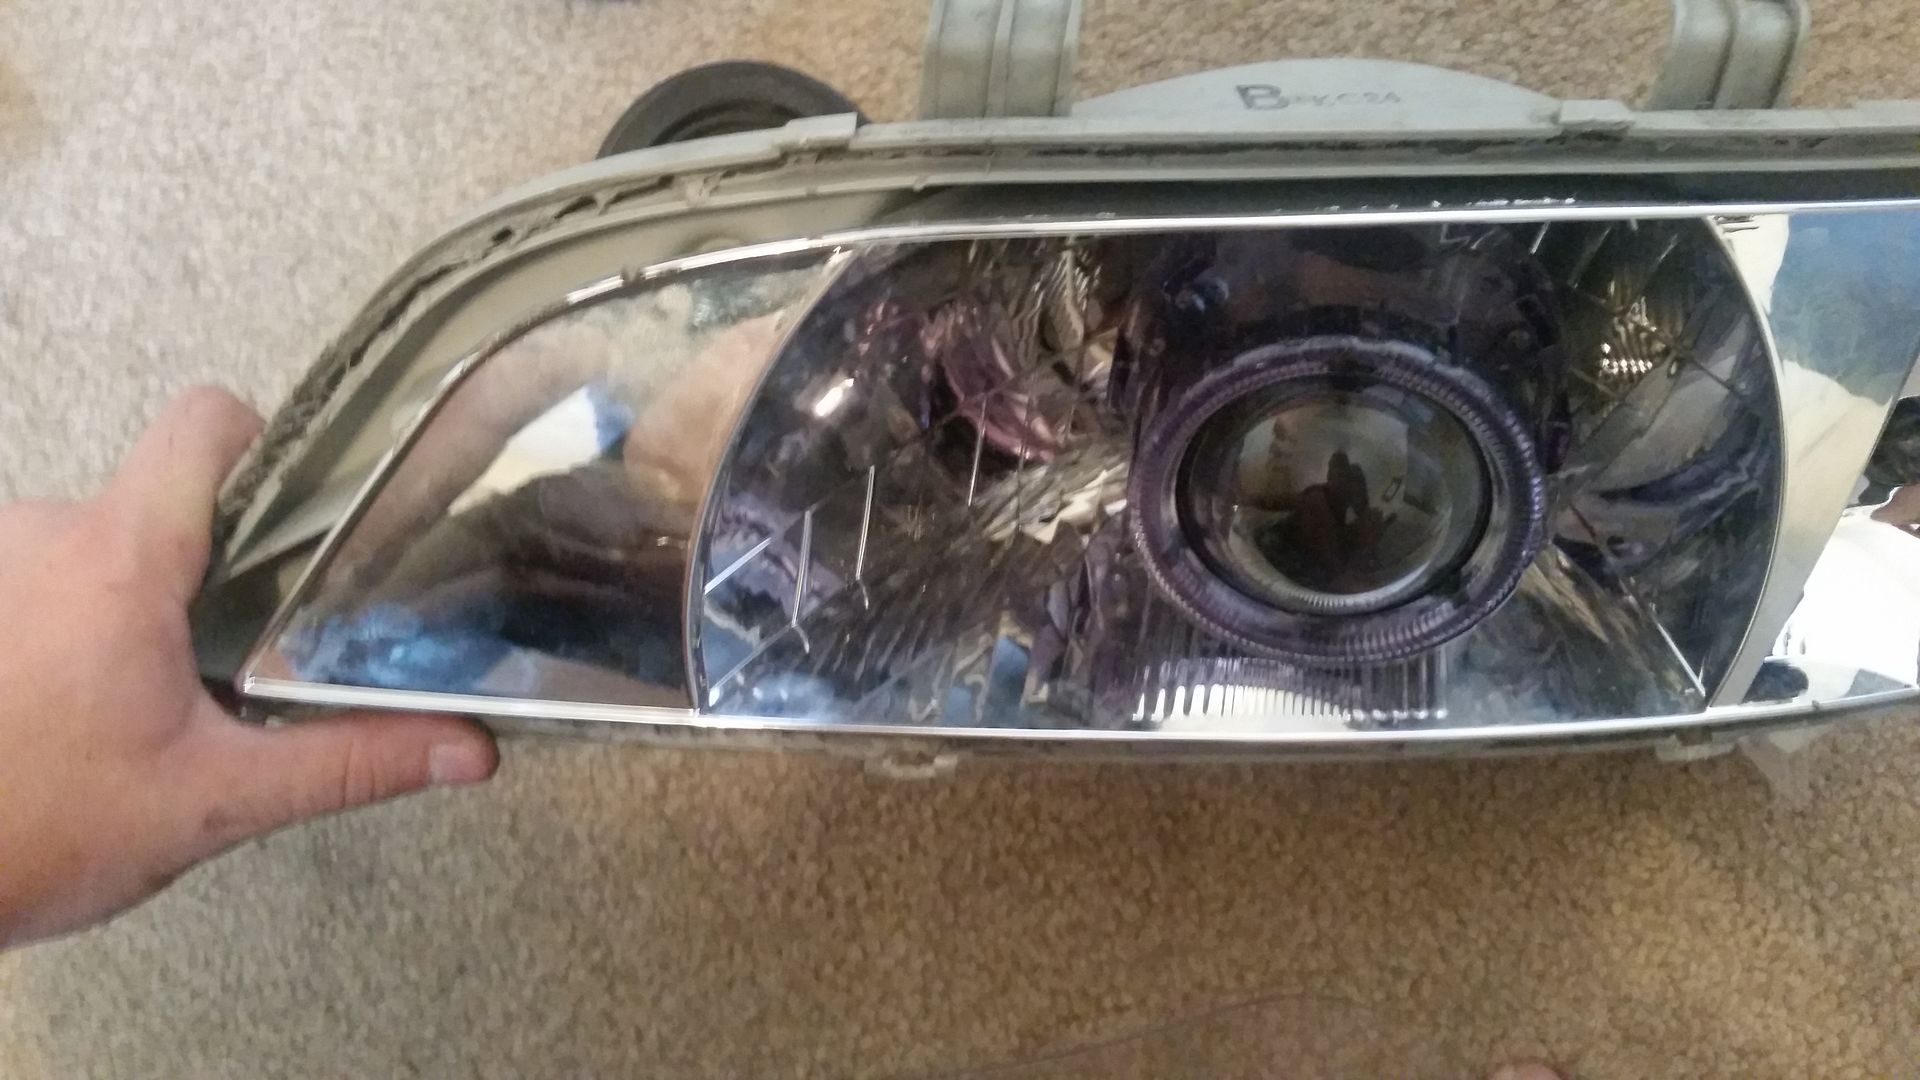
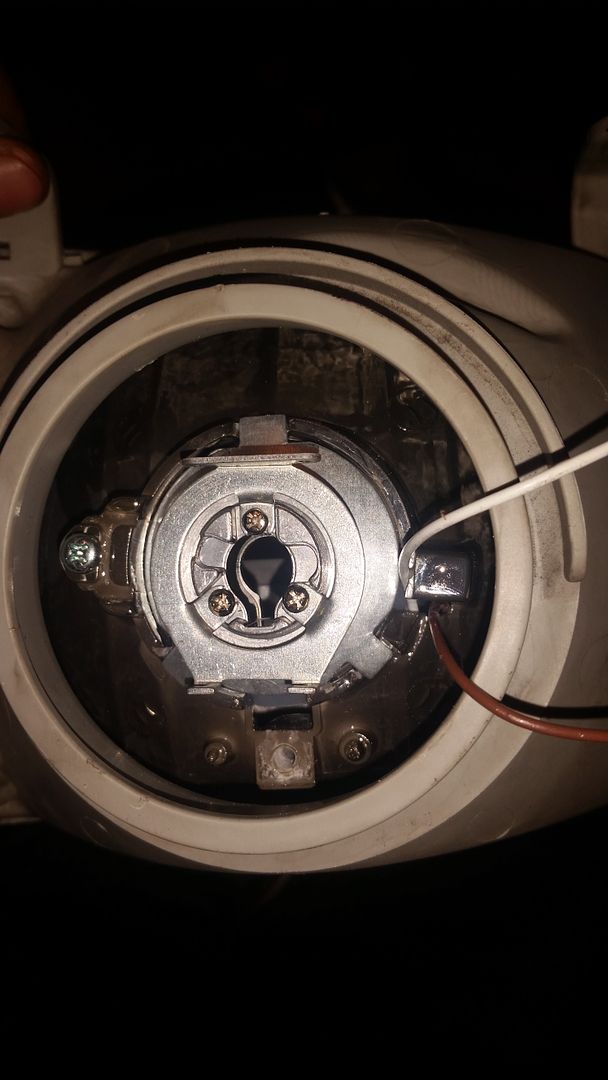
The H4 adapter plate will help to locate the projector, but as I discovered, even though it's supposed to set the rotation perfectly, it was slightly off. I had to trim the adapter ring's center pin (on the inside of the hole, it's at 12 o'clock and physically touches the notch on the projector threads, as is right above the top screw hole on the projector shaft). I had to trim the right side of this a hair to allow the projector to rotate counterclockwise slightly. Otherwise, the projector cutoff would not have been level. I'm not sure if this is a defect in the OEM housing, or just a slight size difference with the adapter ring, but it's best to check this before you close the lights back up. You may not need to trim yours. I only had to trim the ring on the right headlamp, so you will need to check on your vehicle. Note that if you need to rotate the projector while it's on, please wear thick gloves. The HID's produce a lot of heat, and the projector housing will burn you.
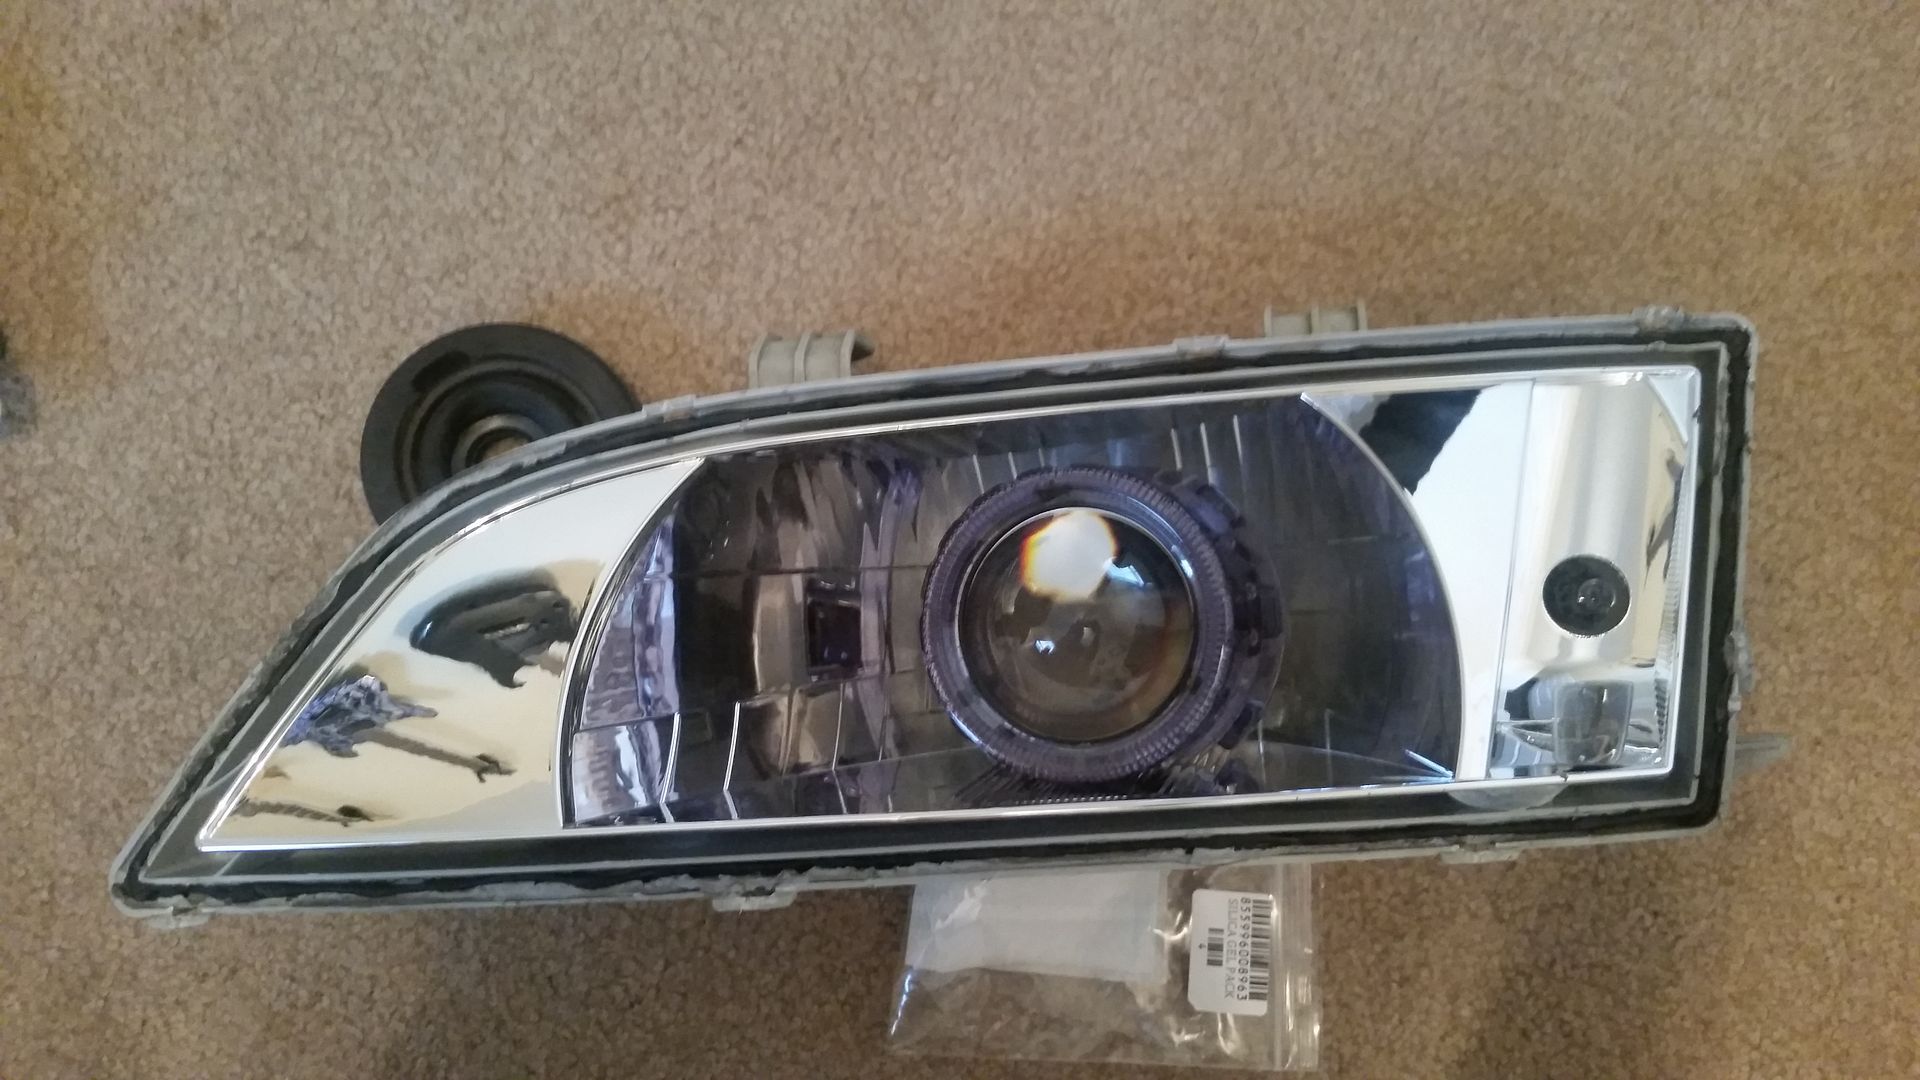
Once you have verified that the projectors' beam patterns are perfectly level when they're installed in the vehicle, you can proceed to final assembly of the projector in the housing. First, install the wiring adapter for the solenoid. This will be in the plastic bag that came in each projector box. it only goes in one way. Pull the wires through the back of the headlight housing. They will fit through the opening in the light, and go around the projector. Using a pair of channel locks, tighten the lock ring all the way down while holding the front of the projector to keep it from rotating back clockwise.
Once the lock rings are tightened, your lights should look like this.
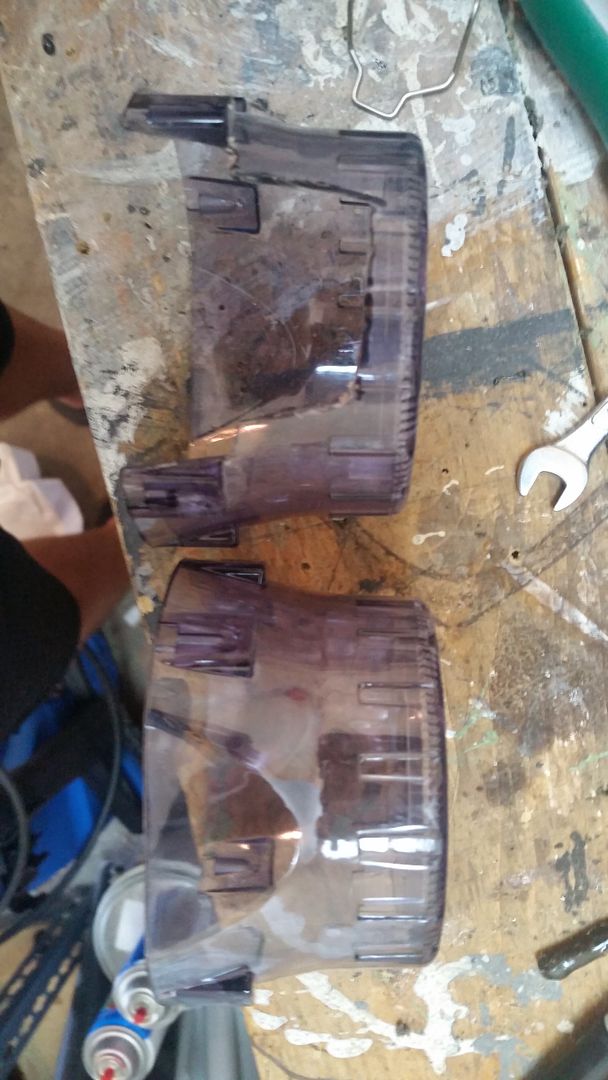
11. Once the projectors are installed, it's time to test fit the shrouds. I went with the graphite shrouds as they look pretty cool when the lights are on, not to mention they're free with the kit lol. You'll need to trim the bottoms out of the shroud to fit the projector and not interfere with the reflector. Trust me on this, when you're cutting the housings, wear safety glasses. Globs of molten plastic will be shooting at your face, and you don't want essentially lava in your eyes.
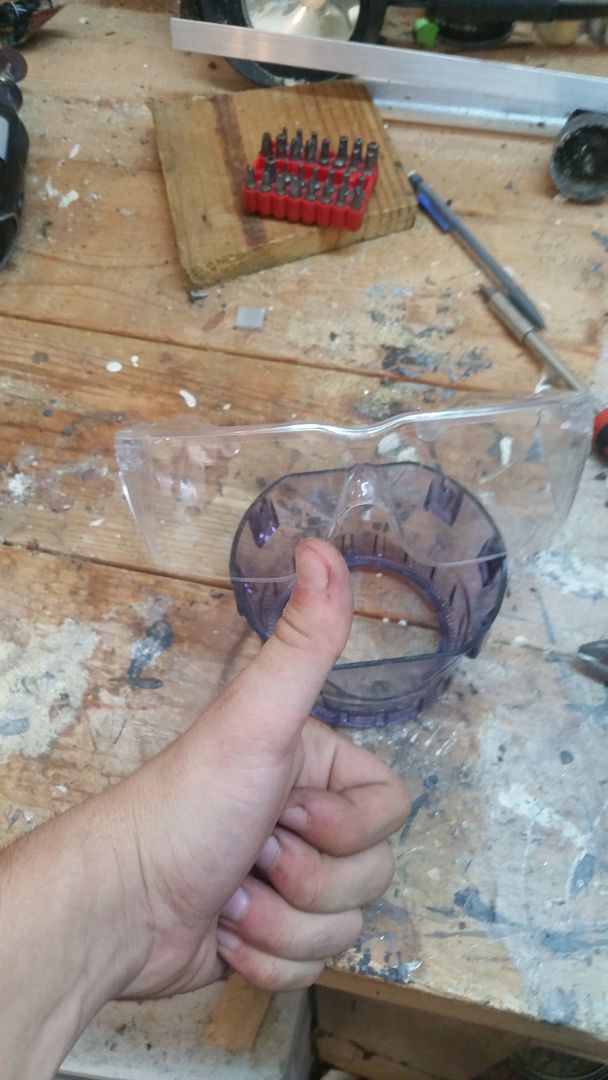
Use a dremel tool with a fresh cutoff wheel to trim the shrouds. Before you cut, mark the shroud with a sharpie so you'll have something to go by. The graphite shrouds are see through, so it's hard to see exactly where they were cut, but the top shroud shows what had to be trimmed to fit the projector properly. The amount of trimming needed will depend on what shrouds you choose.
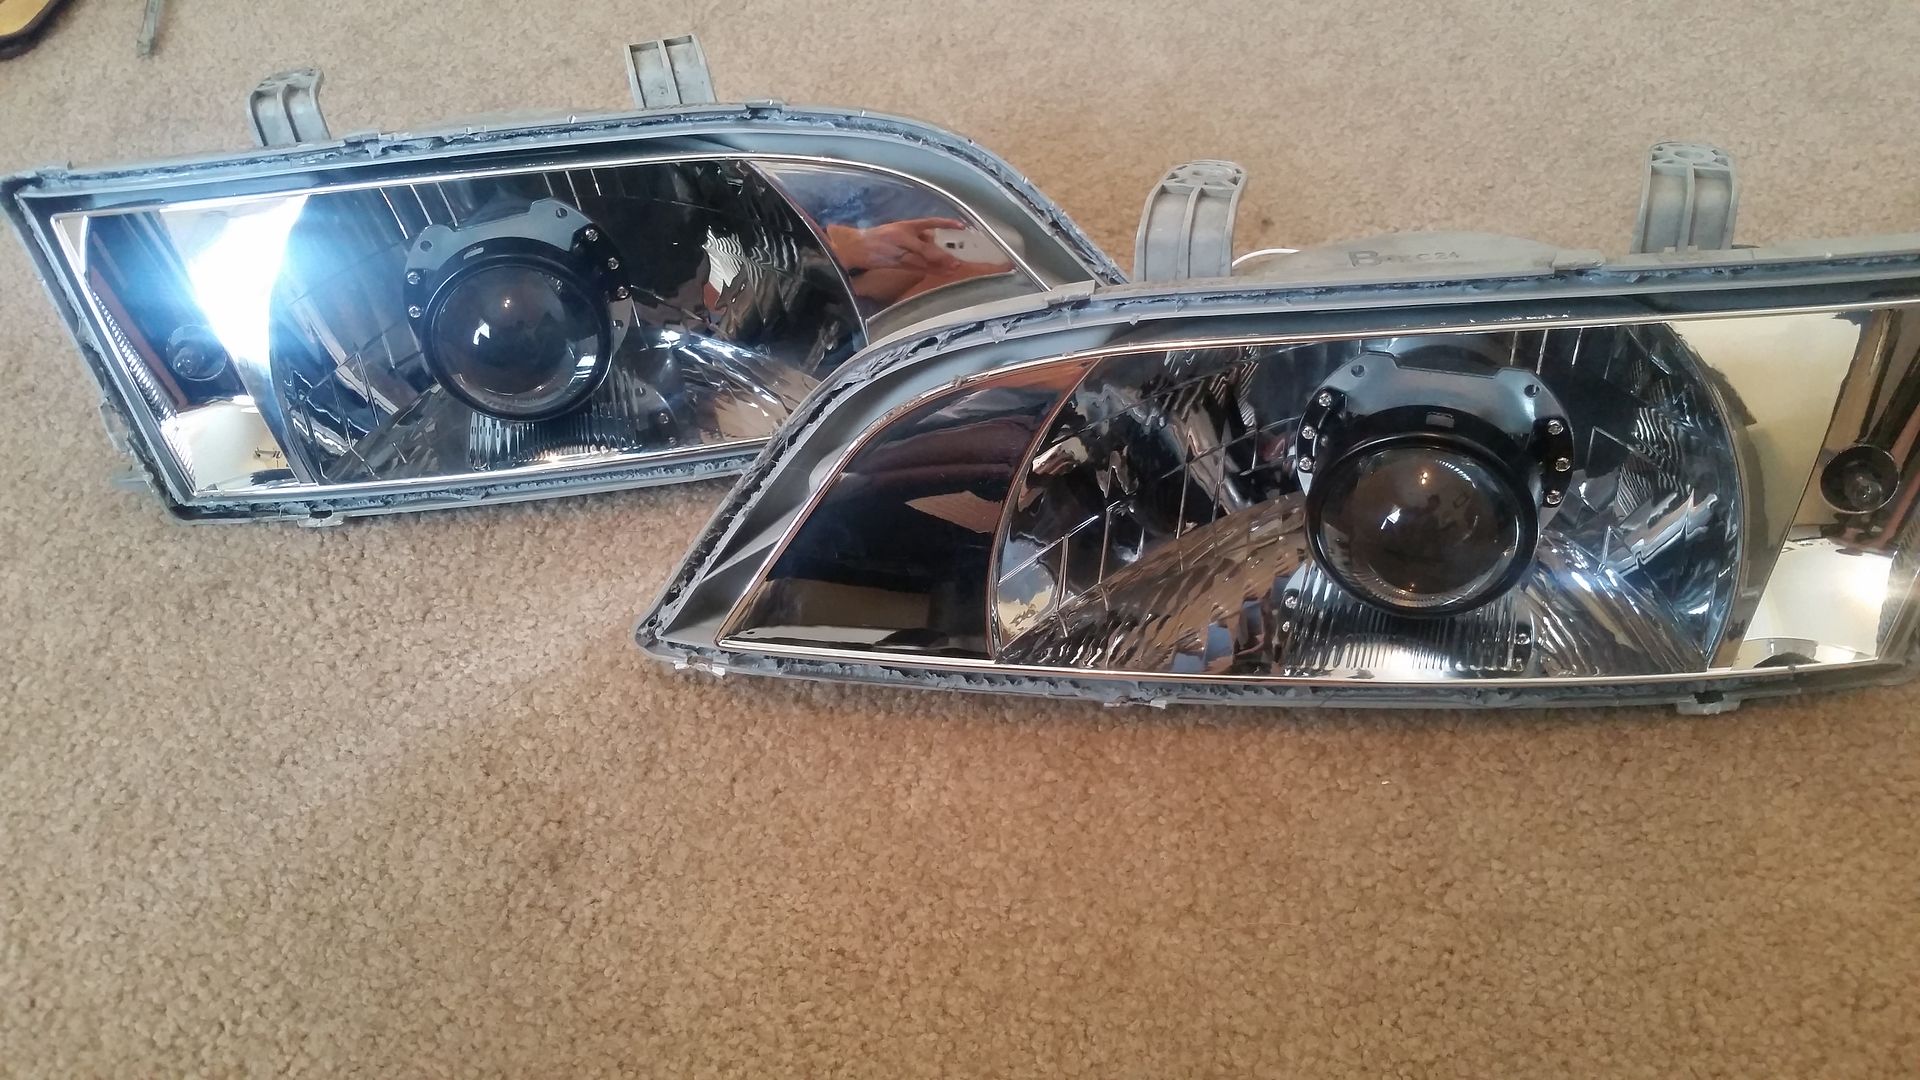
To attach the shroud to the projector, insert the shroud centric rings that you should have purchased onto the projector and use a small amount of JB weld to hold the shroud centric ring to the projector. Once the centric ring is on and the jb weld has dried, you'll see 3 small tabs on the inside of the shroud. My camera wouldn't focus on these, but you'll want to put a small dab of jbweld on these, then slide the shroud onto the projector and shroud centric rings. The JB weld will lock the shrouds into place on the centric rings to ensure they don't fall off while driving. When done, your lights should be like this now.

12. Once both shrouds are secured and the jb weld has dried, it's time to prep the lights to reinstall the lenses. First things first, you'll likely notice that the reflector is smudged from finger prints and dirt (pardon the bad quality photo, it was hard to show the finger prints and dust in this light).
Use a CLEAN microfiber towel and some isopropyl alcohol applied to the towel and clean the reflector and housings. Use one small corner of the towel to wipe on the alcohol, and then the other dry side of the towel to wipe off the excess to keep streaks to a minimum. This doesn't have to be perfect yet as we'll clean them again, but it's a good idea to keep as much dust and debris out of the lights before the next step.
13. Now we're going to use the silica gel packs that we bought. These are needed in the off chance that any moisture does get into the lights. They'll help absorb it and keep your lenses dry on the inside.
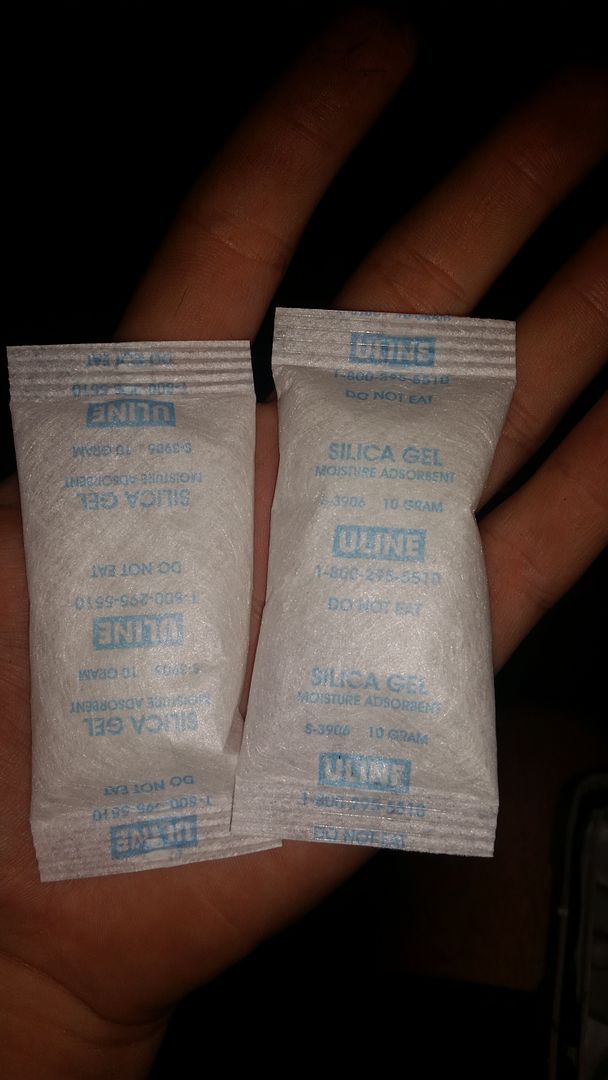
I tucked one behind each side of the reflector in both lights, so 2 packs per light. Try to hide them well, as you don't want to see the packets once the lights are resealed. If you look closely in these pictures, you can see where I tucked the packets under the reflectors.
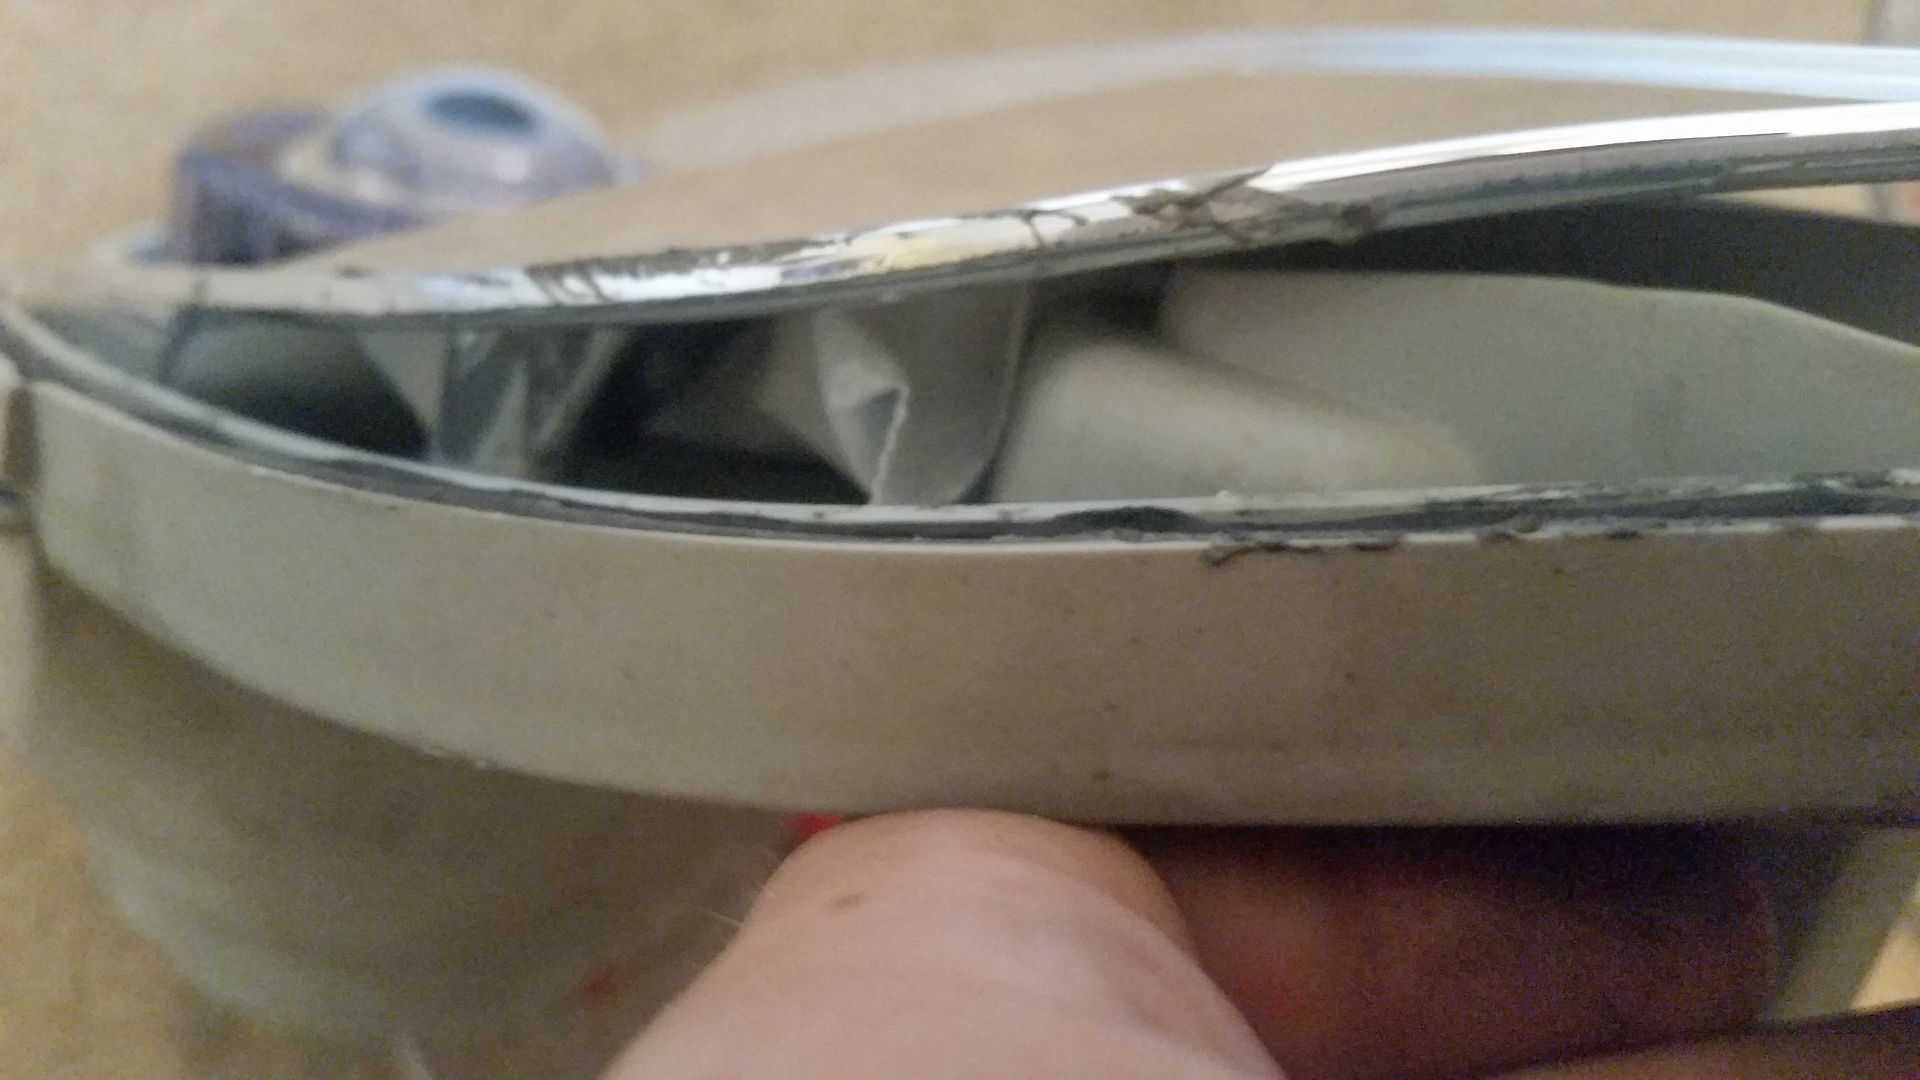
14. Now that the lights are mostly clean, we can prep them to reseal. This step is optional since the factory glue in the housings is pretty stout, but when it comes to keeping water out of your expensive new lights, I like to be safe than sorry. I'm using a butyl tape that I got on Amazon, but The Retrofit Source also sells this as a product called RetroRubber. I had a ton left over from my last 2 retrofits, so I didn't need to order more.
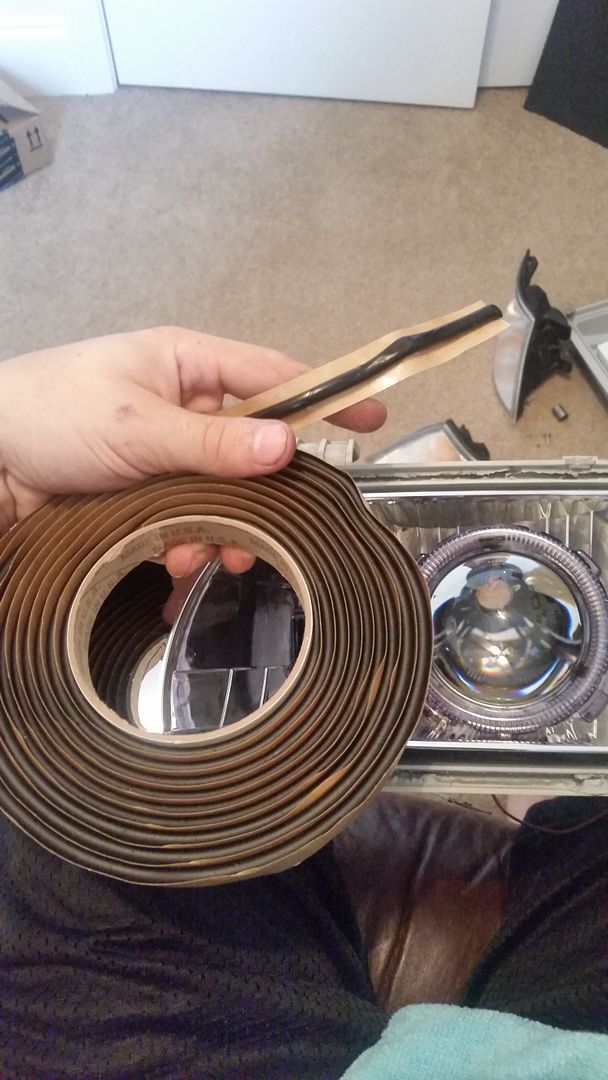
I like to do each light in sections when putting in butyl tape. You don't need a lot for each section, as you can see from the small part I cut for the top of the light.
You'll be stretching this out and tucking it into the top crease where the lens sits, so a little goes a long way.
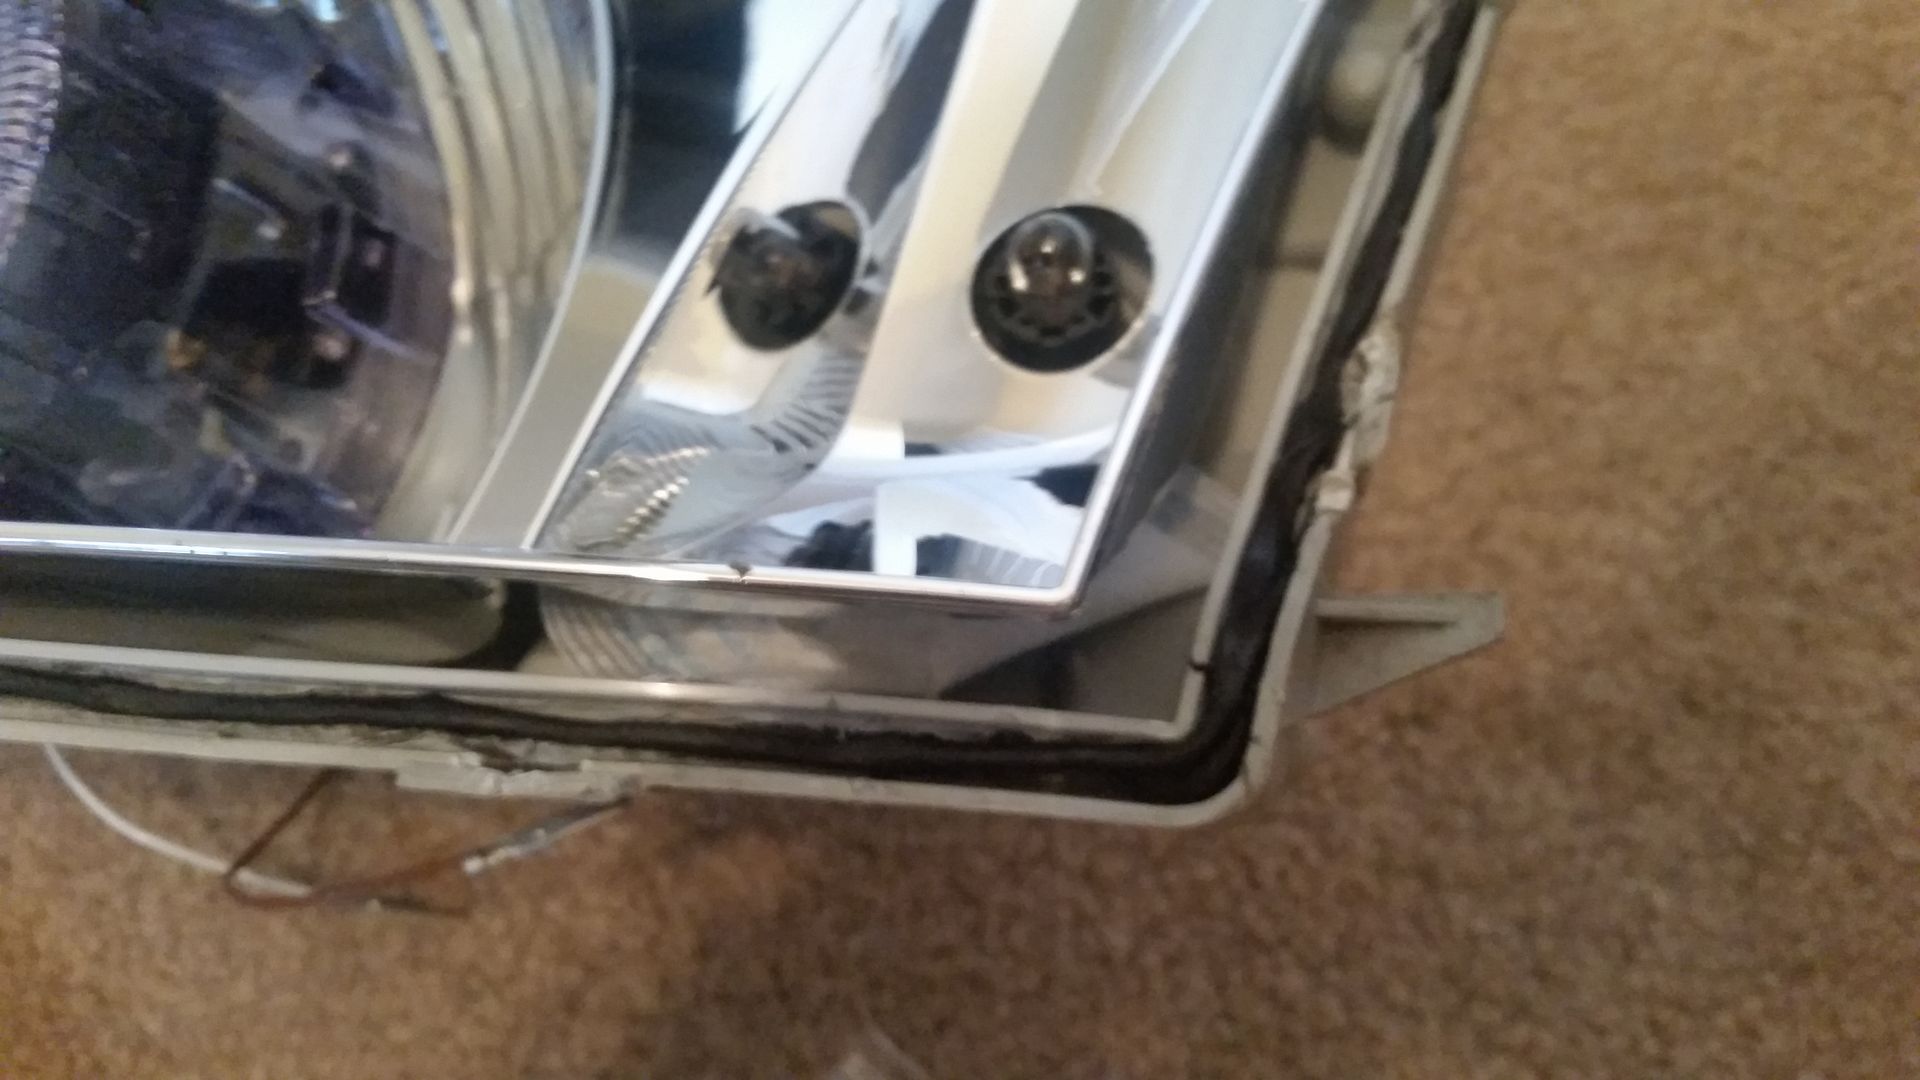
Once you've done the 3 channels, your light will look like this.
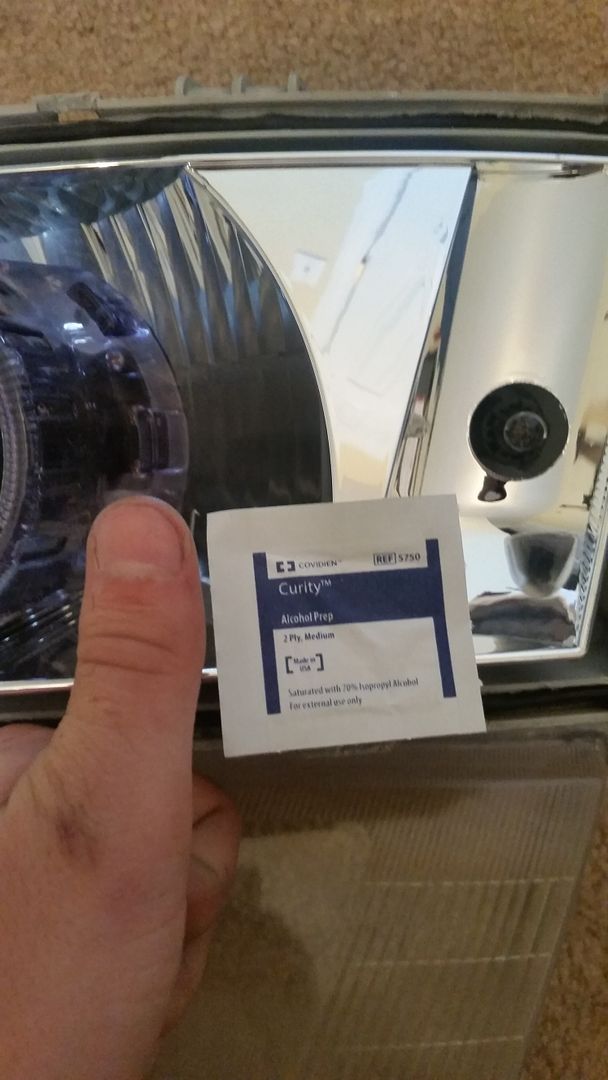
15. Now it's finally time to re-seal our lights. Pre-heat your oven to 200 degrees F first. Then, if you open the little black envelope that comes with the TRS kit, inside will be 2 alcohol wipes in paper wrappers. Open one of them, and use this to clean off the lens on the projectors. You'll only need 1 wipe for both projectors, we'll be using the other one in a later step so save it.
16. Once the projector lenses are cleaned and dry, do one final sweep through the light to make sure there aren't any smudges, dust particles, or in my case tons of dog hair. Remove any, using some compressed air or again a microfiber towel and alcohol. Also make sure the INSIDE of the headlight lens is clean. Once the light is completely clean, set the lens on top of the headlight assembly and slightly push in on it to let it "bite" on the new glue. You can see the gap between the mounting point on the lens and the headlight housing.
Take your piece of cardboard and place it back in the oven. Then, place the headlight LENS DOWN on the cardboard. By placing it lens down, gravity will help you a little while the glue warms up. Bake them again for about 8 to 10 minutes, doing each light individually. While you wait, eat some cheap dollar store cookies, because that's all you can afford after blowing all your money on headlights.
Once the timer is up, take the lights out USING GLOVES AGAIN to avoid getting burned. Push down on the headlight lenses by hand first to help them seat down into the glue. Then take a pair of channel locks or regular pliers and go around the headlight lens and gently squeeze the lens and housing together. Be VERY careful again not to use too much force, as you don't want to crack the lenses. Make sure all of the tabs on the lenses re-seat into the slots on the headlamp assembly, and ensure that the lens fully seats back into the housing. There shouldn't be any gap between the lens and the housing if you do this properly.
17. Now that your lenses are fully seated, let the lights cool off before the next step. Once cooled, it's time to finish assembly on the projectors. Place the H4 adapter ring in the slots and over the projector. This will only fit on one way, so it's not hard to make sure this is on correctly.
Take the bulb retainer ring and the 3 screws you saved earlier
and put them into the projector.
BE EXTREMELY CAREFUL NOT TO DROP ONE OF THESE SCREWS INTO THE HOLE IN THE PROJECTOR. IF YOU DO, YOU WILL LIKELY HAVE TO TAKE THE HEADLIGHT LENS OFF AGAIN TO GET IT OUT. I used a magnetic screwdriver to help avoid this, but you can also put something over the hole, like tape, to keep this from happening.
18. Now it's time to install the bulbs. Remember that alcohol wipe we saved earlier? Now is the time to get it. When you take the bulbs out of the box, open the box from the bottom and pull the bulb out using the foam insulator to hold it. DO NOT touch the glass of the bulb. Then, take the alcohol wipe and gently wipe the glass of the bulb to ensure that it is clean. Do this for both bulbs before placing them into the projectors.
The bulbs will only go in one way, but try to avoid scraping the bulb on the projector when you insert it. Once the bulb is in, place the bulb retaining spring into the top holes of the retaining ring.
You'll want to push down, over, and then to the right to get the retaining spring to lock into the feet on the bottom of the bulb retainer rings. It's hard to see, but the bottom of the spring will slide into the slots. It does take some force to get this to go in.
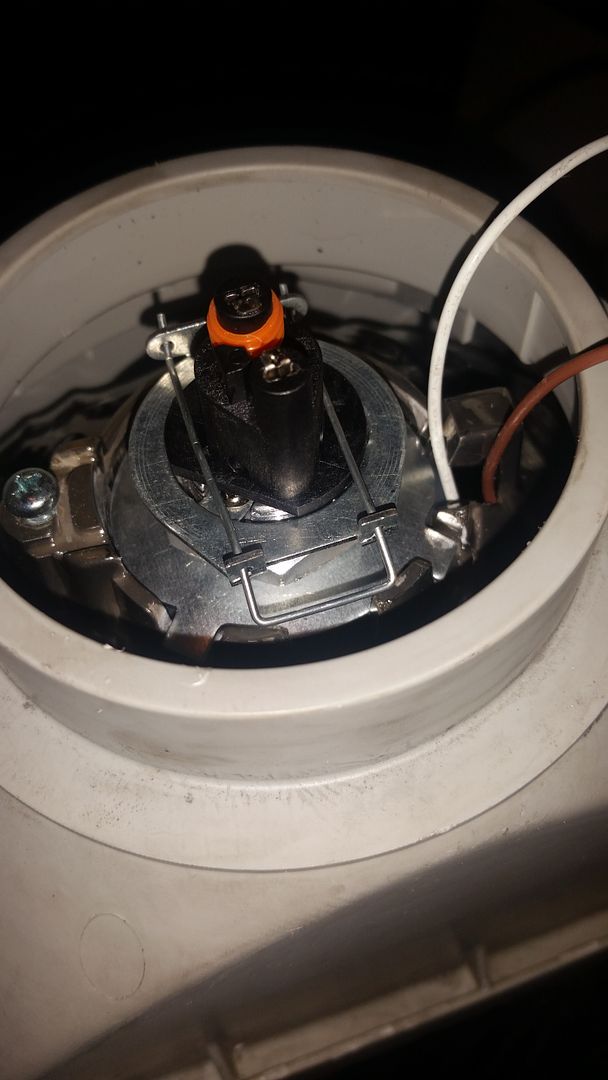
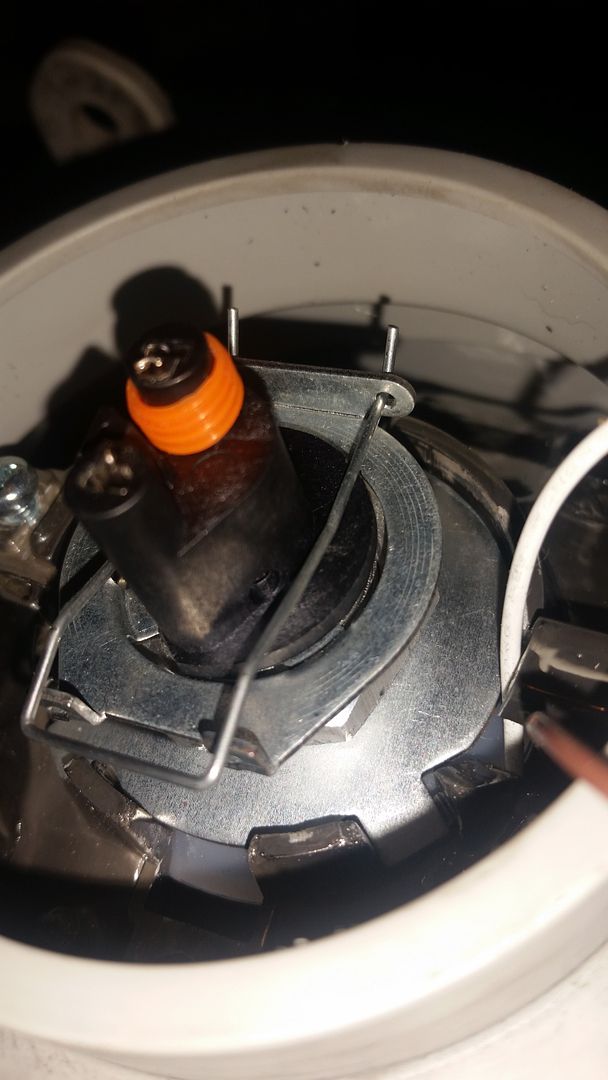
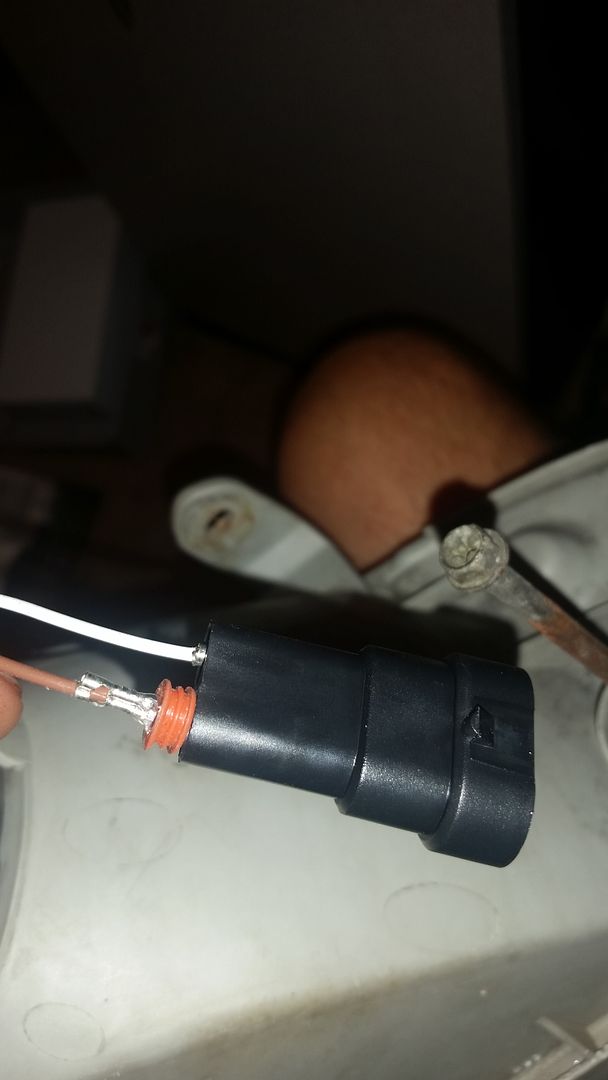
19. Next is wiring up the solenoid, since these are a bi-xenon projector. The solenoid wires should be pulled through already, and make sure that the orange grommets are about halfway down the metal crimp connectors. The white wire is V+, and the brown wire is ground. The notch on the top of the connector indicates what side the wires go in, as illustrated in the photo. You'll need to use a small screw driver to push the connectors all the way into the 9006 connector.
20. Now your lights should look like this - aka THEY LOOK LIKE CRAP STILL!
IF YOU DON'T POLISH YOUR HEADLIGHTS BEFORE YOU REINSTALL THEM IN THE CAR, YOU FAIL! There's no excuse not to use this time to clear the lenses, unless you've already done this recently. Even if you have, it's a great time to polish them again lightly to ensure that 100% of that HID goodness makes it onto the road.
21. Now it's time to finalize the wiring in the car itself. The Motocontrol 9003/H4 harness is labeled very clearly. There's a relay pack, Battery + wire ring, 2 high beam connectors, two H4 connectors, and 2 ground wire rings. I don't recommend fastening the ring connectors until everything else is placed, as it makes it easier to move the harness around. You can mount your ballasts, amp igniters, and relays as you wish, but this is how I chose to do mine. I could have made the install cleaner if I removed the bumper cover or fenders to hide the ballasts and arc amps, but I like to have them easily accessible in case I need to service them.
I chose to place the relays behind the airbox. I attached it using the bolt on the coolant overflow bottle.
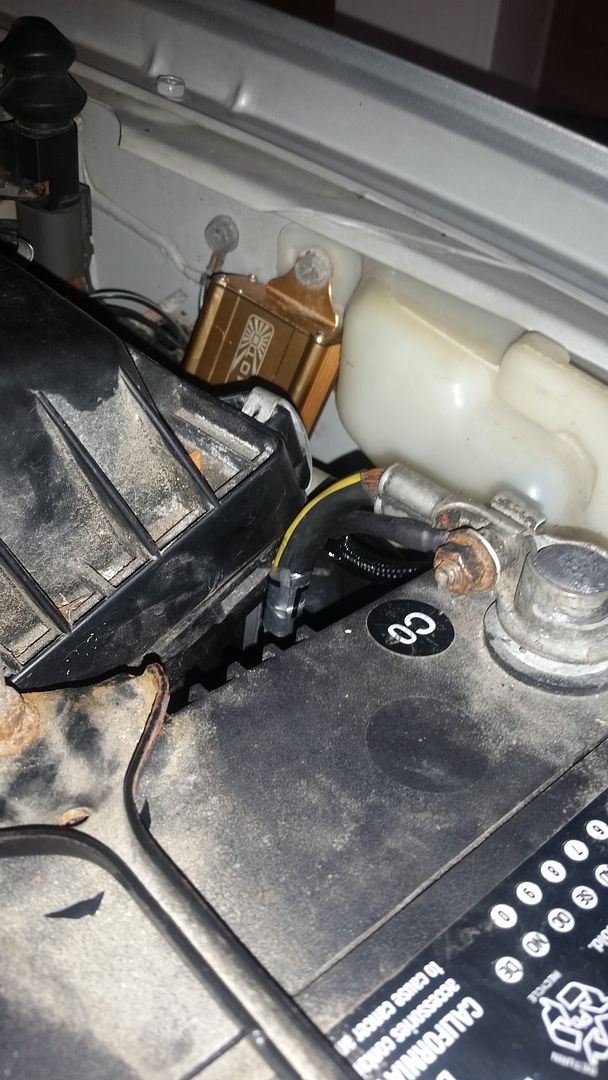
For the drivers side ballast and amp igniter, I bolted the ballast directly to the core support, and zip tied the amp igniter to the tube from the coolant bottle. Again, not the cleanest spot to put them, but in such a tight engine bay, they'll be easy to service if needed.
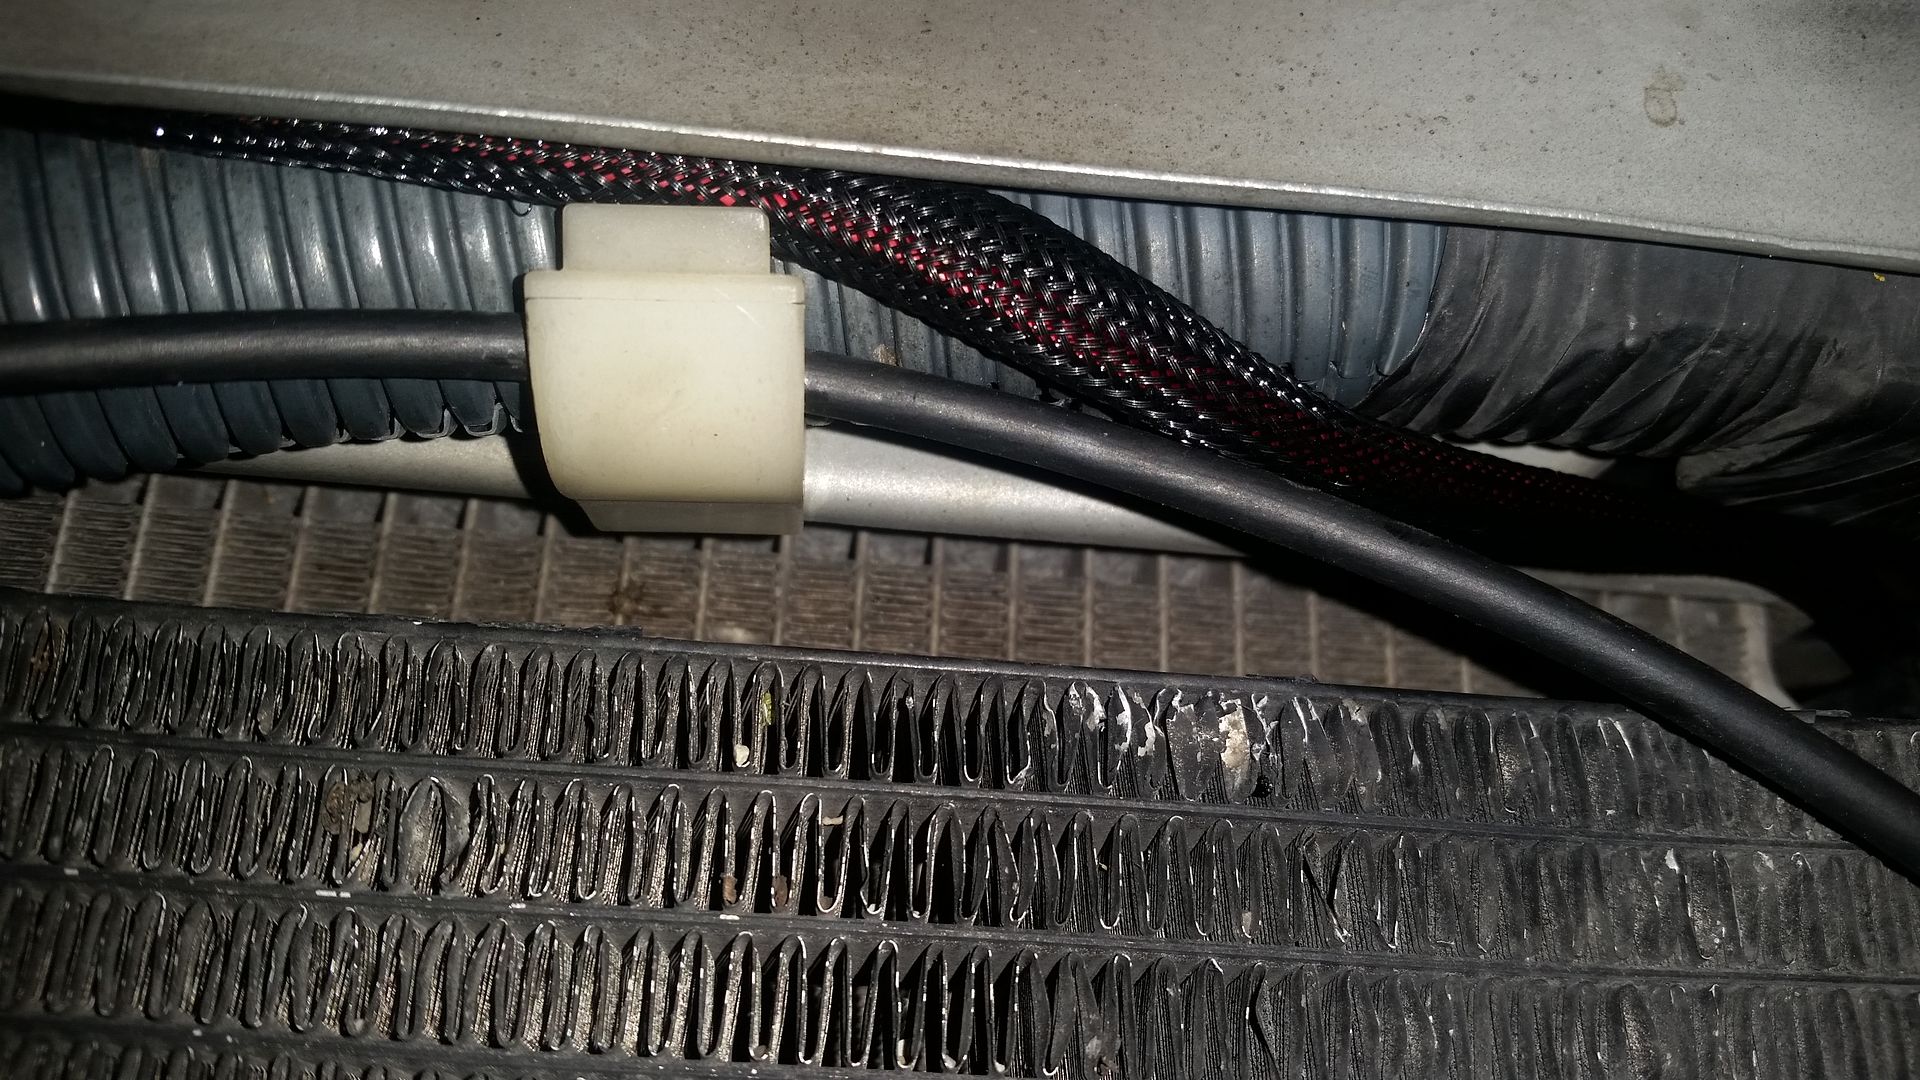
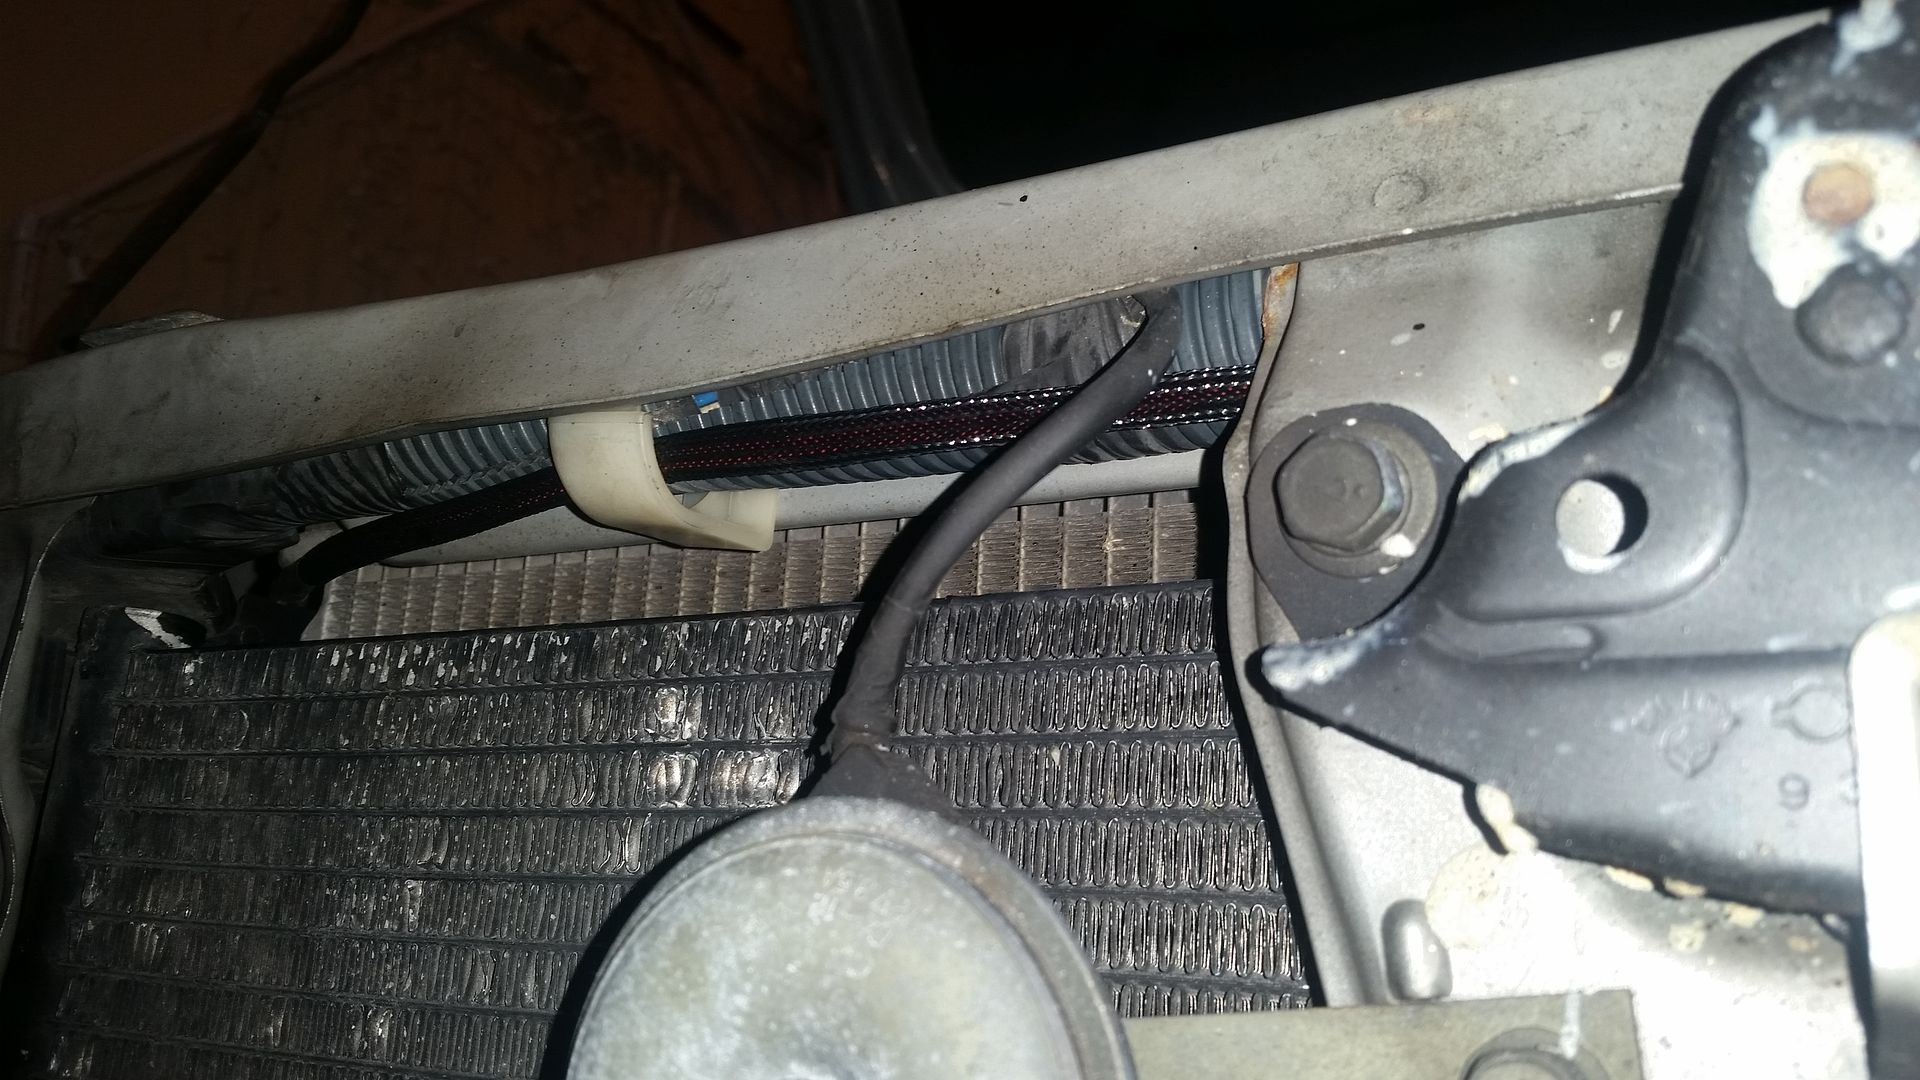
For the transition to the passenger side, I slide the harness through the gap between the radiator and the core support, behind the hood latch, and back out on the other side. If you look at the exisiting wiring harness that runs through the core support, there's a white clip on each side holding that harness in place. I tucked the HID harness into these clips to keep it up and out of the way, and not hanging down in front of the radiator.
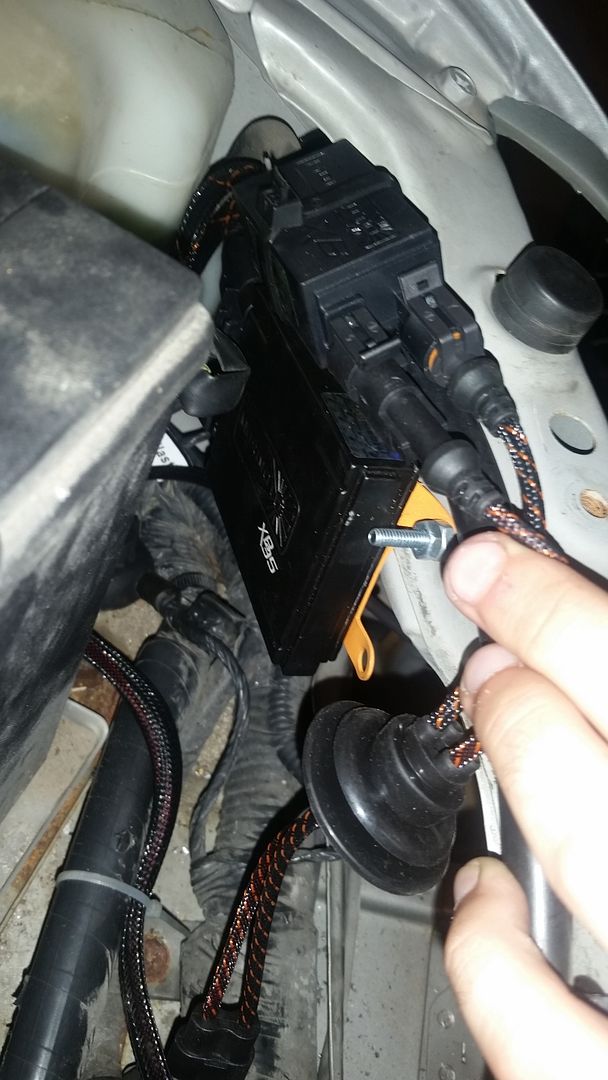
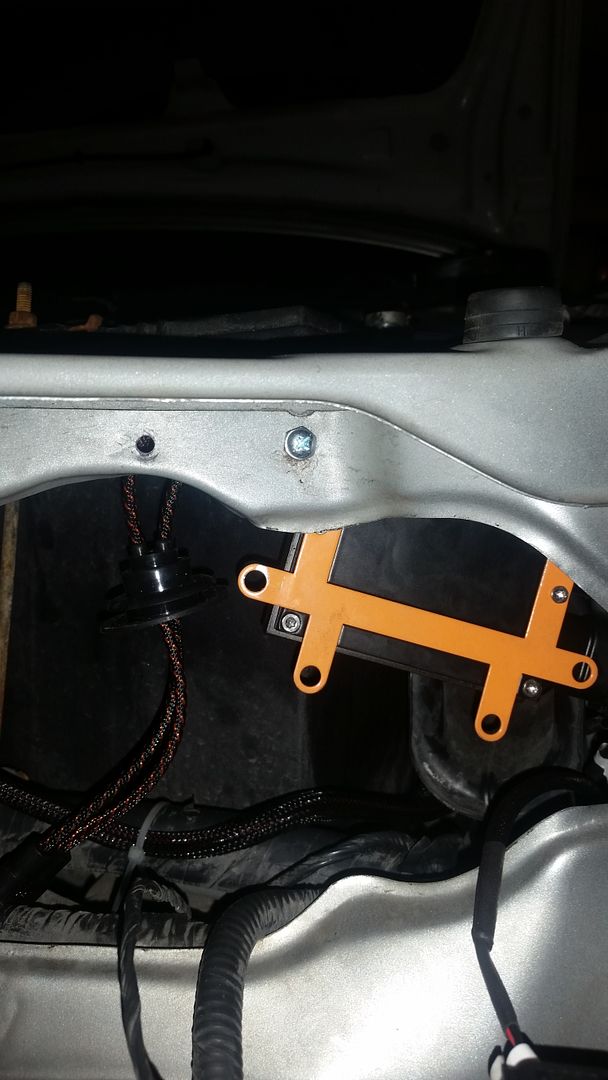
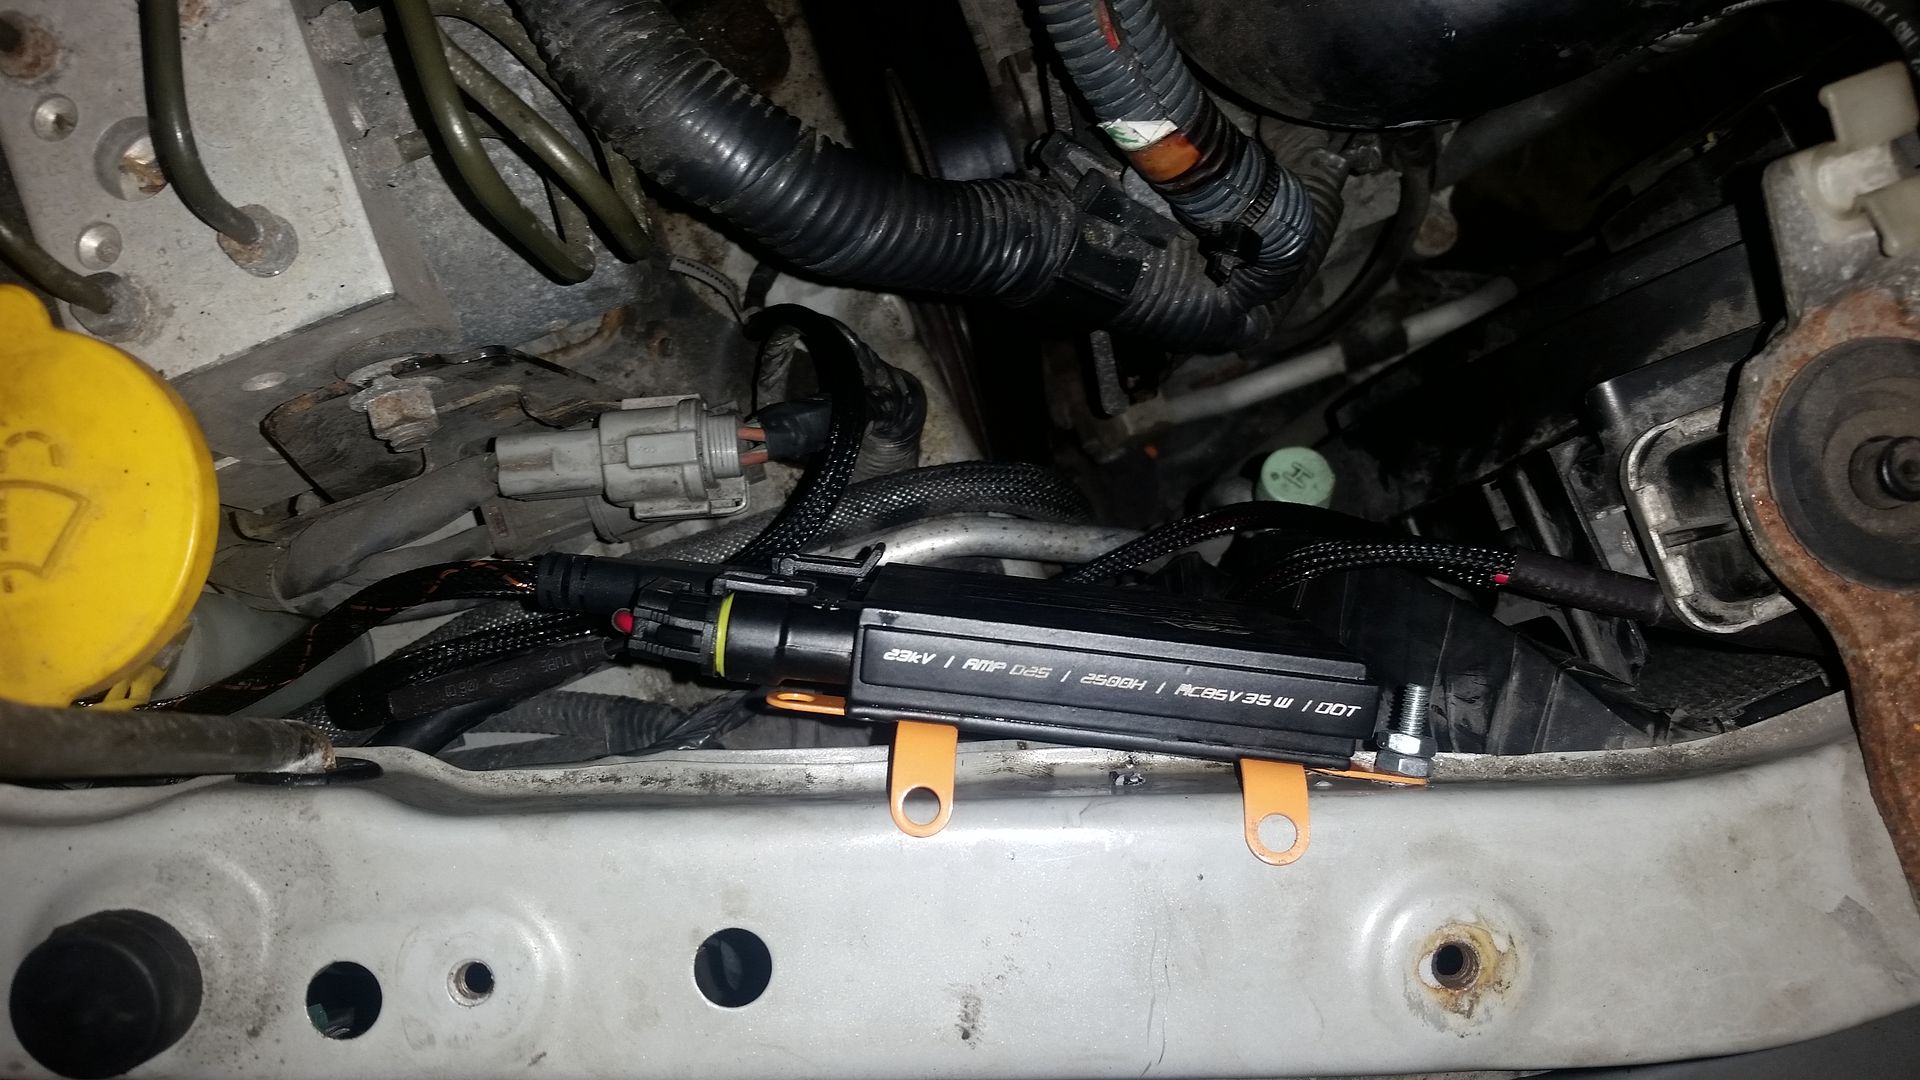
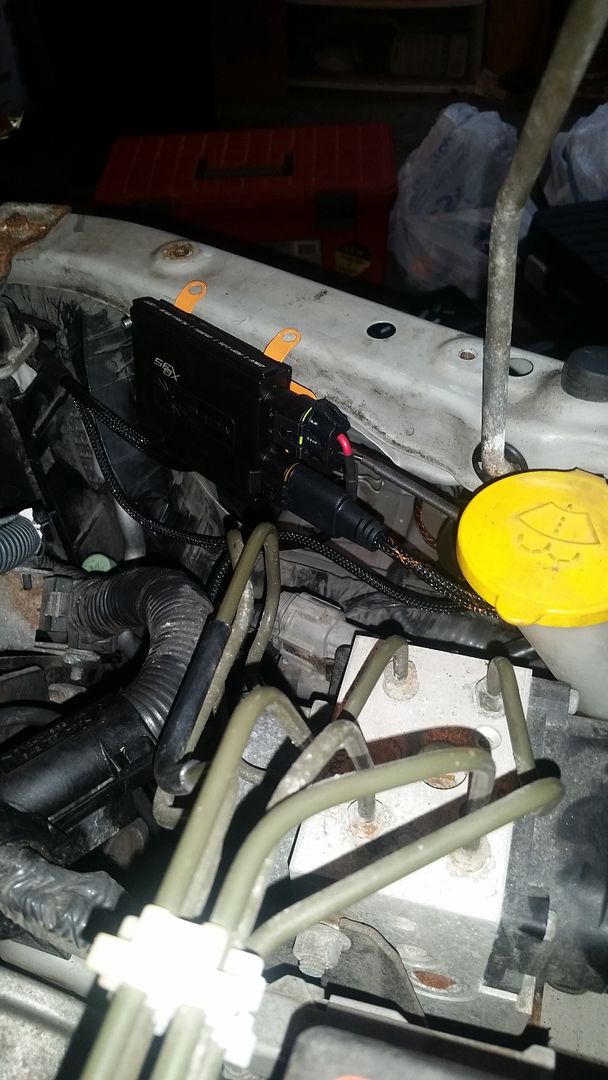
Now on the passenger side, I mounted the ballast horizontally due to clearance issues. The ballasts MUST be mounted either vertically with the connectors DOWN, or horizontally to ensure that they remain water-resistant.
I may wind up relocating this ballast if I have any trouble with heat since it's so close to the radiator and exhaust.
I tucked the amp igniter behind the window washer fluid, and zip tied it to the AC lines.
From there, follow the tags on the wiring harness. The "Ballast" plug goes into the 2 prong connector of the ballast, the amp igniter plugs into the 3 pin connector on the ballast, which then plugs into the HID bulb. The high beam harness plugs into the high beam solenoid on the projector.
22. From there, re-attach the headlamps in reverse order. Plug in the corner marker, the center bulb, and the projector into the amp igniter. Make sure to re-use the rubber grommet that was on the headlight housing over the old H4 bulb. This will help keep things water resistant.
After the electrical connectors are plugged back in, line up the locating pin on the light between the corner marker and the headlamp, and push this into the green clip. Reinstall the two 10mm bolts on the top of the lights, and tighten them down.
23. Now that the lights are installed, AGAIN MAKE SURE YOU CLEAR YOUR HEADLIGHTS!!!!! I don't have any pics of this process, but there are a ton of light cleaning tutorials available online, as well kits you can buy. To do mine, I first cleaned the headlights thoroughly with soap and water, then dry them. I wet sanded with 800 grit, then increased to 1000, 2000, then 3000 grits. You'll know it's time to switch grits when you can stop feeling a lot of resistance on the sandpaper. When you first start, especially with the 800 grit, you'll feel the sand paper wanting to catch on every bit of fog on the lights. Once that's sanded down, the paper will start moving smoother over the light. I use a spray bottle filled with water to constantly keep the lights wet. You don't wan't to let the lights get dry, so the spray bottle works great here. You'll also want to change directions with every grit. So with 800 I sanded horizontally, with 1000 grit I sanded up and down, and so on with each grit. If you do this with your lights on the car, make sure you use masking tape to mask off your bumper and fenders so you don't scratch your paint. Once finished, the lights should have a slight haze on them. You shouldn't be able to see any deep sanding marks any longer. If you do still see deep scratches, you'll want to go back over the lights with 1000, 2000, then 3000 until the scratches are all blended well.
Then after wetsanding, I used Meguiars Plasti-x on a yellow polishing pad that attaches to my drill. This isn't necessarily the best polish, but it's what I had on hand. Follow the instructions on the bottle, regardless of what polish you use. I hit each light about 4 times to get the clarity I wanted. I could probably get them even clearer, but had to get the car back on the road.
After polishing, it is 100% required that you put some sort of UV coating on the lights. If you don't do this, your pretty lights will be fogged and yellow in no time, requiring you to sand and polish everything again. Again, I used what I had on hand, which is Meguiars Headlight protectant. Whatever product you choose, make sure it has some type of UV resistance.
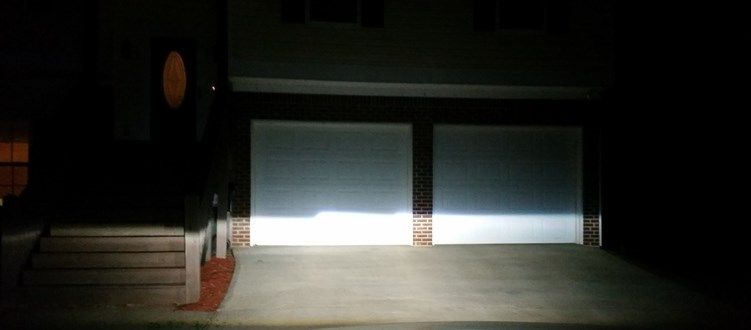
24. Time to tune the aim on the lights. It started raining right when I finished, but I wanted to get a quick output shot so I didn't get to finish tweaking. I brought the right beam down just slightly, so they're perfectly aligned now. Did I mention they're significantly brighter than stock? And because we're using a relay harness, your stock factory wiring won't have to worry about carrying the extra current that the HID's require.
25. Step back and admire your work! Dang that looks good! And a home-made sport grill appeared as well! (again sorry for the dirty car. It's been raining 24/7 basically, and I need to tackle the front bumper with some touch up paint where the front plate was).