PontiacBonnevilleClub.com http://www.pontiacbonnevilleclub.com/forum/ |
|
97 LeSabre Project http://www.pontiacbonnevilleclub.com/forum/your-ride-pics-and-videos/topic51882.html |
Page 1 of 2 |
Author: | gweg_b [ Mon Jul 16, 2018 4:00 pm ] |
Post subject: | 97 LeSabre Project |
So, this is something I've been thinking about for awhile, but finally started this past weekend (7.14.18): working on my mom's 1997 LeSabre. My parents bought it in '99, and currently only has 165K miles on it. The problem is it's gotten a lot of abuse over the years, being parked outside all its life and driven in the winter. As a result, the rocker panels have rotted. The passenger side isn't too bad, but the driver side is gone. Because the engine and trans, and most of the rest of the body, are still good, I thought it was worth trying to save the car. First, my mom can't just go out and buy a replacement (especially at a price where it wouldn't need work), and second, this will be good practice for my LeSabre. It has a bit of less rot than mine (both rear wheel wells are in excellent condition, mine aren't), so I thought it a good project to cut out all the old metal from and weld in new. Here are a few pics: So far Tim and I made it as far as getting the interior apart and inspecting the problem areas. As soon as we can, we are going to start cutting. We don't get a lot of time to work on our projects, so this may take some time, but I plan to keep this as updated as much as possible. |
Author: | harofreak00 [ Mon Jul 16, 2018 4:33 pm ] |
Post subject: | Re: 97 LeSabre Project |
Daunting. For an amateur, this will be overwhelming. Are you sure the subframe mounts are solid? If not, don't waste your time. |
Author: | VIN_H_For_Hotness [ Mon Jul 16, 2018 5:20 pm ] |
Post subject: | Re: 97 LeSabre Project |
Its not my wish to be Negative Nellie here- but if the frame is that rotted I have to question the integrity of the metal brake & fuel lines too. Also, what causes rust isn’t the car- it’s the climate and local road salting. If your moms not planning to move anytime soon all that rust is gonna come back , and in five years you’ll be back to square one . Good luck on the job if you still want to go forward. |
Author: | MattStrike [ Tue Jul 17, 2018 11:15 am ] |
Post subject: | Re: 97 LeSabre Project |
You won't know until you start poking around and cutting just how bad the rear frame really is. Just because it looks intact doesn't mean squat. Has to do with the fact that the frame in these area's rots from the inside out. I would do some poking around those frame rails in front of the wheel well before getting too far into this project. For the rocker panel, again the rot starts from the inside, between the inner and outer structure stampings. So by the time the rocker, which is mainly 'decorative' rather than structural, rots out the entire bottom of the outer structure is usually also gone. Pardon my not at all to scale representation of that cross section: |
Author: | gweg_b [ Thu Jul 25, 2019 11:54 am ] |
Post subject: | Re: 97 LeSabre Project |
It's been over a year now, and so I think it's time for an update: the car is finished!! After months of work, I'd say Tim and I got the car to about 90% of what it used to be. This was our first time doing this much body work. We messed a few things up, but we also learned a lot about what to do and not do next time. My mom is happy. Here are some pics of it finished: It's hard to tell, but a lot of work was done inside and out. I have a lot of pictures to sort through, so I'll post the progress pics soon. But, Tim and I are happy with the work, and this was a huge learning process, and we now have more knowledge to apply to my 95 LeSabre for when the time comes. |
Author: | tcolvinOH [ Thu Jul 25, 2019 2:50 pm ] |
Post subject: | Re: 97 LeSabre Project |
This definitely took longer and was way more involved than either of us expected, even though we both knew it was going to be an extensive repair. This was a good project to develop body work skills on and there are lots of obvious imperfections in some of the repairs where decisions were made and skills werent as developed as we'd have liked. While the initial pictures gave a glimpse of how bad the rust was, once we started poking around, the rust was way worse. There was quite a bit hidden under paint and panels, as well as what appeared to be good metal - wasnt. As Matt suggested, the inner and outer structures of the rocker panels was mostly or completely gone. There was work done to add structure to the rocker panel before we put the skin back on. In addition, the jack point toward the rear of the car was completely gone. Significant time was spent attempting to reconstruct this area, with success. Everything that was cut away was replaced with new metal and then sealed, similarly to a repair Matt made (that was mentioned in a previous post). One repair that went rather interesting was the repair of the bottom of the fenders. On both sides of the car, where the fender bolts to the rocker panel, there was at least 4-6 inches of metal that was completely rusted out. This is a common occurrence with this car, as every fender that would match the car (4 different cars) in the Pick n Pull looked exactly the same. Finding both fenders proved to be difficult and expensive. So I took it upon myself to attempt to reconstruct the bottom. The metal was bent by hand, and on close inspection, you can tell that it was. The basic shape is there, but ran into some fitment issues once putting them back on. I made the fenders before we repaired the rest of the car. In hindsight, I probably should have waited until the end of the build, for more accurate measurements. There was some mention early in the project about checking the brake and fuel lines. The good news is that the fuel lines I believe were in good shape to begin with and the brake lines were recently replaced. However, the bad news was that when the brake lines were done, the lines going from the ABS to the master cylinder were not. During the test drive, we blew a brake line and had to take a couple more weekends to repair (mostly because I cant bend brake line worth a *dang*). There's way more detail and as Greg said, there are a ton more pictures. Those will end up here shortly. |
Author: | MattStrike [ Thu Jul 25, 2019 8:39 pm ] |
Post subject: | Re: 97 LeSabre Project |
Definitely oil spray that thing. Can't wait to see the pictures; based on what I saw of the '95 I'd guess this one ended up worse off. |
Author: | tcolvinOH [ Thu Jul 25, 2019 9:10 pm ] |
Post subject: | Re: 97 LeSabre Project |
The 97 was in better shape. The passenger side of the 95 is in pretty bad shape. We didnt have to do much on the passenger side of the 97. You'll see in pictures, I started cutting into the passenger side of the 97 and it was pristine. The floor pan on that side had some issues, but not nearly as bad as the drivers side. Oil spray is a good idea. Or a healthy coat of thick grease...on everything. |
Author: | tcolvinOH [ Thu Jul 25, 2019 9:13 pm ] |
Post subject: | Re: 97 LeSabre Project |
I should clarify...when I said pristine, I meant the rocker panel was pristine. The 95 has a lot of rot in the rocker panel. When I started cutting into the 97 on that side, the metal was clean and solid. The drivers side was so brittle, cutting it up only took so much time due to my inexperience. I got so comfortable with the cutter that I nearly sliced my thumb in half. tcolvinOH wrote: The 97 was in better shape. The passenger side of the 95 is in pretty bad shape. We didnt have to do much on the passenger side of the 97. You'll see in pictures, I started cutting into the passenger side of the 97 and it was pristine. The floor pan on that side had some issues, but not nearly as bad as the drivers side.
Oil spray is a good idea. Or a healthy coat of thick grease...on everything. |
Author: | tcolvinOH [ Thu Jul 25, 2019 9:28 pm ] |
Post subject: | Re: 97 LeSabre Project |
@MattStrike - by the by, if you happen to have a few minutes and dont mind making some A pillar clips, we'd be most grateful. I dont recall how many were broken during the teardown. I think we mentioned it at the meet in June. |
Author: | dougtoth [ Fri Jul 26, 2019 7:29 am ] |
Post subject: | Re: 97 LeSabre Project |
I would suggest that you get some cans of Fluid Film. (Amazon) Spray it down with this. The product is great. Was developed in WWII for the use on submarines and planes to combat the sea water salt. I have used it on my brake lines and also on the inside of the gas door. This stuff will not break down. |
Author: | gweg_b [ Fri Jul 26, 2019 9:24 am ] |
Post subject: | Re: 97 LeSabre Project |
Spraying the underside is not a bad idea. Although, this car's winter use is being significantly reduced after all this work. But, in the end, it can't hurt. Also, my 95 is in much worse shape. The 97 only had one bad side (the driver's), but mine is rotted on both sides, and has a lot more rot throughout the body. But, Tim and I know so much more now about this, that it shouldn't be much of an issue. And those clips Tim mentioned, I need 4 now. Broke the clips in the passenger a-pillar a few weeks ago. Not even sure how I managed that. |
Author: | MattStrike [ Fri Jul 26, 2019 9:38 am ] |
Post subject: | Re: 97 LeSabre Project |
As soon as I have an opportunity I'll print you some clips. I'm hoping in the next few weeks I'll have some time, should have them ready before the next meet anyhow. |
Author: | gweg_b [ Fri Jul 26, 2019 11:00 am ] |
Post subject: | Re: 97 LeSabre Project |
No hurry, since they are not critical to the car's operation. I'm still waiting on the c-pillar panels to be finished anyway. And, at some point today I should be able to get some in progress pics posted. |
Author: | gweg_b [ Fri Jul 26, 2019 12:15 pm ] |
Post subject: | Re: 97 LeSabre Project |
Okay, here are the first round of progress pics. This was during the cutting and early rebuild phases. So, these show getting rid of the old metal and mostly working on designing the replacement piece for the fenders. As soon as I sort through them, I'll have pics of the rocker and interior rebuilding. Having the front tore down. Found rust (mostly surface) on the radiator support: Tim cutting the outer rocker skin off: Tim cutting the rotted inner structure: Rocker skin removed: The crusty floor pan: The bottom of the driver fender. Nothing left: Planning the fender rebuild: Tim forming the metal by hand: The basic shape of the lower fender: Testing on the car: Shaped and welded: Fender replacement painted: The floor pan all cleaned and painted: I should be able to get some more uploaded after lunch today. |
Author: | gweg_b [ Fri Jul 26, 2019 5:05 pm ] |
Post subject: | Re: 97 LeSabre Project |
Went through and found more pictures to post. I'm not going to post everything (we have close to 200 pictures for this project), but I posted the ones that showed the most work or repair. This group is a little larger than the last group. Cutting off the rest of the rocker skin: Welding in support brackets: The inner rocker structure support bracket being welded into the floor pan: Rubber coated all the inner structure: Test fitting the replacement outer rocker panel (this was not a skin, but a full section of rocker): Filling the gaps: Welding the rocker panel into place: Rebuilding the gap between the body and floor pan: Tim and I found a bad spot at the front of the passenger side. This was probably the worst area on that side of the car: Repaired and patched: This was the rear frame rear area in front of the rear driver side wheel. This is where most of the metal was gone: Starting the rebuild of the rear area by adding new metal support: The brick (Tim's plan for building strength into the rotted rear area): The brick being installed in it's new home: Patching up the hole: Epoxied, sealed, and painted: Getting primer on all the repaired areas: Now paint: Sealing up all the seams: The replaced rocker panel all painted: Tim making some final adjustments to the replacement rocker panel (to prevent the bottom of the door from rubbing): Doing some final touch-ups: Getting close to being finished: And when we thought we were finished, Tim attempted to touch up and area we thought was just surface rust until he found out the metal was gone. This was above the rear passenger wheel. So, all the bad metal had to be cut out: Replacement made for the rear wheel well: After we had everything finished, I took the car for a test drive, and I ended up blowing a brake line from the master cylinder to the ABS. Tim and I went through and replaced both those lines with the nickel cooper line. The lines to all 4 wheels were replaced a few years ago by my brother, with the nickel cooper lines. Then with help from Will and Aaron (who drove 7+ hours to help out), we managed to auto bleed the ABS and get the car back on the road. This was a challenge, and a massive project. Tim and I accomplished a lot in a year, and learned more than I thought we ever would. It's odd, it seems like we brought the car to the garage such a long time ago, but at the same time, it was all a sweaty blur. The 95 doesn't seem like such a challenge anymore, but it'll have to wait, the SSEi needs work first. Also, Tim may stop by to add more of his thoughts. I'm glad we finished this project, but it's going to seem weird not working on it anymore. |
Author: | tcolvinOH [ Fri Jul 26, 2019 9:04 pm ] |
Post subject: | Re: 97 LeSabre Project |
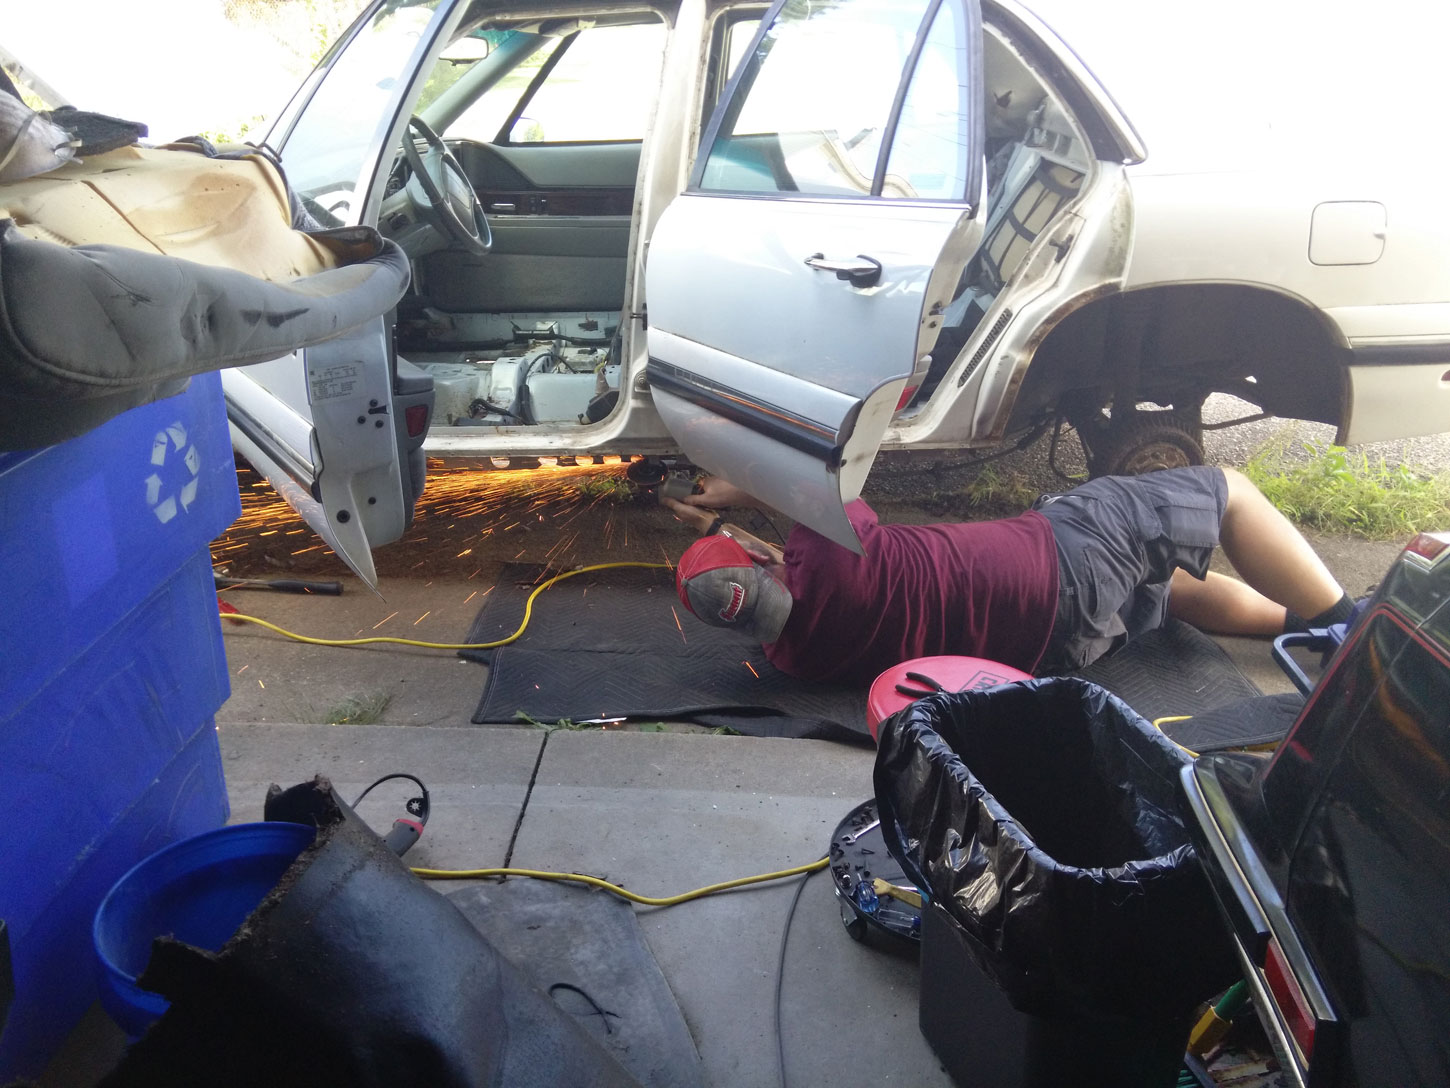
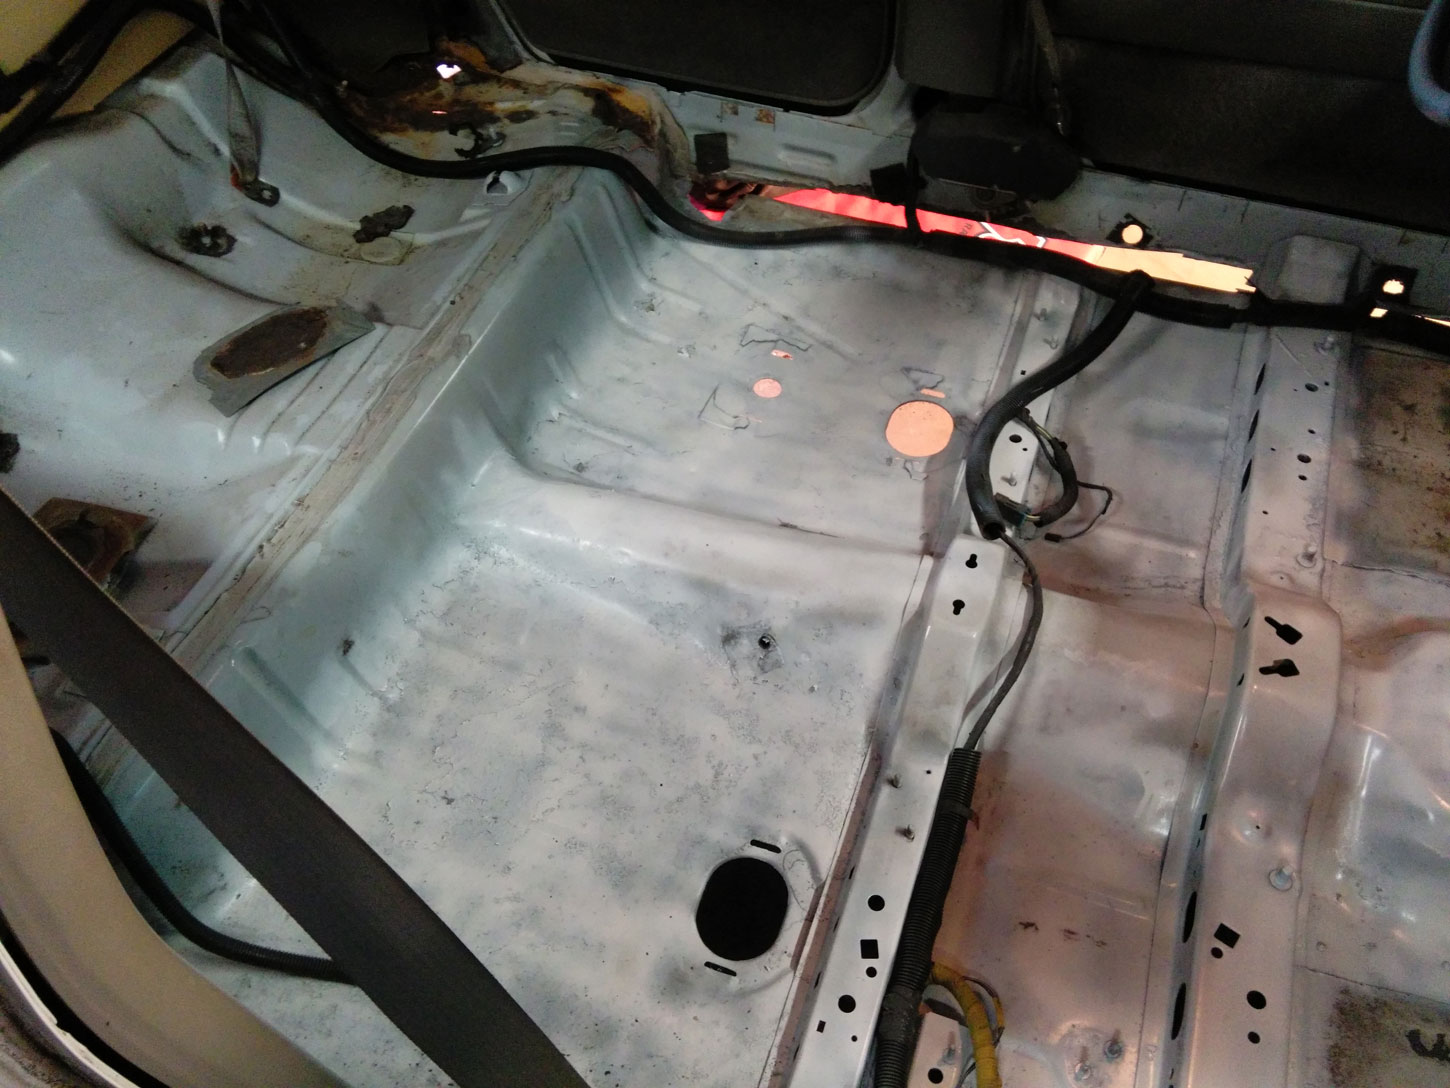
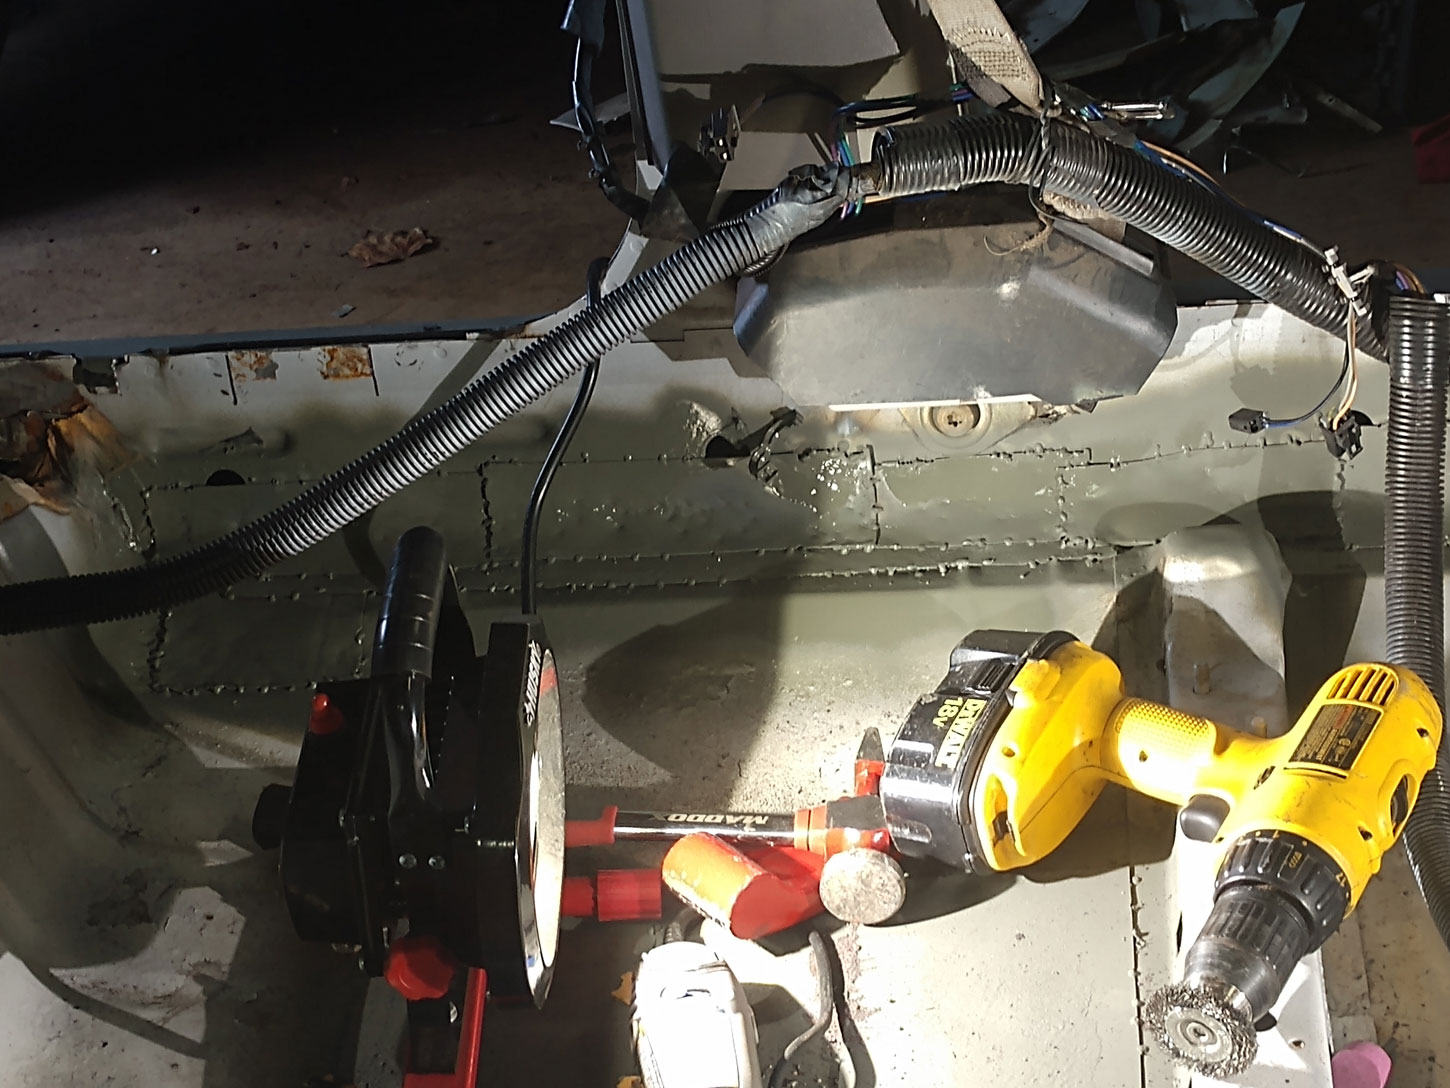
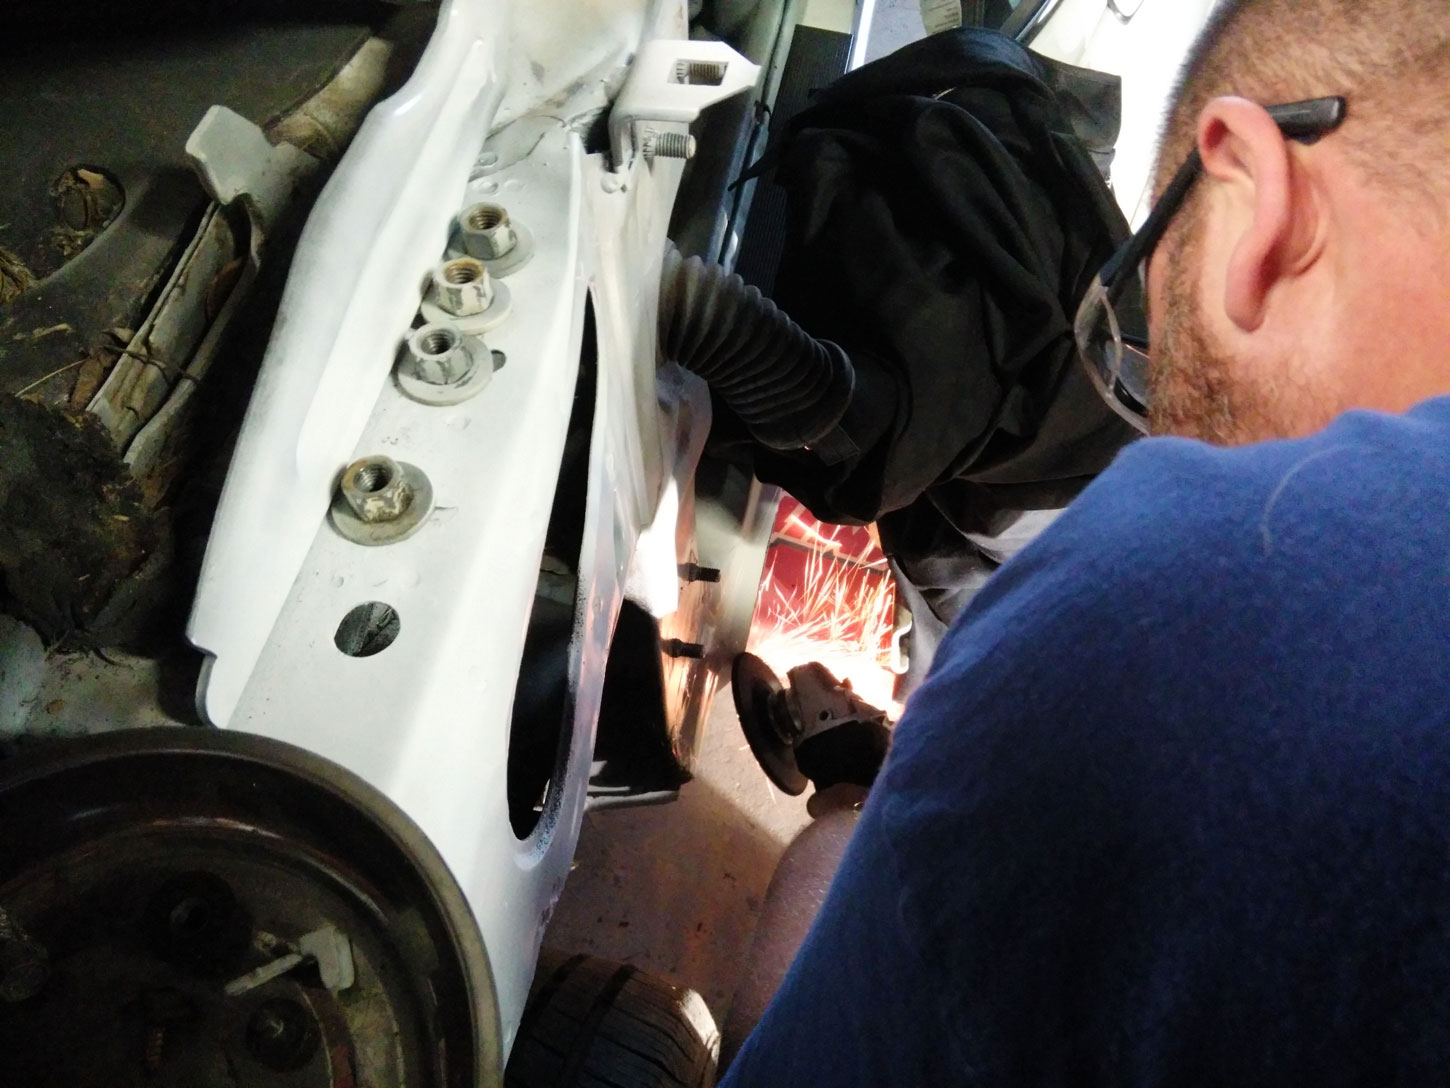
You can see from the last batch of pictures, there was quite a bit of metal work done. At the June 2018 meet, there was some concern that our welder had a problem. However, once we tested at Matt's, we found that it was the homemade extension cord that was really the issue. I spent a fair amount of money to get what was needed for MIG welding and havent had a problem since. Knowing we were going into this project, a lot of what we knew we needed were reliable tools. In addition to these pics, we spent money on getting the welder ready, I spent a ton of money on clamps and metal to make this all happen. As Greg mentioned, we learned a ton on this build. we both knew this was going to be a big project, but I think this is the biggest project we've taken on, to date. 
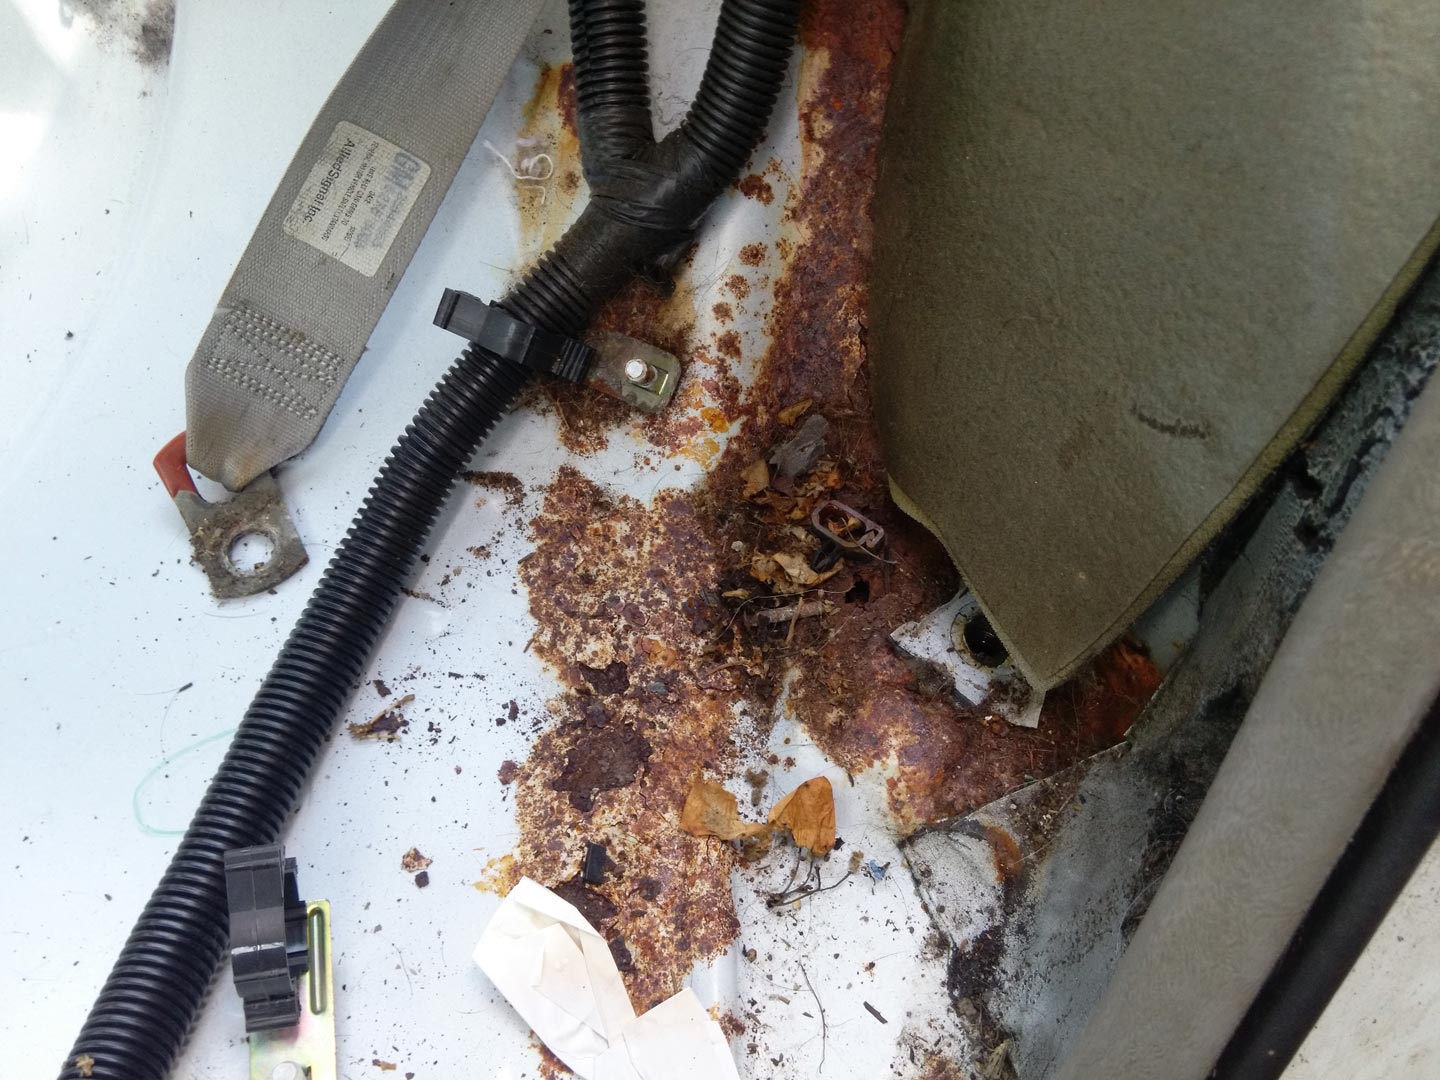
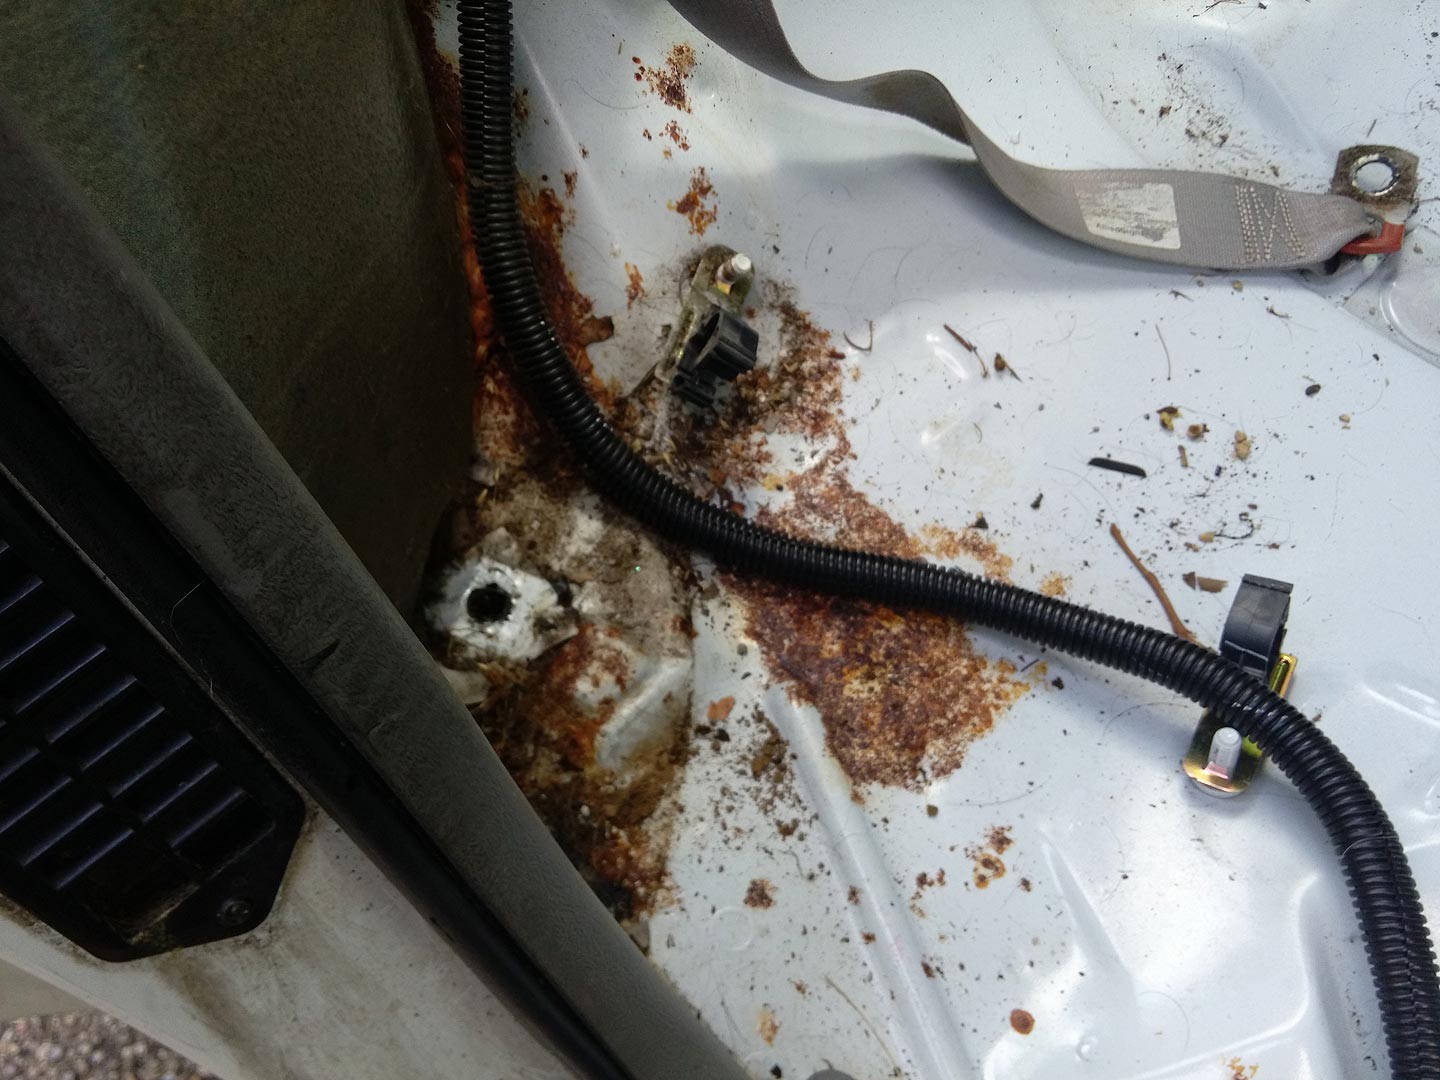
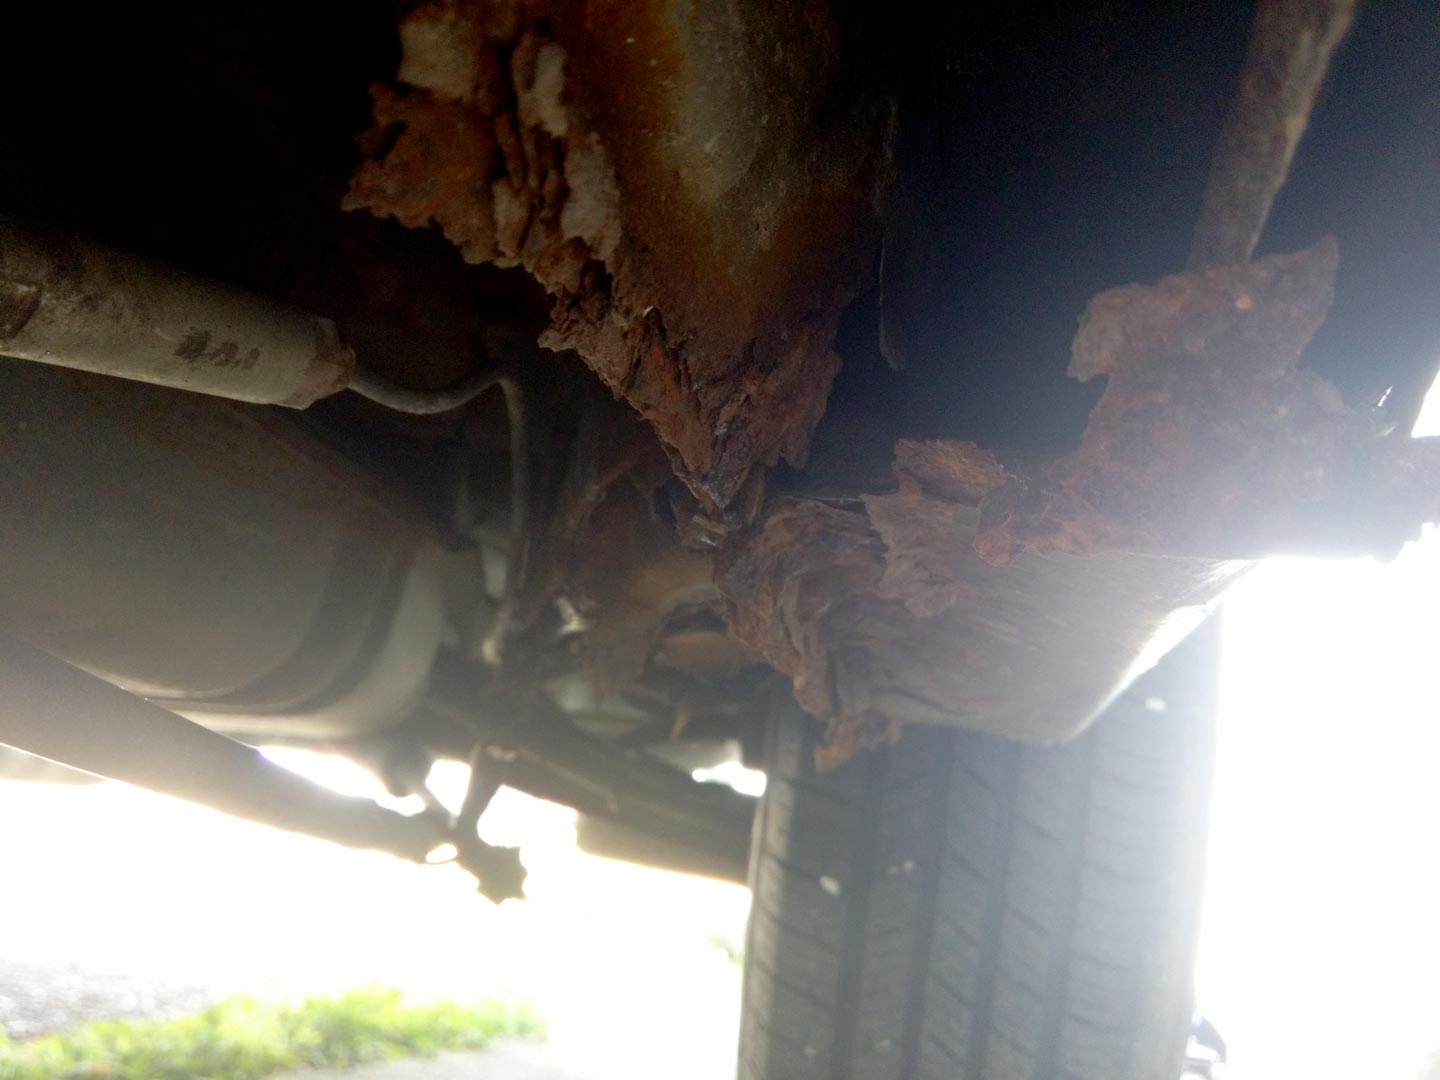
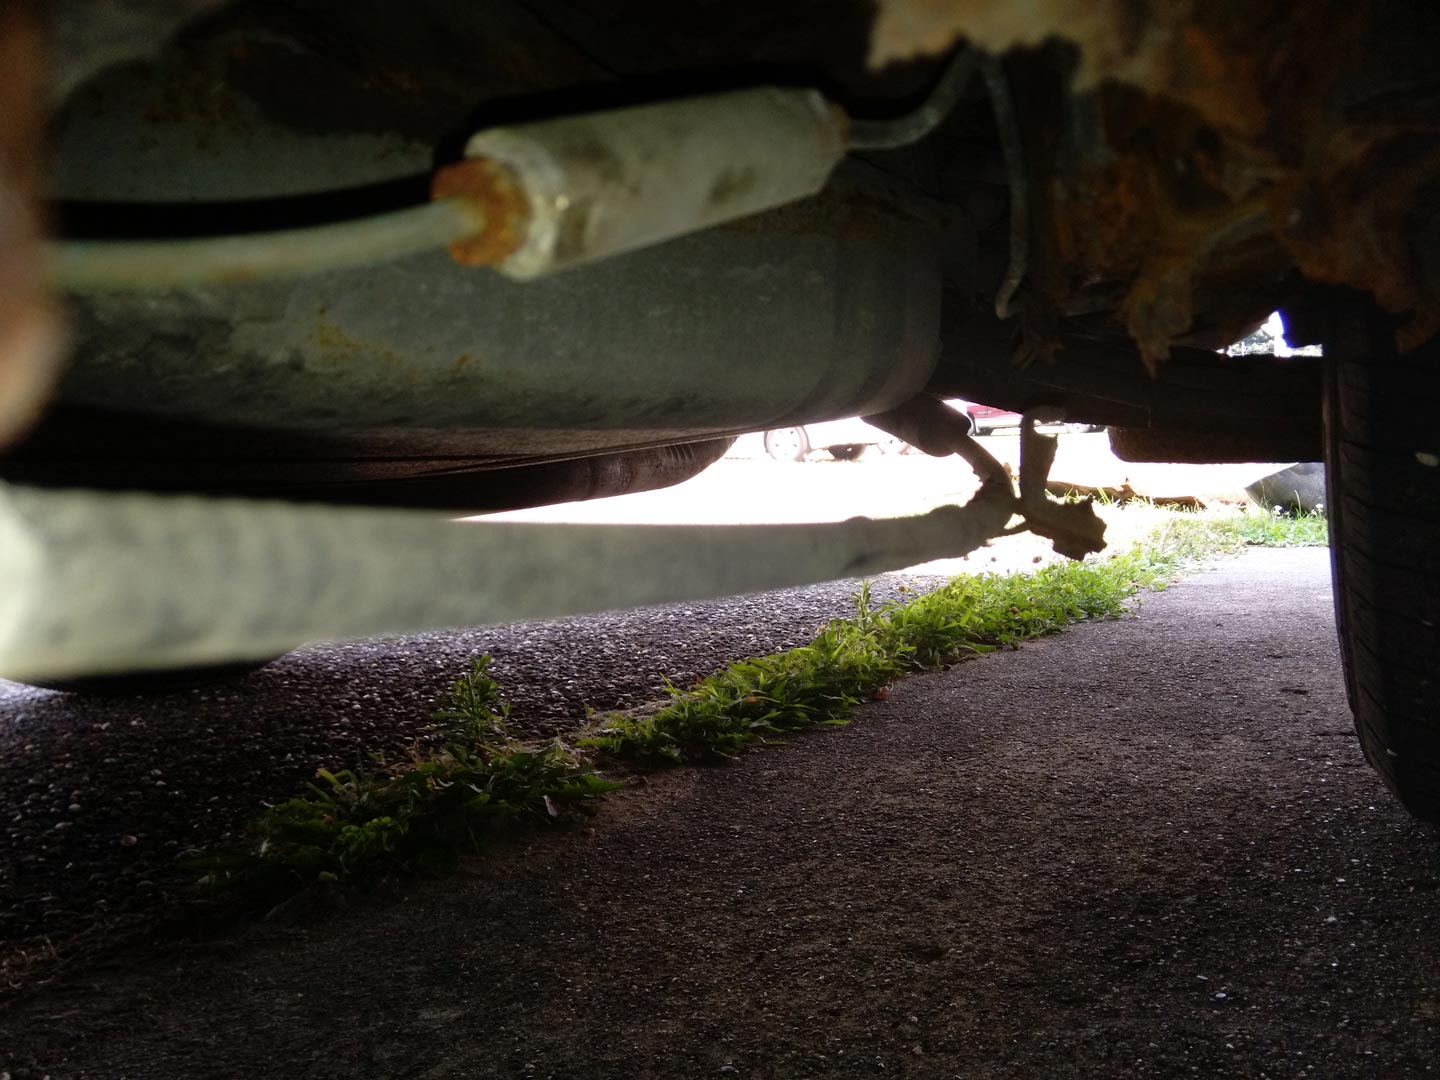
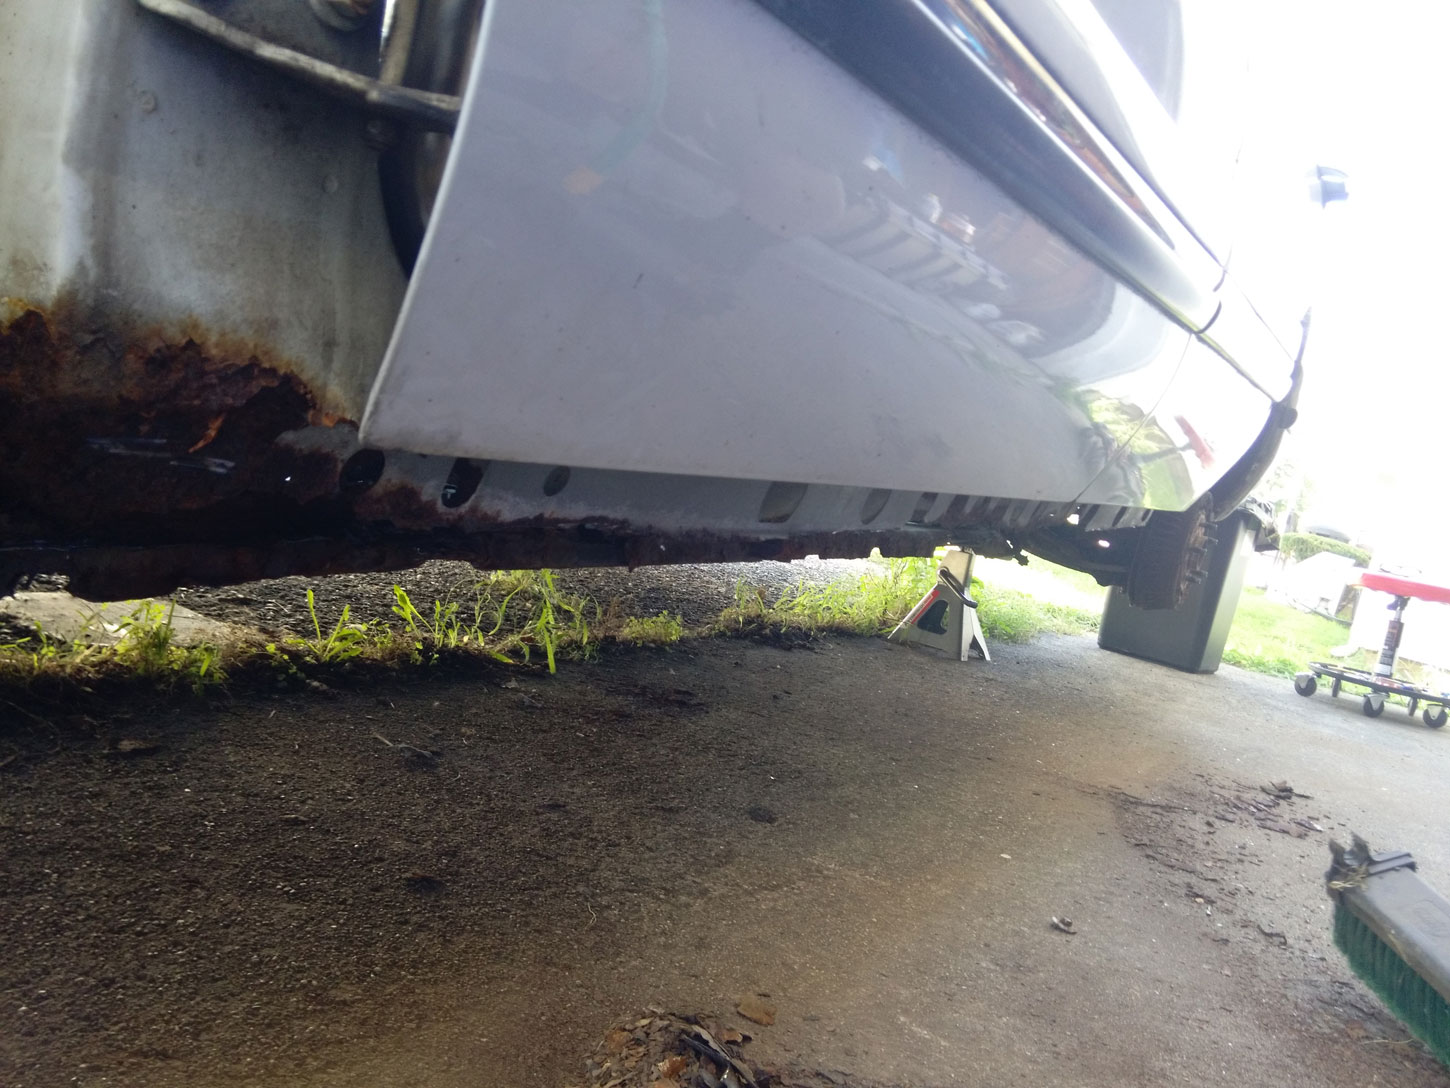
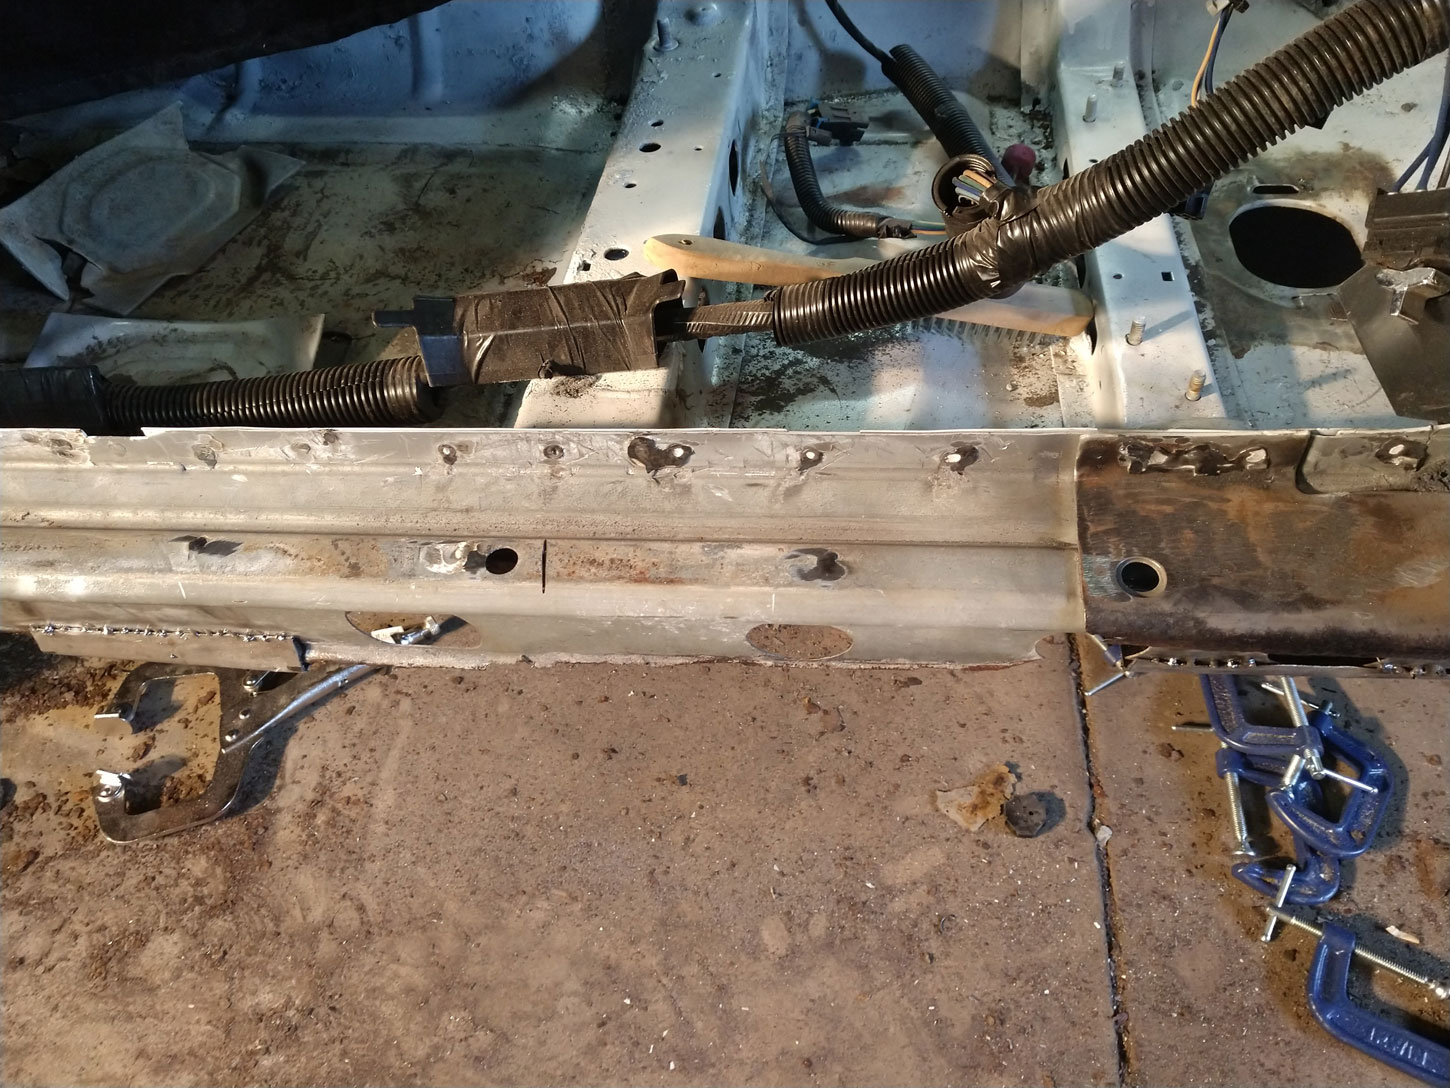
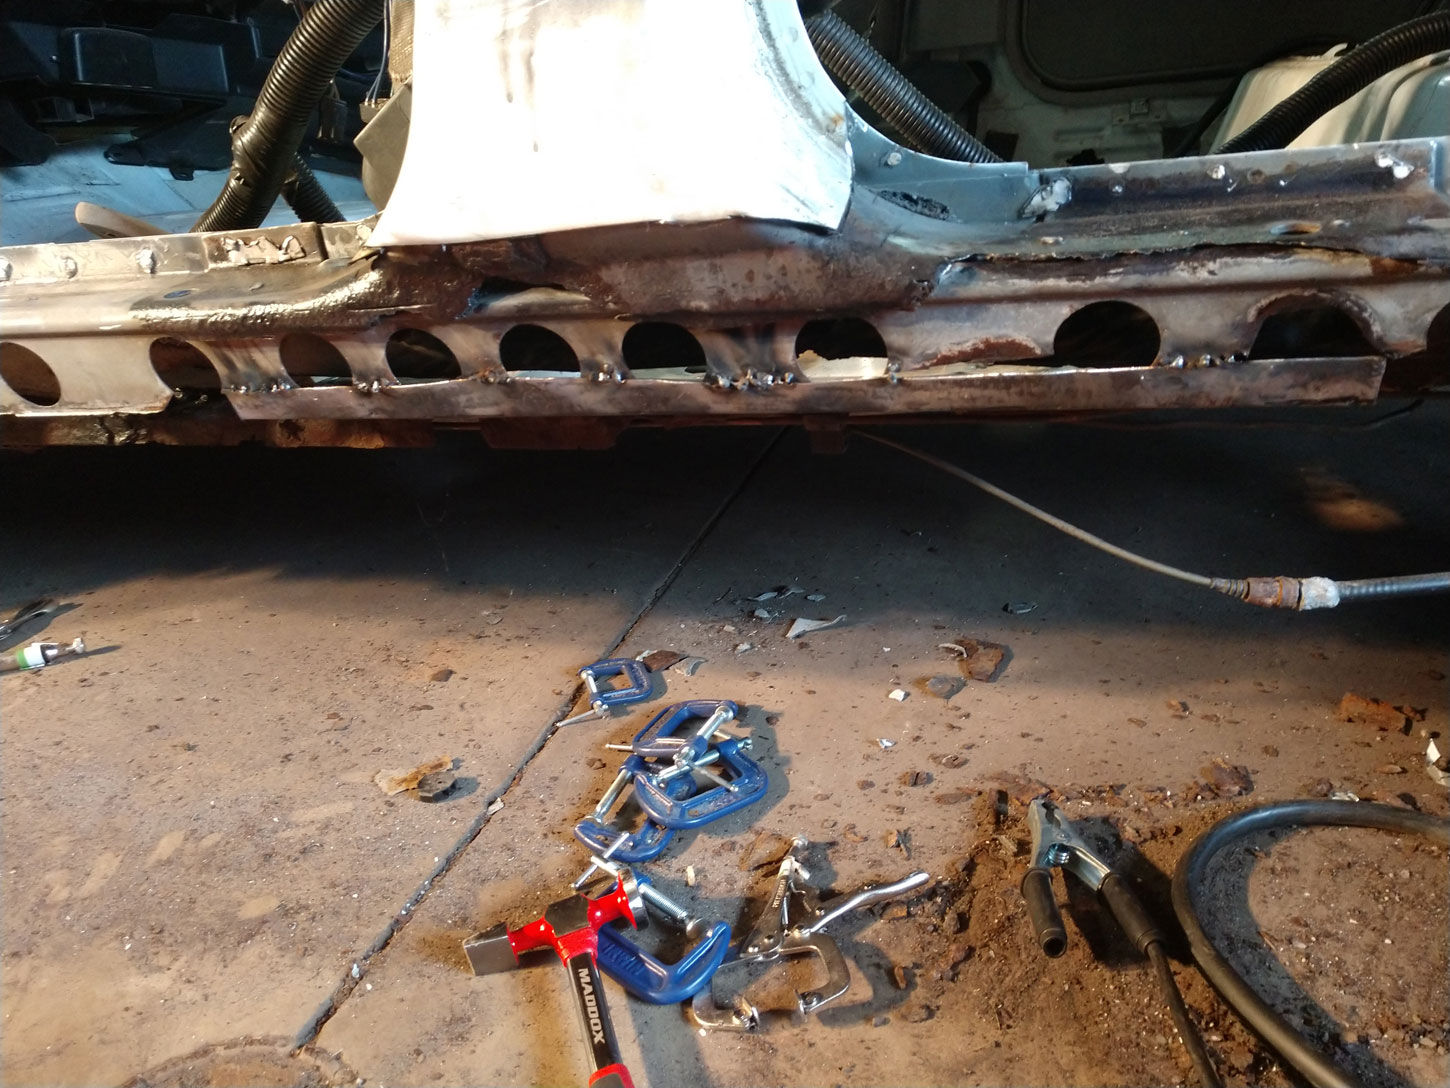
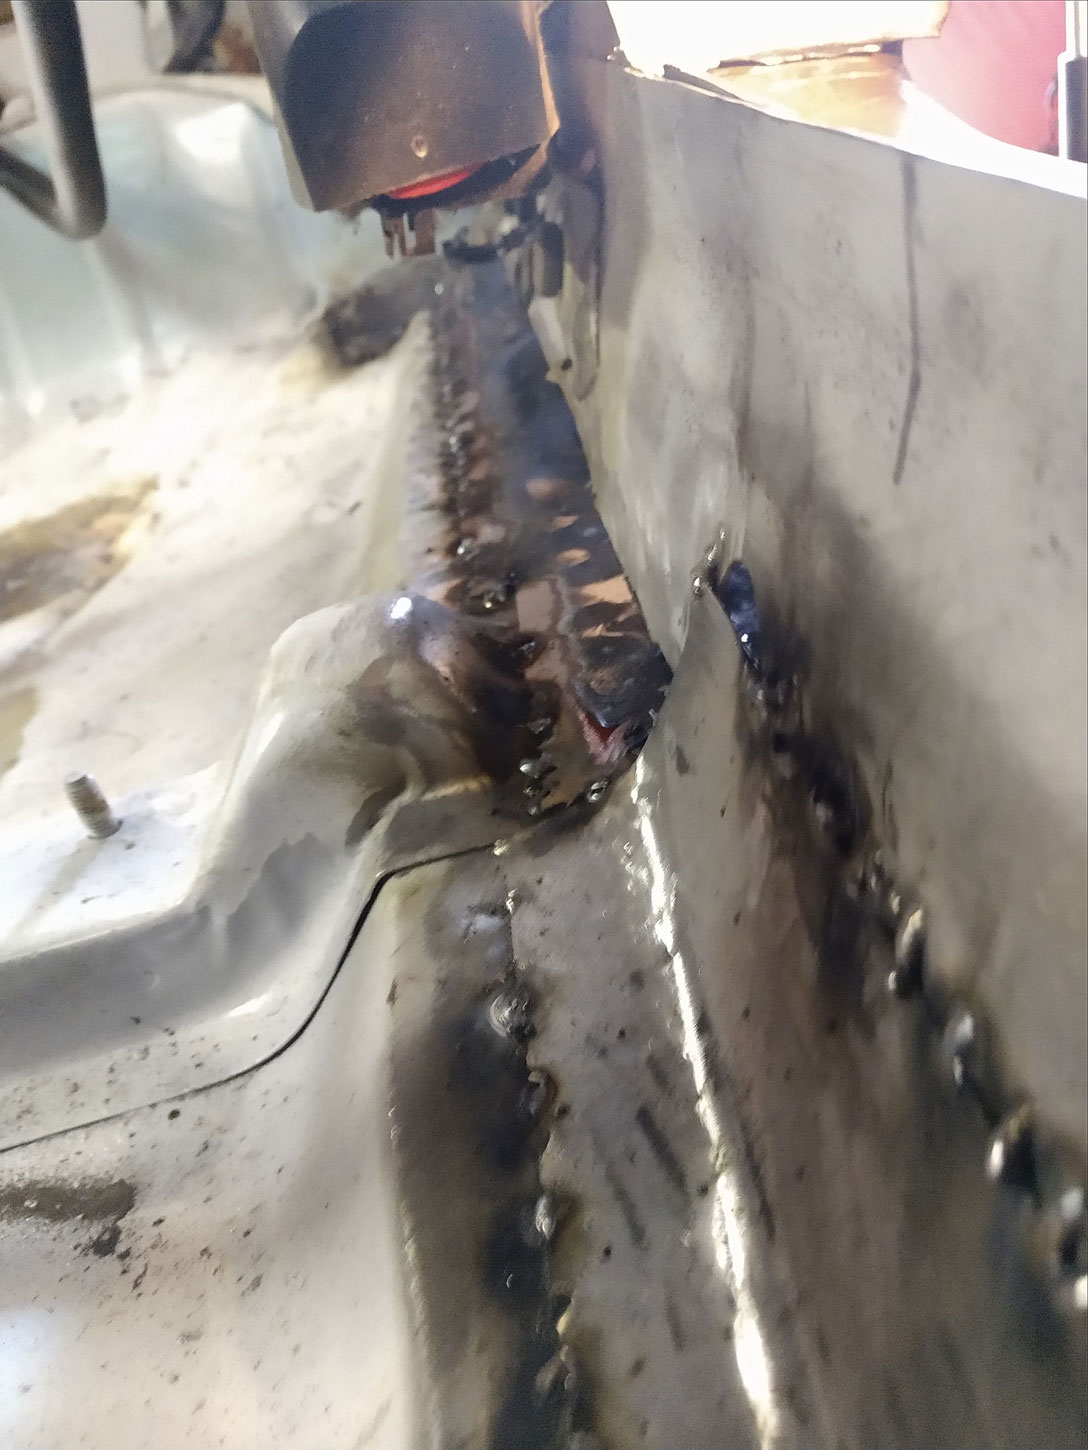
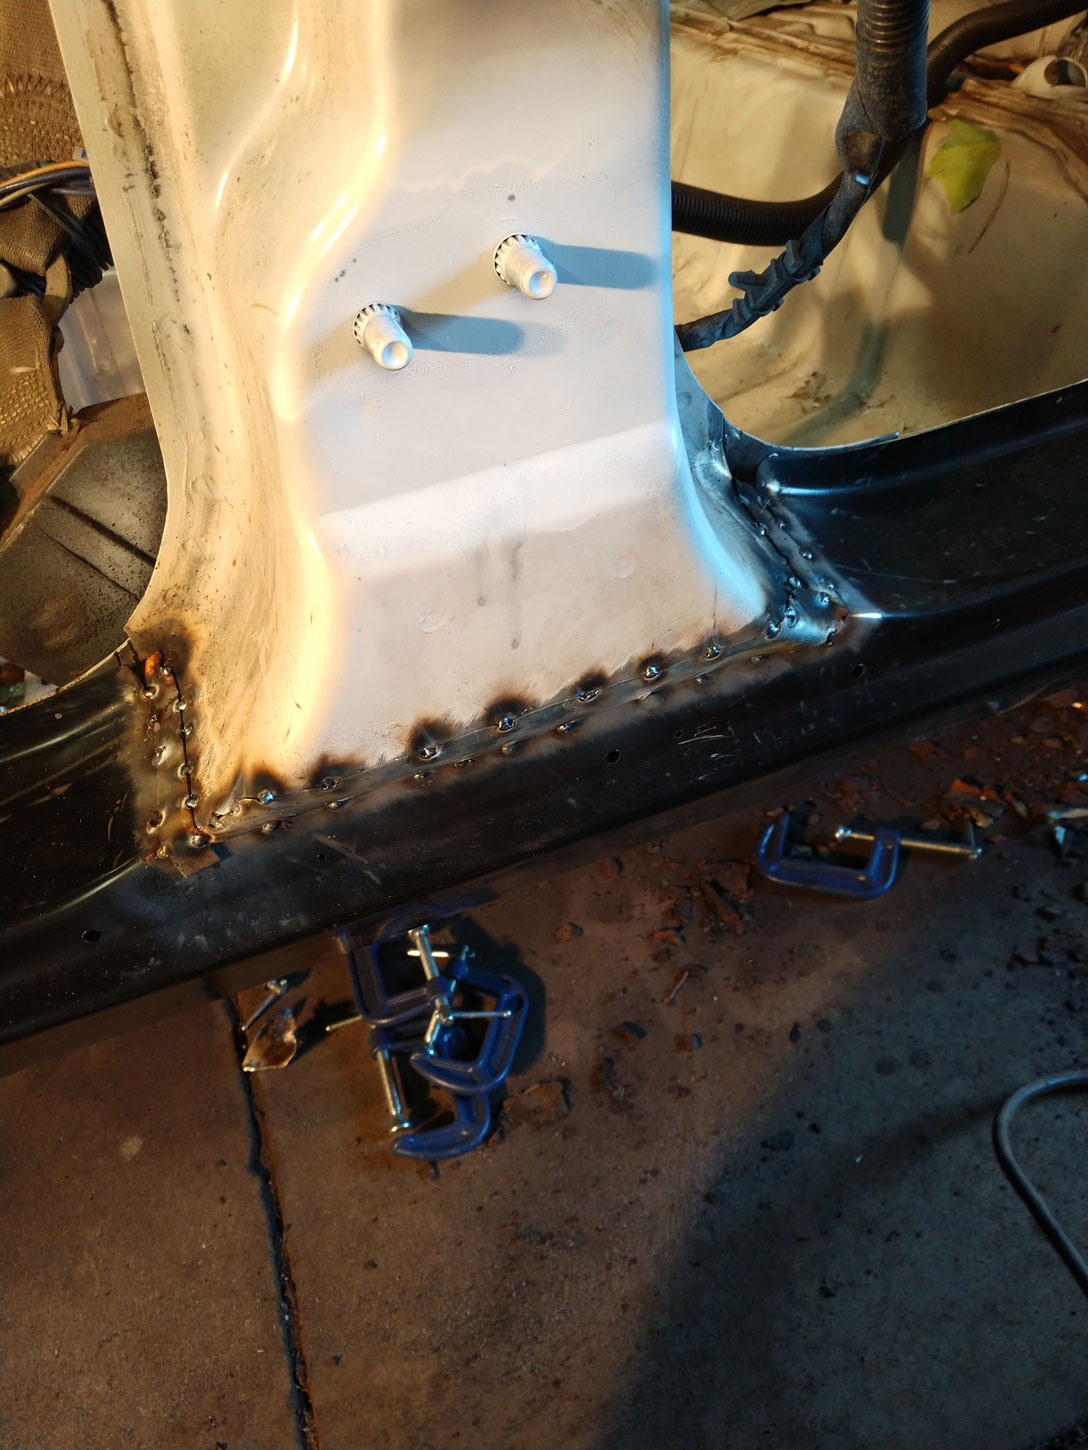
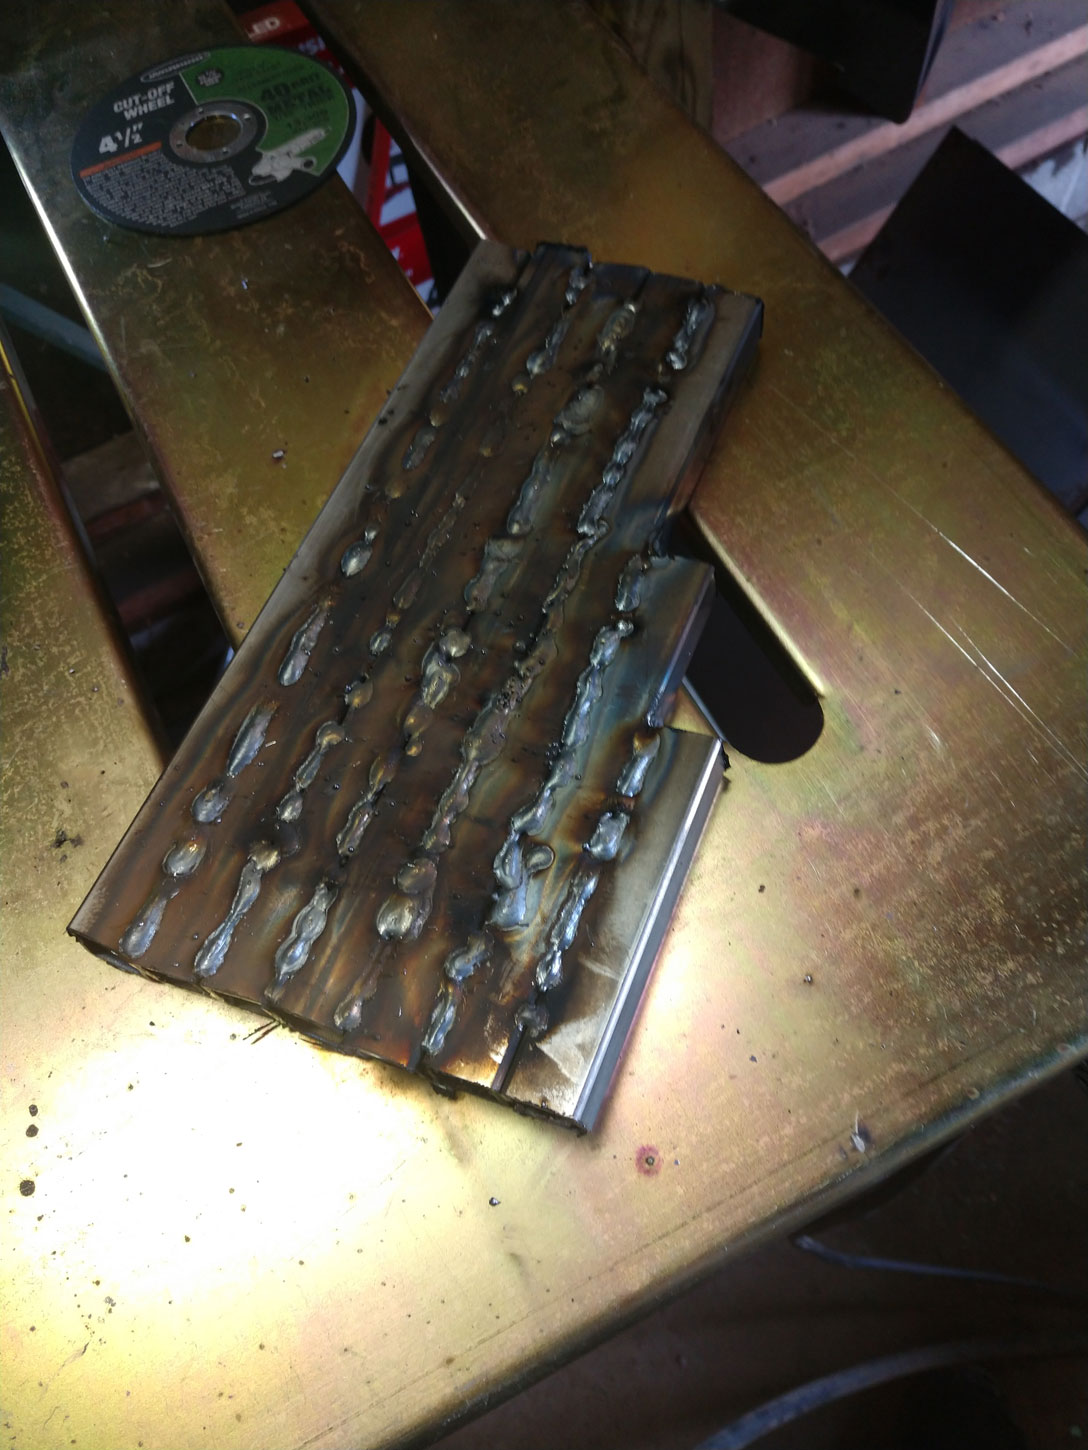
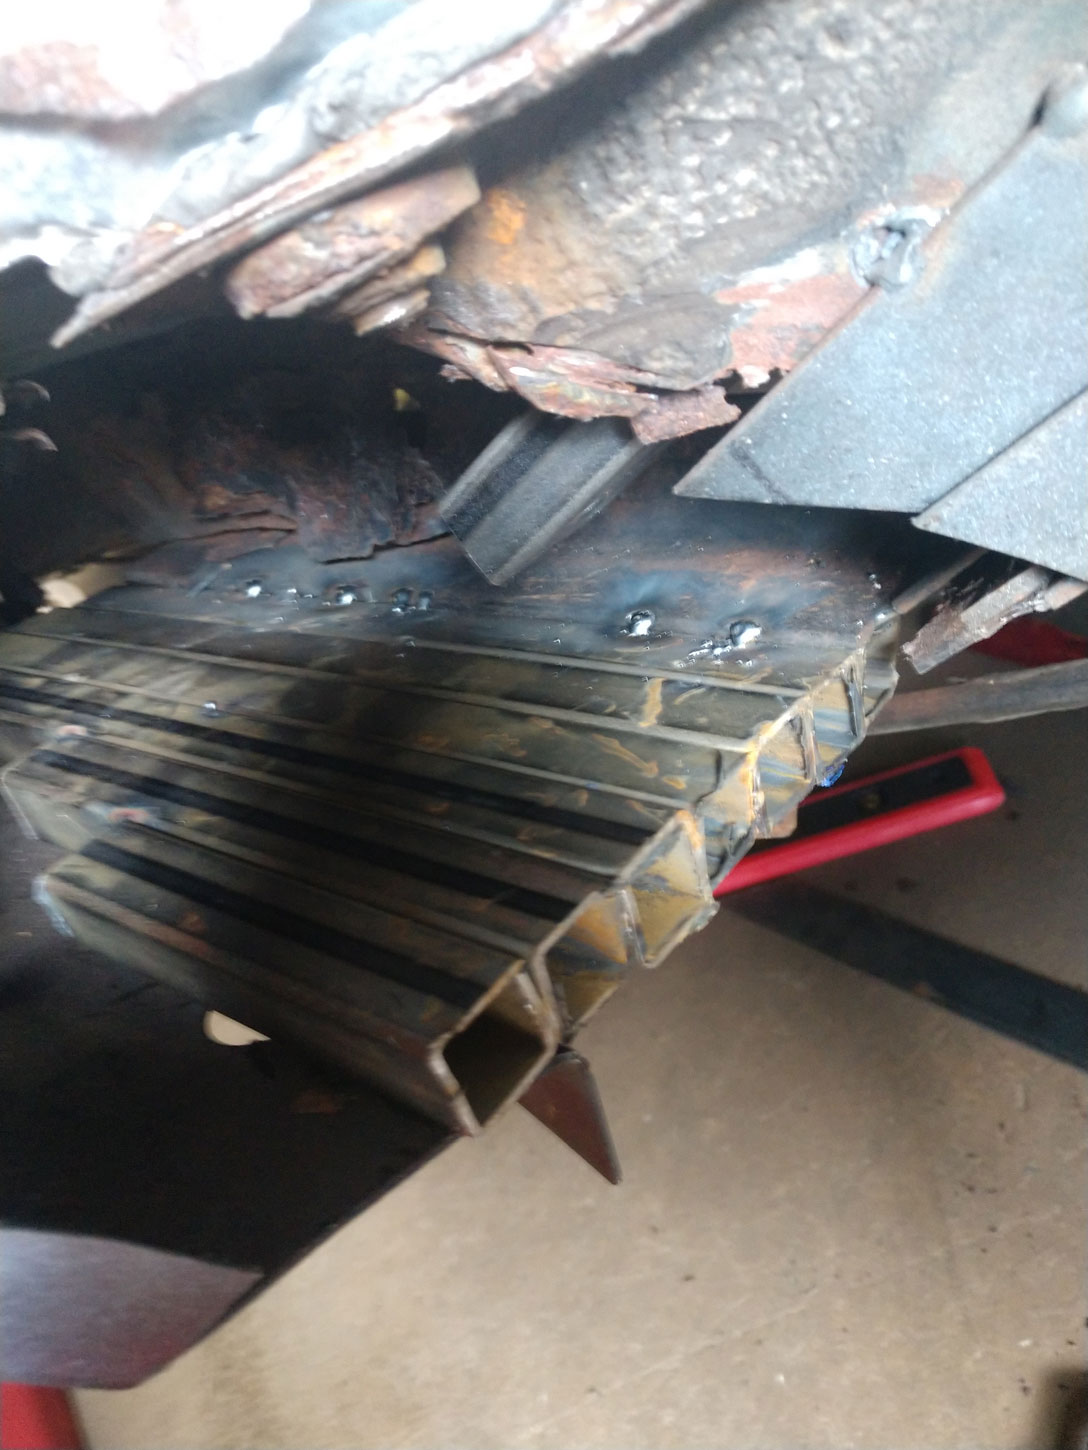
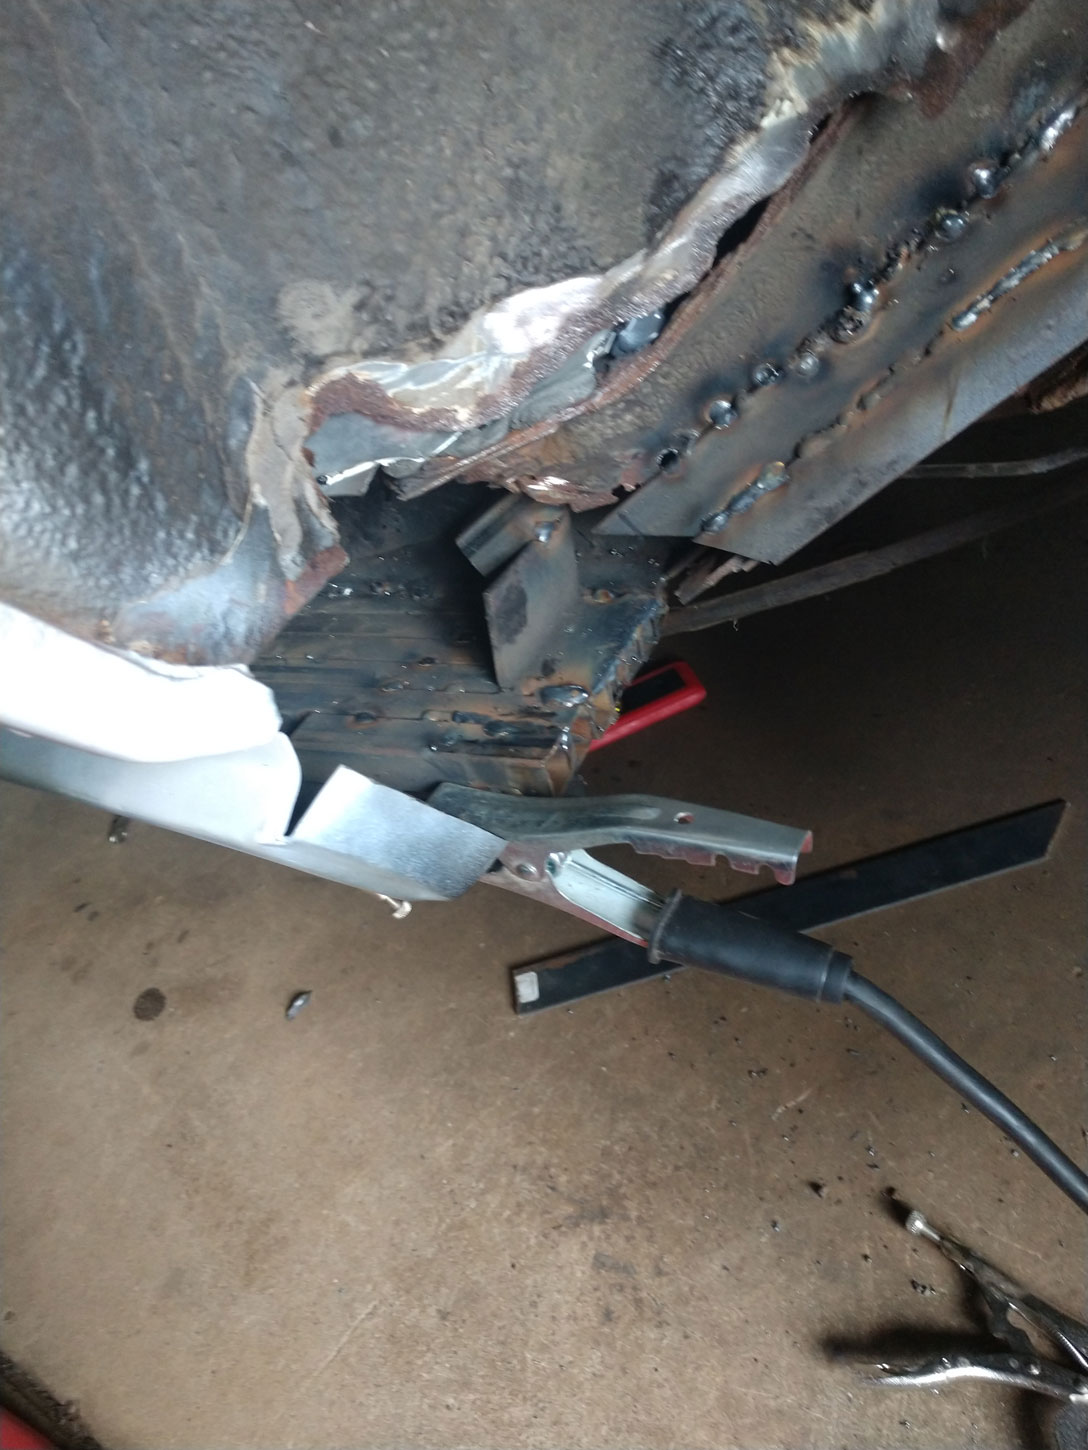
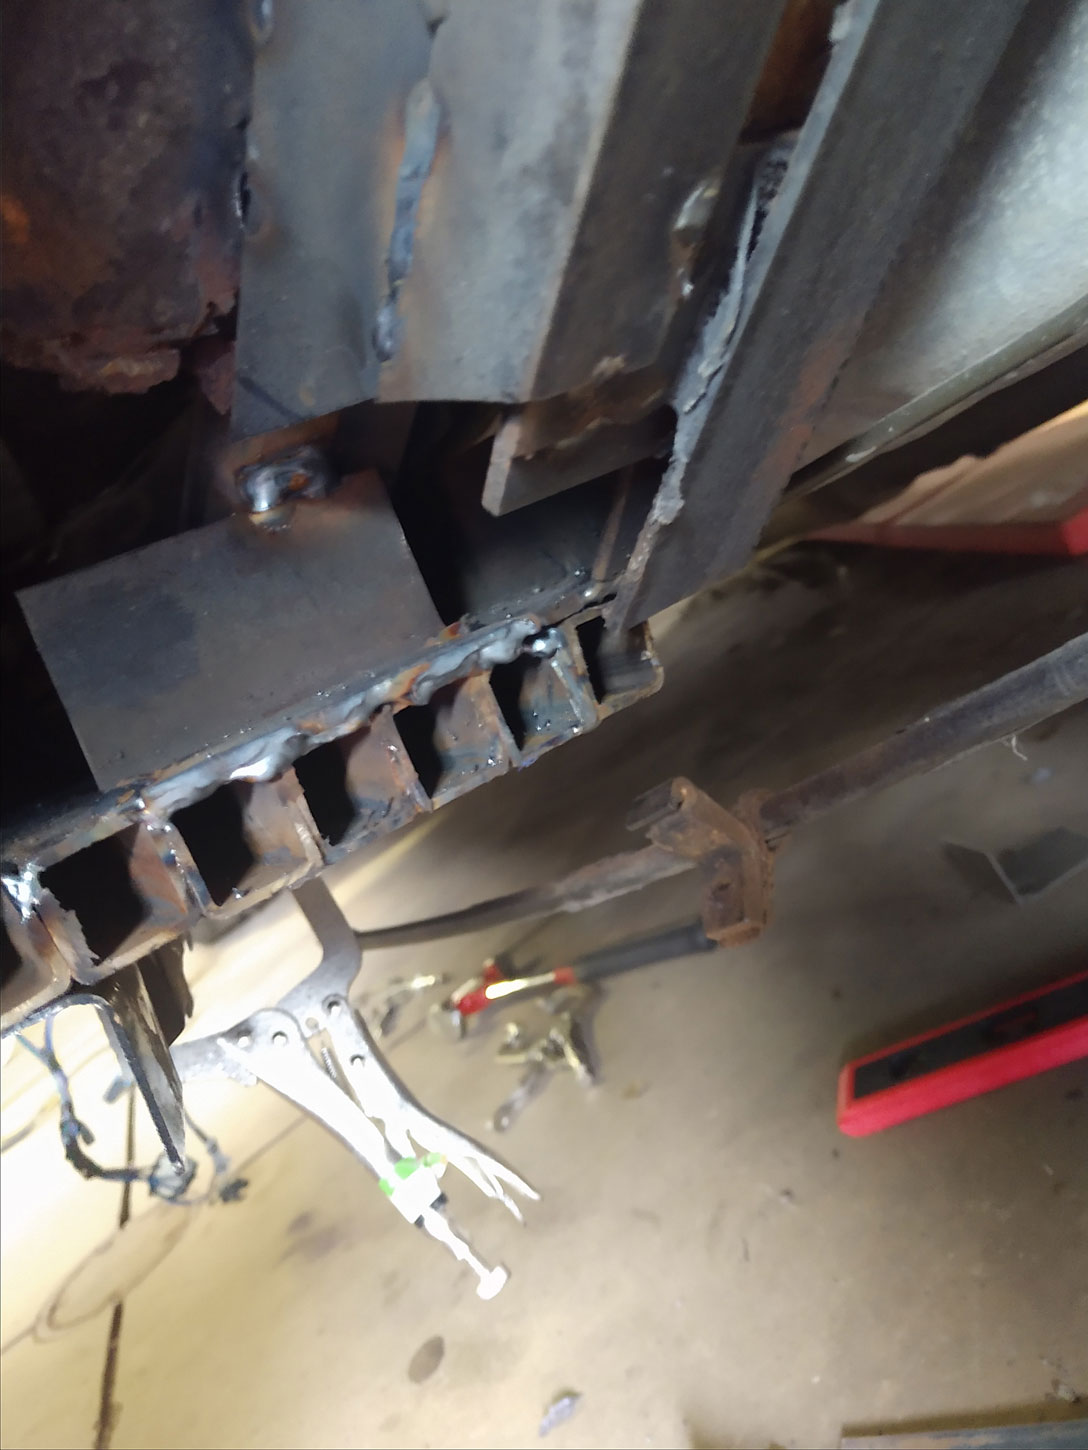
I want to try to expand on the pics a bit. For example, the brick. Im really proud of this, even though that section of the car took weeks for me to really get my brain wrapped around a concept I felt happy with. That part of the car is supposed to have a jack point. The frame rail comes down from the rear of the car and ties into the floor pan and rocker panel/rocker panel structure. Its a fairly solid piece of metal, which is why you can put a jack on it. I wanted to try to replicate this as much as possible. What you're seeing is 3/4 inch tubing, welded together from about 8 inches at its longest, down to about 4 inches at its shortest. Each piece of tubing is tack welded, and then a bead shot down both sides. In addition, because the frame rail was basically gone, I added in straight metal, 3/4 inch tubing, and angle iron to rebuild the frame rail. It is not the prettiest and certainly there are things Id do differently knowing what I know now. One thing I can tell you. Its solid as hell. We've had the jack on it several times since the metal was put it in place and it hasnt creaked or moved in the least. Which was really by design. 
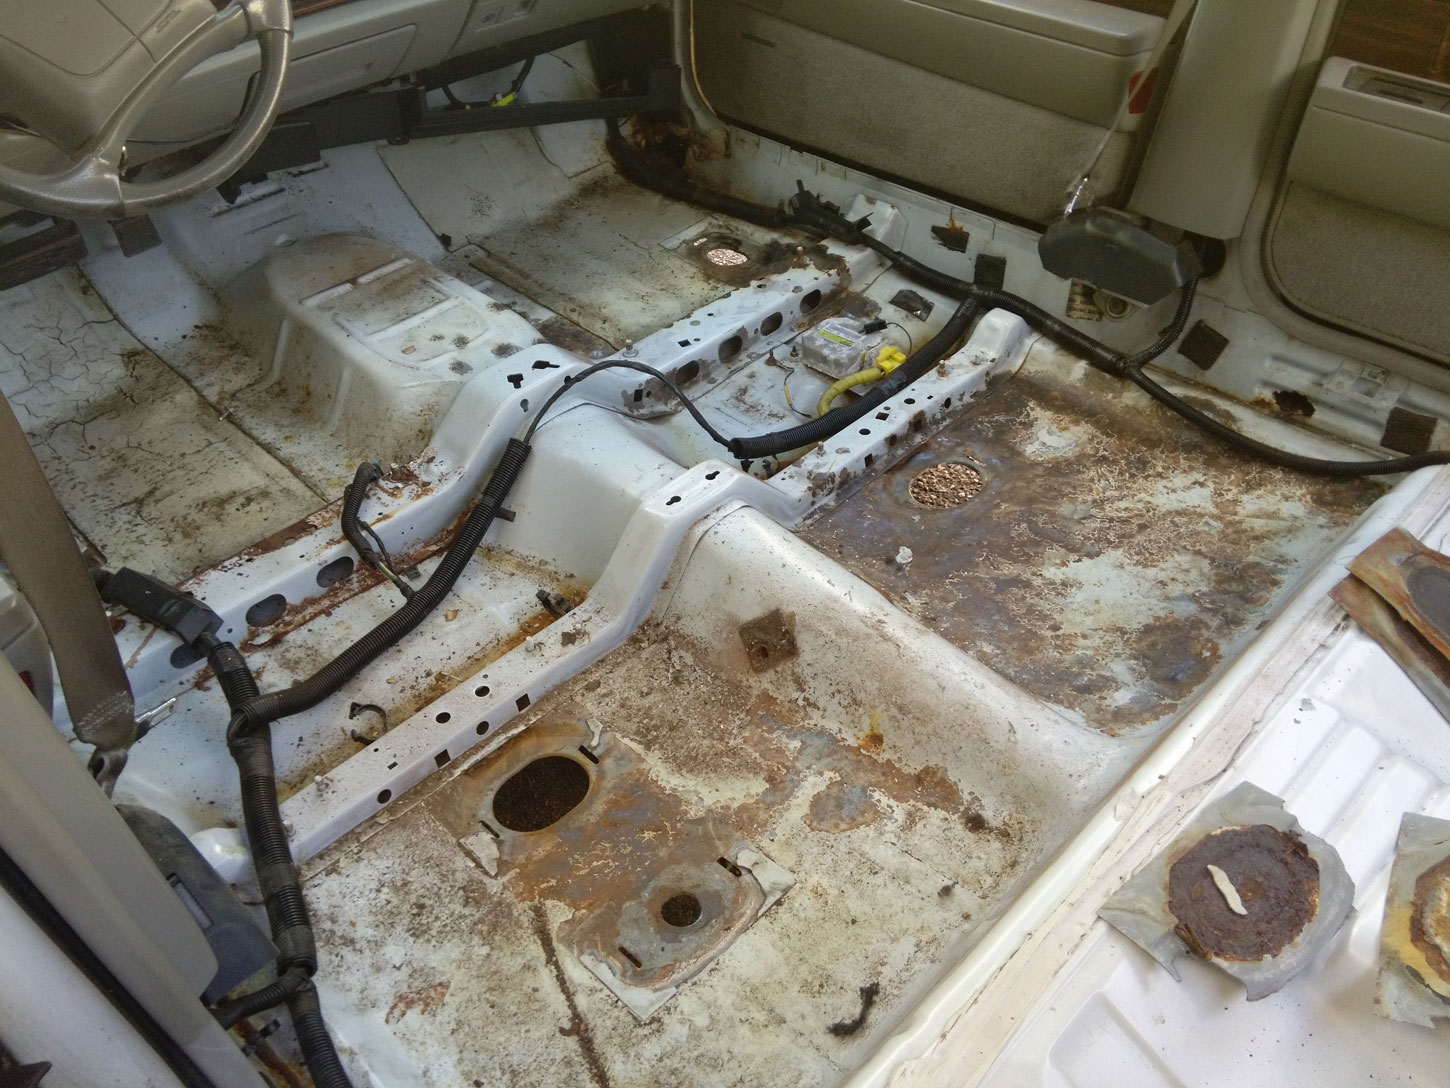
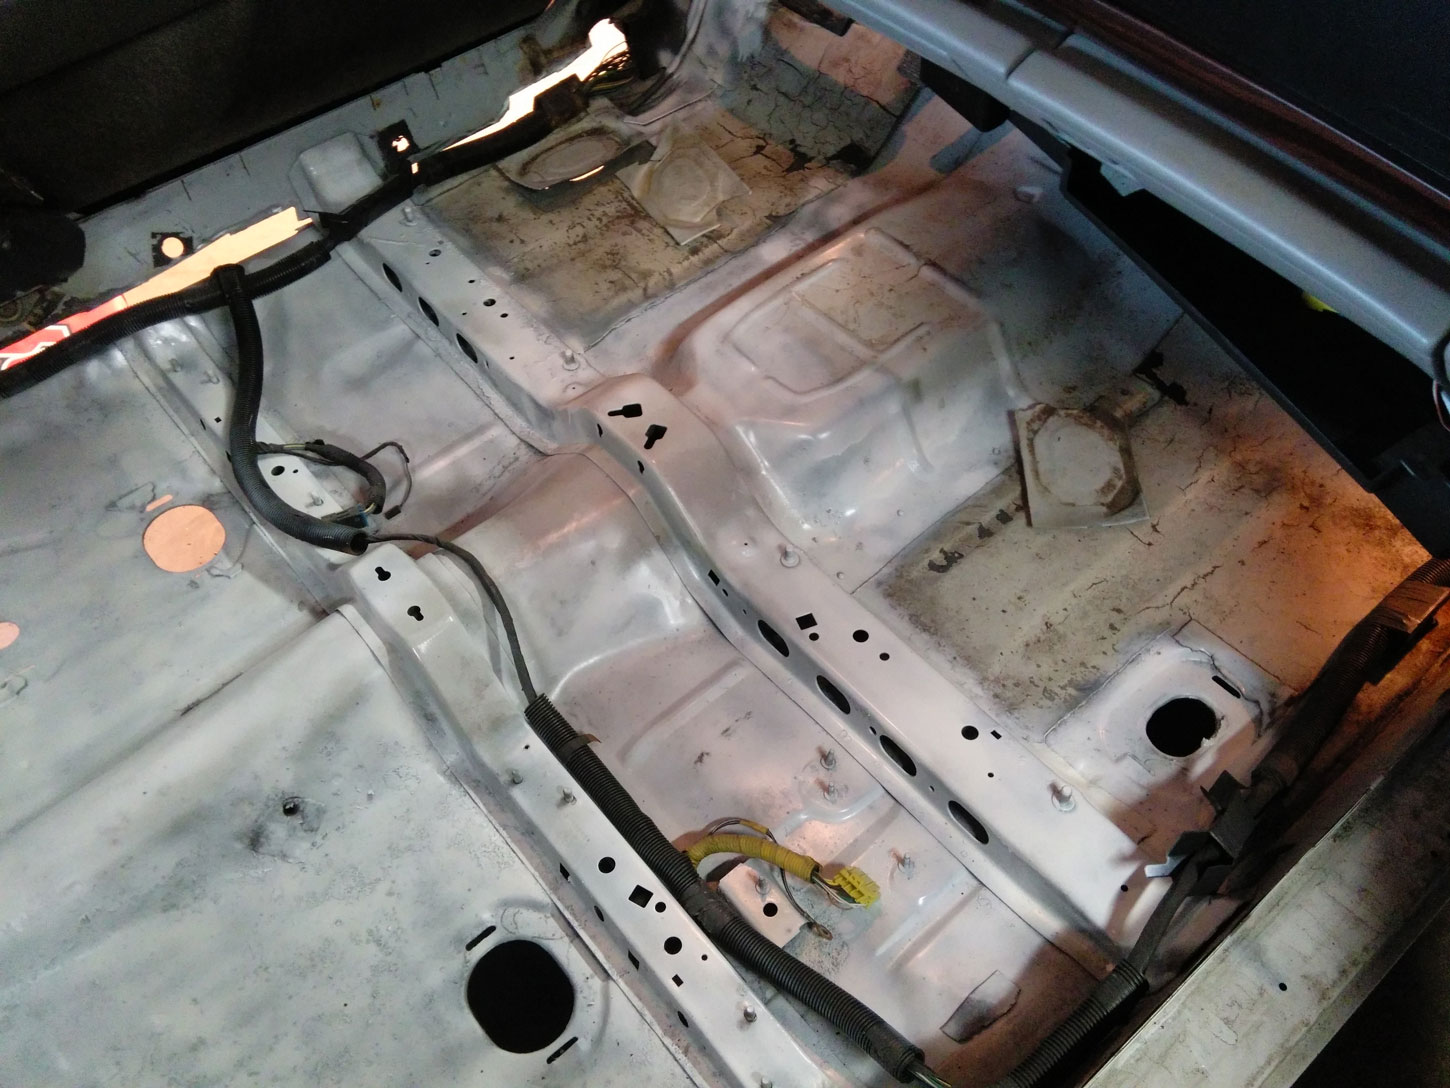
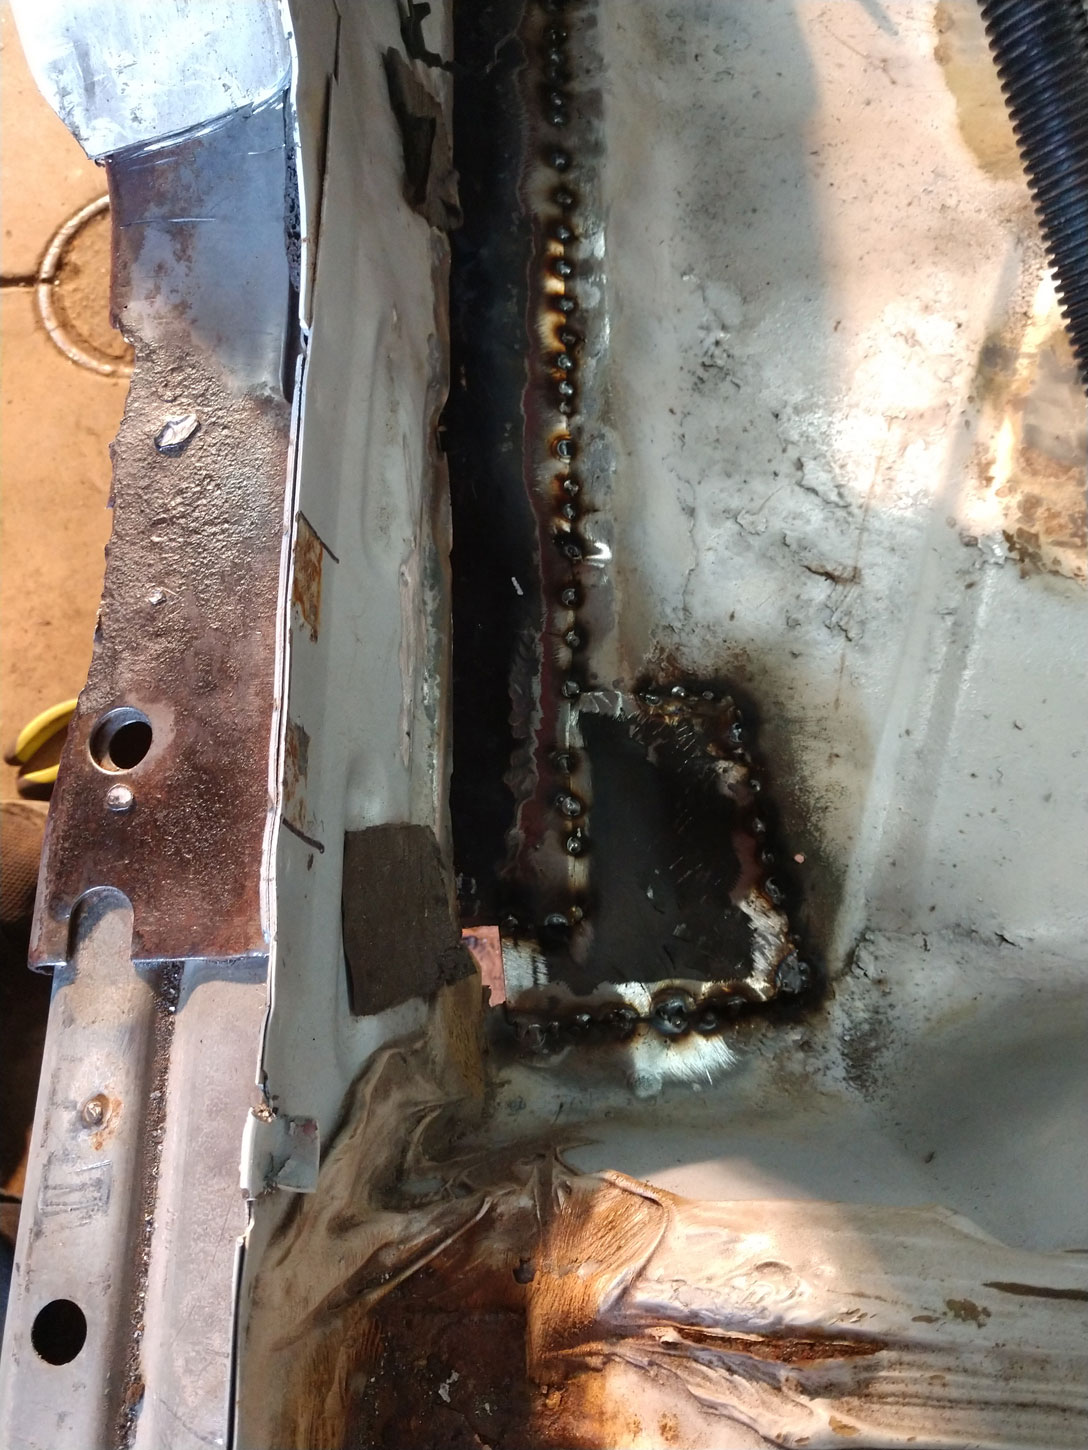
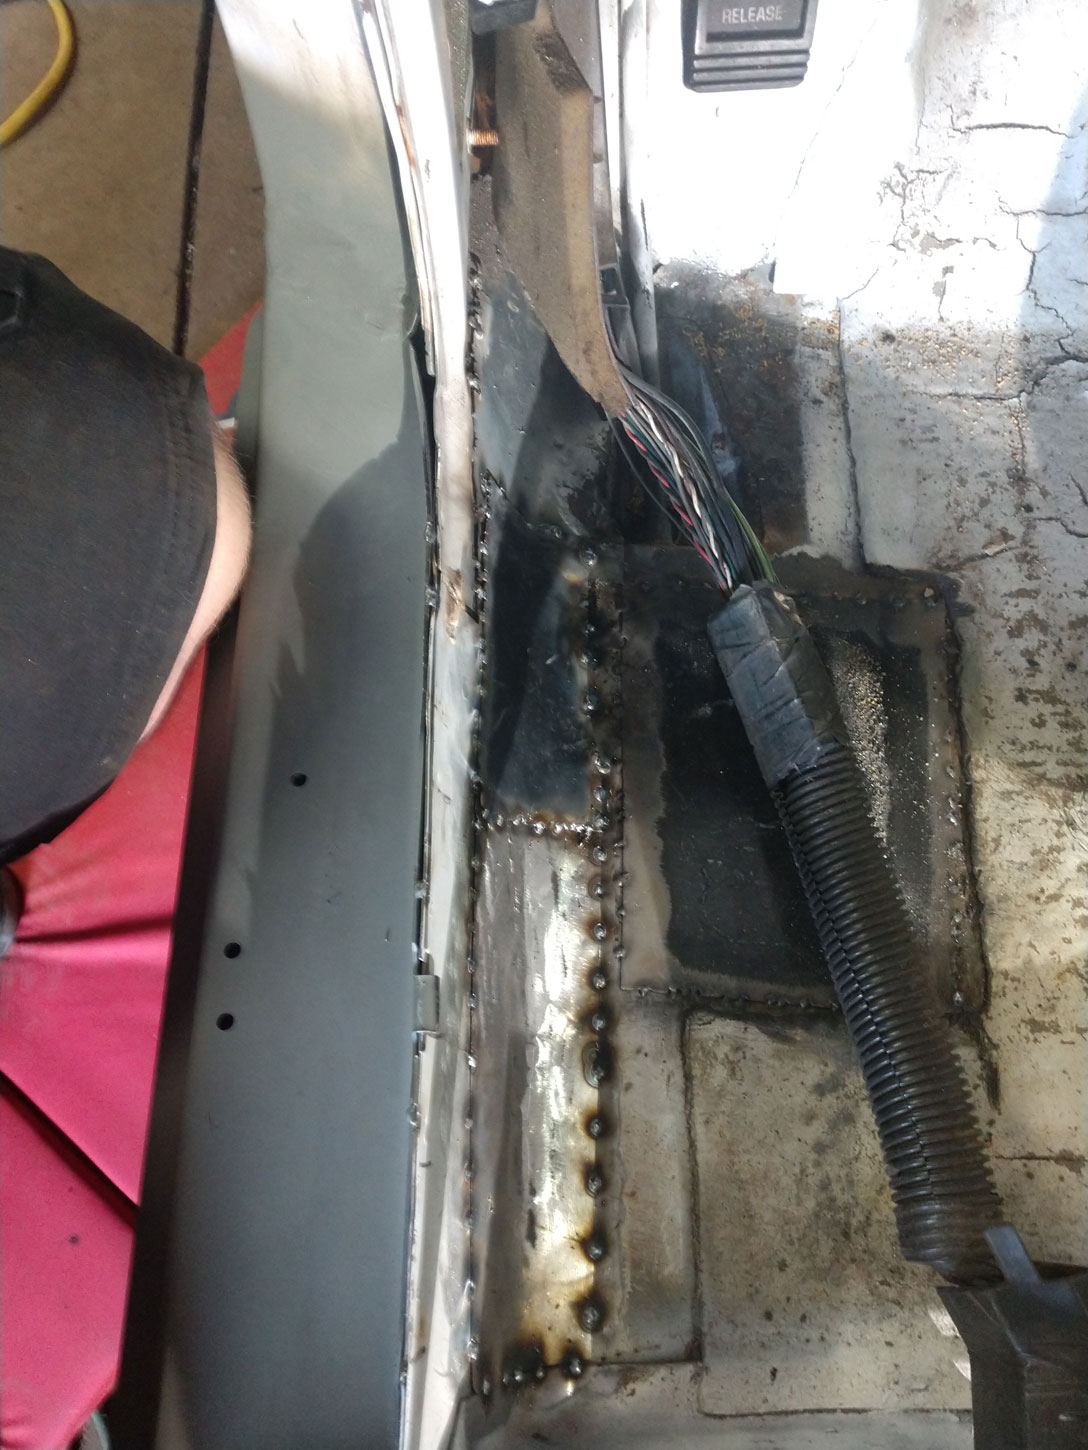
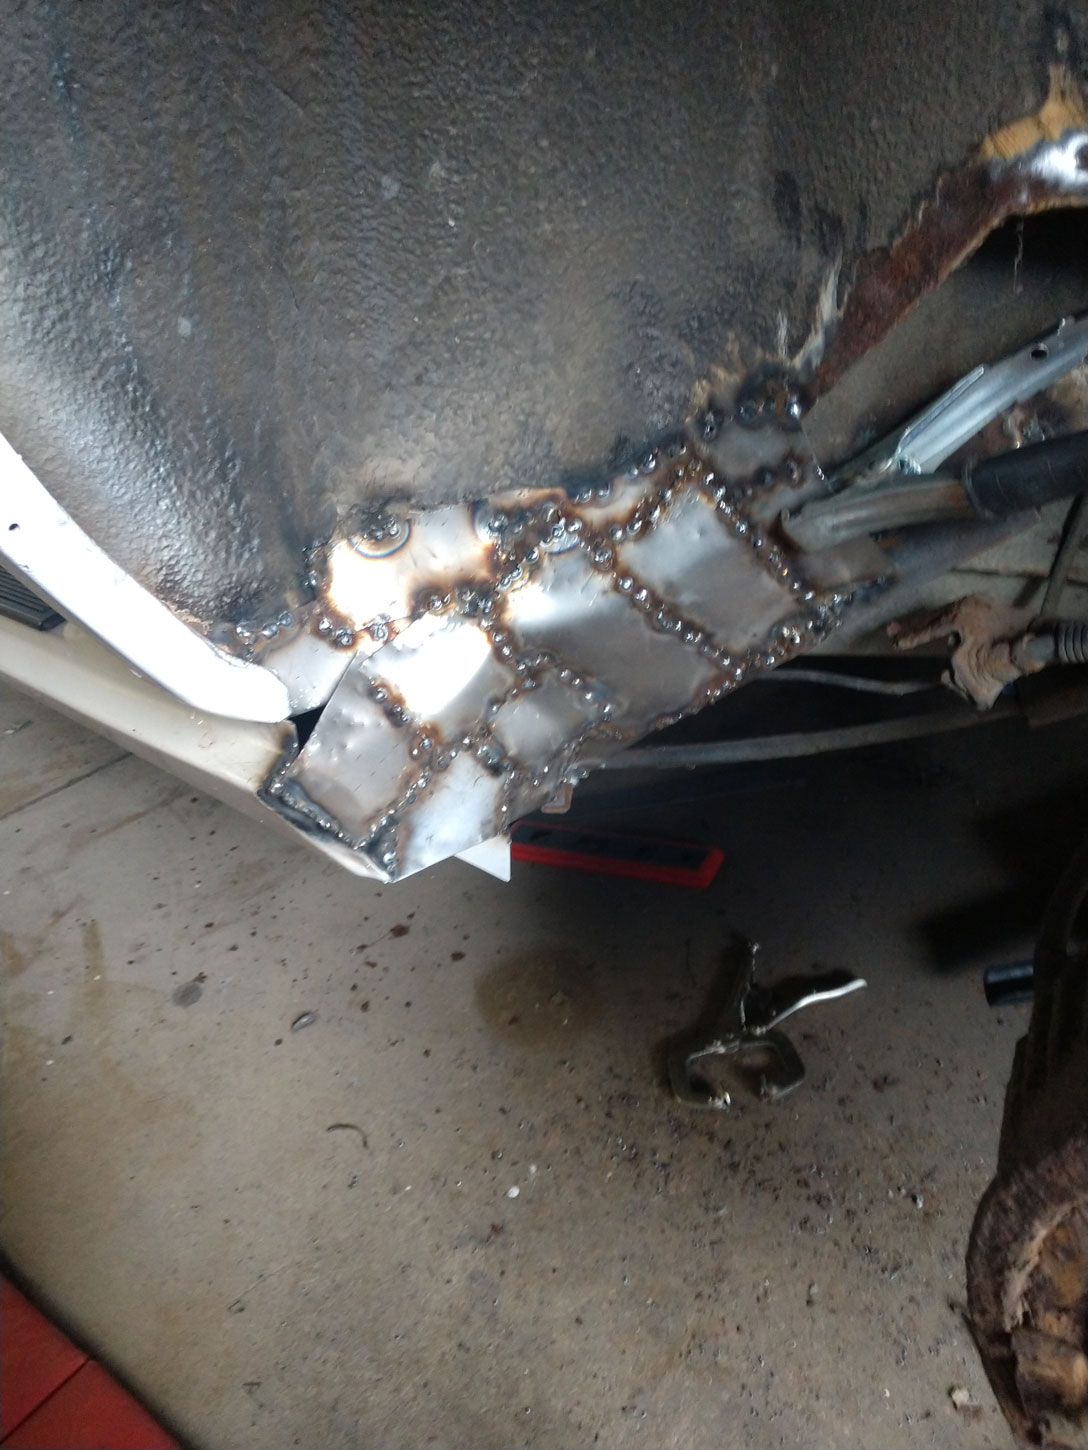
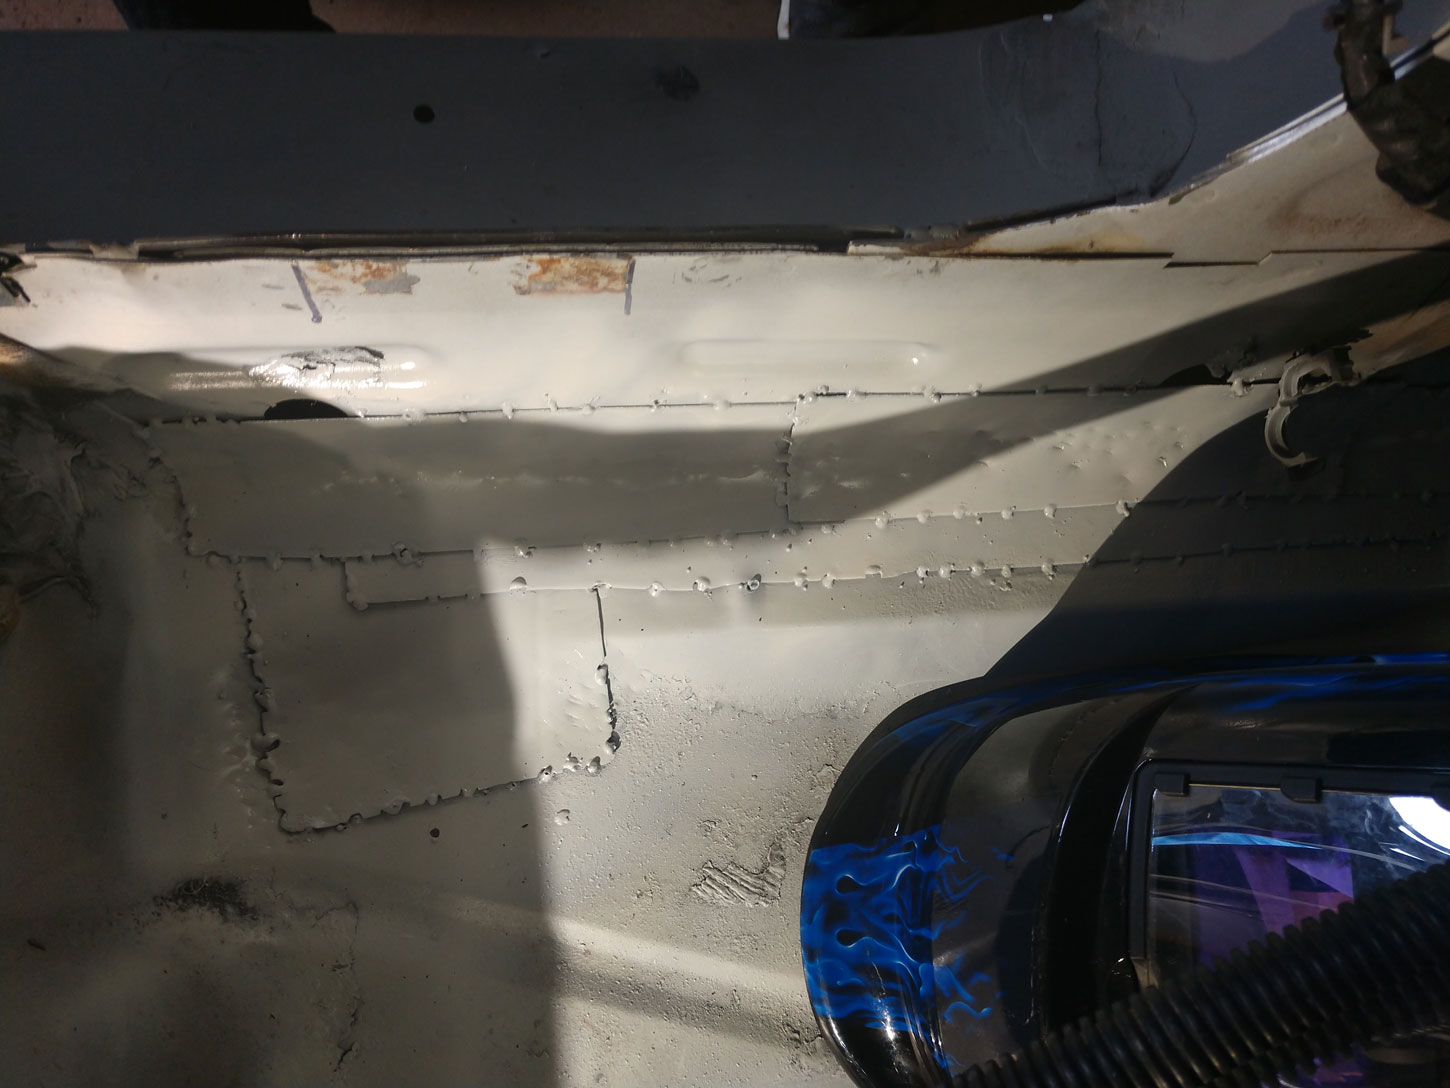
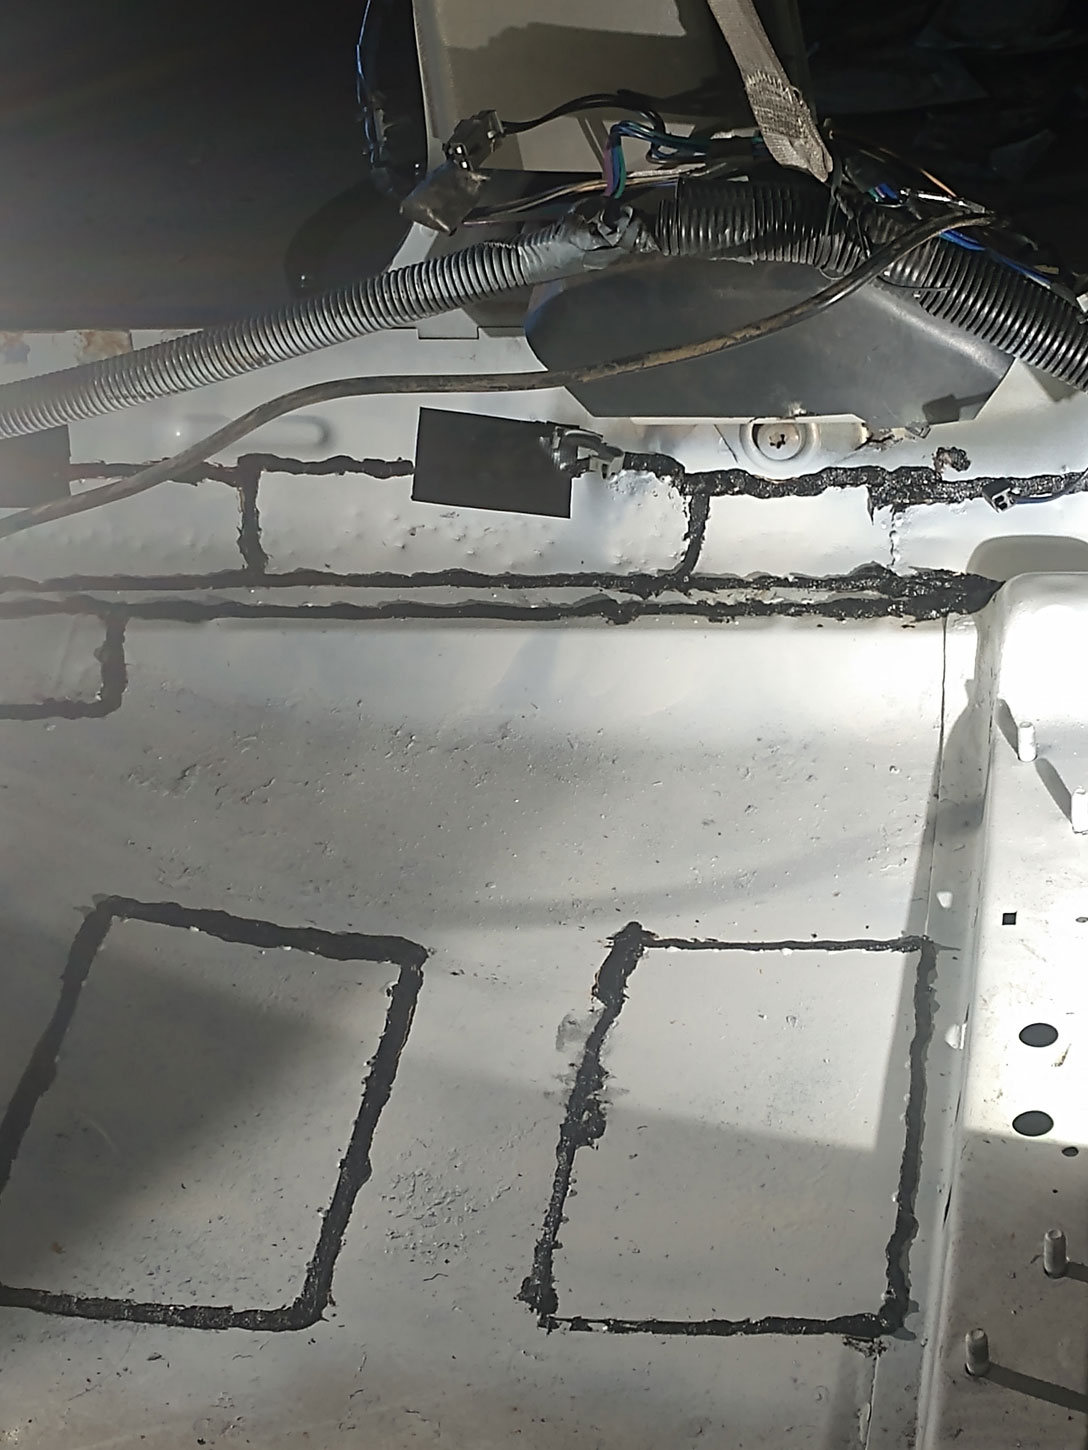
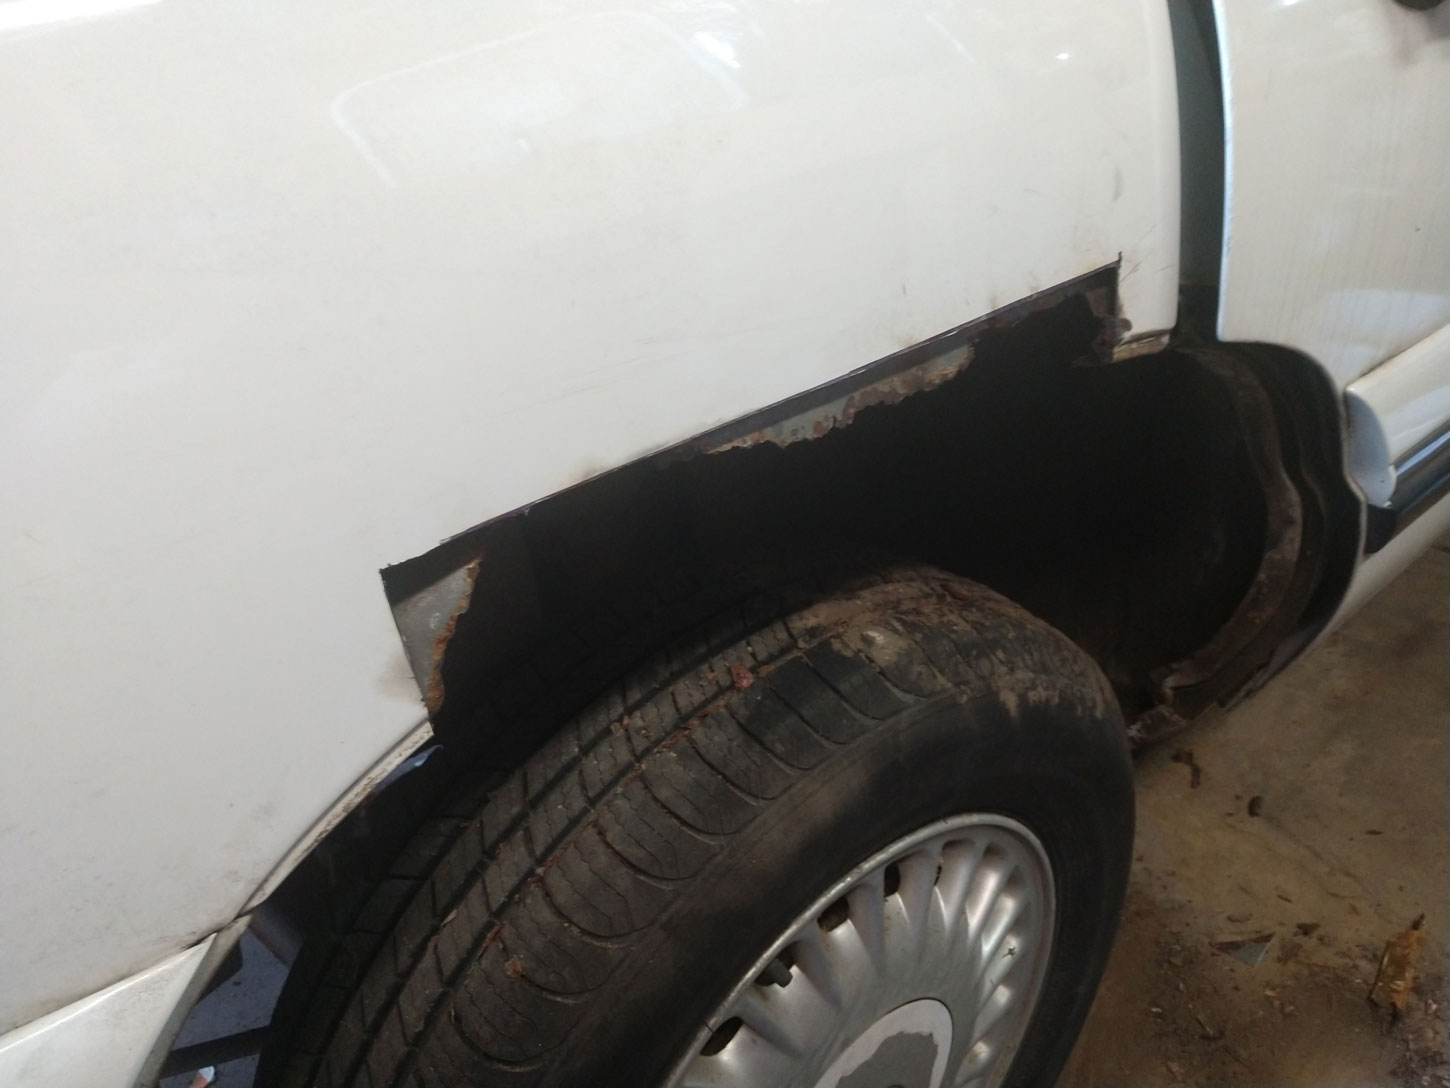
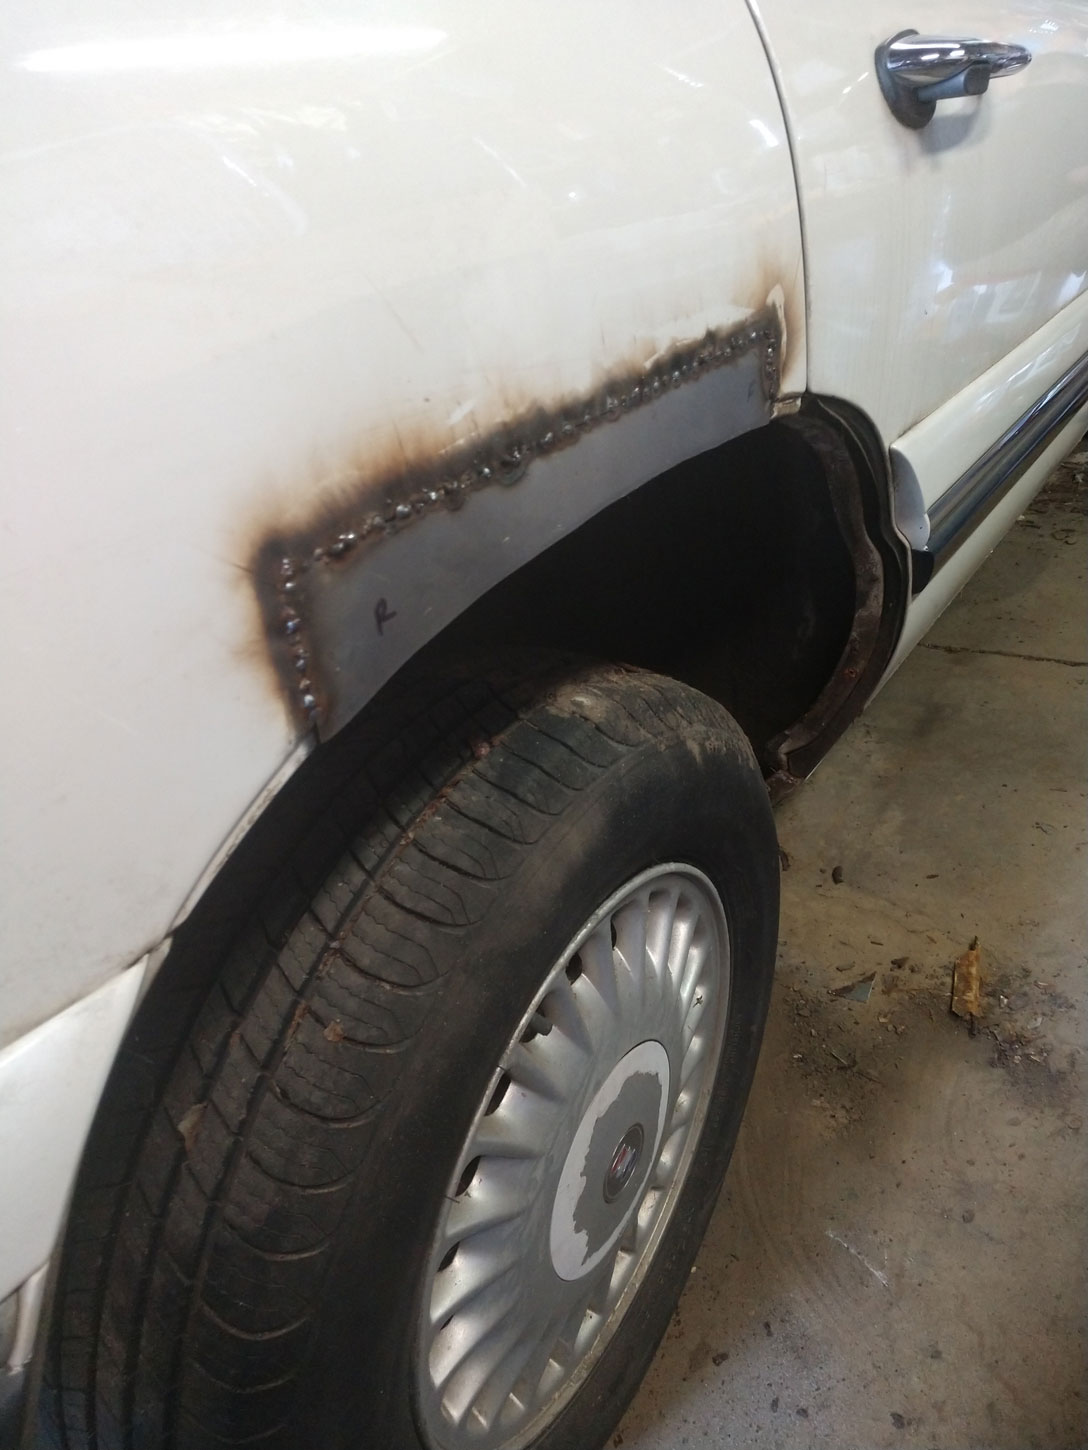
Buttoning up the rear wheel well was quite the challenge. It was an exercise in patience. I basically started with one small piece of metal and built on that with each new piece, creating new patches along the way until the hole was closed. This took quite a bit of time to think through and get right. 
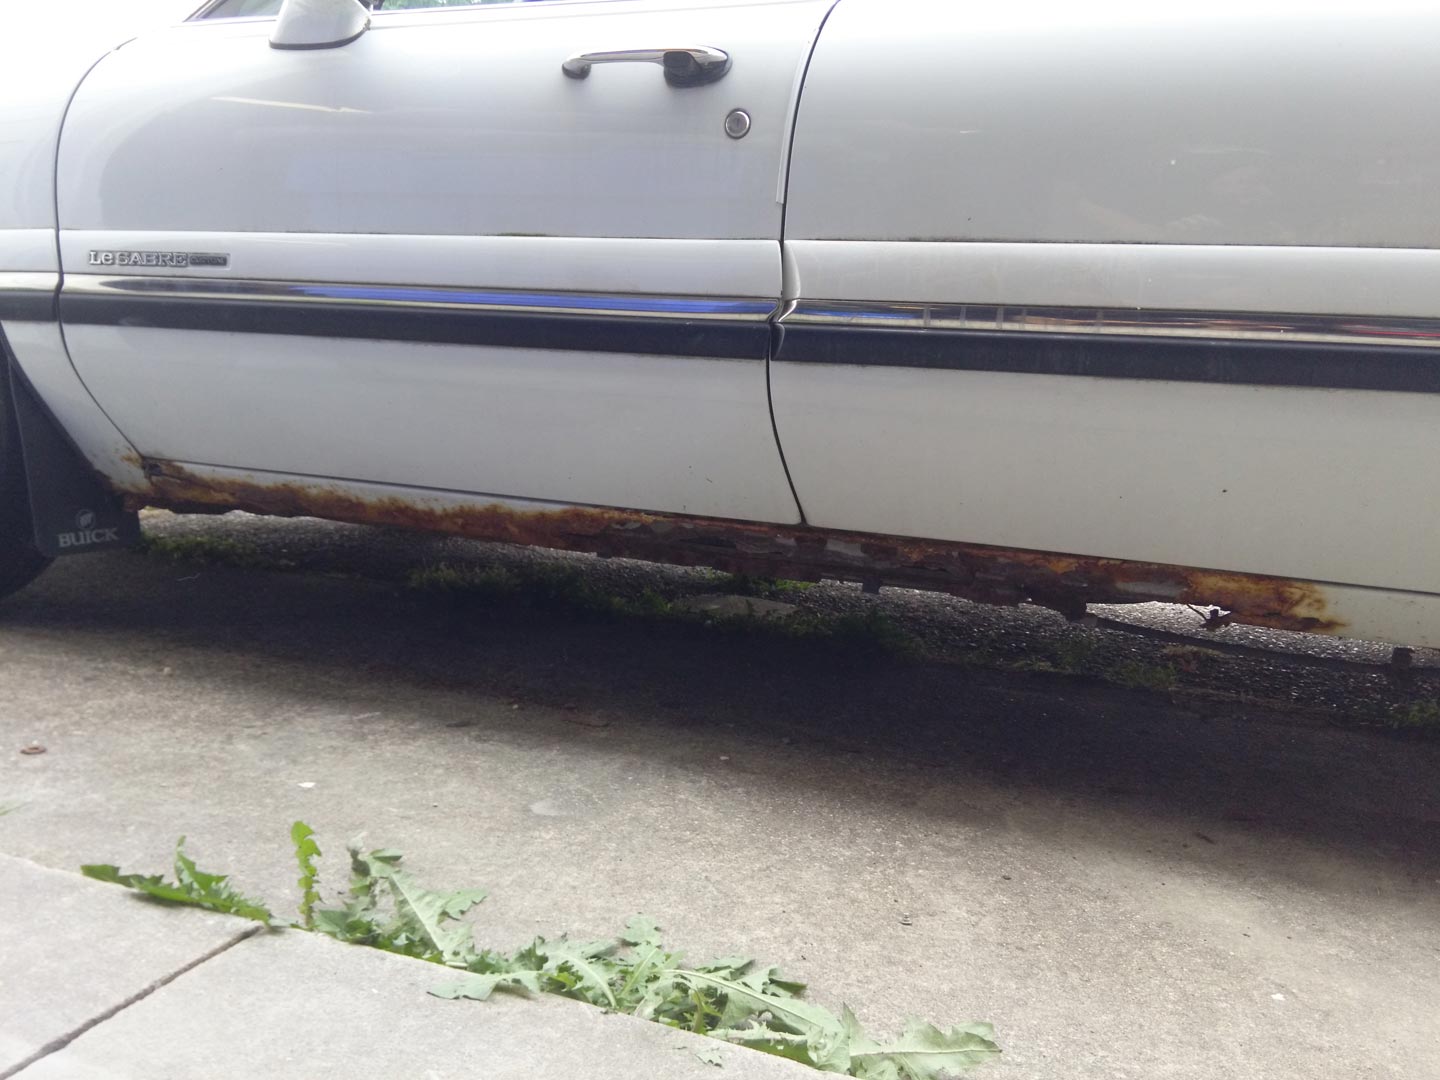
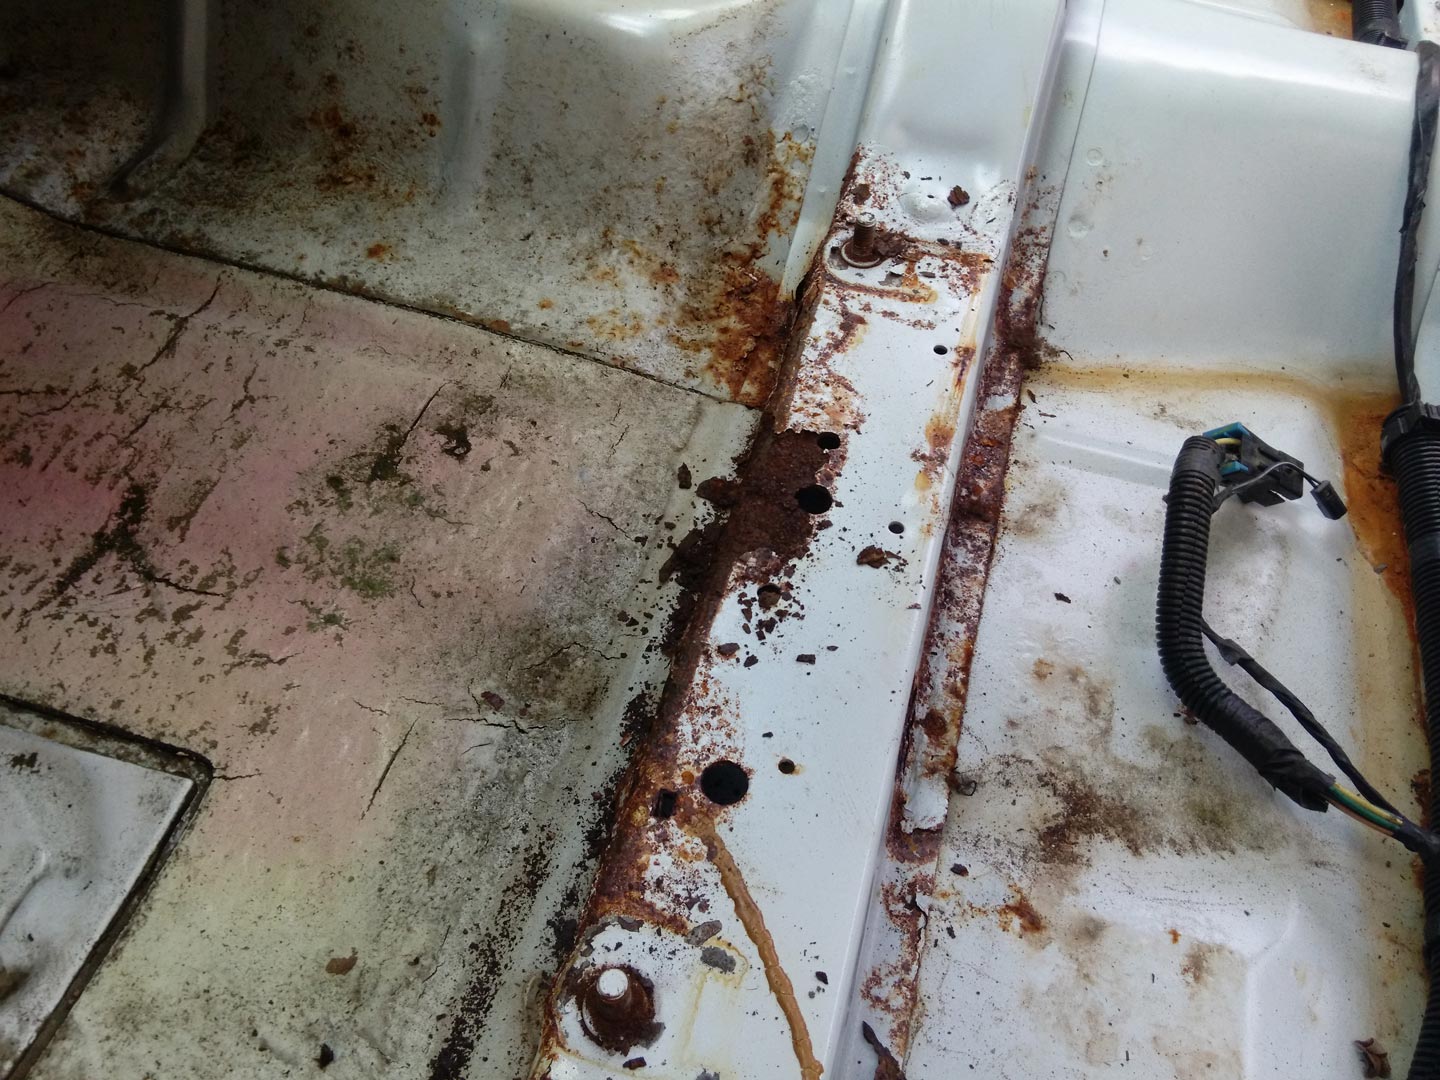
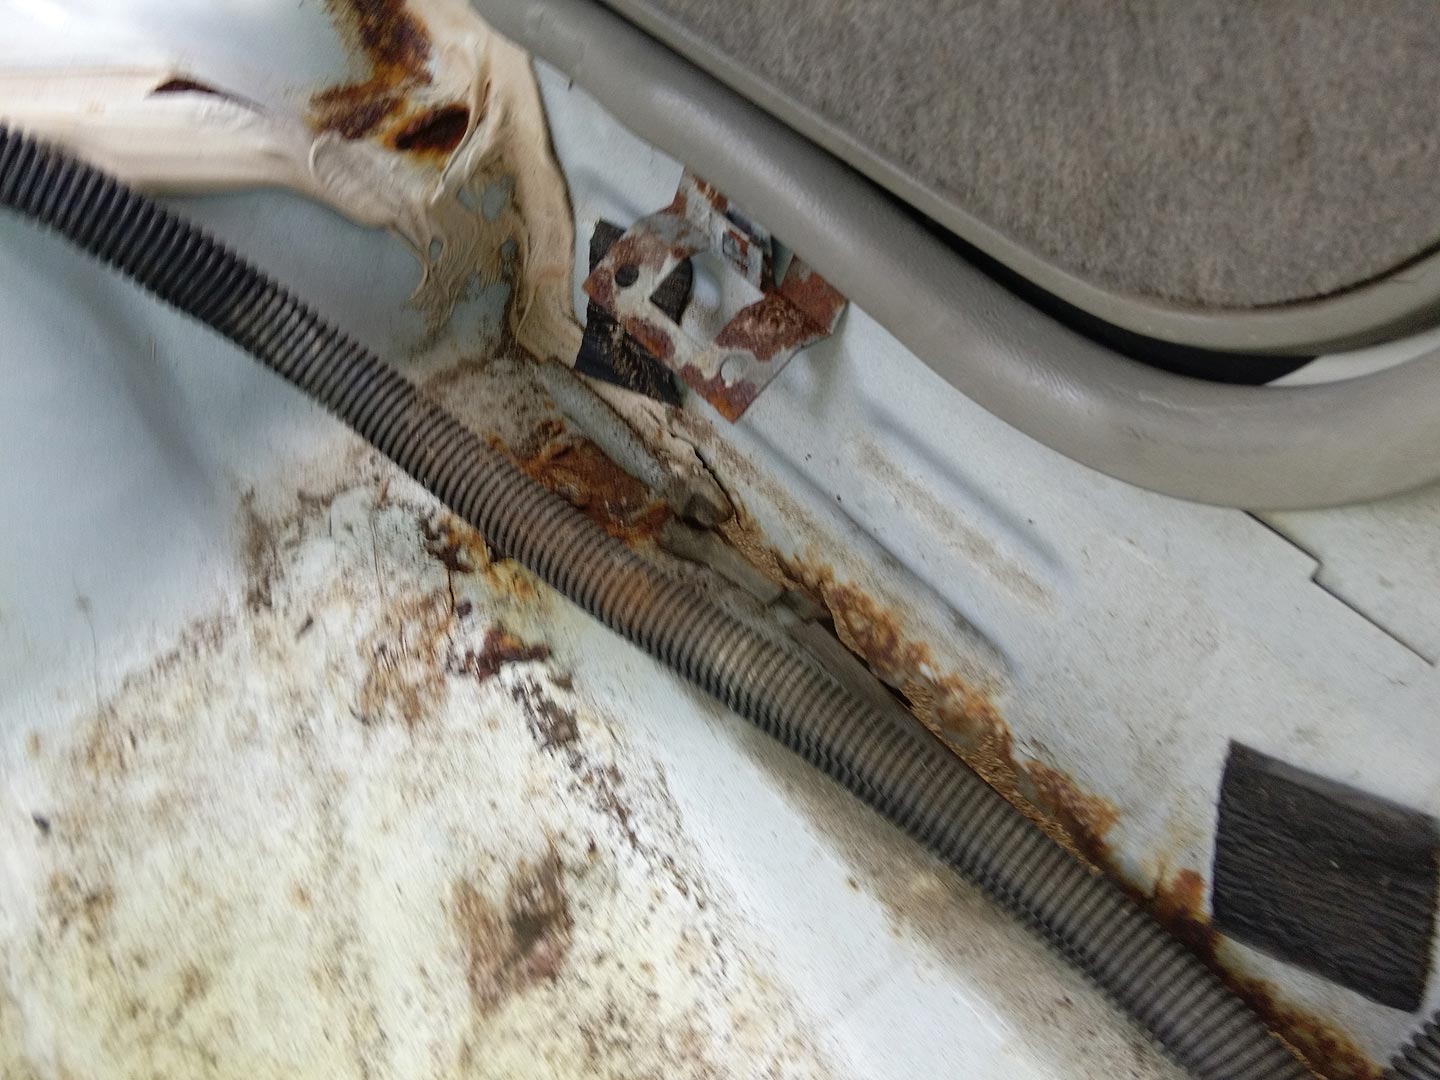
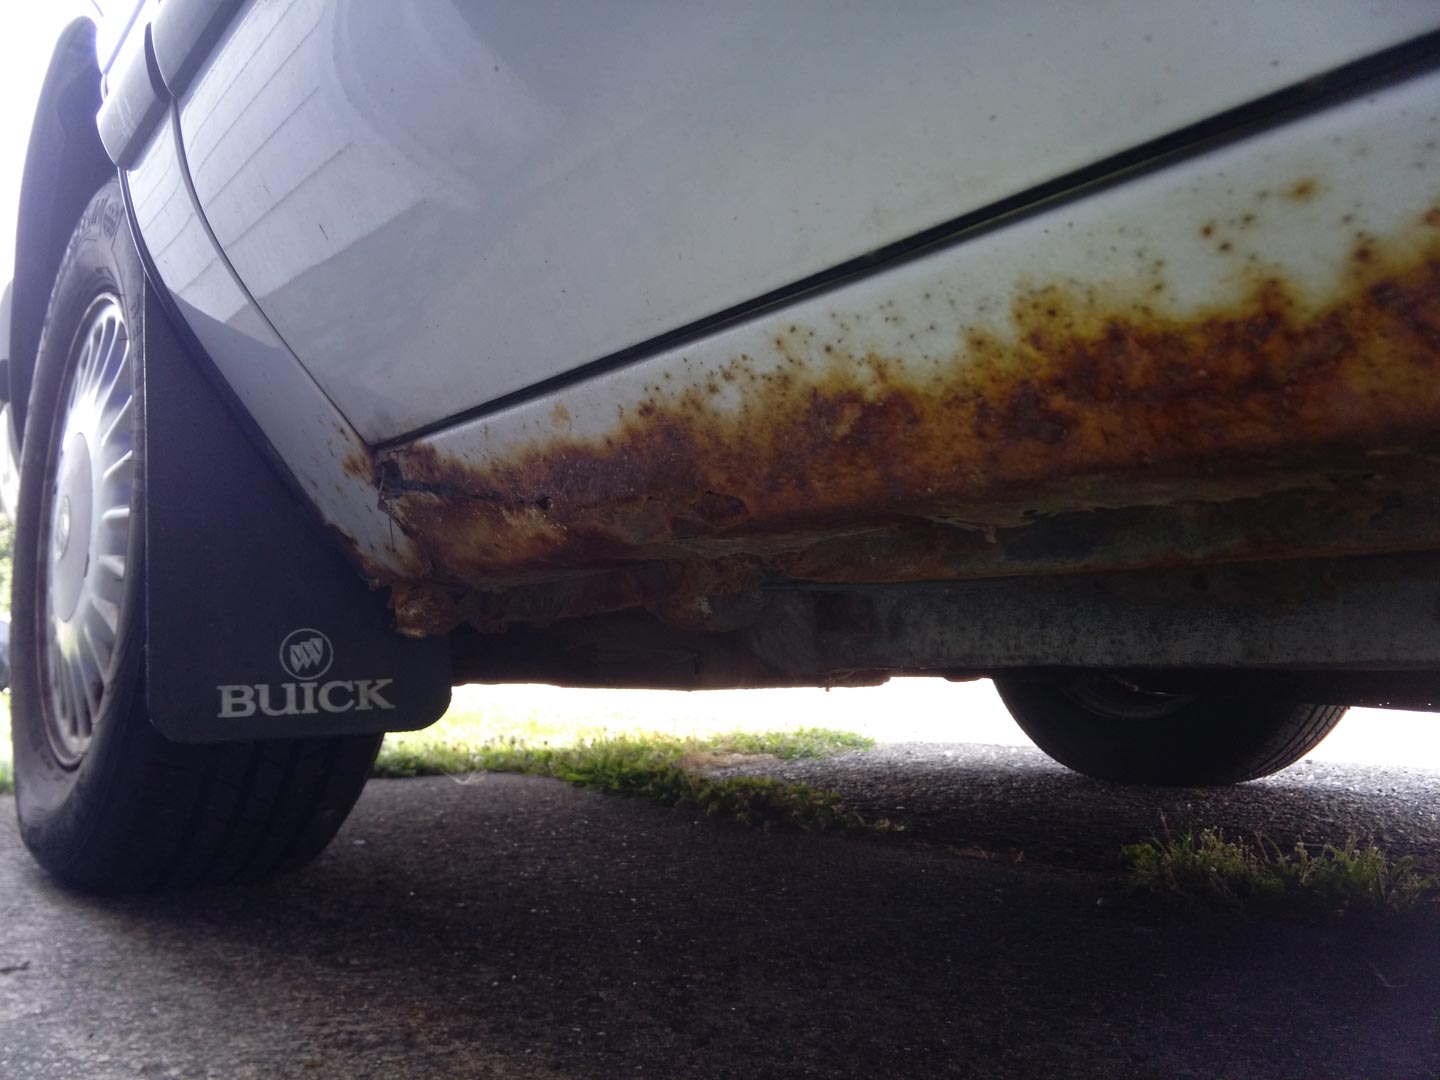
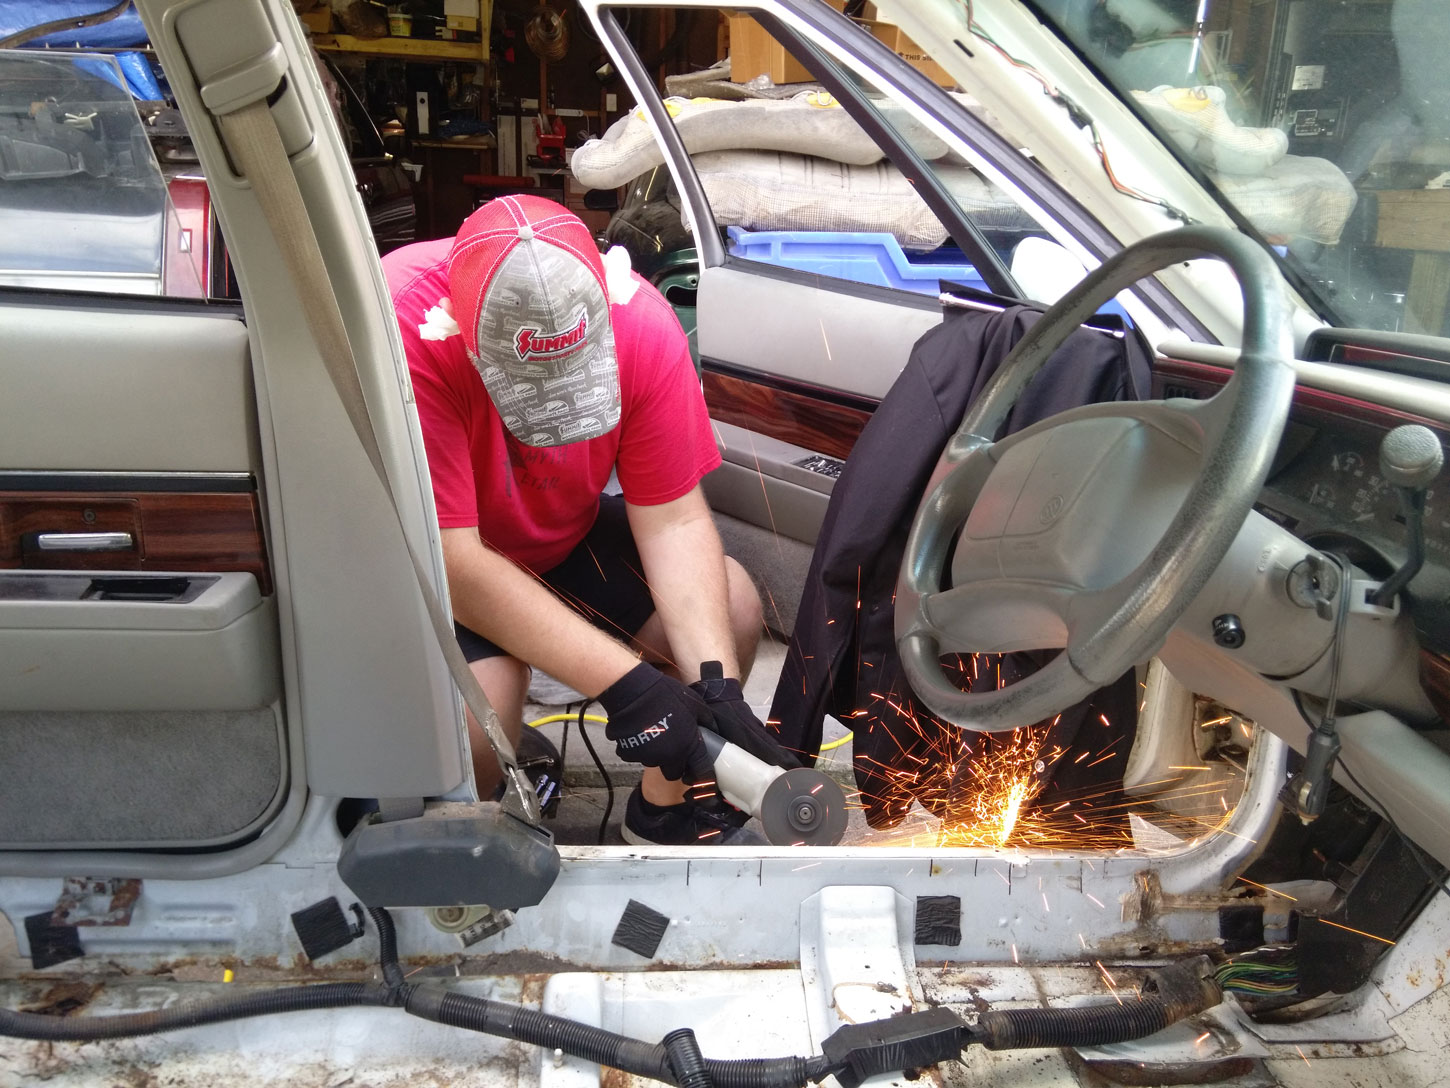
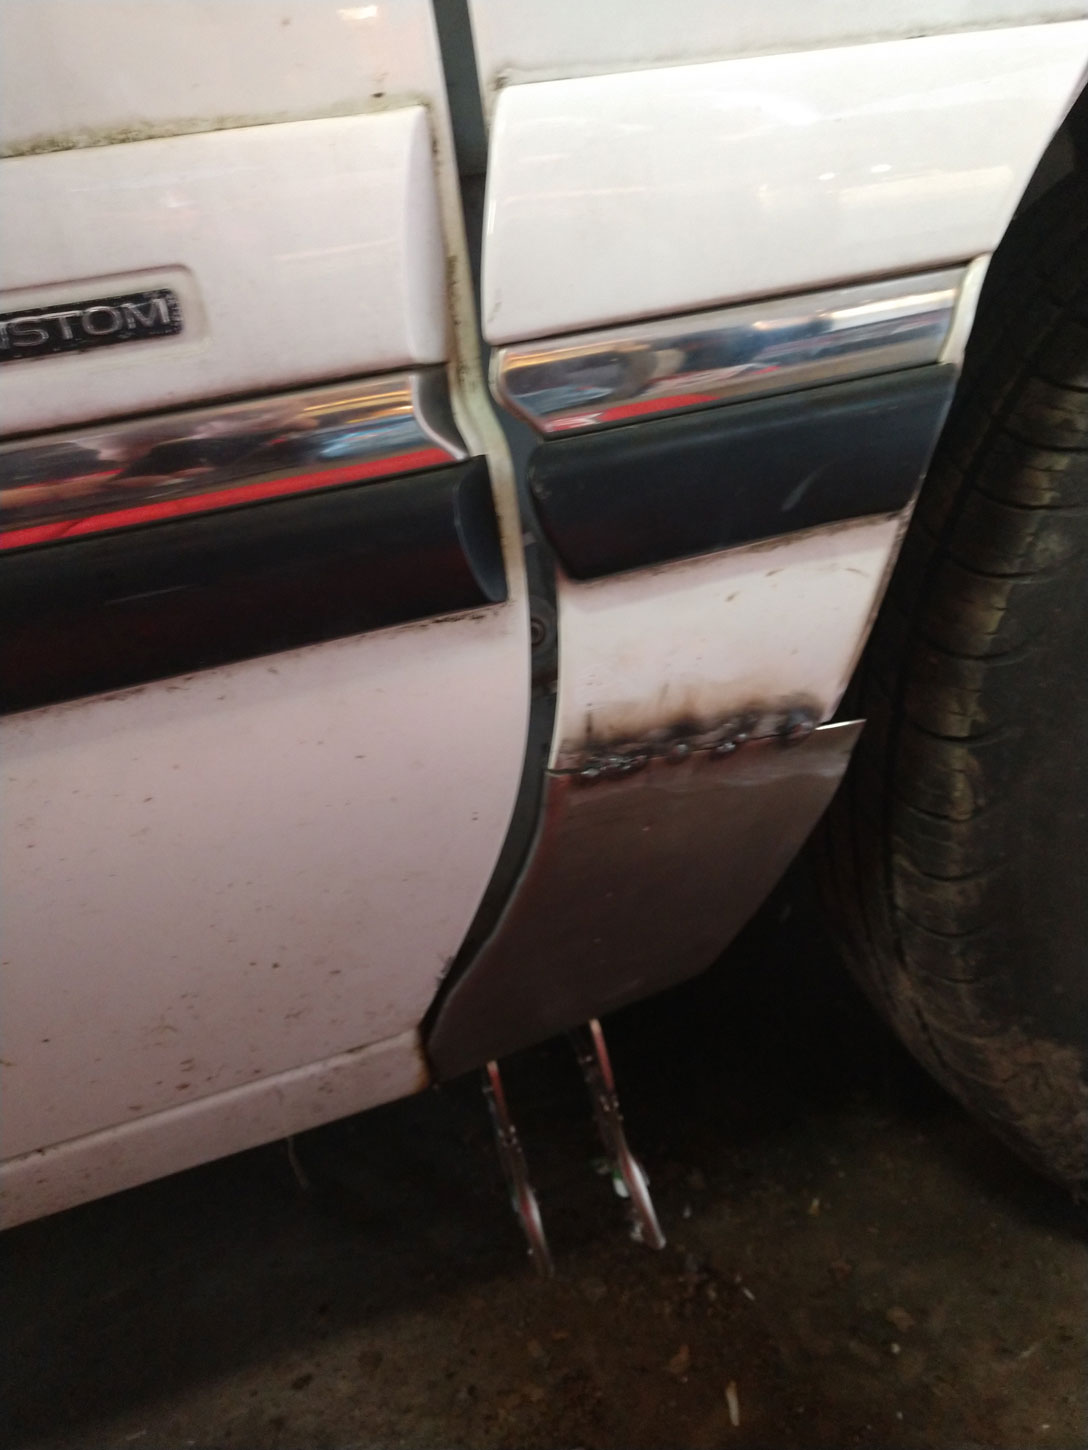
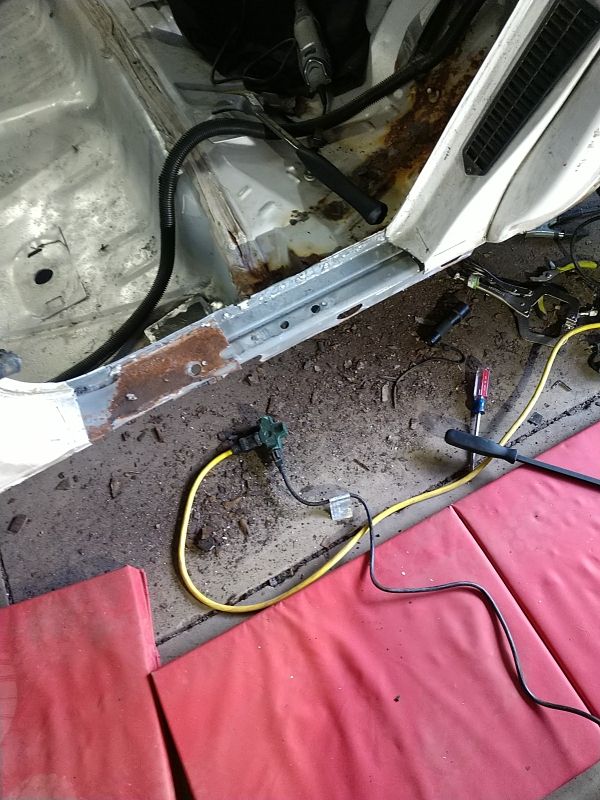
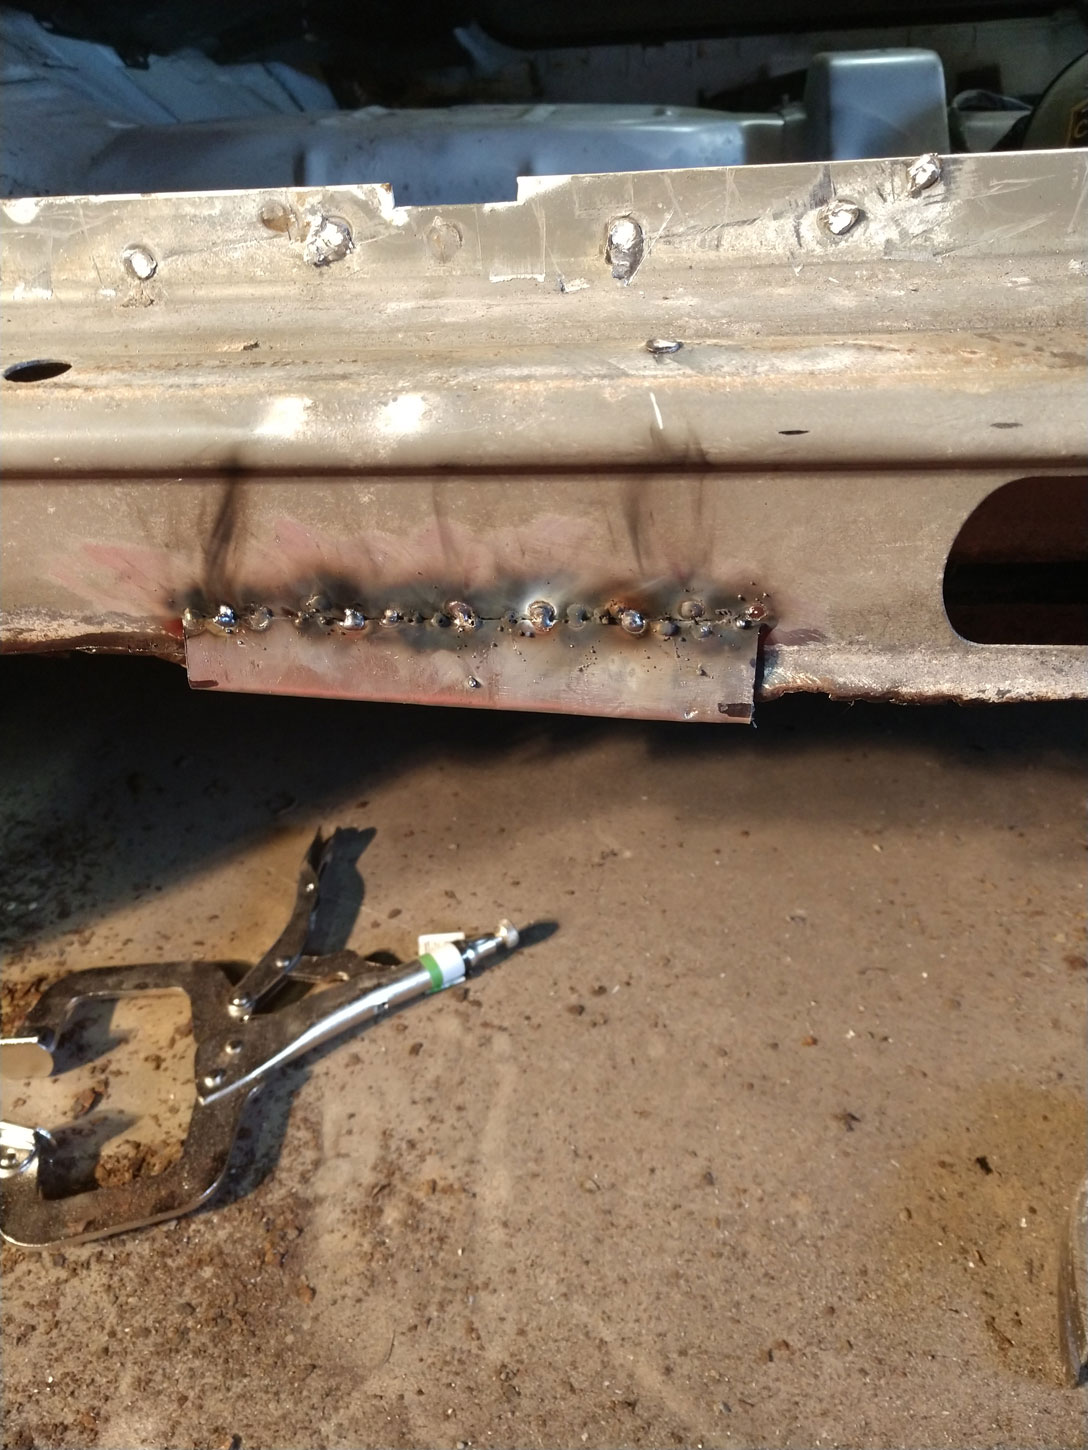
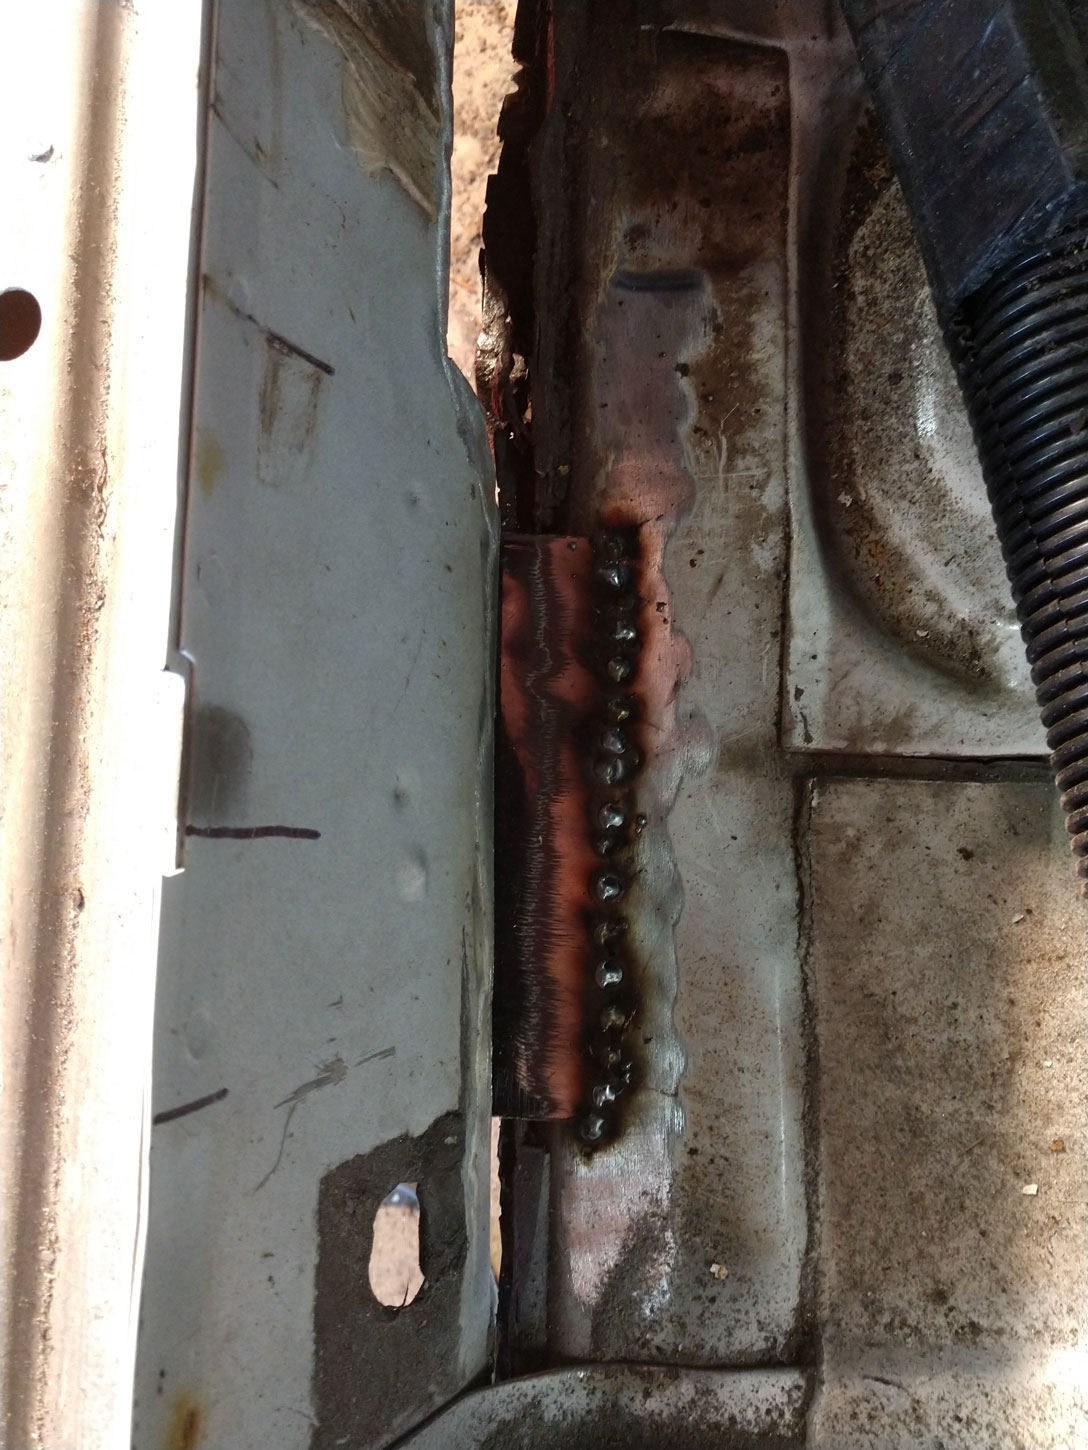
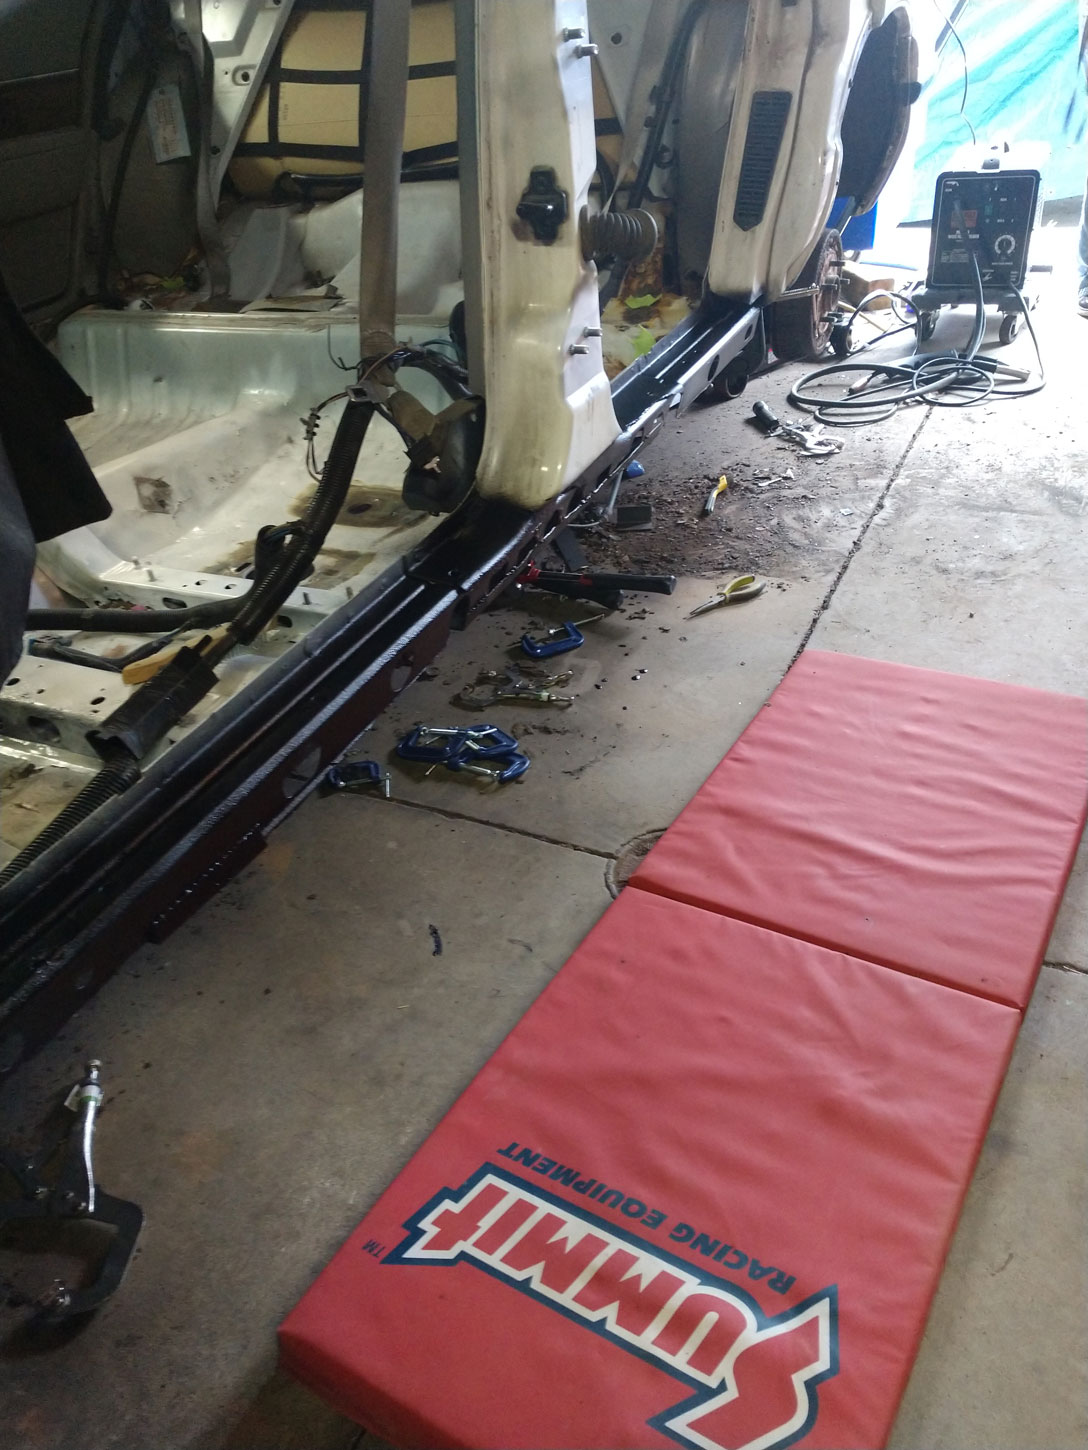
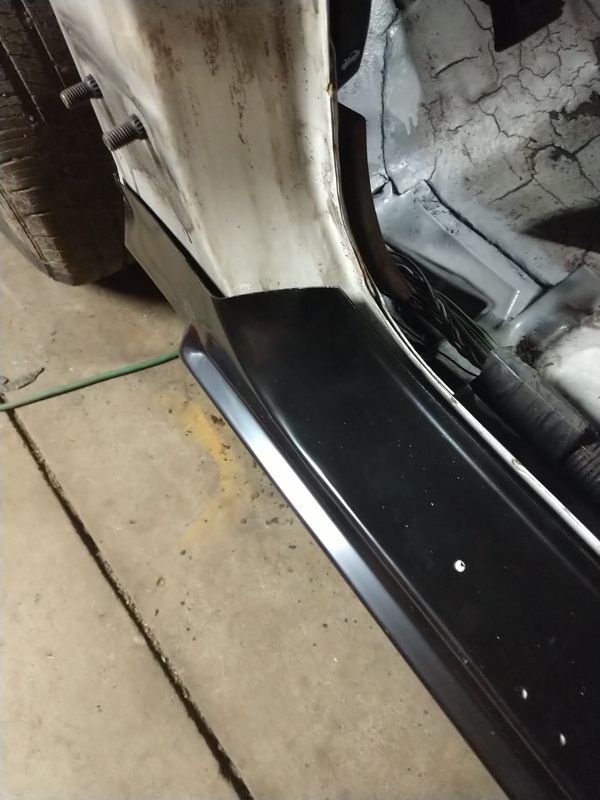
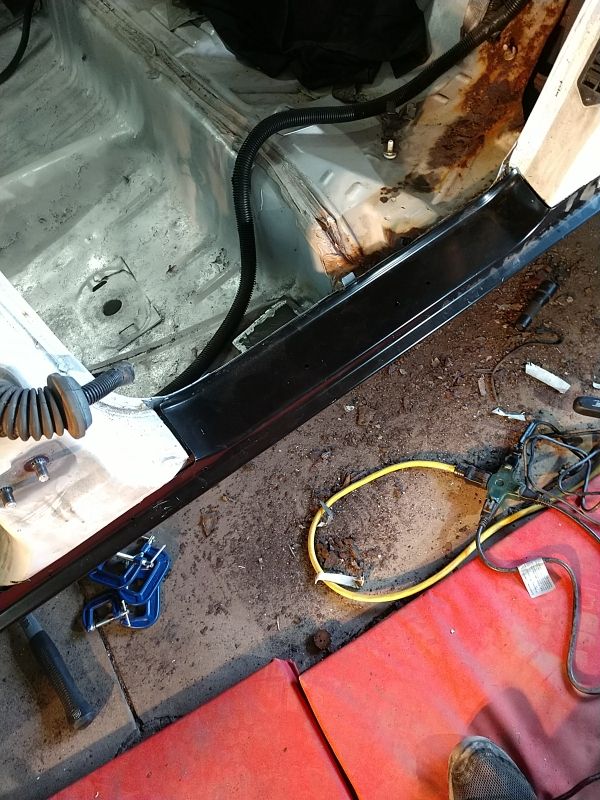
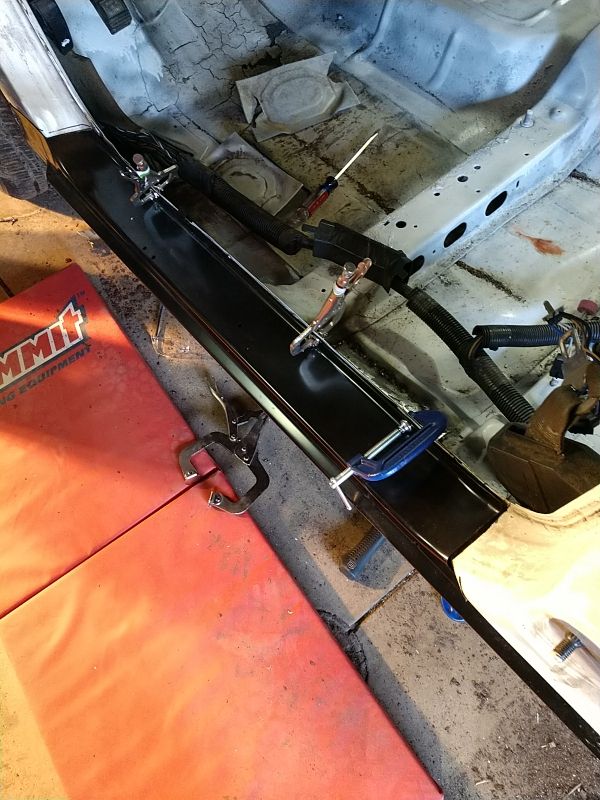
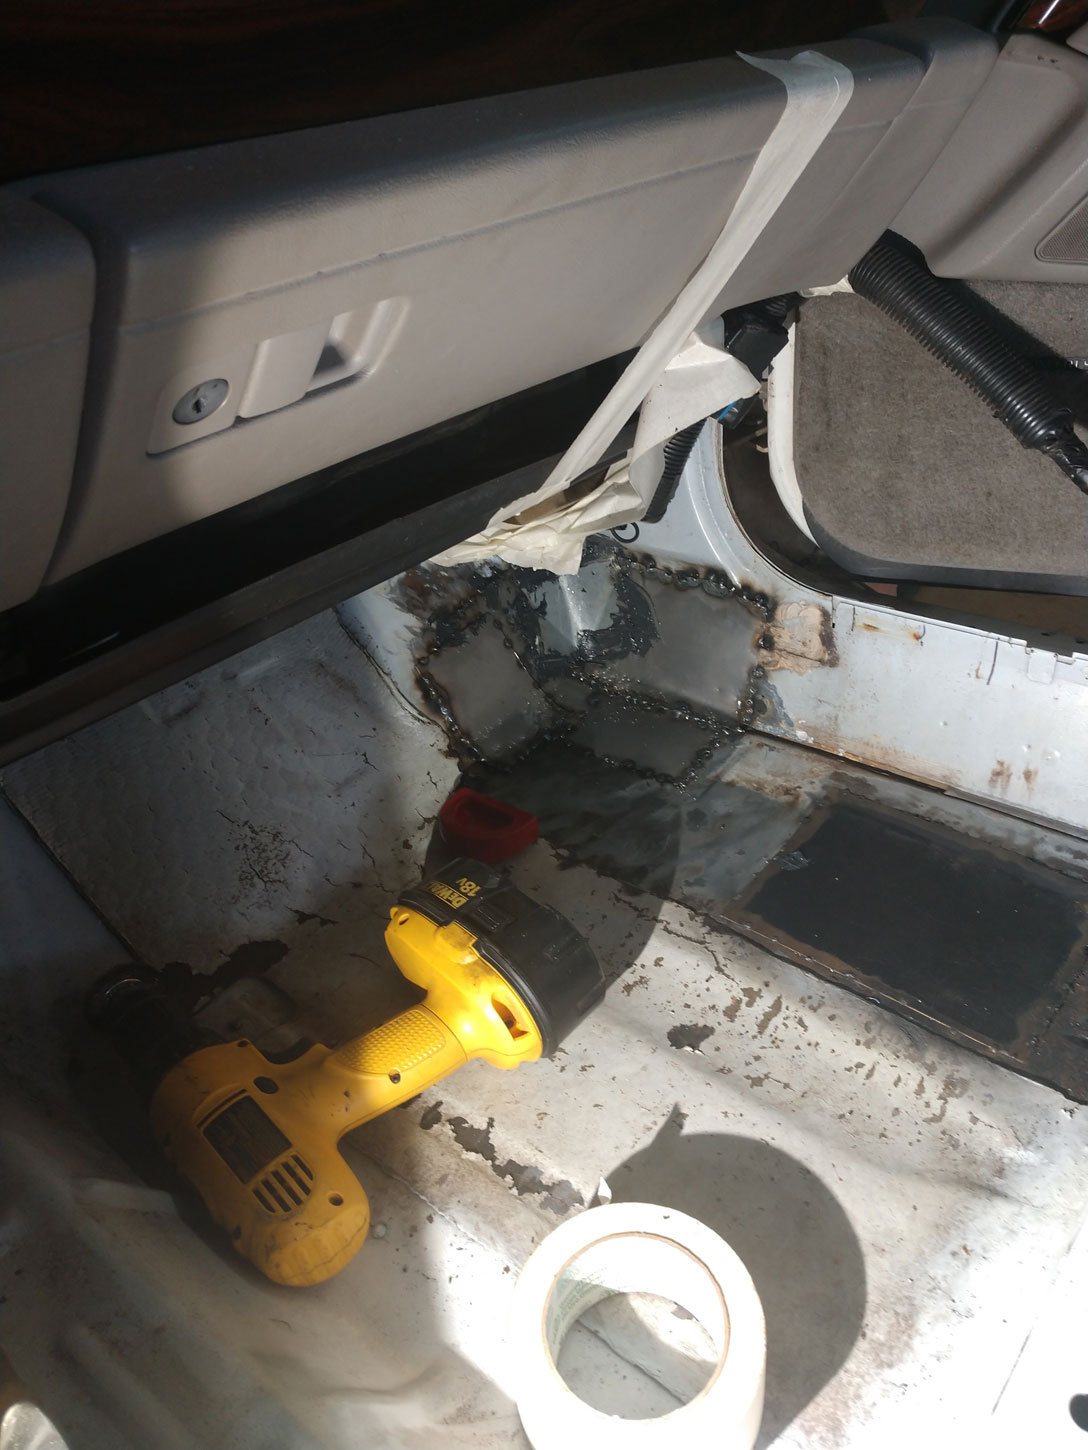
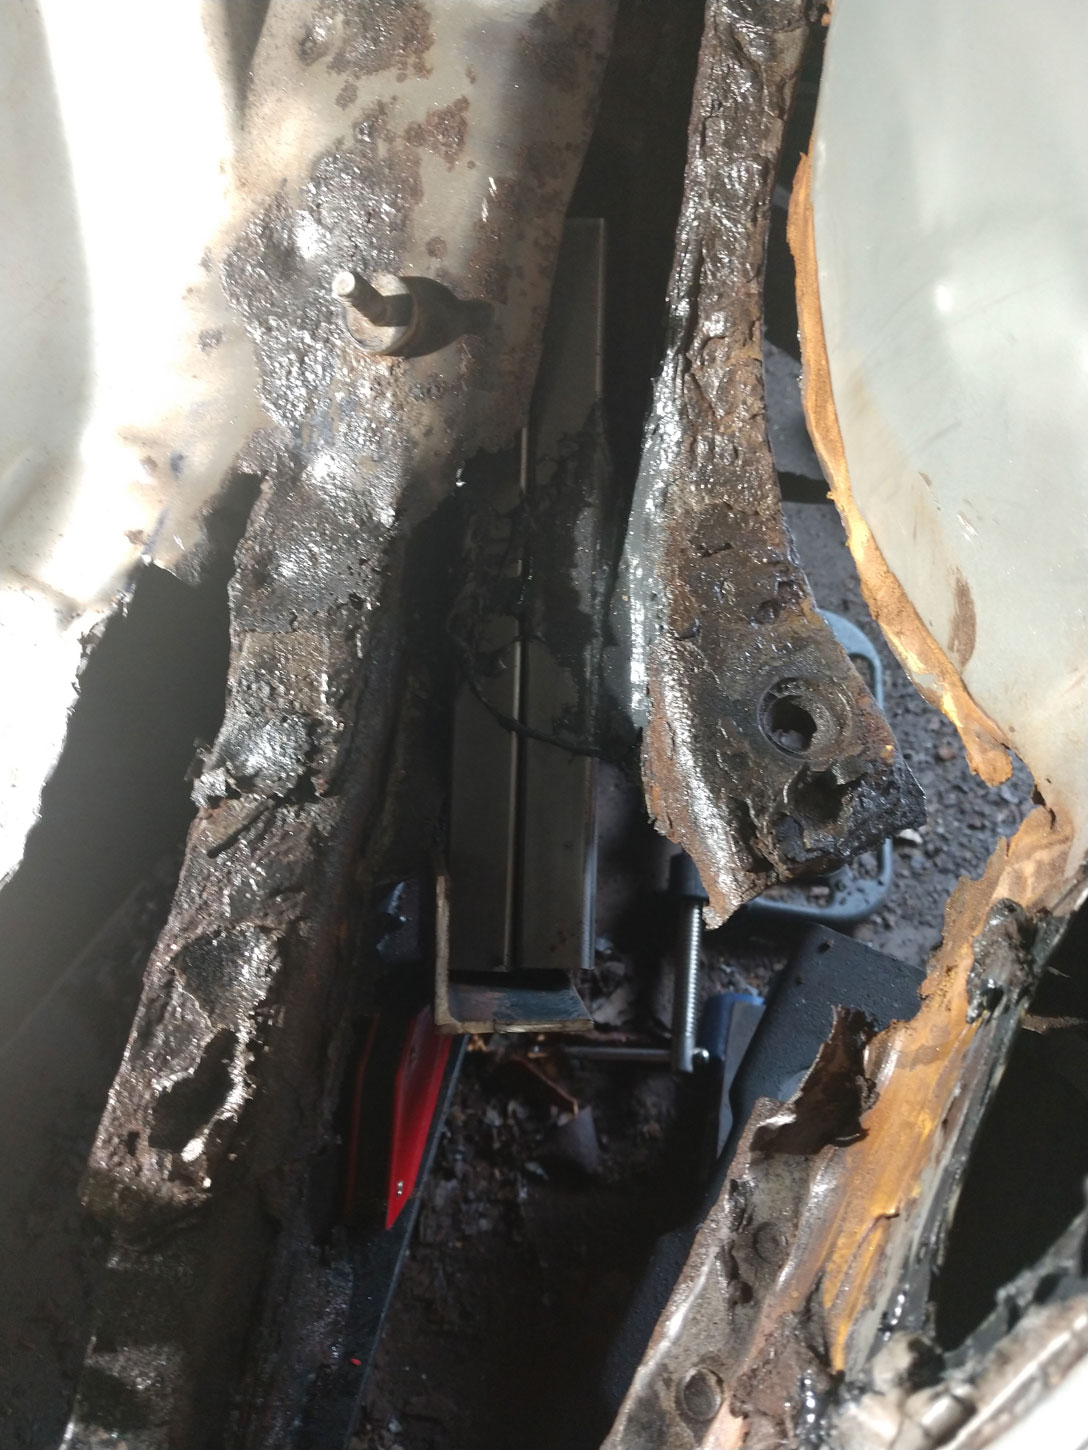
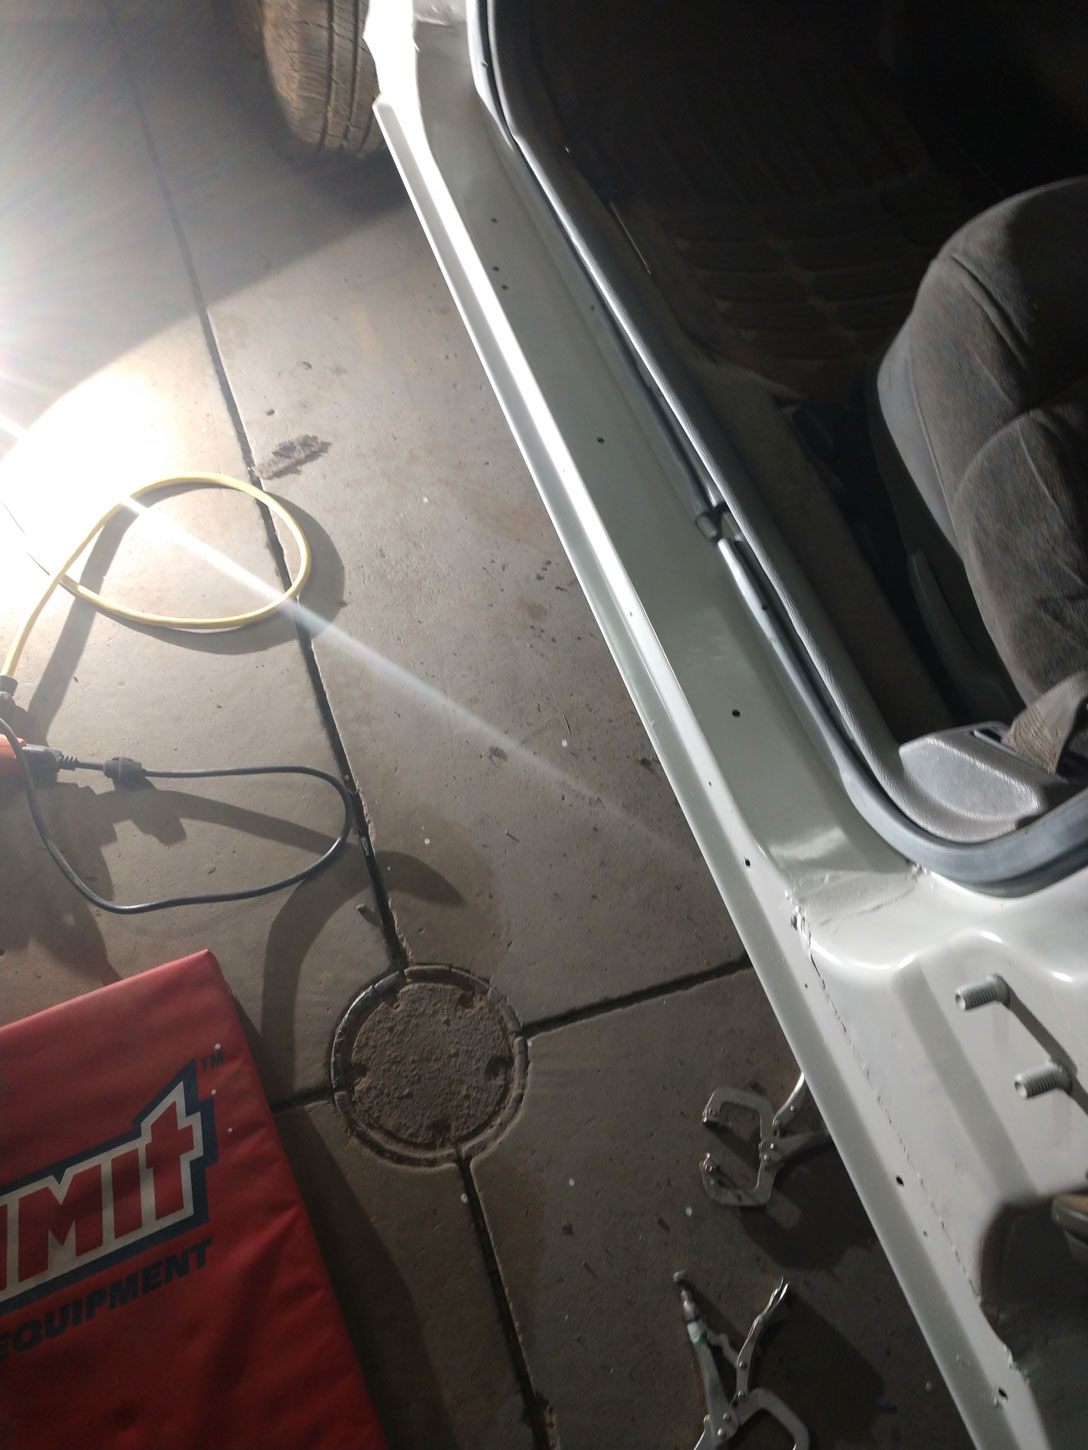
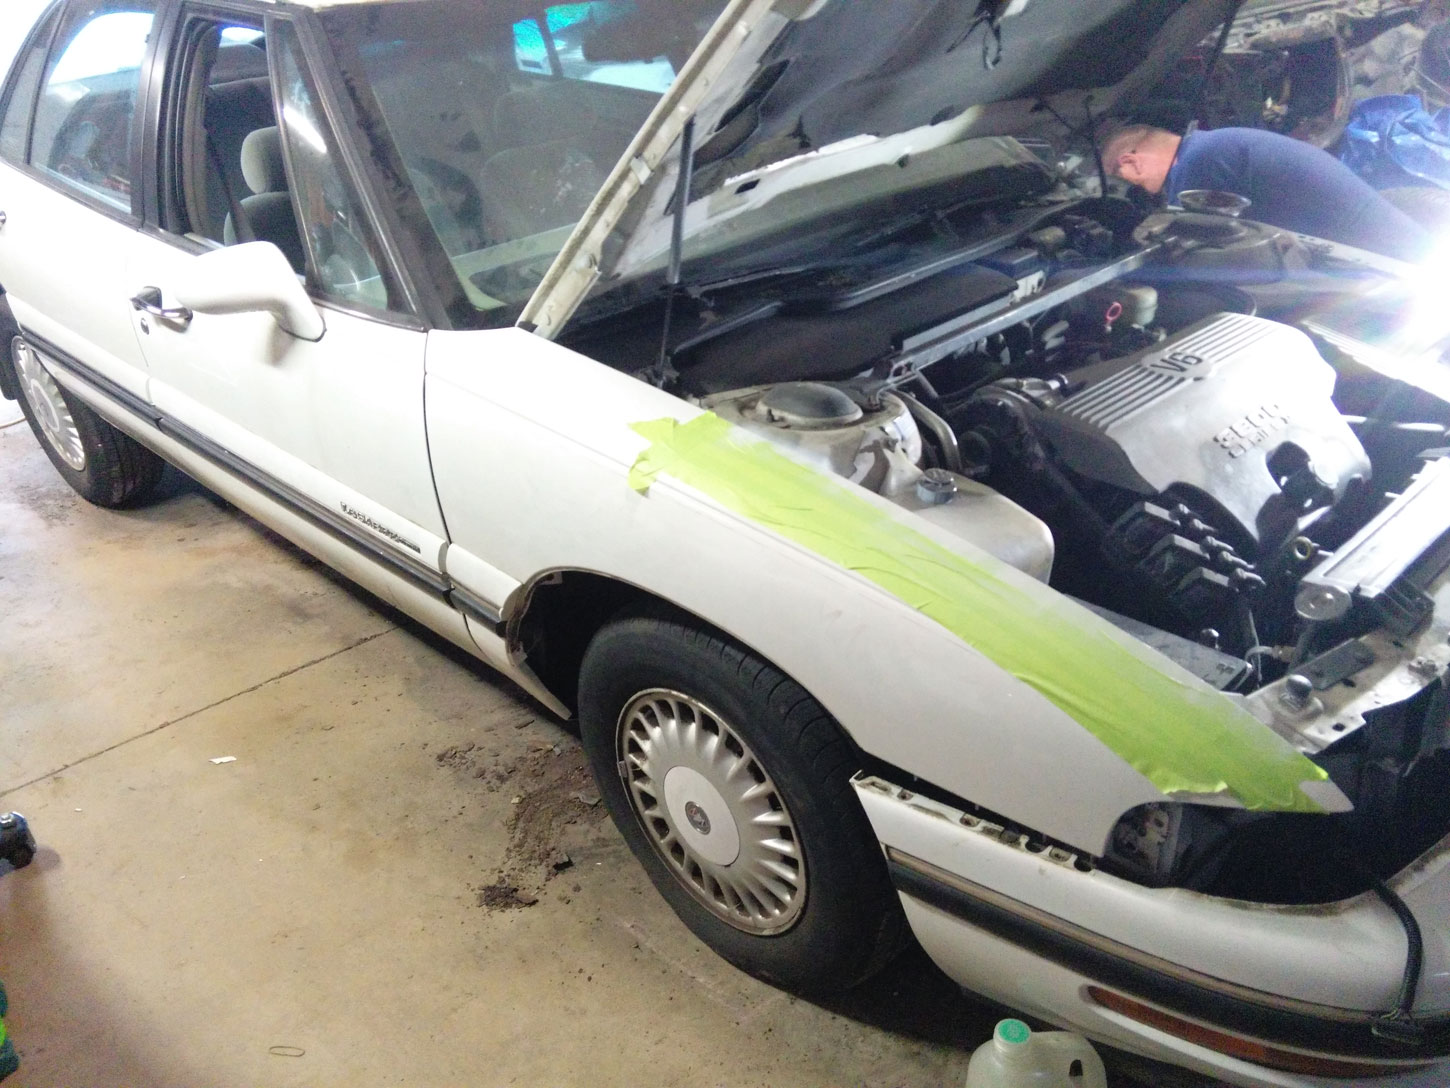
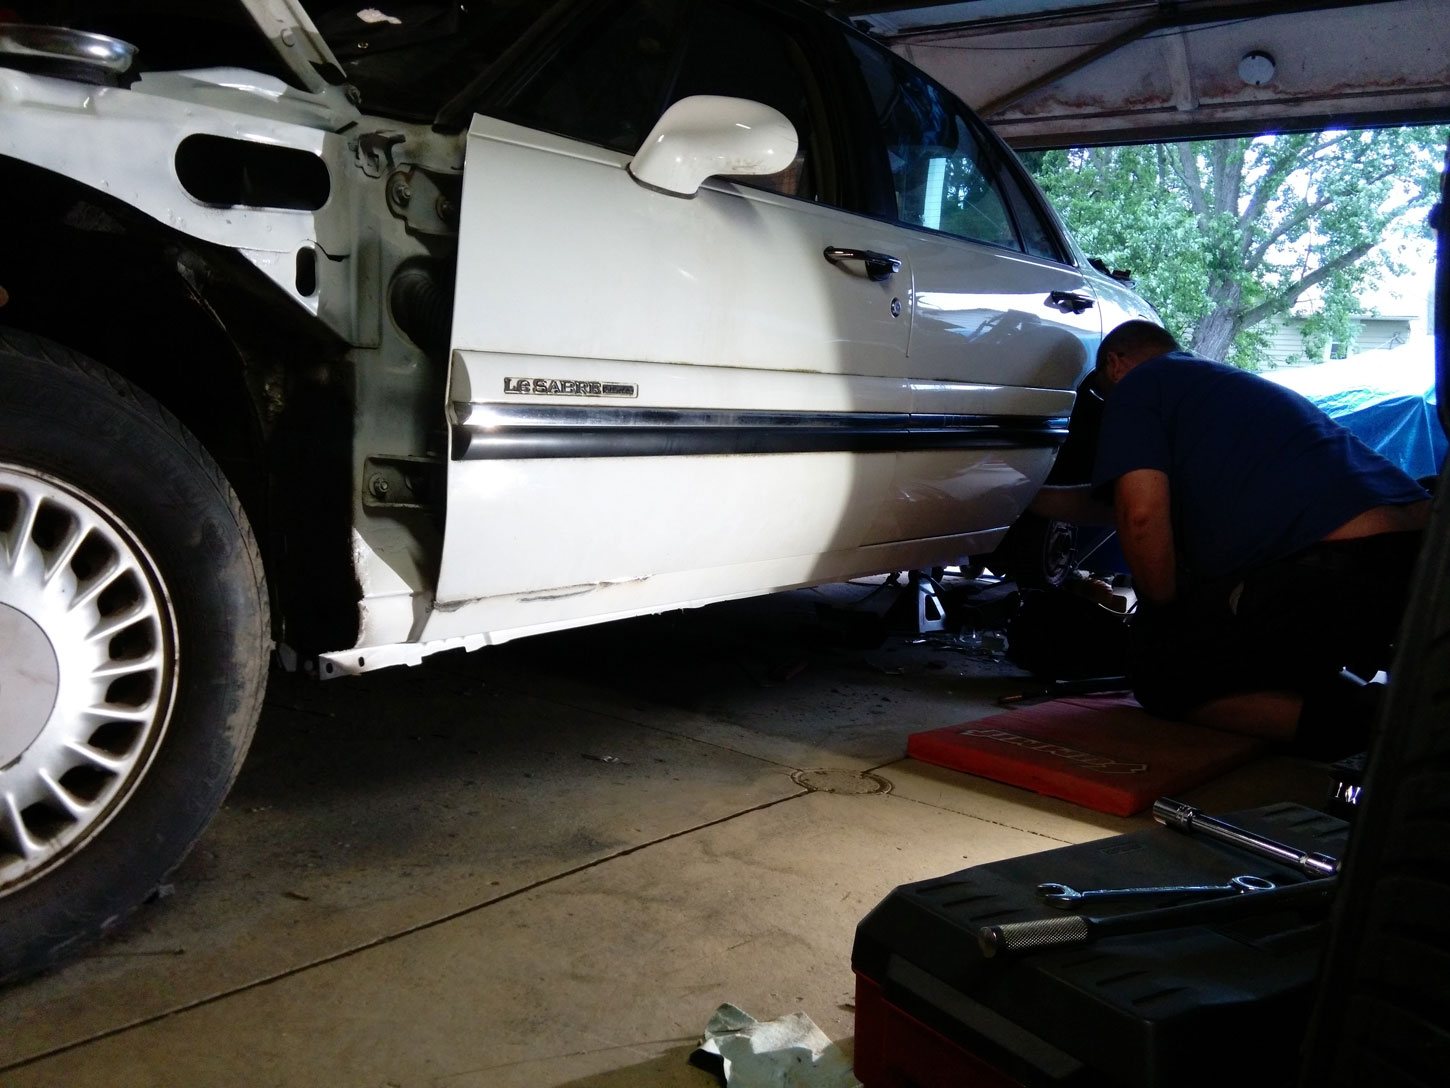
Getting the rocker panel to fit right was....interesting. We had fitment issues from the outset. First, we couldnt get the panel in because it wouldnt clear the doors. So we took the doors off. From there, it still didnt line up. Seemed like there was too much of a gap. We discovered there was still skin left from the existing rocker panel. So I spent about 3 hours breaking the existing welds with a chisel and a hammer. Only to remember after it was done that we had an air hammer. My hands certainly would have appreciated that. Once the skin was off, the rocker panel fit much better, but still was never truly right. The bottom fitment was an issue in that it never did fit all the way into the car against the floor pan/inner structure seam. The seam where the existing rocker panel, inner structure, floor pan (pinch weld) meet was all bent up and not even close to straight (and toward the rear of the car, completely gone due to rust). Rather than try to figure out how to fix that, which would have likely required quite a bit of heat and hammer work - there is a 4' section of 1/2" square metal tube that sits in a gap along that body line, which is welded to the car. The bottom of the rocker panel is then welded to that. 
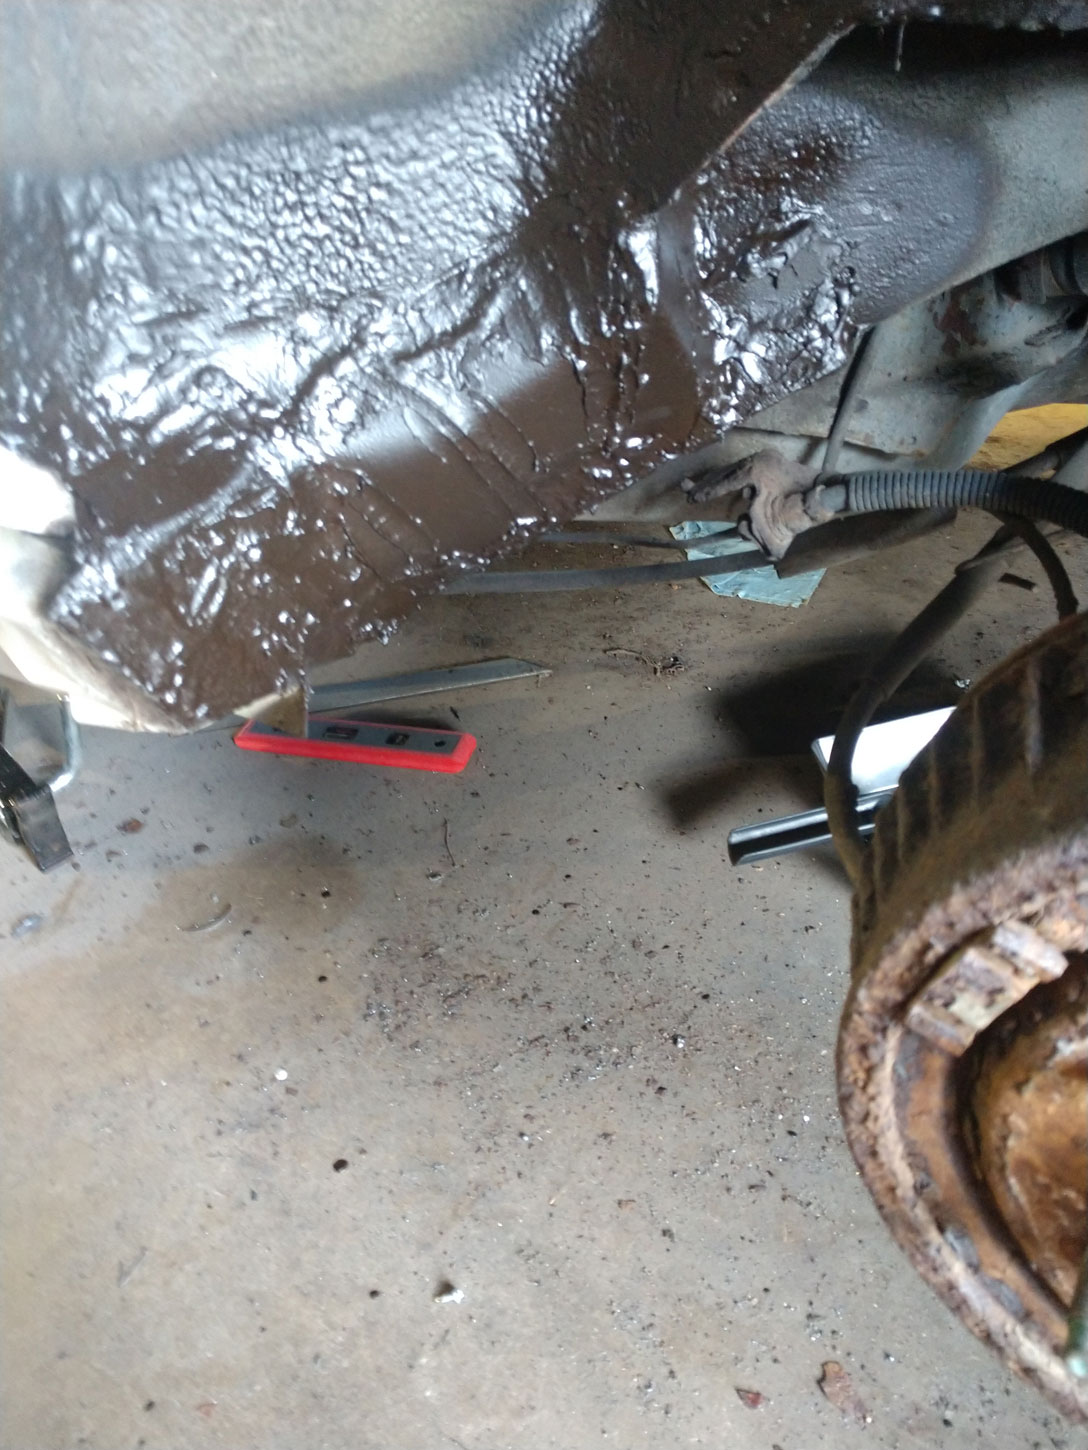
The sealant on the seams was an idea of Matt's. Its basically roofing sealer. It smells awesome - has some asphalt in it. I'll take a pic of the stuff we actually used, but the nice thing about it was that not only did it provide a water tight seal, but its also flexible when its dry. We also used quite a bit of epoxy in places where I couldnt really get the welder. I found that PC-7 held up great for this kind of work and really provided the additional structure and adhesion we needed to move forward. 
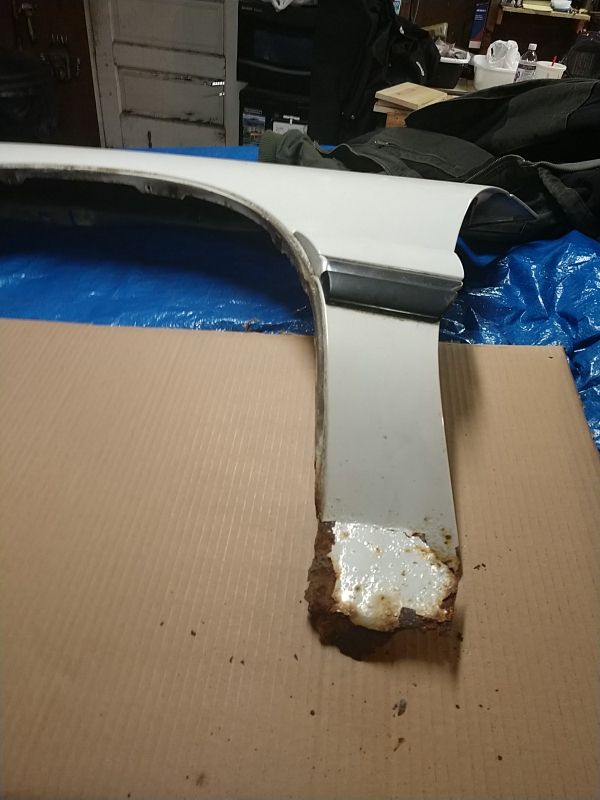
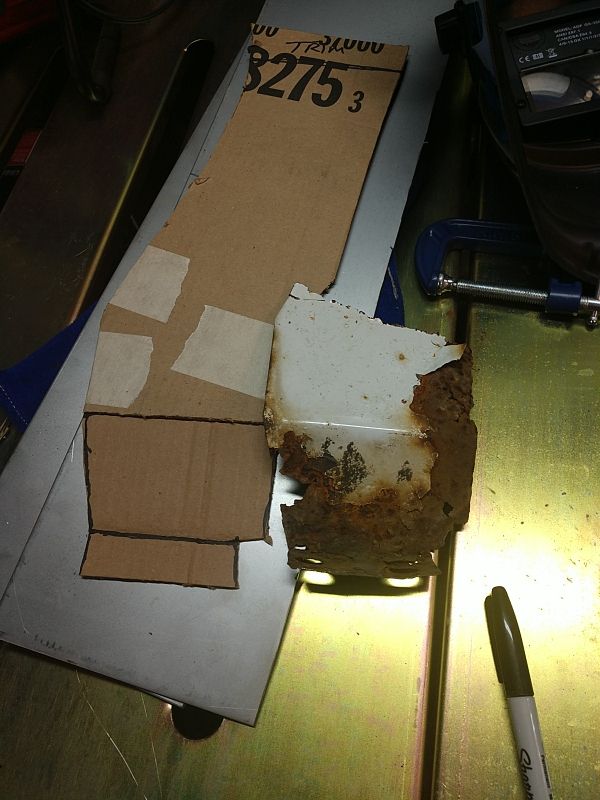
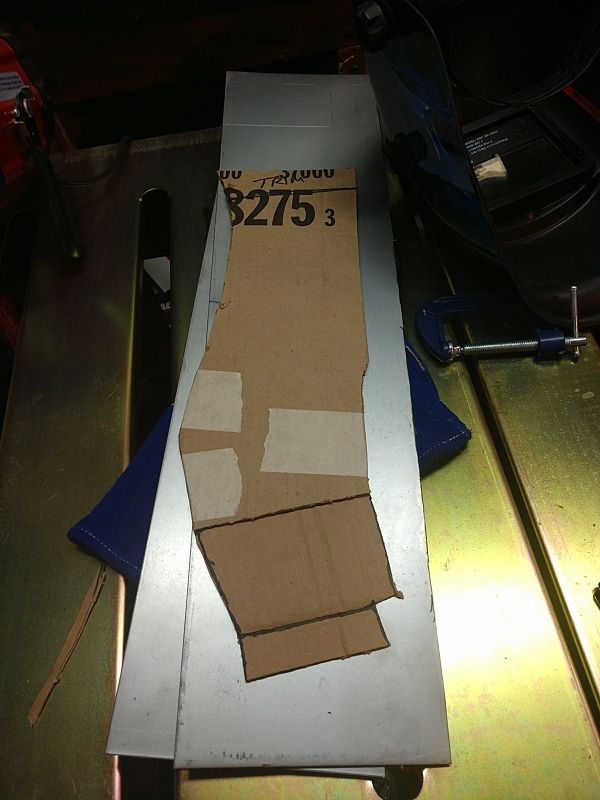
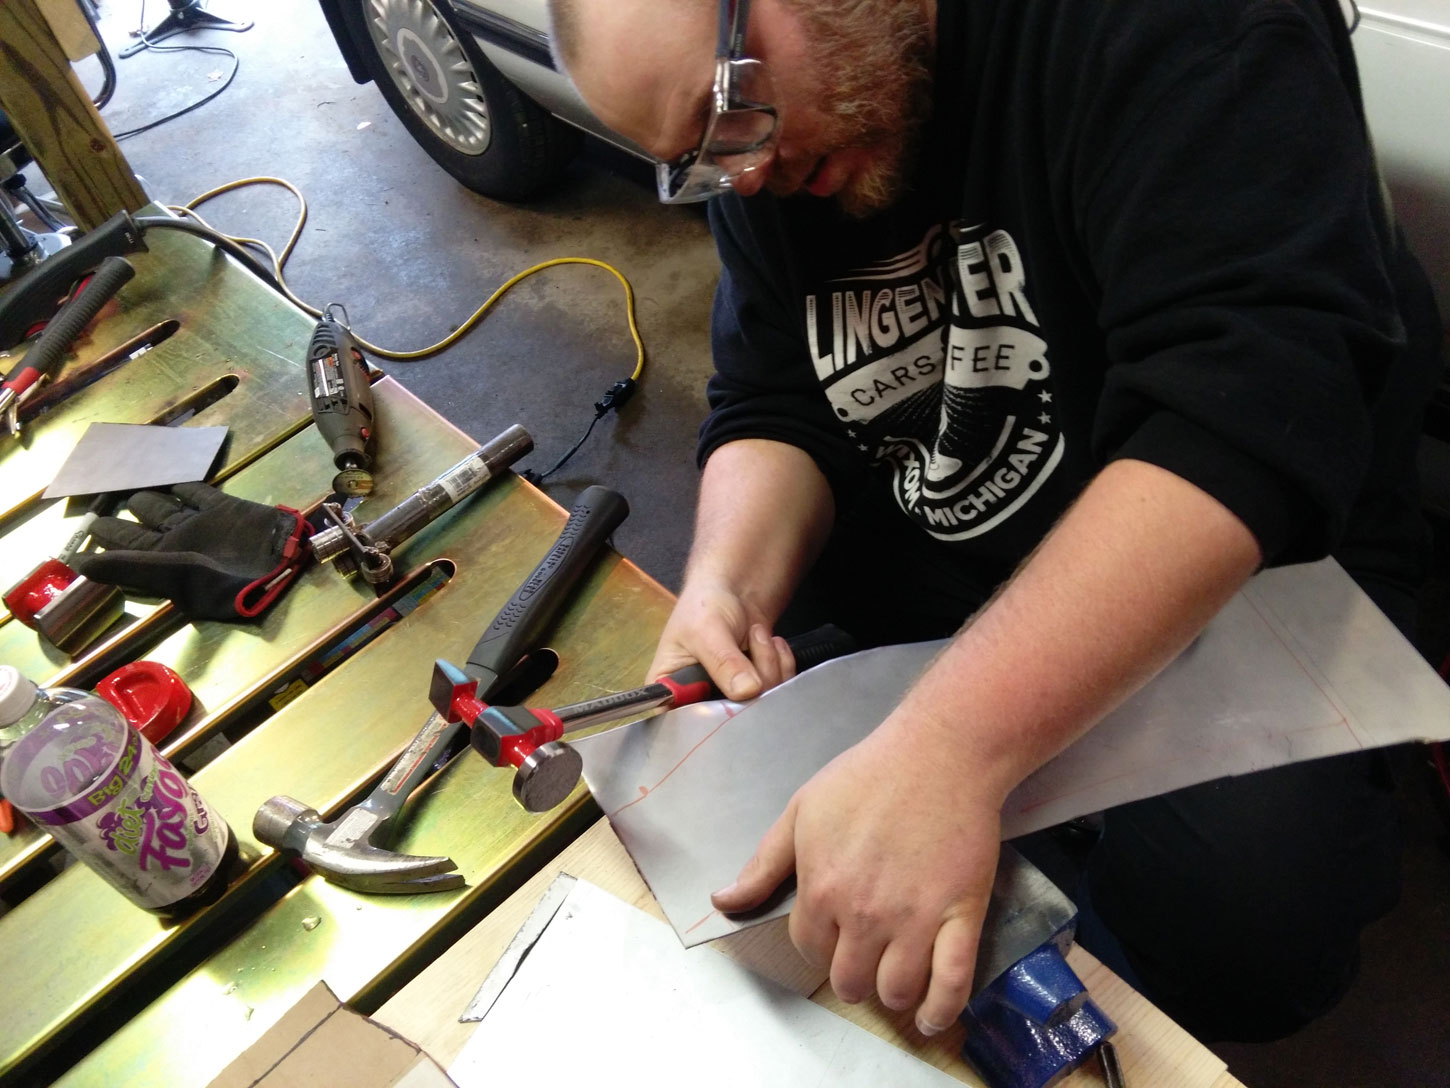
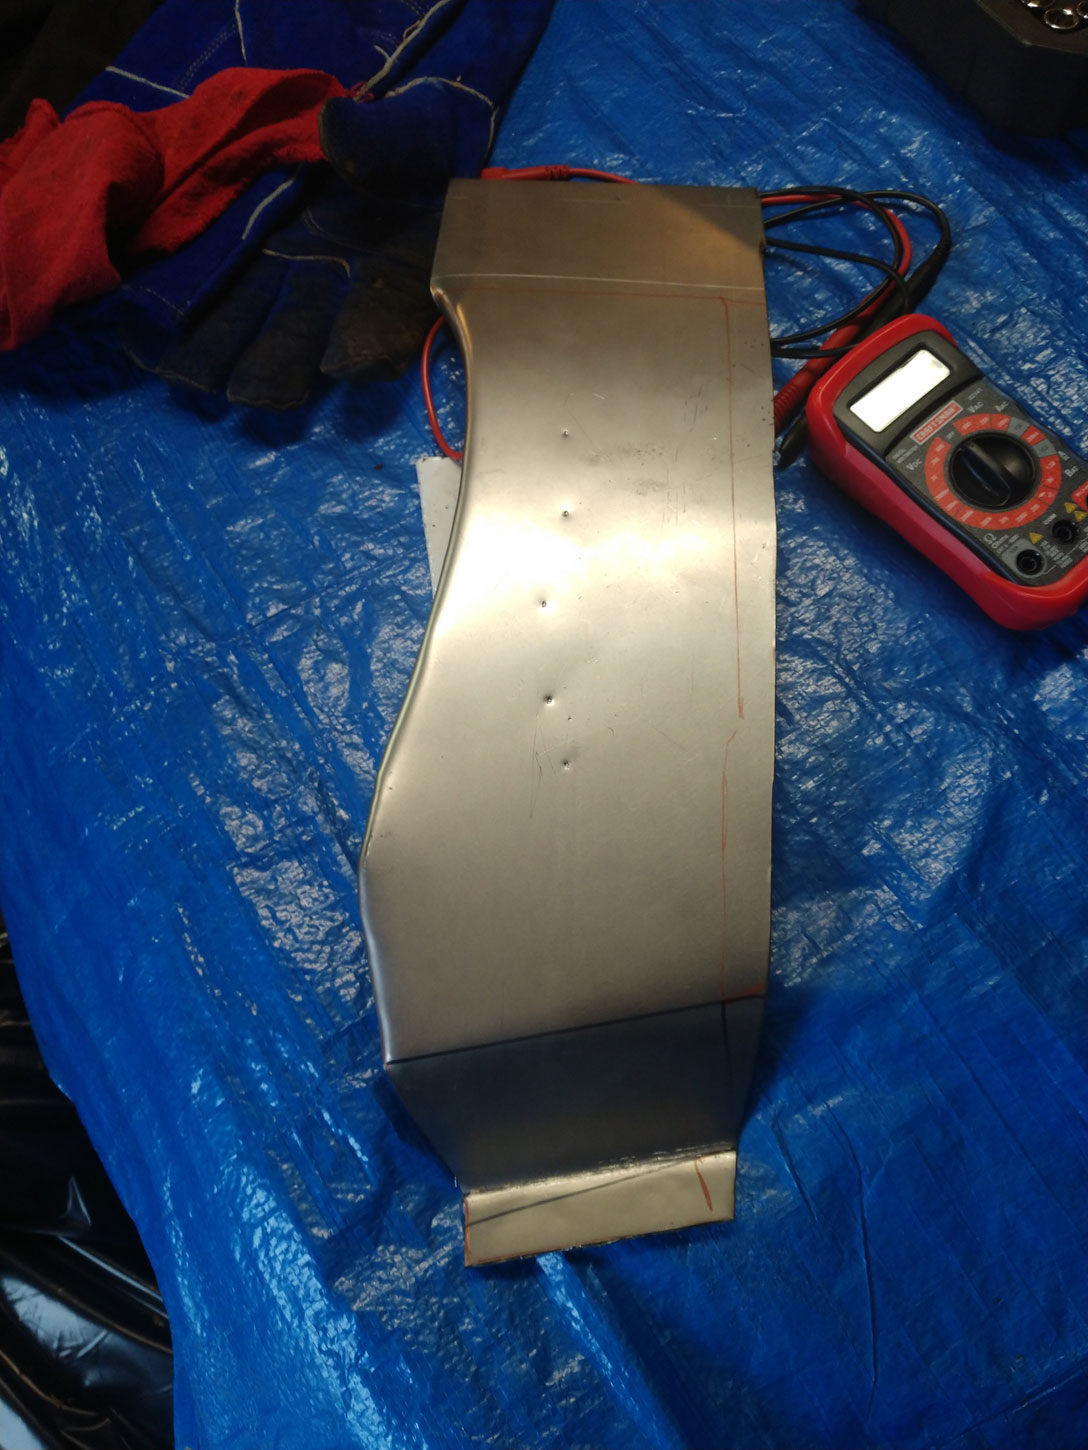
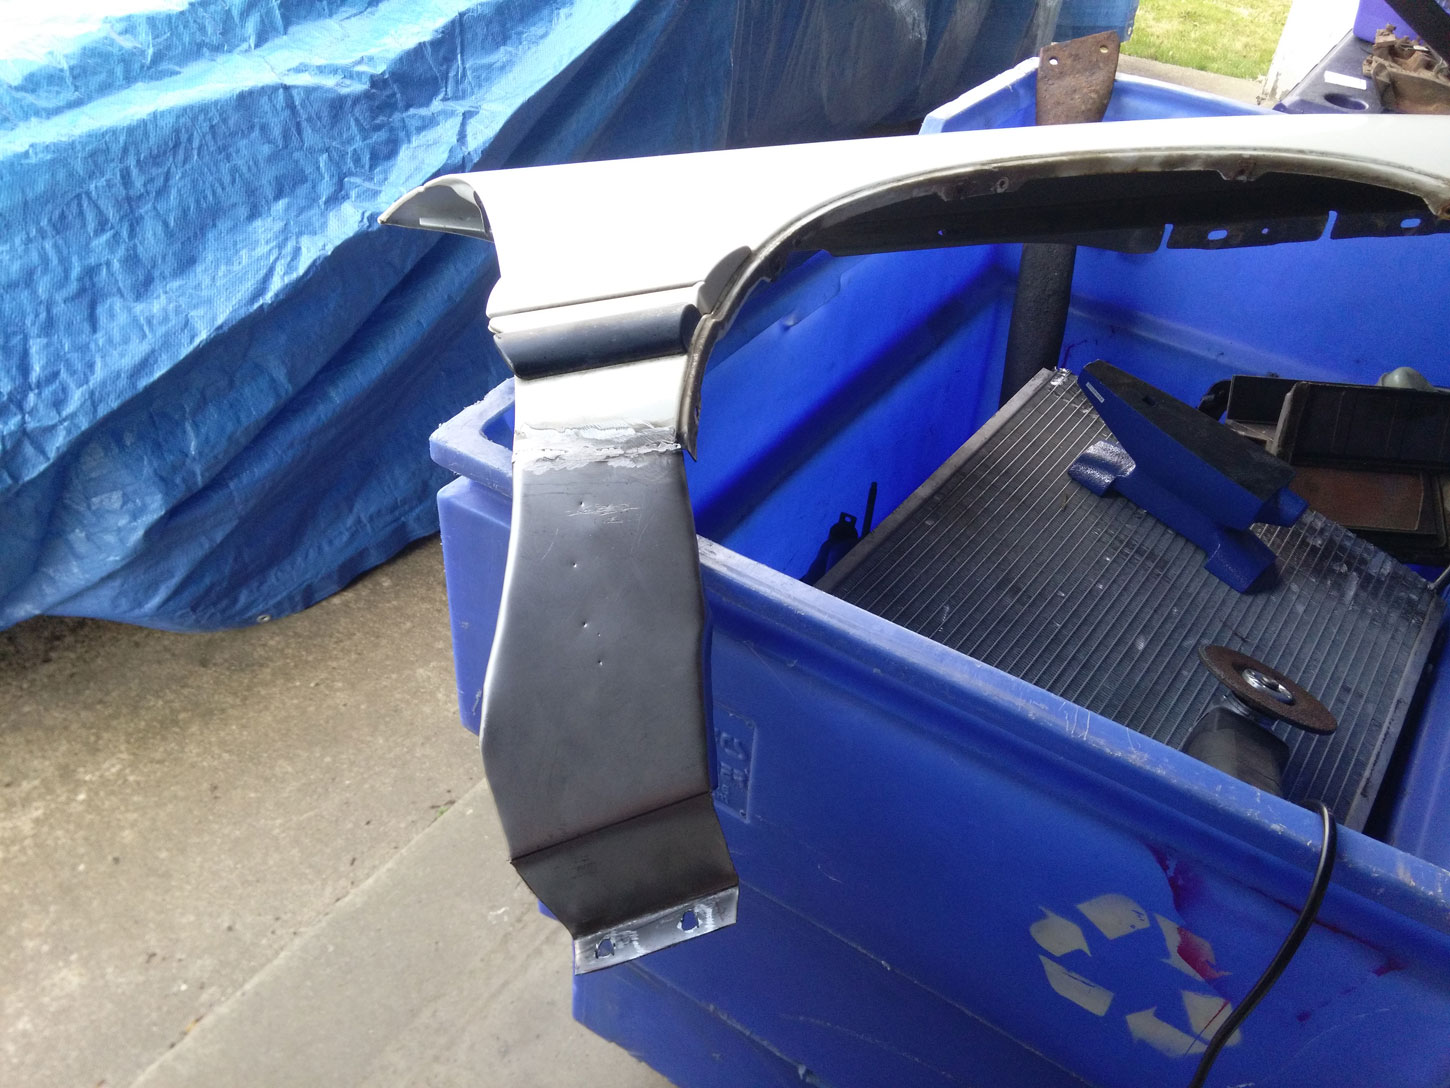
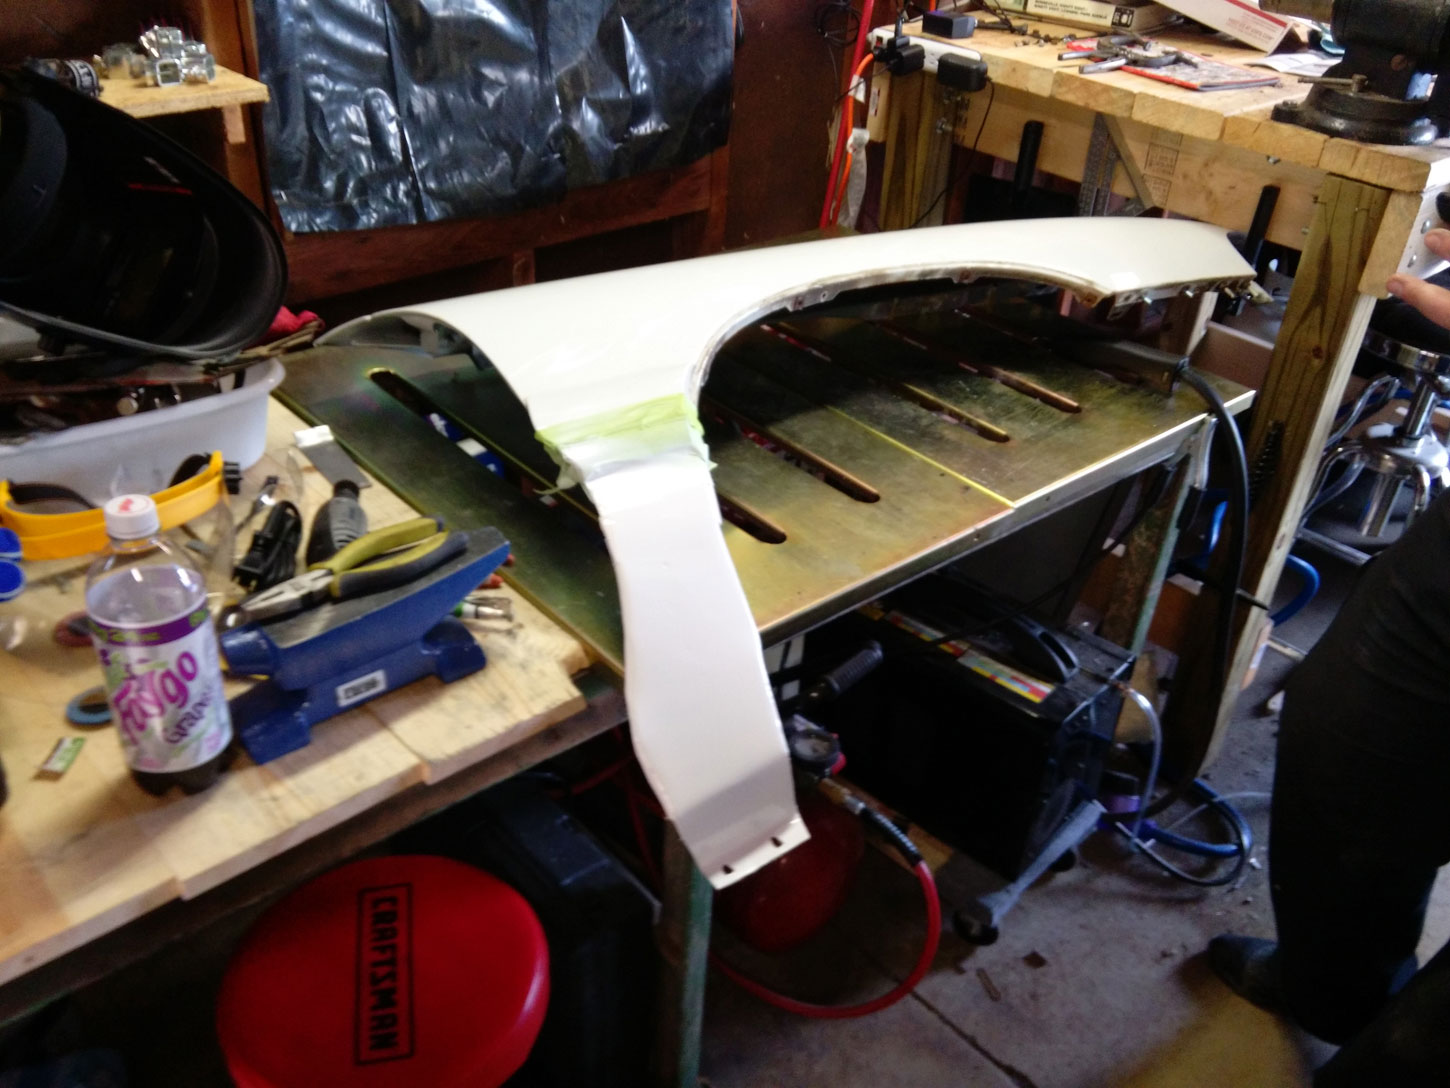
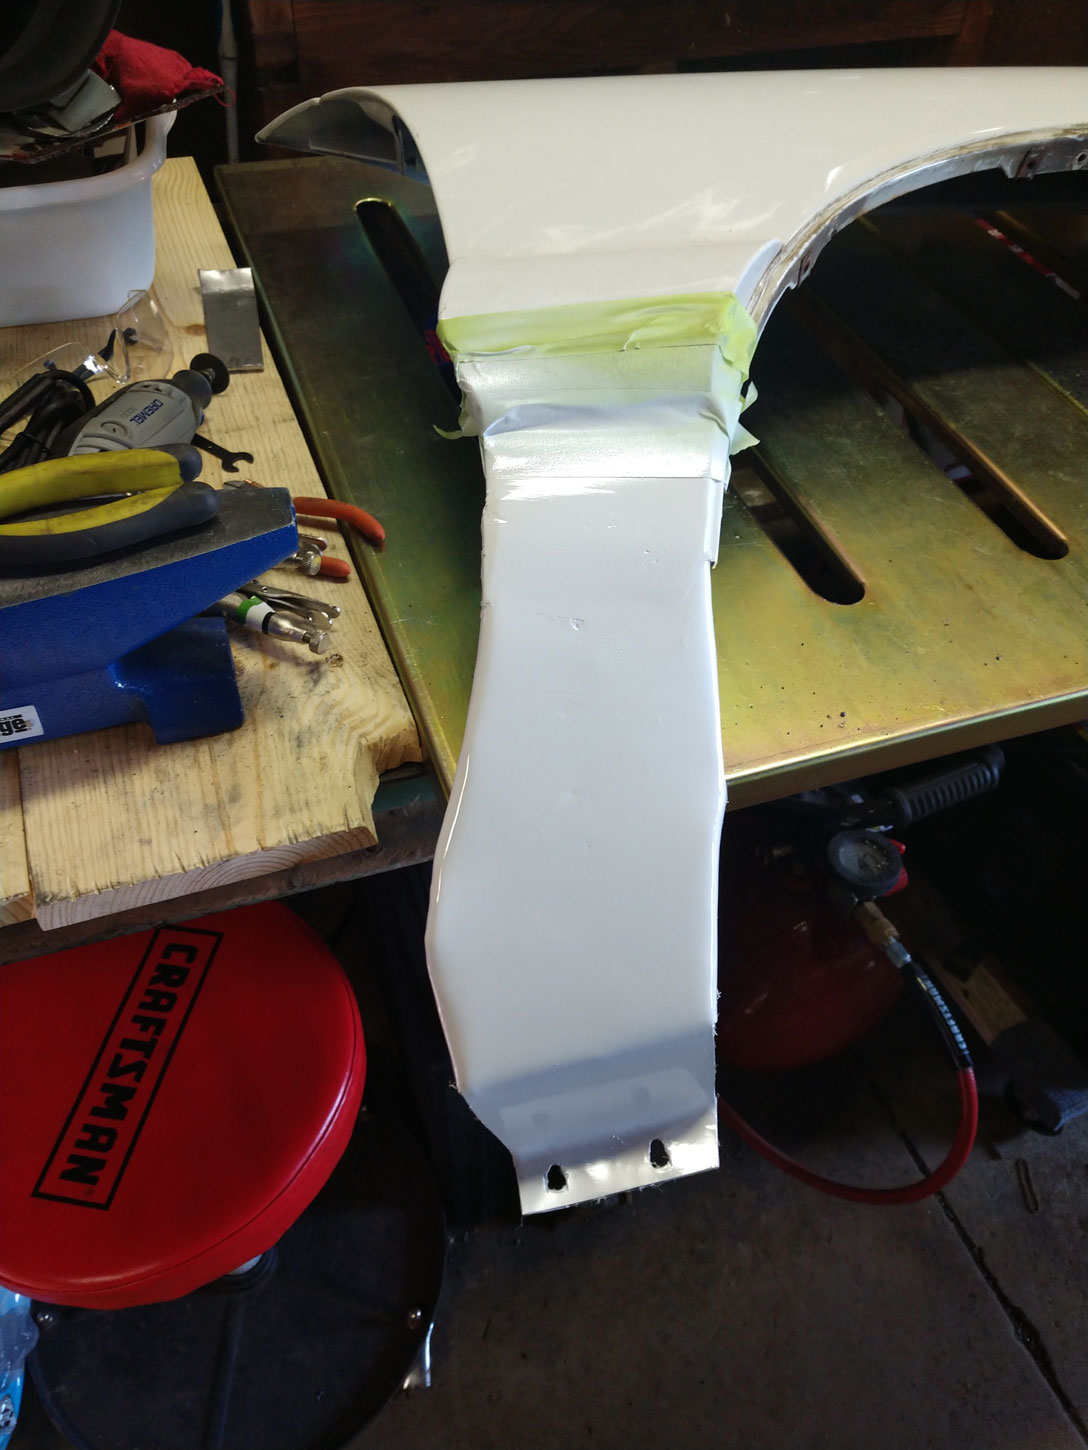
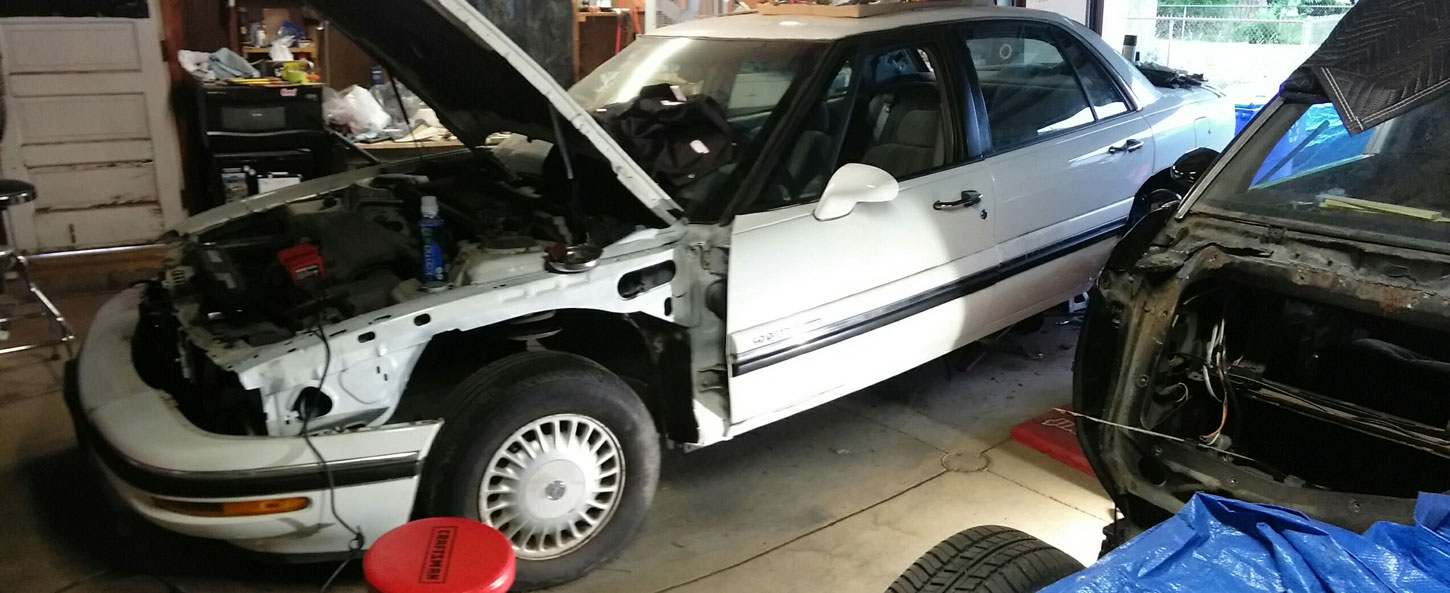
Coming back to the fenders, one of the ideas I had was to build a tool that would let me bent sheet metal that was curved, because I didnt want to spend a significant amount of money on a bending tool. So I did what anyone would do and did a fair amount of research to see if I could make a hillbilly version. I had a decent concept, but after spending a couple weeks on it, the execution wasnt exactly what I was hoping for. Needless to say, it then required me to bend the metal by hand. If anyone has a suggestion on how to bend metal along a curve without doing it by hand - Im all ears. Id love to invest in some hand tools that would accomplish this, but I suspect that Im looking at some higher end tools for this type of work, which I dont have the money or the area to store them. Im sure I'll think of more later. With us spending a year on the car, there's so much detail. You learn so much about the car doing a project of this extent. And of course, there was quite a bit of cursing at GM about why they do things the way they do. All in all, it was a fun build. |
Author: | tcolvinOH [ Fri Jul 26, 2019 9:14 pm ] |
Post subject: | Re: 97 LeSabre Project |
On the brake lines - I think initially my patience had just been tested to the point where I needed to walk away. My first attempt at bending a line was not great. Upon further review, I learned that when you use the bending pliers, you're supposed to bend the line to the pliers, not try to bend the line WITH the pliers. I ended up kinking the line I made, which isnt really fixable. I honestly dont understand what the hell GM was thinking by making a mounting bracket that runs over top of the ABS, where lines are going to connect. The factory lines ran between the ABS and the bracket, creating quite a tight turn. Since the tubing benders we had didnt allow for that, I had to go around the brackets. Im actually rather happy with how it turned out, but it seemed like an unnecessary amount of effort. Really appreciate Will and Aaron making the 7 hour trip out here to help us bleed the system and move the 95 (all of us wearing flip flops or sandals while moving the car, btw). The passenger side rear wheel well rust....I was cleaning up what we thought was just surface rust, until I pushed on the metal and put my finger through it. I knew at that point that it was going to require cutting. It was a good opportunity to try to fit a piece of metal in as close to the shape of the car as possible. I also learned that my finishing work needs a lot of development. Its solid now. |
Author: | 95naSTA [ Fri Jul 26, 2019 9:58 pm ] |
Post subject: | Re: 97 LeSabre Project |
It's always cool to see the cancer cut out of these things and put back on the road. Grats on getting it there. |
Author: | tcolvinOH [ Fri Jul 26, 2019 10:55 pm ] |
Post subject: | Re: 97 LeSabre Project |
Thanks. The car was savable, even when the shop said to trash it. It took some doing. Some determination and a whole lot of stupidity. But, it was worth saving and a good car to learn on. And there was lots of learnin' done on this car. |
Page 1 of 2 | All times are UTC - 5 hours [ DST ] |
Powered by phpBB® Forum Software © phpBB Group http://www.phpbb.com/ |