EDITED:
Thanks for the kind comment
Pictures.


| PontiacBonnevilleClub.com http://www.pontiacbonnevilleclub.com/forum/ |
|
| Our '99 Bonneville (Granny) http://www.pontiacbonnevilleclub.com/forum/your-ride-pics-and-videos/topic42603-60.html |
Page 4 of 5 |
| Author: | TheLoyale [ Thu Feb 11, 2016 2:45 pm ] |
| Post subject: | Re: Our '99 Bonneville (Granny) |
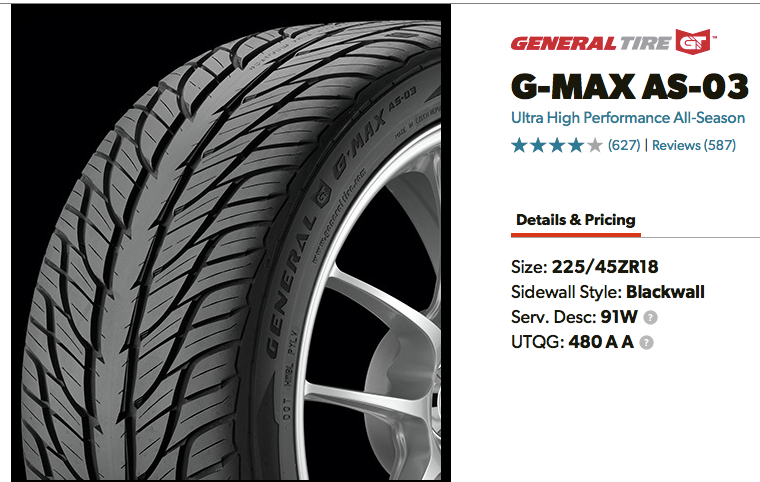
Just wanted to test the waters. Would there be any interest if this car came up for sale? I'm thinking price would be $4,500obo. As you can see thru the thread, I've put a lot of time into the car. Its turn key and go, needs nothing (Except for some summer rubber) We have been tossing the idea back and forth of selling the good ole' Bonne before I buy Summer shoes for it. Cheers all! -Tom |
|
| Author: | 98SSE [ Tue Mar 01, 2016 9:15 pm ] |
| Post subject: | Re: Our '99 Bonneville (Granny) |
Looking good. Intake gasket ever been done? |
|
| Author: | 1oldman [ Tue Mar 01, 2016 11:46 pm ] |
| Post subject: | Re: Our '99 Bonneville (Granny) |
Nice looking work. - BC |
|
| Author: | TheLoyale [ Wed Mar 02, 2016 12:26 am ] |
| Post subject: | Re: Our '99 Bonneville (Granny) |
No the intake gasket leaks pretty good, nice pools of oil sit in the Manifold and Head castings. Been wanting to change it out, but I really don't want to pull the Fuel rail off to do it. I hate getting Injectors reseated haha. Maybe I'll get to it before the motor bursts into flames :p -Tom |
|
| Author: | 96 SSEi [ Sat Jun 25, 2016 5:53 pm ] |
| Post subject: | Re: Our '99 Bonneville (Granny) |
looks great for a ride that's pushing 2 decades |
|
| Author: | WhiteArrow3800 [ Wed Jul 06, 2016 7:55 pm ] |
| Post subject: | Re: Our '99 Bonneville (Granny) |
Wow those look much better on the car than I figured! Great choice! |
|
| Author: | TheLoyale [ Wed Jul 27, 2016 9:28 pm ] |
| Post subject: | Re: Our '99 Bonneville (Granny) |
So since I haven't been to a junkyard yet to take a gander, Do all H-body SSEis have larger sway-bars (F/R) than any SE? Also, are they routed the same? I think the next step for this car is definitely larger sways. I still need to get under the car and see what size is on it now. |
|
| Author: | MattStrike [ Wed Jul 27, 2016 9:47 pm ] |
| Post subject: | Re: Our '99 Bonneville (Granny) |
All SSEi's and most SSE's have the larger sway bars. |
|
| Author: | 98SSE [ Thu Jul 28, 2016 7:41 pm ] |
| Post subject: | Re: Our '99 Bonneville (Granny) |
Looks good! |
|
| Author: | TheLoyale [ Fri Jul 29, 2016 12:53 am ] |
| Post subject: | Re: Our '99 Bonneville (Granny) |
Thanks guys! |
|
| Author: | TheLoyale [ Tue Sep 13, 2016 1:21 pm ] |
| Post subject: | Re: Our '99 Bonneville (Granny) |
Update: Upper and Lower Intake gaskets. So I am getting ready to replace the upper and lower intake gaskets along with Valve cover seals, as I've noticed a decent amount of Oil in the radiator. So far I have a new Dorman Upper Intake assembly (Comes with plenum gasket, Throttle assembly seal, PCV and EGR tube, Fuel Injector O-rings and two metal tubes) I am getting a Fel-Pro lower intake set which comes with a whole bunch of seals and gaskets. It is listed as a "2nd Version" I am guessing it is an improved design? Or do different generation L27s use other styles of gaskets? I am also getting Fel-pro valve cover seals, which do not come with grommets. Are there any grommets to replace? I'm also getting a genuine Thermostat as well. Is there anything else I should get or need to know before digging into this? I have an FSM from 1992 which seems kinda vague about the procedure. I plan on getting this done within a weekend. Anything else, give me a holler -Tom |
|
| Author: | 1oldman [ Fri Sep 16, 2016 8:50 pm ] |
| Post subject: | Re: Our '99 Bonneville (Granny) |
TheLoyale wrote: Update: Upper and Lower Intake gaskets. I am also getting Fel-pro valve cover seals, which do not come with grommets. Are there any grommets to replace? I'm also getting a genuine Thermostat as well. Anything else, give me a holler -Tom Felpro Grommet Set Part No. ES 72833 $11.99 http://shop.advanceautoparts.com/p/felp ... r+grommets hope this helps on the parts. - BC |
|
| Author: | TheLoyale [ Fri Sep 23, 2016 12:25 pm ] |
| Post subject: | Re: Our '99 Bonneville (Granny) |
Awesome, thanks for the part number! Time to start gathering parts. -Tom |
|
| Author: | TheLoyale [ Fri Oct 21, 2016 1:54 pm ] |
| Post subject: | Re: Our '99 Bonneville (Granny) |
Gonna be replacing Upper and Lower Intake gaskets, Valve cover seals, Thermostat, Heater Hoses and Rad hoses this weekend. Got everything, went with genuine ACDelco Thermostat. Fel-pro gaskets and Gates Hoses. Question I have is Torque specs and Sequence for The Upper and Lower intake bolts along with the Valve cover bolts. I have a '92 FSM which lists 88 In.lbs for the Intake and Valve covers. Is this correct? Torque sequence for the Lower intake Starts in the middle, moves to the left 2, then to the right 2, then the 2 closest to the belts (Front) and finally the two closest to the Trans (Rear) Is this correct, or does any of this change from between '92-'99? |
|
| Author: | TheLoyale [ Fri Oct 21, 2016 10:30 pm ] |
| Post subject: | Re: Our '99 Bonneville (Granny) |
Well there doesn't seem to be any torque sequence for the upper intake in the FSM, but it does say 22ft.lbs on those bolts. 88 In.lbs on the Lower intake and Valve covers (Which seems a bit much for plastic valve covers with grommets) Doubled checked and I should have everything needed for the job. One thing is throwing me off though, the FSM shows there is a flat gasket for the Thermostat housing, yet all the Genuine GM part sites I have visited along with O'reilly's does not list said gasket. They only show the Thermostat assy which comes with the rubber seal. That is how I have the currant Thermostat, hasn't leaked yet anyhow. Tomorrow I'll snap a few photos during the work for giggles. -Tom |
|
| Page 4 of 5 | All times are UTC - 5 hours [ DST ] |
| Powered by phpBB® Forum Software © phpBB Group http://www.phpbb.com/ |
|