Hey everyone! Long time no chat!
Mods, feel free to move this as necessary. I figured this could go in General since a ton of us have had vacuum leaks and EVAP leaks on our cars over the year! The UIM gasket plagued my old LeSabre several times, and I would have loved to have had this option back then! I recently have been fighting a P0300 on my G37 (actually copy-pasting this write up from my post on the G37 forums), and checking for vacuum leaks with this smoke machine was one thing that helped me troubleshoot.
If you've ever tried to track down vacuum leaks, it's frustrating and even dangerous if you're trying to use carb cleaner, map gas, etc to try and find the leak. By far the most effective way to find any type of vacuum or EVAP leak is with a smoke machine. As we all know, those can be pricey and expensive, and most of us that are trying to find vacuum leaks don't have the time to wait for one of those to get shipped. So, I decided to make my own using simple items that a lot of us have around the house, save for 1 or 2 of these.
Here's what you'll need, photos are attached below of your list:
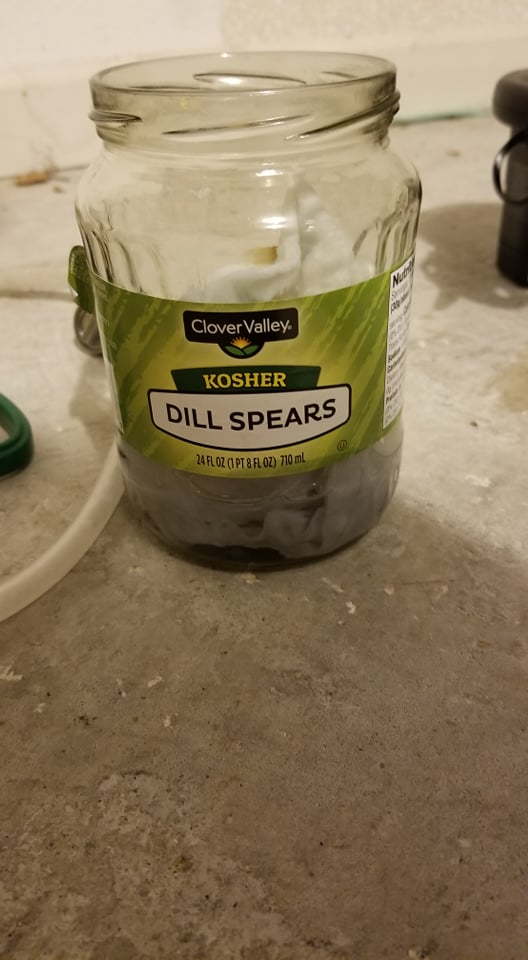
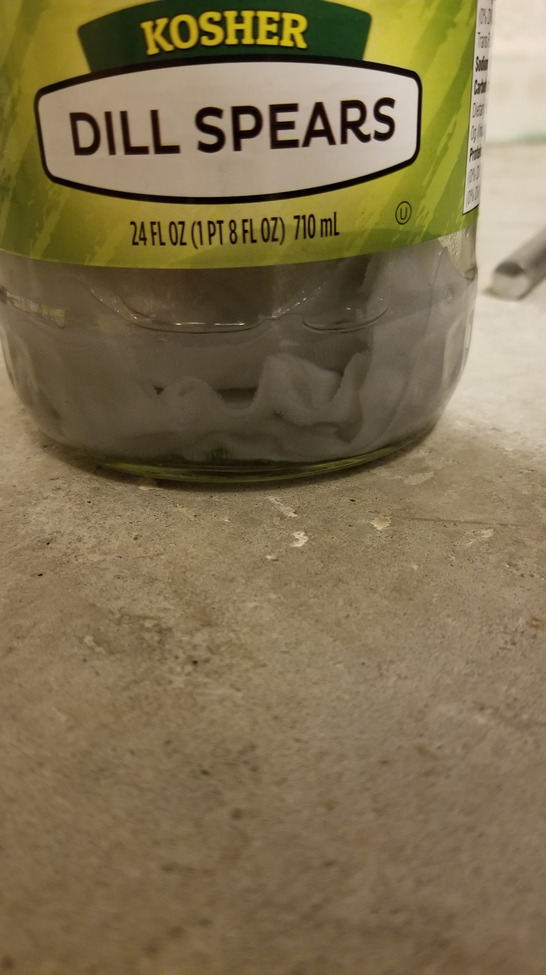
Empty 24oz Pickle Jar (You can get away with a smaller jar, but this size holds a good amount of smoke)
Cotton white sock or t-shirt
baby oil (make sure you get pure baby oil, not one with an aloe or other additive)
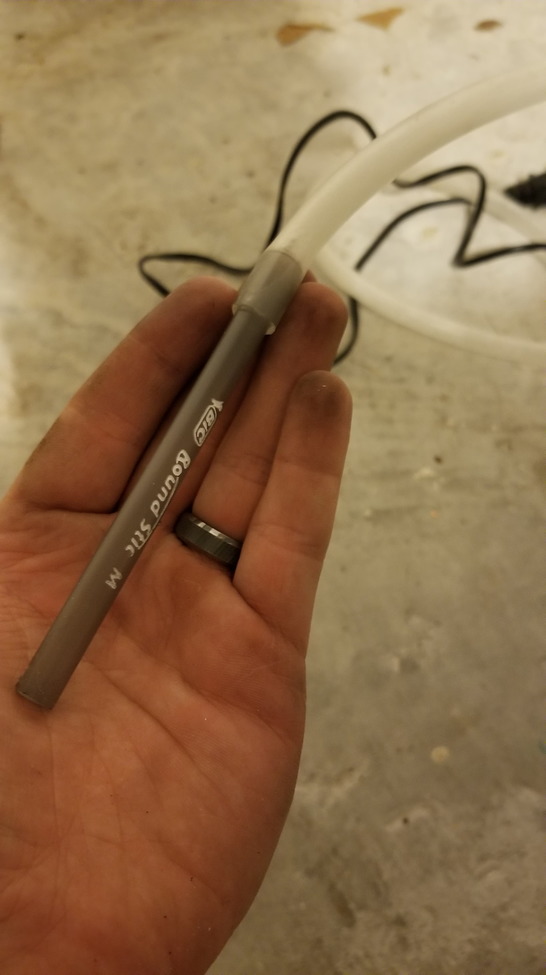
two BIC Pen's
The cheapest soldering iron you can find (If you can find one that has a plastic surround vs. a metal, plastic is better)
Carb cleaner Cap (If your soldering iron has a metal base)
1/4" ID clear tubing
Bicycle pump OR an air mattress pump
JB Weld or another high heat plastic/metal safe epoxy
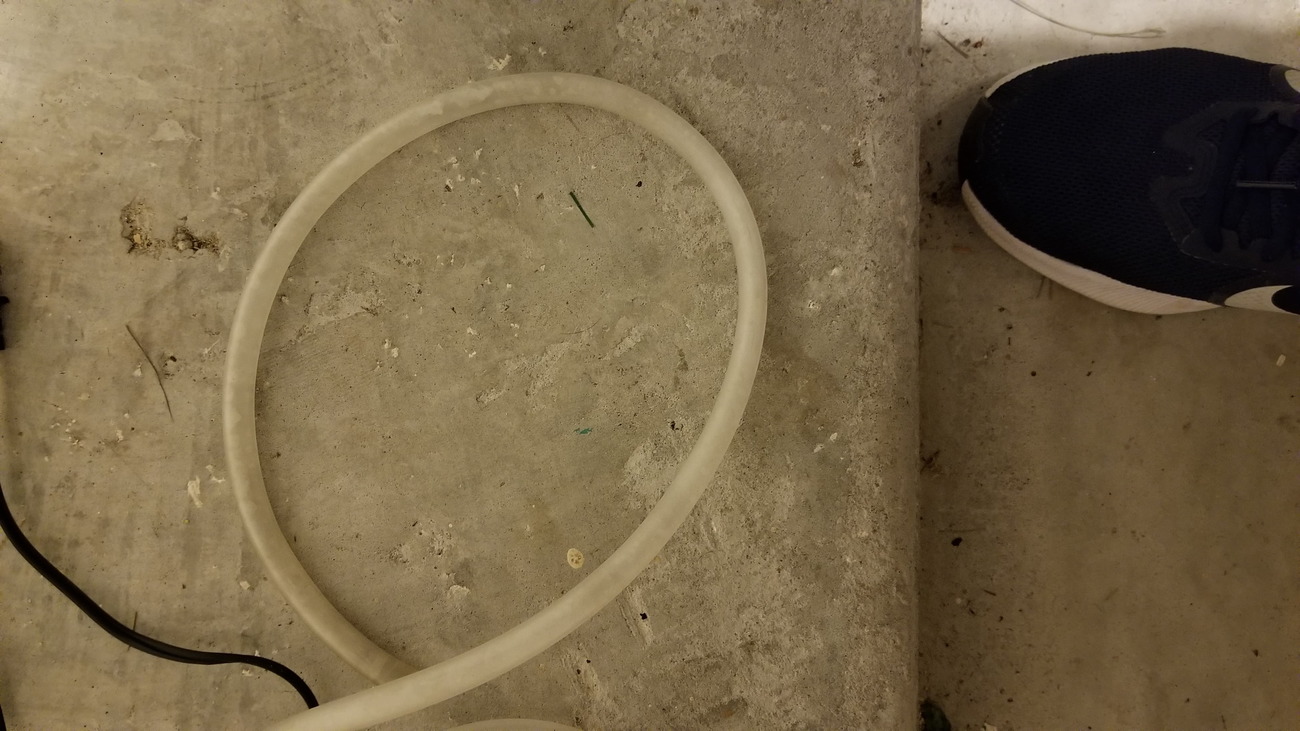
Clear Tubing - I'd get about 6ft of tube
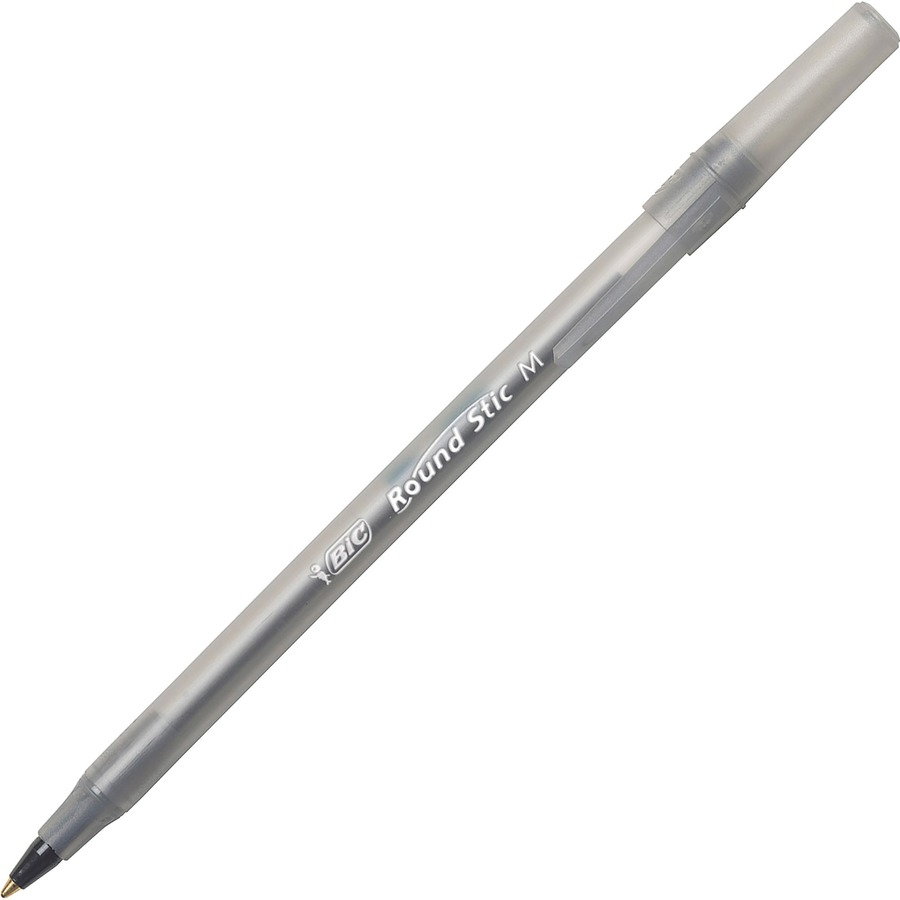
Standard BIC pen WITH LID
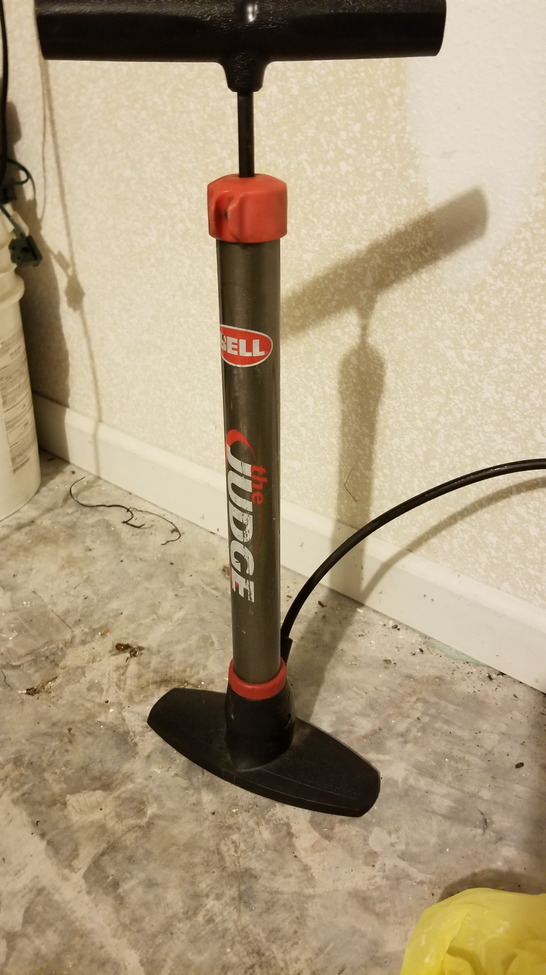
Bike Pump
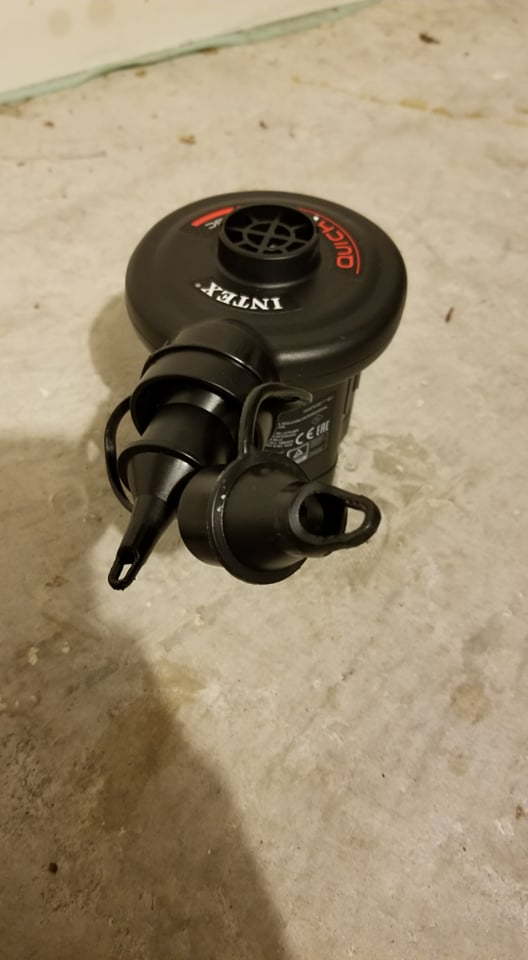
Air mattress pump
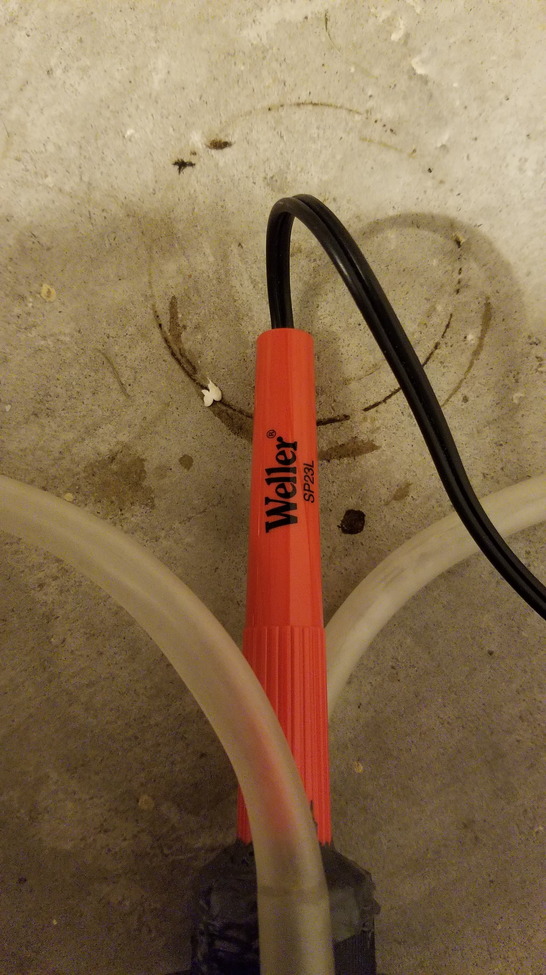
Cheap Weller soldering iron
Start out by measuring the diameter of the metal shaft of your soldering iron. It's crucial that you only measure the metal shaft, and not the plastic handle portion. Once you know this, take the pickle jar lid and drill a hole dead center that is this size. The hole needs to be just big enough to let the shaft of the soldering iron through, but not big enough that the base and handle of the iron can go through.
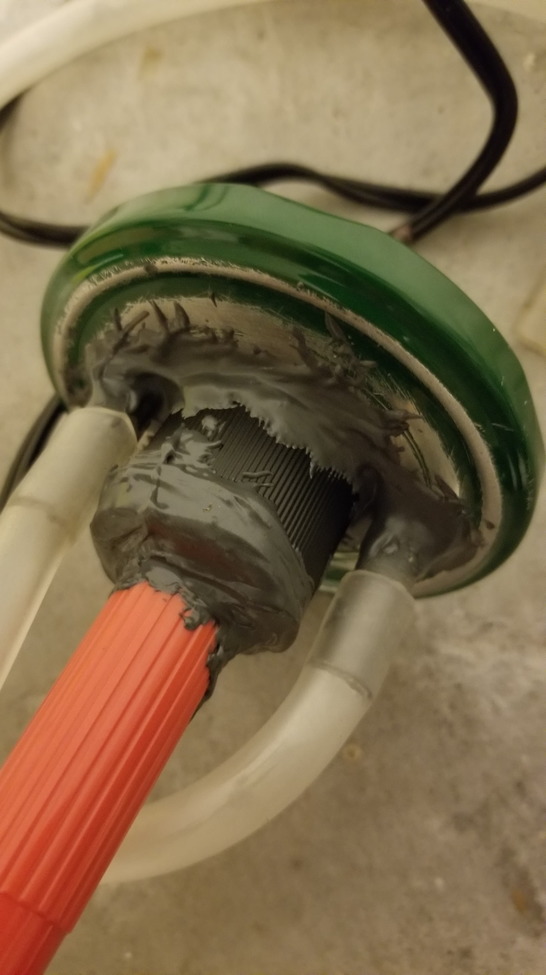
Now, depending on if your soldering iron has a metal cap around the bottom of the handle where it contacts the shaft, you may need to create a shroud for the iron so that this metal piece does not directly contact the lid of the jar when the soldering iron is inserted. Mine did have a metal cap, so what I did was I hollowed out the cap from a can of carb cleaner, and then slipped this around the circular base of the soldering iron. This way, the cap was touching the plastic handle, but not the metal cap. The fit should be snug, but the cap will still be somewhat loose.
Next, insert the soldering iron and cap loosely into the hole you made in the pickle jar's lid. Go about a 1/2" to the side of the cap, and make two marks, one on each side of the lid. Next, take two BIC pens, and take off the caps. Cut off the very top of the cap where it would be closed, so that it is an open hole, and then cut off the extrusion that would hold the pen to your pocket. Use a christmas tree bit or 1/4" bit to make two holes in the pickle jar lid. At this stage, you can choose to sand the top of the lid so that it is bare metal, but this is not required. These holes should let you slide the two pen caps upward from the INSIDE of the lid. Since the caps are tapered, they will lock at the top of the hole, allowing for a tight fit.
Next, remove your soldering iron and cap from the pickle jar lid. I used JB Weld to hold the carb cleaner cap to the soldering iron. This way, when the iron is inserted into the pickle jar, there's about a 1/4" gap between the metal base plate of the iron and the jar's lid. Let the JB set completely before you move the soldering iron. The JB weld not only holds the cap to the soldering iron, but will also help create an air tight seal.
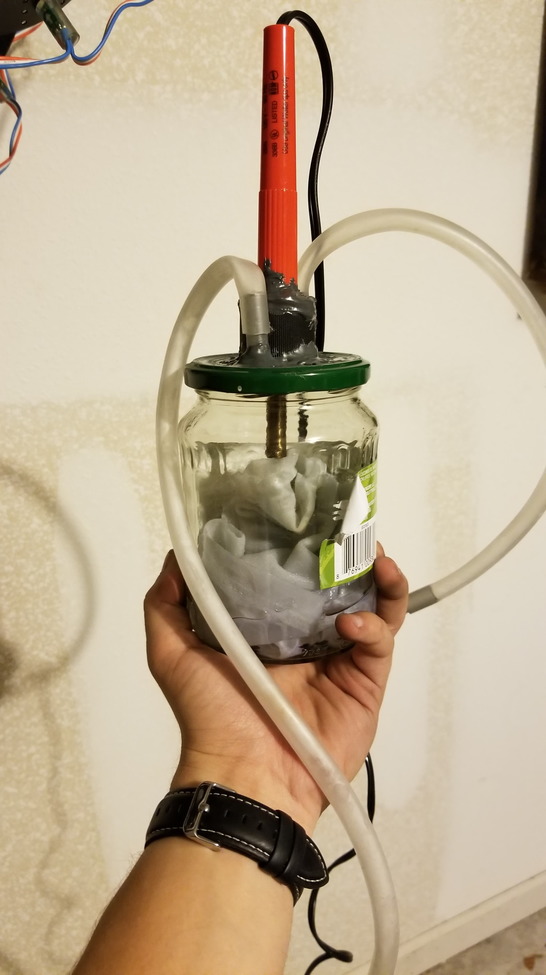
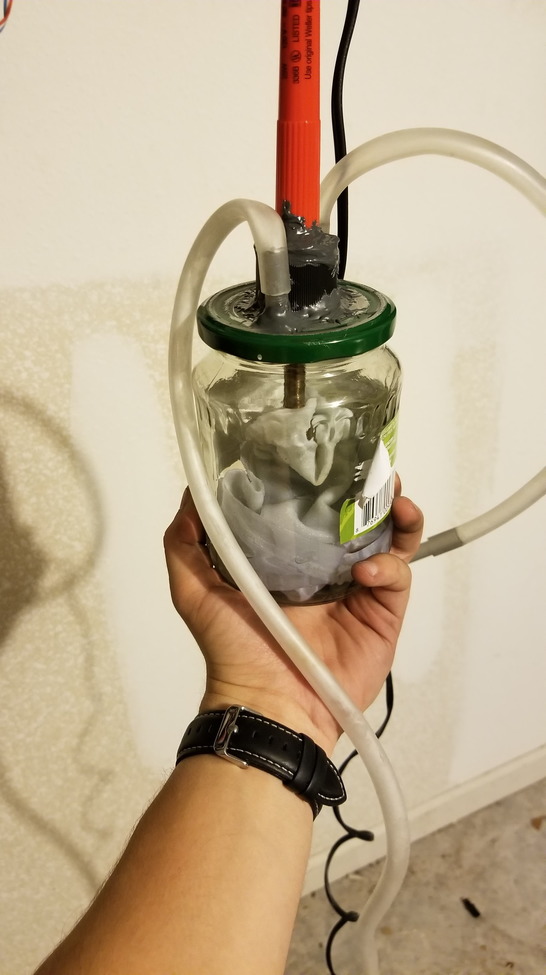
Take the pickle jar lid, and apply JB Weld on the top and bottom of the lid around your two pen caps to create an air tight seal. MAKE SURE YOU DO NOT GET ANY JB WELD ON THE RUBBER SEAL INSIDE OF THE JAR'S LID!!! The rubber seal on the lid will help it seal to the jar.
Once the soldering iron and cap have set, you can put JB Weld around the bottom of the carb cleaner cap and put it into the center hole of the pickle jar lid. Again, the JB weld will seal the iron to the lid, and since you already JB Welded the cap to the iron in an earlier step, it is an air tight seal. Let this dry for 24 hours to completely cure.
Next, take your 1/4" ID tubing, and cut it into two sections, one about 4' long and one about 2' long. Place these two tubes over the BIC pen caps on the lid.
.
Your pickle jar lid should look like this below
At this point, you can decide if you want to use a bicycle pump to move the air for your smoke machine, or a small hand pump like an air mattress pump. In my trial and error, I found that the bike pump actually worked better, because the mattress pump moved too much air too quickly, so the smoke did not stay as concentrated.
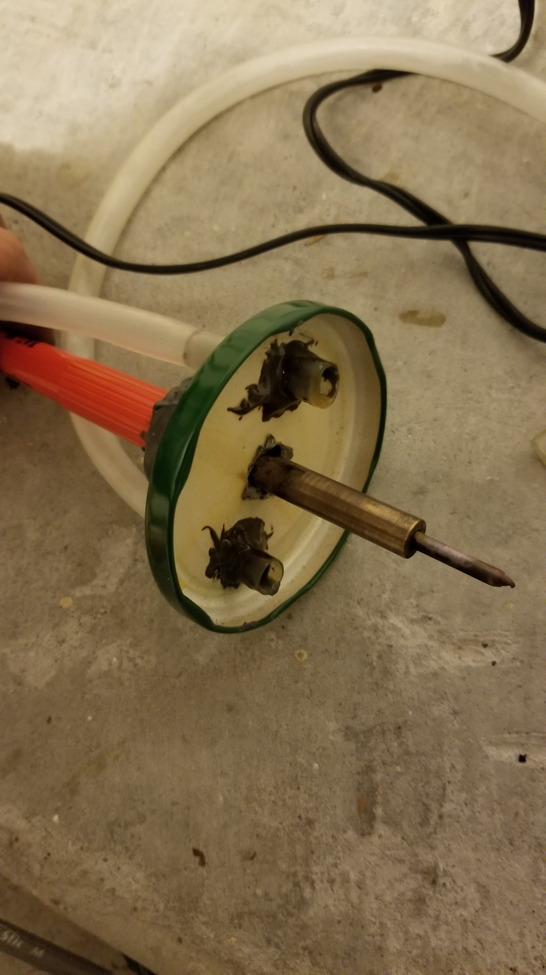
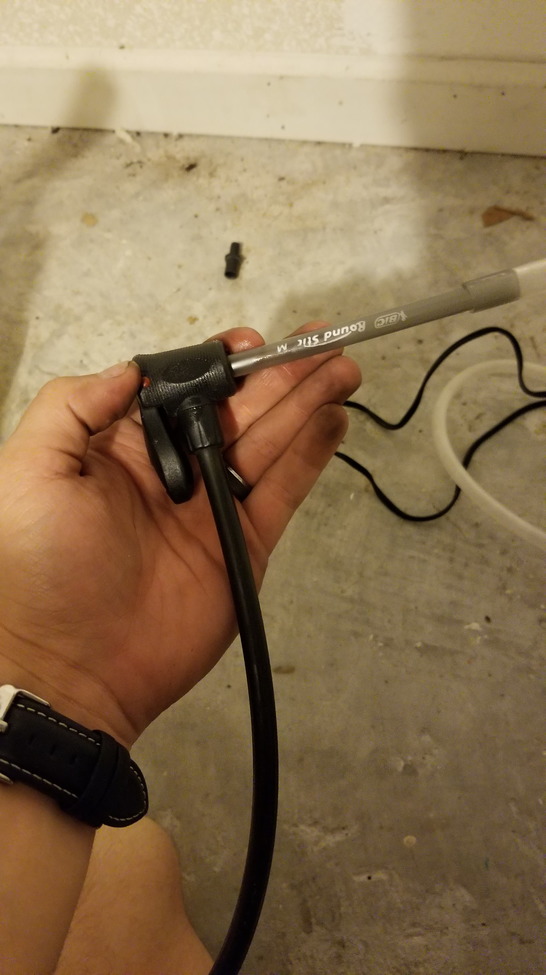
If using the bike pump, take the guts out of one BIC pen, and cut off the sealed end so that it is a hollow tube. Place this pen in the other side of the 2' tube, as shown below
The BIC pens are the perfect size to fit inside the bike pump nozzle, and lock into place.
Next, take an old 100% cotton sock, or cut up some old 100% cotton T-shirt. It'll take some trial and error to get the size of this right, but when you put the lid of your jar on, you want the tip of the solerdering iron to just touch the fabric, but not so much that it is completely engulfed by the fabric. For me, cutting off a strip of T-shirt starting from the bottom of the shirt and going about 6" up was perfect.
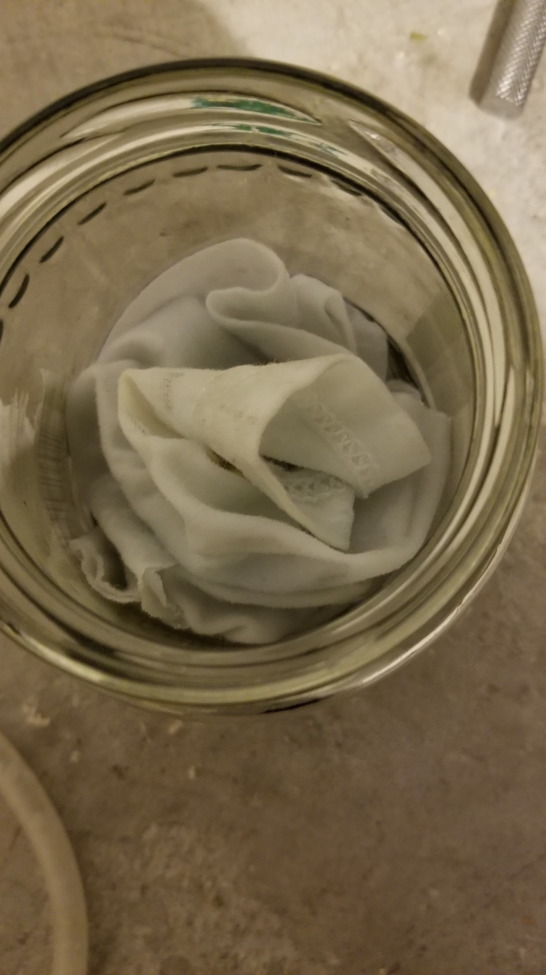
Now, take your baby oil and completely saturate the fabric. Soak that thing until it is dripping wet. Once your fabric is completely soaked, add about 1/2" of standing oil at the bottom of the pickle jar.
As your smoke machine works, the fabric will act as a wick, sucking up the oil. It's important to add the extra oil and completely soak fabric so that it does not burn up.
Once you've added your fabric and oil, put the lid assembly on your pickle jar, and plug it in to an extension cord. It will take about 5-10 minutes to fully heat up and start making smoke. Close off both tubes and check for any leaks on your jar, and seal as necessary.
Once your jar is air-tight, you can hook the 2' section to your air pump (bike pump or mattress pump), and the other end to a vacuum port that you'd like! From there, it's just a matter of pumping in as much smoke as you need to fill the intake system, and then look for leaks.
Here's what the finished product looks like
I hope this helps someone! I can't take all credit for this, because I did see a video a long time ago about making a smoke machine similar to this. I think all together this cost me maybe $15, and was a lot easier than trying to find a wick and resistance wire locally to make a paint can version. This one is also great, because it doesn't require an air compressor to work like many DIY smoke machines. Even if you don't have a bike pump, you can technically blow into the tube yourself to move the smoke, although I would not recommend this as breathing this smoke in would likely be toxic.