Change Valve Cover GasketsThis work was done on a 1995 Series II (non-supercharged) 3800 engine - other years and models similar but not identical.Have you noticed when you were under your car, or poking around the engine compartment that the sides of your engine are wet with oil? Oil dripping on the driveway under your car? Do you smell a really nasty odor occasionally from your heater ducts? Could be time to change your valve cover gaskets.
Here is how I did mine. The job shouldn't take more than an hour unless you want to clean the valve covers and the outside of the engine. I was just happy to stop the drips.
What you need:
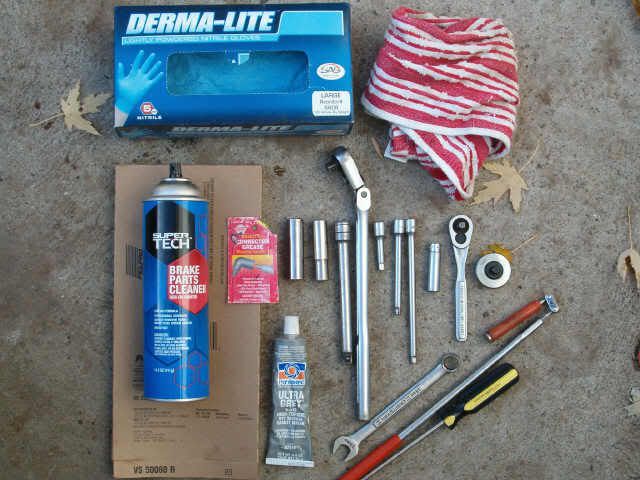
Tools: 1/4"-drive ratchet, extensions, and 3/8"socket. 3/8"-drive ratchet, extension, 13mm and 10mm sockets. A thumb-wheel ratchet is helpful, and a 13mm combination wrench may be easier to use on the engine cover bracket nuts. A magnetic pick-up tool to retrieve the stuff that you drop under the car.
Parts: New valve cover gaskets, brake parts cleaner and a couple of rags. Some nitrile gloves will keep your hands clean. The Fel-Pro part number is VS 50080 R; it fits GM 3800 engines (VIN C, L, K, 1) from 1988 to 2001. These gaskets cost about $15. Also, a little dab of stiff silicone grease if you have it. I used a little RTV silicone to hold the rear gasket in place. Grease would have been better.
You don't need to lift the car or drain any fluids, or even disconnect the battery. Just open the hood and have at it.
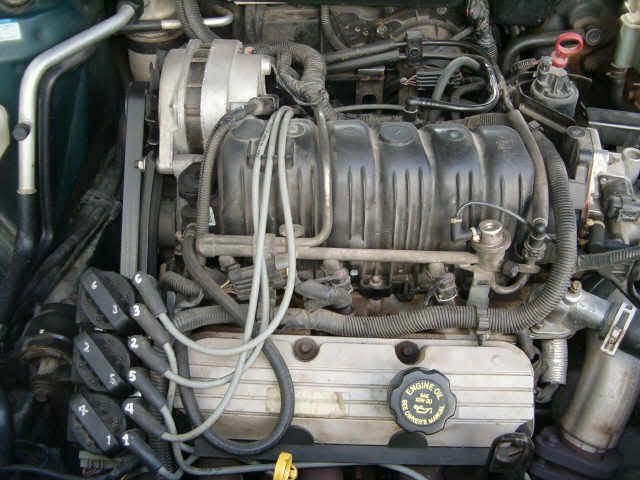
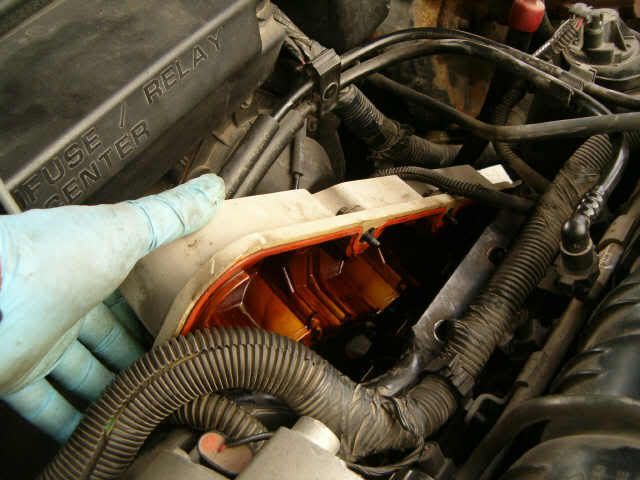
Remove the engine cover by twisting the oil fill spout counterclockwise and pulling it out. Then lift the front of the cover to disengage the cup from the cover bracket on the rear head, and lift the cover out. Replace the spout and filler cap.
Use a silver sharpie marking pen to number the coils and plug wire ends.
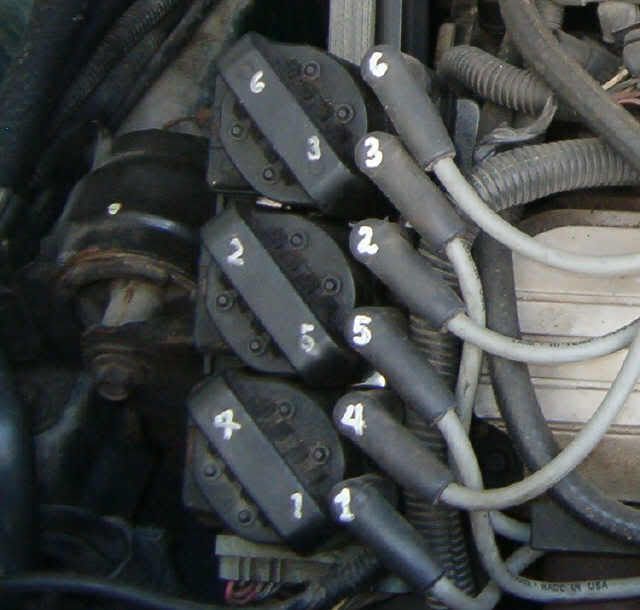
Remove wires at coils; pull out on the bottom lugs and lift the black plastic wire retainer to remove it from the front valve cover. Place the wires out of the way in front and in back.
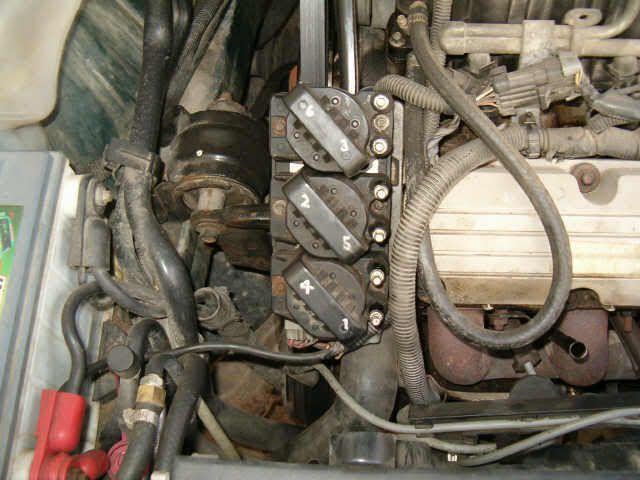
Move wiring looms out of the way. Remove the oil dipstick.
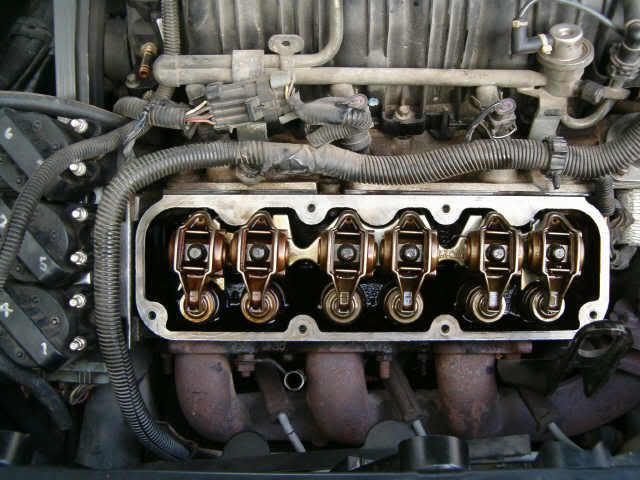
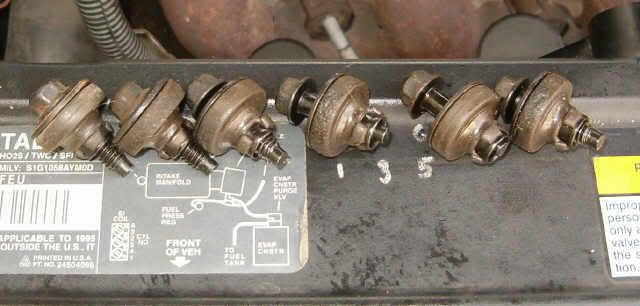
Using a 3/8" socket, unbolt the six valve cover bolts.
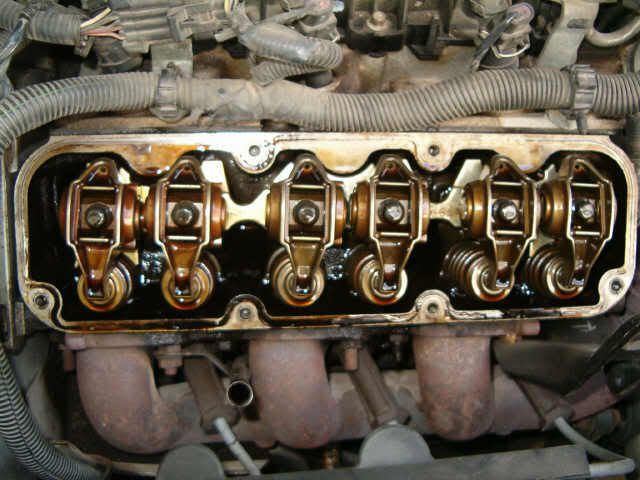
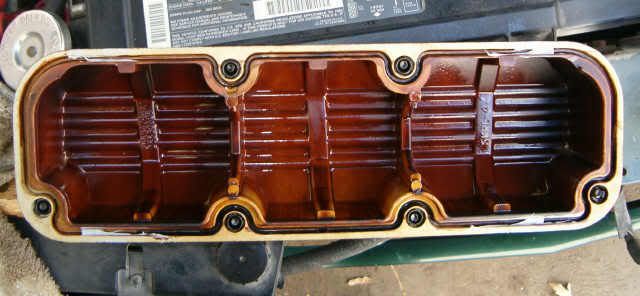
Remove the valve cover. The black marks show where oil was leaking past the old gasket.
You can see how the old gasket has become flat.
Spray brake parts cleaner on a rag to clean the sealing surface of the cylinder head. Do not spray brake cleaner on the surface - you don't want brake parts cleaner in your engine.

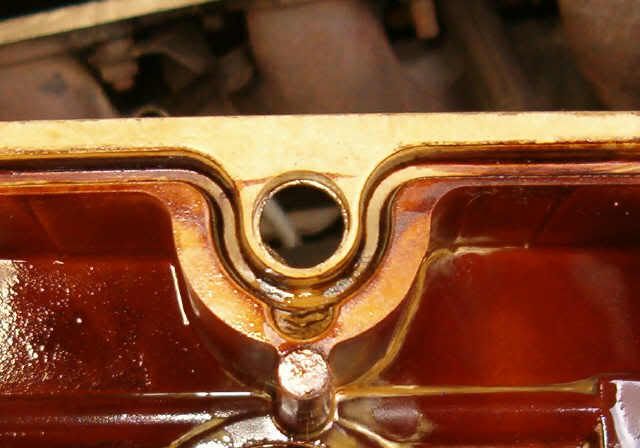
Clean sealing surface ready for the new gasket.
Remove the old gasket. You will see a place molded into the valve cover for a gasket locating tab.
This is the time to clean the valve covers if you like. Kerosene or mineral spirits in a plastic pan with a stiff parts brush will work fine if you don't have a parts cleaner. I don't care what my valve covers look like as long as they don't leak, so they are only getting a cursory wipe with a rag. Install the new gasket into the groove on the cover.
Compare the valve cover sealing surface with a new gasket.
You should not need to buy these grommets unless yours are missing or in really bad shape.
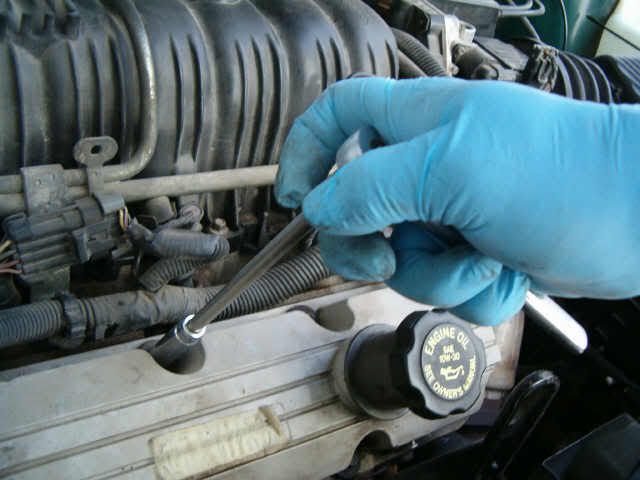
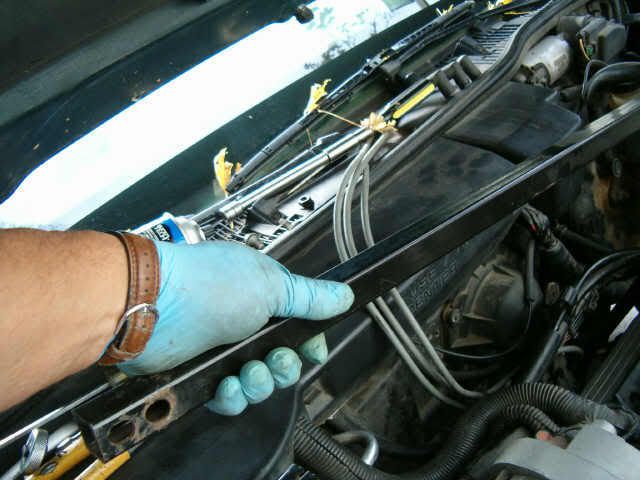
Replace the front valve cover and the six bolts. Tighten the bolts from the center to the outer ends in a couple of passes without using a handle. The bolts have a torque limiting sleeve to prevent over-torquing and only need to be snugged up. Holding the wrench as shown will prevent over-tightening.

Now it gets a little more difficult. For the rear cover, you need to remove or loosen some stuff. First, undo the four 13mm bolts and remove the strut bar.
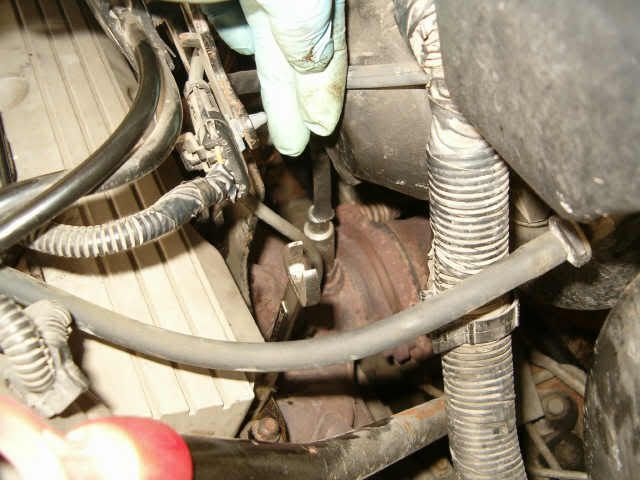
Loosen the 13 mm bolt on the rear of the alternator, this bolt threads into the tubular support that is attached with two bolts to a bracket on the rear cylinder head.
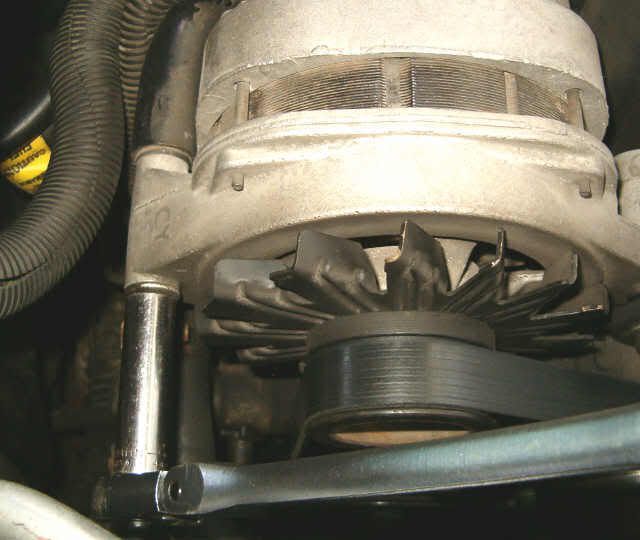
Next, remove the two 10mm bolts that hold the tubular support to the bracket.
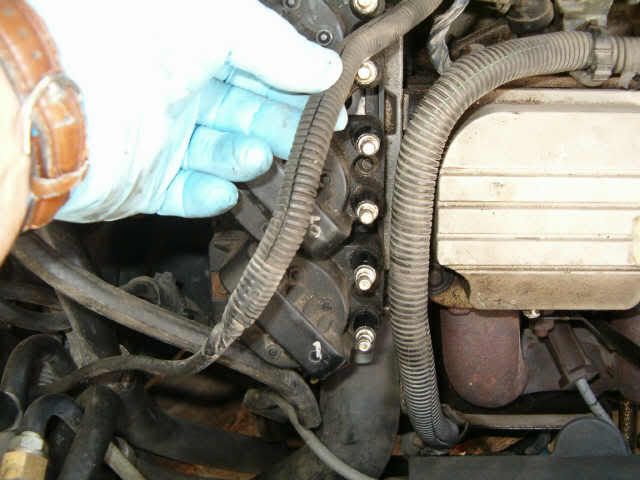
Next, remove the two 13mm nuts securing the engine cover bracket to the rear cylinder head. I used a combination wrench. It is not necessary to remove the fuel lines or the oxygen sensor connector from the bracket.
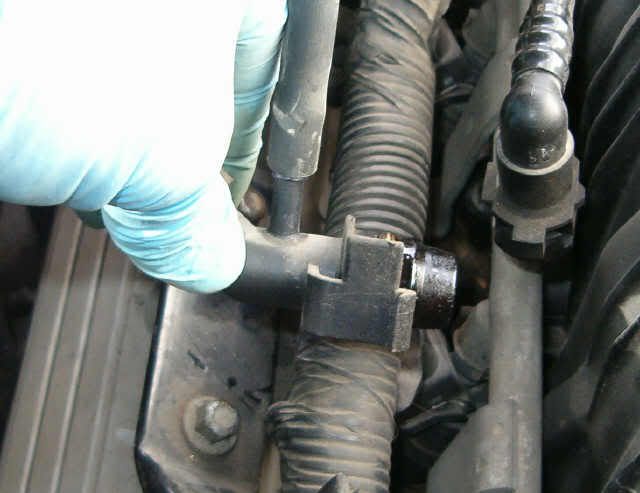
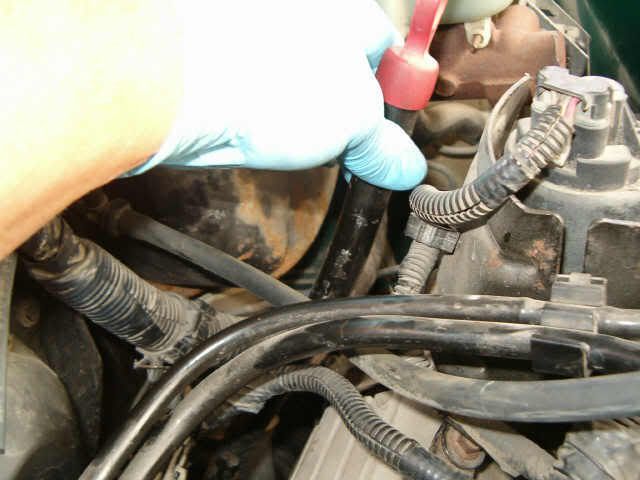
Press in the tab and pull out the vacuum fitting from the rear of the upper intake manifold. This fitting has two hose barbs - one for the large hose to the power brake booster and one for a small hose to the vacuum reservoir for the heater and air conditioning system. Remove the smaller hose from the fitting and swing the fitting up out of the way.
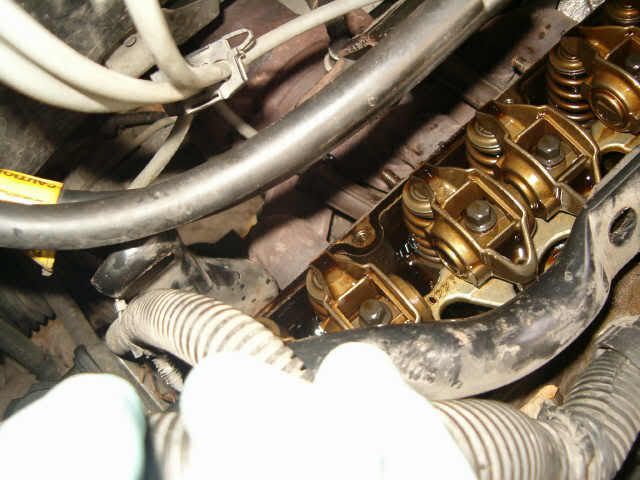
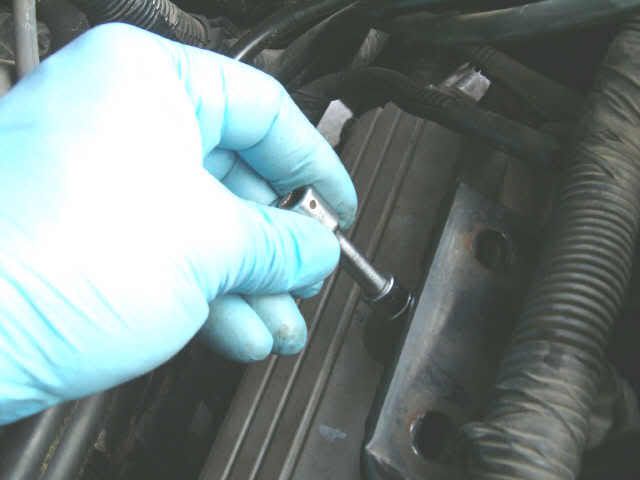
Now you can undo the six bolts using the various 1/4"-drive extensions as needed. The rear valve cover can then be twisted and wiggled out as shown.
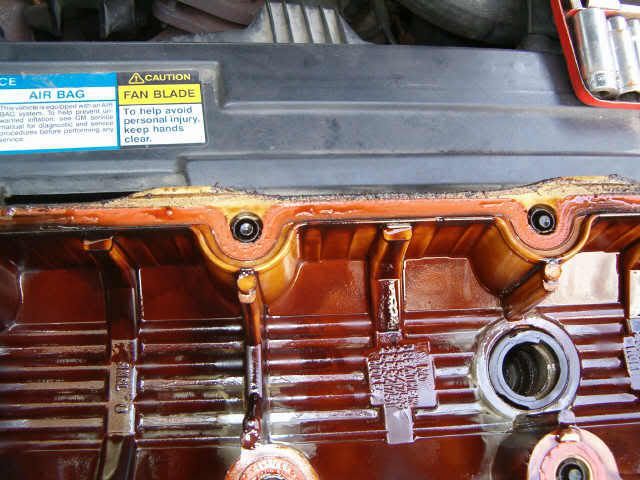
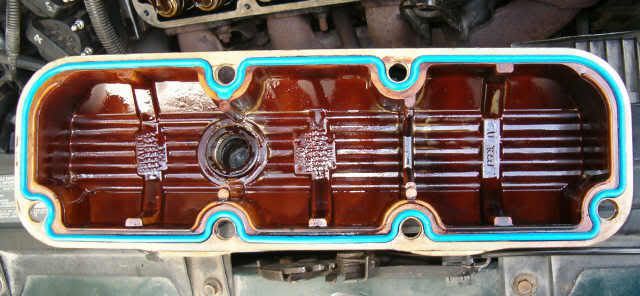
Black marks show where the oil was seeping onto the rear exhaust manifold making a stink when the heater or AC drew in "fresh" air.
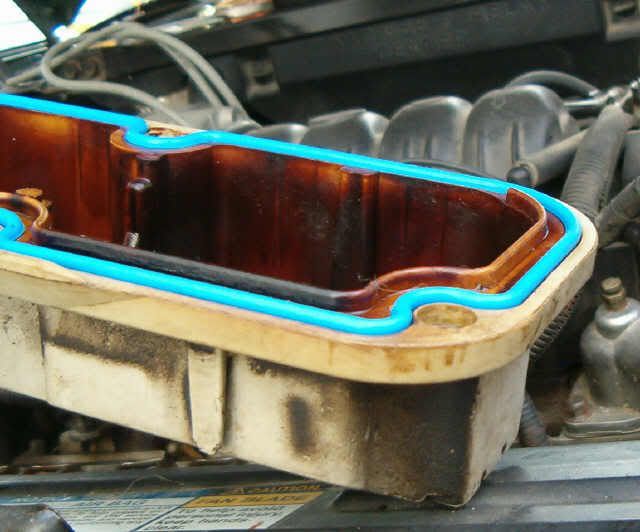
After cleaning the sealing surface on the rear cylinder head as you did the front, clean any oil from the valve cover gasket groove with a rag and a screwdriver and apply a bit of silicone grease or some other stiff grease to hold the gasket in place. Instructions on the Fel-Pro package say to install the gaskets dry - do not use chemical adhesives. Good luck with that! The gasket would not stay in the groove on the rear cover as I tried to manipulate it into place. So, even though the package said not to, I used just a little dab of rtv silicone...
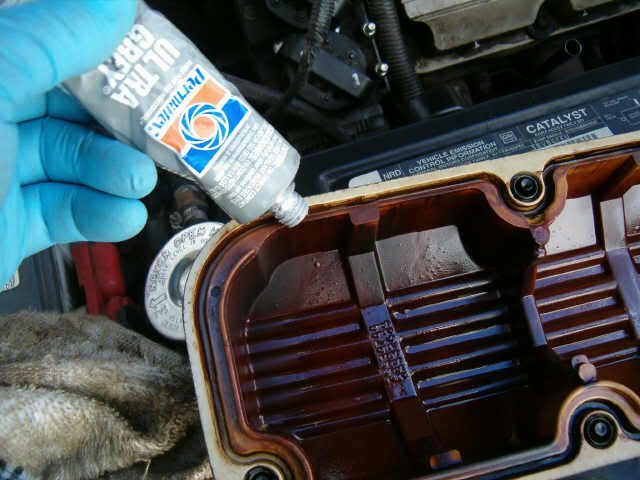
... in four places to hold the rear valve cover gasket in place as I wiggled the cover back on. After I applied the rtv silicone I thought that stiff silicone grease would have been a better choice as it would not make any extra work the next time the gasket needed to be changed.

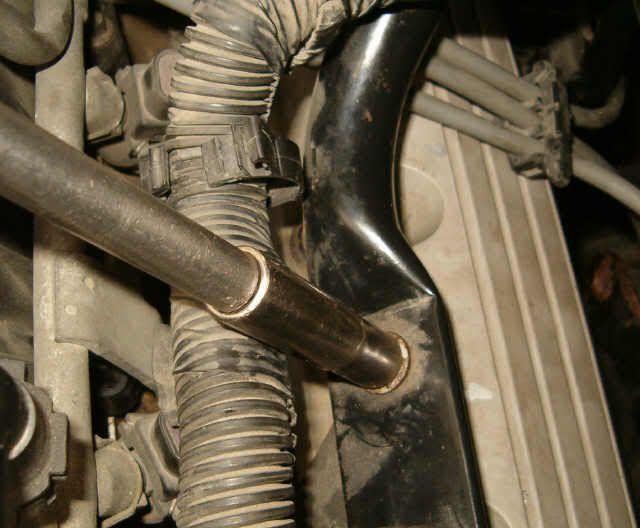
You may need to push the transmission fill tube a bit to squeeze the cover back in place.
Hand tighten all the bolts first, then snug them up with a wrench.
Replace the engine cover bracket, bolts for the alternator bracket, vacuum fitting and hoses. Make sure the little hose fitting at the base of the vacuum reservoir on the firewall is still secure. Tighten the 13mm bolt at the rear of the alternator. Replace the strut bar. Replace the spark plug wire retainer onto the front valve cover and route the spark plug wires connecting them back to the coils. Replace the wiring looms, dipstick, and the engine cover. Miller time.
_________________

1998 3.8 Dodge Caravan 214K
2000 3.3 Dodge Caravan 175K
1949 Plymouth Special Deluxe 4-dr sedan 25K (needs some work!)