Note: I (and PontiacBonnevilleClub.com) don't take any responsibility or have any liability if you mess up something.
To get to this point, you'll have had to dropped the pan, removed the filter, and removed the shift accumulator. There are directions on this if you search around.
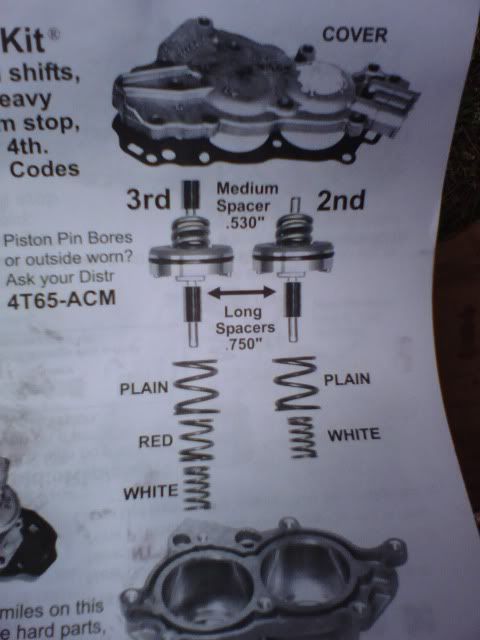
First off, here are the directions included with the kit. Very comprehensive, and very easy to follow. You'll have an extra yellow spring (maybe a red spring also), and some other bags left over.
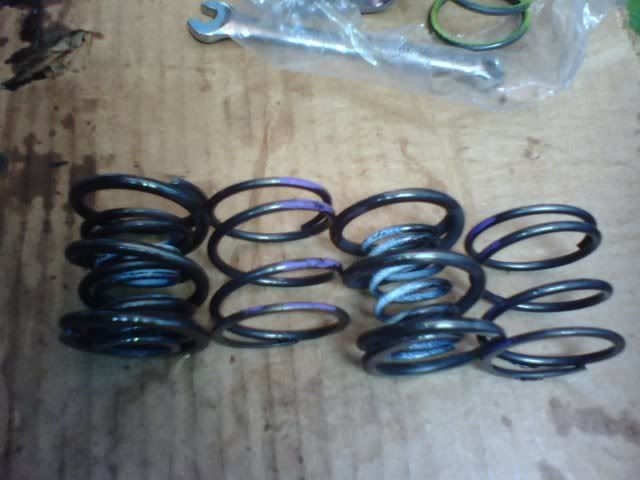
Here are the springs included in the TransGo kit assembled according to the manual. The order is: TransGo 2-3 springs, OEM 2-3 spring, TransGo 1-2 springs, OEM 1-2 spring. As you can see, the TransGo springs are thicker and more numerous than the OEM springs. Push on the springs, and you'll feel the difference immediately. The OEM springs are far weaker. Although they do make good stress relievers to play with.
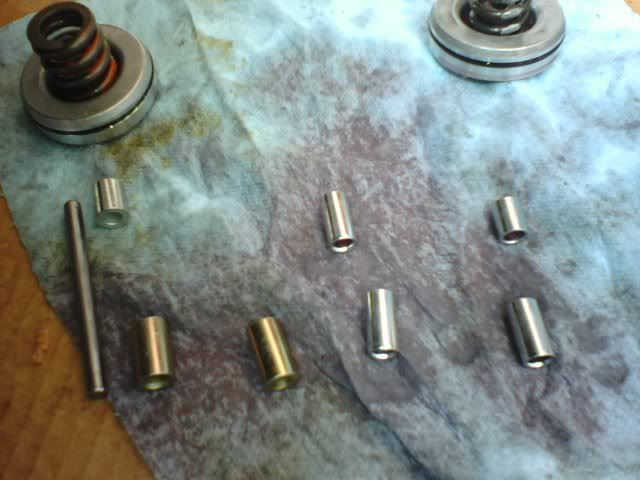
These are the spacers included in the TransGo shift kit versus the spacers I had in the transmission before. The TransGo stuff is again on the left, the DIY kit is on the right. Like the DIY kit, the TransGo has .75" long spacers in the bottom of the bores. Where they differ is on top of the piston. A .53" long spacer goes in the 2-3 accumulator piston top, vs the DIY's .75" spacer. The 1-2 piston doesn't get any spacer. I elected to keep the .5" long spacer from my DIY kit in the 1-2 accumulator piston, and to follow the TransGo instructions to put the .53" spacer on the top of the 2-3 accumulator piston. The .75" spacer leaves no room for movement of the 2-3 accumulator piston, so I followed the instructions for the 2-3 accumulator. Here's the picture illustrating the differences.
Now, to the installation.
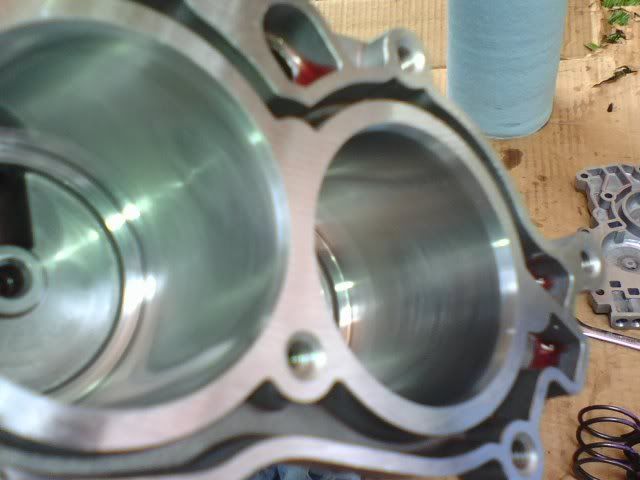
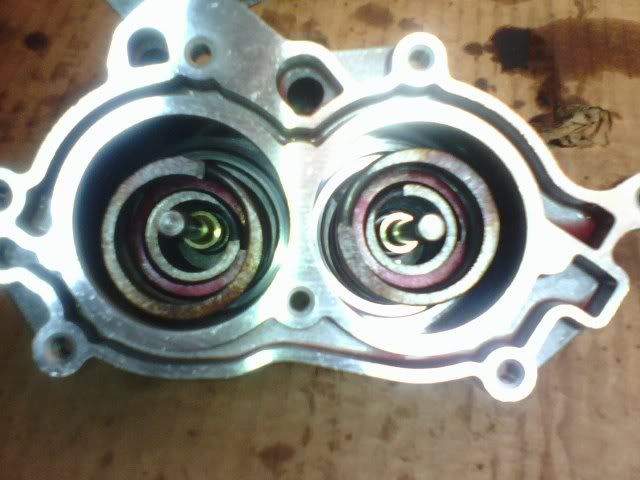
Here is an optional step of using a Scotch-Brite pad to lightly scuff up the accumulator piston bores. The idea behind this is to get oil clinging on the walls to lubricate the piston. Intense does this, so I did it too. It's not mentioned in the TransGo kit. It seems to be working so far.
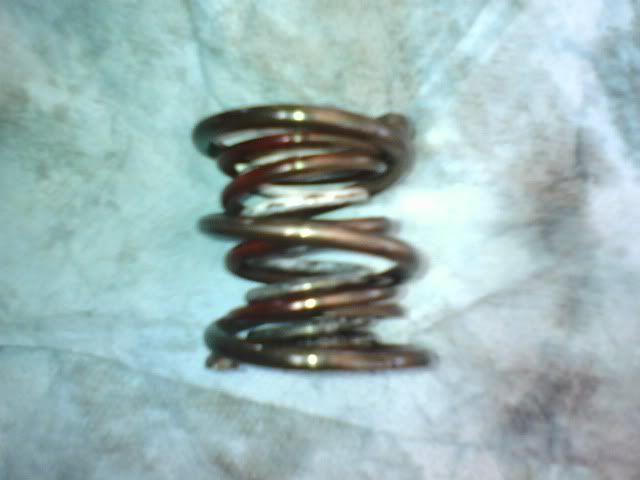
These are the springs for the 2-3 accumulator assembled. The order, heading from outside in, is: plain, red, white. They just slide into each other, no sweat.
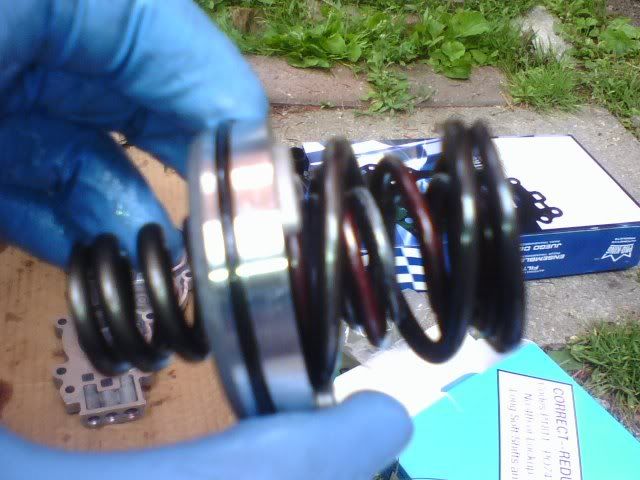
Now, the springs are pre-installed on the accumulator piston. Seat the springs on the piston like you see in the photo, as it's impossible to seat them by dropping them into the bore. I tried, and failed miserably. The springs will re-align once you put the piston back into the bore.
I put this together to illustrate a step where I differed from the instructions. As I was not opening the side cover, I had an extra red spring in the kit. That spring is found in the 1-2 accumulator now. I did this because I wanted a crisp 1-2 shift, and it needed a home. And, if the 2-3 shift can benefit from that red spring, the 1-2 can as well, at least to me.
I followed the kit's instructions for the 2-3 accumulator, and made some changes to the 1-2 accumulator that I think will be beneficial:
Differences I did from the TransGo instructions:
1. Added the red spring to the 1-2 accumulator springs. The 1-2 springs are now identical to the 2-3 accumulator springs.
2. Kept the DIY shift kit's .5" long (for the folks who didn't have a DIY kit to cannibalize, its a .5" long by.25" inner diameter) spacer in the 1-2 accumulator piston top.
I think these changes made the kit a bit firmer on the 1-2 shift. It also shortens the shift time. This is noticeable with downshifting, which has noticeably less lag than with the DIY shift kit. Upshifting is firmer too. I think these changes are for the better, although time will tell.
After the photos, I finished up by reassembling the accumulator, installing the filter, cleaning and installing the pan, and running 14 quarts of ATF through the transmission. I then disconnected the battery for 20 minutes to wipe the computer's memory so it could learn the shift kit.
So far, in the few miles I've put on it, the shifts are very quick, positive, and firm. Downshifts are faster, as are upshifts. It's almost like a 4T60. Nothing jarring, just fast and smooth shifts. I'd highly recommend this kit to anybody with a 4T65 looking to band-aid their transmission's pressure control solenoid (PCS) problems.