PontiacBonnevilleClub.com
http://www.pontiacbonnevilleclub.com/forum/

My 1997 Camaro: Top Swap!!!!!!!!!!!!!!!!!
http://www.pontiacbonnevilleclub.com/forum/your-other-rides-pics-and-videos/topic45588-60.html
Page 4 of 6

Author:  MattStrike [ Sun Dec 11, 2016 1:32 am ]
Post subject:  Re: My 1997 Camaro: Project I CAN SEE!!!

I took the front clip off the Camaro today. That was mostly easy, it's going to need a few repairs (horrible body shop work to fix what looks to be a minor front end collision). But I managed to test fit the main bracket that will strengthen the header panel once the cutouts are made. It was a very close fit for a first shot at it with a tape measure! So just a few alterations and I can print those out too.

Author:  MattStrike [ Sat Jan 21, 2017 10:40 am ]
Post subject:  Re: My 1997 Camaro: Project I CAN SEE!!!

A lot of work has gone on behind the scenes. But if everything goes well this week with the printing aspect this project will be completed by next weekend!

Author:  MattStrike [ Mon Jan 23, 2017 11:23 am ]
Post subject:  Re: My 1997 Camaro: Project I CAN SEE!!!

As of last night I have the first official final part printed. Pics to follow, I've been hoarding them and not uploading.

The part I started with was the purple part in the earlier pictures, the main projector mount. The final part is printed in ABS. I have had some challenges with ABS parts due to warp; I don't have a fancy enclosure and industrial grade equipment here (yet, lol). But the warp seems to have been limited to non-critical areas and will not effect the fitment of the part.

The issue of course is that the support material is not strong enough to hold the part down, and I don't have a heated enclosure. But I setup as much of an enclosure as I could with scrap on hand, and have had very good results printing at 100% infill with minimal warp on overhangs, and as more layers get built up the thickness of the part is strong enough that eventually it's strong enough to overcome the warp. We'll see how well it works, I would only need some minor fully infilled supports to get a perfect print. But I may not even need to do that.

The main mounts are a 46 hour print at 100% infill. It's brutal, but the second one is about half-way done already. The only other ABS parts I need to print is the light pipe block-off plate and the lens retainer, each of those are about 10 hour prints. Then I get to switch over to PETg for the light pipes (6 hour print total) and the body mounts (20 hour prints), then PLA for the covers (2 hours) that will seal off the projector from the elements.

Glass is just normal 3/16" glass cut to size by a local glass shop. Those should be strong enough to not break easily, and if they do I can always bump up to 1/4" glass. But it's very well supported and not very large to begin with so it should be OK. Unfortunately, getting them tempered is going to be nearly impossible, the pieces are just too small, and you can't cut glass after tempering it.

Author:  MattStrike [ Mon Jan 23, 2017 5:26 pm ]
Post subject:  Re: My 1997 Camaro: Project I CAN SEE!!!

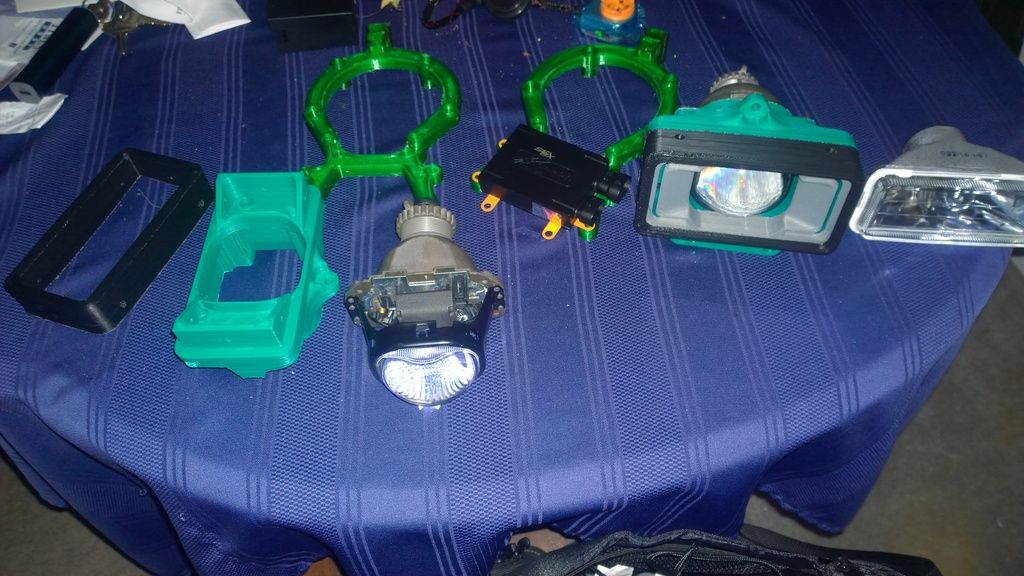
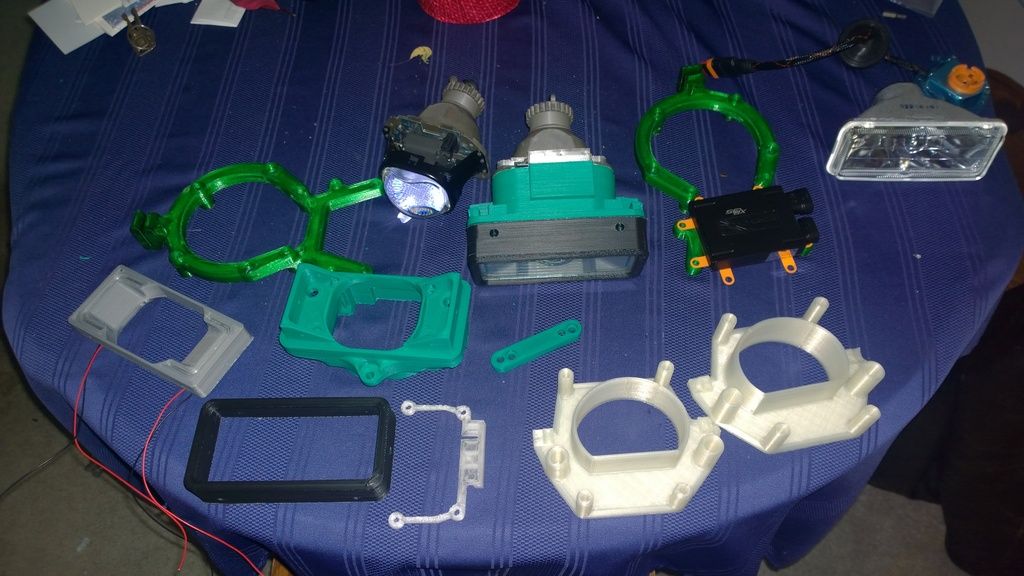
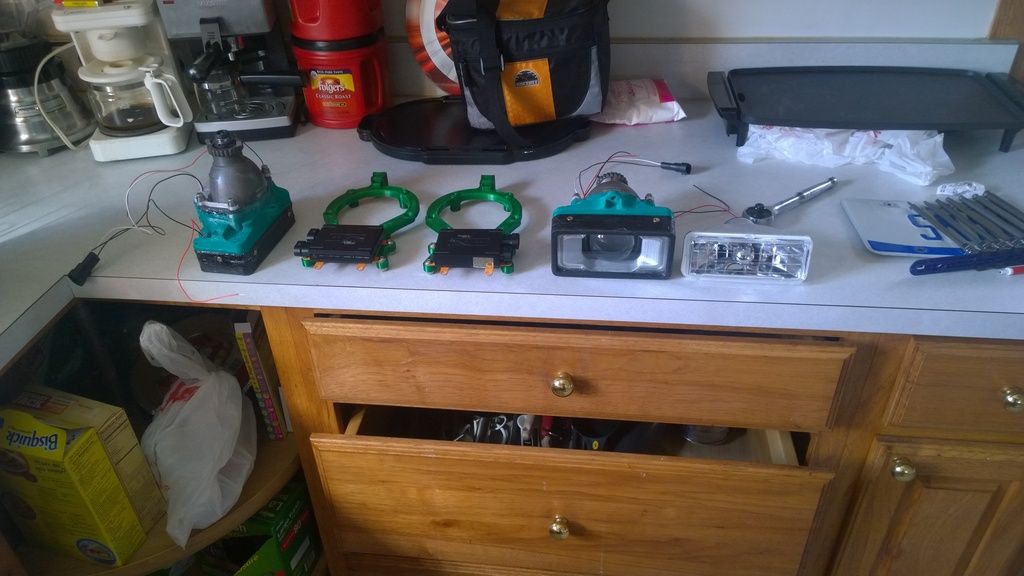
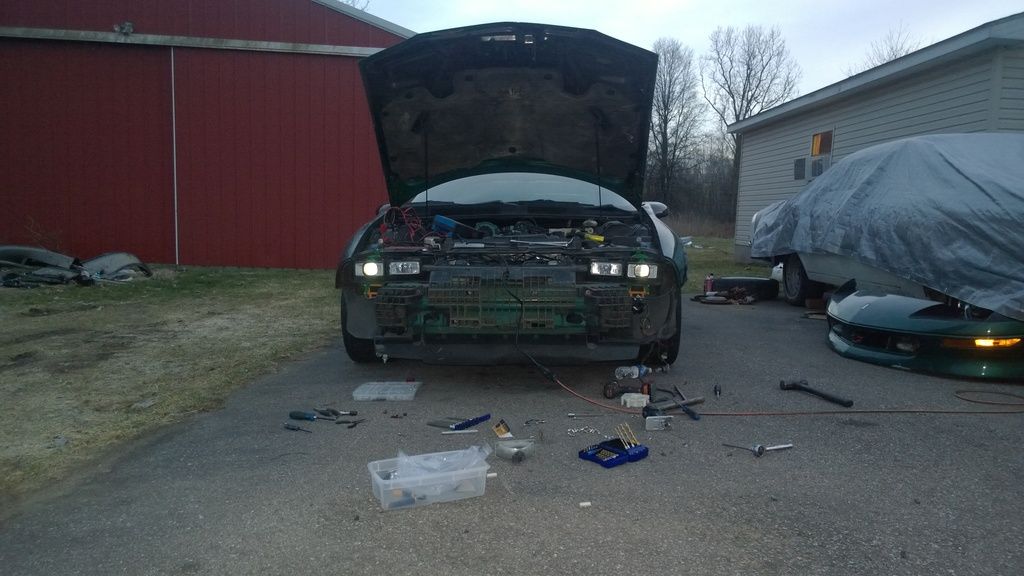
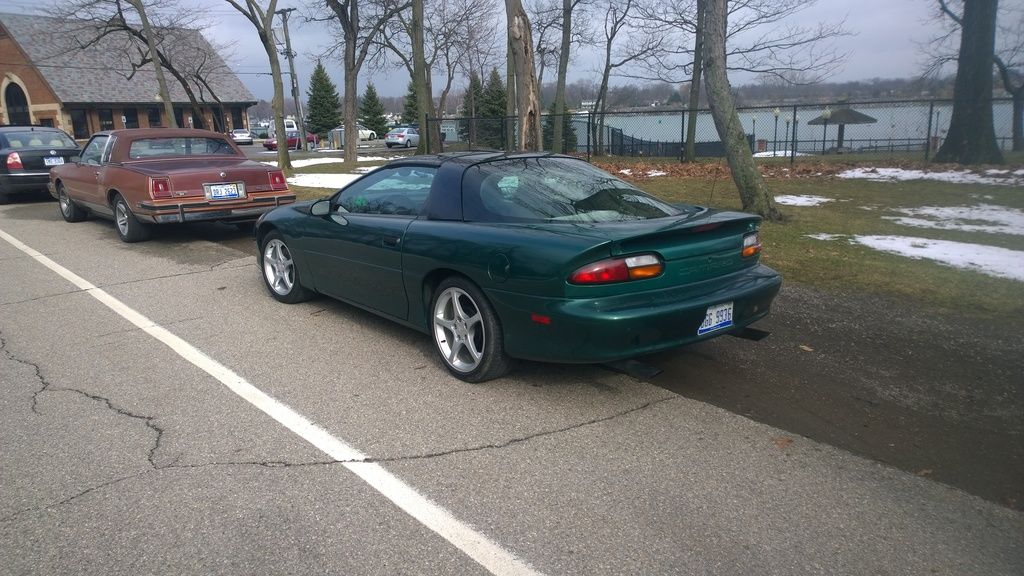
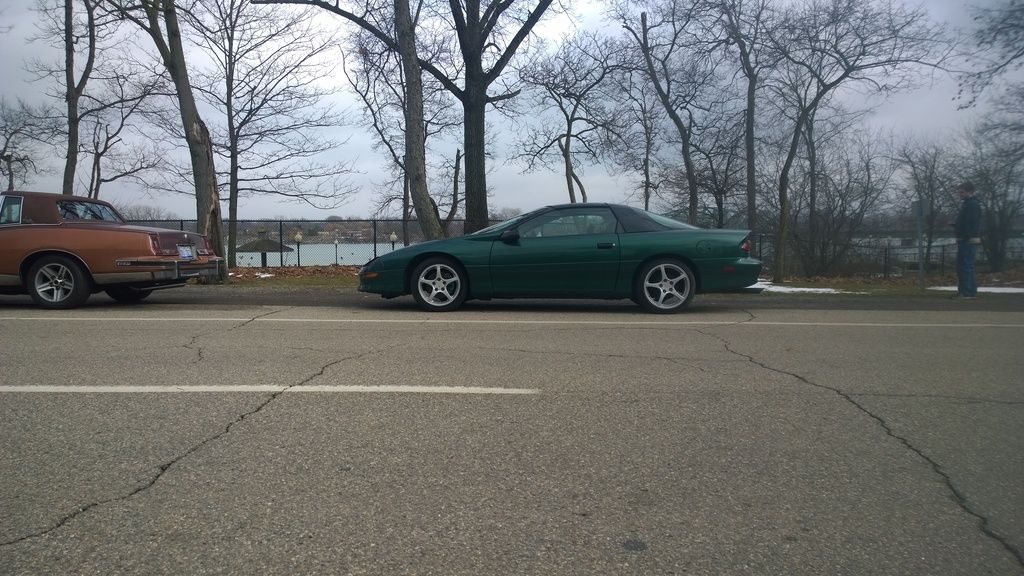
Some teasers of the test fitting process!

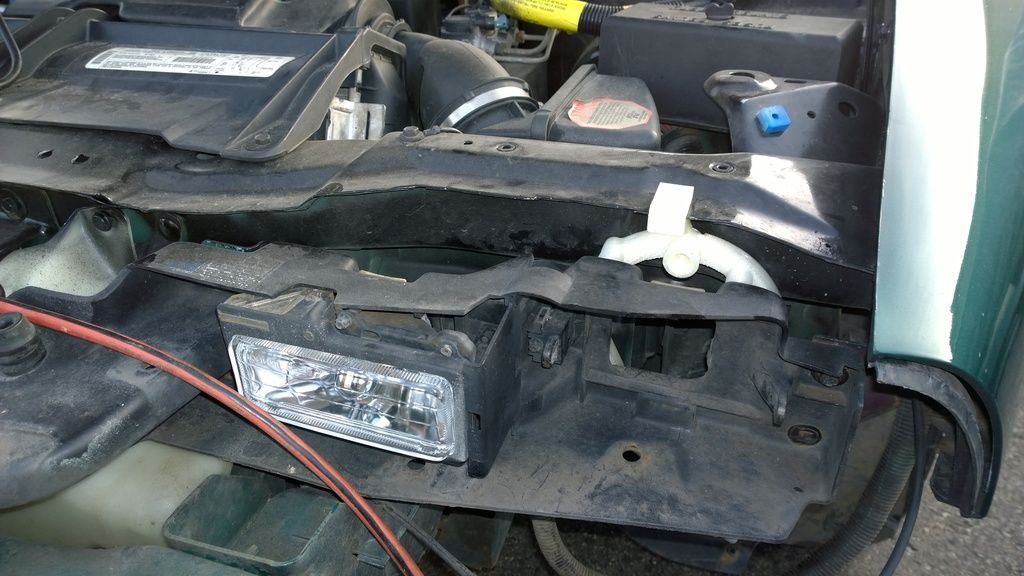
I started out on the Drivers side. Mocked up an approximate location for the projector:
Image

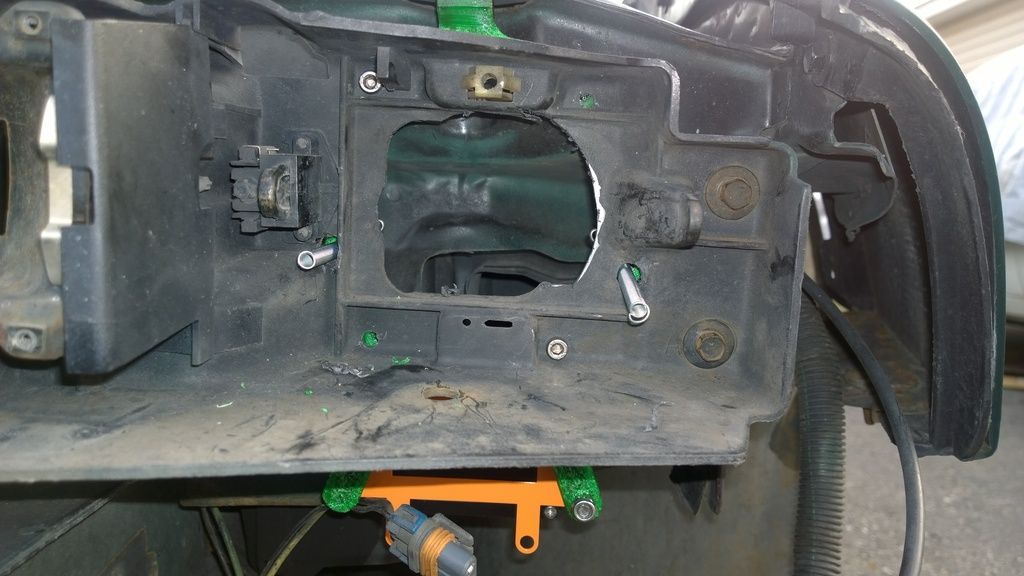
That chamfer formation in the core support is not really doing anything to help here, so the final mounting position will be offset from it slightly. The important part was the mounting depth, and yes it clears the core support. There's just enough room for up/down and side/side adjustments:
Image

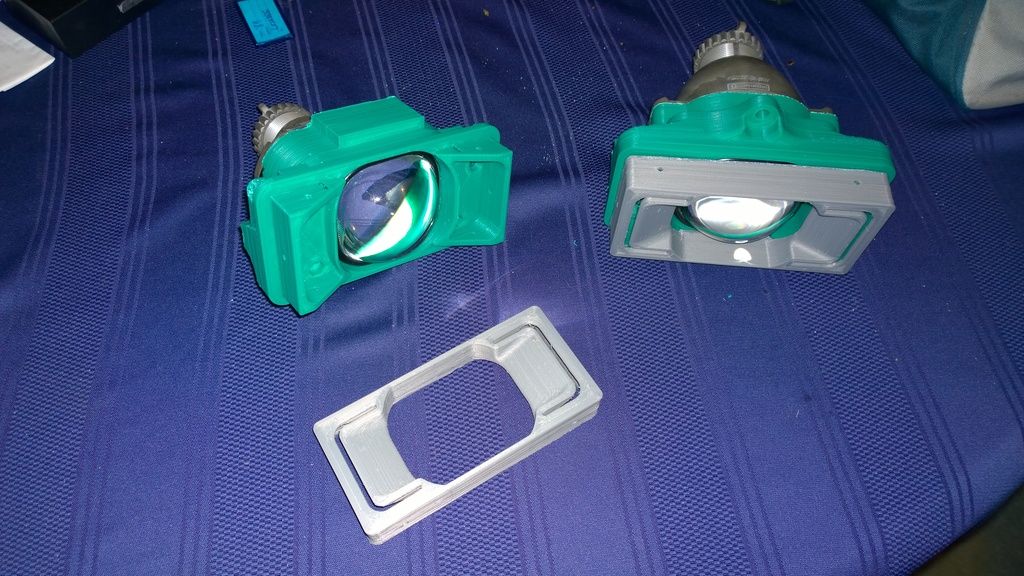
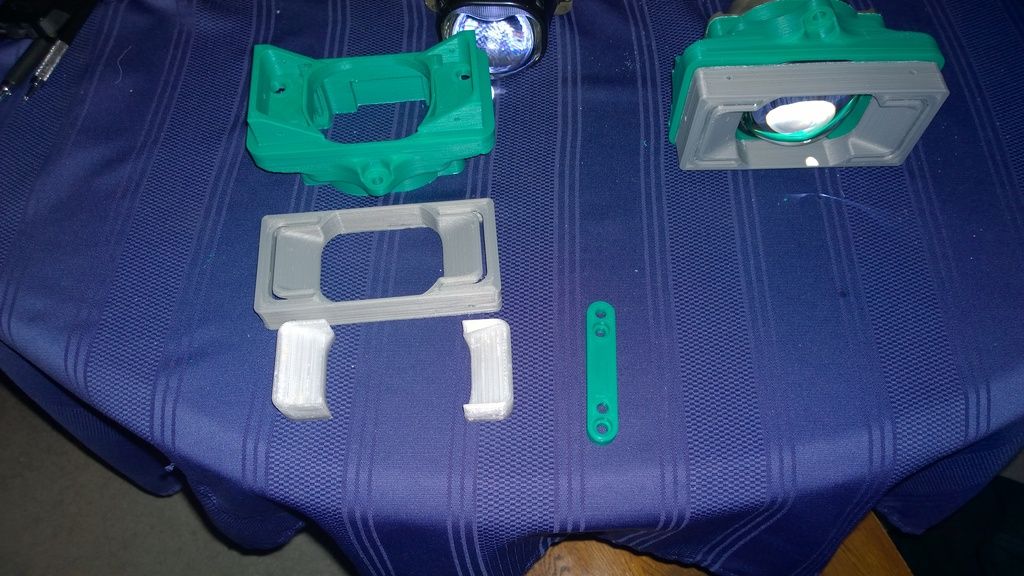
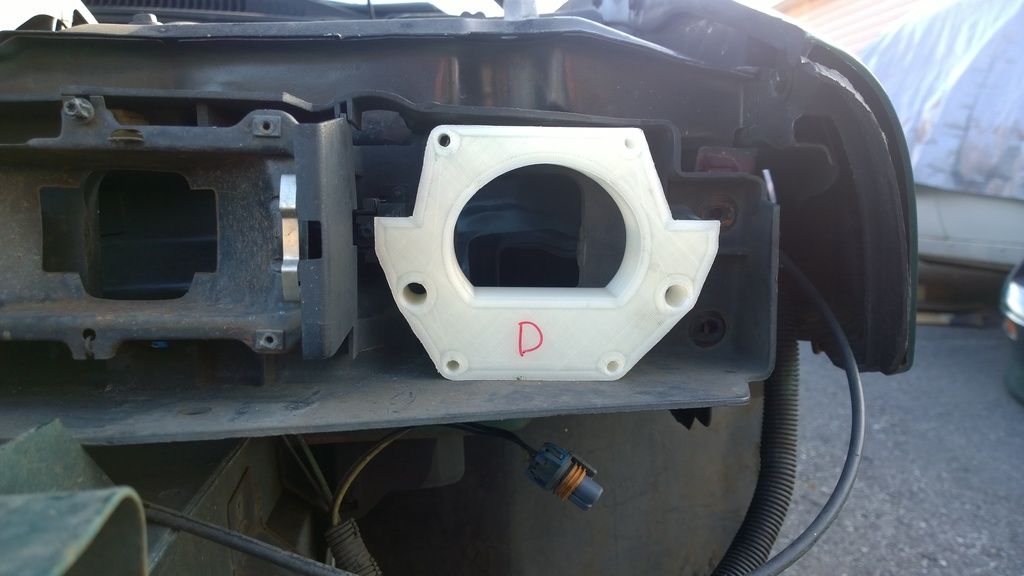
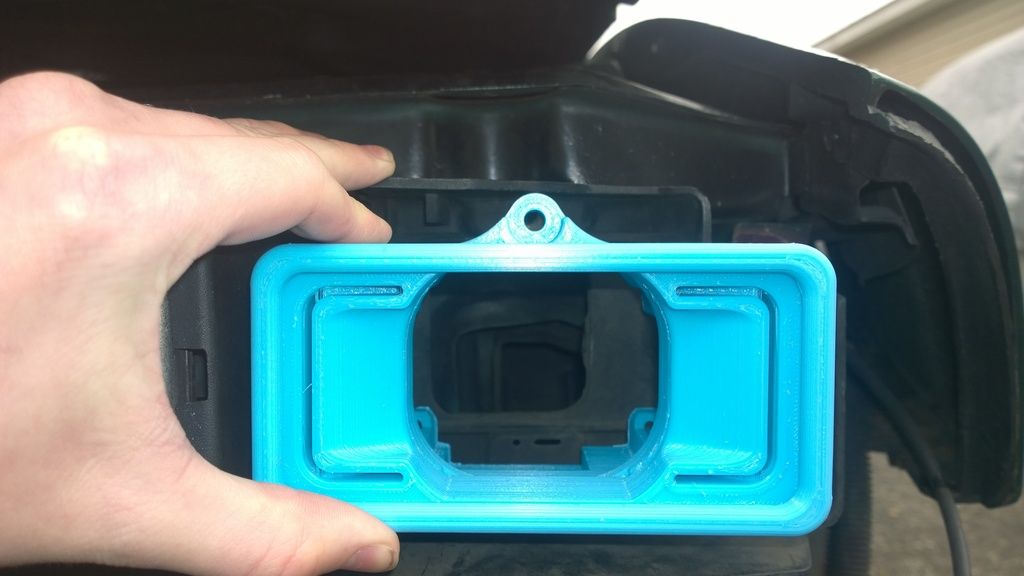
Next is the body mount piece. I could have gotten away without it, but I wanted a clean way to mount the igniter boxes as well as make it stand out even more that it's my handiwork. It reinforces the header panel from the small amount of cutting I have to do, and holds the springs that will be used to retain the projector mount, similar to the way that the original headlamp bucket was mounted:
Image

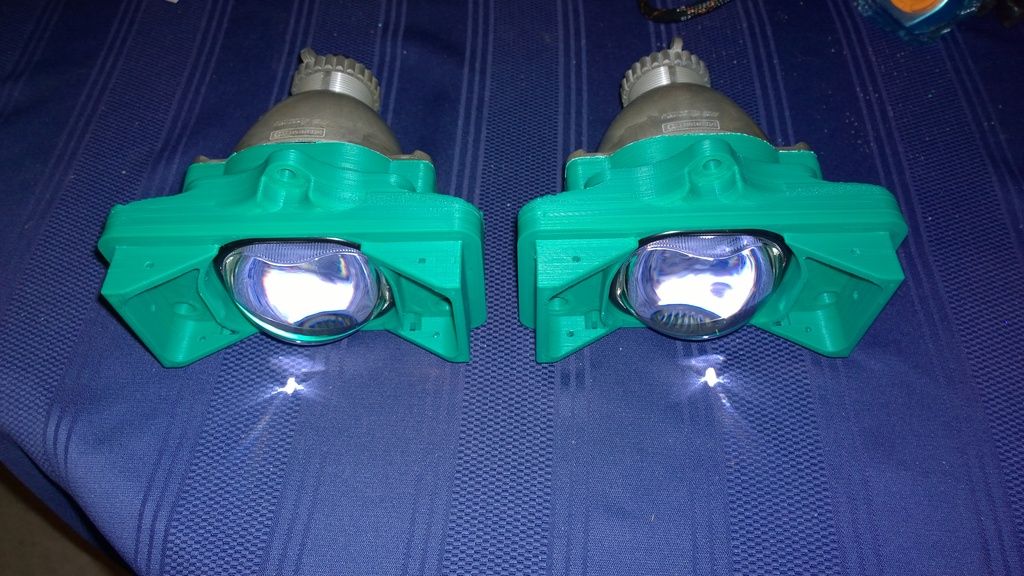
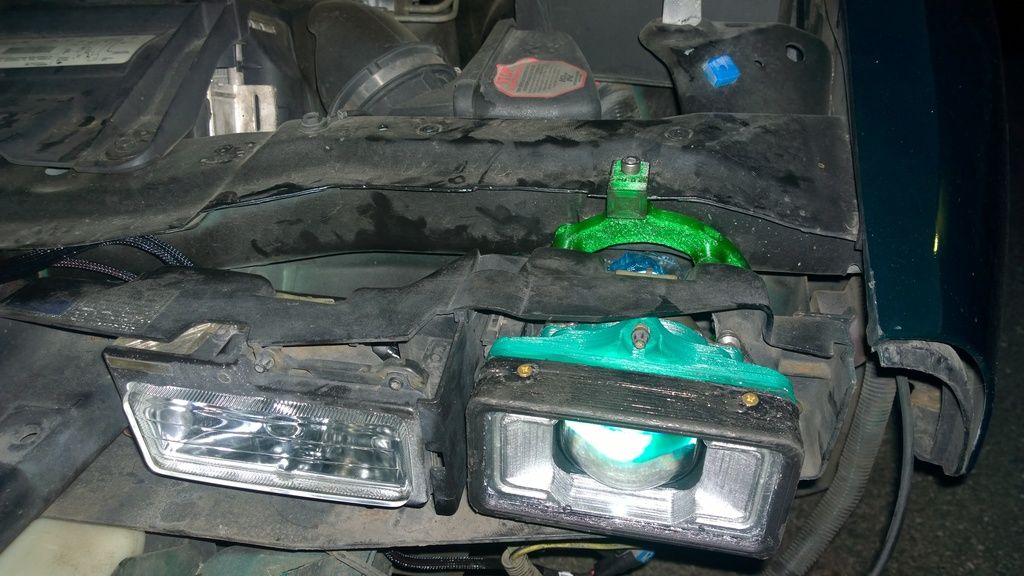
Then, my final prototype assembly (all PLA with minimum infill and wall thickness for faster printing):
Image

Image

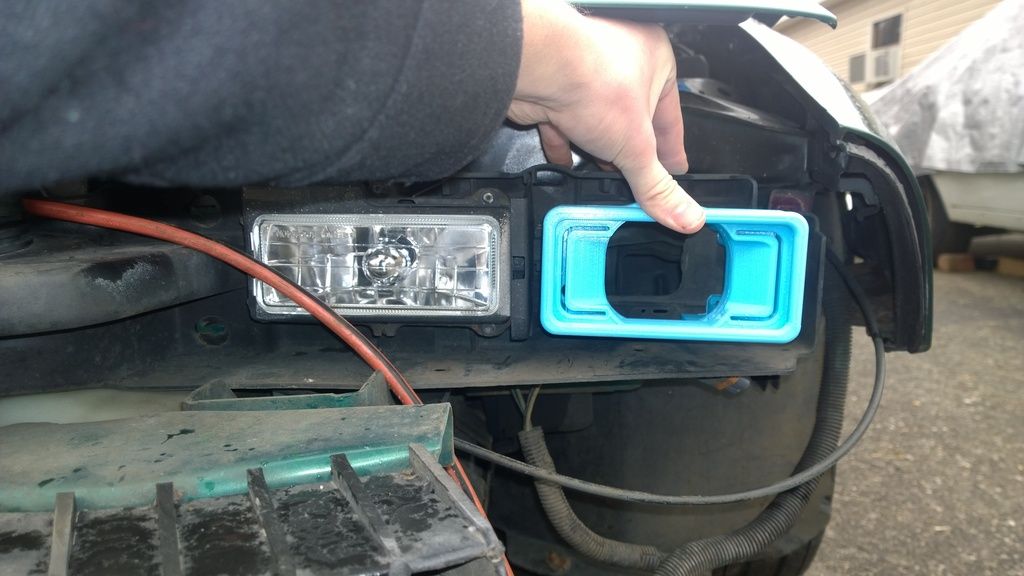
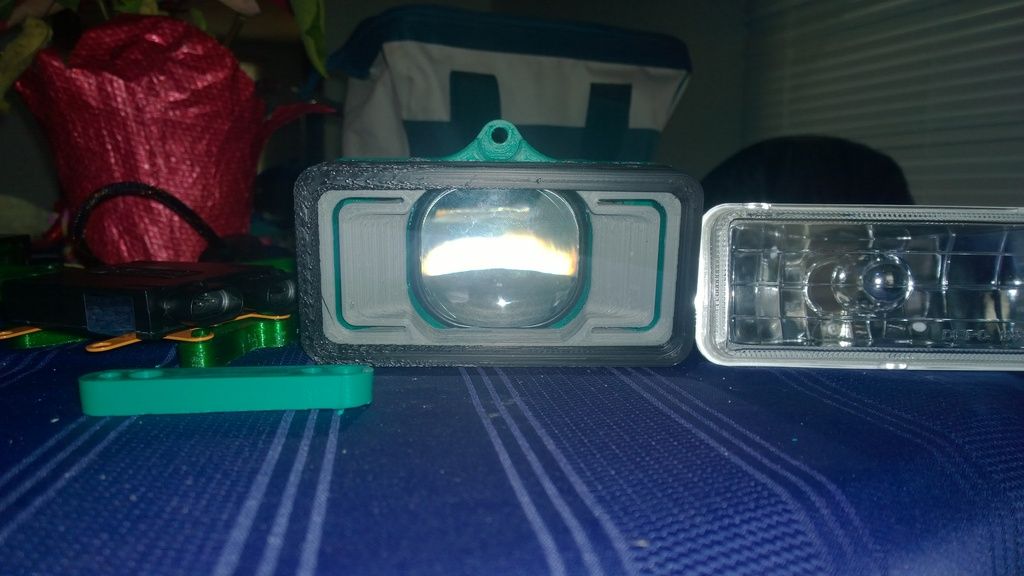
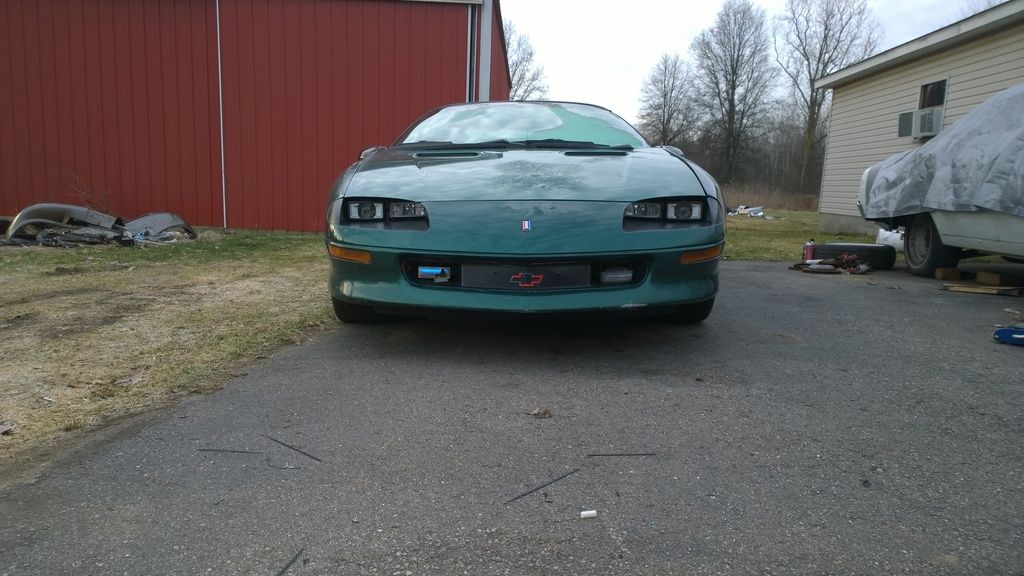
Overall it fits very similarly to the original bucket, and maintains that OE look. Final colors will be black lens cover, silver light pipe blockoff plate, and that's all you will be able to see with the hood down. The new glass lens is nearly the same size as the original sealed beam. And the lens cover is nearly the same size as the original bucket was. So it hopefully looks incredibly stock. The projector mount and body mount and most anything else will be green, to show off the work when the hood is up.

The only major issue I found was that the header panel mount on the drivers side is 10mm lower and 10mm further forward than the passenger side. Imagine my surprise to find my parts didn't fit both sides! I printed a bracket to space out the passenger side to match the drivers side. Eventually I'll have to figure out which is right. I'm hoping the drivers side is correct... because if it's not then the projector doesn't fit under the core support!

Author:  MattStrike [ Tue Jan 24, 2017 11:26 am ]
Post subject:  Re: My 1997 Camaro: Project I CAN SEE!!!

First parts are complete!

I wish I could have had a little better control over warp, but these will work out just fine.
Image

Author:  95naSTA [ Tue Jan 24, 2017 2:01 pm ]
Post subject:  Re: My 1997 Camaro: Project I CAN SEE!!!

Those came out good. Nice job.

Author:  MattStrike [ Tue Jan 24, 2017 11:14 pm ]
Post subject:  Re: My 1997 Camaro: Project I CAN SEE!!!

Play by play!

Image

Author:  1oldman [ Tue Jan 24, 2017 11:58 pm ]
Post subject:  Re: My 1997 Camaro: Project I CAN SEE!!!

Looks very straight forward. can't wait for the completed project. - BC

Author:  MattStrike [ Thu Jan 26, 2017 3:18 pm ]
Post subject:  Re: My 1997 Camaro: Project I CAN SEE!!!

Working on the light pipes today. Might have to re-visit this idea later though. I'm doubting that this will work like I was expecting, too much light dispersal due to the lines inside the part from the 3D printing process. The LEDs have been glued in place (not shown yet) and will be wired up later tonight for a final test, and we will see what happens. I might attempt to sand them smooth and soak overnight in a sealed container of mineral spirits and minwax to see if I can get them to clear up a bit. If not I will have to re-design and print at a slower speed to minimize the opaqueness.

Image

Author:  MattStrike [ Fri Jan 27, 2017 10:54 am ]
Post subject:  Re: My 1997 Camaro: Project I CAN SEE!!!

So this is how the light pipe turned out. I'm not totally upset with it, but it's not going to be bright enough to really see during daylight. Maybe that's OK. I'll have to think about it.

Image

Author:  redfury [ Sat Jan 28, 2017 3:53 pm ]
Post subject:  Re: My 1997 Camaro: Project I CAN SEE!!!

The future! I wish I had access to and knowledge to use a 3D printer.

Author:  MattStrike [ Sun Jan 29, 2017 11:25 am ]
Post subject:  Re: My 1997 Camaro: Project I CAN SEE!!!

Status update!

Most of the parts are done printing. I have some post-processing to do to get the up to my standards yet, and finish wiring the LEDs, and of course painting certain parts. But here it is!

Image

Image

Author:  MattStrike [ Mon Jan 30, 2017 11:24 am ]
Post subject:  Re: My 1997 Camaro: Project I CAN SEE!!!

Finished printing the templates for the cutting that needs to be done to the header panel. It's just a few holes and to trim the opening to fit the projector.

Image

Now I just have to order some hardware and seal things up.

Author:  MattStrike [ Thu Feb 16, 2017 9:17 pm ]
Post subject:  Re: My 1997 Camaro: Project I CAN SEE!!!

Project: Complete (for now)!!

Parts are assembled and sealed against the elements. They aren't perfect, I am still working on the whole ABS warping while printing thing.
Image

My cutting template (could use some adjustment, but overall it worked fine):
Image

The header panel after modifications and the reinforcement bracket on:
Image

Just a preview!
Image

All done! 35W 4500K. The high beams are new 9006 conversion housings with 9011 bulbs.
Image

Bumper cover back on:
Image

And, yes, this is good. I can finally see!!!
Image

Author:  MattStrike [ Fri Feb 17, 2017 11:45 am ]
Post subject:  Re: My 1997 Camaro: Project I CAN SEE is DONE!!!

Took a picture this morning, guess it's fair that now that I can see, you should be able to see clearly as well.

Image

Author:  bs009 [ Fri Feb 17, 2017 2:38 pm ]
Post subject:  Re: My 1997 Camaro: Project I CAN SEE is DONE!!!

Looking good!

Fog lights next?
:poke:

Author:  MattStrike [ Fri Feb 17, 2017 3:30 pm ]
Post subject:  Re: My 1997 Camaro: Project I CAN SEE is DONE!!!

I'm already shopping for that, lol. The other lights that I have also need to go in. Need to find silverstar amber 194 bulbs to match the signal lights...

Author:  MattStrike [ Mon Feb 20, 2017 12:48 am ]
Post subject:  Re: My 1997 Camaro: Project I CAN SEE is DONE!!!

Took advantage of the amazing weather today to get another photo. I'm really happy with the way these have turned out.

Image

Author:  archaicguy [ Mon Feb 20, 2017 6:19 am ]
Post subject:  Re: My 1997 Camaro: Project I CAN SEE is DONE!!!

Excellent work indeed!

Author:  MattStrike [ Sat Mar 18, 2017 8:46 pm ]
Post subject:  Re: My 1997 Camaro: Project I CAN SEE is DONE!!!

I've been putting off tires for a while now. Yesterday I priced out a new set of four tires to fit the wheels I painted last year. Plan was to go to the famous salad shooter style wheel and whatever performance tires I could find that were going to be good. But apparently it's hard to find the stock 235/55r16 tire, and going to a 245 is also just as hard to find and brands are limited.

So I did this instead!

Image

Image

Image

Image

Image

Image

Fronts are 17x8.5, rears 18x9.5. Came with tires at about 85% tread, fronts are Pirelli P6 and the rears are Pirelli P zero nero all season. Got them for basically what new tires would have cost for the other wheels.

Page 4 of 6 All times are UTC - 5 hours [ DST ]
Powered by phpBB® Forum Software © phpBB Group
http://www.phpbb.com/