Applying a painted wrinkle finish can have a positive performance benefit in terms of cooling. Superchargers and Alternators will run more efficiently if they have an added ability
to cool. Both of these neat little devices produce heat as a by-product of producing power (either generating electricity or producing boost). Using the right techinque and the right
product can produce desirable results.
Aside from the performance issue, doing it RIGHT can have a positive visual benefit, and doing it WRONG can do the opposite. As you read through this, don't forget the biggest bit of
advice I can give, PRACTICE. Do it on SCRAP. When you think you have it, go for it.
Many electrical and electronic devices over the years have used wrinkle paint for the durable surface as well as the cooling benefit. The right 'color' can also be a benefit (google
'black body theory') with regards to gaining, retaining, or losing thermal energy. The color, however, is not a big factor when compared to the ability of a 'wrinkled' finish being
more capable of changing temperature due to it's increased surface area. Think of the cooling fins on the supercharger, or the grooves in the valve covers. the increase the surface
area of what would otherwise be a smooth surface.
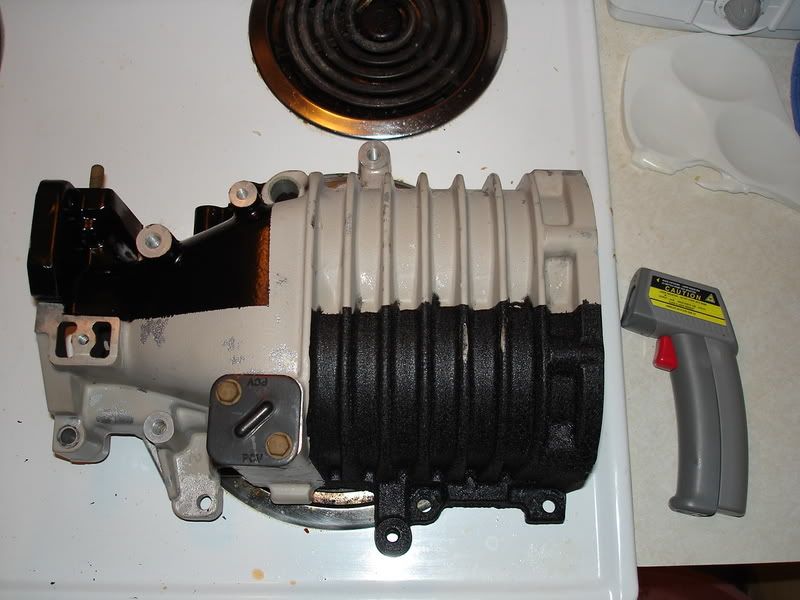
I did a bit of 'laboratory' testing in my kitchen with a supercharger housing before I formed my conclusions. I painted sections with gloss black paint (opposite side factory finish)
and wrinkle black (opposite side factory) in order to compare OEM coating to both black paint and wrinkle finish. My testing did NOT have any air flow during the cooling cycle, more
on that later.
The test mule:
The results:
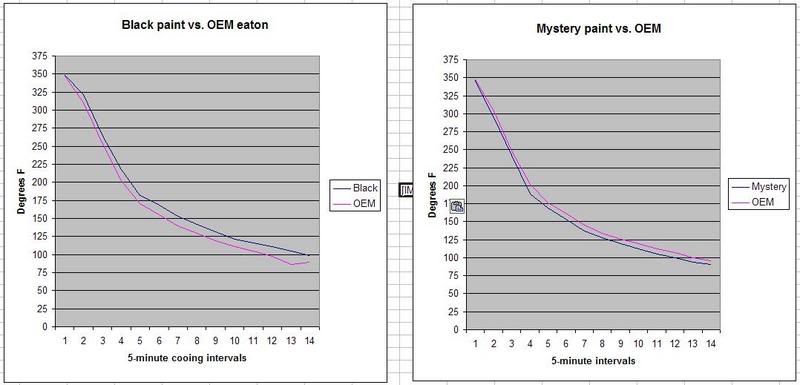
(mystery paint is the wrinkle coat)
The stuff we're talking about:

I buy mine from my local NAPA off the shelf, and VHT also carries it, but I haven't used (or needed) the VHT brand or it's temperature rating.
Also keep in mind Plasti-kote #217 is supposedly the same stuff basically, but I haven't used it and won't speak for it in this article.
http://www.plastikote.com/products/Spec ... Paint.htmlIt doesn't take a rocket scientist to figure out that any surface will cool quicker if it has more surface area. Micro-wrinkles can increase the surface area of anything by
quite a bit if done properly. My testing didn't factor in the airflow of a moving car to aid in the cooling, but testing at regional car meets between otherwise identical
superchargers (one coated, one not), and extreme cases of the proven 'hotter' running M62 coated vs. the cooler running M90 uncoated have been proven in practical applications
numerous times. So let's get on to the process. The cars that were compared at the dragstrip from run to run only had the benefit of the 1/4 mile return road back to the pits
before comparison, and in all cases, the coated supercharger (or valve covers) on the coated engine were always noticably cooler than the uncoated or OEM coated parts by a
significant margin.
The biggest issue is PREP. The surfaces need to be clean and un-primed. The first step is to break down and clean the parts. If it's a supercharger, refer to
http://www.3800supercharger.net/ for an aid in disassembly. Keep in mind that you should be either replacing the needle bearings (over 50k miles) or re-greasing the needle bearings
(under 50k miles) when you re-assemble. This will also require new supercharger oil (read links for more info on the above-linked page) and a GREAT opportunity to replace the
coupler (also in 'links'). Simple disassembly will 'lose' enough lubricant in the needle bearings to require maintenance, or risk damage to the supercharger.
After disassembly (and bearing removal), CAREFULLY clean and de-grease the exterior surfaces with a brush and a commercial degreaser. Easy-Off oven cleaner, simple green, or Castrol
Super-Clean work great (read all instructions and precautions). RINSE WELL, and thorougly dry. Repeat as necessary.
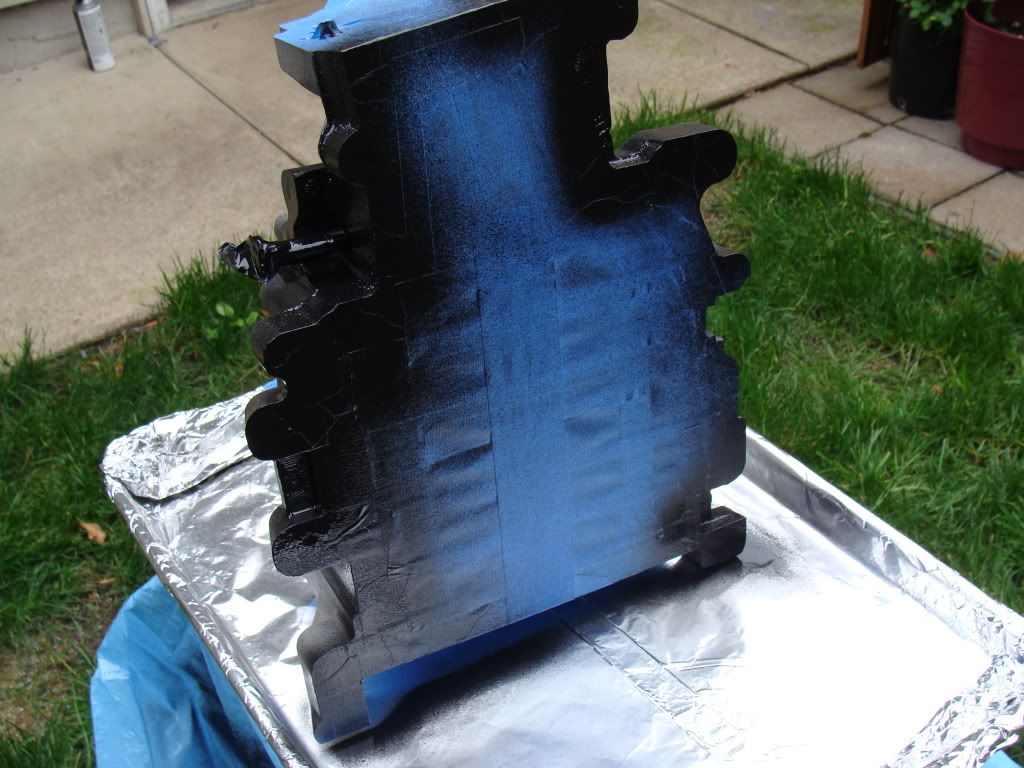
After the surfaces are clean, mask the parts. This includes any surface that mates to any other surface, or any surface that has a gasket touching it. Blue painter's tape is the best.
TRIM the tape so that it doesn't over-hang any other surface you want painted:
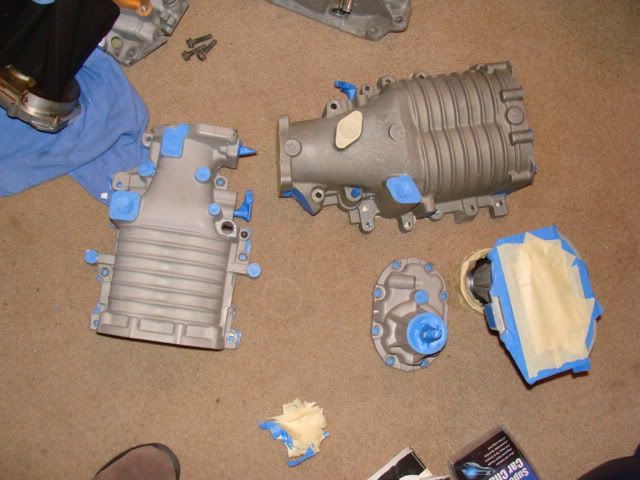
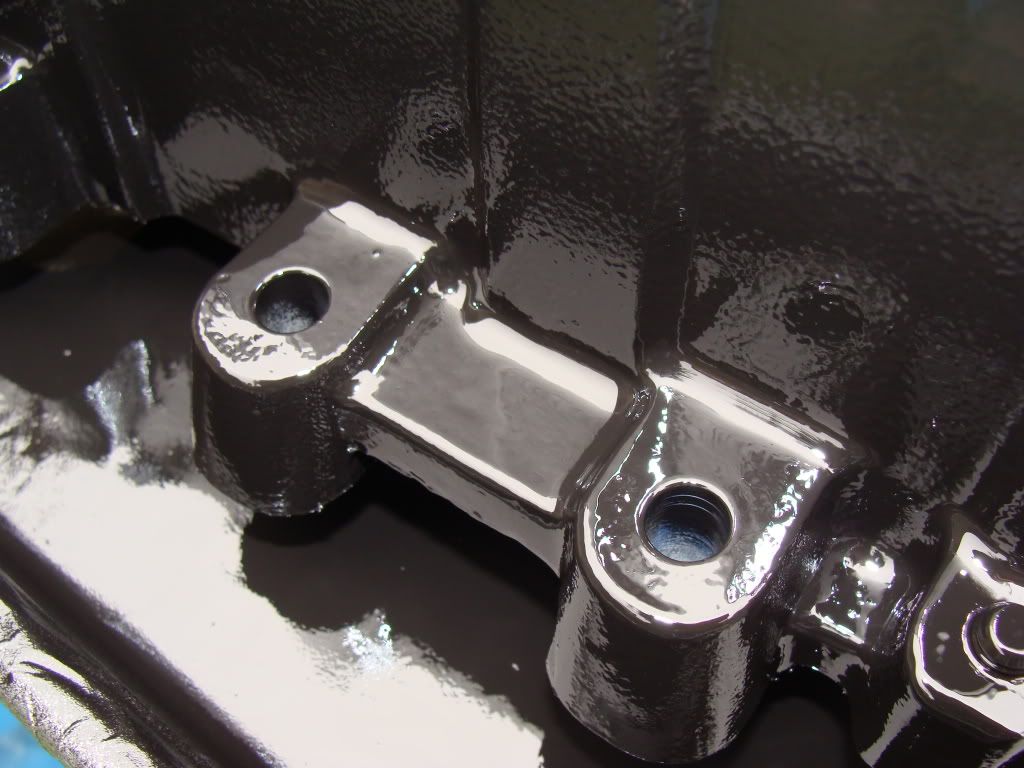
Note how carefully this is masked? Very important for the visual appearance later.
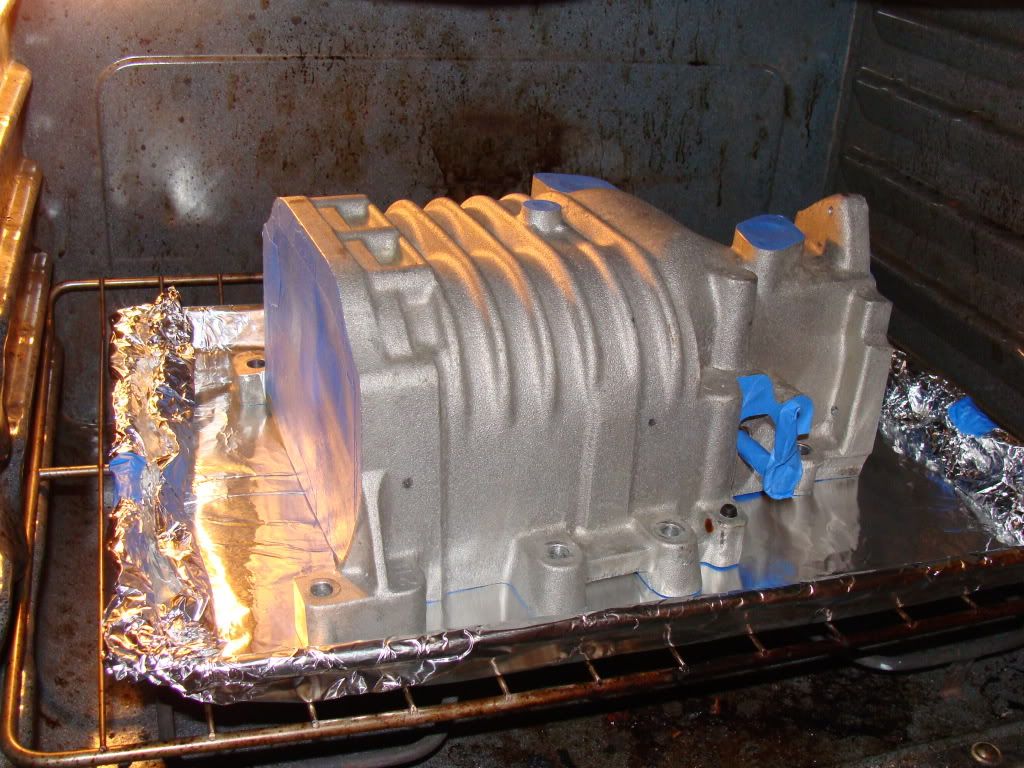
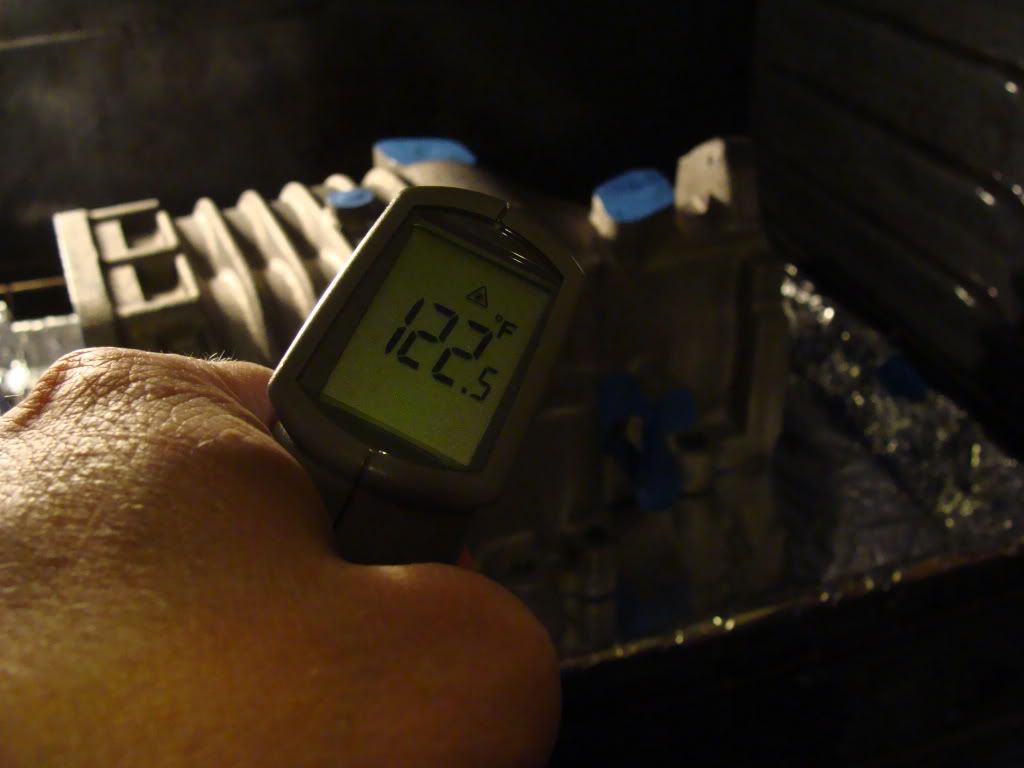
After masking, put the parts in the oven (that's right, wait until she's out of the house) on WARM. I do NOT suggest a gas oven. Electric ovens ONLY. Set the oven to 'warm'.
This is typically about 125-150 degrees F. Let the parts sit in there for about 30 minutes to come up to the proper temperature. While the oven warms, get a piece of scrap plywood
ready (or cover the wife's baking sheet with foil to prevent overspray from killing it), and have the oven mitts ready. Shake the can while this is going on.

When the parts are at the proper temperature, take them outside to your painting zone (light wind is ok, and airborne dust and dirt don't really matter with this stuff). Temperature
conditions also don't matter. Cold days will work fine with pre-heated parts as long as the paint can is at room temperature. I strongly suggest an accessory 'trigger spray' attachment
on the can. This can be purchased at any paint or hardware store.
Stand the blower upright and quickly paint the under side pockets and other areas that will be hard to hit with paint when the parts are sitting 'normally'. The nosedrive should be upright for the entire time, and the rotor assembly should be propped up so the plate doesn't touch anything. It may be best for your first time if you bring out only one part at a time (with CLEAN oven mitts).
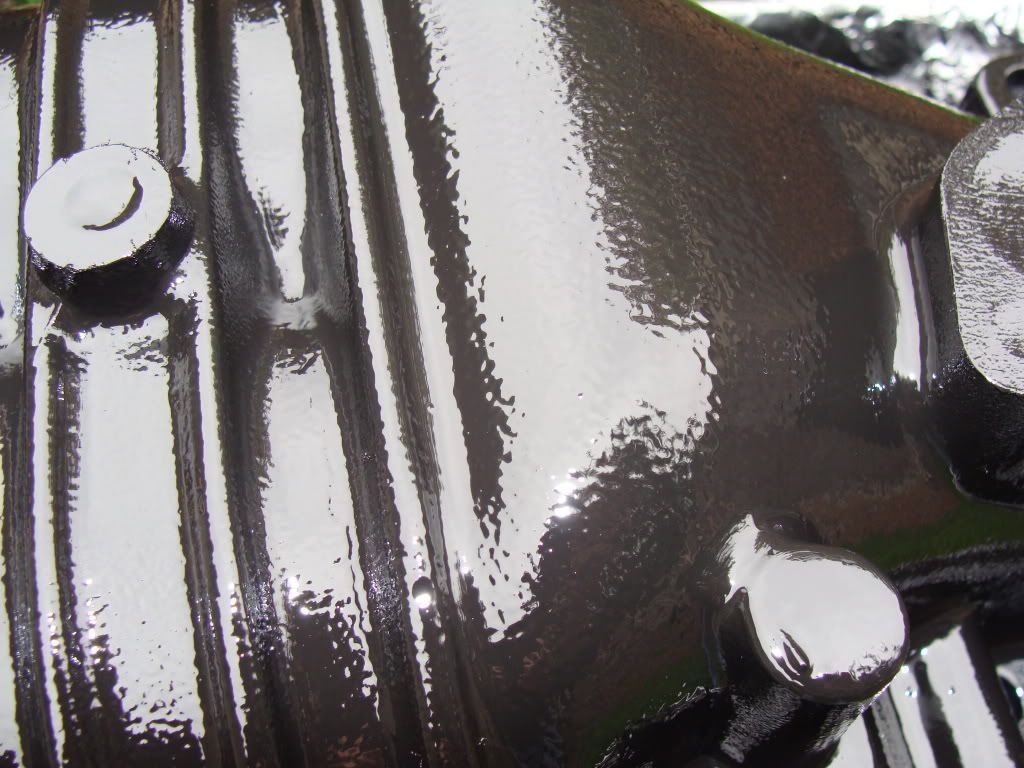
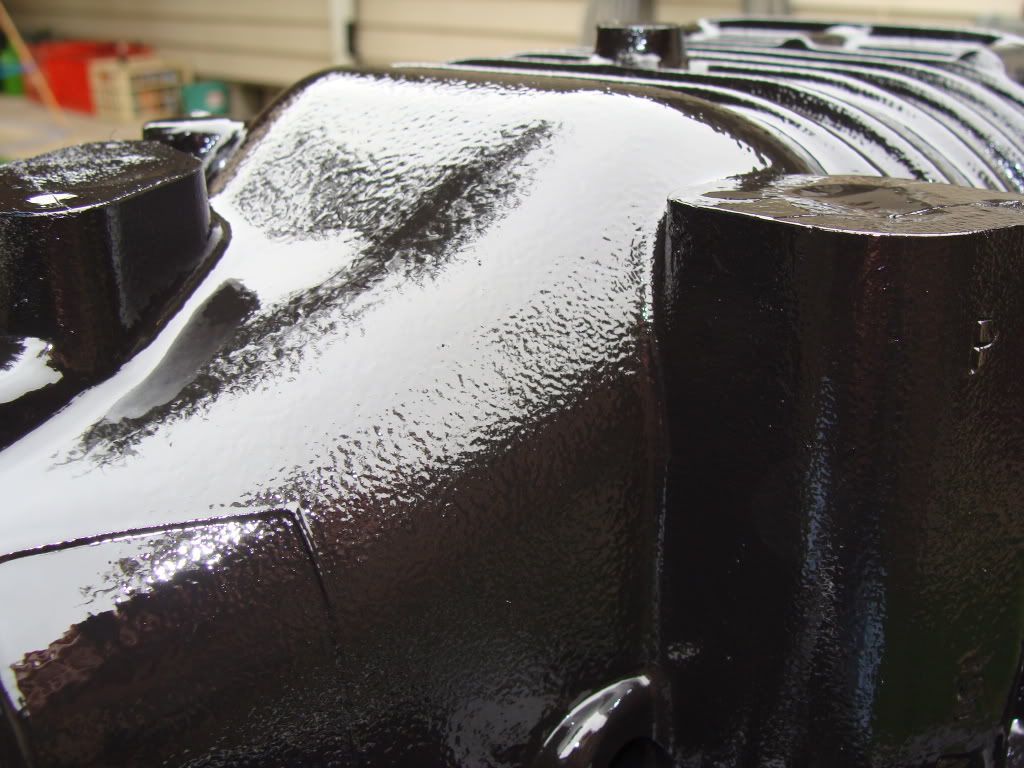
After painting the hard to reach spots, lay the supercharger housing back on it's base across some scrap of some sort to hold it up off the pan/board you're painting or baking on. Hit it with full coverage, one light coat first, then go back and lay on a heavier coat, but not heavy enough to run. Let it sit for about 10 minutes, then put it back in the oven for another 30 minutes.
When the last part has been back in the oven for 30 minutes, turn the oven off. Carefully take the parts outside. Assembly can continue 24 hours later.
Masked and preheating:
Zapping the hard to reach spots underneath first:
Laying both coats on:
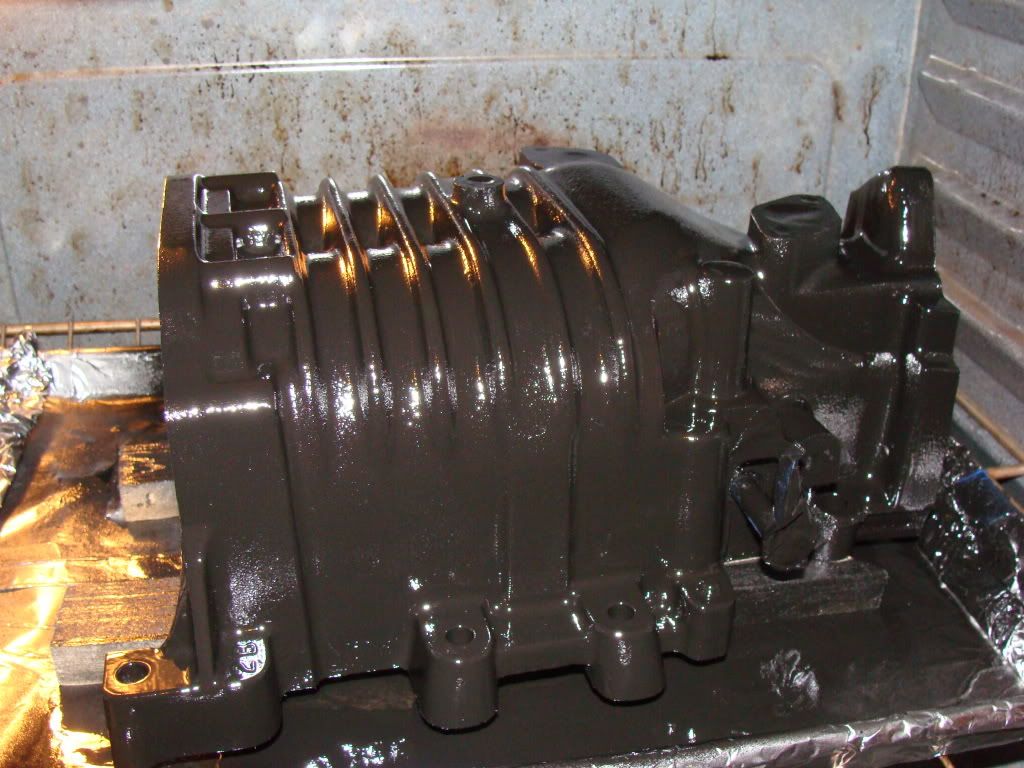
Back to the oven to bake some more:
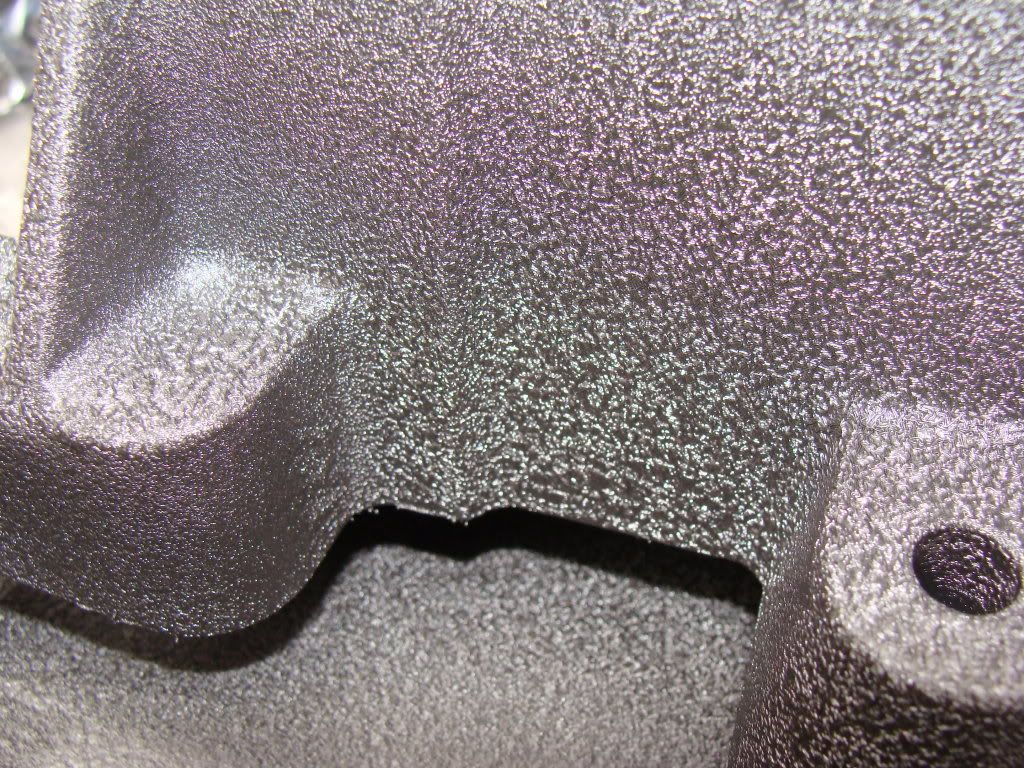
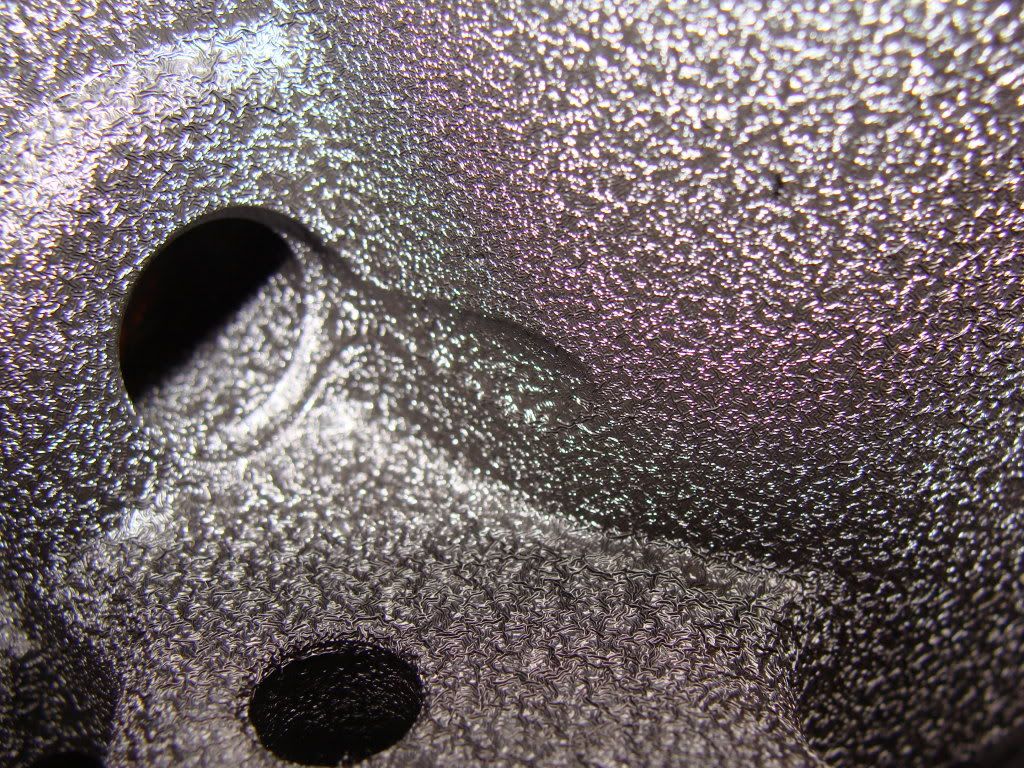
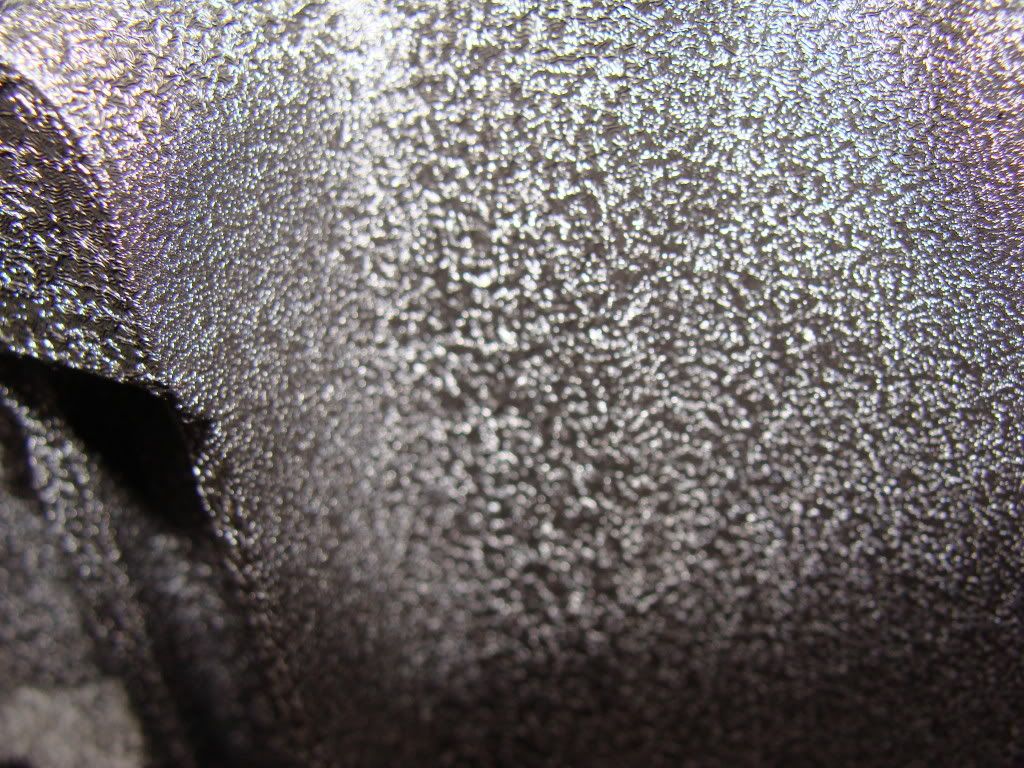
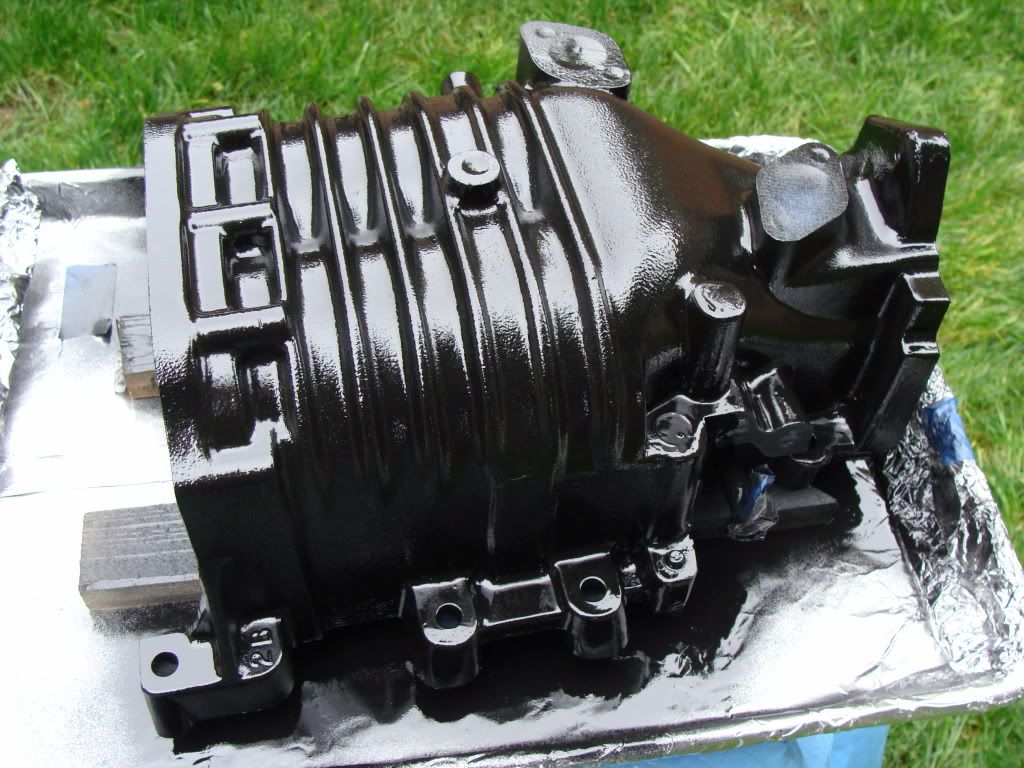
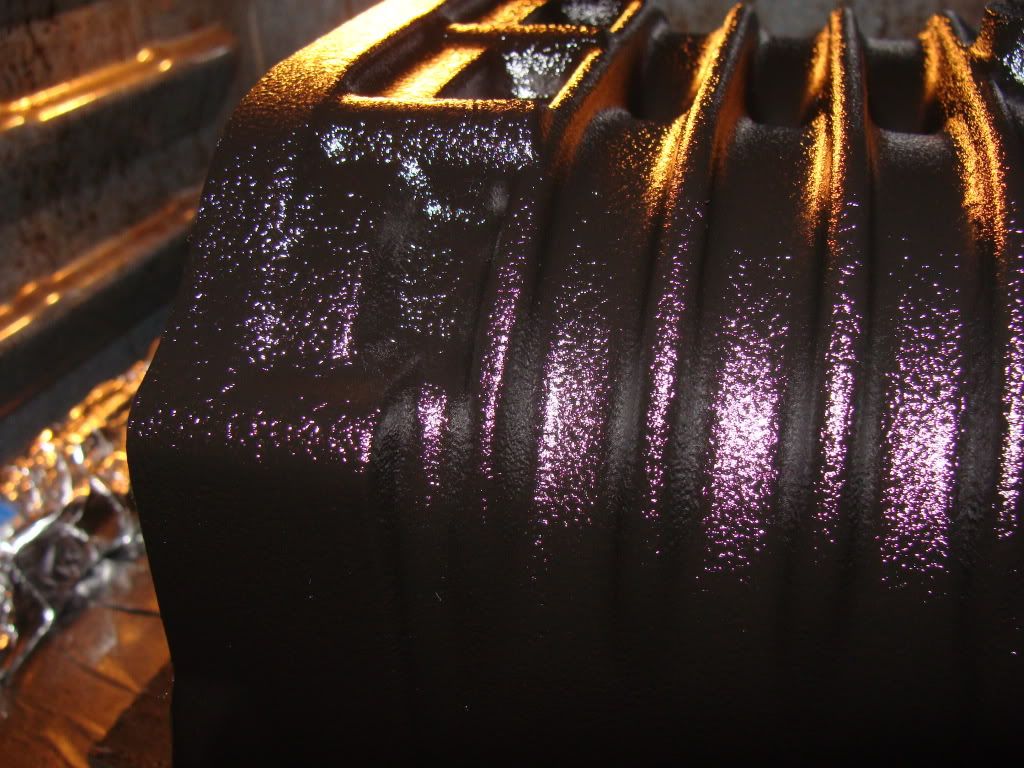
After 5 minutes, the wrinkle is starting:
The finished product: