Submitted by author : crash93ssei
If you AL7 seats are very slow to recline and almost don't work at all when cold, chances are that this will fix your problem

What you will need:
Philips screwdriver
3/8 drive ratchet
13 mm socket
15 mm socket
T 30 torx bit with magnetic screwdriver
T 50 torx bit
Pliers
S2 square drive bit
Cordless drill ( optional, but really really helps )
Grease fitting
Grease gun
About 2 - 3 hours spare time the first time, less on the second seat.
Overall, I would say that this job is quite easy to do, just time consuming and a couple steps are a tight fit. Keep in mind though that my car is currently HORRIBLY trashed inside and hasn't been cleaned since last August due to my brother and sister driving it then the engine and trans blowing up...
On to the writeup
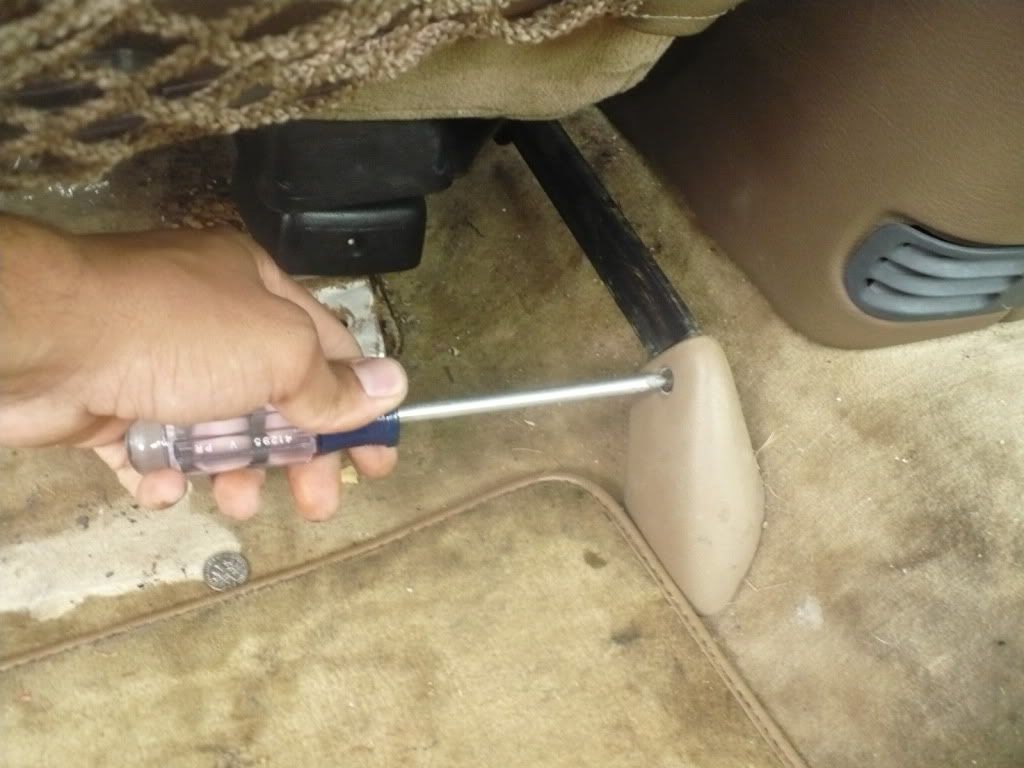
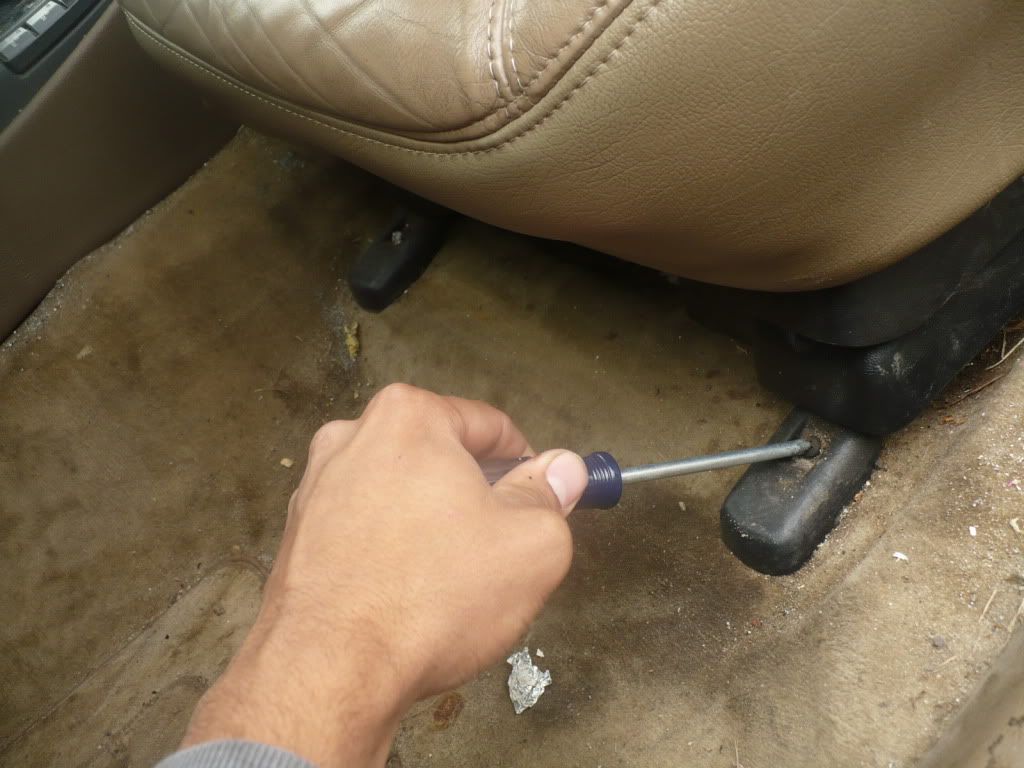
Start by moving the seat up as high as you can, then move it as far forward as you can. Go through the back door and remove the screws (Philips screwdriver) holding the plastic covers over the seat rail end.
Once the covers are removed, set them aside and use the 3/8 ratchet with the 13 mm socket to remove the nuts holding the rear of the seat down.
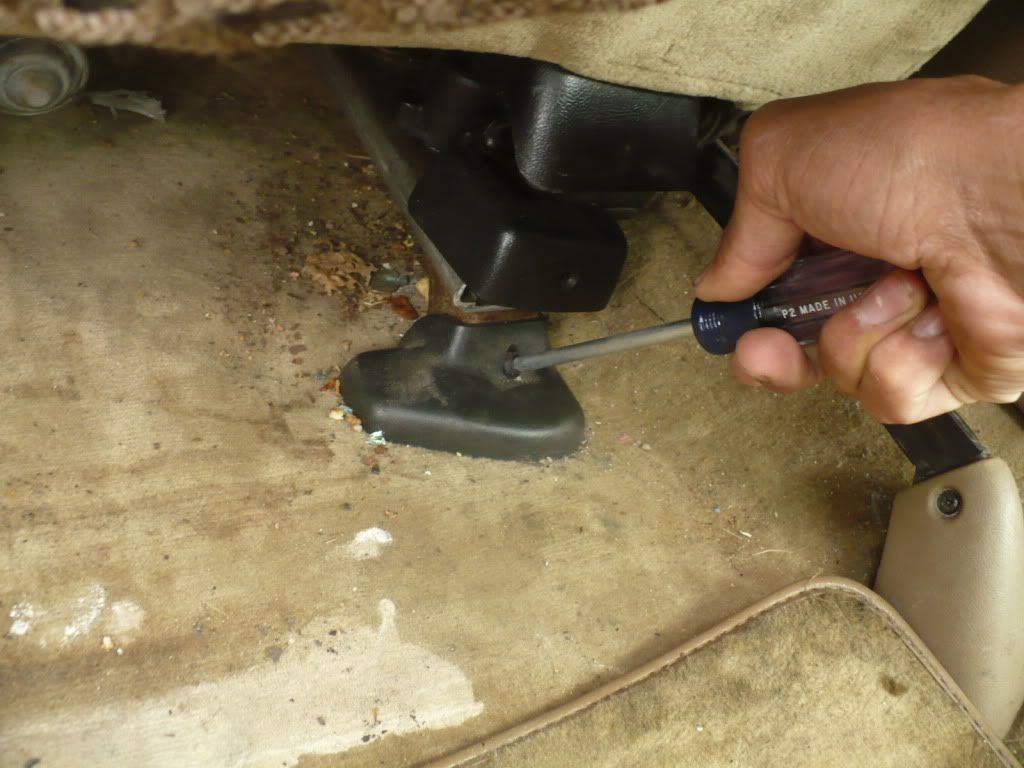
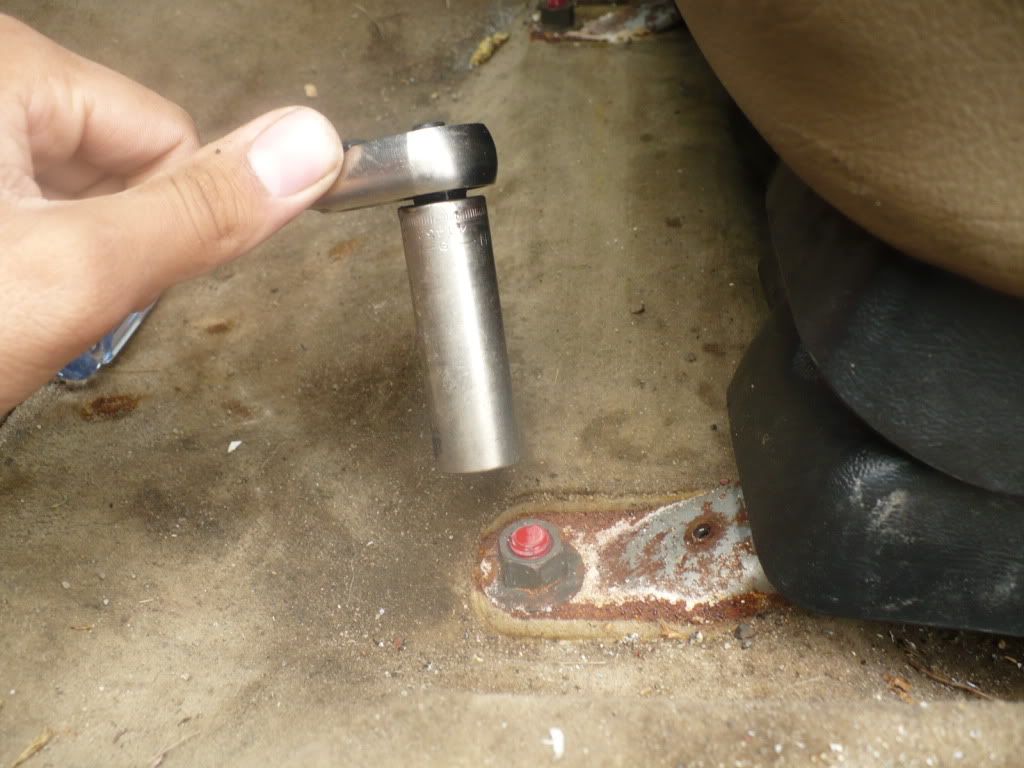
Remove the screw (Philips screwdriver again) and cover over the seat belt rail.
Next take the T 50 torx bit with the 3/8 ratchet and remove the seat belt rail bolt
 At this point, go to the front door and move the seat back as far as it will go, still keeping the seat at it's highest setting. Make sure to keep it up high as you will need the extra room later on.
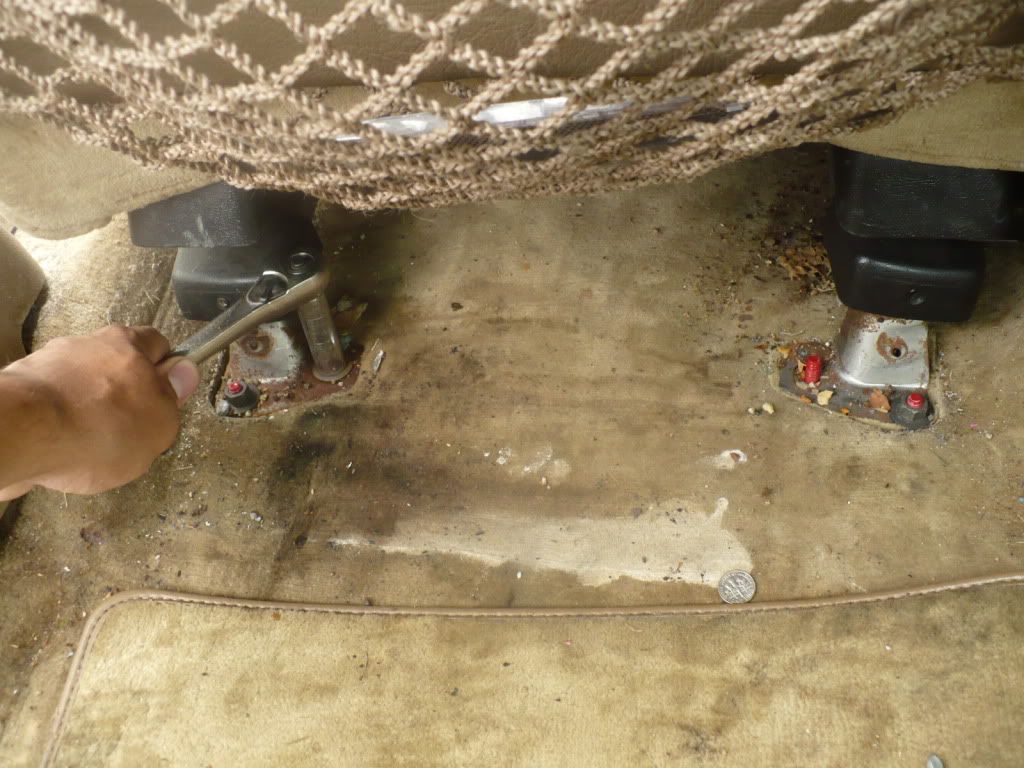
Once again, use the Philips screwdriver to remove the screws that hold the plastic covers in place over the seat rail.
Then use the 3/8 ratchet with the 15 mm socket to remove the nuts off the front of the seat rails.
Now the seat is ready to turn over and disconnect the wires and air line.
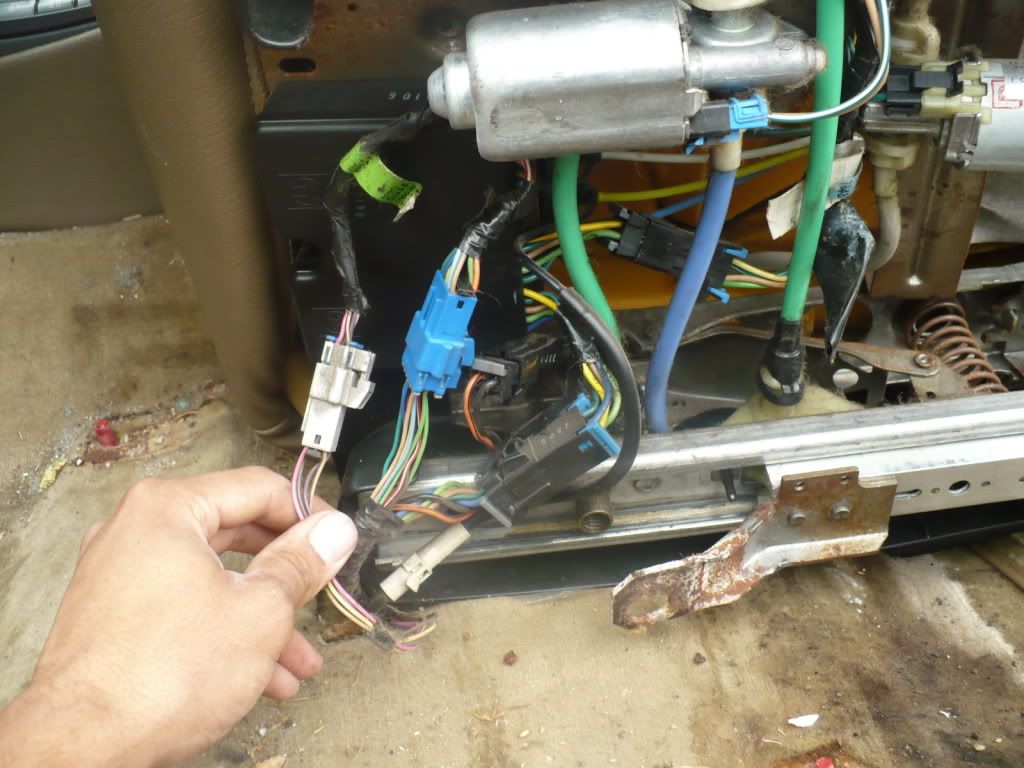
When you get all the wires and air line unhooked, remove the seat being
extremely careful not to scratch your trim or paint. Set the seat down and flip it upside down, this is where you will be working for the next hour.
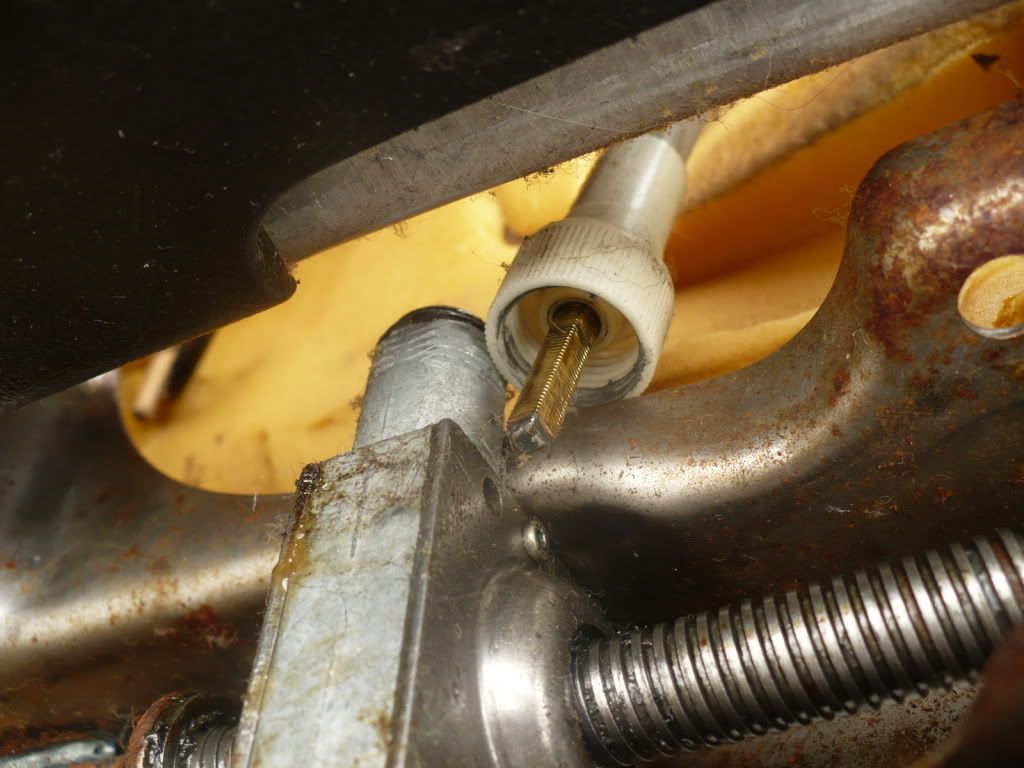
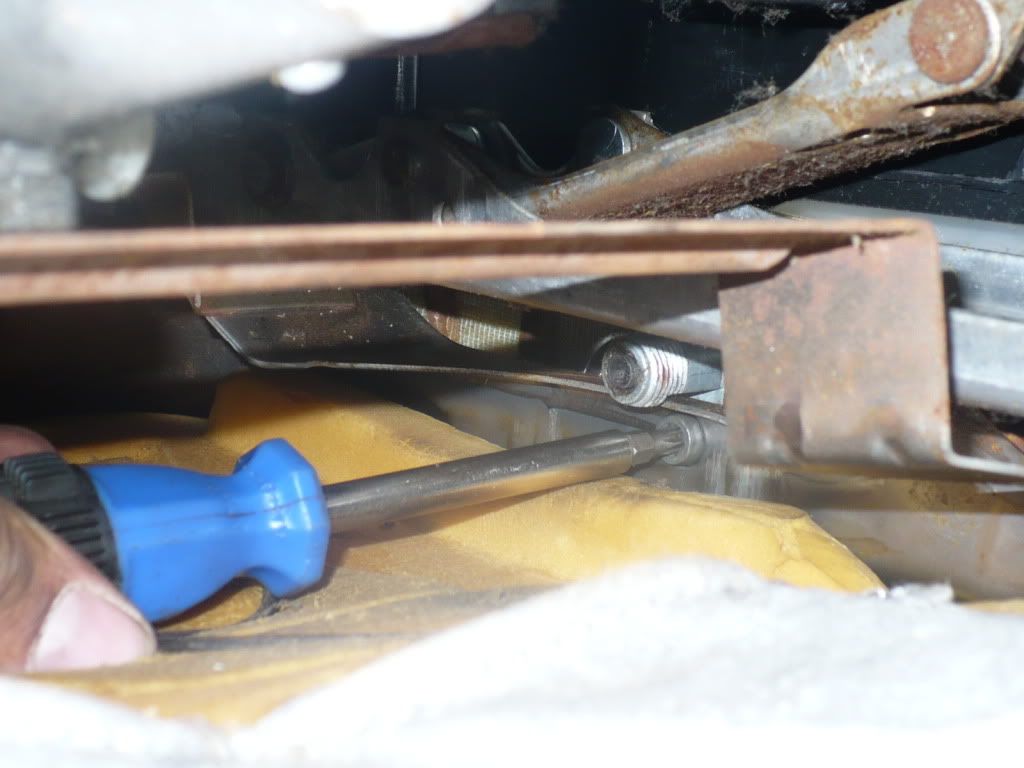
This is what you will be going after, and do one side at a time.
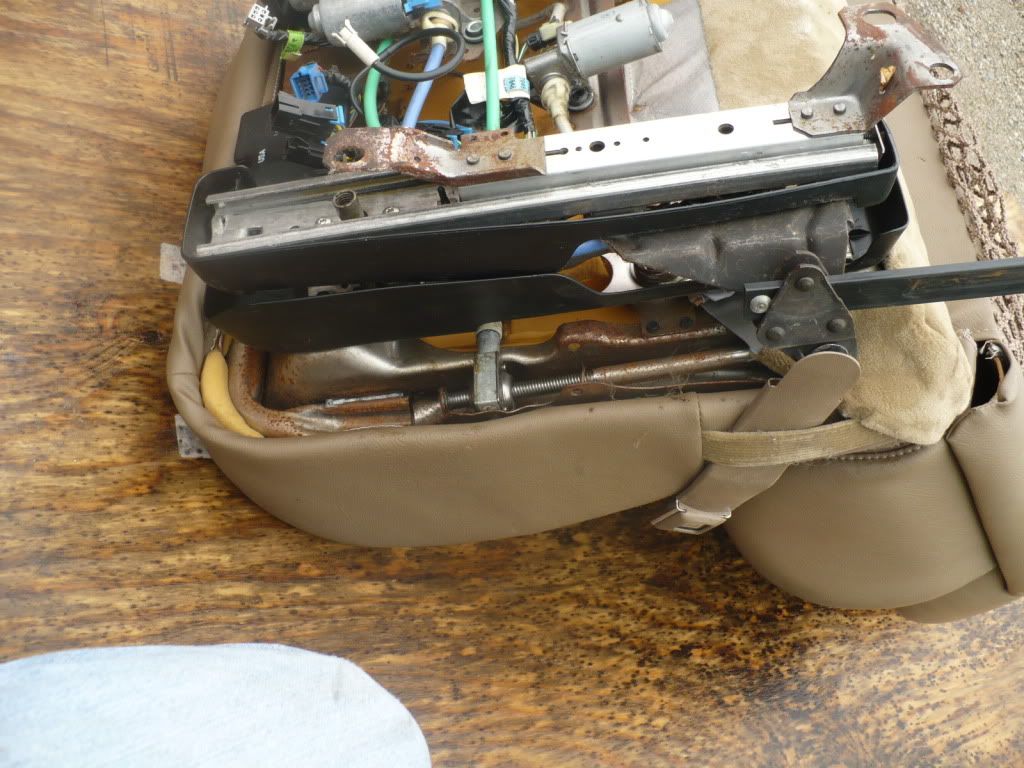
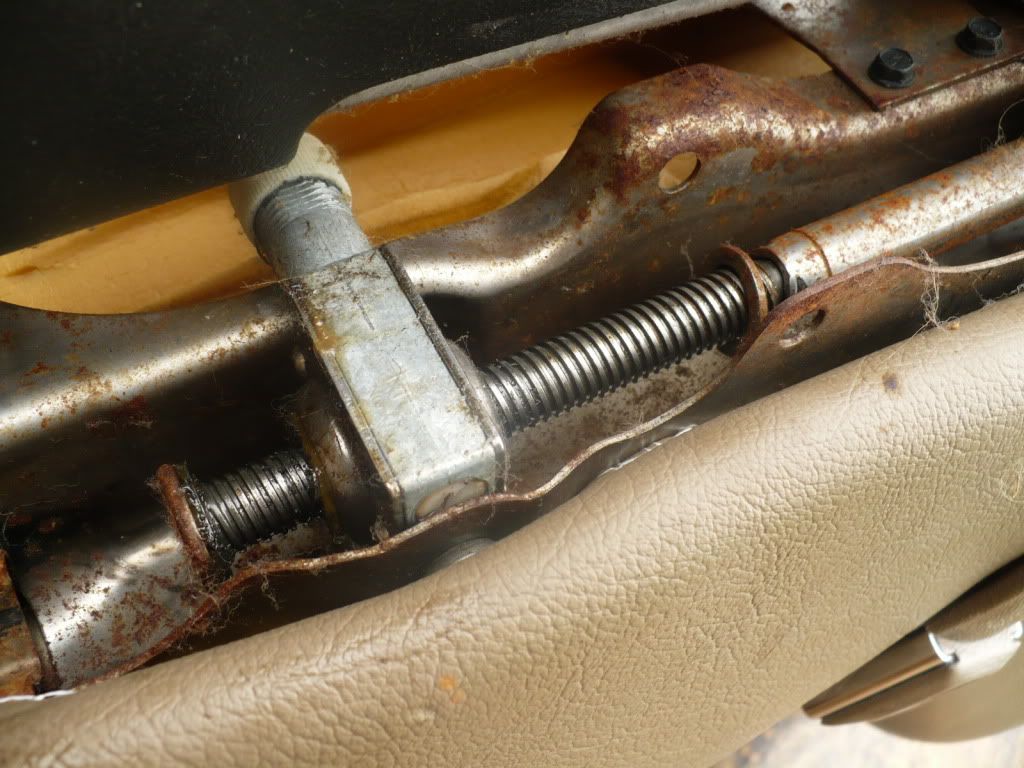
Over the years of use, the grease breaks down, wears out, and basically gums up and makes it very difficult for the motor to move the gears inside the box.
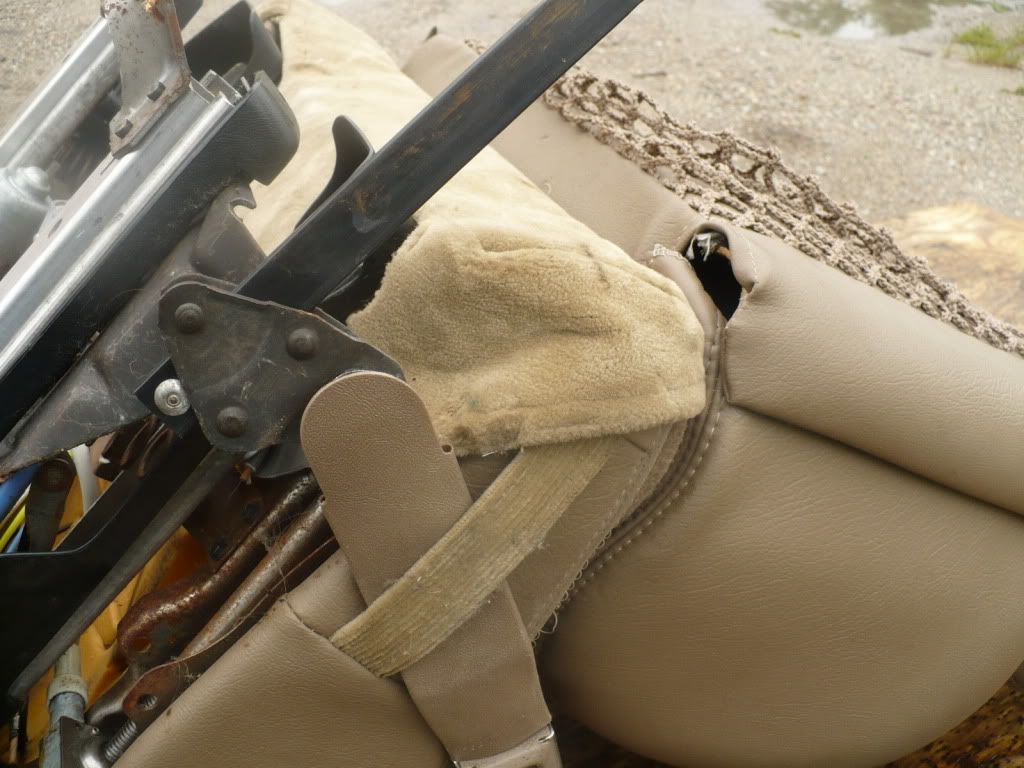
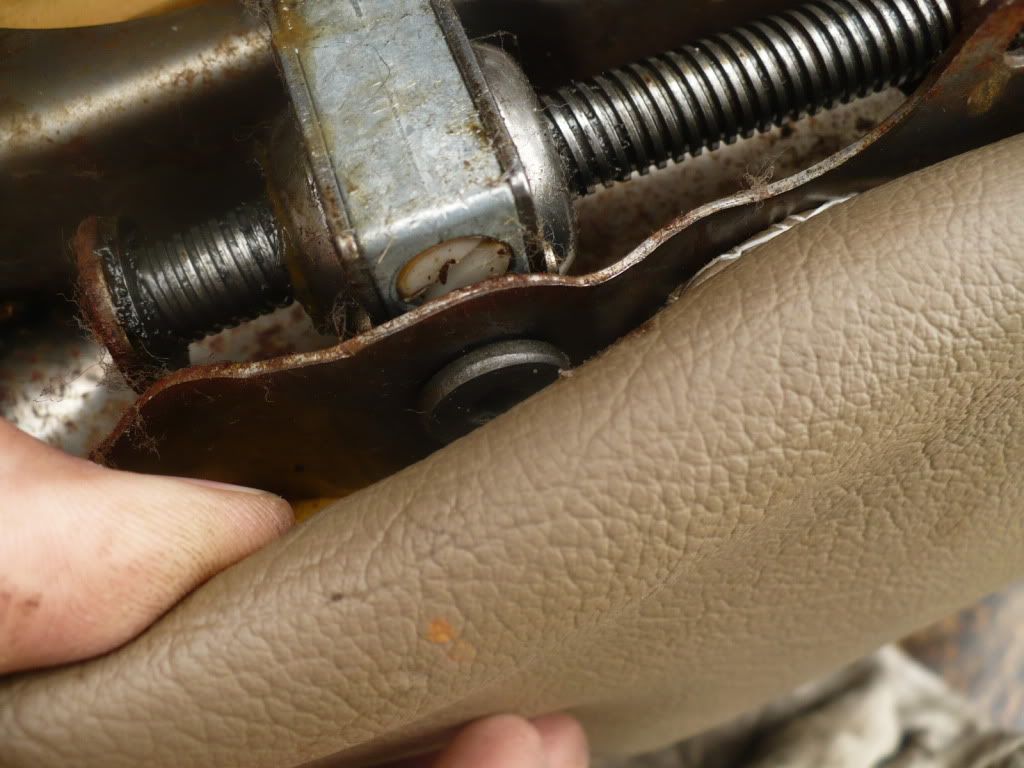
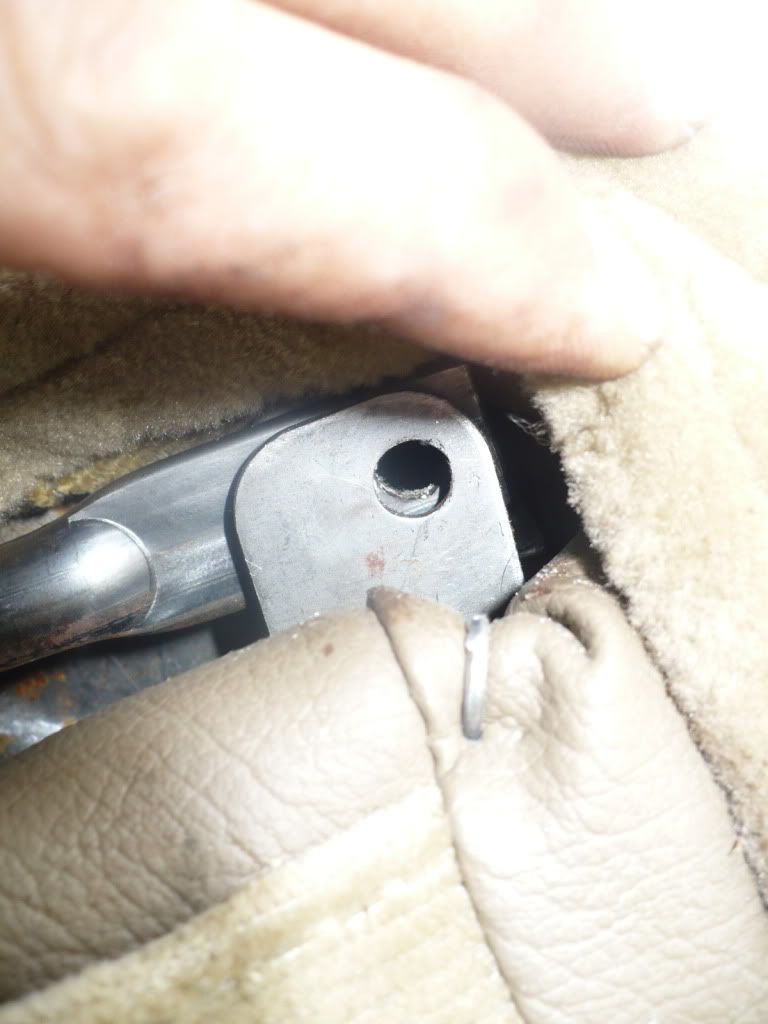
You will need to move the fabric back at the corner of the seat to get to the pin that holds the arm in place.
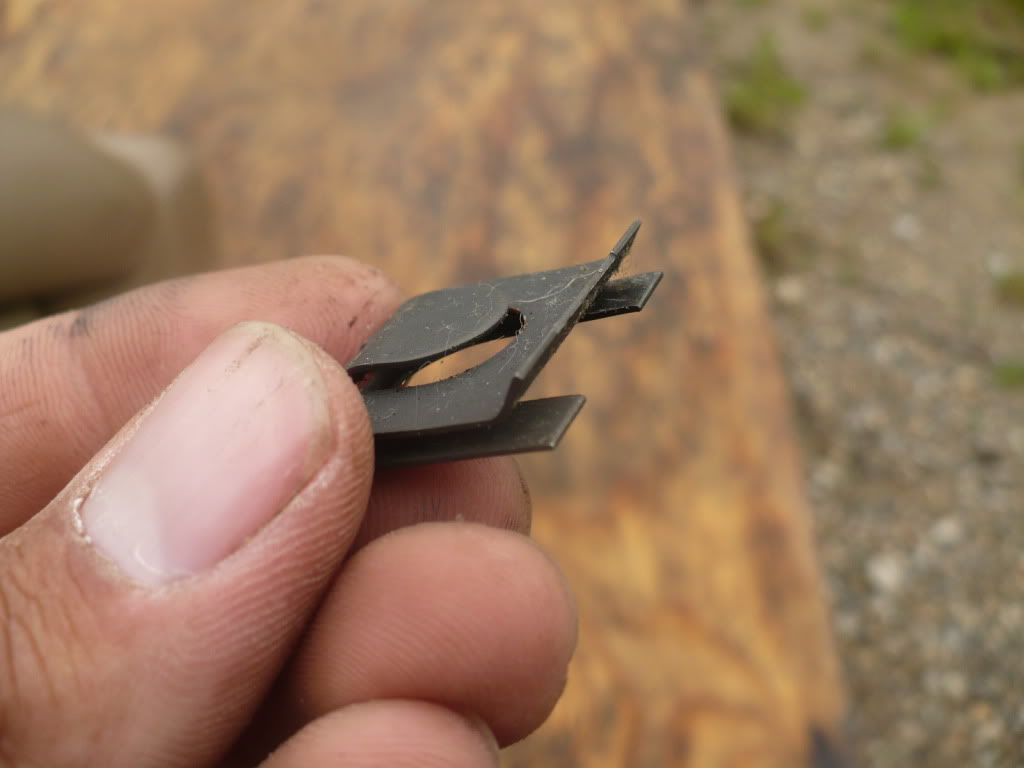
Here you can see the clip you need to remove. It just simply slides up and pops off.
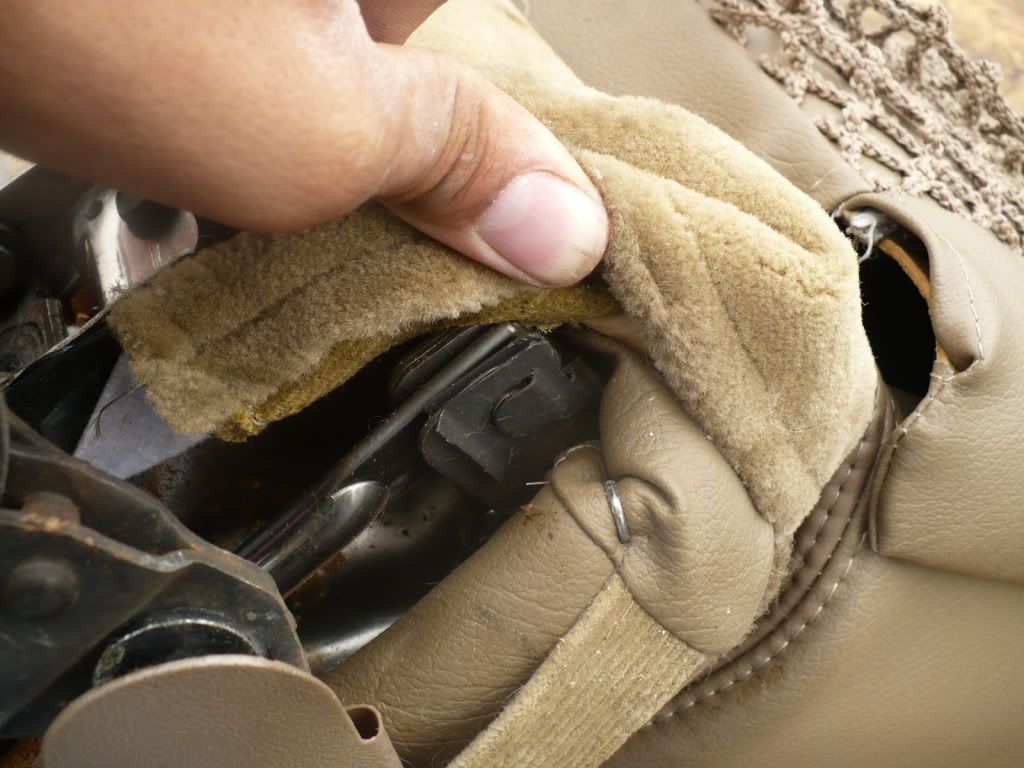
Once the clip is removed, you will see the pin that holds the recline arm in place that needs to be removed. Pliers will work just fine for this, but Vice Grips were closer, so I used them. Just be sure not to squeeze it to hard and flat spot the pin.
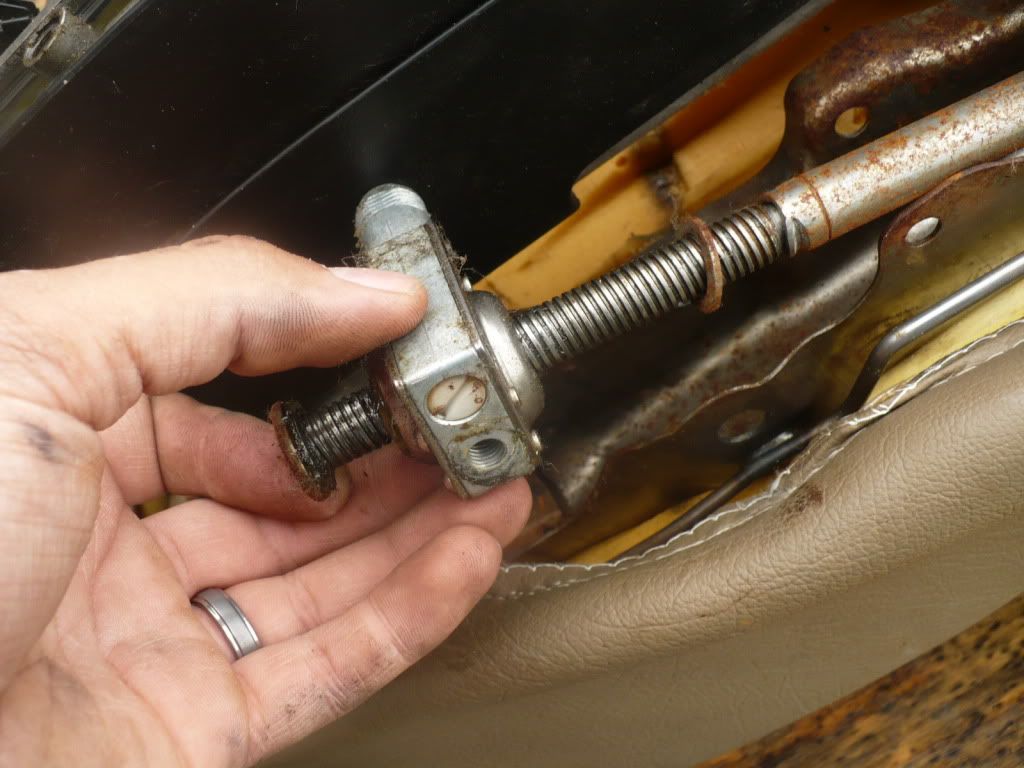
Now you need to remove the driveshaft from the gearbox. It simply screws out.
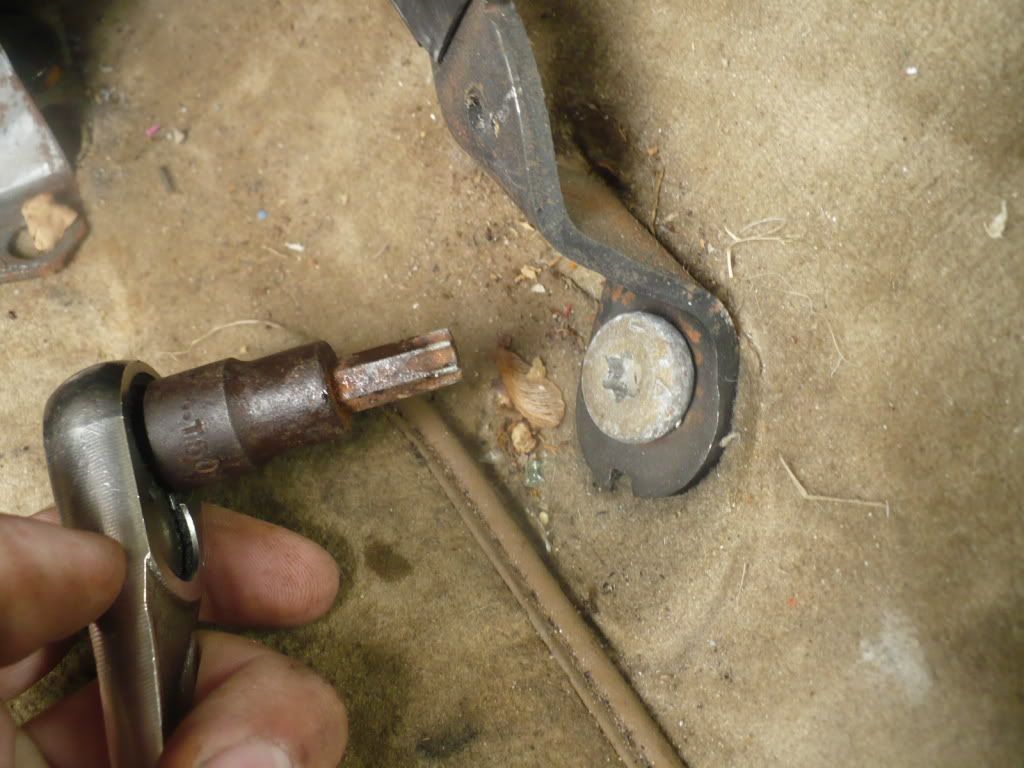
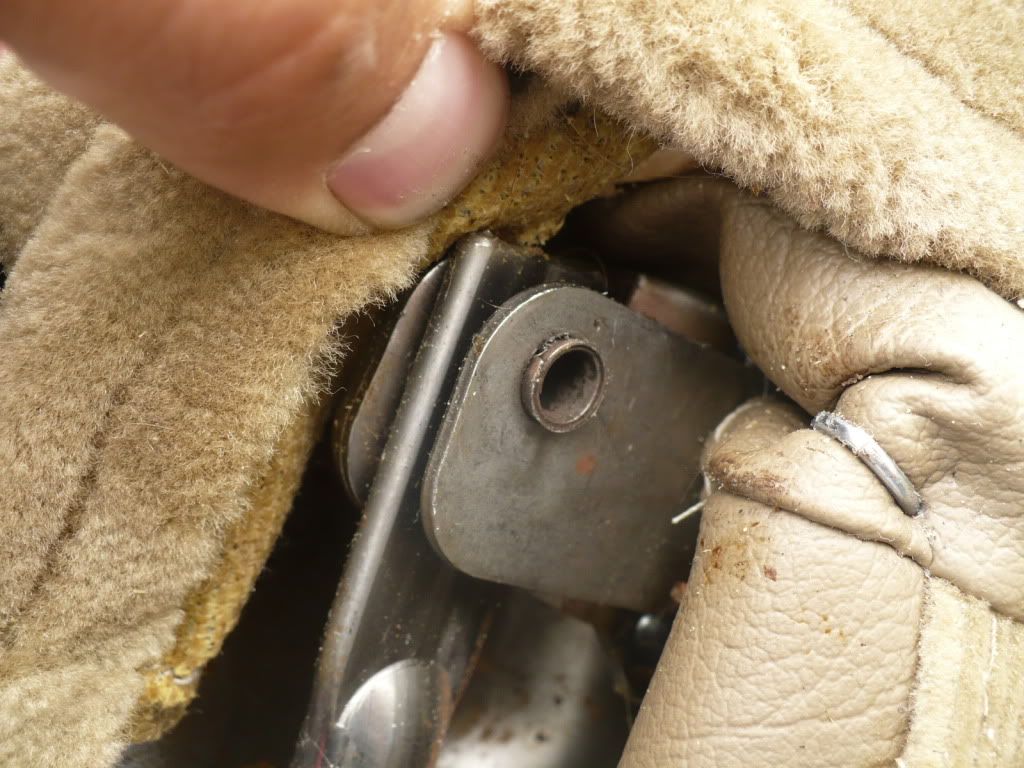
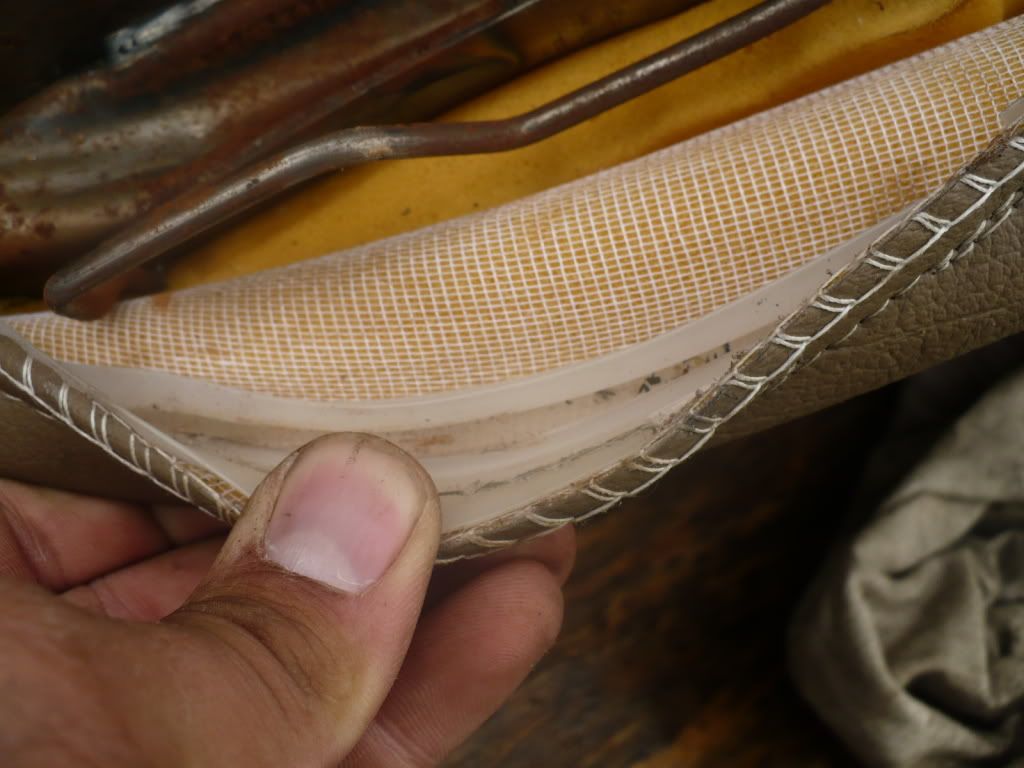
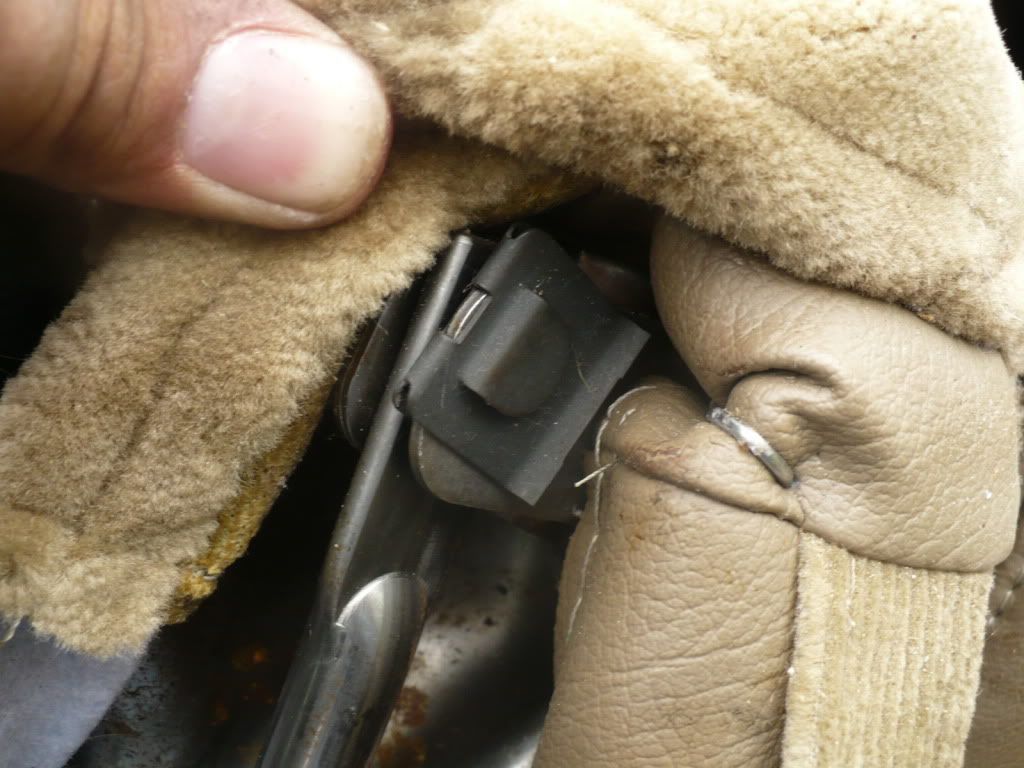
Here is what you need to remove next. The leather seat skin will simply pop up and away, allowing you to access one of the Torx head screws that hold the gearbox in place.

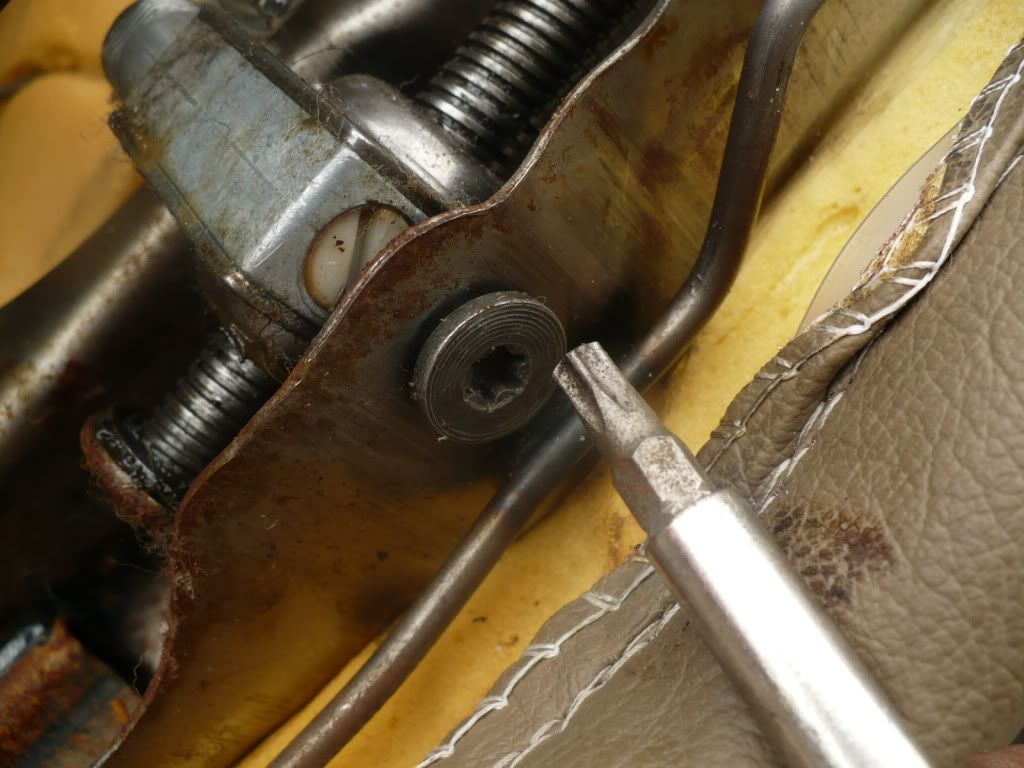
Remove this screw using the T 30 torx bit
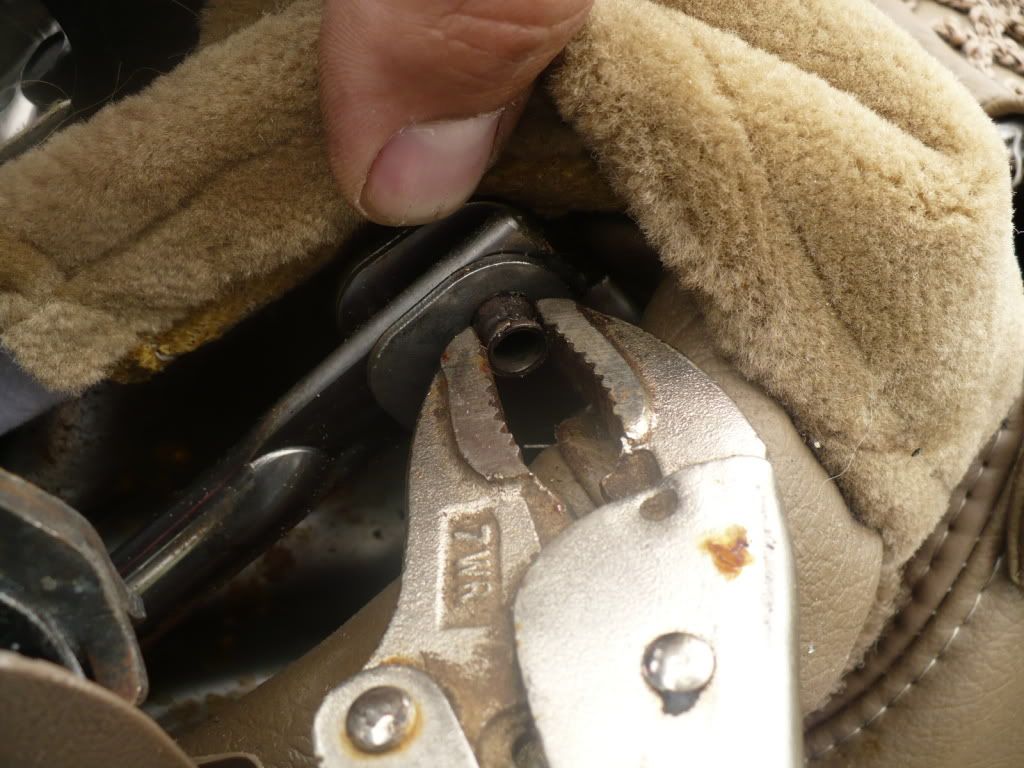
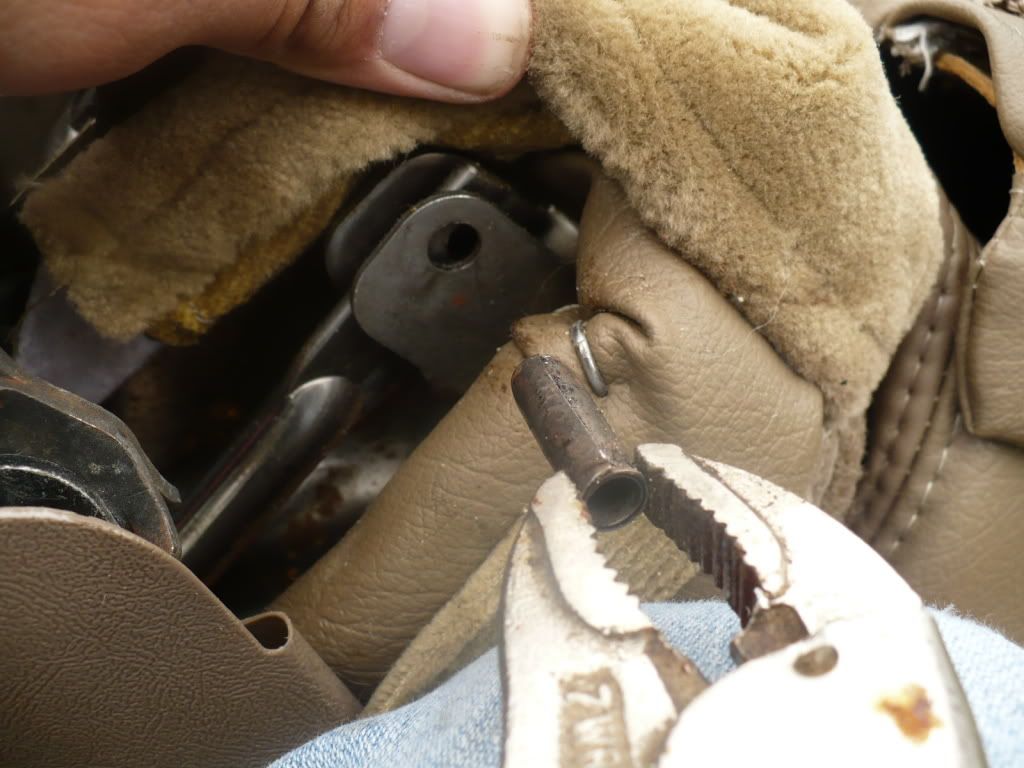
NOW, this is the hard part. There is one more T30 torx head screw that holds the gearbox in place from the opposite side. It is right under where the driveshaft goes in and is quite difficult to get to, and even harder to see. This is about the hardest part of the whole process and thin arms with small hands will really help in this step.
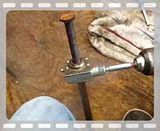
This is the best pic I could get of it.
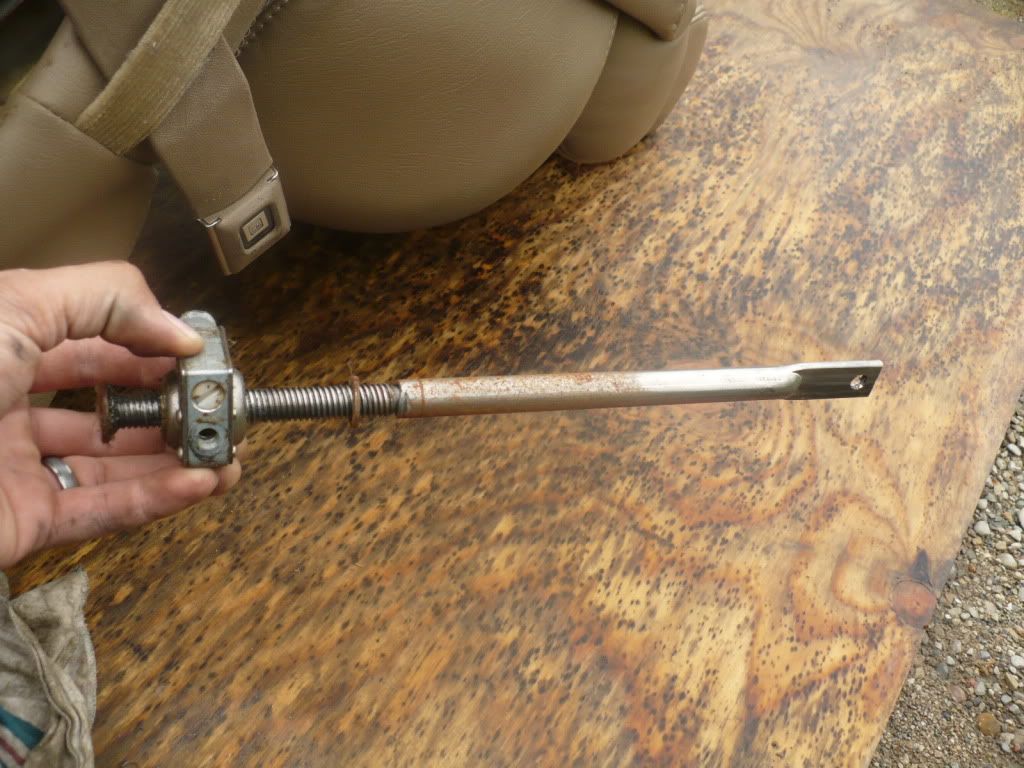
When you get that screw out, the gearbox and arm will come out.
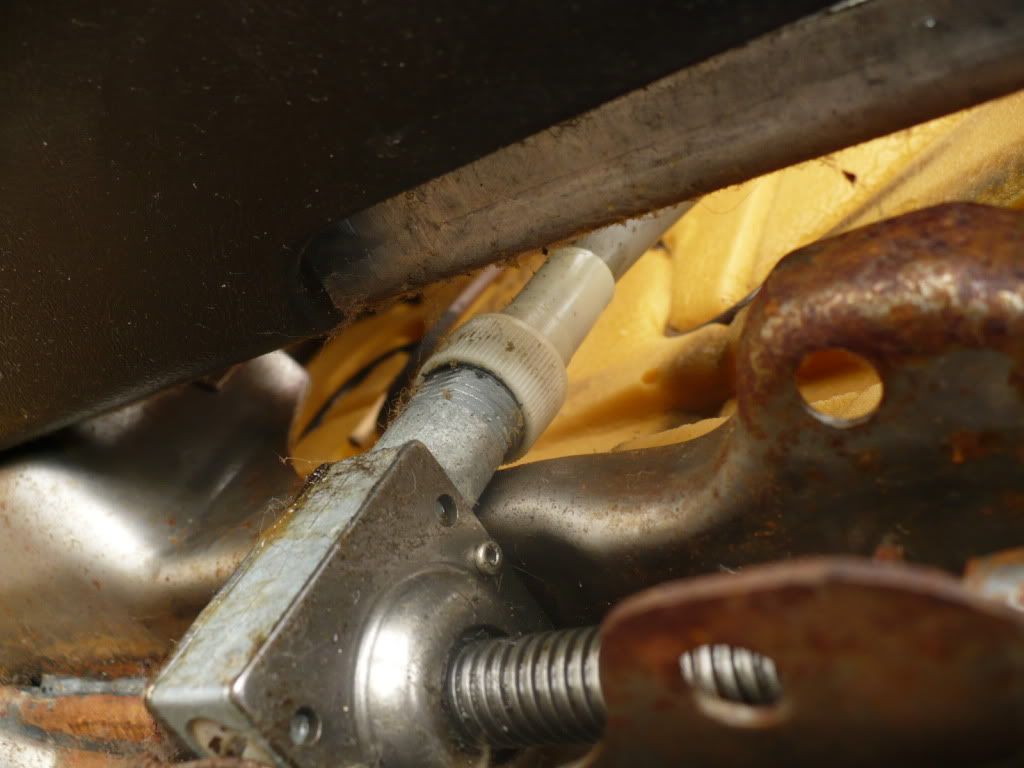
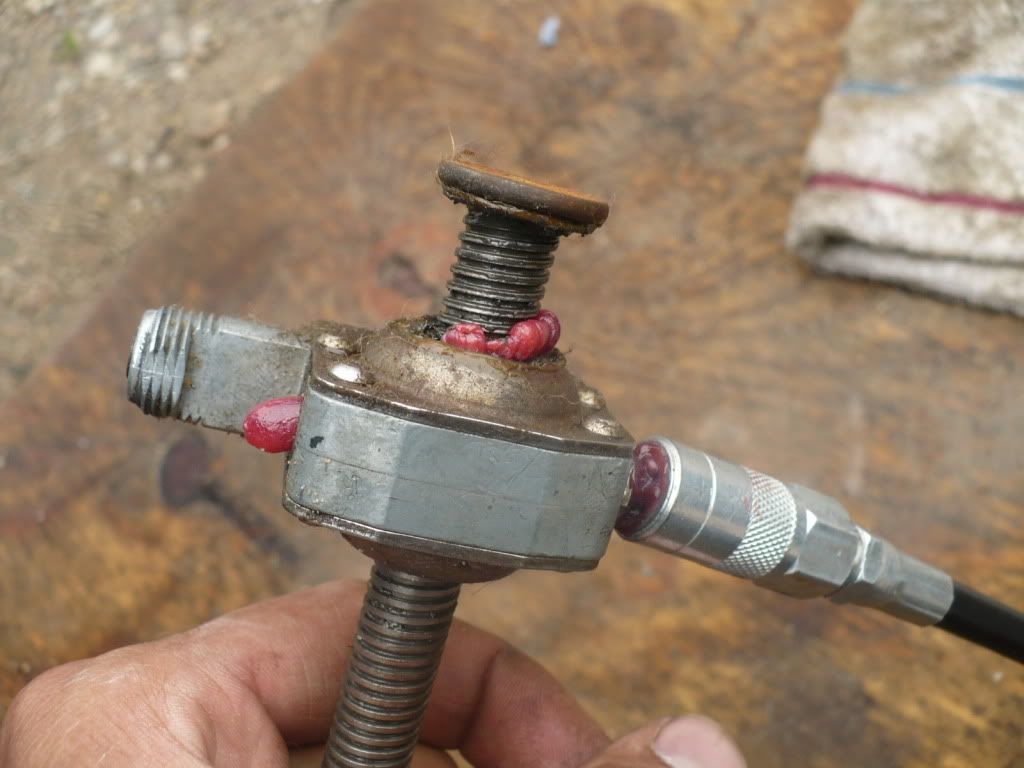
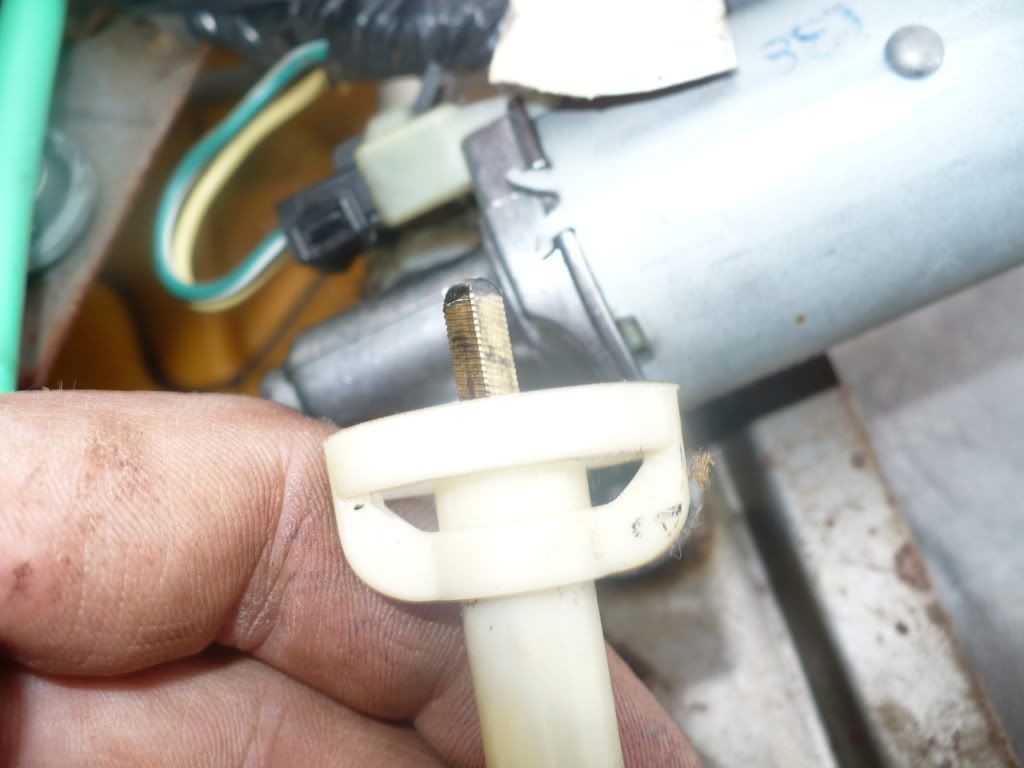
Here you can see where one of the mounting holes are for the gearbox, and you can also see that it goes directly into the gearbox and you can see a gear. You will put the grease fitting in here and fill the gearbox with good clean fresh grease. (The grease fitting needs to be the same threads as the screws that came out, of course)
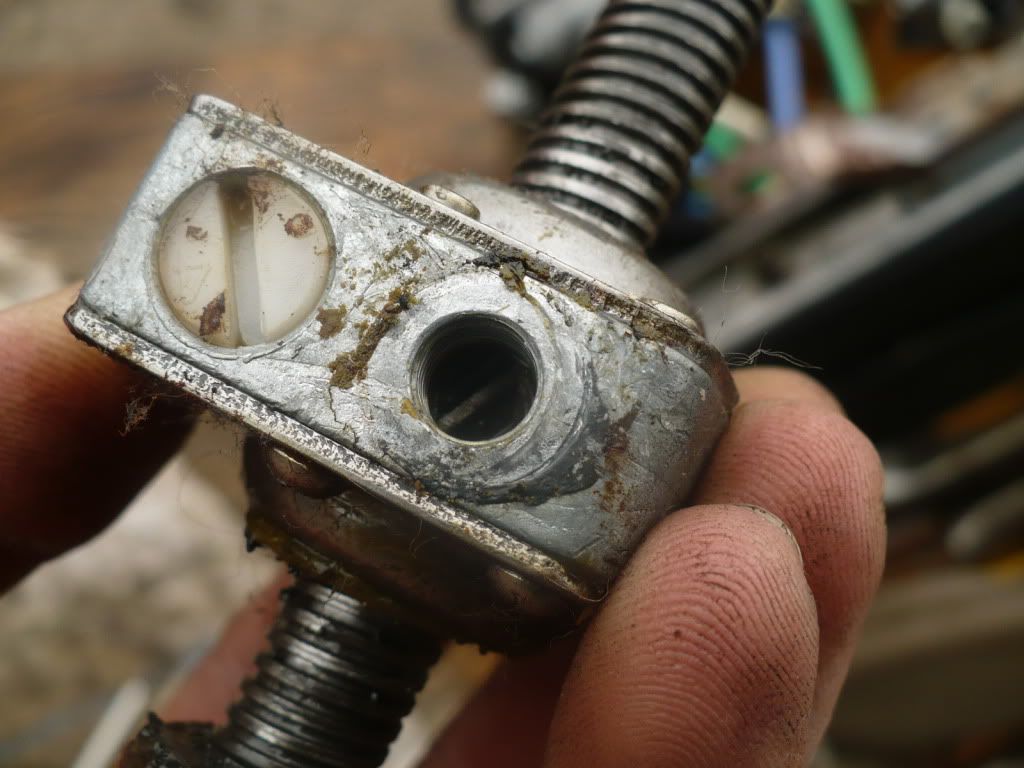
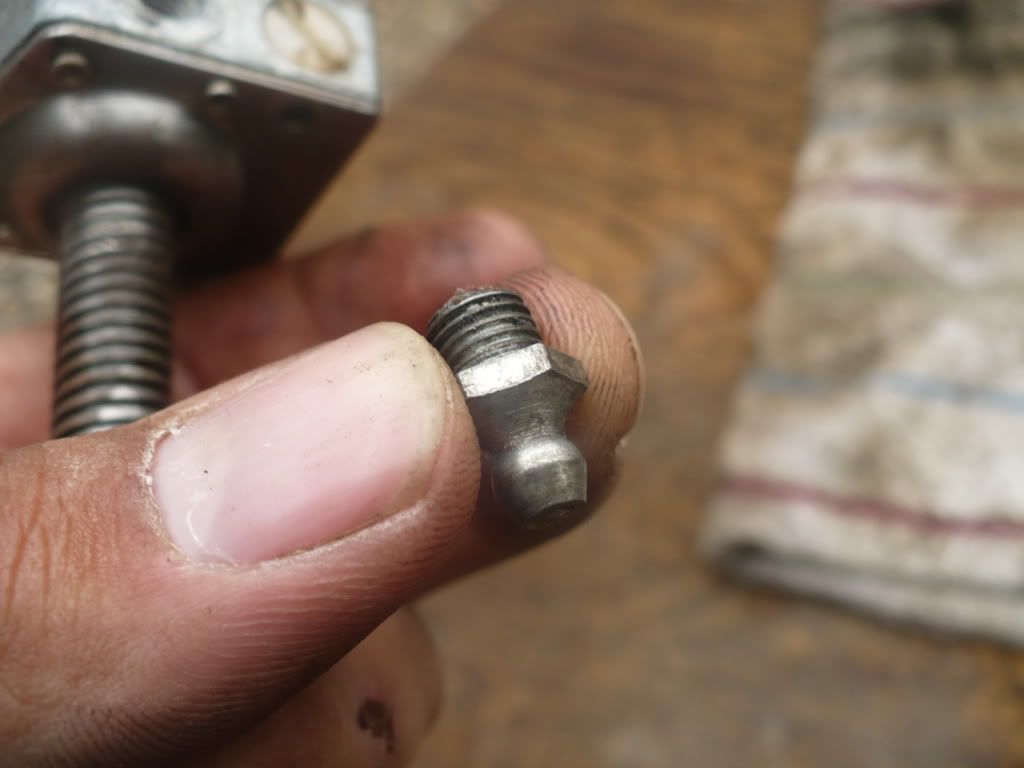
Fill the gearbox with grease until it starts coming out
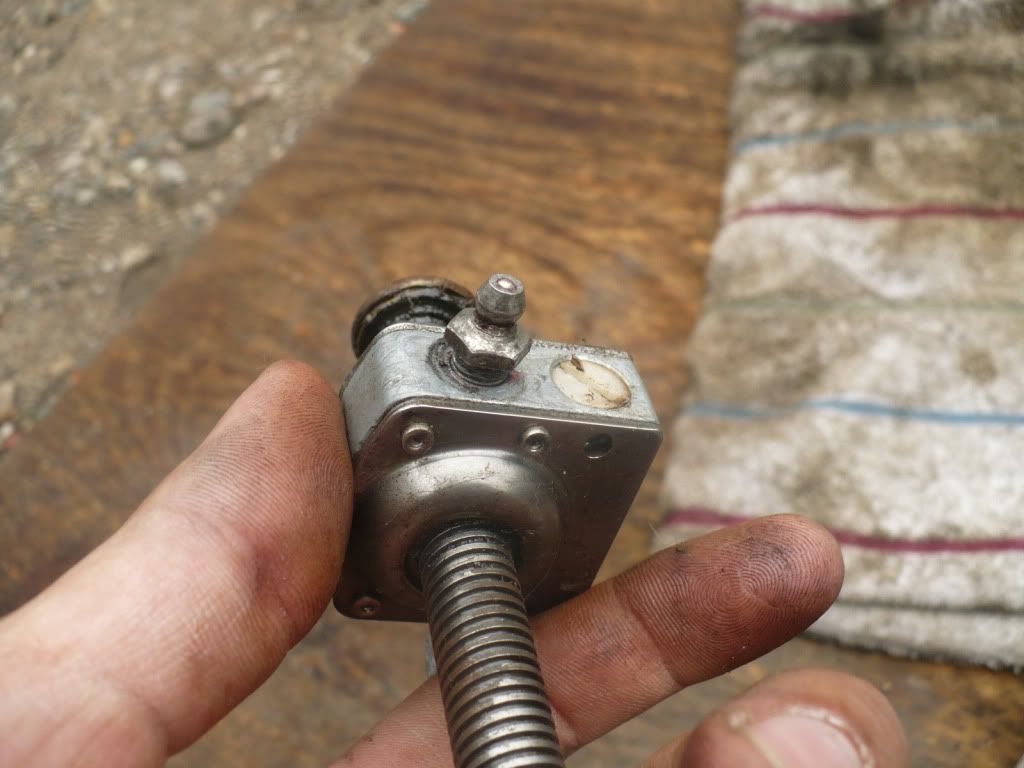
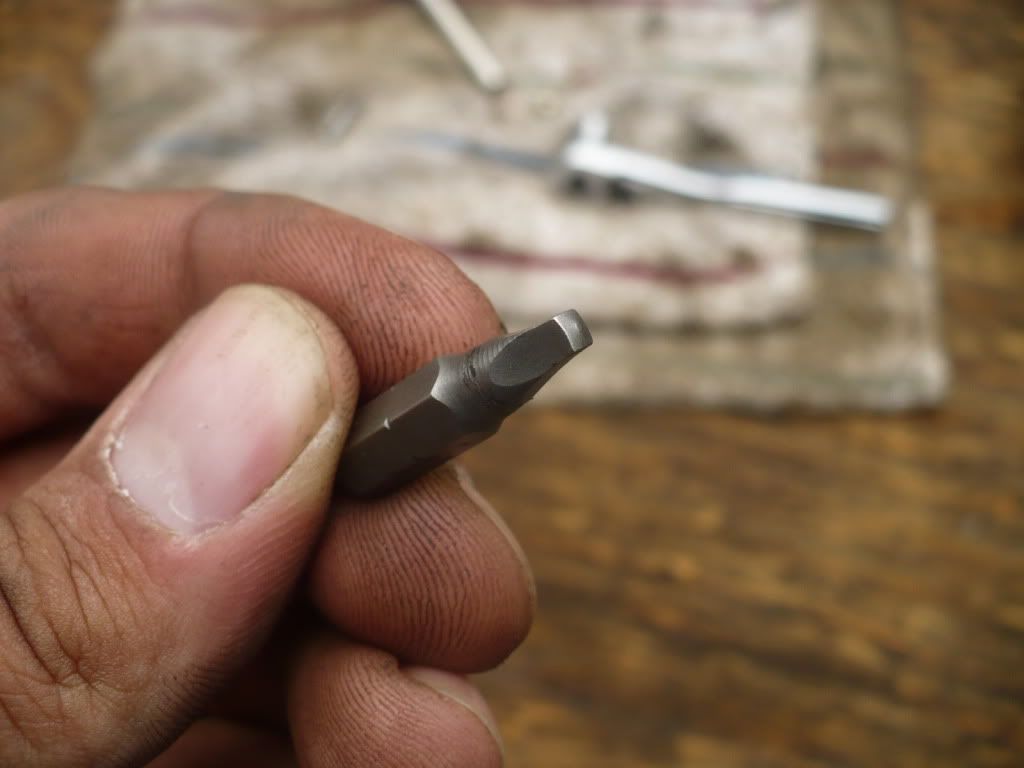
Now you will notice that the S2 square drive bit is the same size as the driveshaft

You have to hold the arm still while spinning the bit in the gearbox so the gearbox goes up and down the threaded part of the arm. A long screwdriver comes in handy for this.
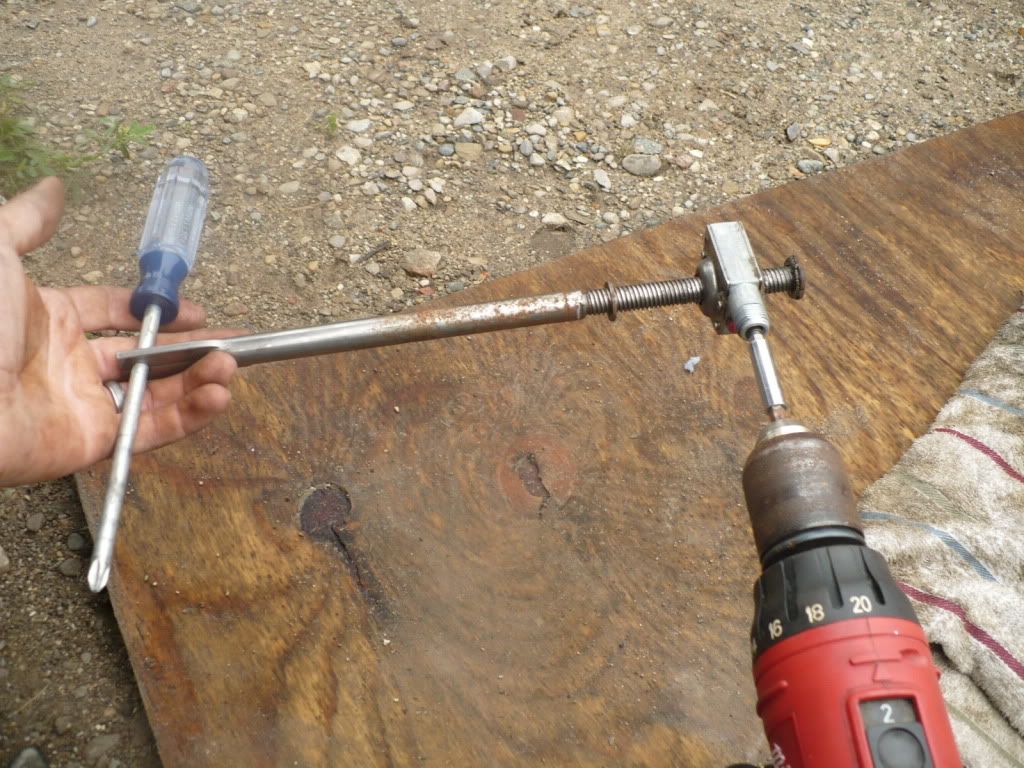
While holding the screwdriver and arm steady, use the screwdriver, or cordless drill to run the gearbox up and down several times. It will likely start off hard, but will get easier quickly as the new grease gets worked in. If using a drill, be very careful not to run the gearbox into either end and jam it up as it may break. Just stop a little bit before the end and you will be fine.
Clean up any excess grease and that is all done.
Now, you may be worried about the pin not lining back up perfect, but fear not, it will all work out in the end. Just get the gearbox to where it looks like it will be close and reinstall it just the opposite of how you removed it, starting with the screws.
As you can see, mine didn't line up perfect
No problem though, just remove the driveshaft from the motor end and reinstall it into the gearbox. Doing this, you can easily twist the driveshaft by hand and extend or retract the recline arm to make it line up perfectly.
Reinstall the pin, then the clip.

Put all the leather and fabric back in place, and then move onto the other side, which is basically exactly the same as this side. When that side is done, put the seat back in your car, and hook up the air line and all electrical connectors. Make sure you test all buttons and make sure everything works before you bolt the seat back in, you don't want to bolt the seat back in only to find out that you missed one plug. When you confirm that all is well, bolt it up, install the covers, and enjoy a fast, quiet, reclining AL7 seat like you have never had before