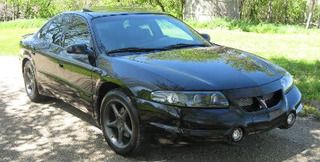
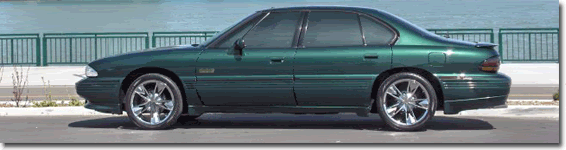
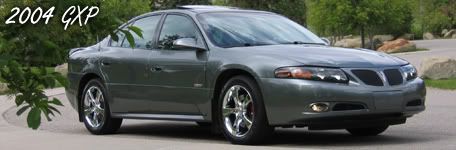
It is currently Fri Apr 19, 2024 4:57 pm

All times are UTC - 5 hours [ DST ]


Post new topic Reply to topic  [ 21 posts ]  Go to page 1, 2  Next
Author Message
PostPosted: Wed Apr 01, 2009 11:23 pm 
Offline
Resident Gearhead
Resident Gearhead

Joined: Wed Apr 01, 2009 7:11 pm
Posts: 2594
Location: Alberta, Canada
Year and Trim: 2004 GXP, 2008 STS, 2020 XT6
Rear Outboard Heated Seats Project

This is very long so grab a coffee...

For about the last year I’ve been working on my rear heated seats. I have a personal policy of not adding or changing anything that I can’t make to look and work like a “factory installed” option.

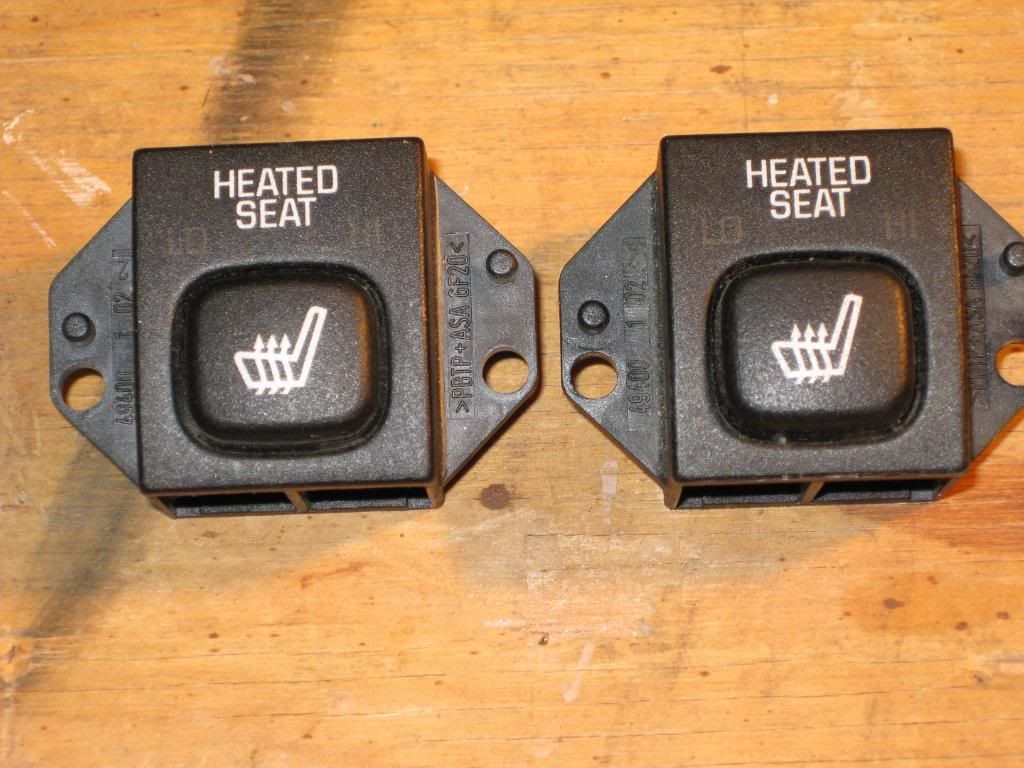
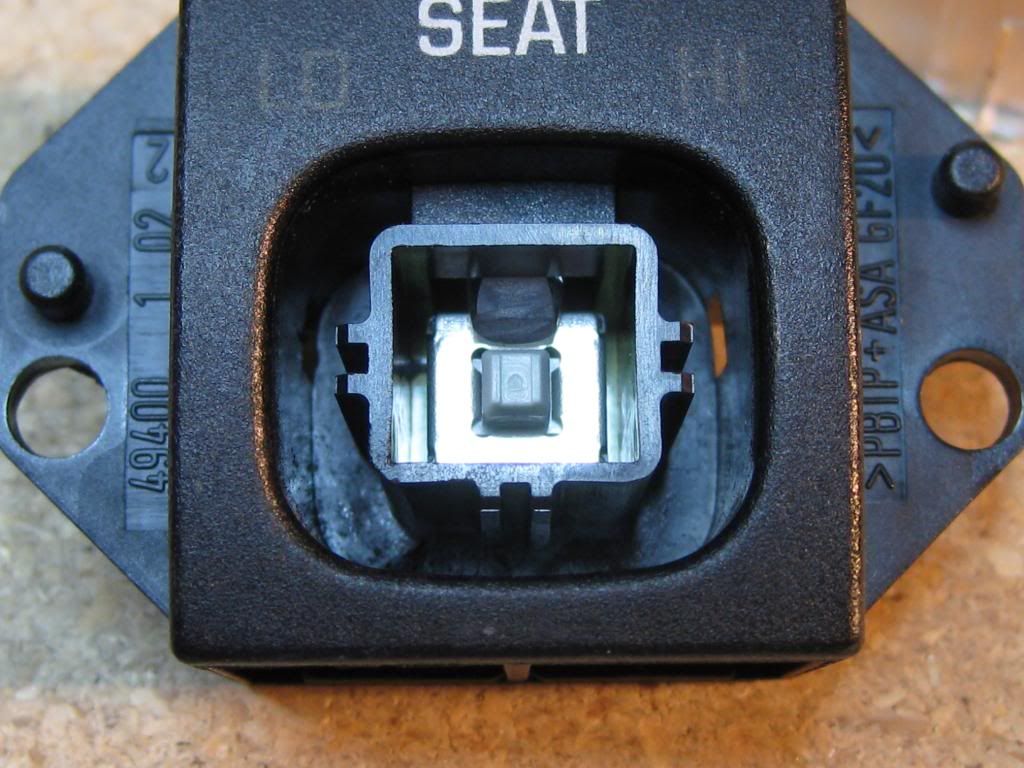
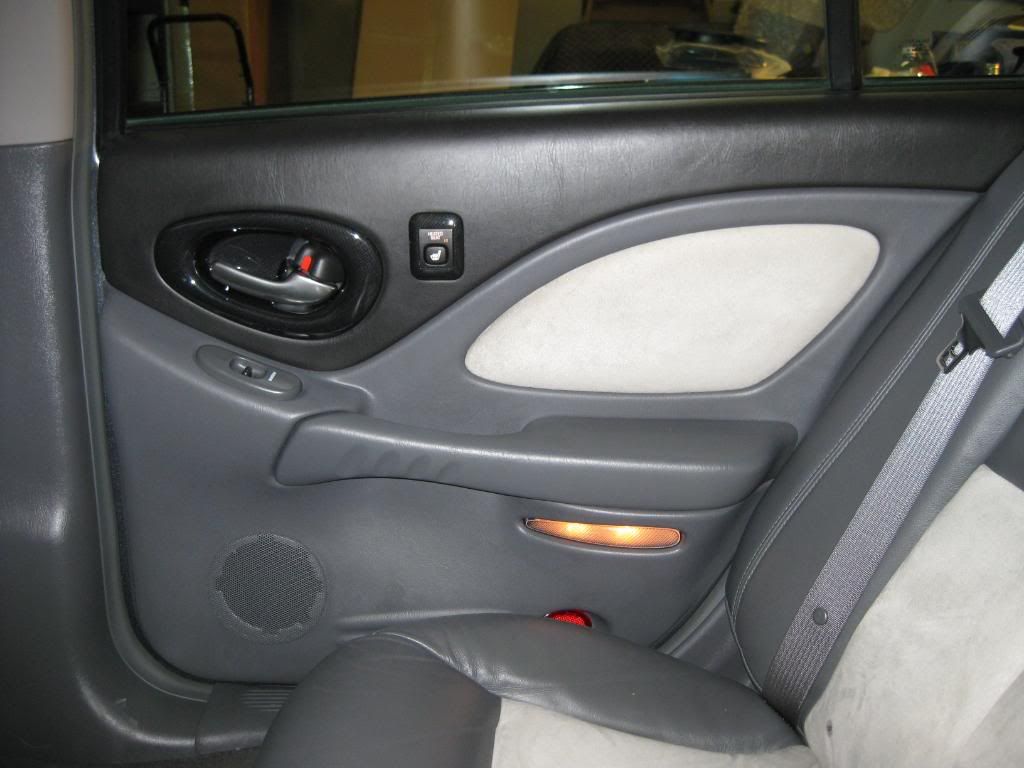
My biggest hurdle was the switches. I wanted something with an OEM look that could be mounted in a place GM might use. For me, this was in the rear door panel. There isn’t enough clearance to use the “Bonneville” switches so these weren’t an option. I looked at several others but finally settled on some from the ’97-’99 Park Avenue. They have a black face (to match my others), they are a GM part (mandatory), they have a small enough profile and the font is close to, if not the same as the other Bonneville switches.

Image

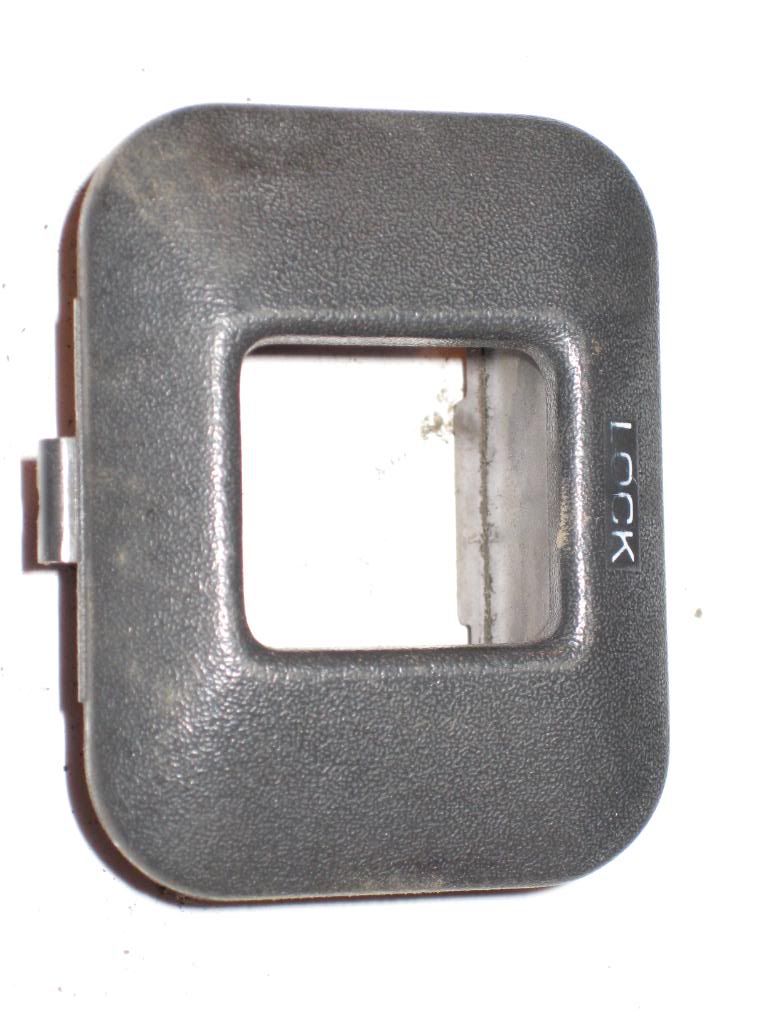
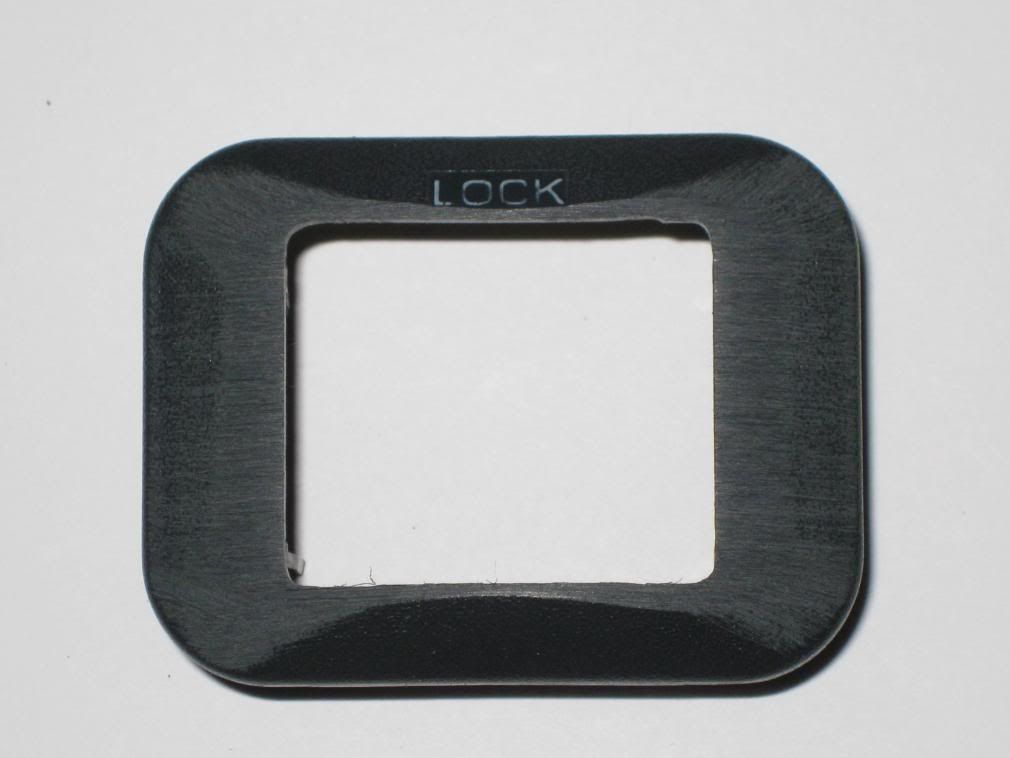
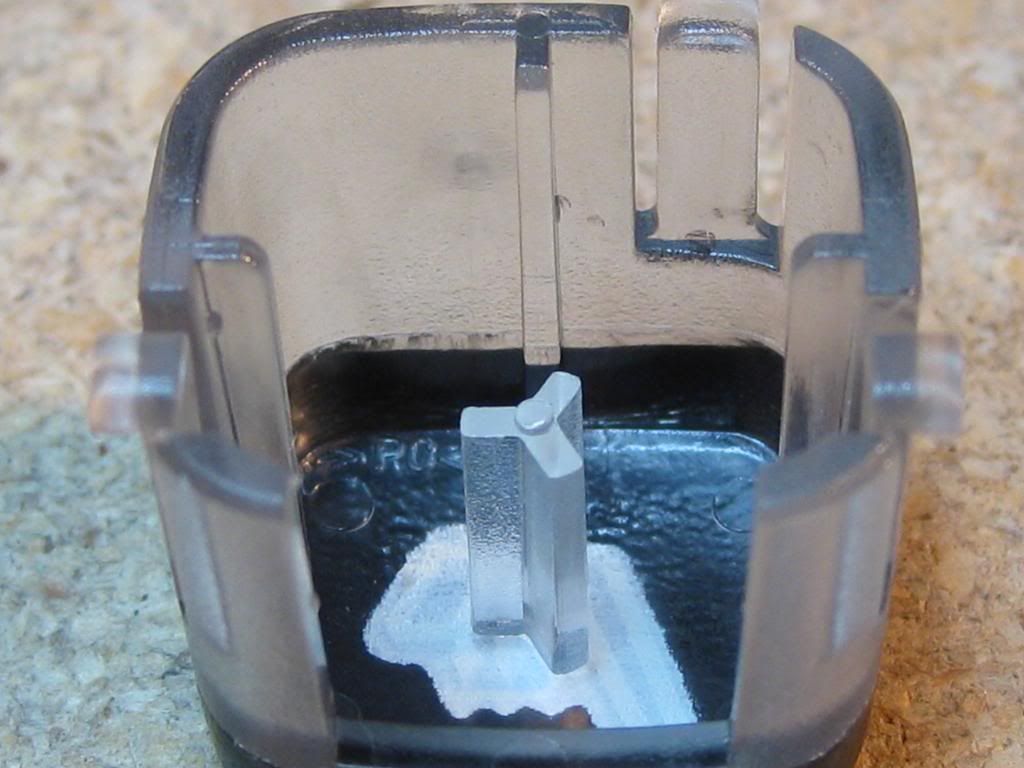
Next was the problem of a switch bezel. I lost count of how many cars I went through at the wrecker looking for possibilities, or at least one that I could make work for this application. Long story short, I ended up using power door lock bezels from an early 90’s Saturn. These are obviously not ideal in their “raw” state so off to work I went. Here’s the original donor switch.

Image

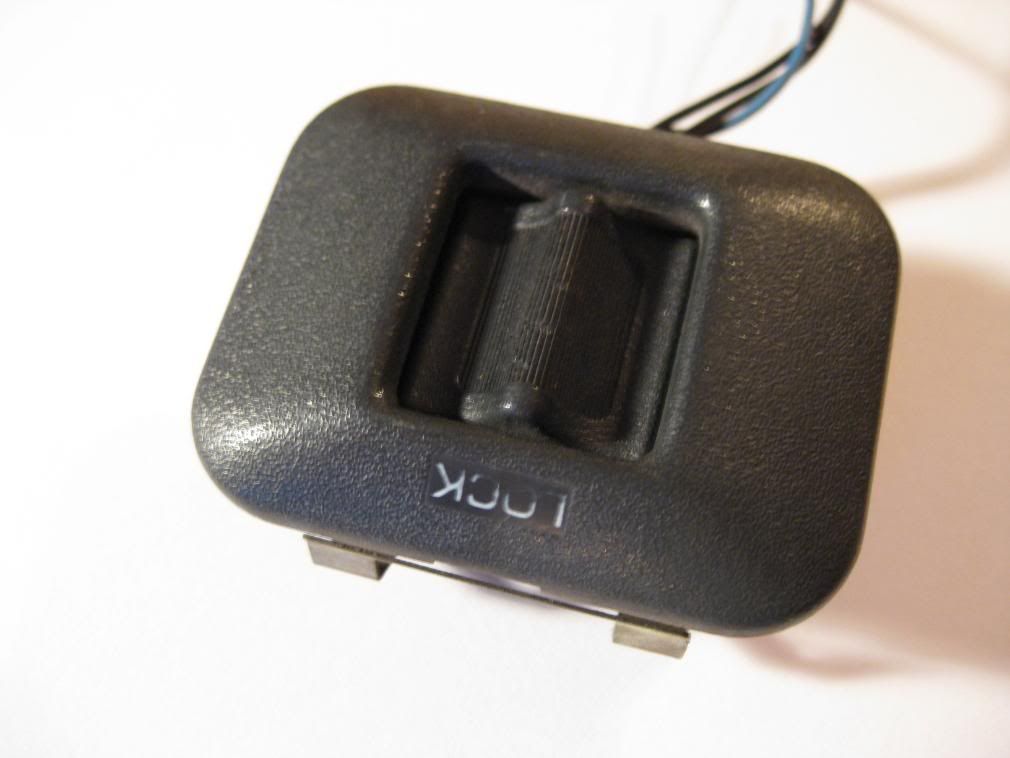
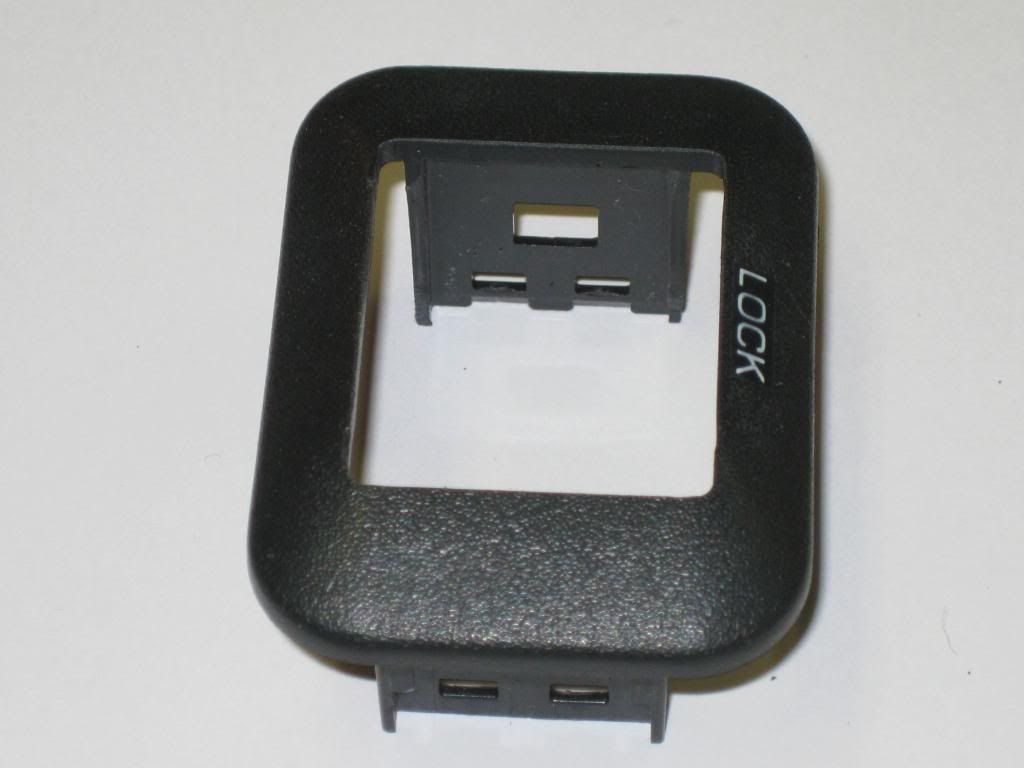
I successfully created a “test” bezel to ensure these would work. For the final product, I had a plastics shop professionally enlarge the opening to fit the new switches.

Image
Image
Image
Image

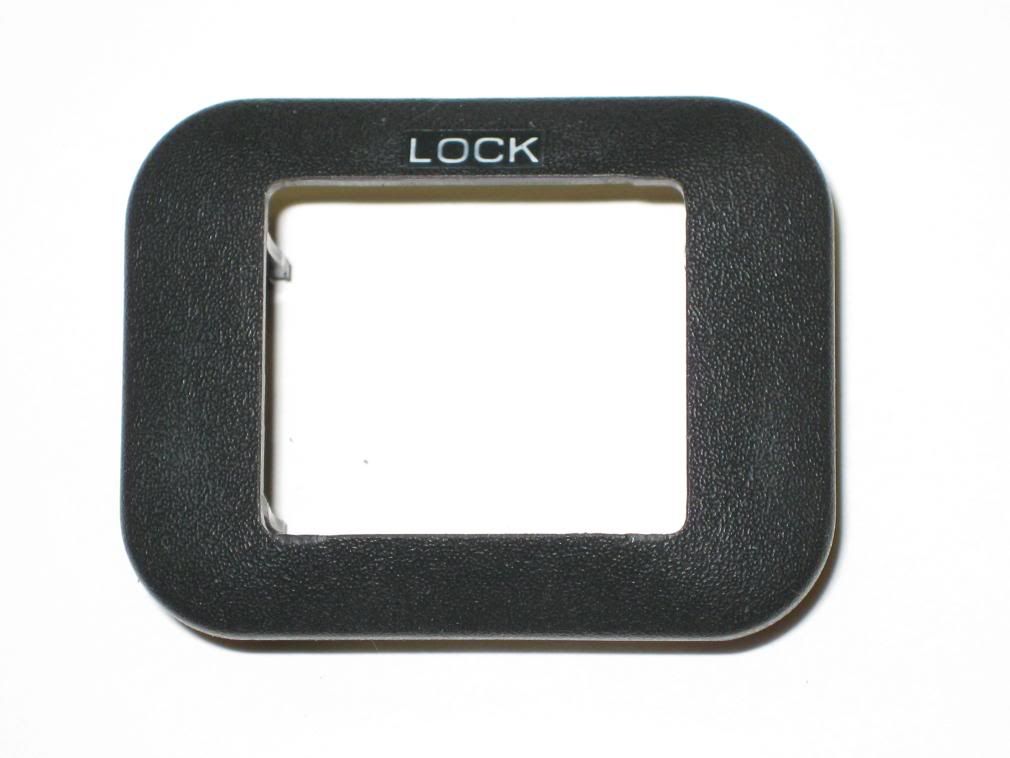
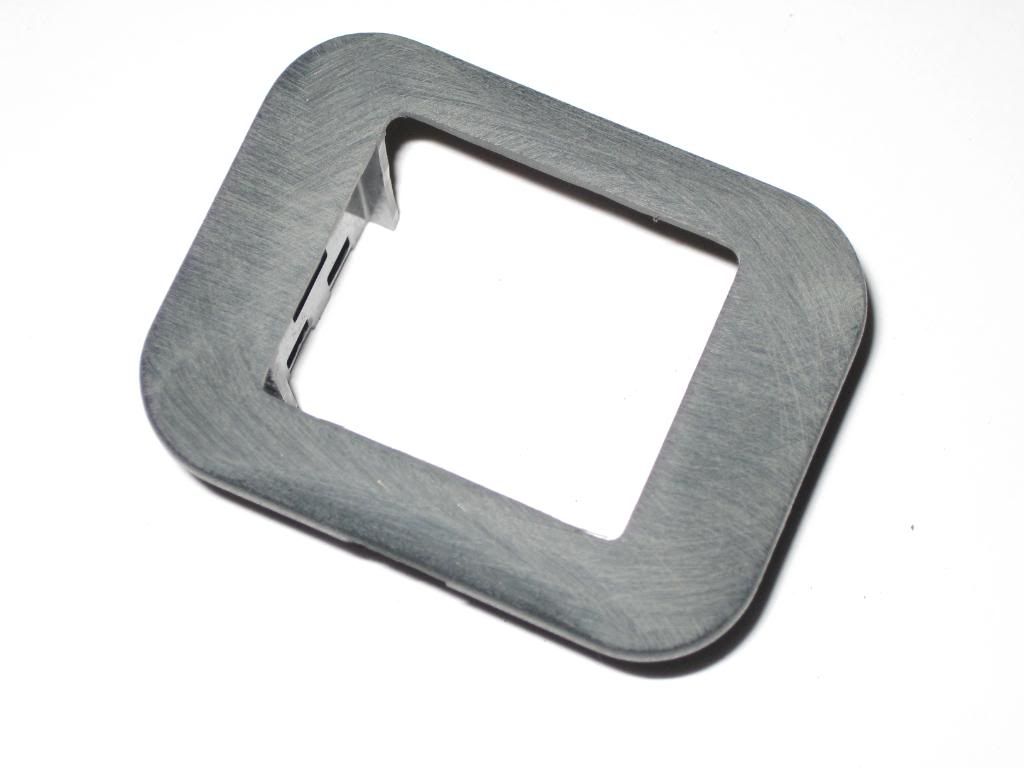
They still didn’t look great so I smoothed and reshaped them for a more “correct” appearance. I used a variety of sandpaper grits until the final step of wet sanding.

Image
Image
Image
Image

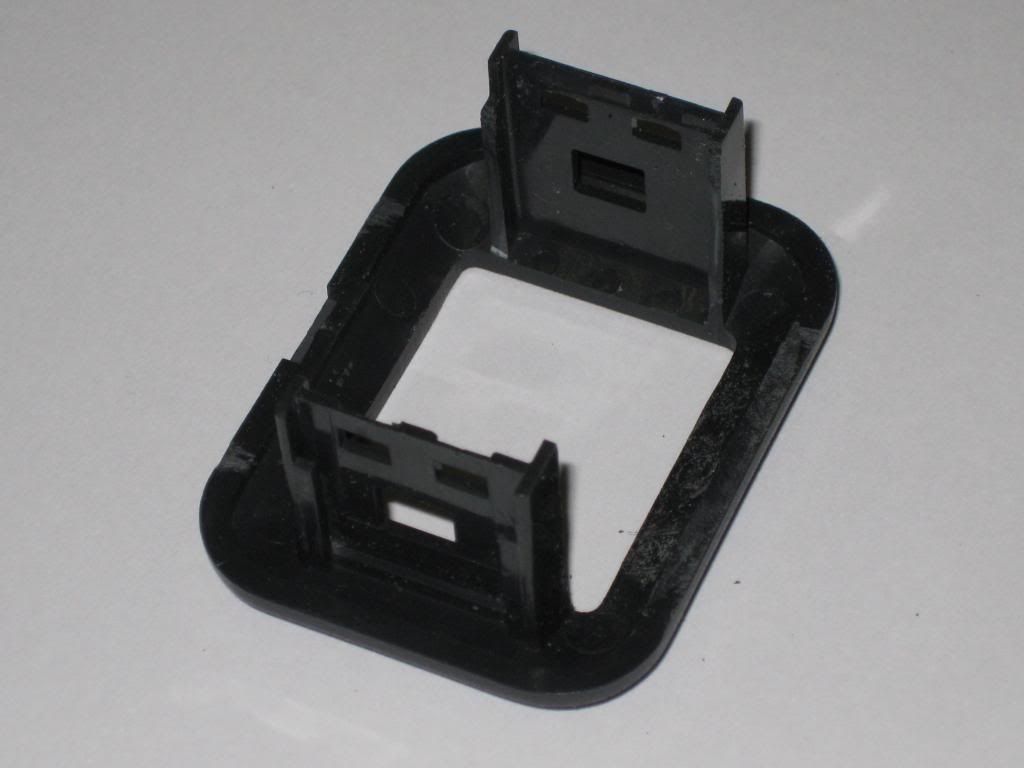
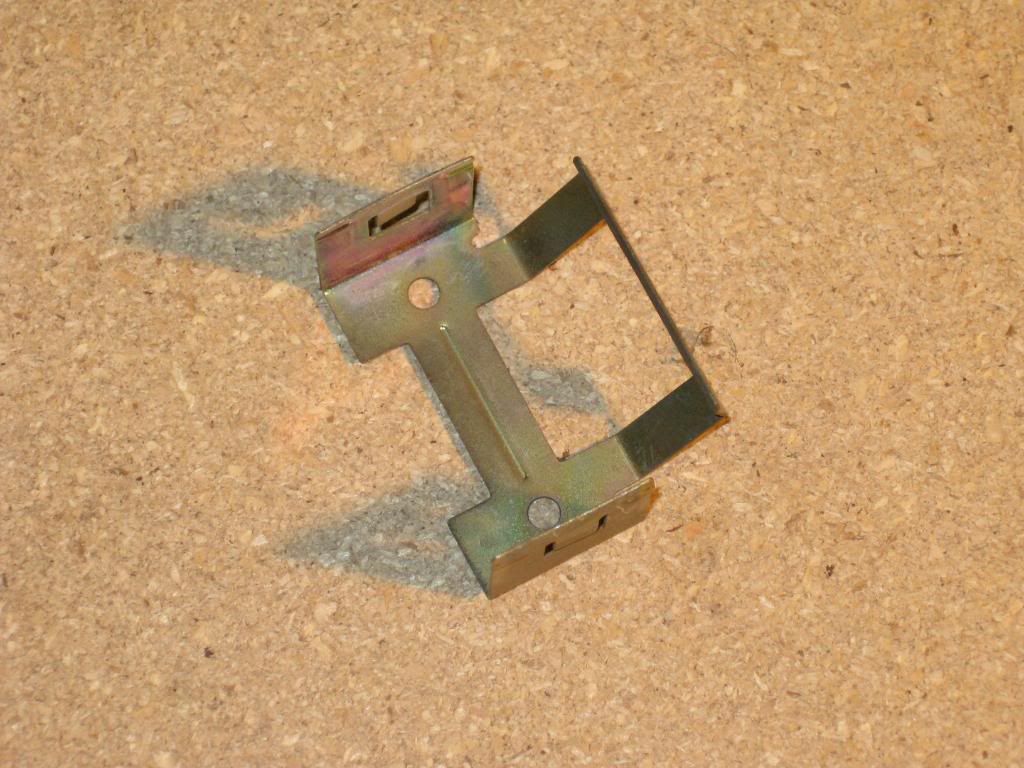
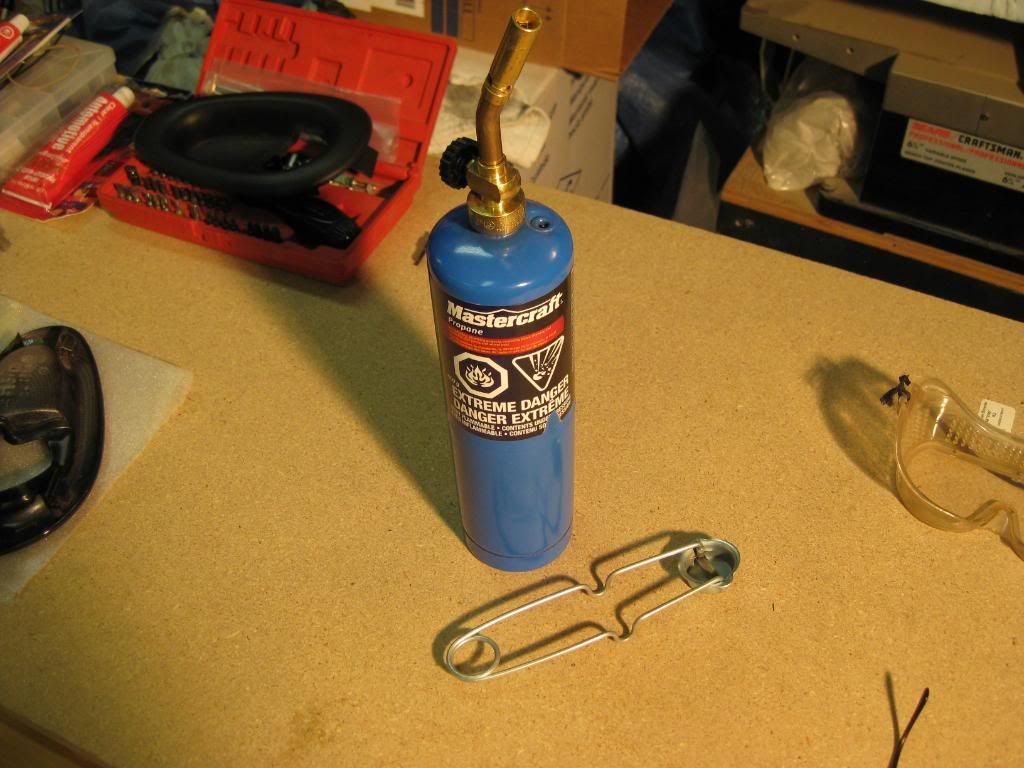
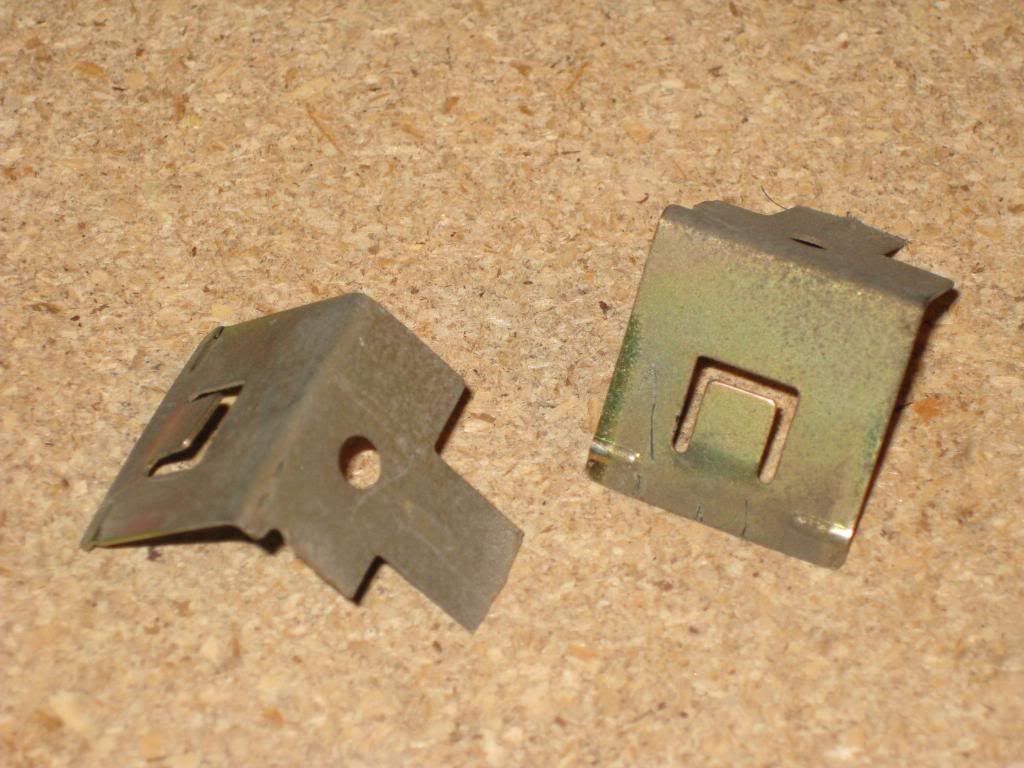
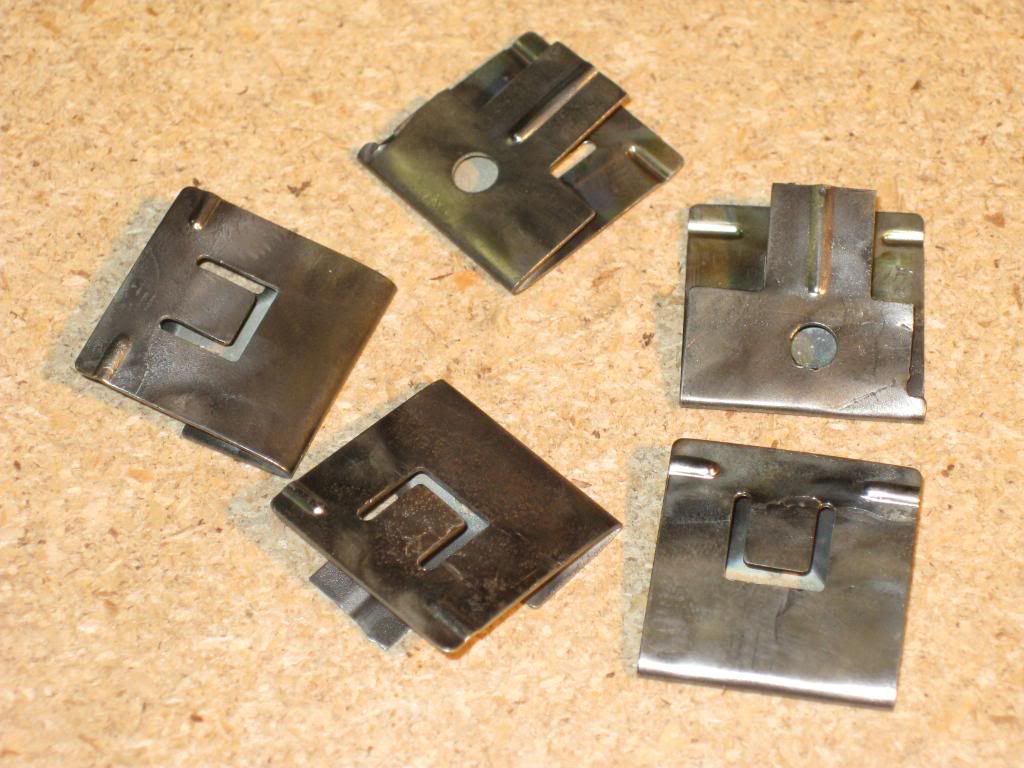
To make the retainers, I had to modify the existing spring steel clips. I had to heat them to make the sharp bend without breaking. A torch and Dremel were invaluable.

Image
Image
Image
Image
Image

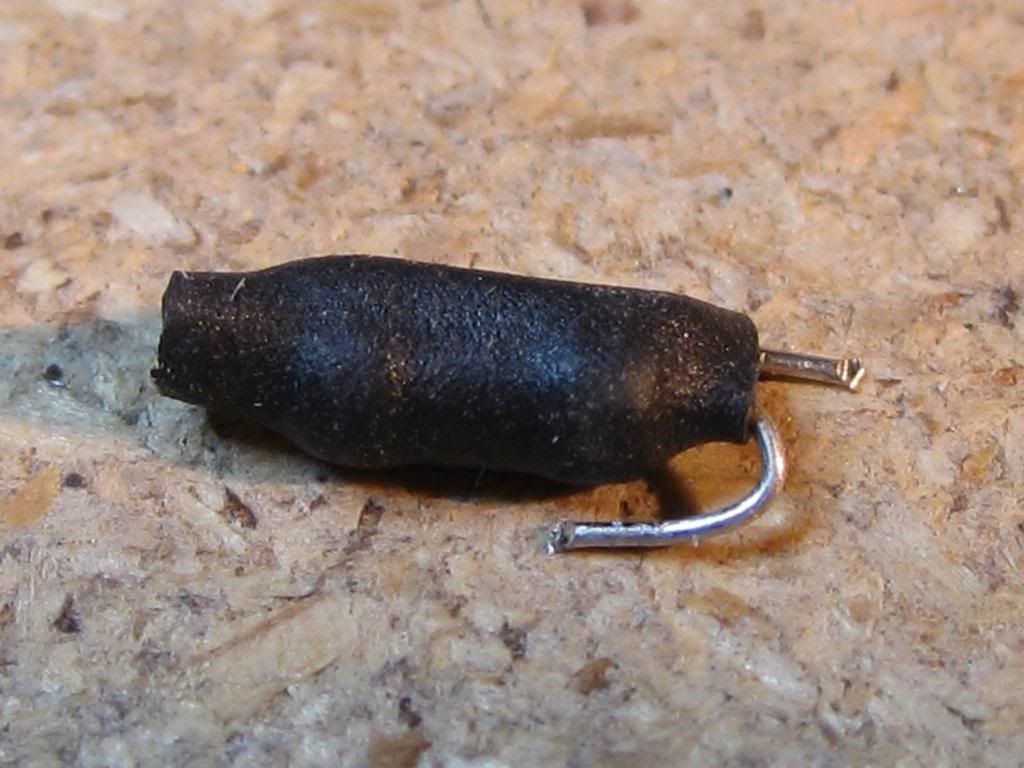
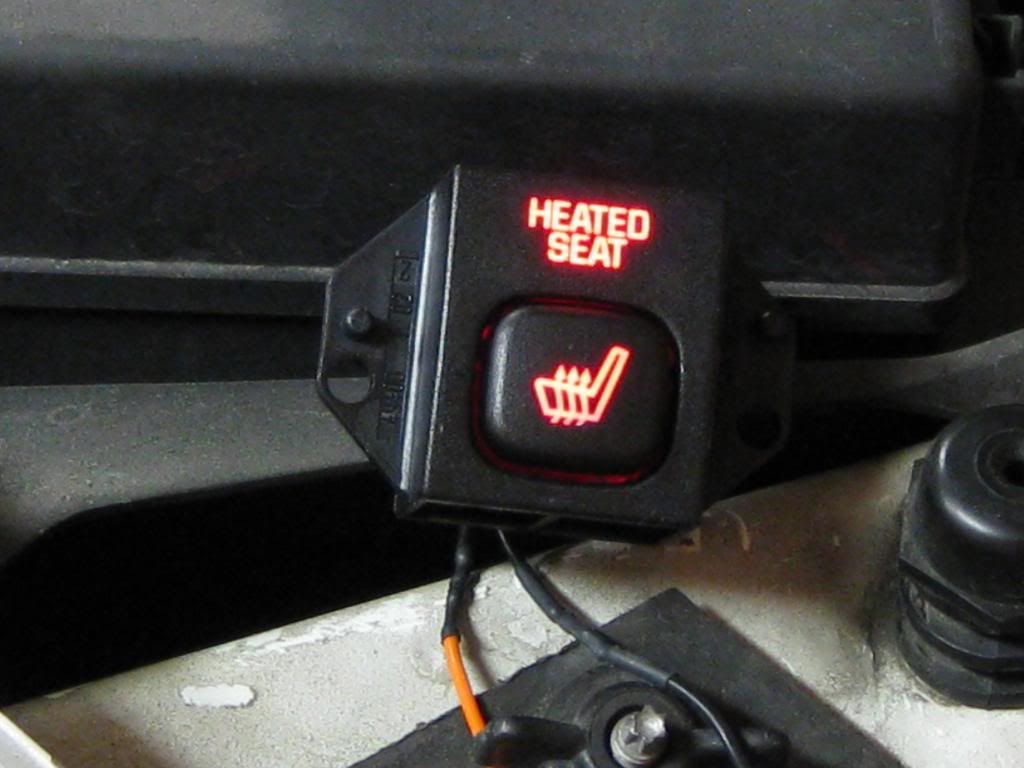
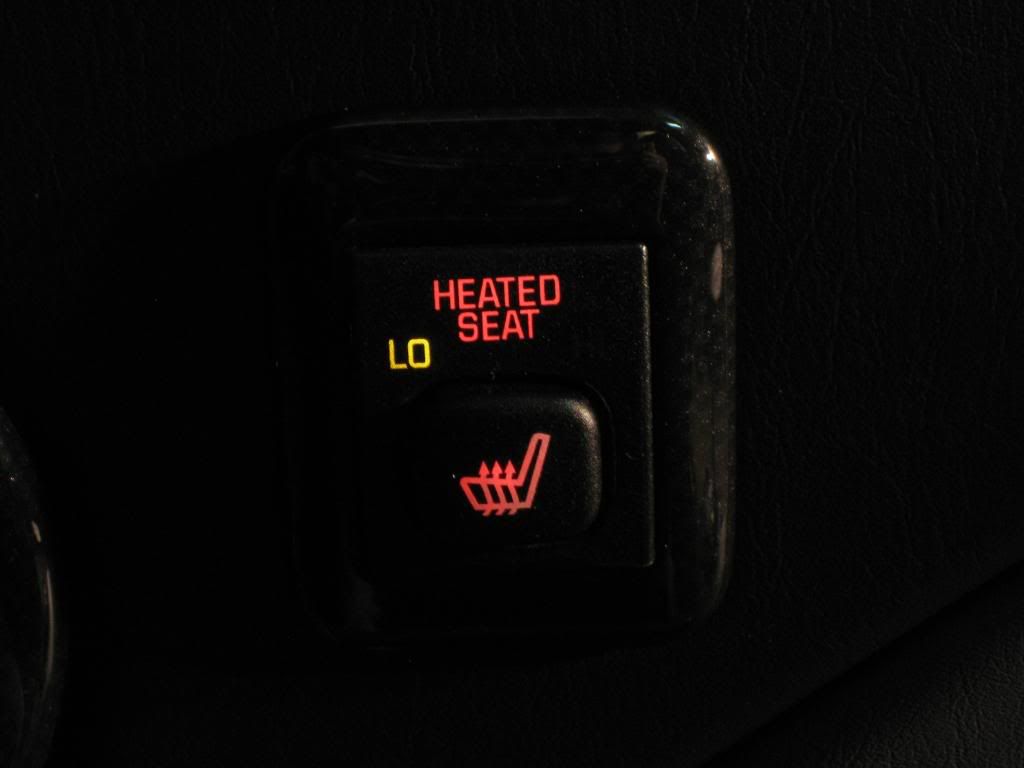
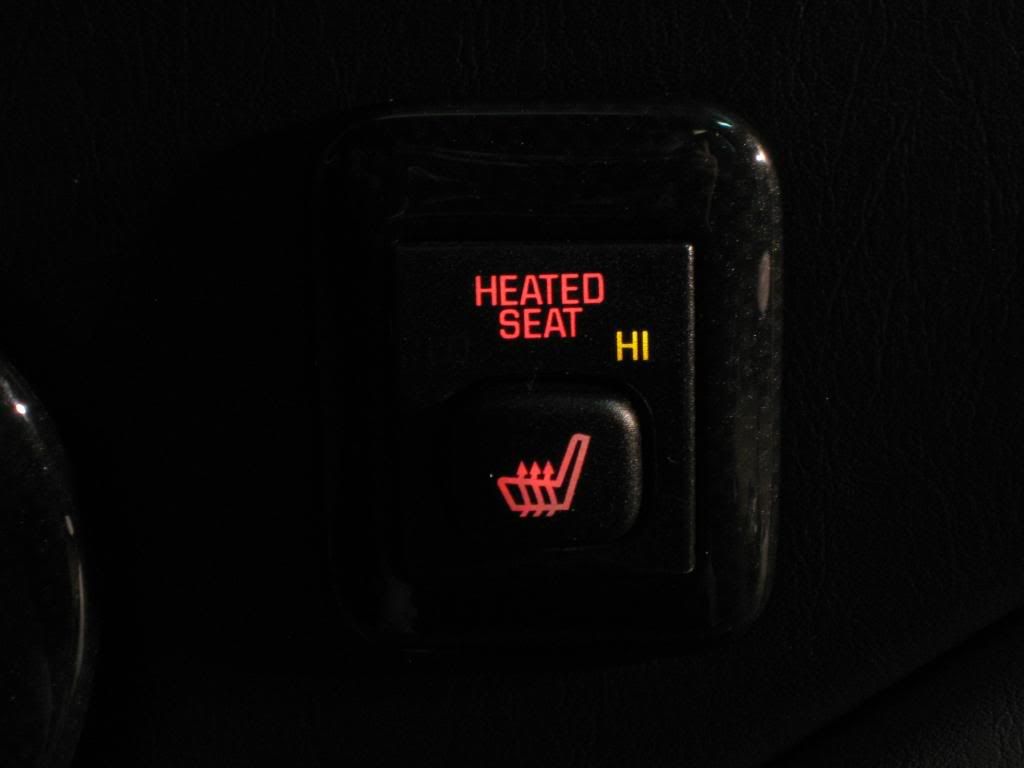
Now with a switch and bezel, there is the issue of backlighting. The Park Avenue lights up green, not a good match for the Bonneville. The backlighting is poorly designed and doesn’t lend well to a crisp appearance. It’s not very bright and in my opinion, completely unsatisfactory.

Image

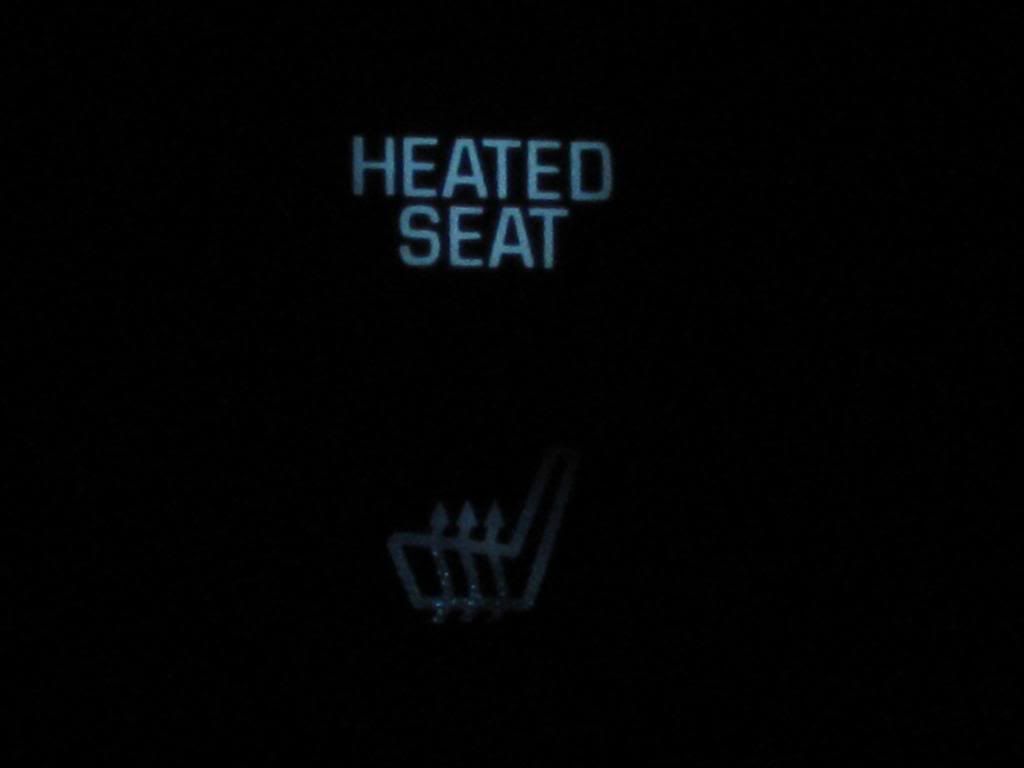
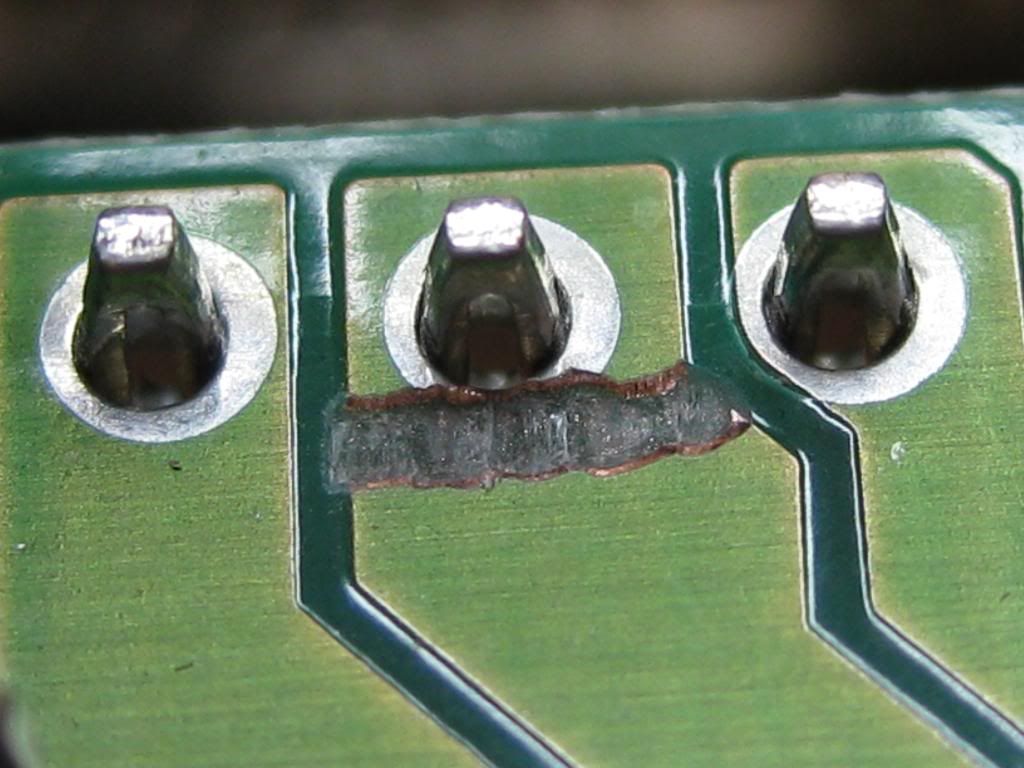
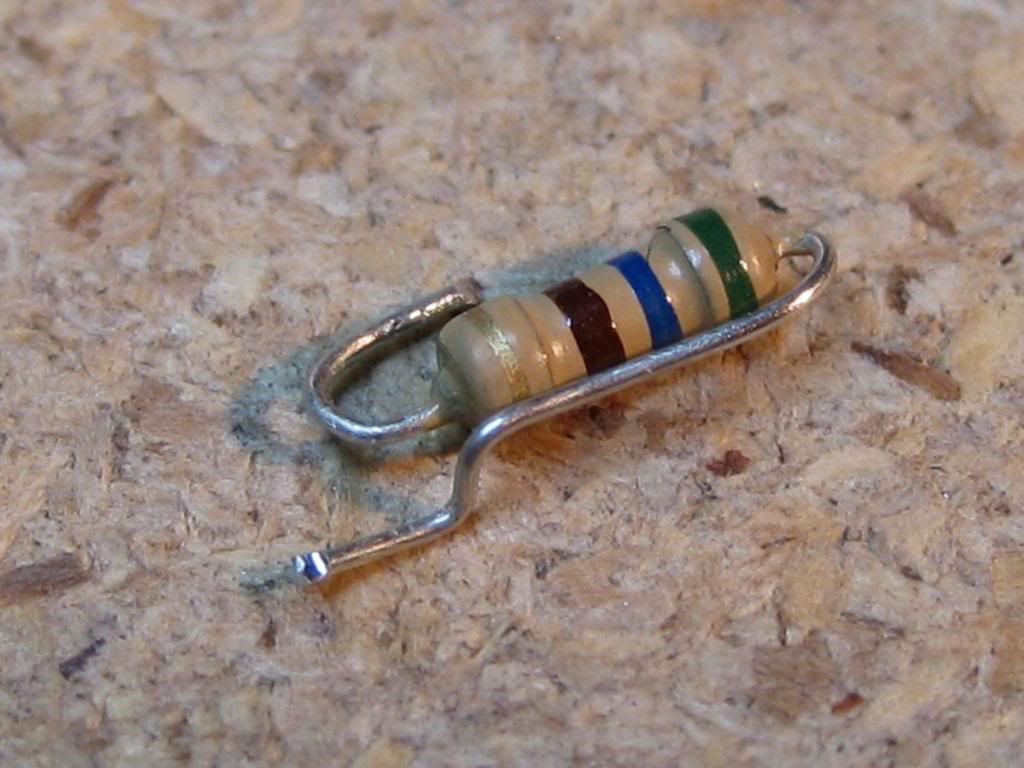
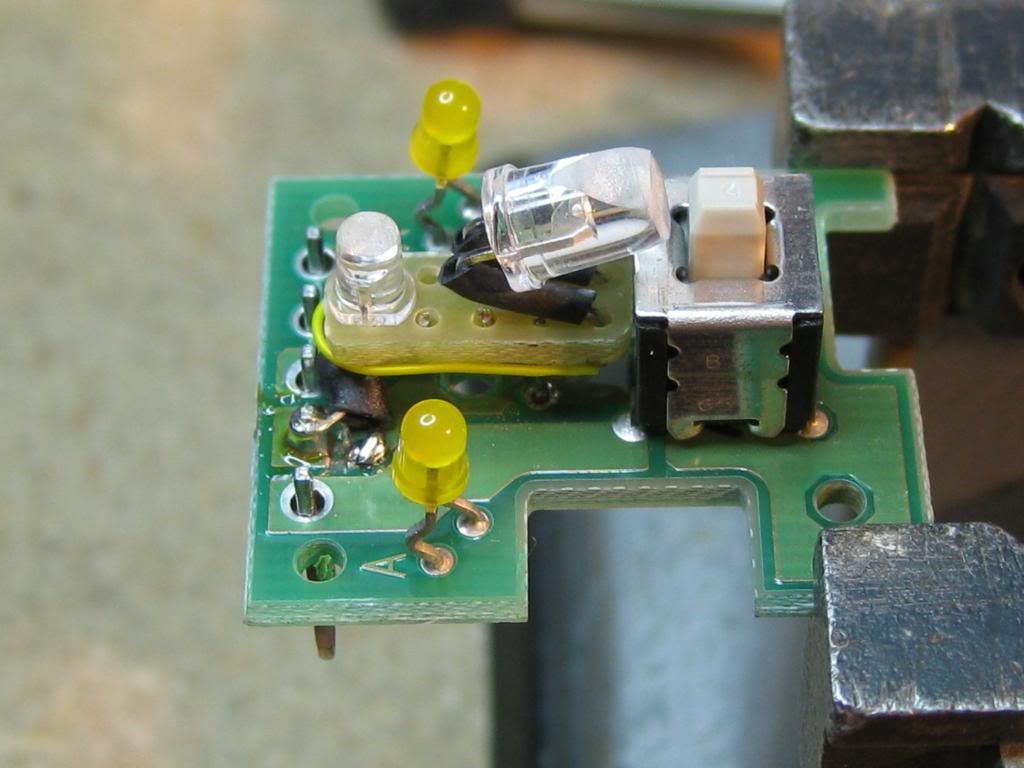
Here’s the inside of the switch. I removed the incandescent bulb and replaced it with a custom sub-assembly using LED’s. I had to add a current limiting resistor in-line with this. I cut a trace on the printed circuit board to facilitate the resistor. I pre-shaped the leads and insulated it before installation. I exposed a small amount of copper from the printed circuit board trace to connect one lead of the resistor. The other lead was soldered right at the connector pin.

Image
Image
Image
Image
Image
Image
Image

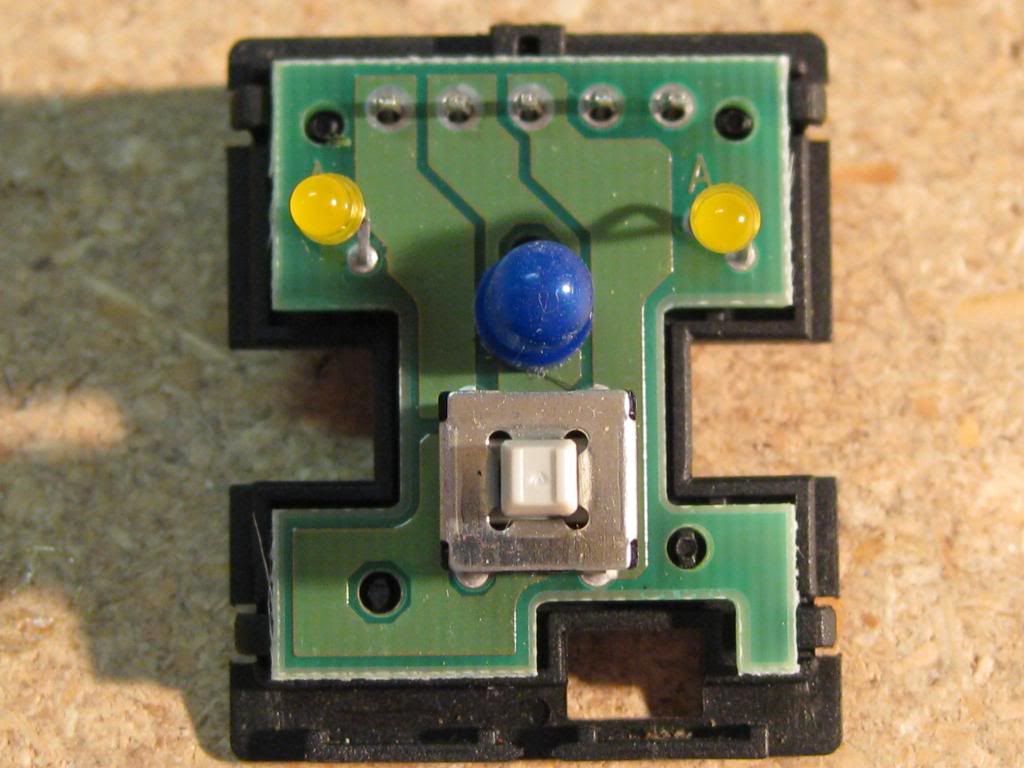
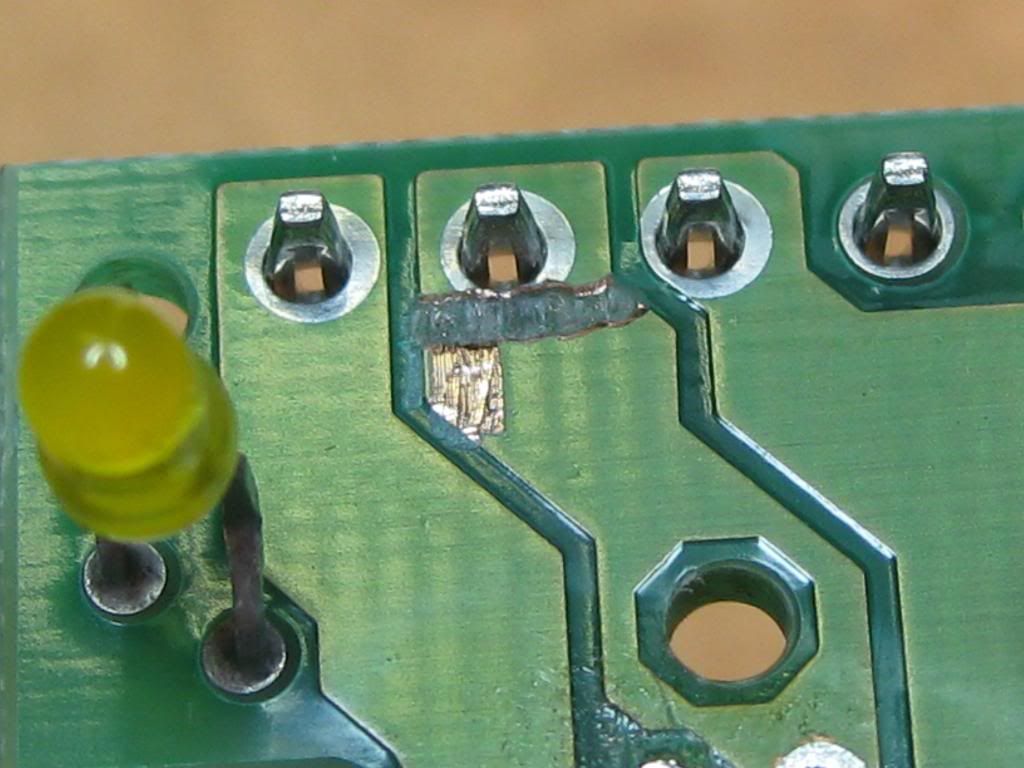
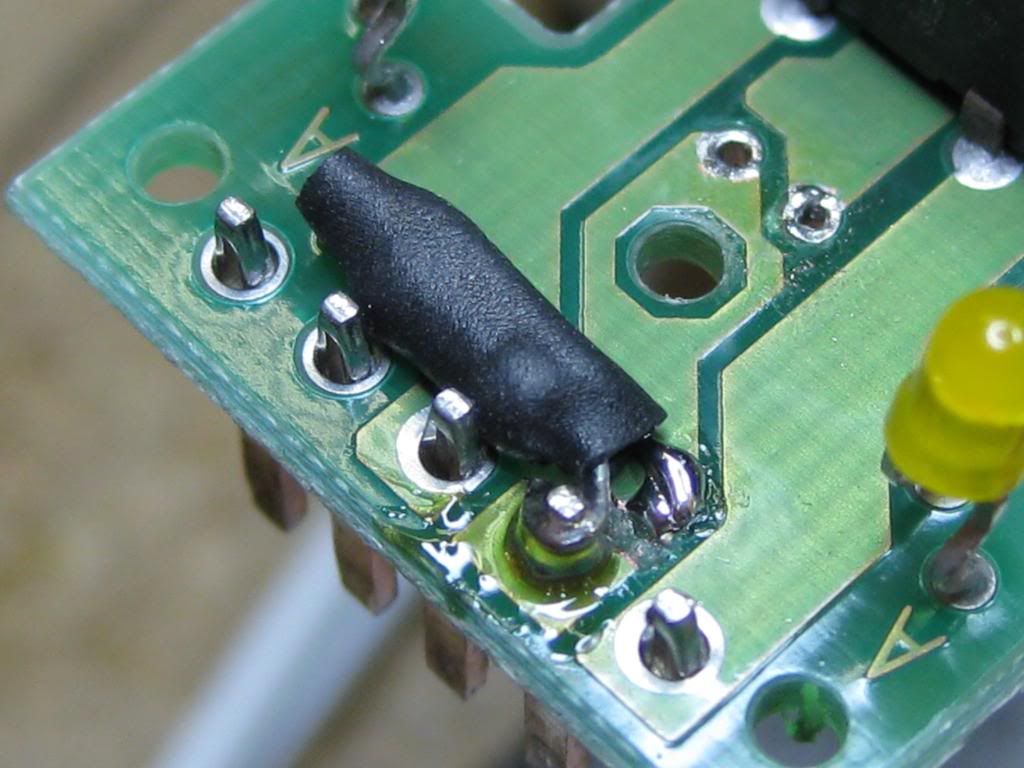
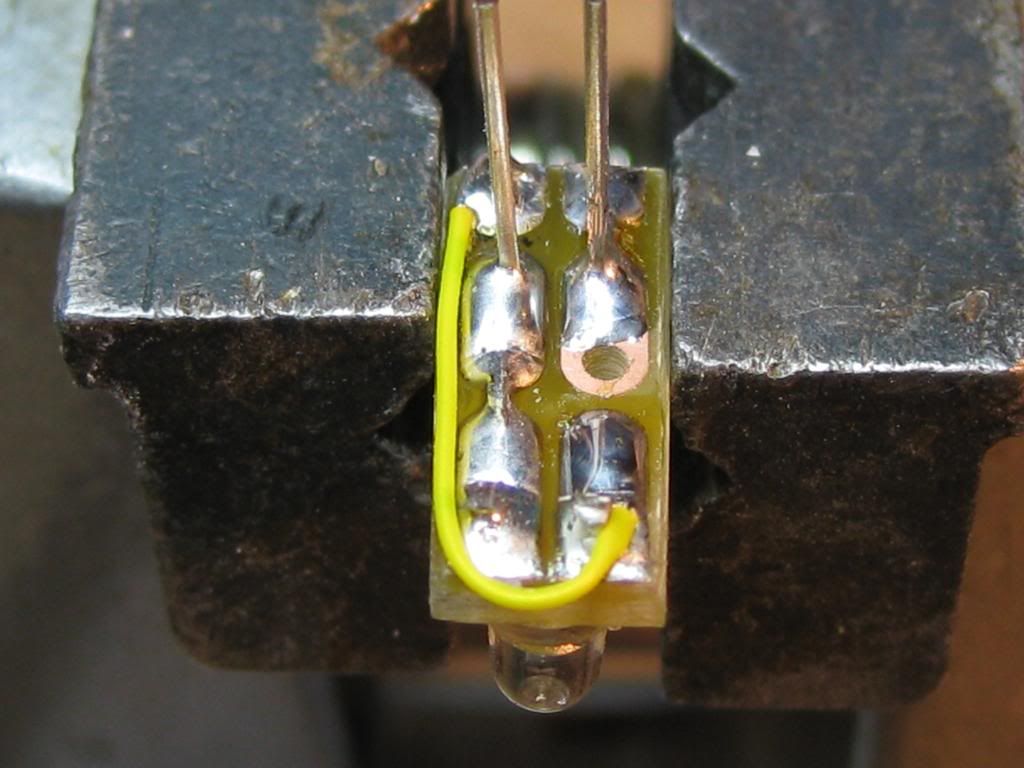
I used one LED to illuminate the “HEATED SEAT” text and another for the symbol. Many LED’s have a narrow beam angle so I reshaped the lenses for a wider, more even spread of light. You’ll see in the picture of the LED sub-assembly, the larger and brighter LED is aimed just above the top of the mechanical switch and not towards the front of the switch housing. I used the clear plastic post that is part of the pushbutton as a “light pipe”. It carries much of the light from the LED to the face of the pushbutton. This scheme has been used in automotive backlighting for years. Some reshaping deflects light forward, but also ensures everything will fit in the housing.

Image
Image
Image
Image
Image
Image
Image

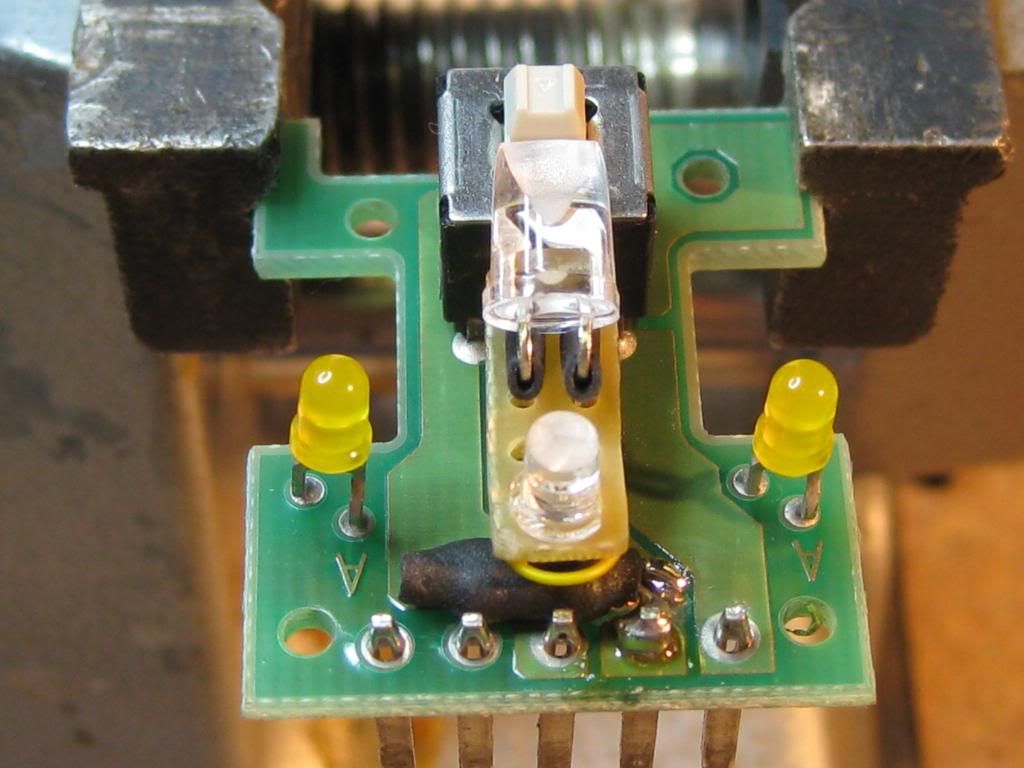
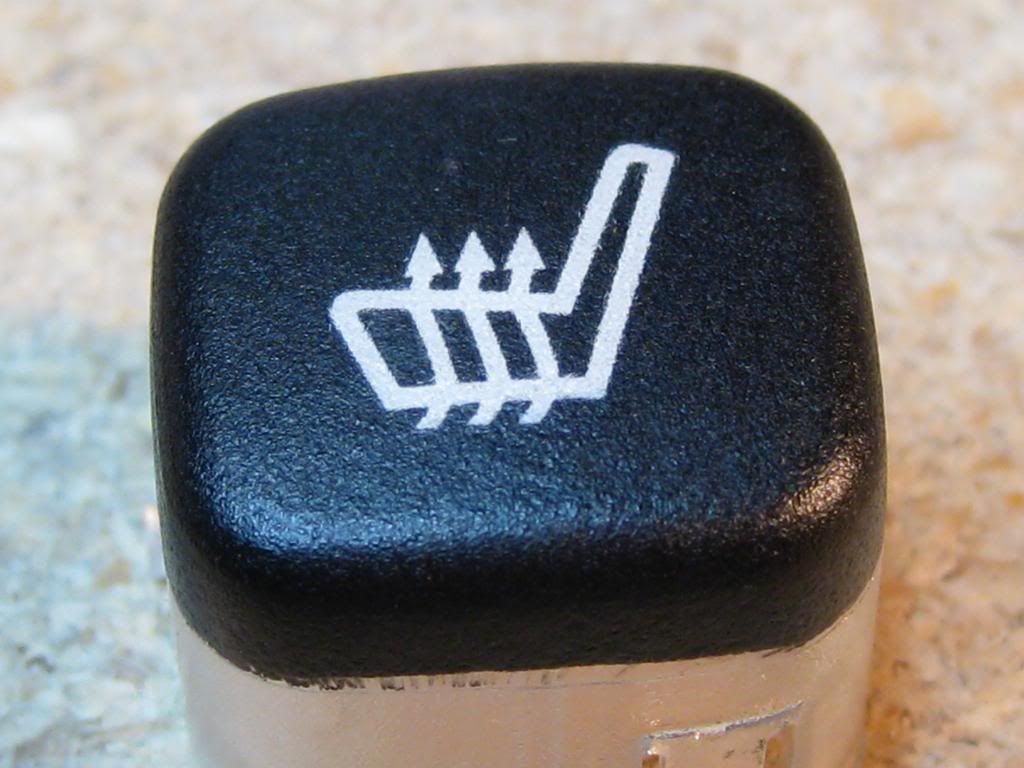
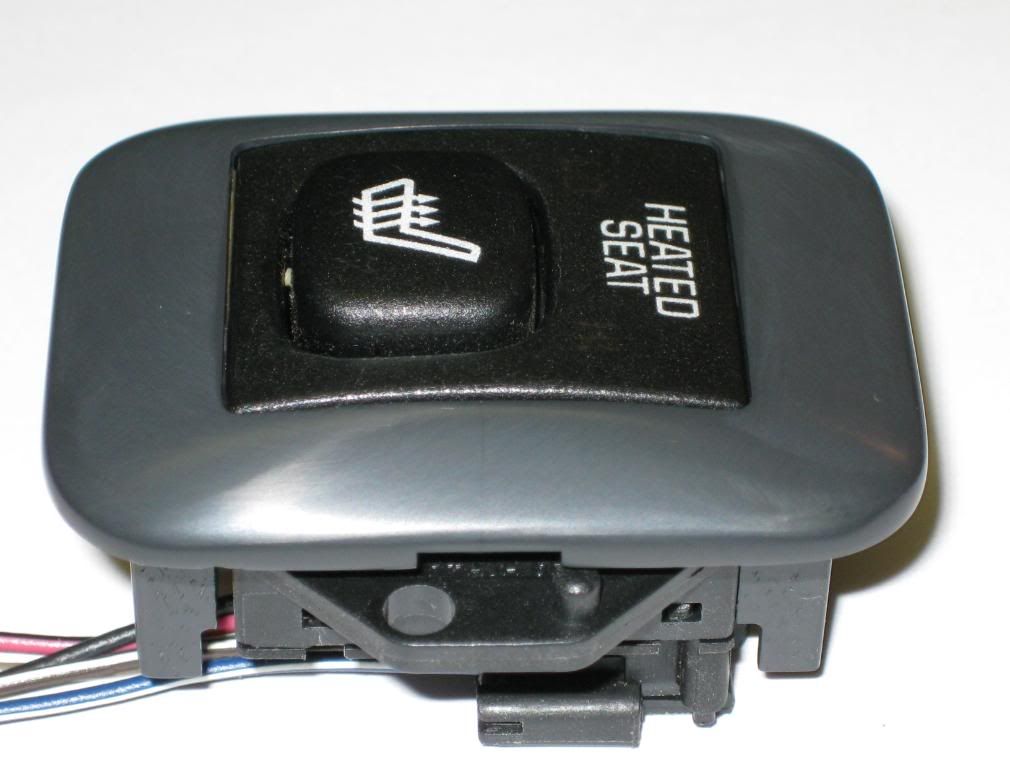
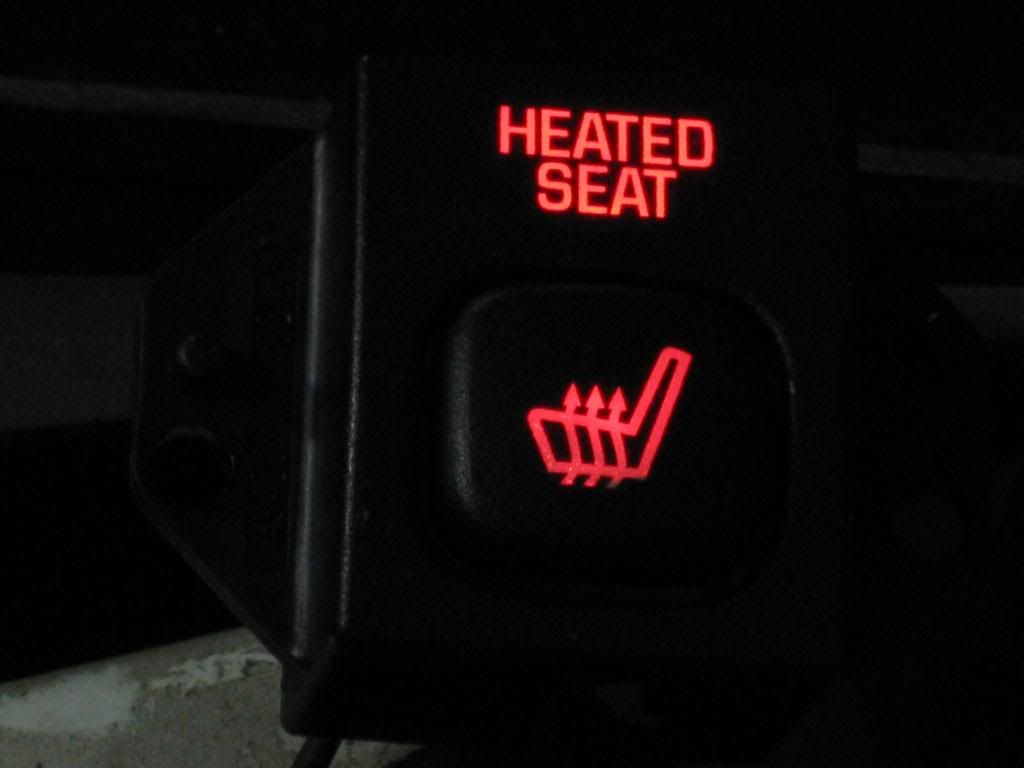
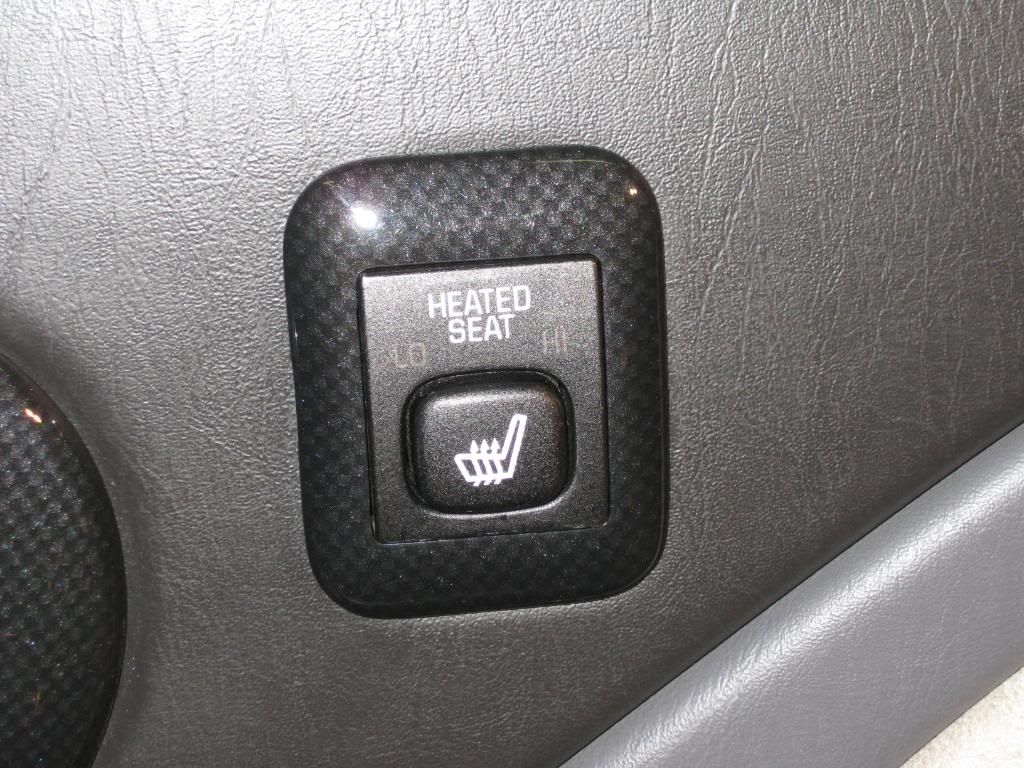
And the finished switch...

Image
Image

After the switches and bezels, the rest seems straight forward...

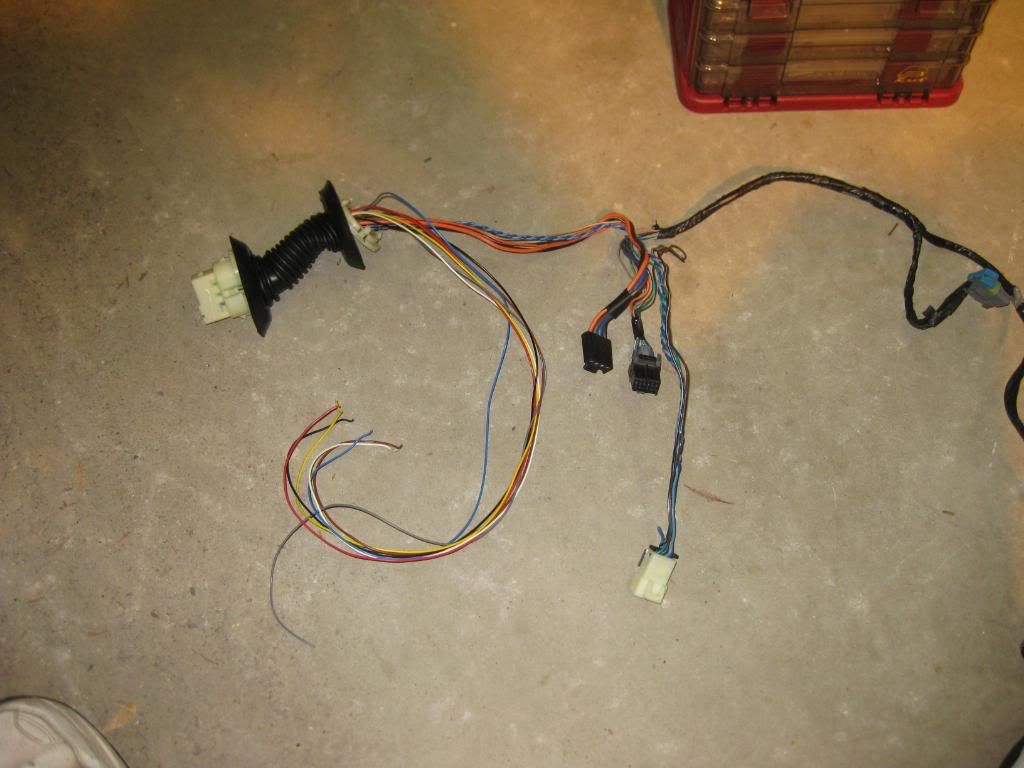
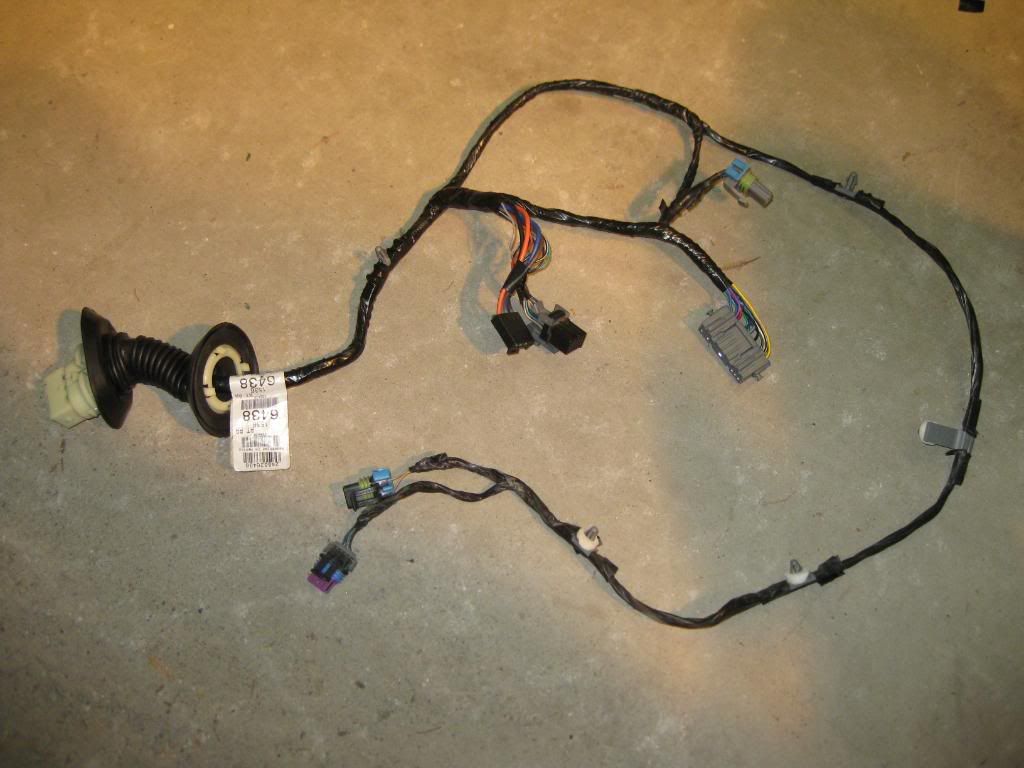
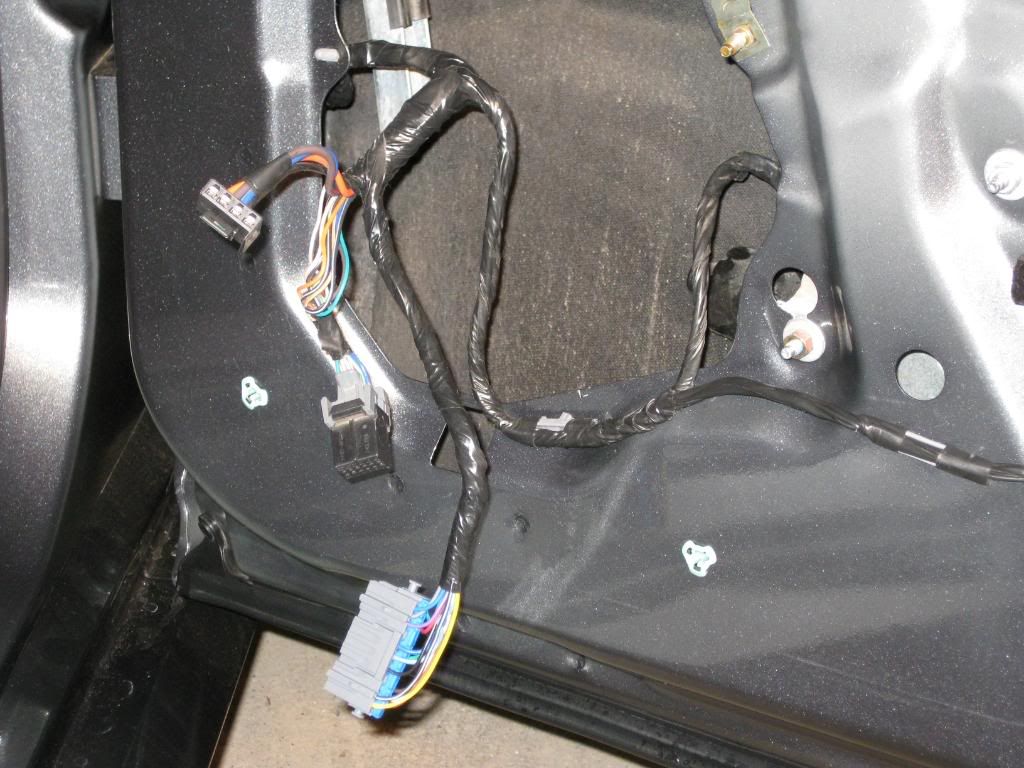
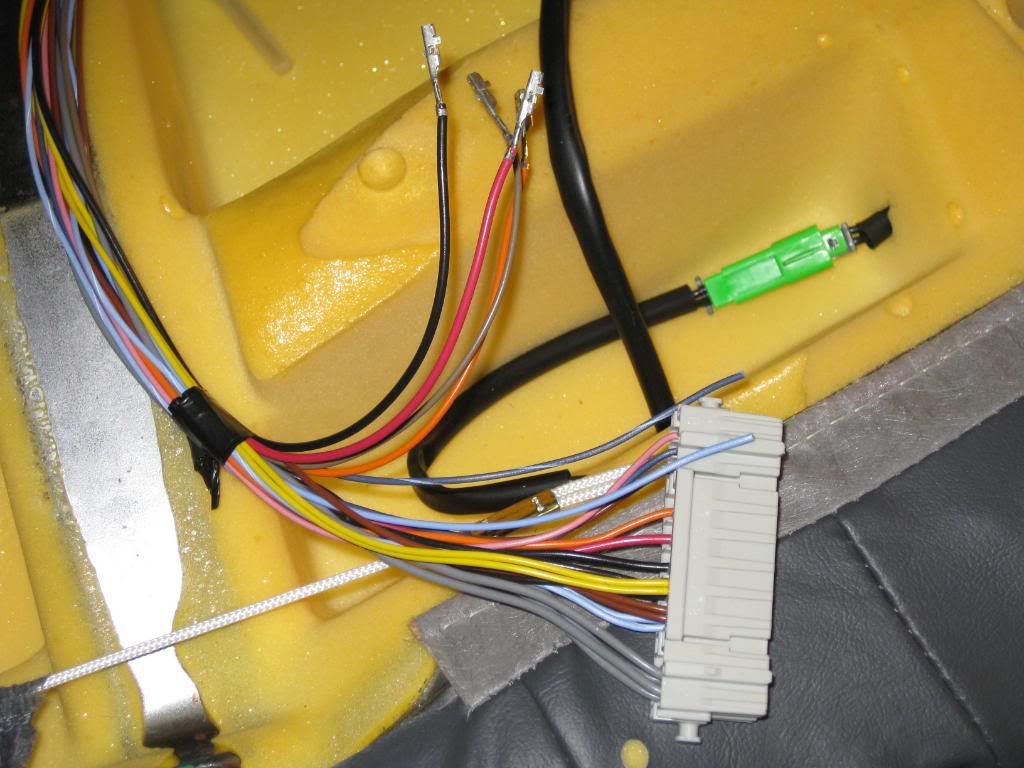
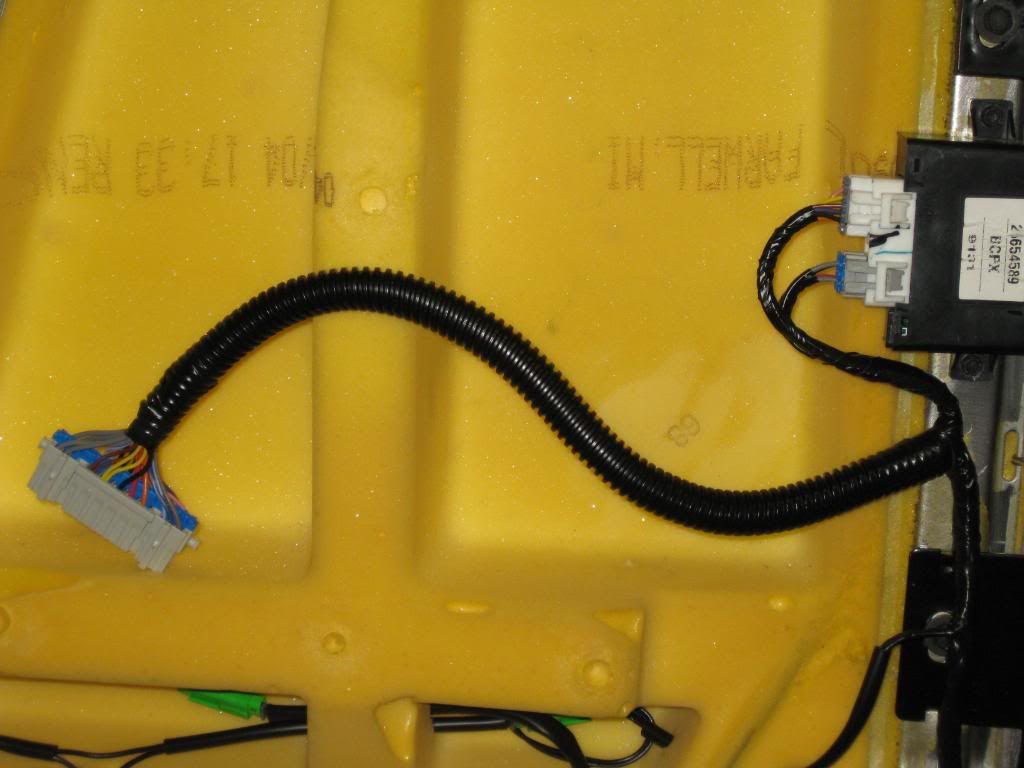
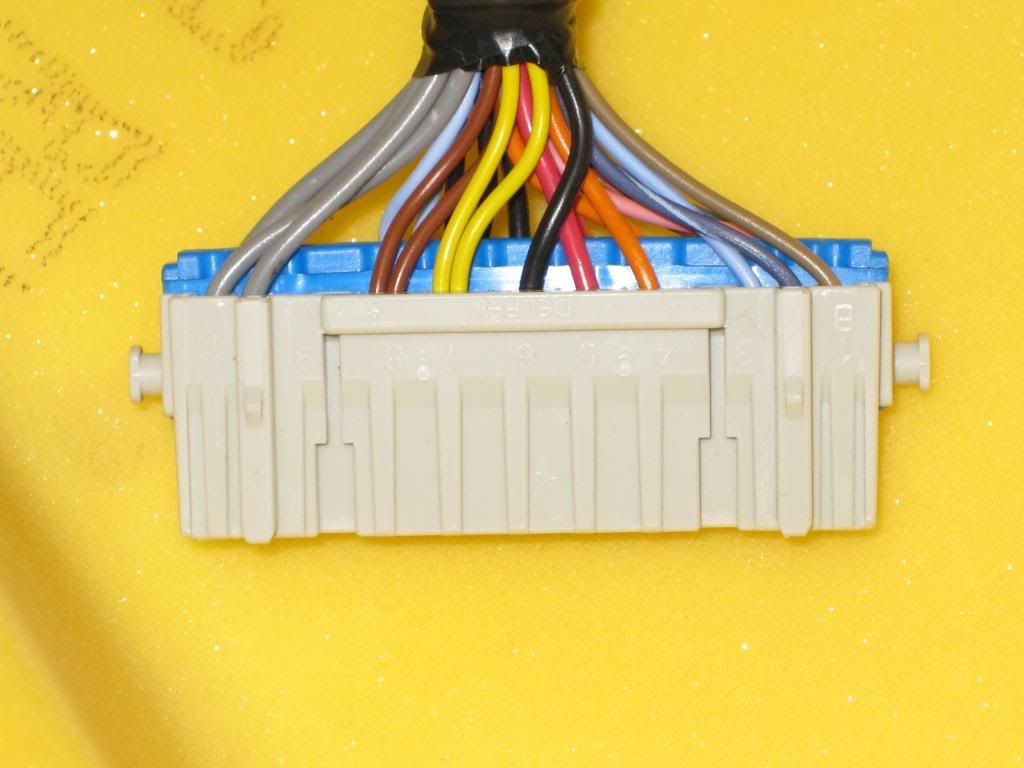
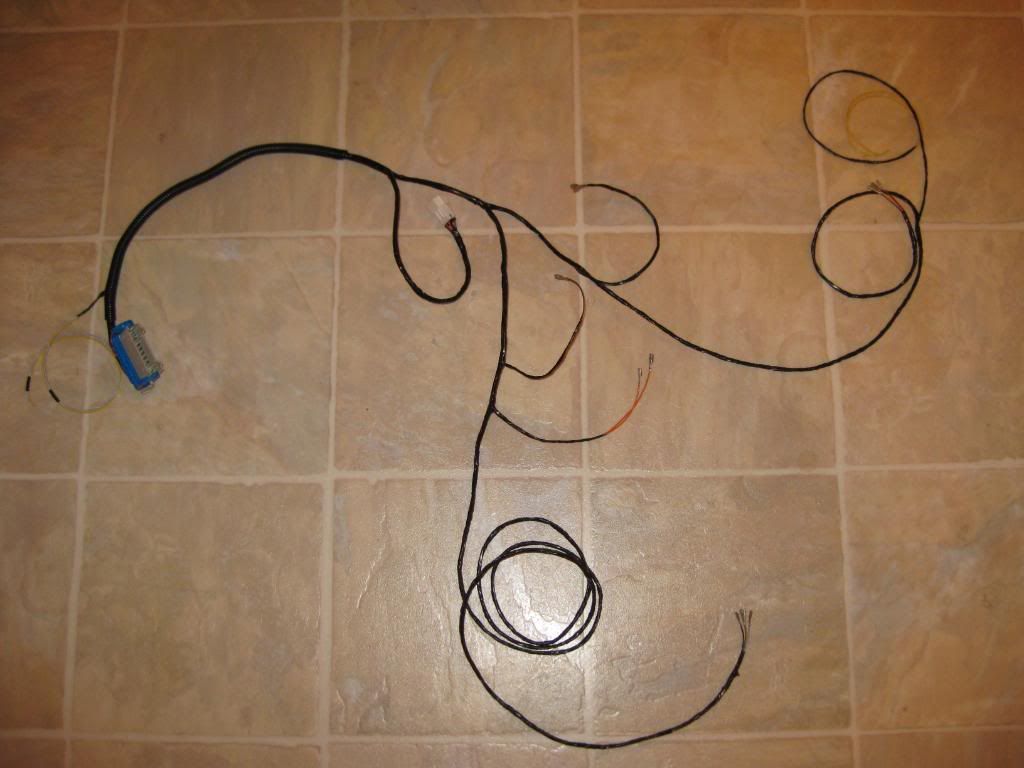
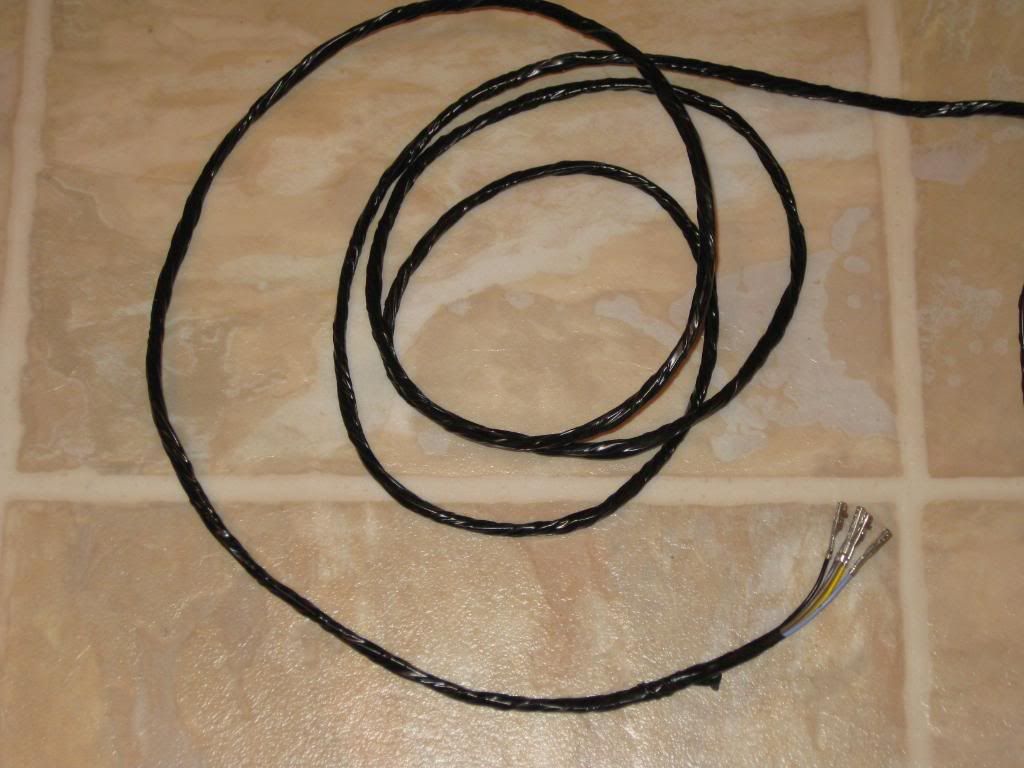
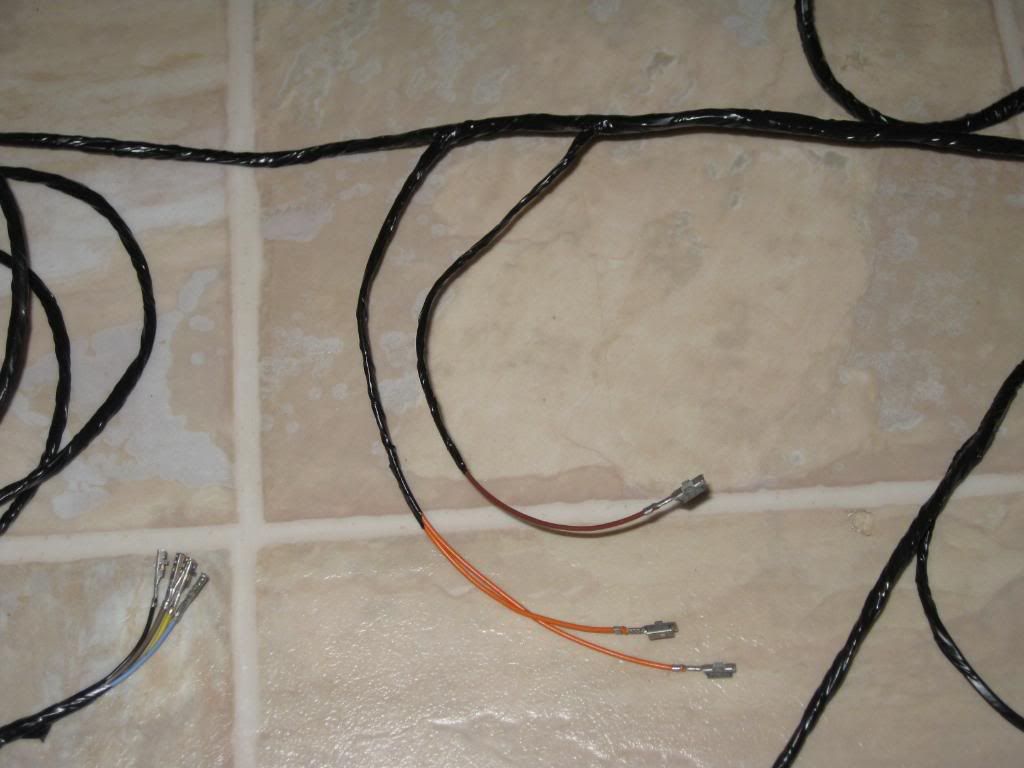
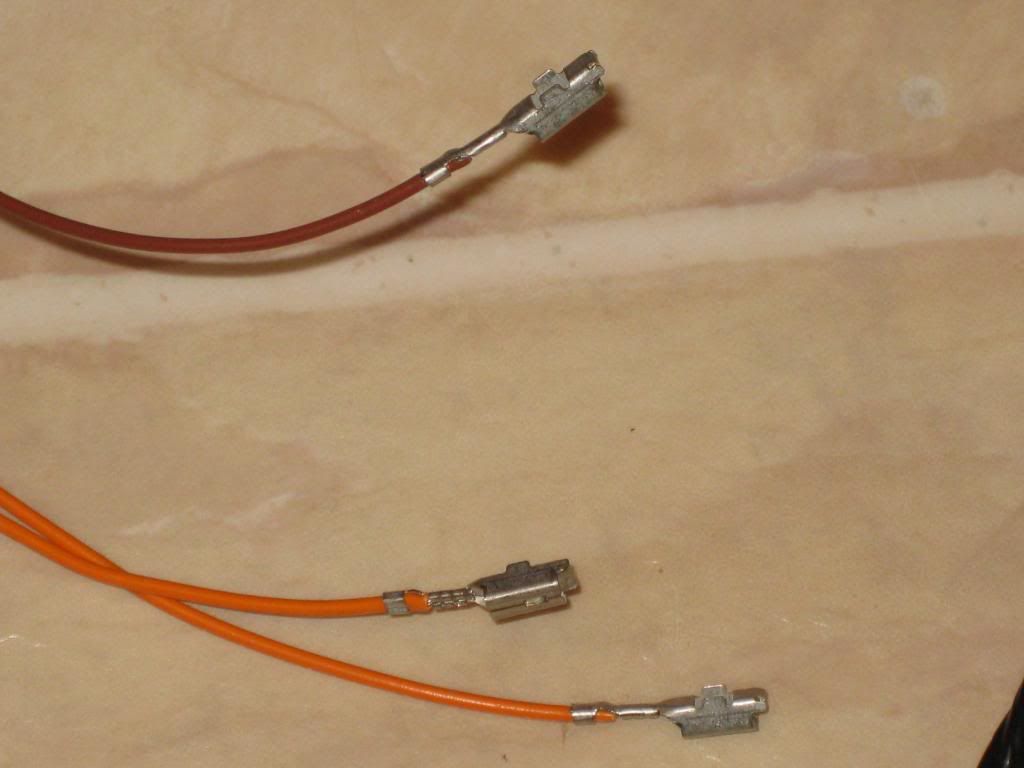
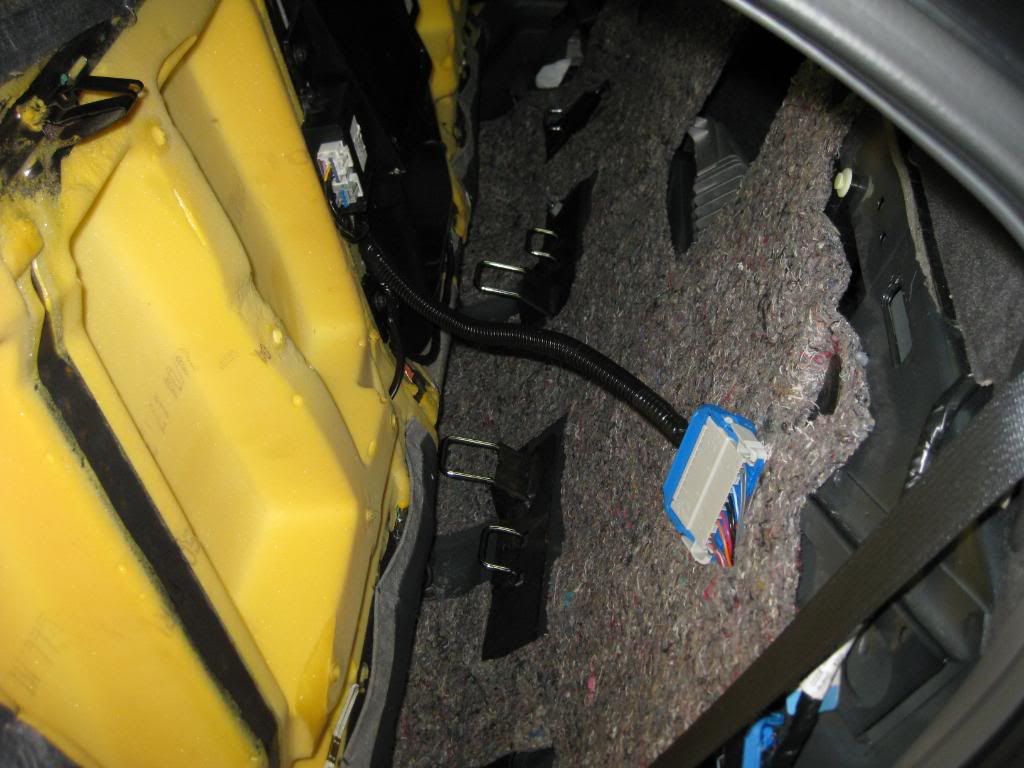
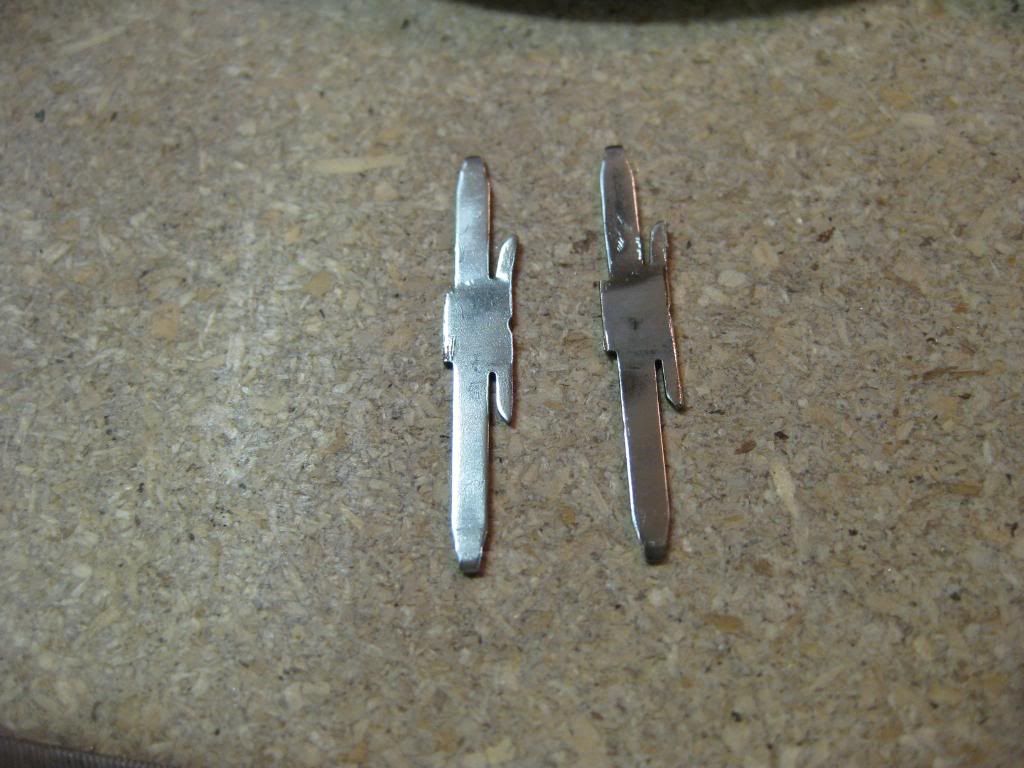
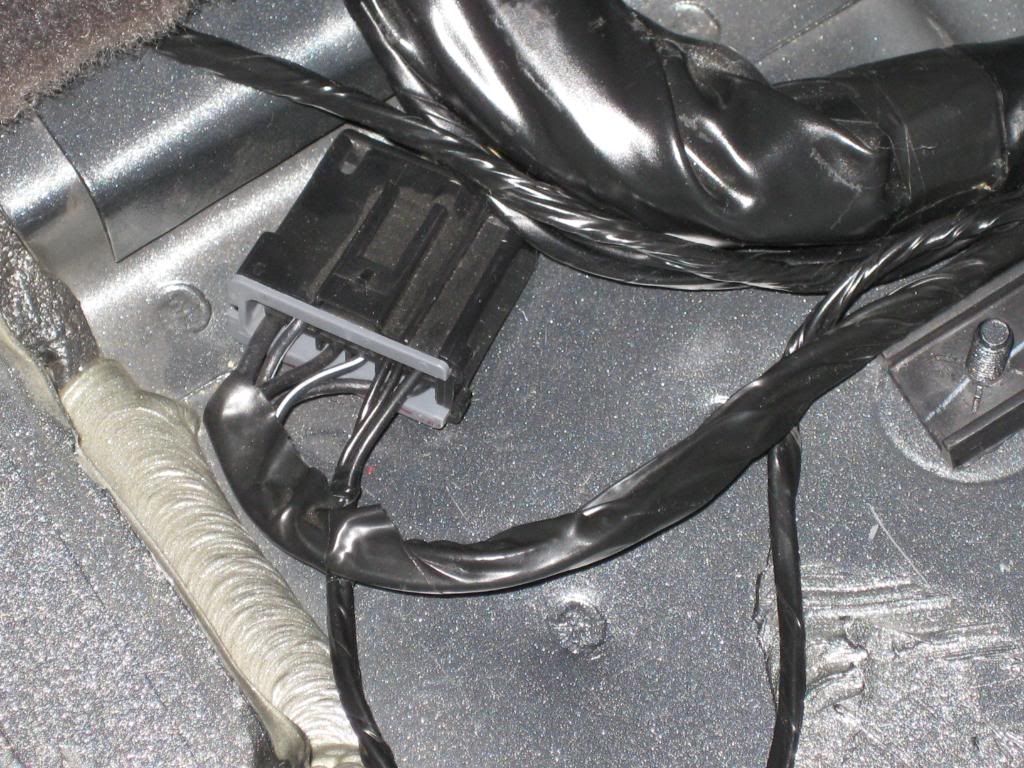
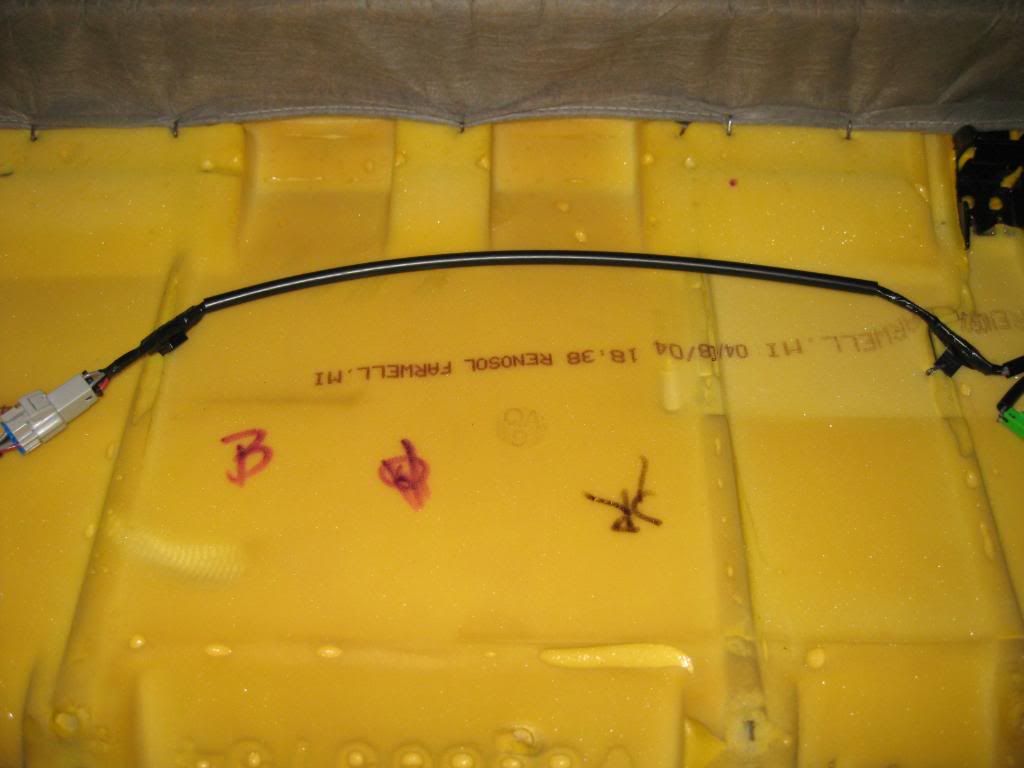
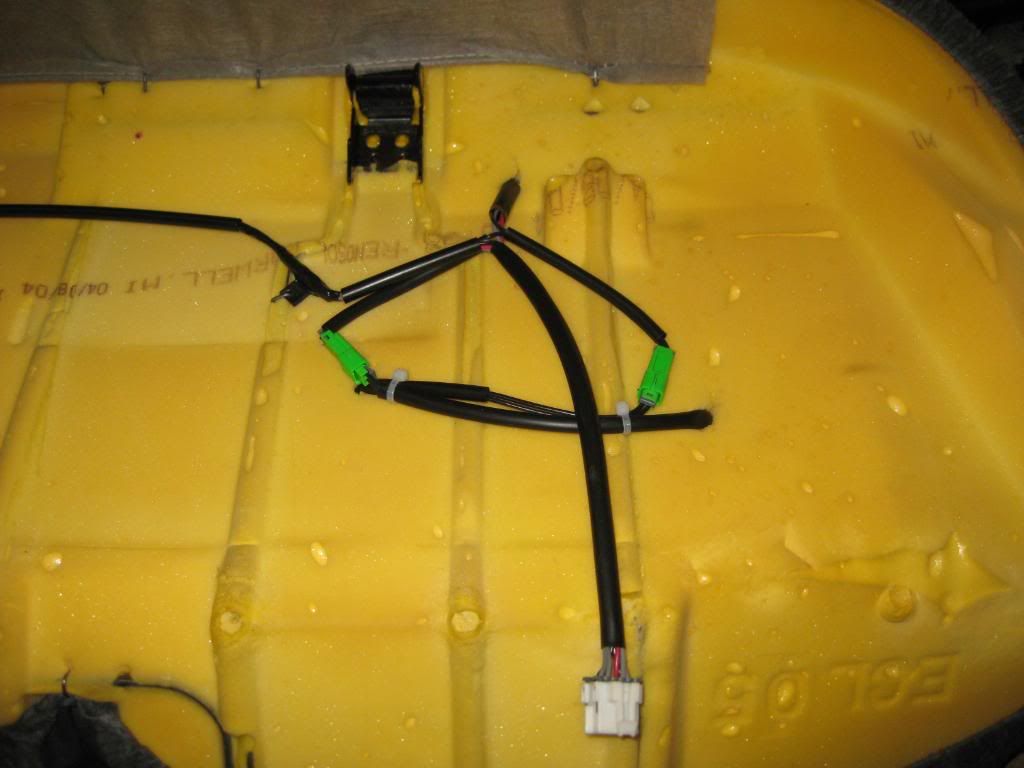
In the spirit of “OEM”inism, I created wiring consistent with what GM would have done. I added wiring to existing sections of harness (doors and door panel harnesses) or built new, custom sub-harnesses. I used all new wire and OEM terminals. There are no splices and all terminals clip into factory connectors. Here you’ll see what I did with the door wiring. The trim panels only have a 10 cavity connector. After the adding courtesy lights, I didn’t have enough capacity for the five switch conductors. I changed these to 18 cavity Lever Lock connectors like those used on the front door panels. Of course I used actual wire harness tape throughout.

Image
Image
Image
Image
Image
Image
Image
Image
Image
Image

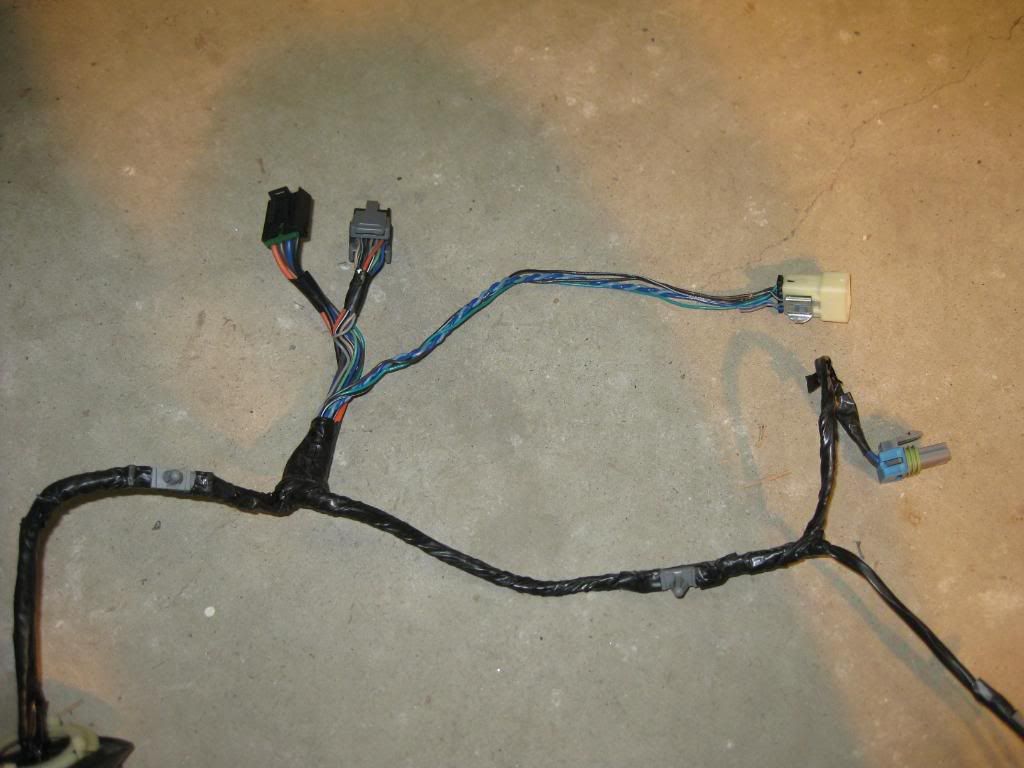
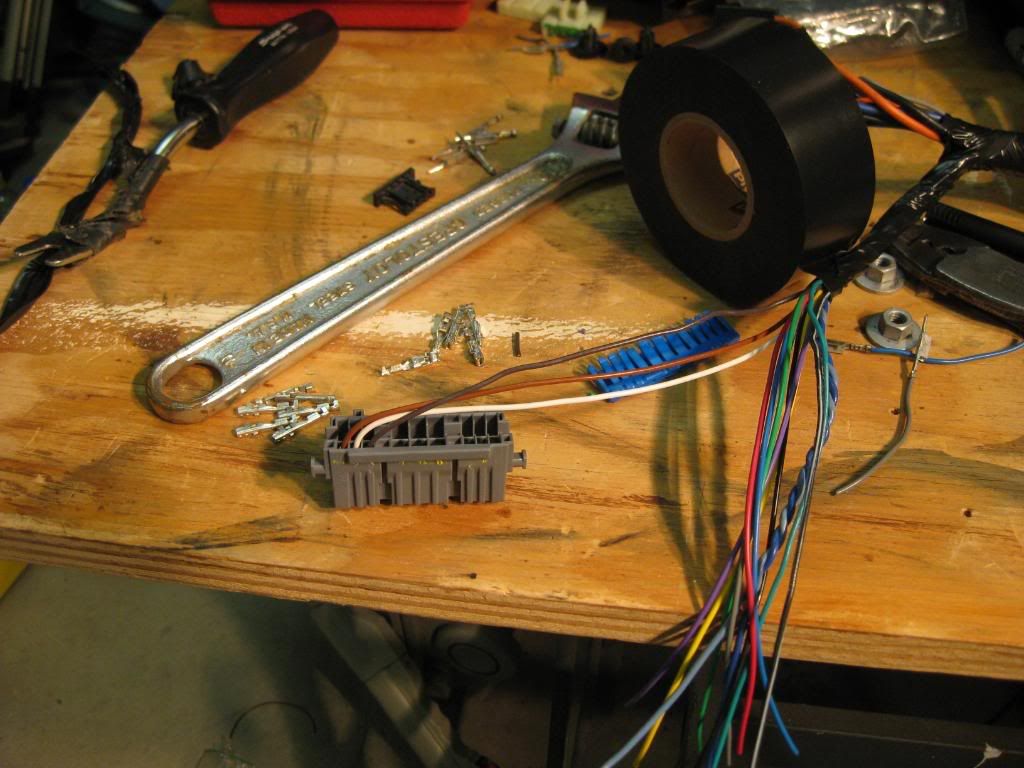
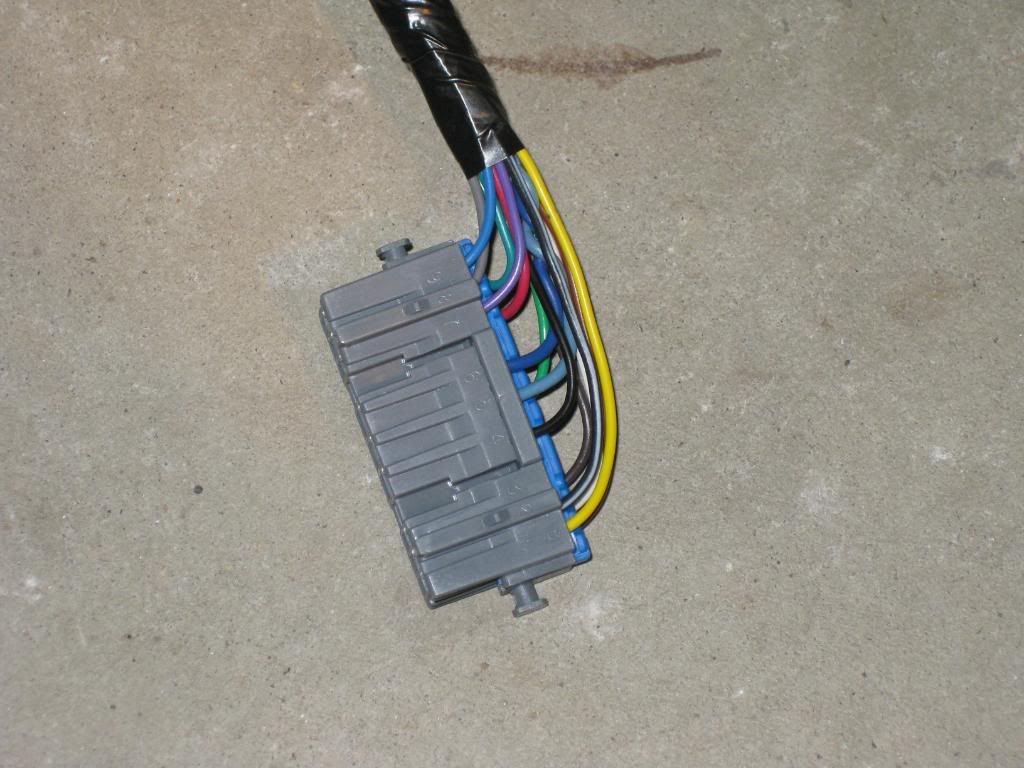
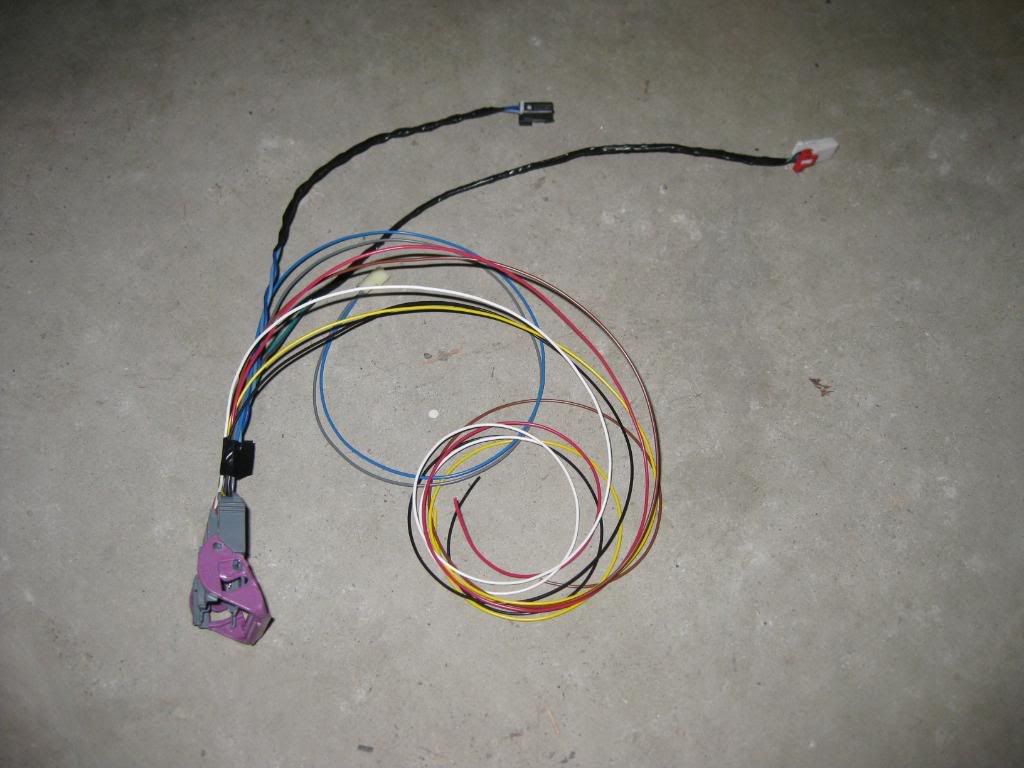
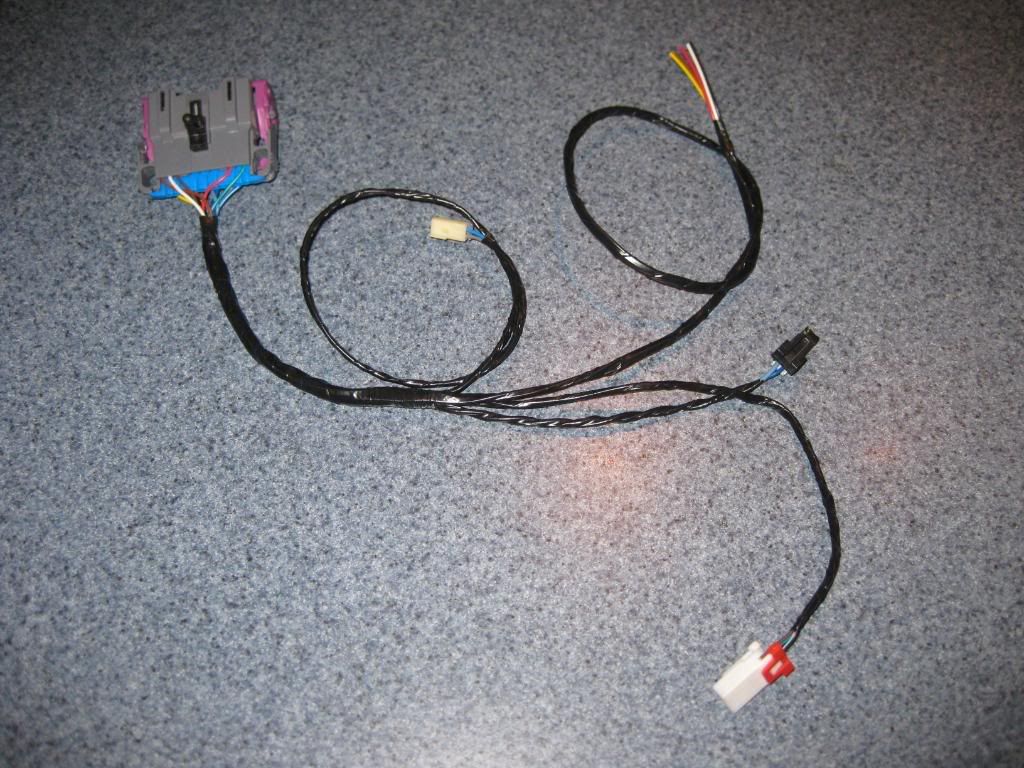
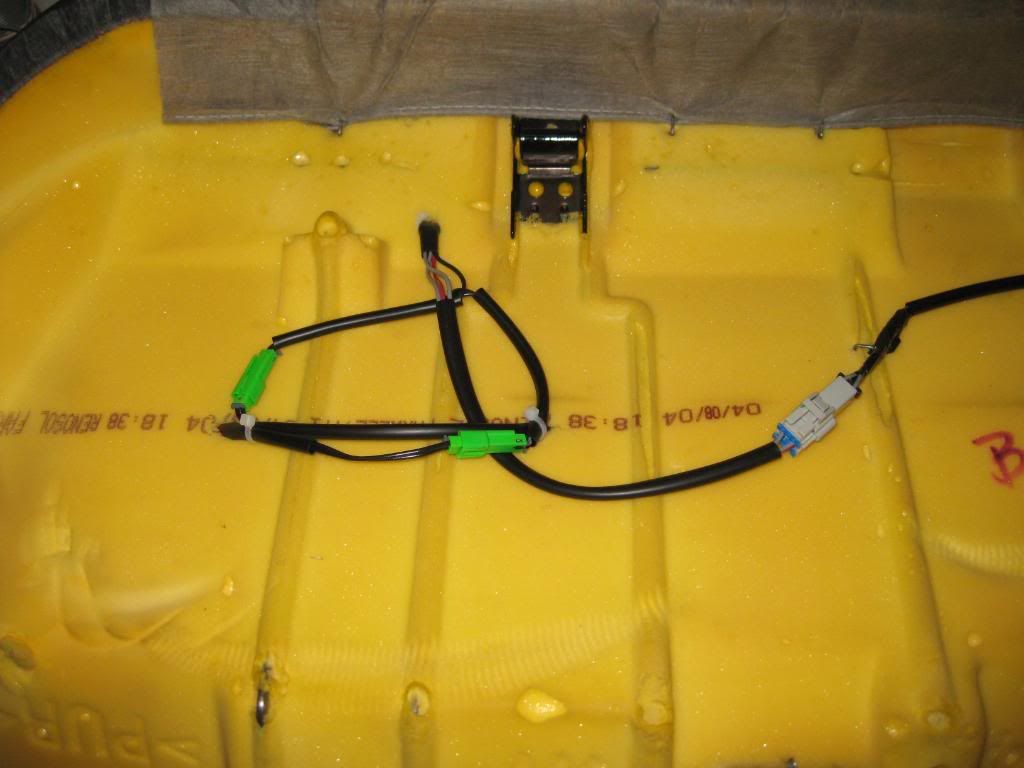
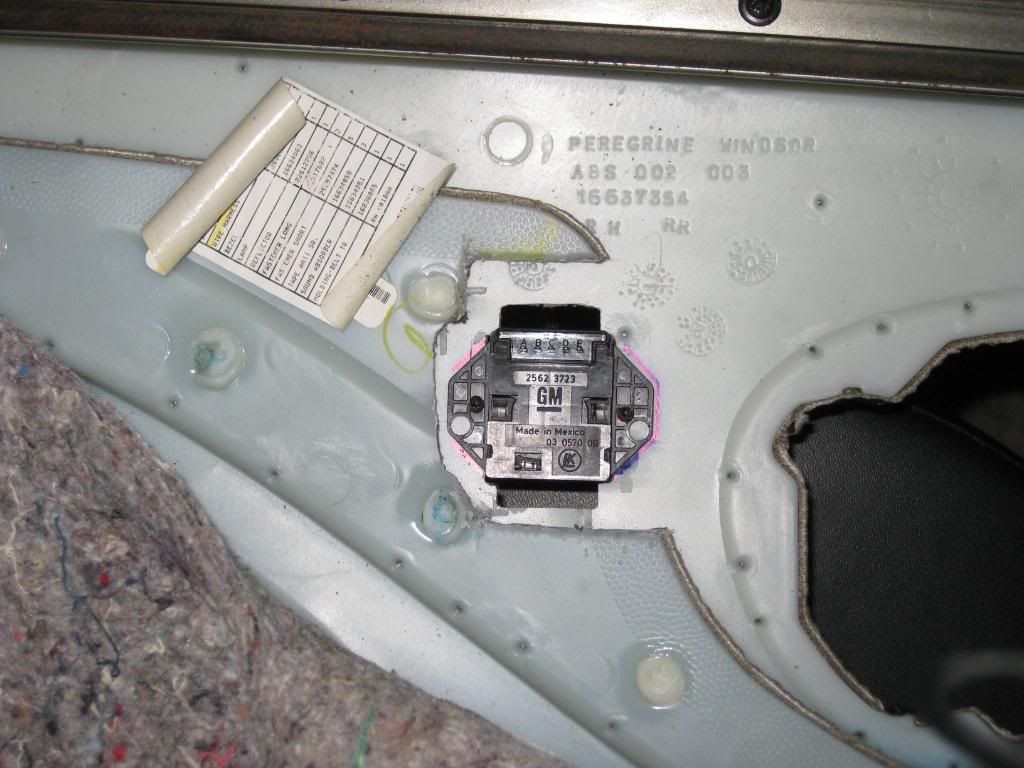
The majority of new wiring was in the addition of the control modules. I wanted to make it easy to remove and install the seat cushion and seat back. I mounted the control modules on the rear of the seat back and built a custom harness that terminated with a 22 cavity Lever Lock connector.

Image
Image
Image
Image
Image
Image
Image
Image

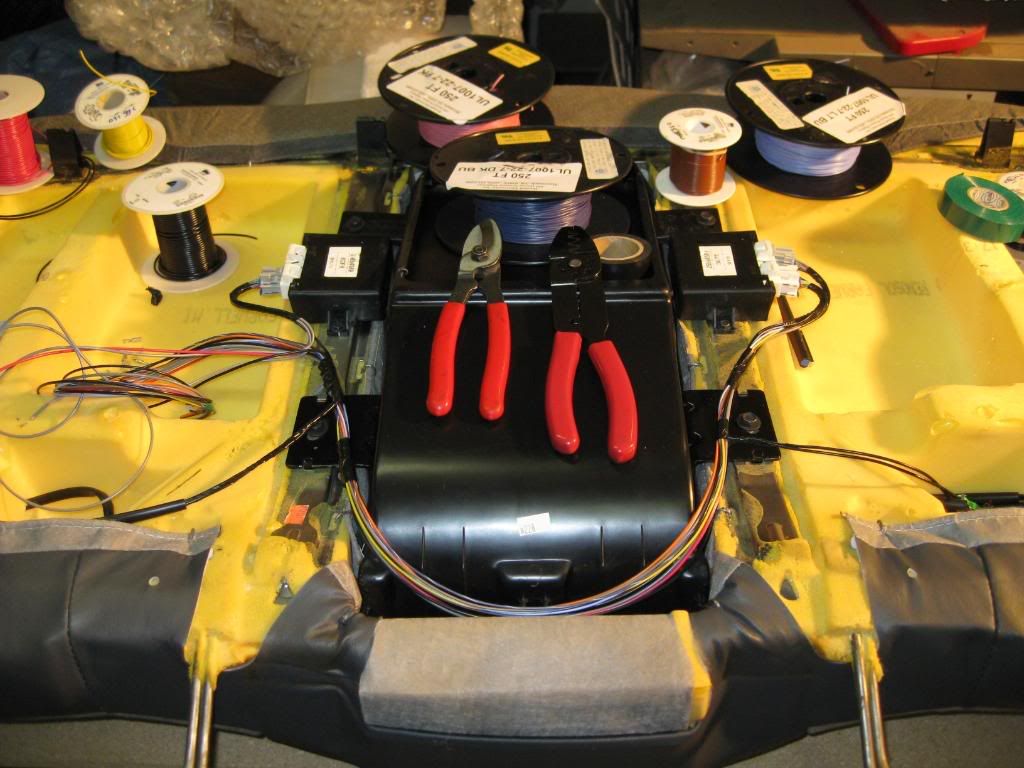
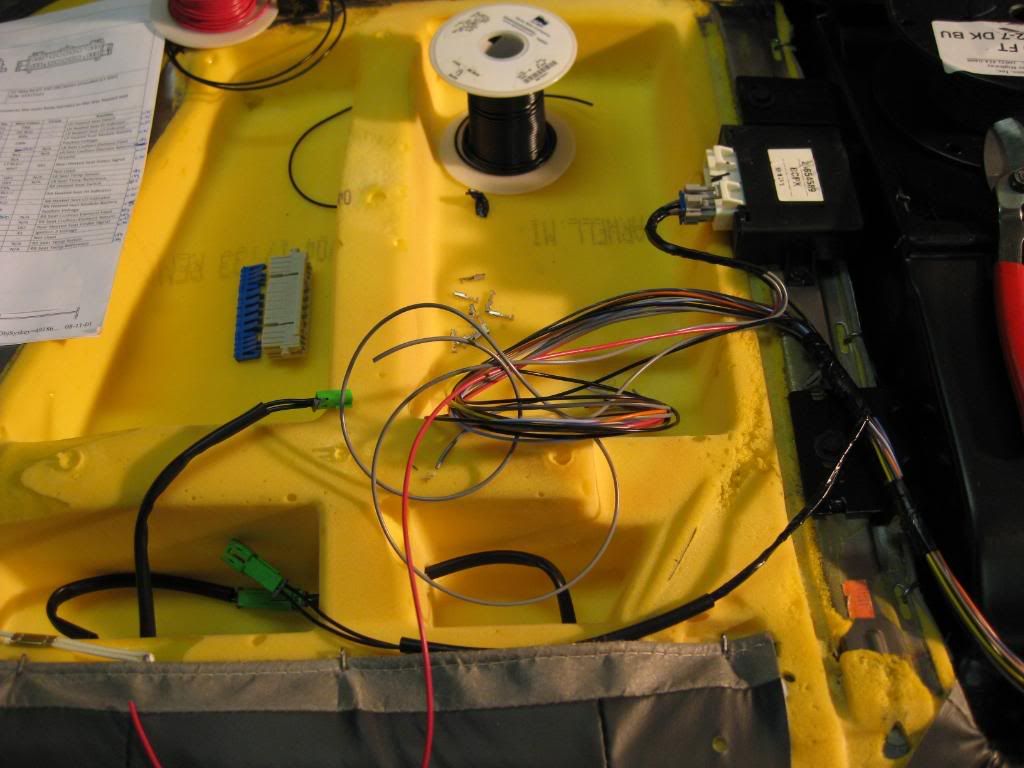
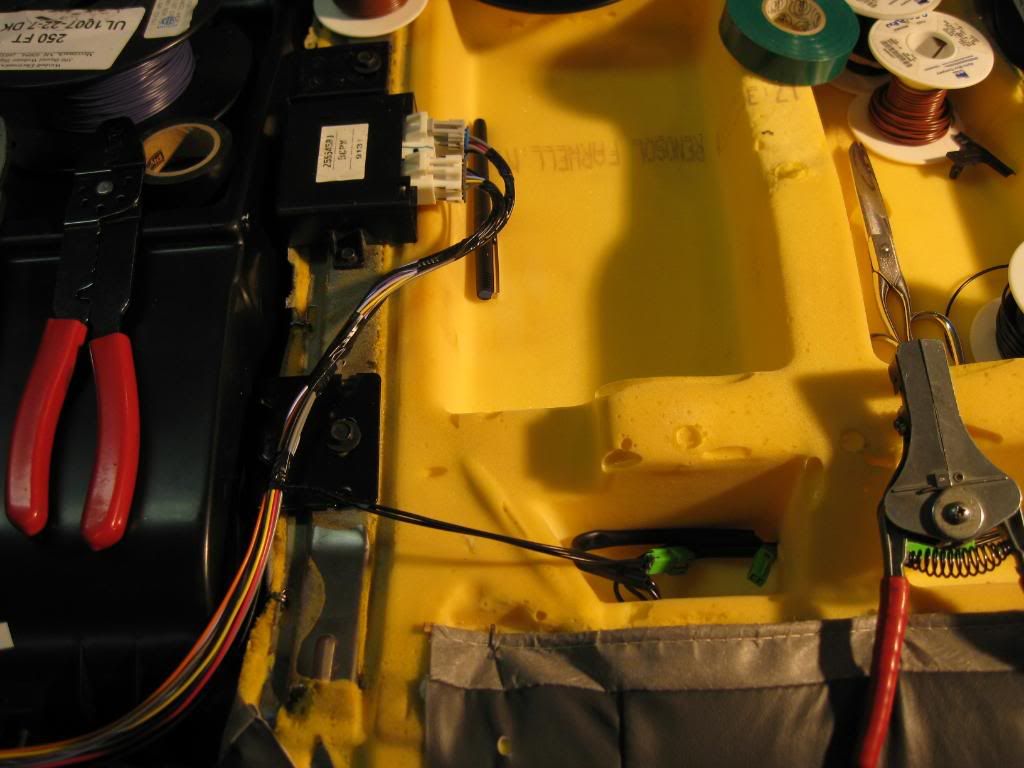
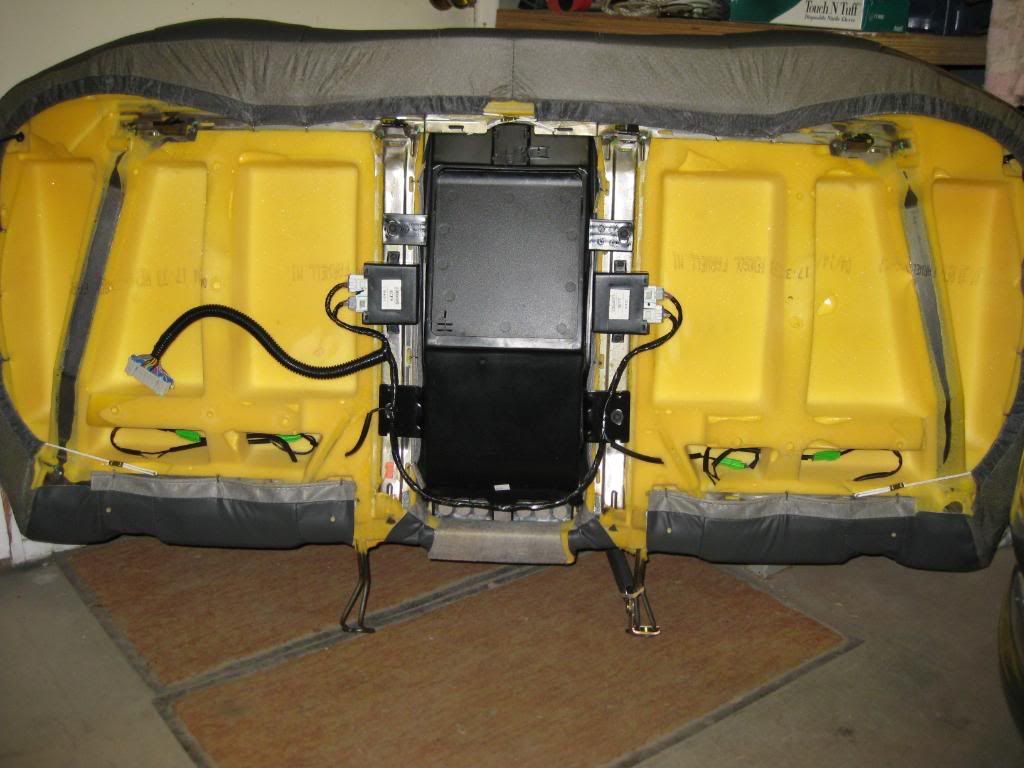
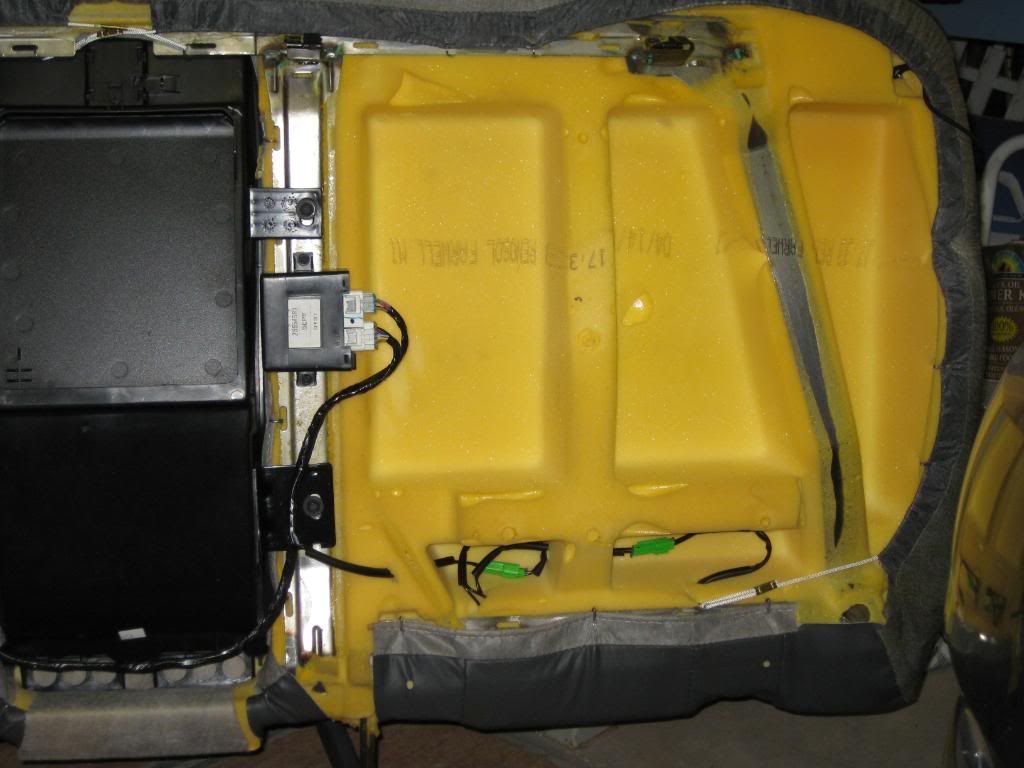
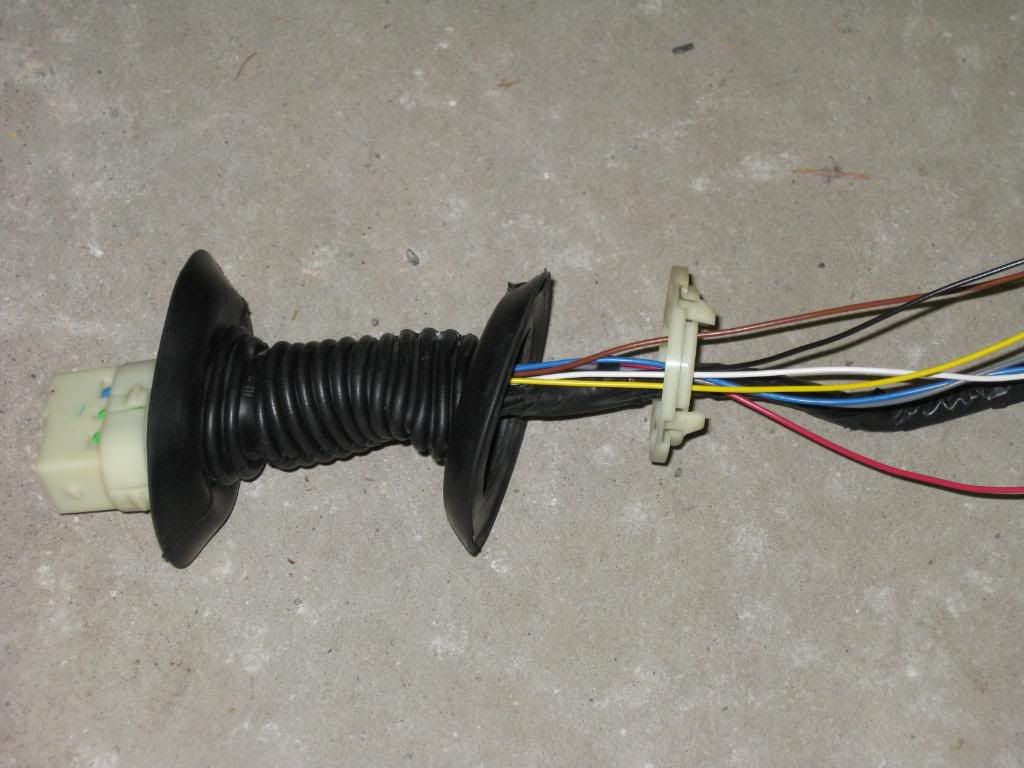
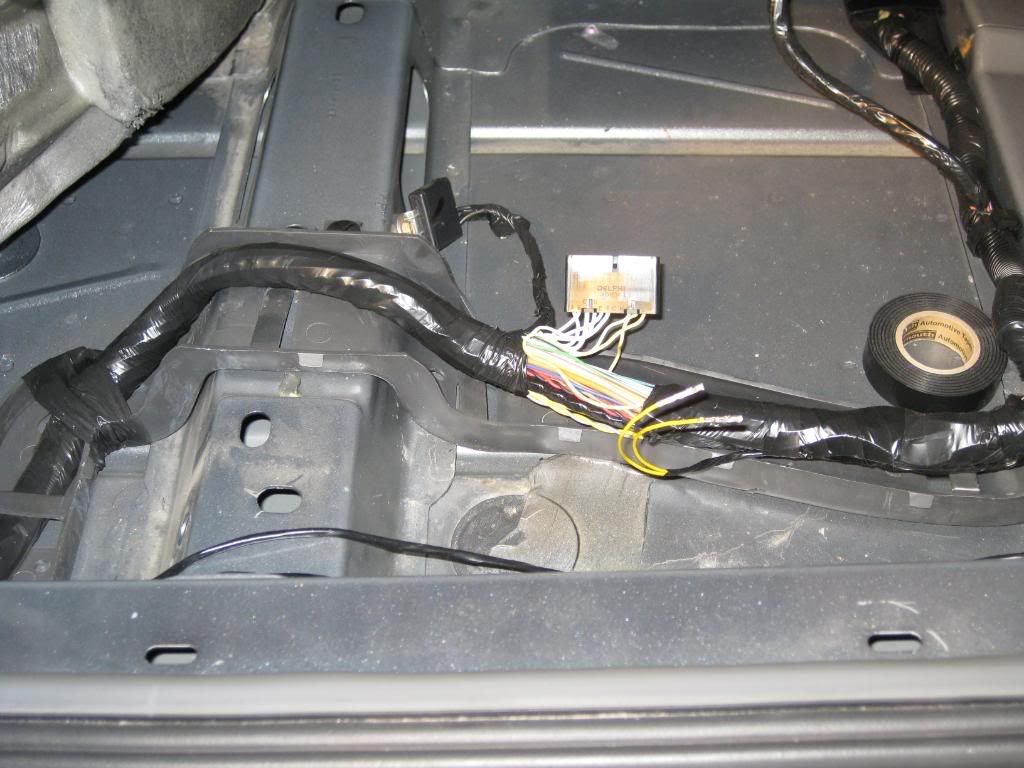
The other half of the Lever Lock connector mounts on the left diagonal cross brace behind the rear seat. This is wired to another custom harness routed to the fuse block, ground, door panel switches and the seat cushion integrating all required components.

Image
Image
Image
Image
Image
Image
Image
Image
Image
Image

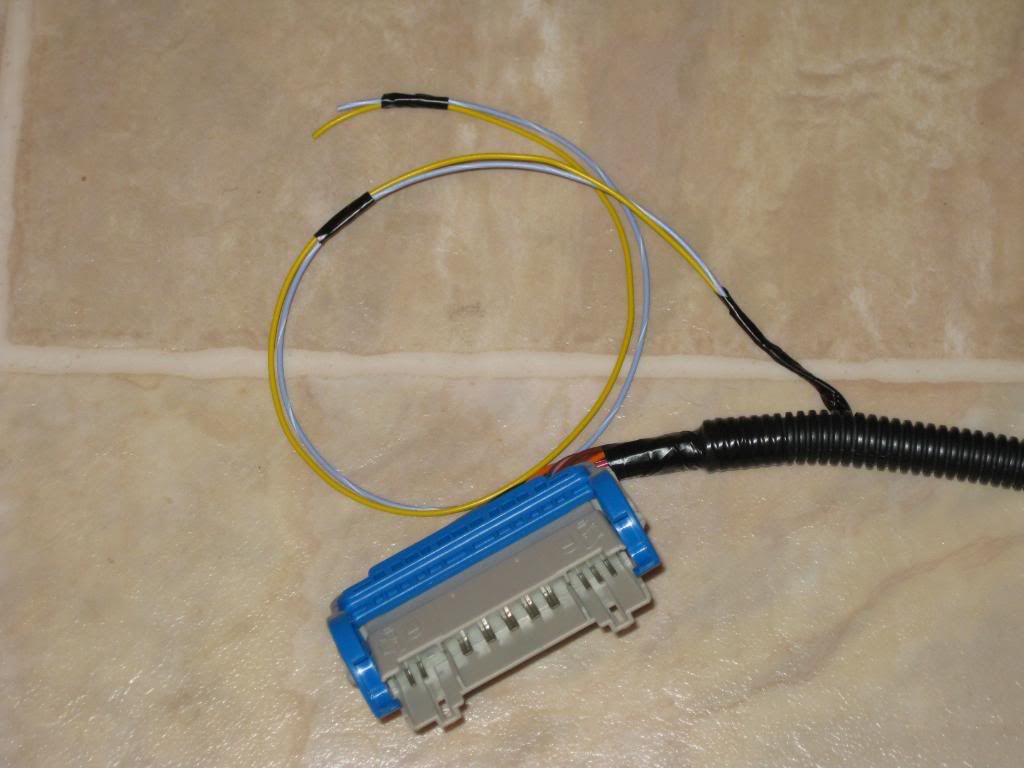
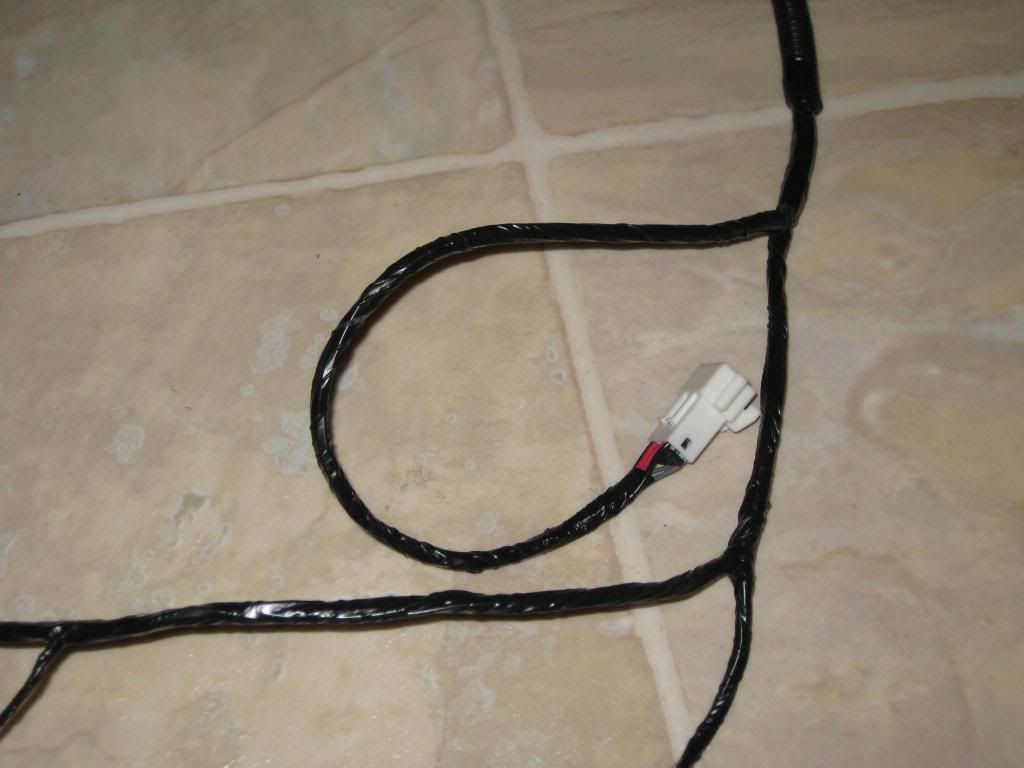
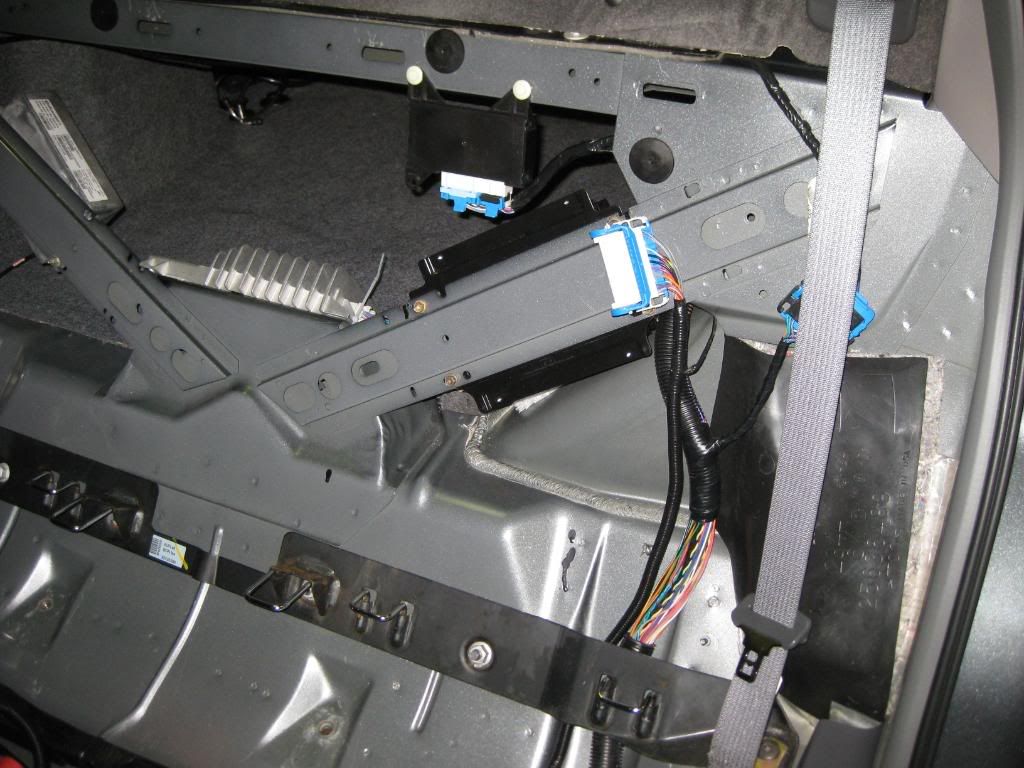
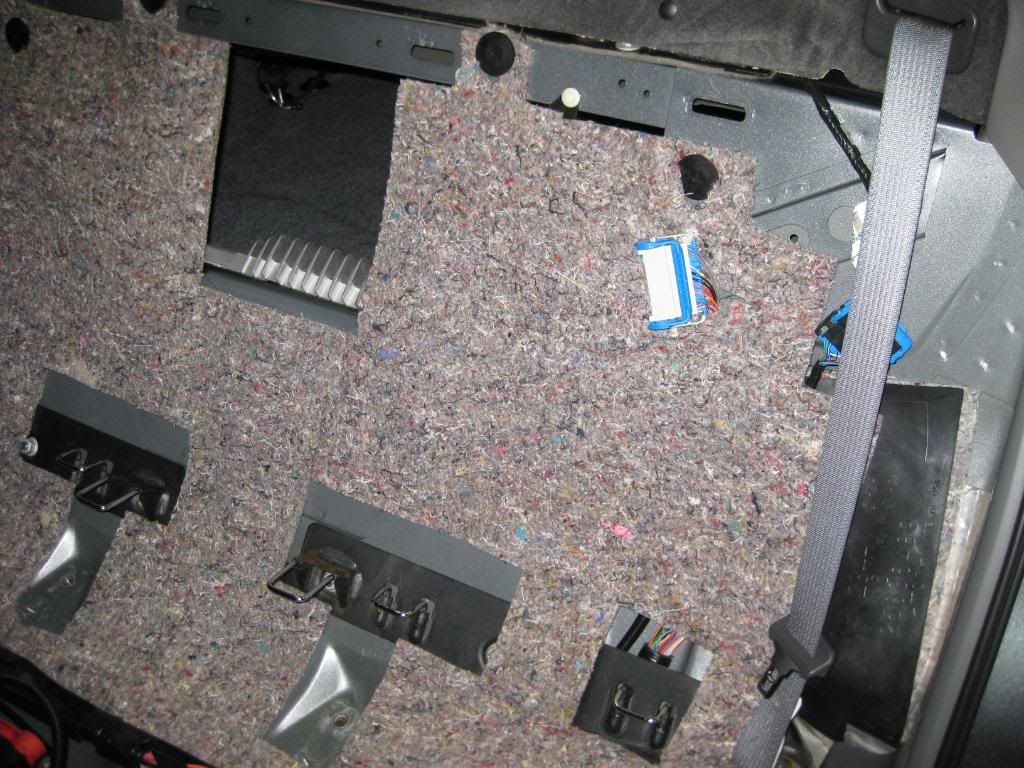
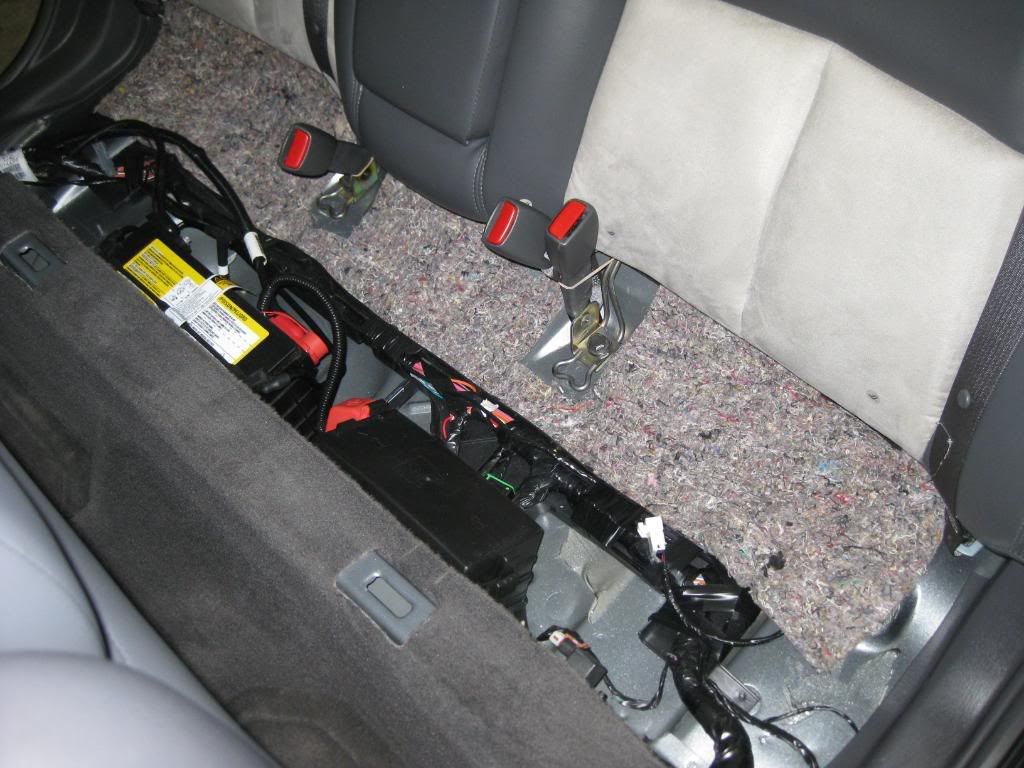
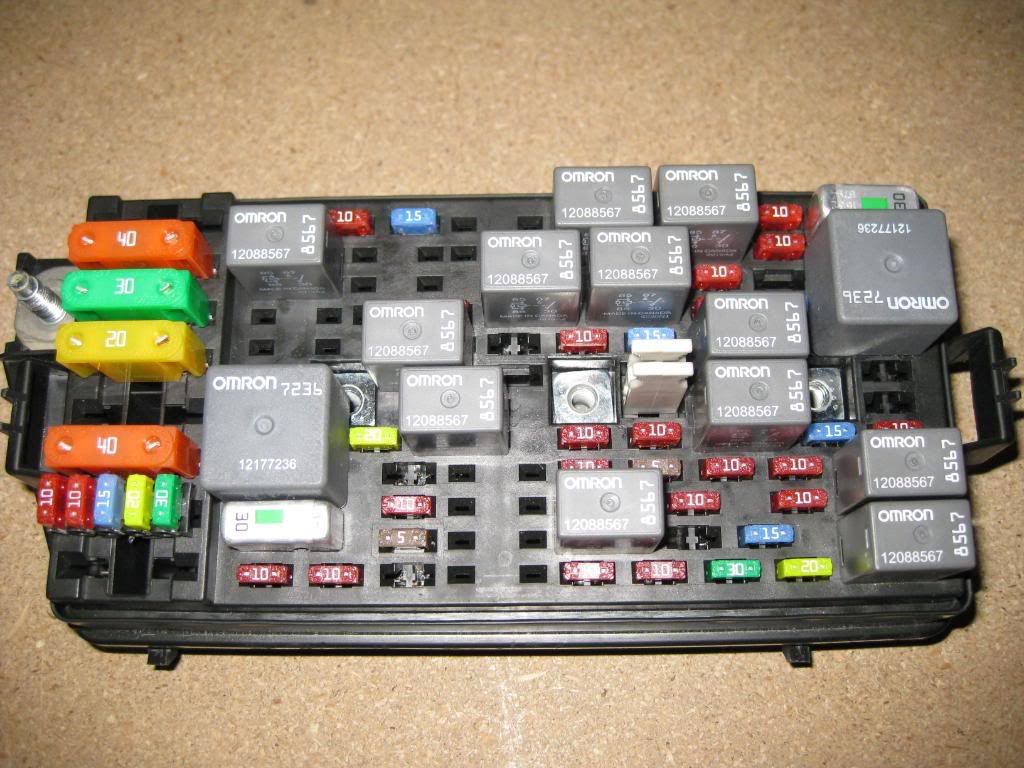
I modified the rear fuse block and added separate fuses for the left and right seat circuits. This was done in the same manner as GM used in other vehicles with this option. The grounds were tied into the factory splice pack underneath the rear seat cushion (left side). The backlighting connects into the splice pack under the driver seat.

Image
Image
Image
Image
Image
Image

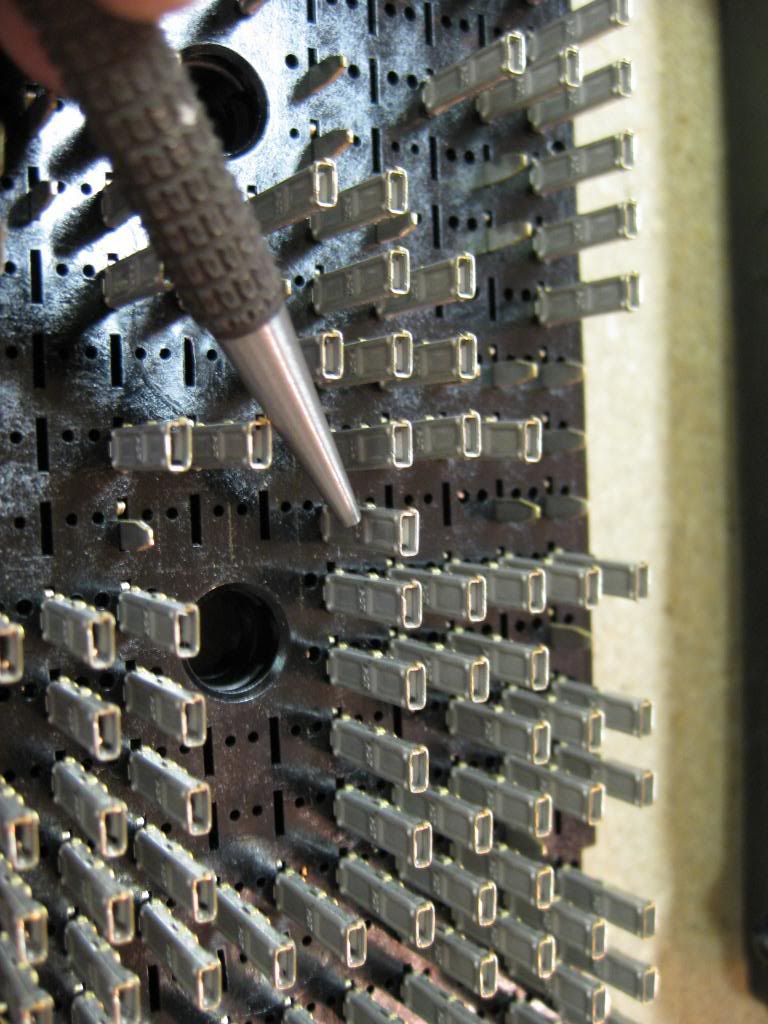
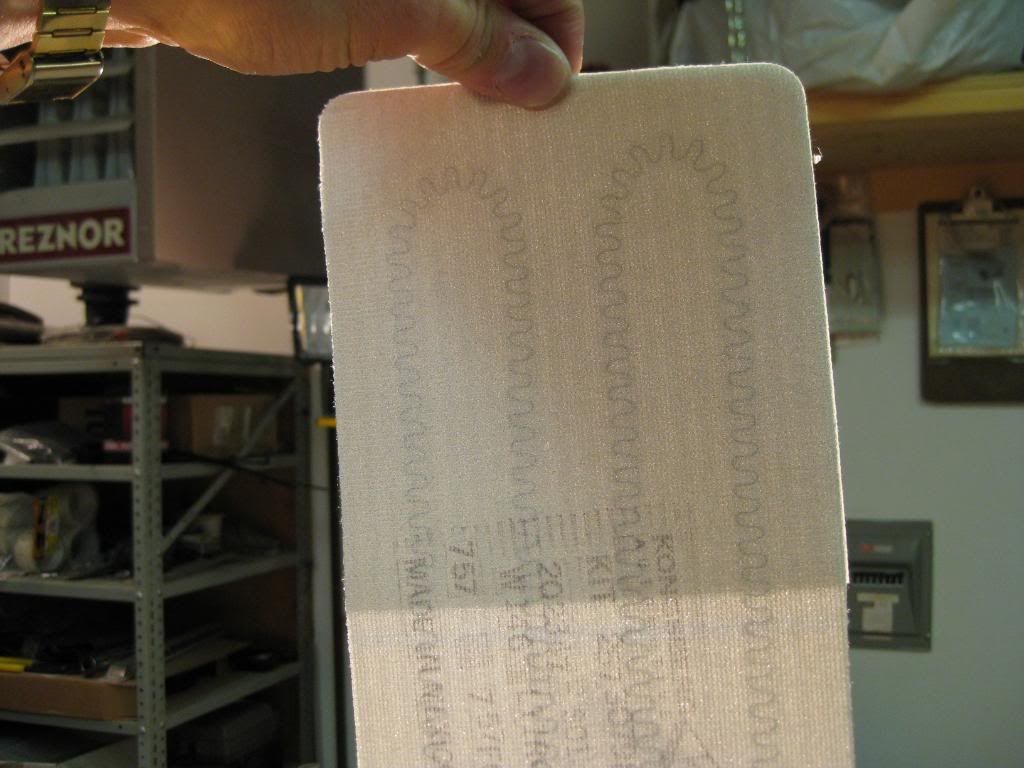
The next step was the heating elements. Because the control modules interchange between the 2000 LeSabre (donor vehicle) and the Bonneville, I used the GM seat element service kit made for the Bonneville GXP. This ensures the elements are a match to the modules. The modules will have been designed for elements of a specific resistance. It’s important that the thermistor (located in one element pads) is correct for proper temperature sensing and regulation. With an element/module match, there is less chance for fire and other problems. Yes, the element kits are quite expensive!

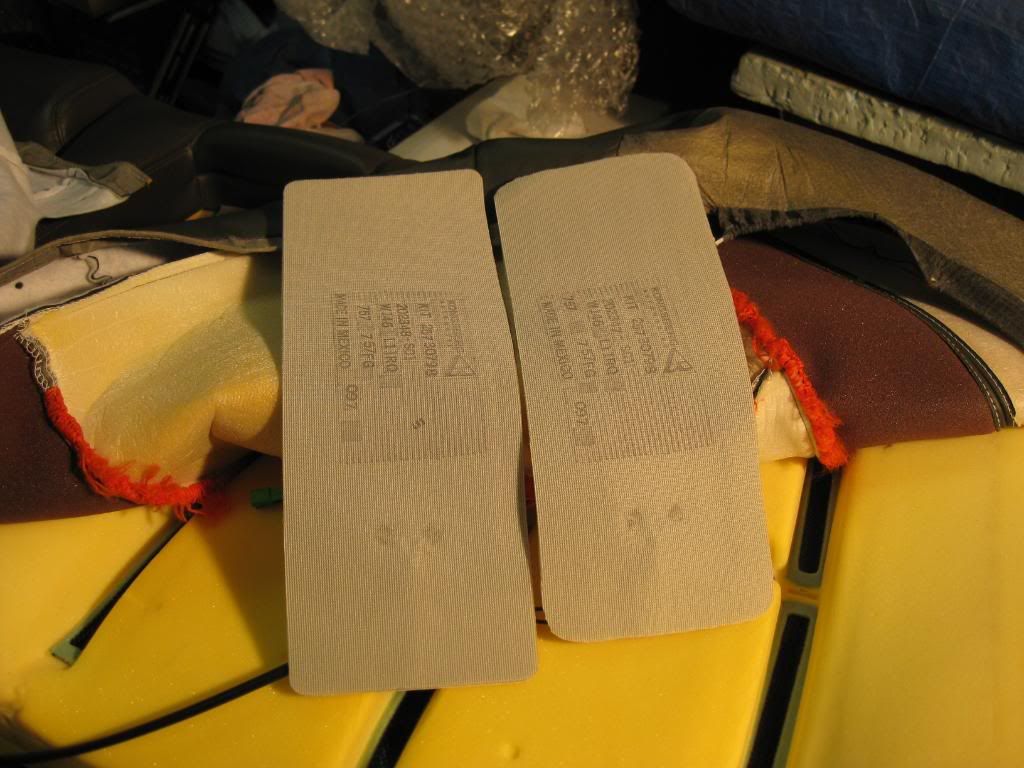
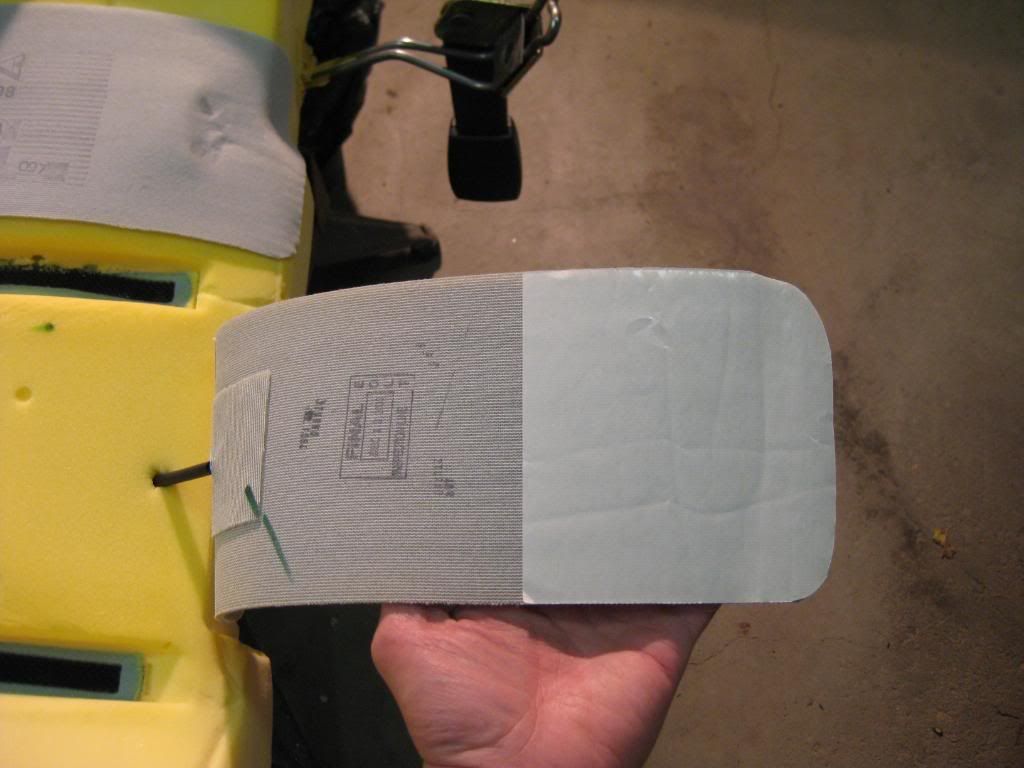
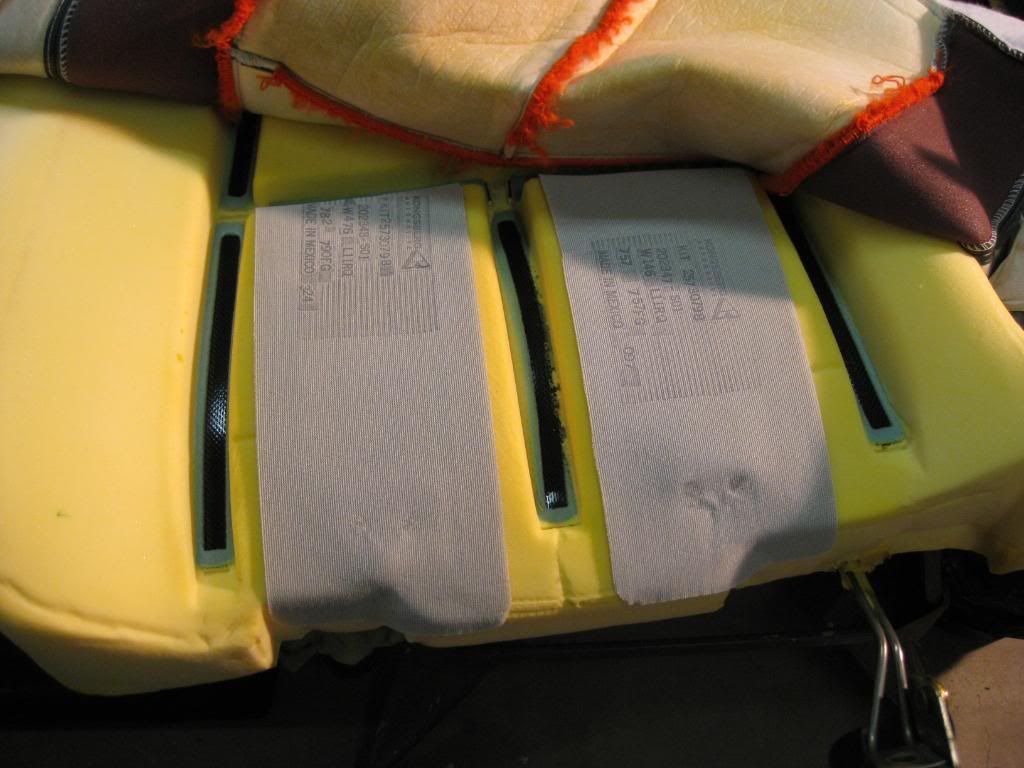
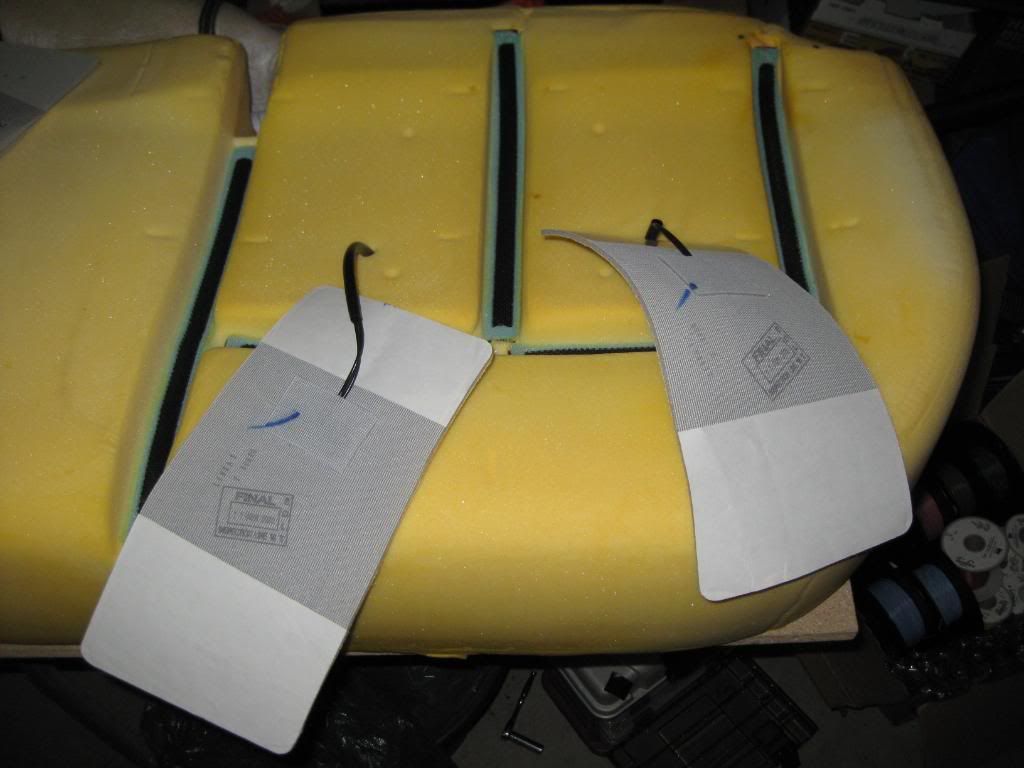
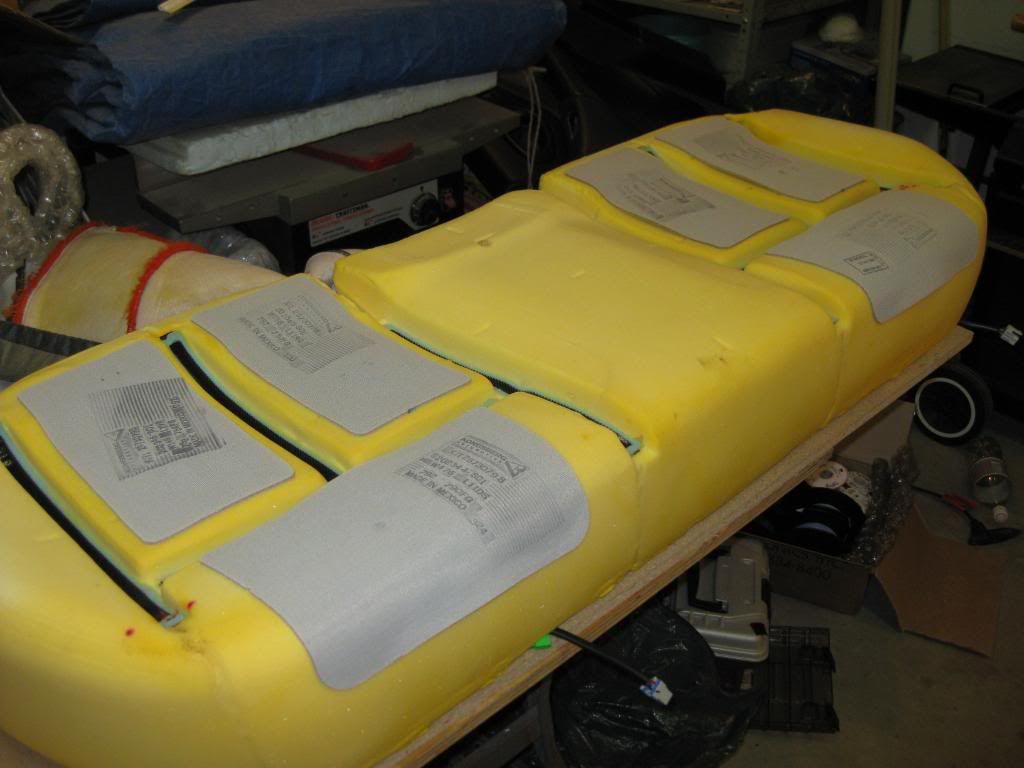
Some element pads are too large and I had to do a little trimming. By holding the elements up to the light, it’s possible to see where safe cuts can be made. I made sure I didn’t trim too much and left a safe margin between the element wire and the edge of the pad. The elements have an adhesive backing and are applied to the foam of the seat assembly. I technically installed the seat cushion elements “backwards”. The wiring is more toward the front of the seat. I’m hoping this will prevent the same failure seen in the front seats by keeping the weight of the buttocks off the wiring connections of the element pad. This doesn’t change the coverage area of the element at all.

Image
Image
Image
Image
Image
Image
Image

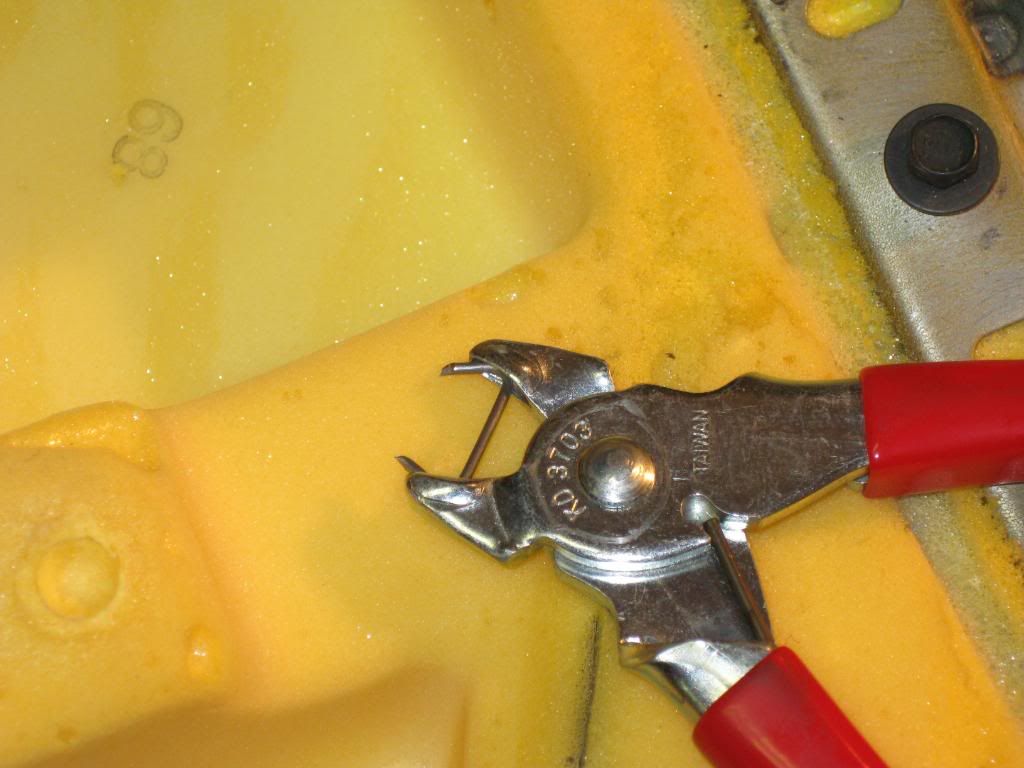
To remove and replace the seat covers properly you will need a pair of hogring pliers and some hogrings. Hogrings are the small metal rings that hold the upholstery to the seat frame. I was able to get the tool from a Mac dealer for about $30 CAN. Hogrings are available at the GM parts counter in bags of about 50. This is roughly the number I needed (although I bought mine elsewhere). At the time, I didn’t realize I could purchase small quantities from dealership.

Image

By NOT completely removing the seat covers, it helped to ensure they were well aligned for reinstallation.

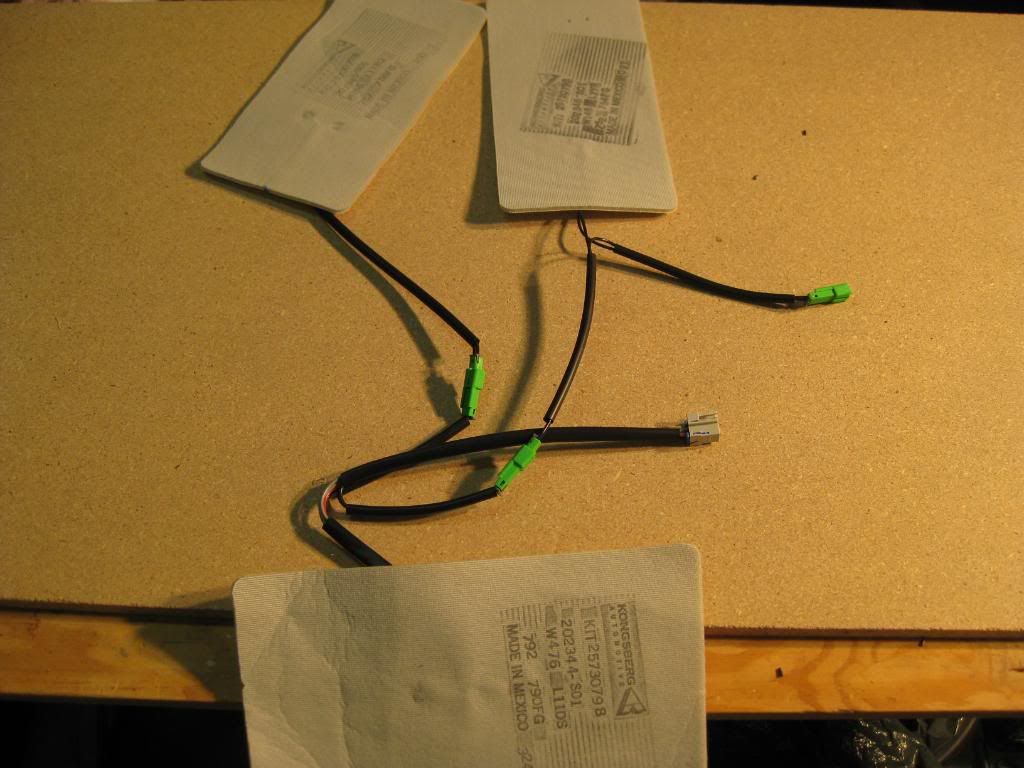
Since the elements are made for the front seats, and the front seat cushion and seat back are not intended to be taken out separately, the wiring was not configured for an ideal rear seat application. I modified the element wiring (at the connectors) in such a way that I have a single connector to disconnect the entire seat cushion from the vehicle. Electrically they are identical to their original form. All five element segments in each seat position (for the GXP style seat, three in other kits) are wired in series.

Image
Image
Image

So I’m pretty much done... right?

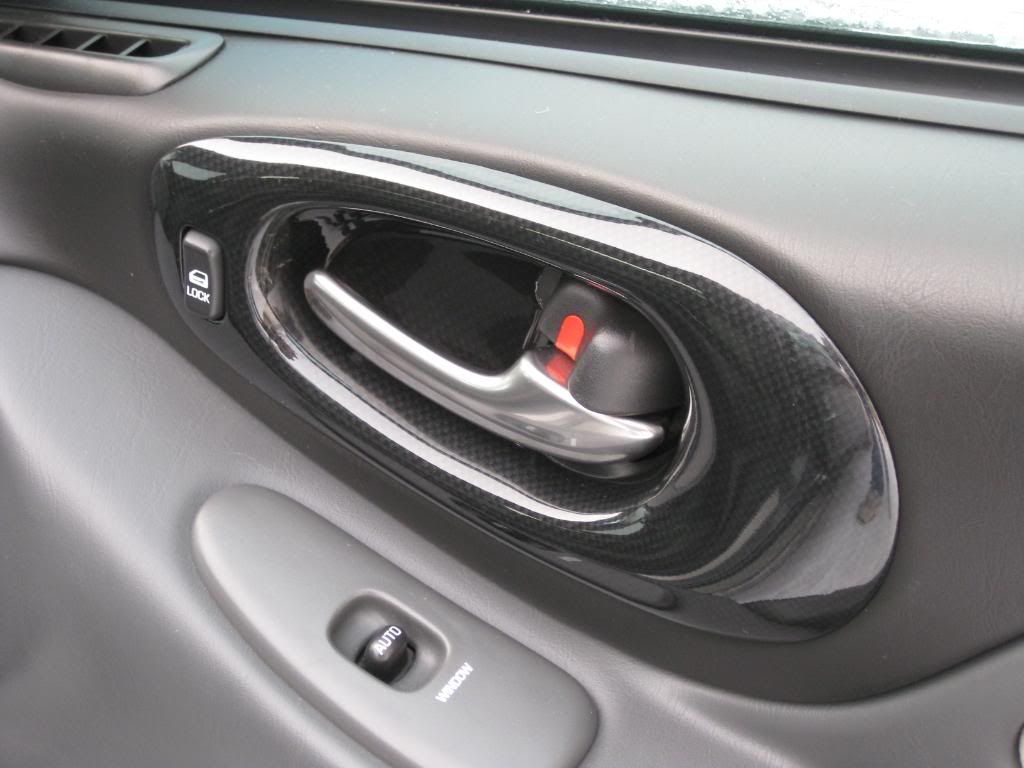
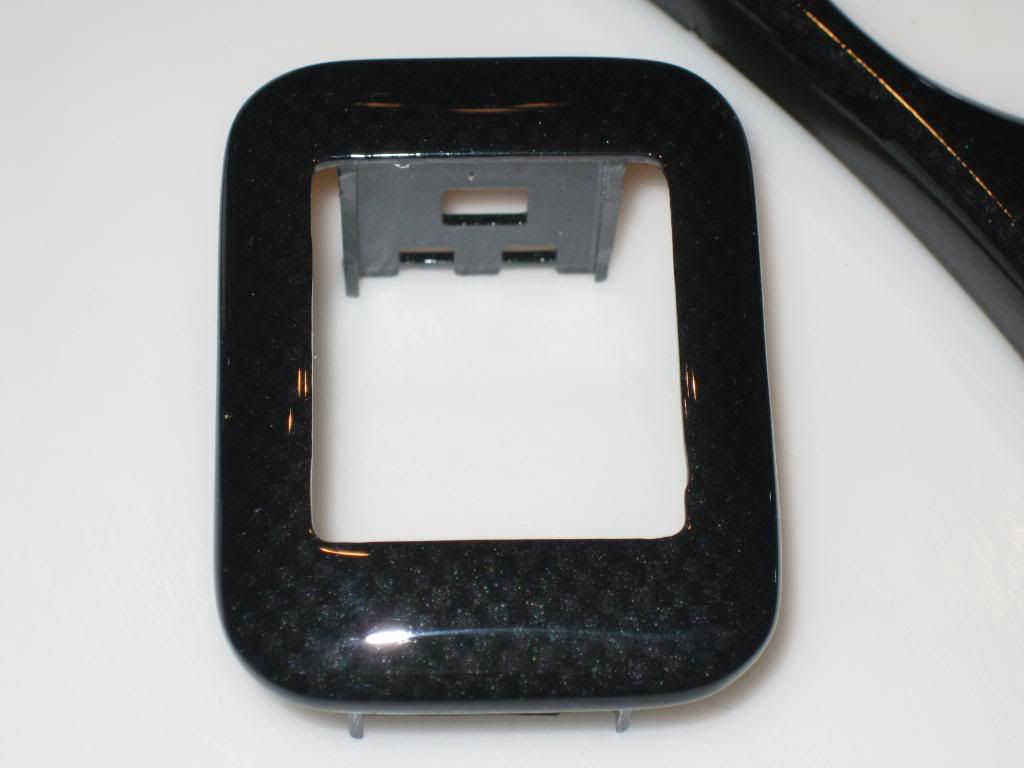
WRONG! I still have to mount the switches. I have the switch and a bezel but in the current form will not look factory. The trim around the door handle has a carbon fibre appearance, but the new switch bezel is unfinished plastic. Because these will be beside each other, it’s a bit of an appearance nightmare! I decided to try and have the new bezels finished the same as the other “carbon fibre” trim. There are a few companies that do hydro graphics printing and are technically capable. The problem is no one could match the GM pattern. I contacted Frank at 
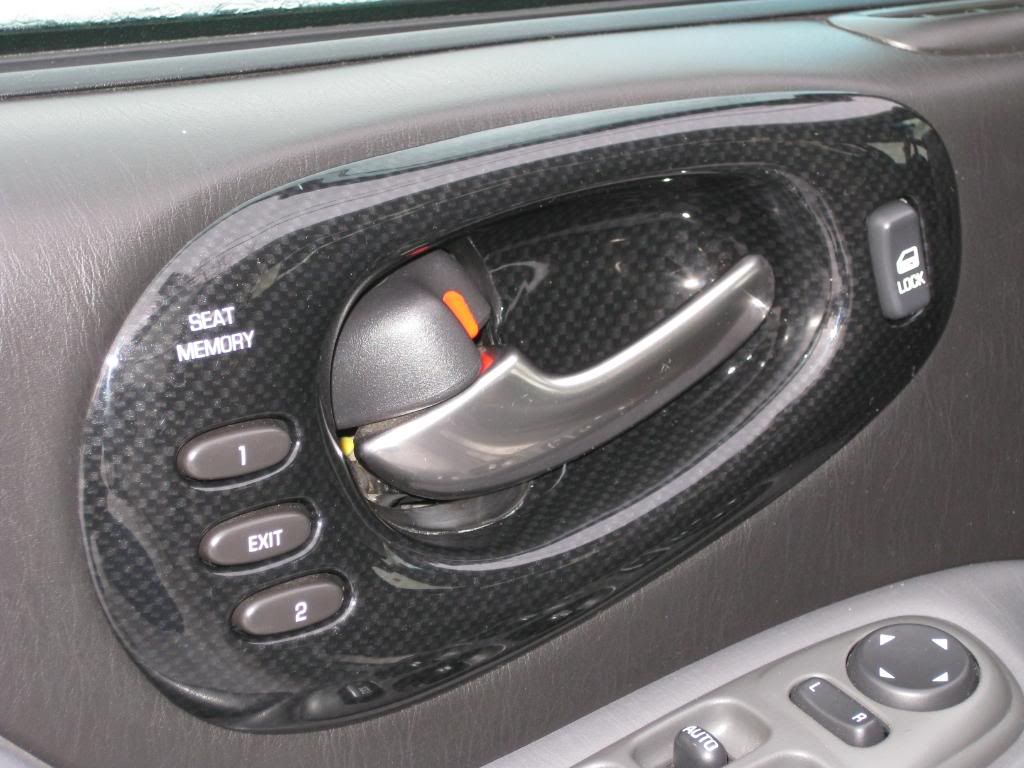
Custom Hydro Graphics in Texas who was able to help with an alternate solution. He was fantastic to deal with. I sent ALL my existing carbon fibre trim pieces to him, along with the new seat switch bezels. He refinished everything in an available carbon fibre pattern. Not only does everything match, it looks far better than the original!

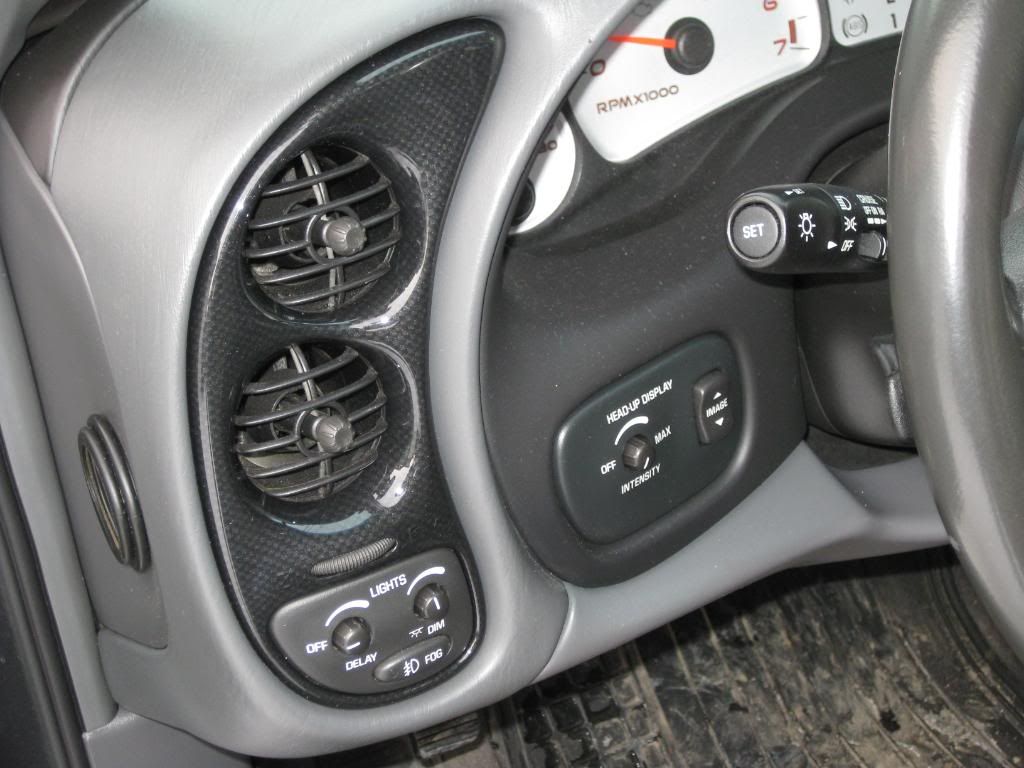
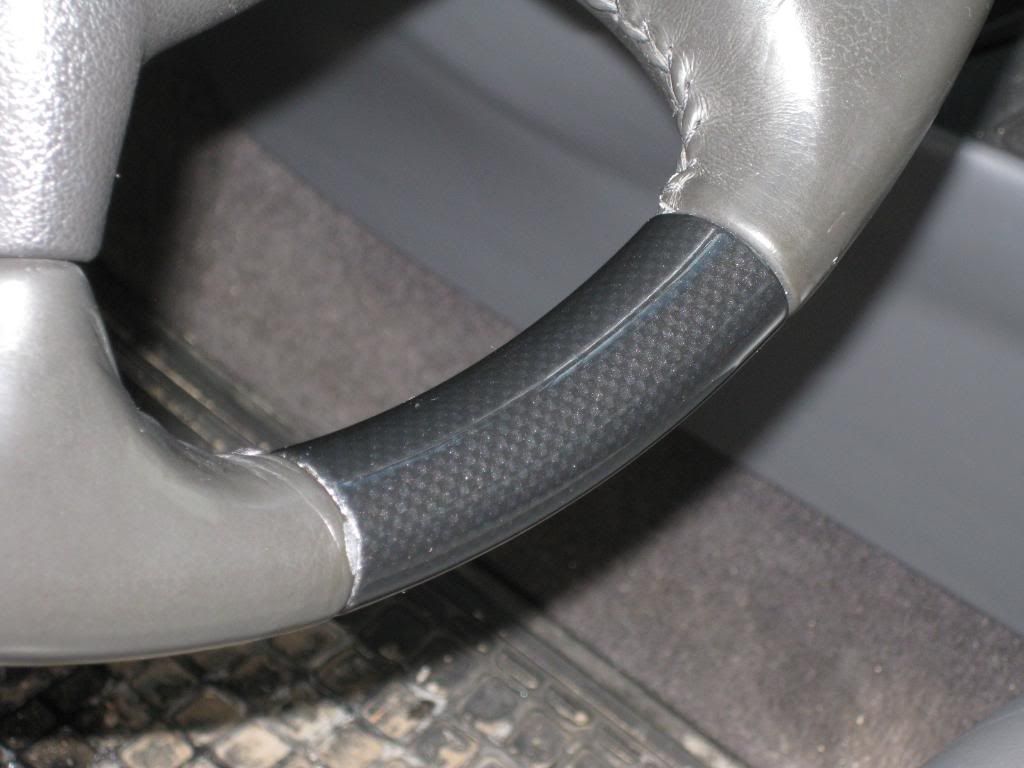
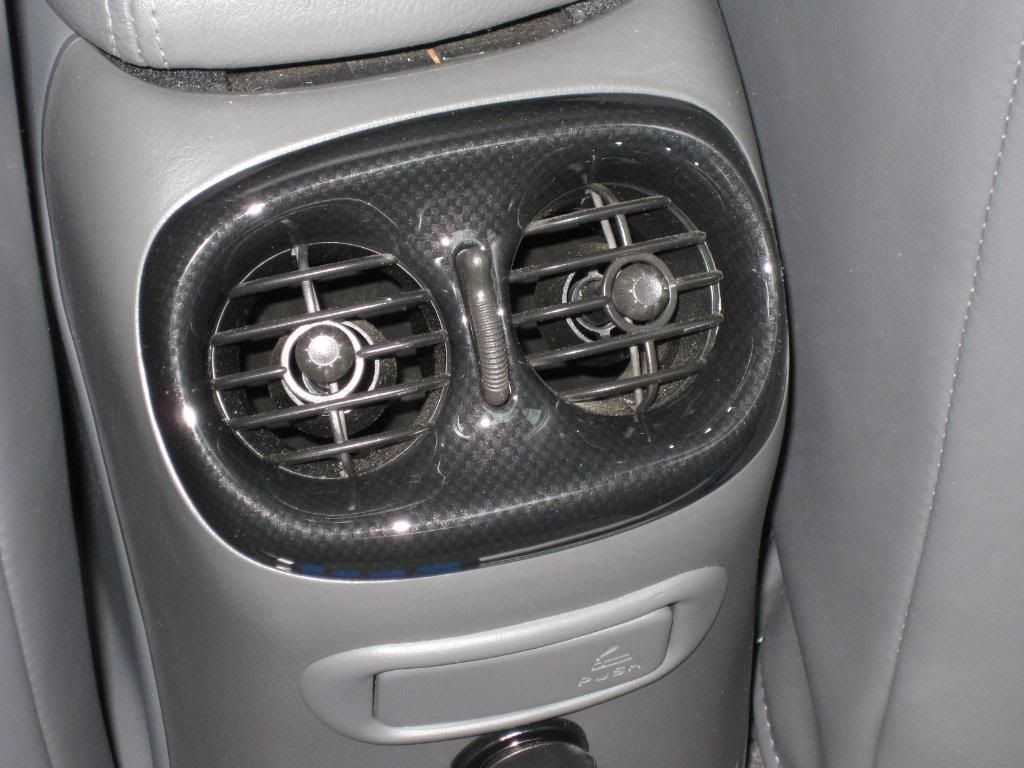
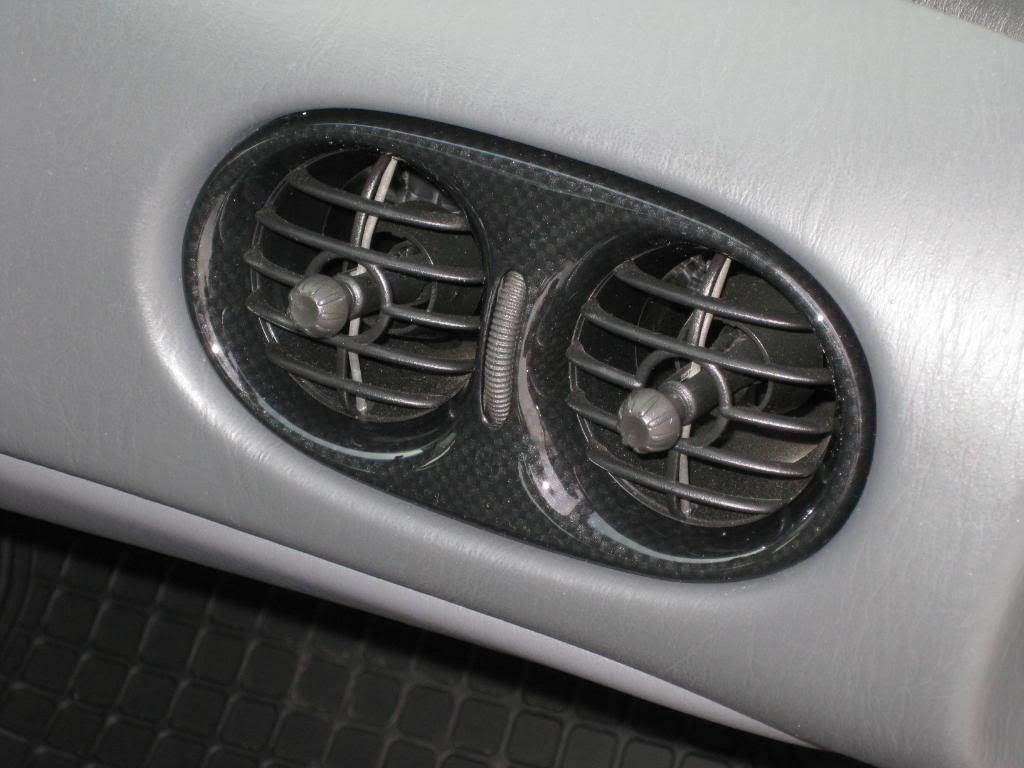
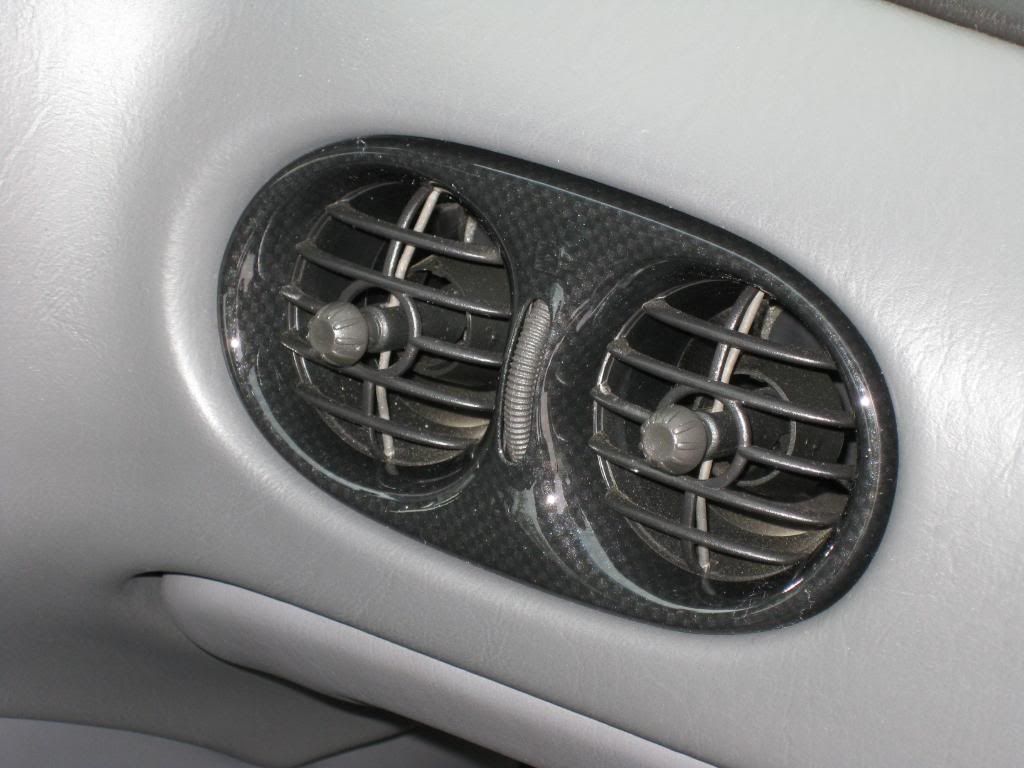
The first picture shows the factory GM pattern. As you can see from subsequent photos, the original is very “brown”. The new finish, from a colour and pattern standpoint, looks stunning with my gray interior. In all I sent my steering wheel, all four dash vent pieces, all four door handle trim pieces, the vent from the rear of the centre console and three new heated seat switch bezels (one spare) to be processed.

Image
Image
Image
Image
Image
Image
Image
Image
Image

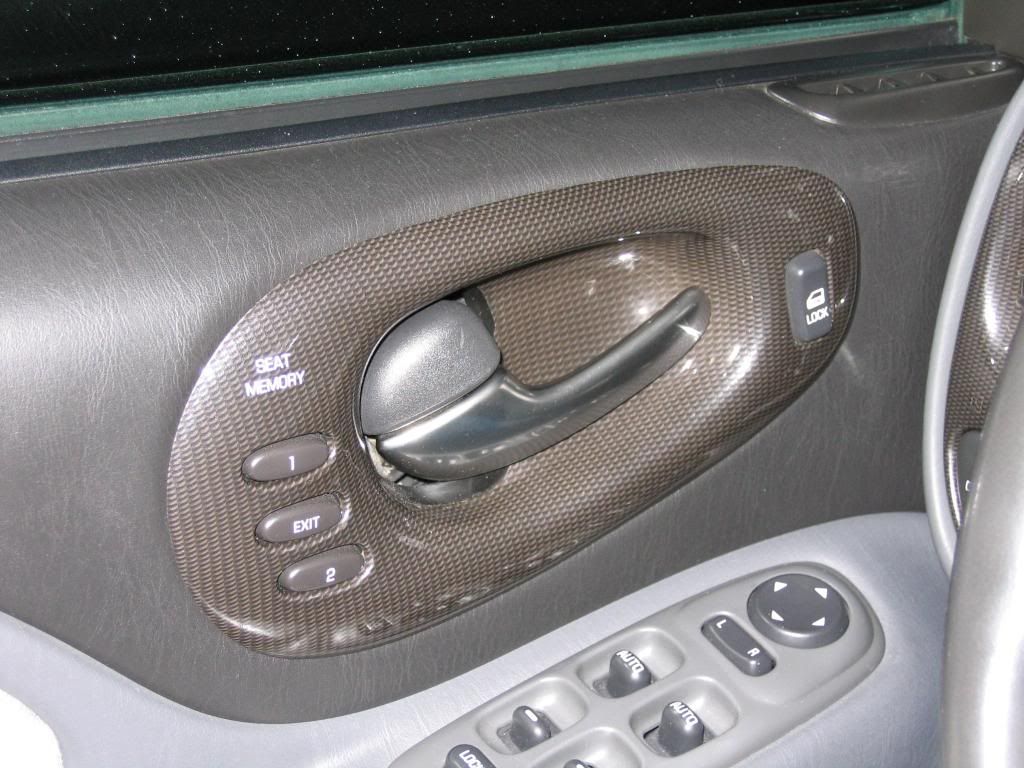
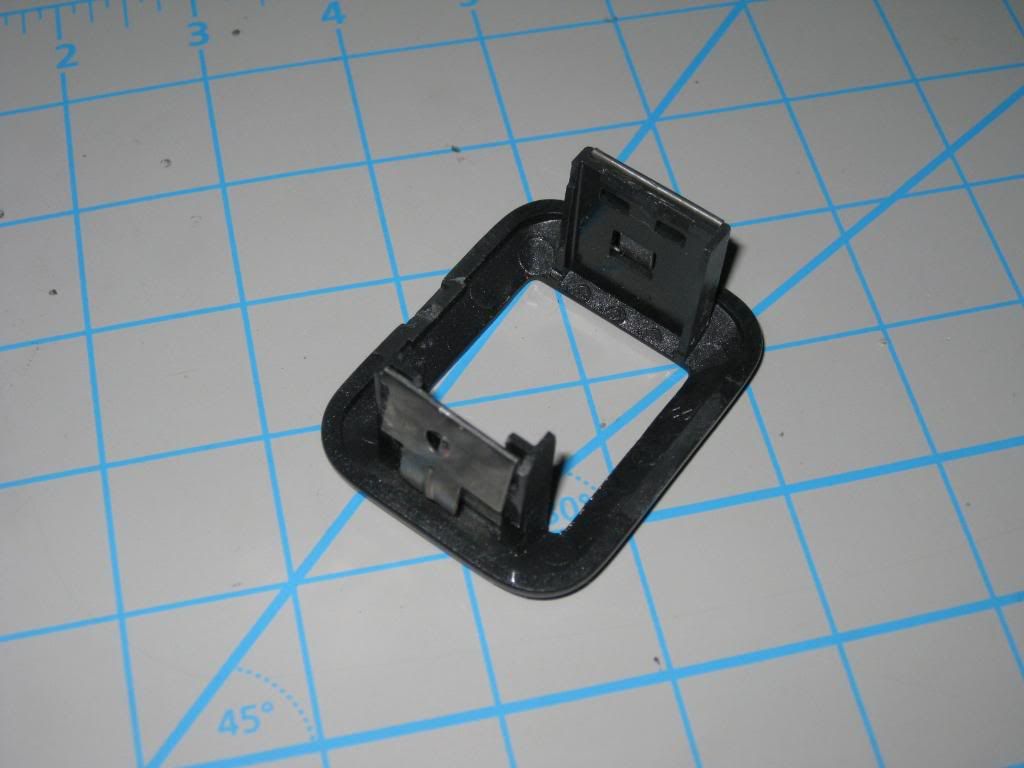
And of course the cause of this all... the new switch bezel!

Image

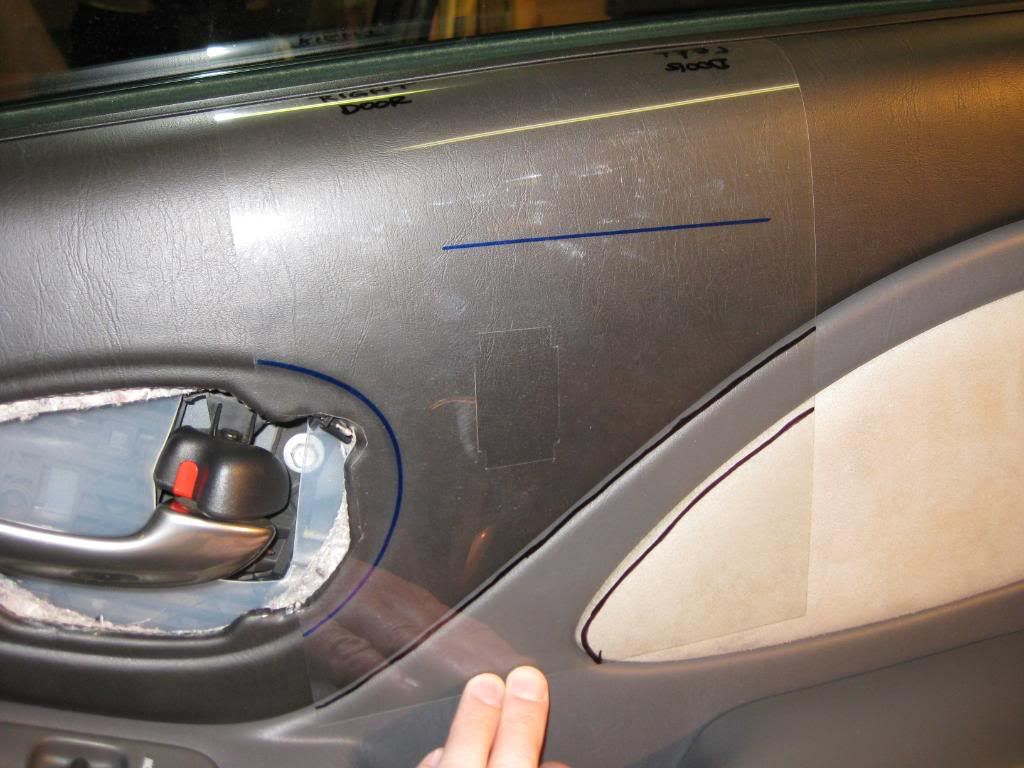
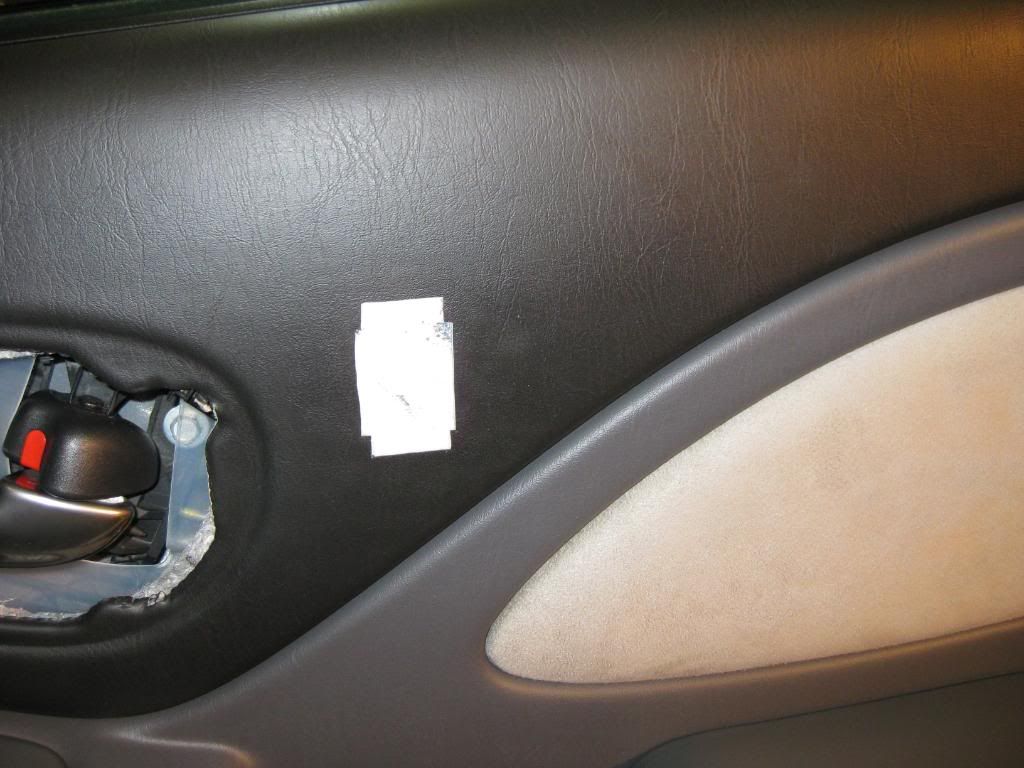
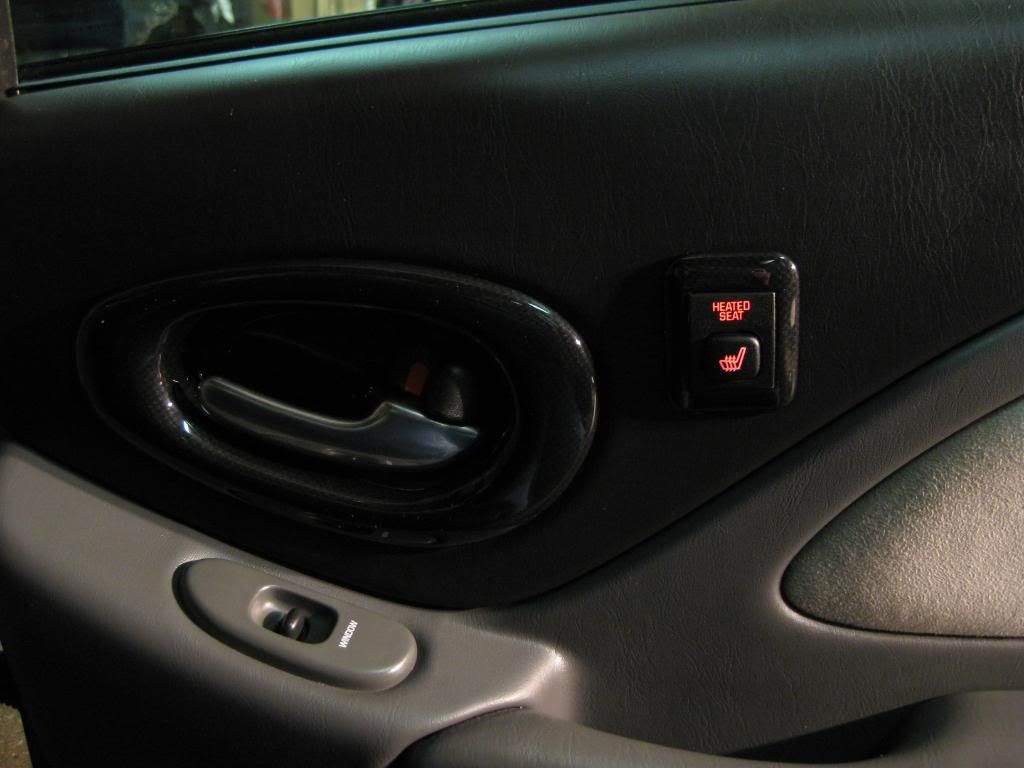
I’m in the home stretch! All I had left was to cut holes in my door panels and mount the switches. This was a little stressful to say the least. There aren’t many GXP’s in the wreckers and so if I messed this up, getting replacement panels could be difficult and expensive. Buying from GM would have cost about $600.00 each. To improve my chance of success I bought a door panel off a 2000 SE to use as a test. I learned a lot from this and believe it was worth the expense.

I made a transparent template using some landmarks on the door panel. This allowed me use it on the left and right doors. It made easy work of placing the switch in the same spot on both sides by simply flipping it over. I’m not going to get into too much detail here. I will say that there’s little margin for error and patience is crucial. The opening was cut using my Dremel and a file.

Image
Image
Image
Image
Image
Image

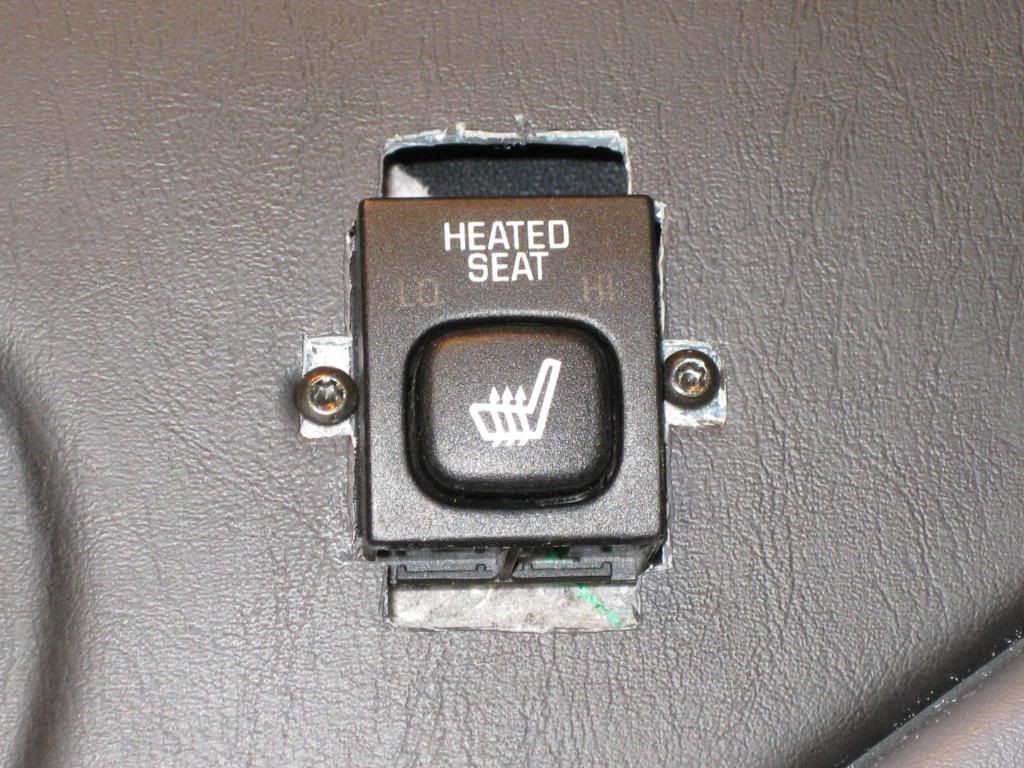
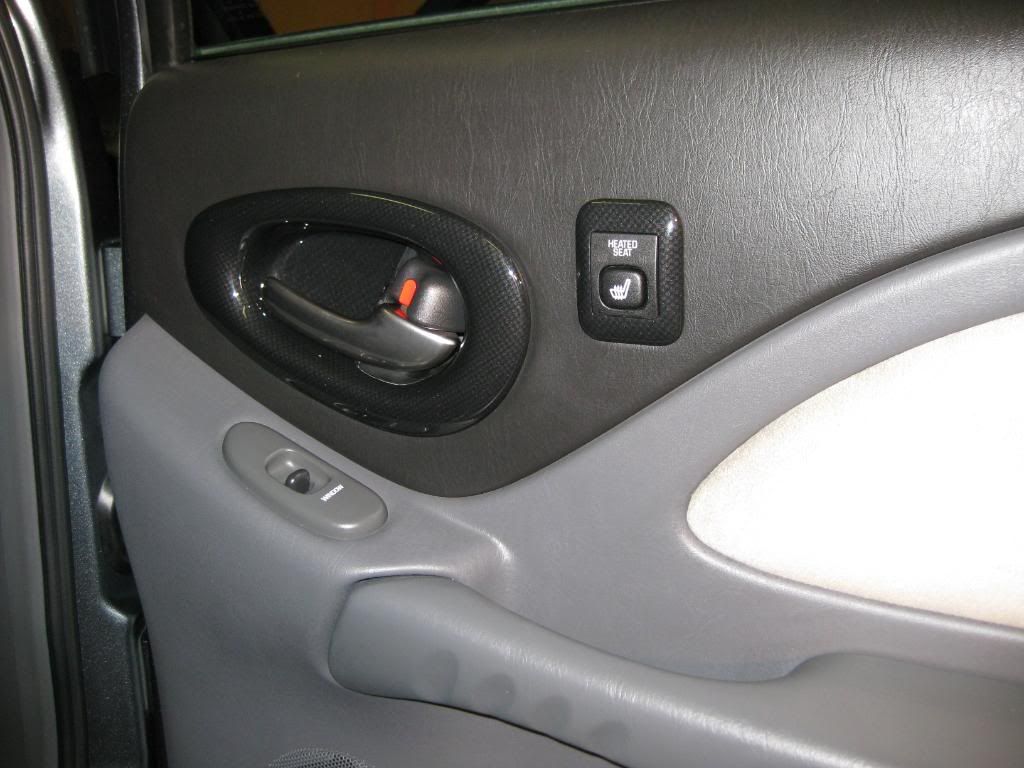
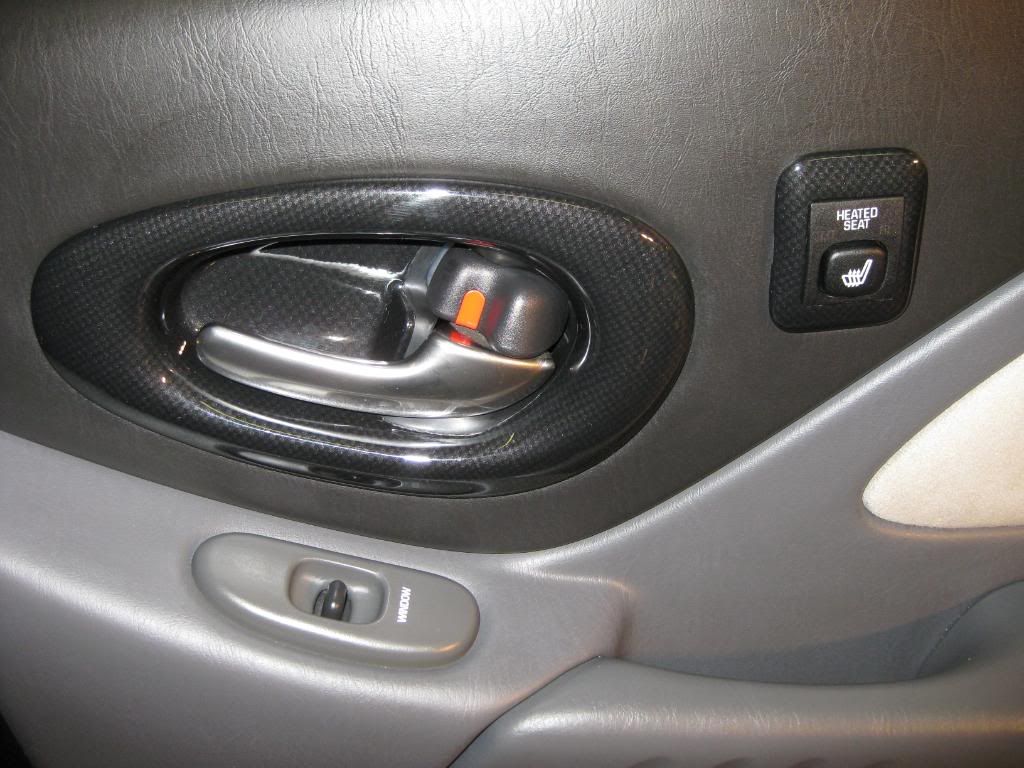
Here is the finished product!

Image
Image
Image
Image
Image
Image
Image

This project cost a lot more than I first anticipated.... A LOT MORE. Probably best not to ask!

_________________
Image

Bose Luxury Sound System w/Touch Screen Navigation, Addition of Factory XM, 2005 MY Antenna, OnStar Upgrade (3G),
RainSense Wipers, Backup Camera, '00 Style Door Panel Courtesy Lights, Heated Washer Solvent, 2X Remote Trunk Release,
Turn Signal Mirrors, Center Console Courtesy Lamp, Rear Outboard Heated Seats, PVD Chrome 18" Factory Rims, Upgraded
Carbon Fibre Appearance Interior Trim, Highly Modified Main Body Harness, Instrument Panel, Door, Door Panel & Headliner
Wiring Harnesses, Custom Fuse Box & Tire and Loading Information Decals, Additional Acoustic Insulation


Top
 Profile  
 
PostPosted: Wed Apr 01, 2009 11:32 pm 
Offline
Certified Bonneville Nut

Joined: Tue May 20, 2008 9:03 am
Posts: 5103
Location: NE Ohio Original join date - March 2006
Year and Trim: ‘12 Jeep Grand Cherokee Overland Summit
Unbelievable. You never cease to amaze us. You should be working for GM, IMO. You just might be able to whip them back into shape.

_________________
2012 Grand Cherokee Overland Summit - Hemi
1996 Thunderbird LX - 3.8


Top
 Profile  
 
PostPosted: Wed Apr 01, 2009 11:33 pm 
Offline
Certified Bonneville Nut
User avatar

Joined: Tue May 20, 2008 5:02 pm
Posts: 4638
Location: Minnesota
Year and Trim: 2001 GMC Yukon XL
holy hell, wow. great work =D>

_________________
-Matt


Top
 Profile  
 
PostPosted: Wed Apr 01, 2009 11:34 pm 
Offline
Certified Bonneville Nut
User avatar

Joined: Wed May 28, 2008 8:51 pm
Posts: 2683
Location: Dekalb Il
Year and Trim: 96 olds cutlass supreme 4 door
:bluetwitch: that looks amazing...your car is building itself up to be a very sweet GXP
one thing i like about this is its a very sleek stock "looking" mod

i like that :)

:hail:

_________________
:headbang:LUCAS Image Member # 534.
96 olds cutlass supreme SL 4 door 3100 4t60 *3.33 gears* *Fe1* 115K bone stock DD
Wake asked SSEiman01 wrote:
why in the the world do you have or need Vaseline in your trunk??!!..well Leather cleans easy..


Top
 Profile  
 
PostPosted: Wed Apr 01, 2009 11:43 pm 
Offline
Certified Bonneville Nut
User avatar

Joined: Tue May 20, 2008 6:43 pm
Posts: 8673
Year and Trim: Sapphire -1999 SSEi Metallic Navy Blue
I'm impressed =D>

_________________
Image
Sapphire -1999 SSEi Metallic Navy Blue
fuelforthesoul1999 wrote:
Sapphire, of course, god that's the automobile equivalent of Halle Berry, you just want her.......

Quote:
Without question, the greatest invention in the history of mankind is beer. Oh, I grant you the wheel was also a fine invention, but the wheel does not go nearly as well with BBQ!!


Top
 Profile  
 
PostPosted: Wed Apr 01, 2009 11:46 pm 
Offline
Posts like an L36
Posts like an L36
User avatar

Joined: Thu May 22, 2008 1:45 am
Posts: 988
Location: Starbuck, MN/Grand Forks, ND
Year and Trim: 2000 SSEi
Wow, simply amazing. I wish I had the money, time, and ability to do stuff like that.

_________________
-Tom
Image
2003 Silverado Ext. Cab - Charcoal - 128,000 miles - Stock...for now.
2000 SSEi - Gone, but not forgotten.


Top
 Profile  
 
PostPosted: Thu Apr 02, 2009 12:33 am 
Offline
Posts like an L27
Posts like an L27
User avatar

Joined: Thu May 22, 2008 1:28 am
Posts: 773
Location: Rockford, Michigan
Year and Trim: 2000 SE, 2008 Trek 3700
Its good to see you around ddalder, your writeups are AMAZING (did you do one for a gm nav head unit into your bonne?)

_________________
Image
2000 SE: 17" Chrome Grand Prix GTP wheels, Pirelli P-Zero Nero Rubber.
180,000 miles and running smooth :)


Top
 Profile  
 
PostPosted: Thu Apr 02, 2009 12:43 am 
Offline
Resident Gearhead
Resident Gearhead

Joined: Wed Apr 01, 2009 7:11 pm
Posts: 2594
Location: Alberta, Canada
Year and Trim: 2004 GXP, 2008 STS, 2020 XT6
Hey guys, thanks for the compliments!

I do have one for my navigation, but it isn't on this board just yet. I'm going to post it but I want to make a few changes first. I had a second thread for some of the updates I did and I'm going to combine everything into one. Hopefully it'll be up in the next week or so. I've got some crazy busy days coming up though for the next 5 or 6.

_________________
Image

Bose Luxury Sound System w/Touch Screen Navigation, Addition of Factory XM, 2005 MY Antenna, OnStar Upgrade (3G),
RainSense Wipers, Backup Camera, '00 Style Door Panel Courtesy Lights, Heated Washer Solvent, 2X Remote Trunk Release,
Turn Signal Mirrors, Center Console Courtesy Lamp, Rear Outboard Heated Seats, PVD Chrome 18" Factory Rims, Upgraded
Carbon Fibre Appearance Interior Trim, Highly Modified Main Body Harness, Instrument Panel, Door, Door Panel & Headliner
Wiring Harnesses, Custom Fuse Box & Tire and Loading Information Decals, Additional Acoustic Insulation


Top
 Profile  
 
PostPosted: Thu Apr 02, 2009 9:21 pm 
Offline
Posts like an L27
Posts like an L27
User avatar

Joined: Thu May 22, 2008 1:28 am
Posts: 773
Location: Rockford, Michigan
Year and Trim: 2000 SE, 2008 Trek 3700
awesome-tacular.

_________________
Image
2000 SE: 17" Chrome Grand Prix GTP wheels, Pirelli P-Zero Nero Rubber.
180,000 miles and running smooth :)


Top
 Profile  
 
PostPosted: Thu Apr 02, 2009 9:25 pm 
Offline
Posts like an LN3
Posts like an LN3
User avatar

Joined: Sun Mar 01, 2009 1:43 am
Posts: 591
Location: Bolingbrook, Illinois
Year and Trim: 2012 Nissan Sentra SR Special Edition
SIMPLY AWESOME!!!!!!!!
SIMPLY AMAZING!!!!!!!!!

:hail: :hail: :hail:

_________________
Jovan

Image


Top
 Profile  
 
PostPosted: Fri Apr 03, 2009 10:54 am 
Offline
Posts like a Northstar
User avatar

Joined: Thu Dec 18, 2008 11:38 pm
Posts: 1700
Location: Cambridge, OH
Year and Trim: 95 LeSabre Custom
01 Bonneville SSEi
09 G8 GT
Simply amazing write-up!!!!

I wish I had even a fraction of your skills and patience! :hail:

I could only dream to make all my extra additions in my Buick use GM factory connectors! I was really intrigued with the LED install in the heated seat switches, as I've had similar ideas for switches in my Buick, just wasn't sure how to go about it.

_________________
- Greg | -- Project Prasinos -- |
Image
1995 LeSabre Custom: 312K Miles | Custom K&N CAI | Edelbrock SDT Muffler | Camaro Tips | 180 T-stat | LED Interior
& Exterior | 20% Tint | PA Grill & Portholes | Limited Trim | GTP Rims | Ported LIM | Plus Many More Mods | Restoration Thread
2001 Bonneville SSEi: 225K Miles | Instense FWI | Intense MPS (3.4") | 180 T-stat | ZZP Plog | Ported Rear Manifold |
ZZP 3" Downpipe | Magnaflow Cat | Retrofitted HIDs | GenV M90 | GXP Brake Upgrade | 35% Tint | Plus Many More Mods |
2005 Bonneville GXP: 101K Miles | Custom FWI
2009 G8 GT: 89K Miles | 35% Tint | Roto-Fab CAI | SOLO Mach Exhaust | BMR Tunnel Brace | BMR Sub Frames | BMR STB |
Kooks Headers | QTP Electric Cutouts | BMR Sway Bars | Elite Engineering Catch Can | Innovative Dual Wideband Kit
1984 Caprice Classic Wagon: 86K Miles | Restoration Project


Top
 Profile  
 
PostPosted: Fri Apr 03, 2009 6:38 pm 
Offline
Posts like an L67
Posts like an L67

Joined: Wed May 21, 2008 10:26 pm
Posts: 1398
Location: Clarkston, MI
Year and Trim: 03 SLE
Very cool! And beautiful car!

_________________
Image


Top
 Profile  
 
PostPosted: Fri Apr 03, 2009 8:49 pm 
Offline
Posts like a Northstar

Joined: Fri May 23, 2008 2:54 am
Posts: 1730
Year and Trim: 1995 SSei
1987 GN 16K Original
Amazing work :hail:

:beerchug:

_________________
Image


Top
 Profile  
 
PostPosted: Sun Apr 05, 2009 11:29 pm 
Offline
Retired Site Developer
User avatar

Joined: Tue May 27, 2008 10:30 pm
Posts: 20960
Location: MN/IA
Year and Trim: '17 Silverado 1500
Wow, that's incredible work. Next time you're in MN, we definitely have to meet up.

_________________
Bye Bye:
Image
RIP sandrock
Sirius wrote:
Think about it. You’re tooling down the road in your Prius, knowing full-well that this thing being green is as big a sham as federally mandated ethanol-enriched gas, Russia pulling out of Ukraine, and Obamacare.


Top
 Profile  
 
PostPosted: Mon Apr 06, 2009 1:40 am 
Offline
Retired Moderator
Retired Moderator
User avatar

Joined: Tue May 20, 2008 11:57 pm
Posts: 5289
Location: Bonney Lake, WA
Year and Trim: Member since Jan 2003
WOW, way to go DARCY!!!!! I'm so VERY impressed with your skills and what you've been able to do with your car!!!

_________________
-driverjohn2005
"Gravenge" -1992 Pontiac Bonneville SSEi- Sold 4/29/12 to "myfirstbonnie"
Current Rides: 2015 Mitsubishi Outlander Sport GT AWD & 1999 Ford F-150 Lariat 4x4 SuperCab


Top
 Profile  
 
PostPosted: Mon Apr 06, 2009 2:18 am 
Offline
SSEi Member
SSEi Member

Joined: Fri Feb 27, 2009 6:53 pm
Posts: 155
Location: ontario canada
Year and Trim: 1999 buick park ave 1996 chevy caprice 9c1
WOW very impressed!! I am like you about the must look factory mods, that's why my car remains unmodified.


Top
 Profile  
 
PostPosted: Mon Apr 06, 2009 10:50 pm 
Offline
Retired Moderator
Retired Moderator
User avatar

Joined: Mon May 19, 2008 1:07 pm
Posts: 2474
Location: Centerville, IN
Year and Trim: 1993 SSE

Member since Nov 2003
Oh. My. Goodness. I can't begin to express my amazement.

_________________
Image

1993 SSE Since 11-12-2000
2011 Camaro 2SS
2006 Silverado 3500 4x4


Top
 Profile  
 
PostPosted: Mon Apr 06, 2009 11:08 pm 
Offline
Moderator / Social Dev
User avatar

Joined: Tue May 20, 2008 11:52 pm
Posts: 5962
Location: Williamsburg, Va
Year and Trim: ___
2001 Bonneville SSEi
2009 Pontiac G8 GT
Awesome-sauce! :banana:

Definitely some nice work there!

_________________
Image
'93 SSE "Guinevere" RIP 1993 - 2019
'01 SSEi "Chloe" Mods: Intense FWI | GenV | WBS Intercooled | 3.2 MPS | 1.9 YT Rockers | SSAC Headers | N* TB | TEP Trans | 3.29 FDR | Torsen LSD
DTM Tuned | Dual AeroForce | Solid Mounts | 255 Walbro Pump | Fuel Logs | GXP STB & Sway Bars | CSS Lowering Springs | GXP Brakes | Disabled DRL
Magnaflow Mufflers | Magnaflow Cat | GXP Seats & Trim | 35 % Tint | Cleared & Tinted Tails | repinS Retrofited Morimoto Mini H1 | 19" GT500 Wheels
'09 G8 GT "Abigail" Mods: Rotofab | LS3 Heads, Intake & Cam | Kooks LT | Solo Exhaust | Tien Springs w/ GXP Struts | Whiteline Swaybars | BMR Subframe Connectors
Achievements: Guinevere - 264k mi | 16.27 @ 84.10mph | March '11 COTM :: Chloe - 223k mi | 13.85 @ 102mph | January '09 COTM :: Abigail - 192k mi | 12.85 @ 112mph


Top
 Profile  
 
PostPosted: Thu Apr 09, 2009 6:36 pm 
Offline
SSE Member
SSE Member

Joined: Fri Jun 27, 2008 10:59 am
Posts: 134
Year and Trim: 2002 SSEI
ALL STOCK (FOR noW)
:hail: WOW .... thats cool


Top
 Profile  
 
PostPosted: Fri Apr 20, 2012 4:26 am 
Offline
SSEi Member
SSEi Member

Joined: Fri Feb 17, 2012 1:35 am
Posts: 161
Year and Trim: '05 SLE
What did you do or use to make the new switch bezel match the factory carbon fiber so well? Looks awesome, would like to know more for something I am thinking about trying to make (gauge pod).

_________________
Scott

'05 SLE, Crimson Tintcoat, 89K

Mechanical: FWI, FelPro LIM and Valve Cover Gaskets, Ported LIM, Prestone Green Coolant, 180 Thermostat

Exterior: Tinted - 35% Front, 20% Rear

Interior: GXP Carbon Fiber Upgrade, Tinted Reflectors


Top
 Profile  
 
Display posts from previous:  Sort by  
Post new topic Reply to topic  [ 21 posts ]  Go to page 1, 2  Next

All times are UTC - 5 hours [ DST ]


Related topics
 Topics   Author   Replies   Views   Last post 
There are no new unread posts for this topic. Adding Heated Washer Solvent

ddalder

5

5541

Thu Apr 09, 2009 5:54 pm

rogers9c1 View the latest post

There are no new unread posts for this topic. Heated Steering Wheel and Shift Knob

KelvinVV

7

2326

Sat Nov 16, 2013 5:59 pm

gweg_b View the latest post

There are no new unread posts for this topic. Project Update - Heated Washer Solvent

ddalder

4

2163

Sat Oct 03, 2015 12:12 am

ddalder View the latest post

There are no new unread posts for this topic. will seats from a gxp work?

1999_pontiac_ssei

3

1498

Sun Aug 15, 2010 11:10 am

dpnewfie View the latest post

There are no new unread posts for this topic. Leather seats

wast3dd3ath

2

1871

Mon Oct 05, 2015 3:53 pm

ddalder View the latest post


Who is online

Users browsing this forum: No registered users and 2 guests


You cannot post new topics in this forum
You cannot reply to topics in this forum
You cannot edit your posts in this forum
You cannot delete your posts in this forum
You cannot post attachments in this forum

Search for:
Jump to:  
Powered by phpBB® Forum Software © phpBB Group


phpBB SEO