Introduction: Gasoline goes through many stages before it enters the fuel tank on your car, from the refinery to the truck that hauls it to the tank at your gas station. In those stages it can pick up contaminants, and those contaminants can damage your fuel system or even your engine unless they are caught before then. That’s what a fuel filter is for, catching those contaminants. However, a fuel filter is a consumable item, and has a capacity before it becomes a significant restriction in the system, which can cause the engine to run rough, due to a lack of fuel. The fuel filter is probably one of the most overlooked items on a car, yet one of the most important. By changing your fuel filter every 15 – 20,000 miles, you can extend the life of your engine, and prevent issues down the road. The following write-up will show you the basic steps in changing the fuel filter on a 2005 Pontiac Bonneville GXP, but this procedure applies to all 00+ Bonnevilles. 3800 V6 cars differ in the location of the bleeder valve on the rail.
Disclaimer: This article is for reference purposes only. Read all steps before attempting procedure, and post any questions in the appropriate section of this forum. Neither the author of this article nor Pontiac Bonneville Club are liable for damages or personal injury caused by misuse of tools or equipment.
Tools/Supplies Needed:
Needle Nose Pliers
16 mm Line/Fitting Wrench
20 mm Open-Ended Wrench
Penetrating Lubricant
Small Screwdriver (Used for releasing pressure at fuel rail)
Purolator Part Number F54714 Fuel Filter (Or other)
Safe Method of Lifting and Supporting Vehicle (Floor Jack and Jack-Stands, Car Ramps, Hydraulic Lift)
Shop Rags/Towels
Container to Catch Excess Fuel (Pail, Drain Pan, etc.)
Safety Glasses/Goggles
Rubber Gloves to protect hands (optional)
Step 1: Park the car in a way that it is able to be lifted and safely secured. Shut the engine off, open the hood.
Step 2: Remove plastic engine cover by pulling up on the front, and pulling towards the front of the car. Set to the side.
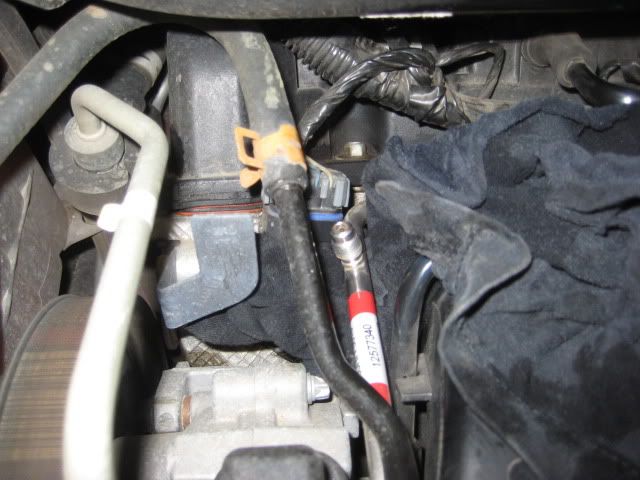
Step 3: Locate Pressure Release Valve on Fuel Rail, located on the left side towards the rear of the rail, and place rags underneath and around to catch fuel. See Figure 1.
Figure 1:
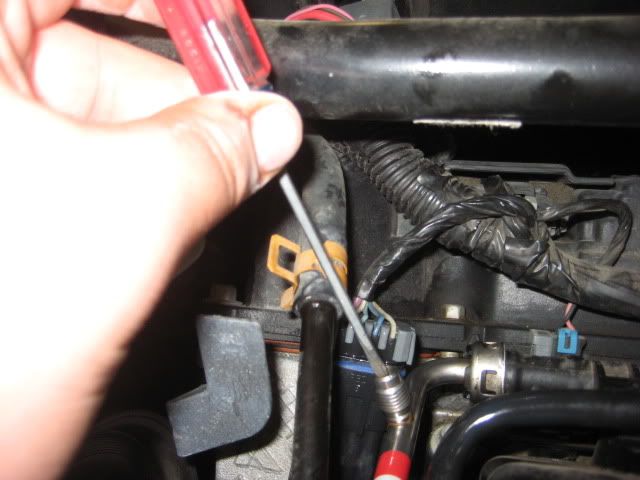
Step 4: With small screwdriver, push down on inside of valve. (See Figure 2) CAUTION: Fuel Spray may cause Eye Damage. Ensure eyes are protected with safety glasses or goggles.
Removing the fuel pump relay and turning over the engine for a few seconds will also allow the rail to de-pressurize. Make sure to depress the valve to ensure all residual pressure has been released in the rail.
Figure 2:
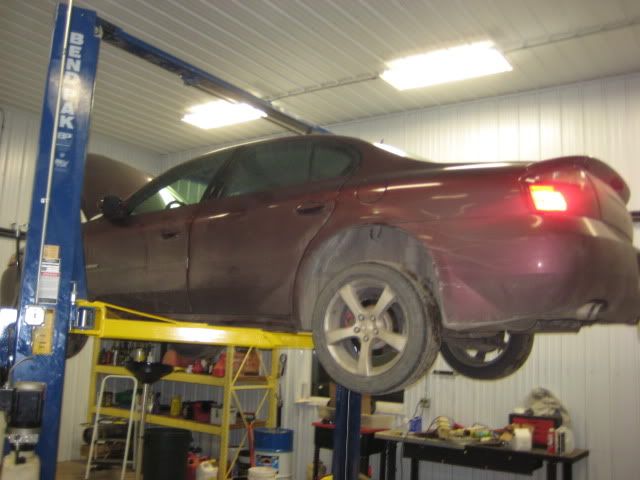
Step 5: Lift and support vehicle. A hydraulic lift was used in this manual, but a jack and stands or car ramps may be also used. (See Figure 3)
WARNING: An improperly supported vehicle can fall and cause personal injury, death, or damage to vehicle. Ensure all safety measures are used.
Figure 3:
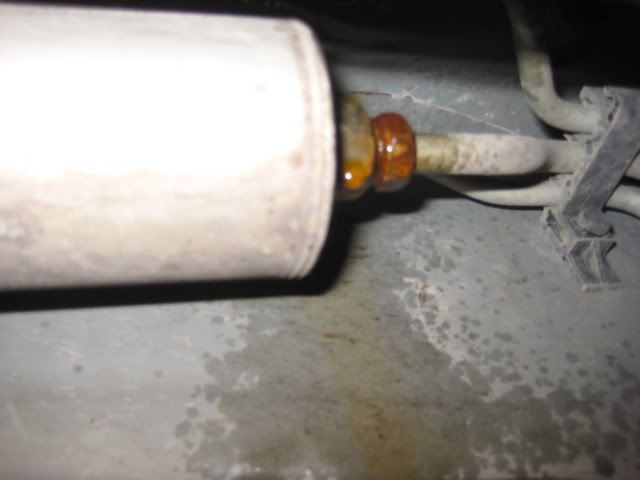
Step 6: Locate fuel filter under rear driver door area. Spray the nut on the forward (towards front of car) end of the fuel filter with penetrating lubricant to ease removal. Let lubricant soak for a few minutes. (see Figure 4)
Figure 4:
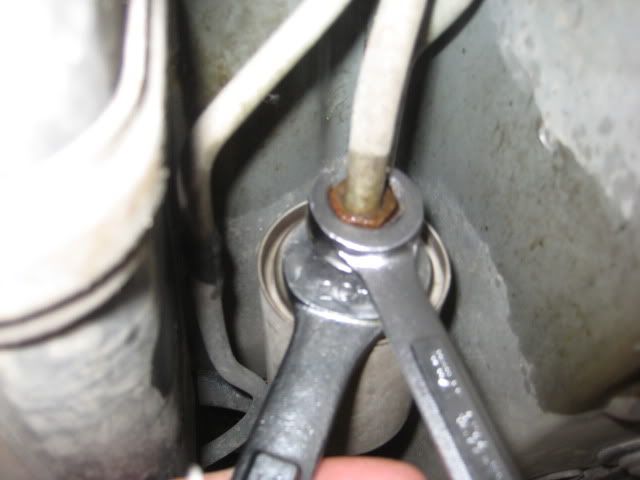
Step 7: Using 20 mm open-ended and 16 mm open-ended and 16 mm fitting wrench, loosen nuts on forward end of fuel filter. (See Figure 5) Residual pressure may be in fuel filter. Ensure there is something to catch fuel, and that you are wearing proper eye protection.
Figure 5:
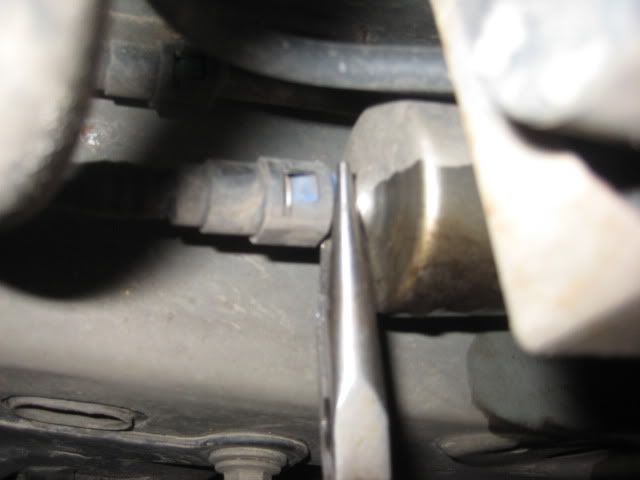
Step 8: Using needle-nose pliers, push in on the tabs on the plastic clip located at the rear of the filter, and pull out. (See Figure 6)
Figure 6:
Step 9: Take new filter, and ensuring plastic clip is on end, insert clip end into rear line (See Figure 7), and insert forward line into nut end. (See Figure 8)
Figure 7:

Figure 8:

Step 10: Using 20 mm and 16 mm wrenches again, tighten nut into filter. Tighten nut until wrenches stop turning easily.
WARNING: Over-tightening nuts can cause damage. Do not over-tighten.
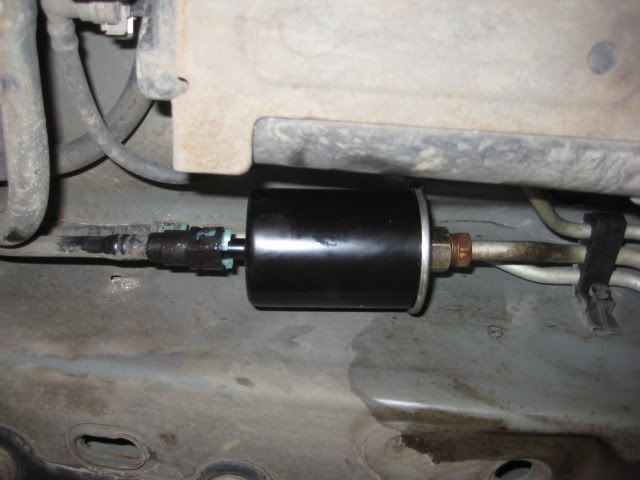
Figure 9 shows how the new filter should look under car.
Figure 9:
Step 11: Lower car, turn ignition key to “On” position, and check on ground under filter for leaks (dripping fuel). If you removed the fuel pump relay, now is the time to replace that as well.
Enjoy a job well done, and the knowledge that the fuel going to your engine is clean.


