Warning: This will be a long read with lots of pictures.
Since it seems most people are so afraid of working on the Northstar and I've gladly owned a number of these cars I thought it was time to create a how-to on their biggest issue......headgaskets.
I had a spare engine from another car than ran awesome and had lower mileage so I brought that to Midwest Cadillac Repair and had them go through the engine. It has been completely cleaned inside and out and had the block drilled out and 20 inserts put in all the head bolt holes as well as resealing the whole engine top to bottom.
That being said...the car I have seems to have hydrolocked and possibly jumped time as the spark plug in one cylinder was smashed and the engine can not be turned over. Hence my opting not to try to reuse this engine at all. But it will make a nice coffee table.
Supposedly GM had this issue fixed my 2004-05 but I have to disagree. I engine swapped a 2005 deville that had the same overheating problem at 100k miles. This car is only around 126k? I believe and has had catastrophic headgasket failure.
When I drained the oil I knew I had found my answer......out came 7 quarts of coolant and 6 quarts of oil. Pulling the petcock only netted me about 1/2 quart of coolant.
So shall we begin......
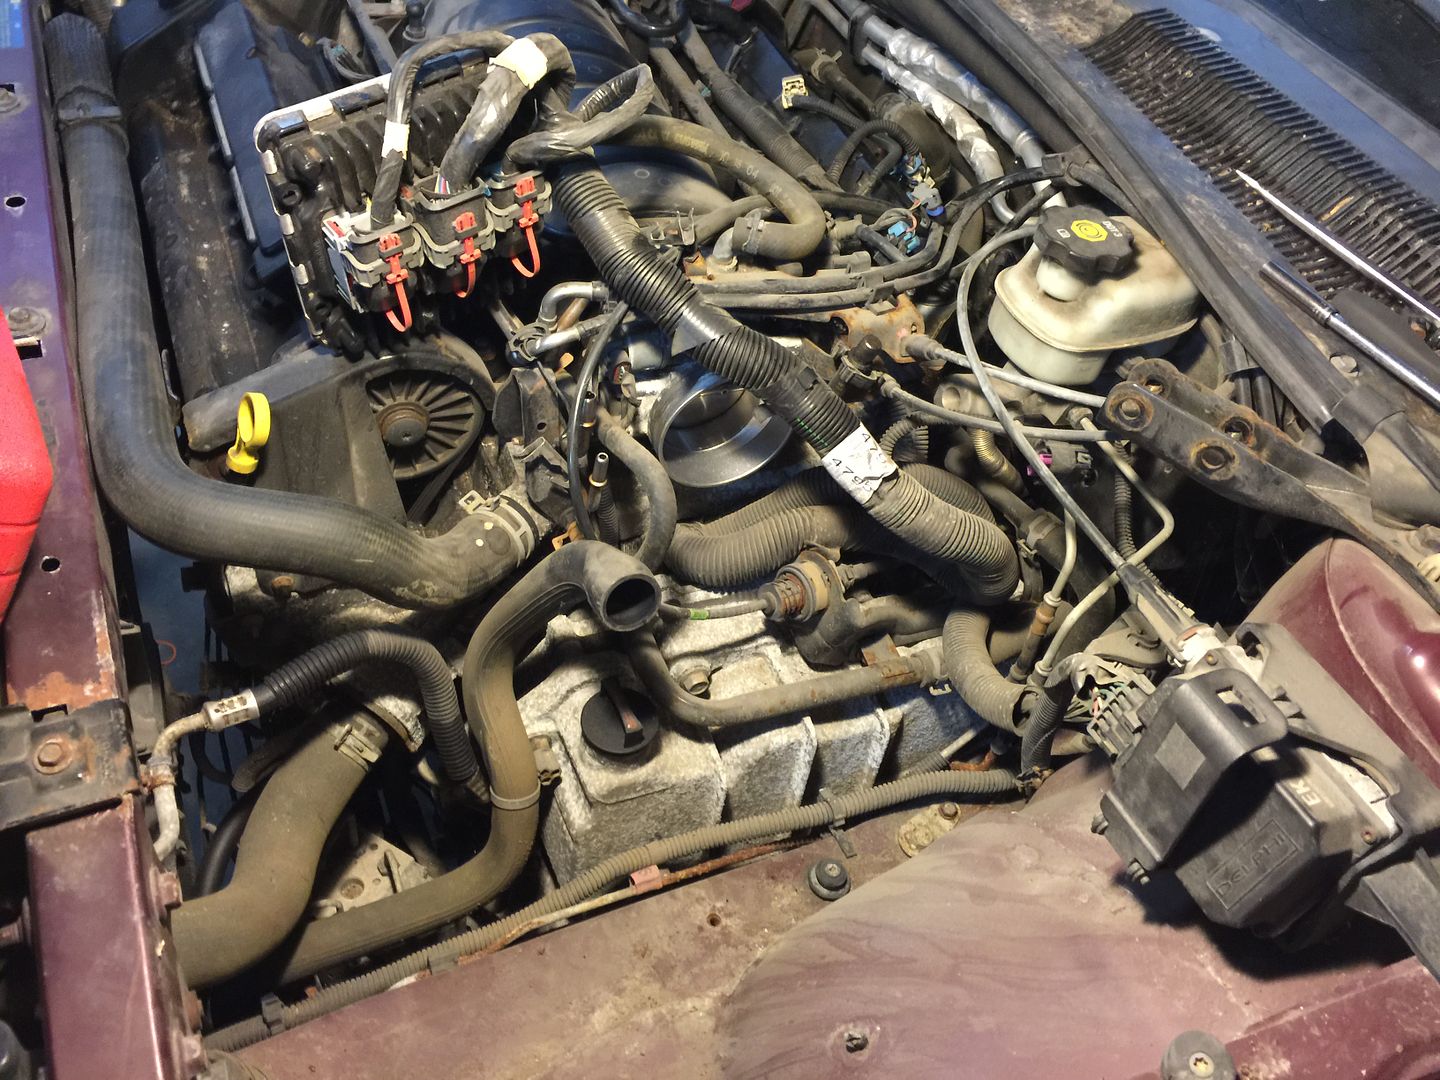
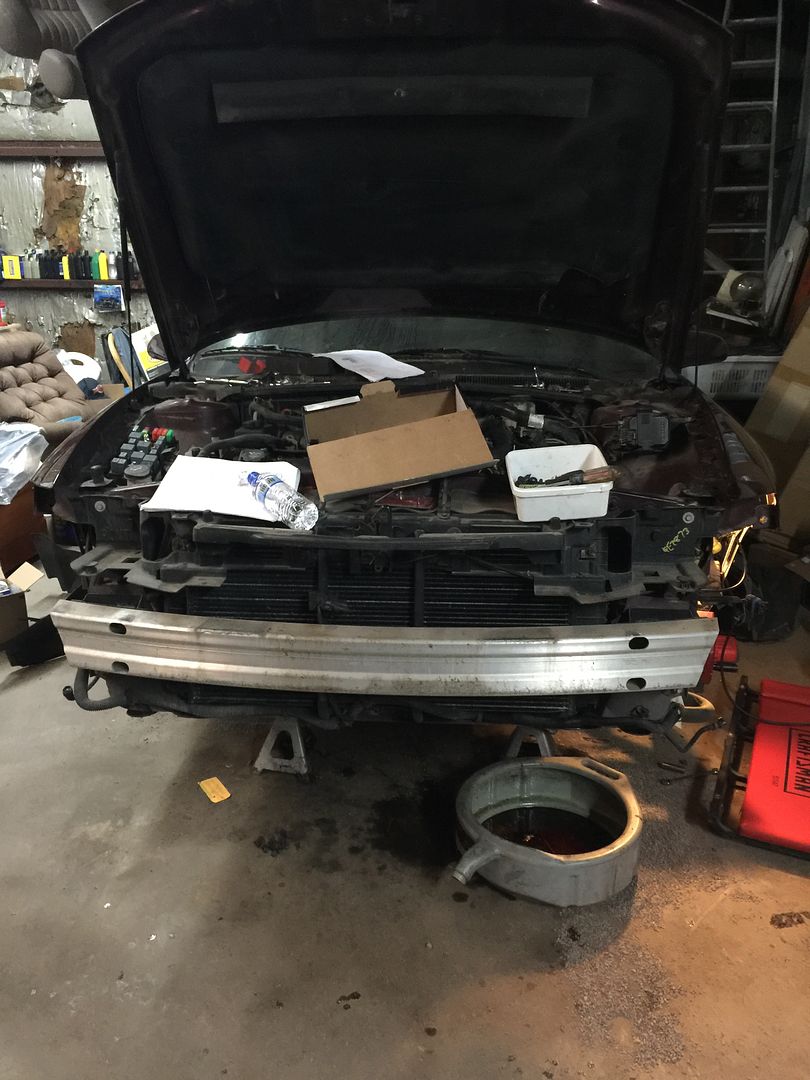
So we start by uncluttering the engine bay. I had the car jacked up already from draining the oil. The directions don't say to do this till later but I'm pretty tall so it makes things easier to work on.
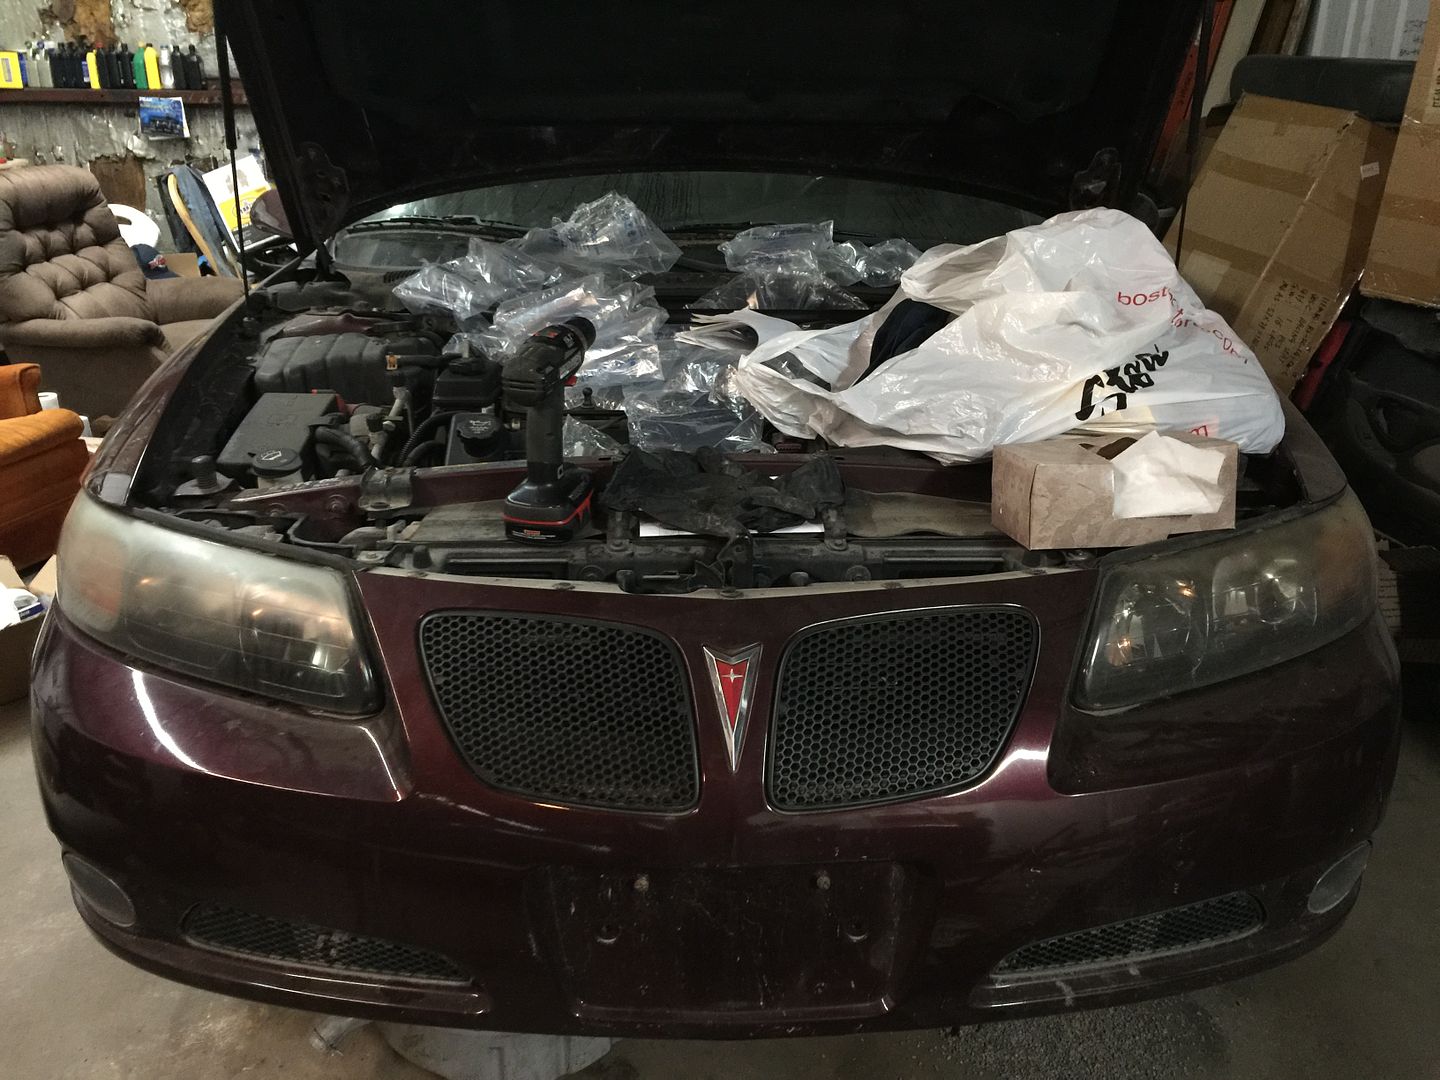
Here are the first few steps....
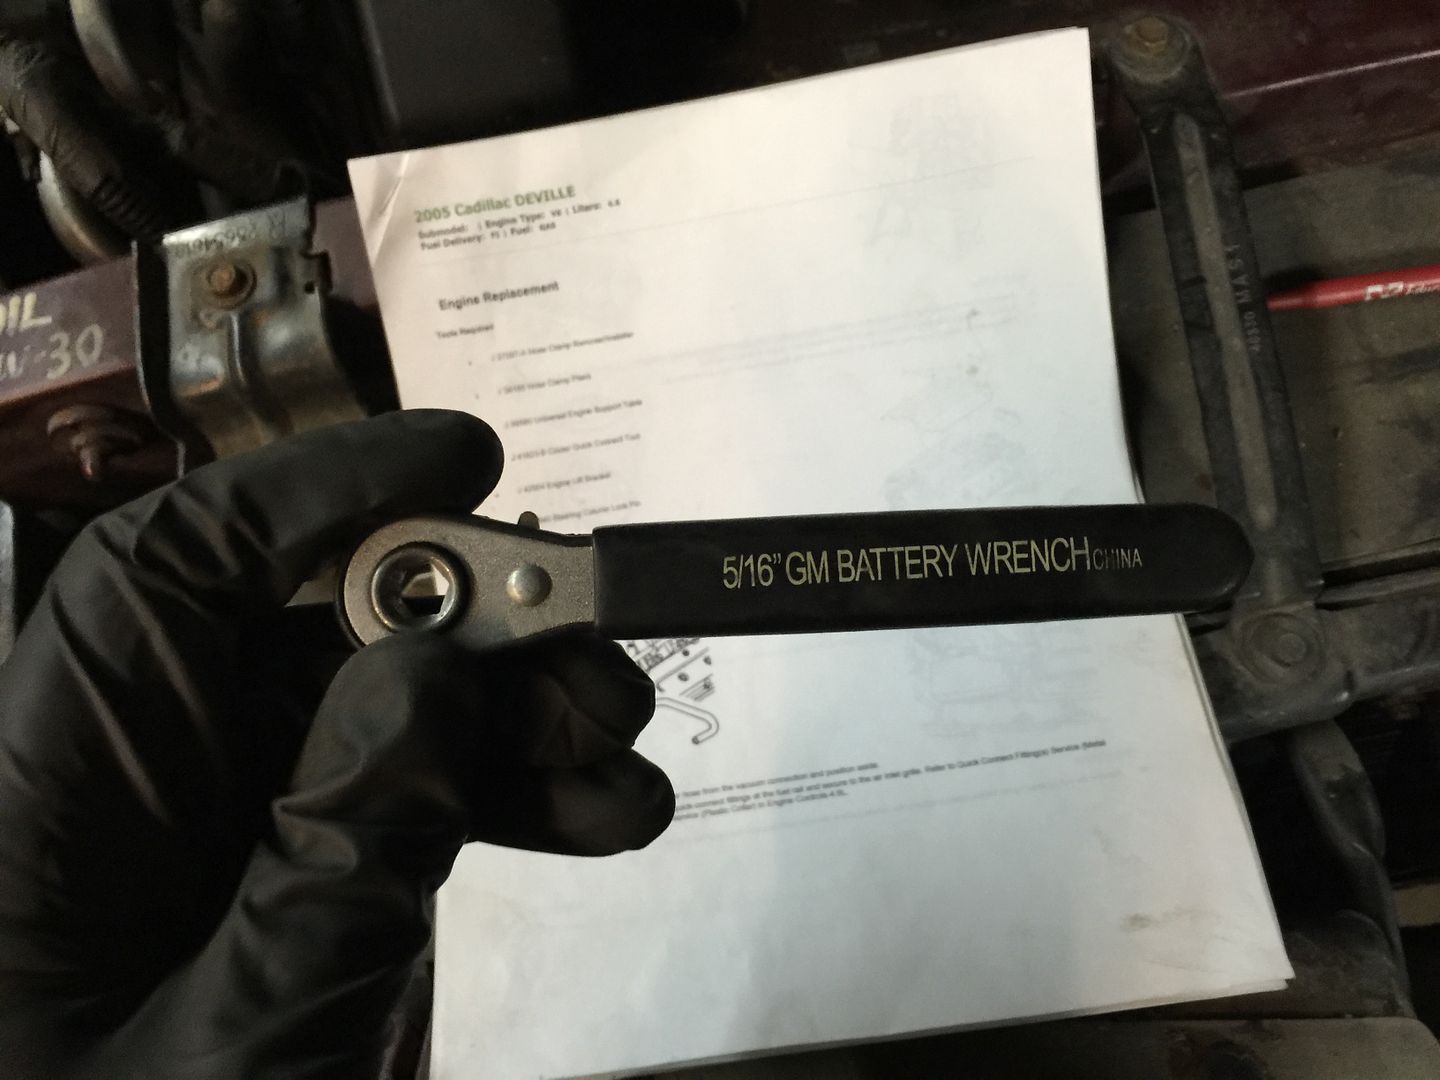
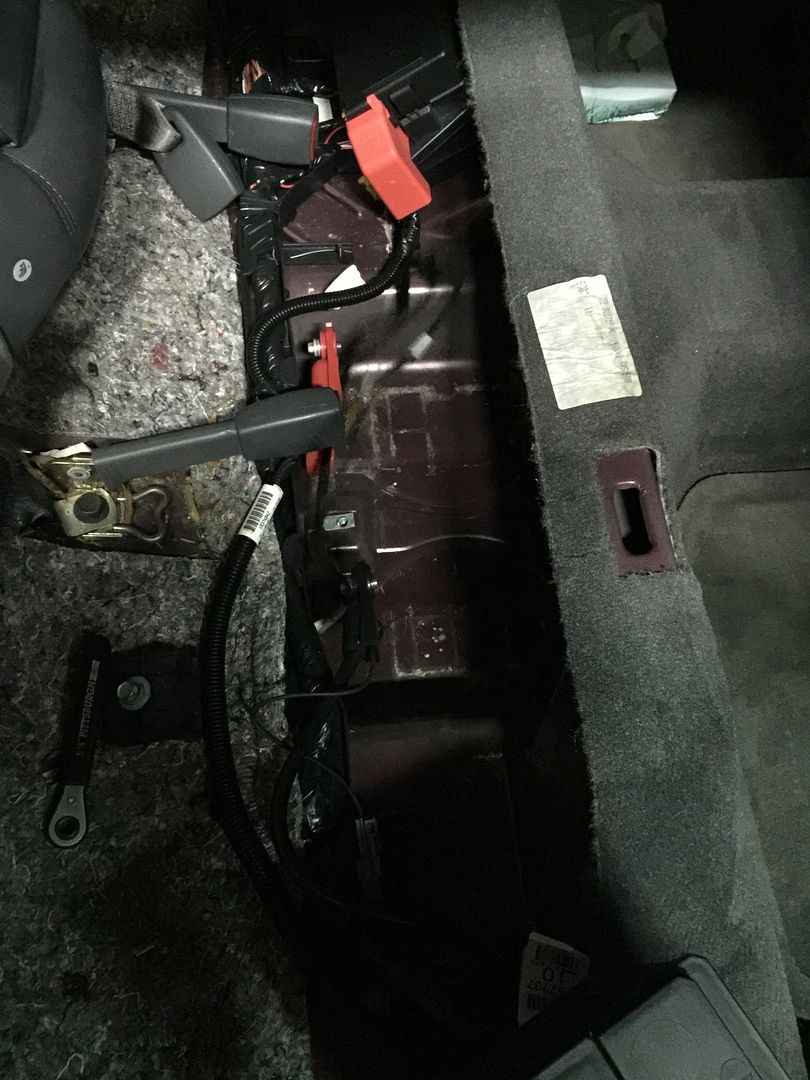
1.) Get out your handy dandy GM battery wrench and disconnect the battery or in my case remove it completely to charge.
2.) Recover the AC Refrigerant. I'll leave you to your own methods for this. Ideally you might want to take it to a shop to have it vacuumed out prior to engine swap and then have them refill it at a later date. If the car is driveable.
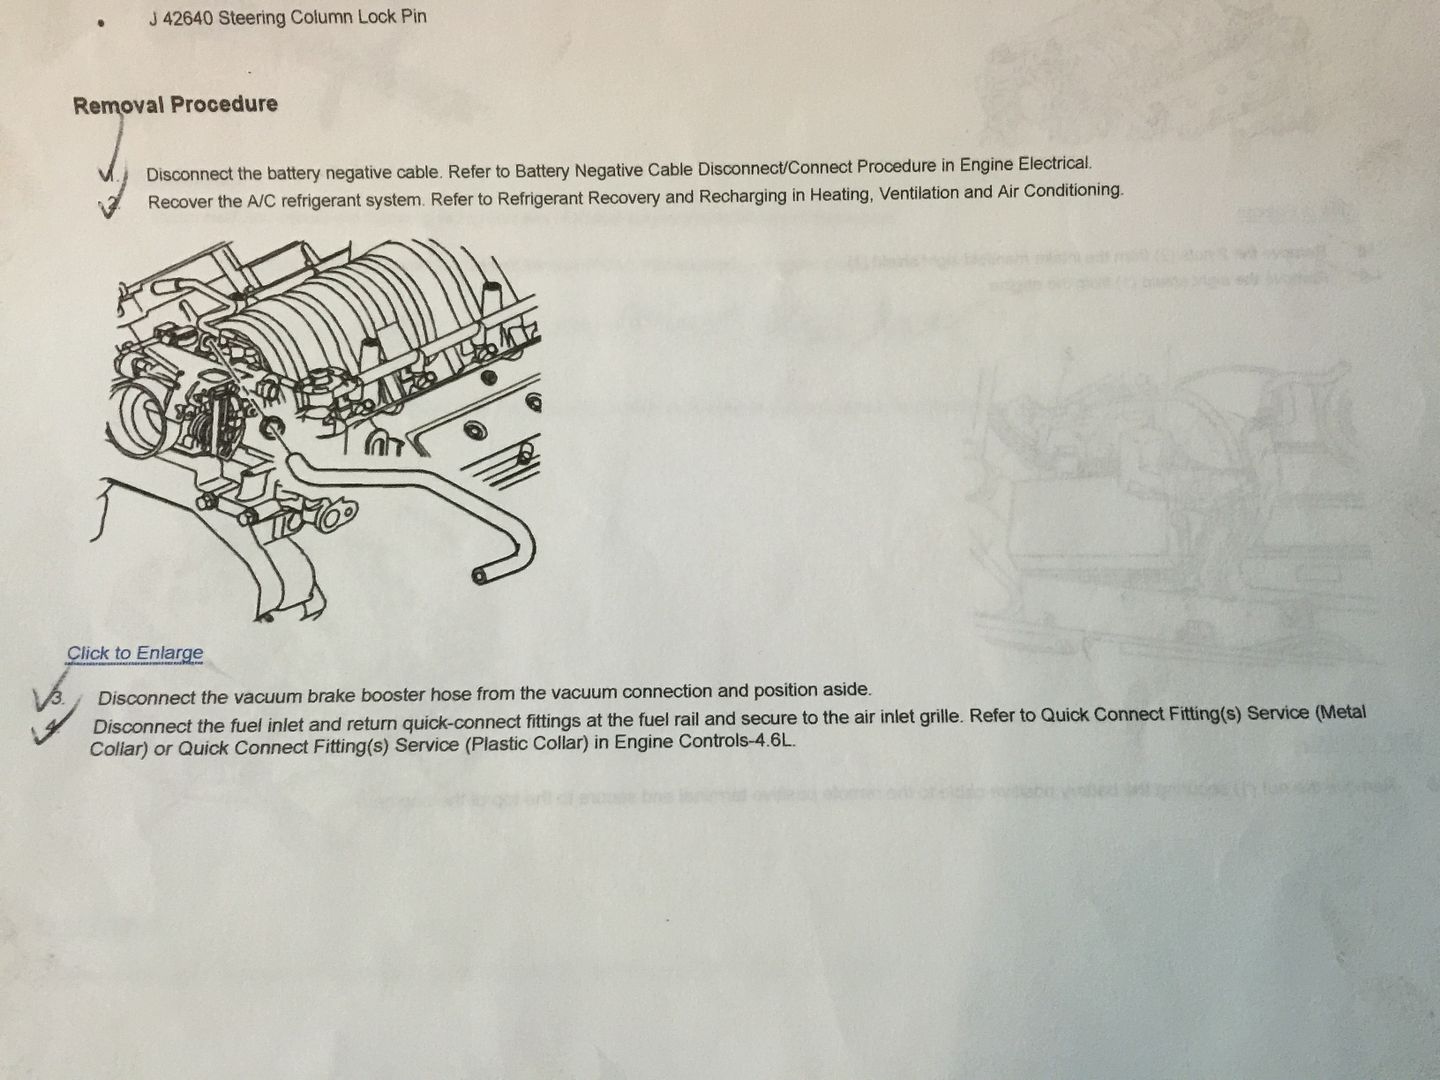
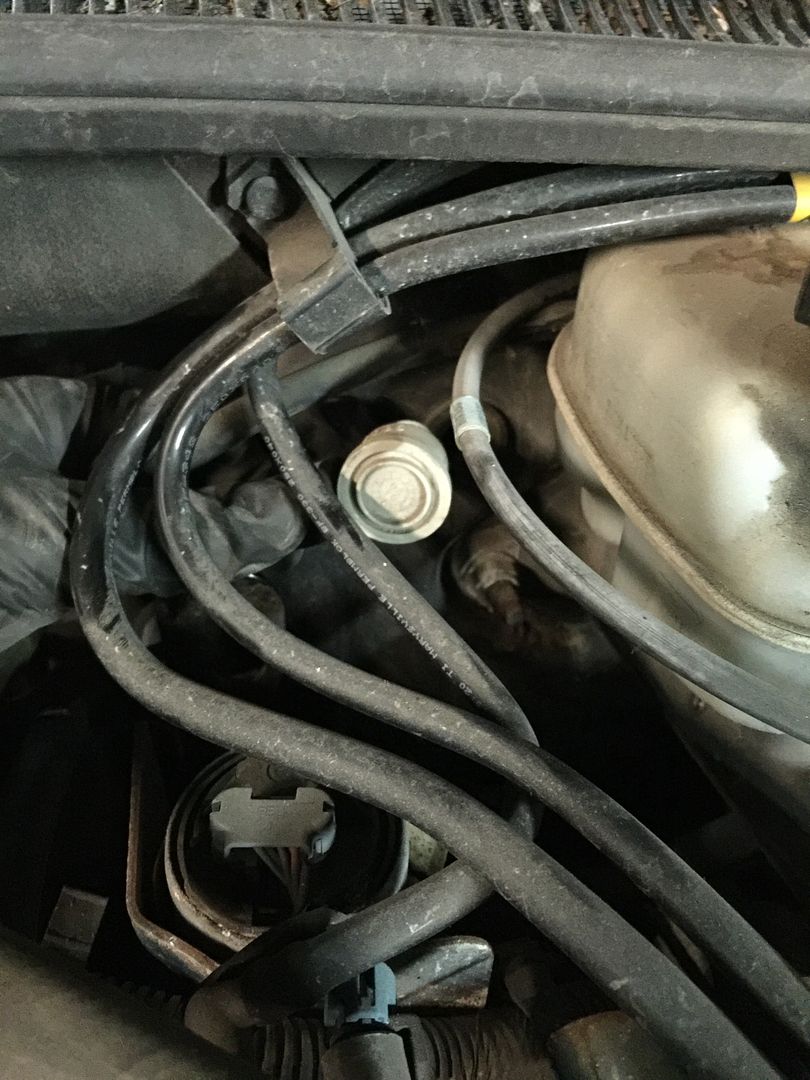
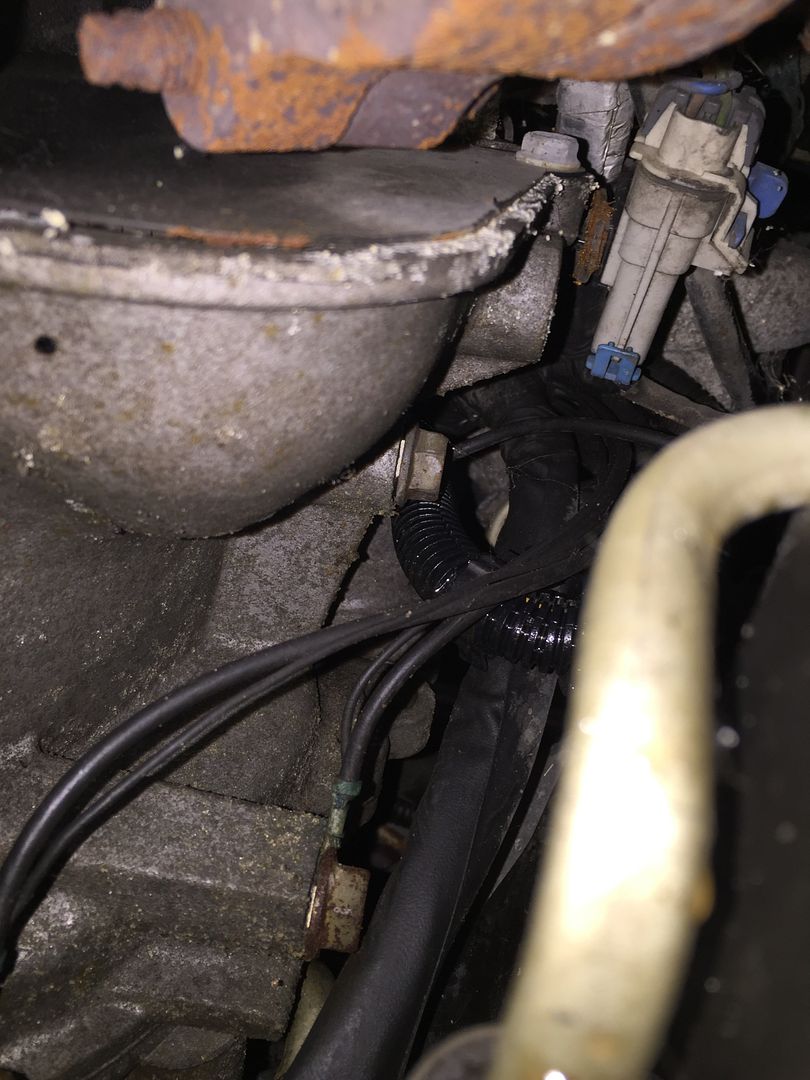
3.) Disconnect brake booster hose. Seen here with the white knob/nipple on the end.
4.) Disconnect fuel lines. Pull back and down and the fuel line lock will pop right off.
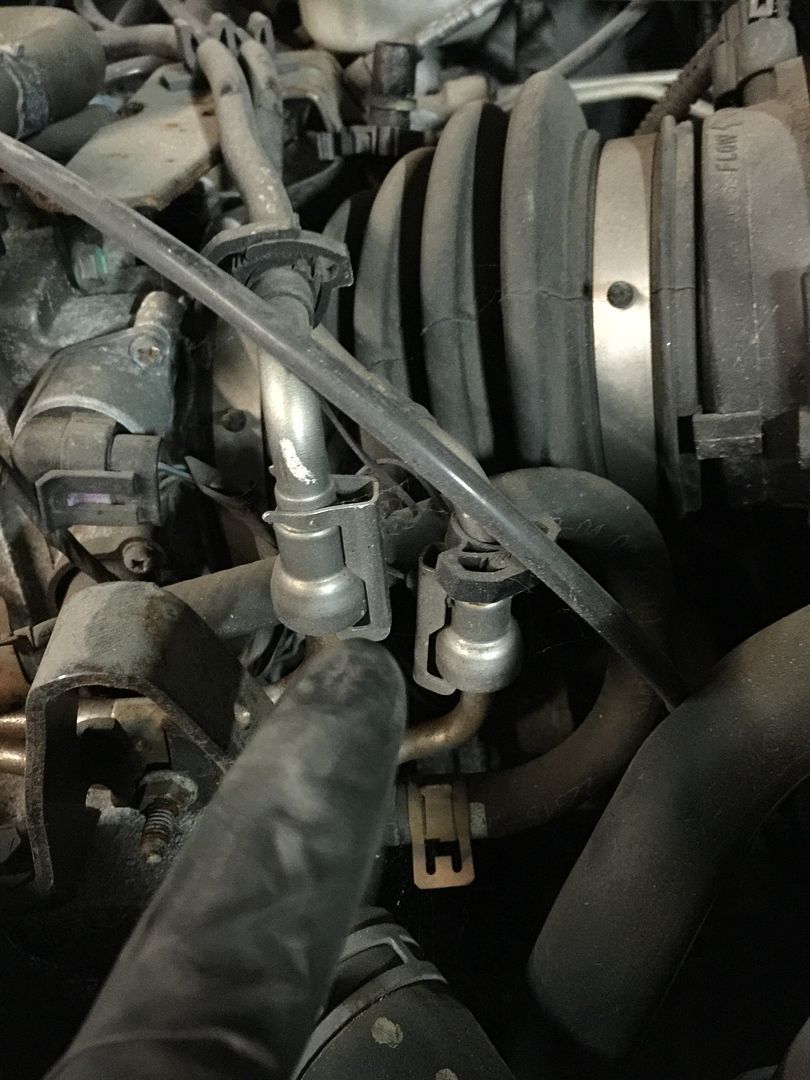
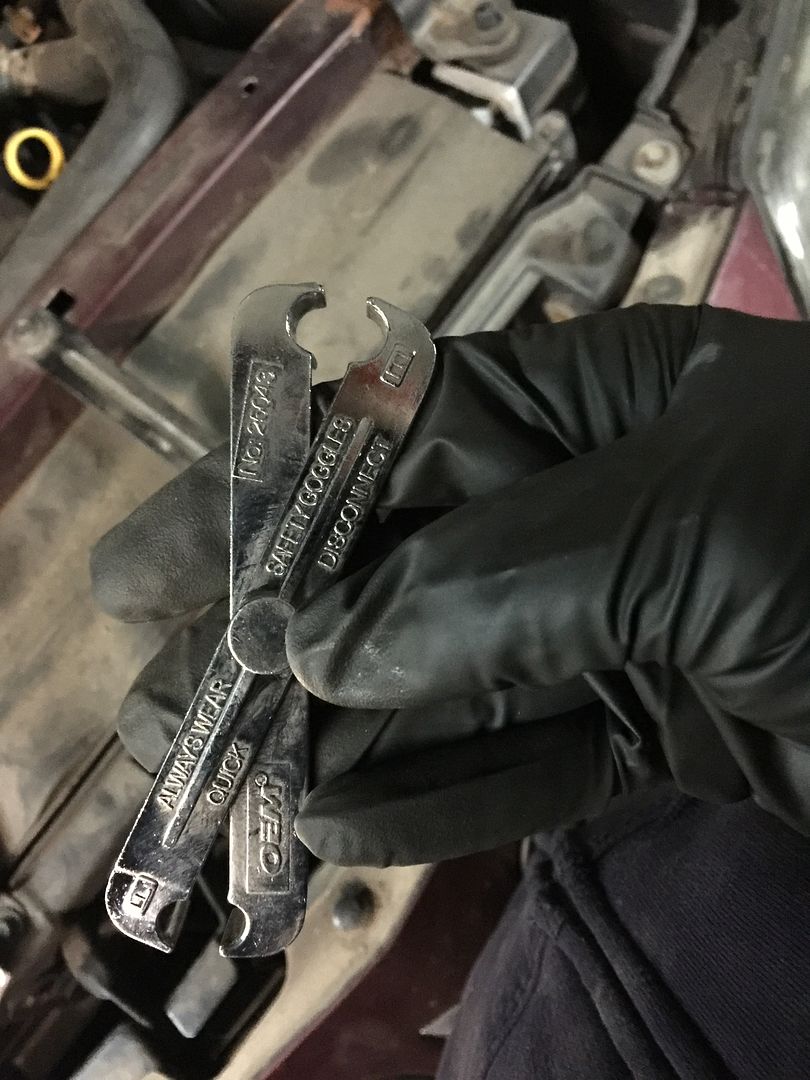
If you use this tool (fuel line remover) it will save you so much time and headache. Just make sure to get a metal one, the plastic ones will break very easily.
Simply press downward on the fuel line, insert the correct size end of the tool into the area around the metal line and push up on the tool. Give the like a tug upward and it should pop right off. Didn't take me more than a few seconds for each one.
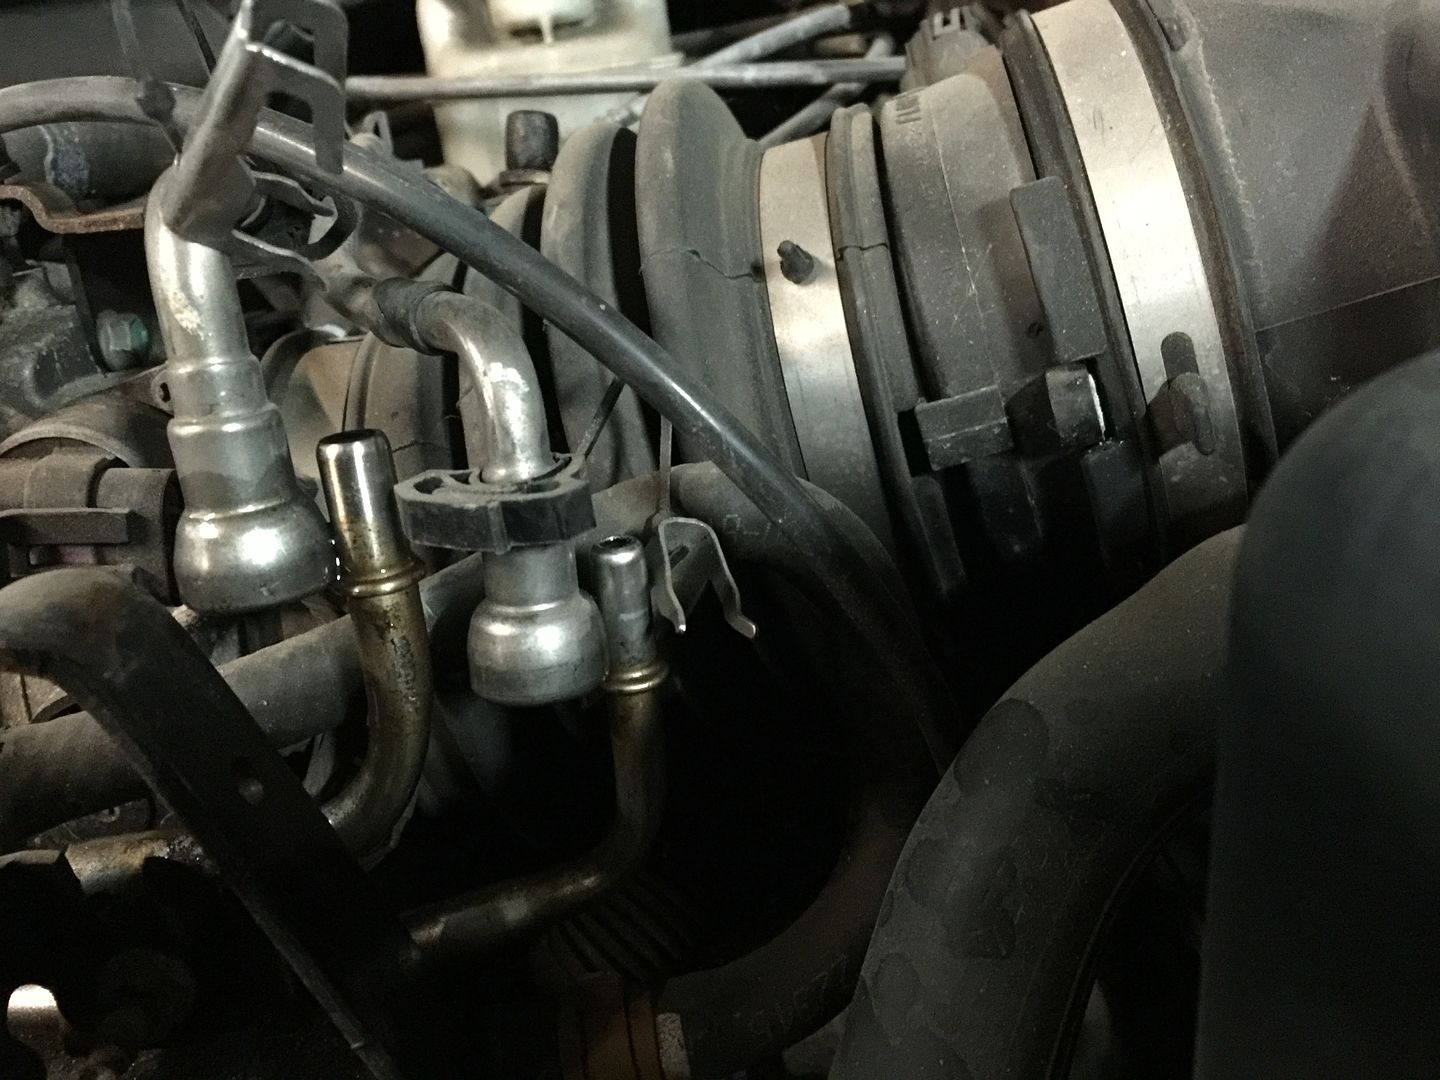
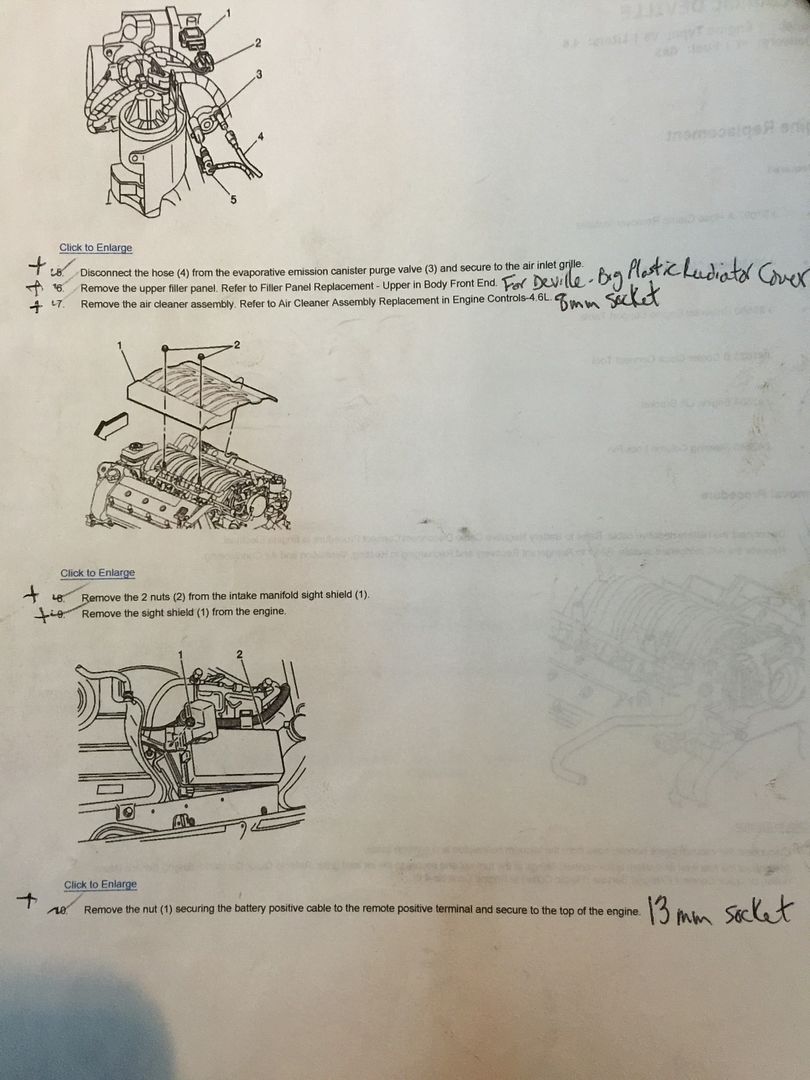
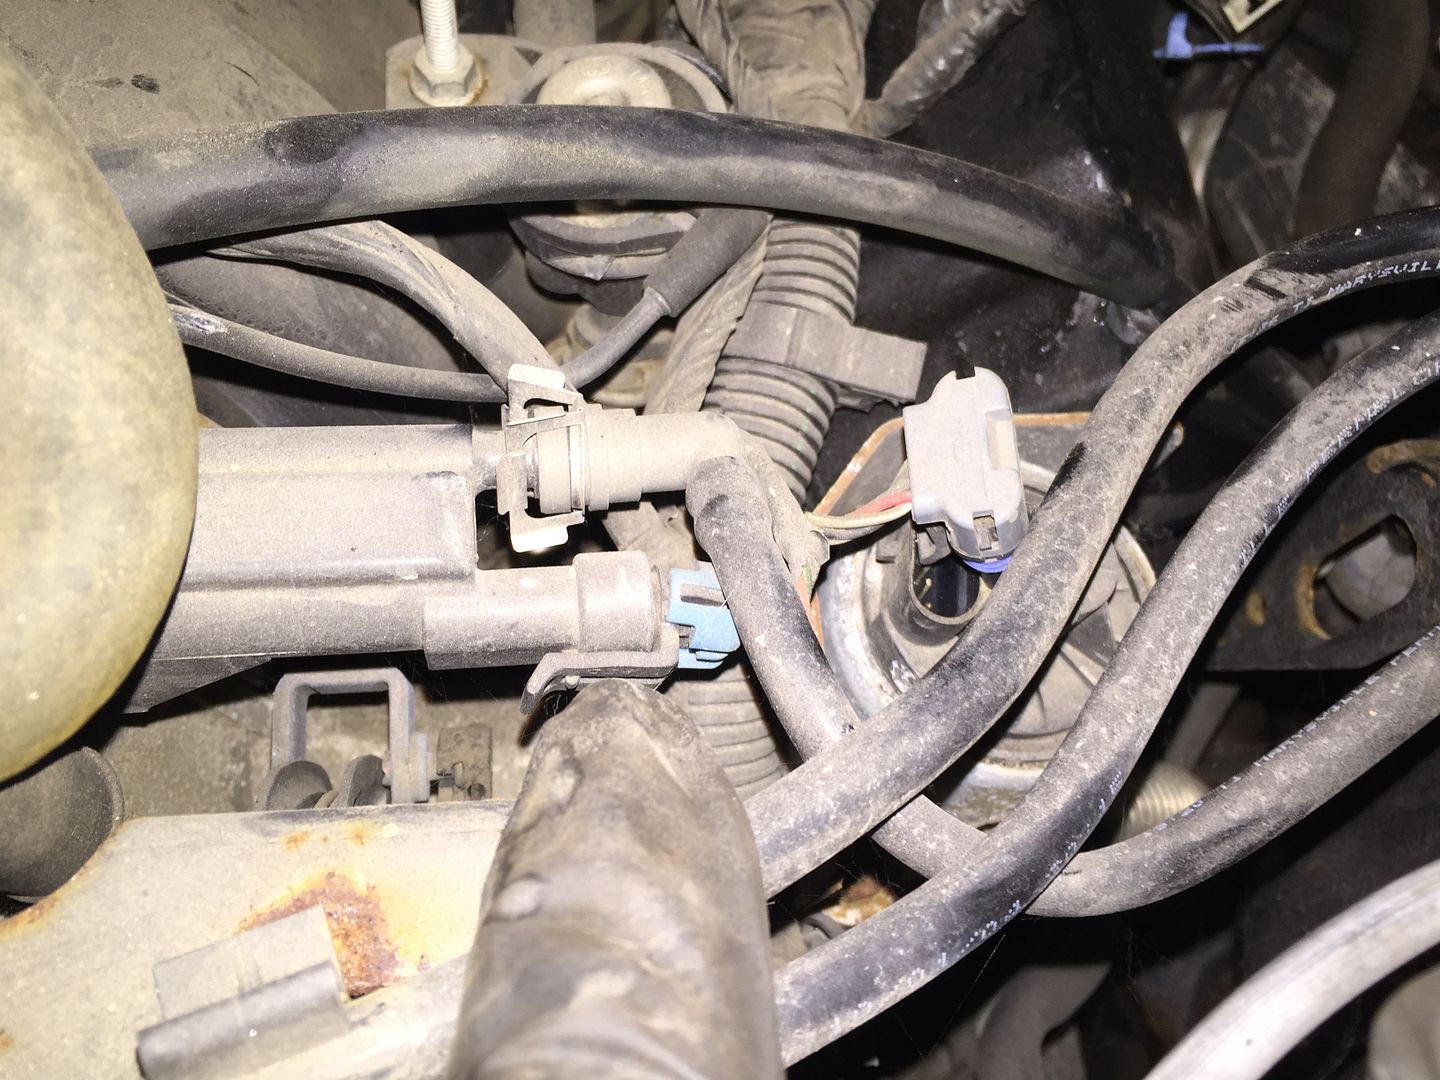
5.) Disconnect emissions hose. Pry the metal clips to the sides and pull the hose off.
6.) This step only applies to Cadillacs with the big plastic upper panel covering the radiator area.
7.) Remove airbox. Unplug this plug.
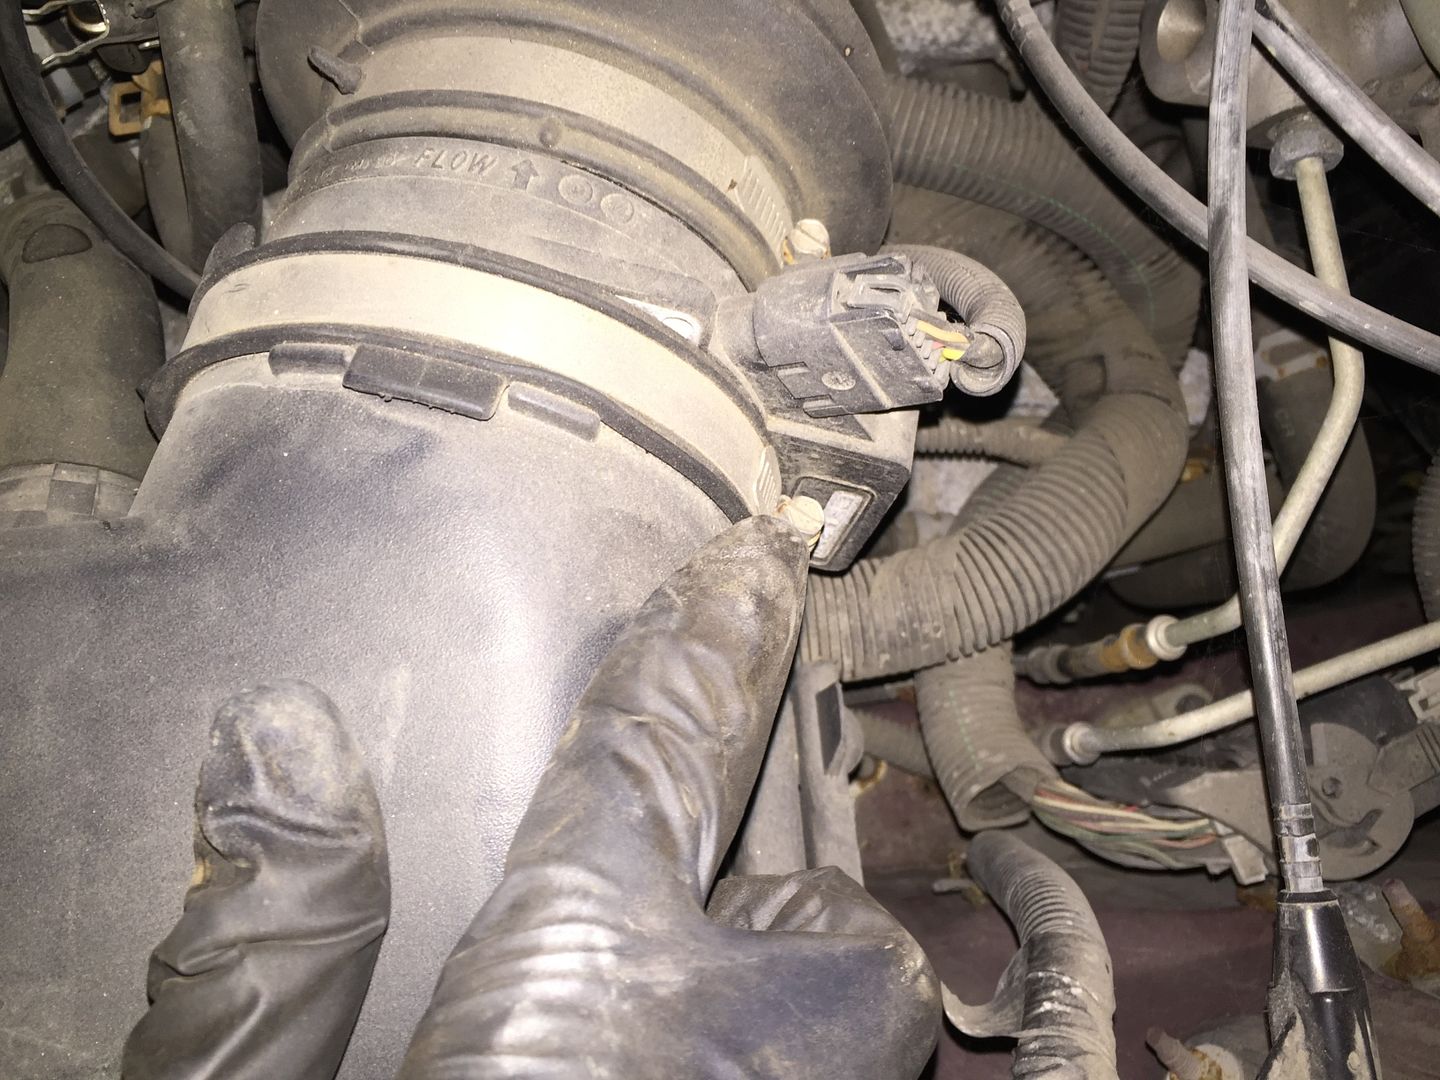
Remove secondary AIR hose.
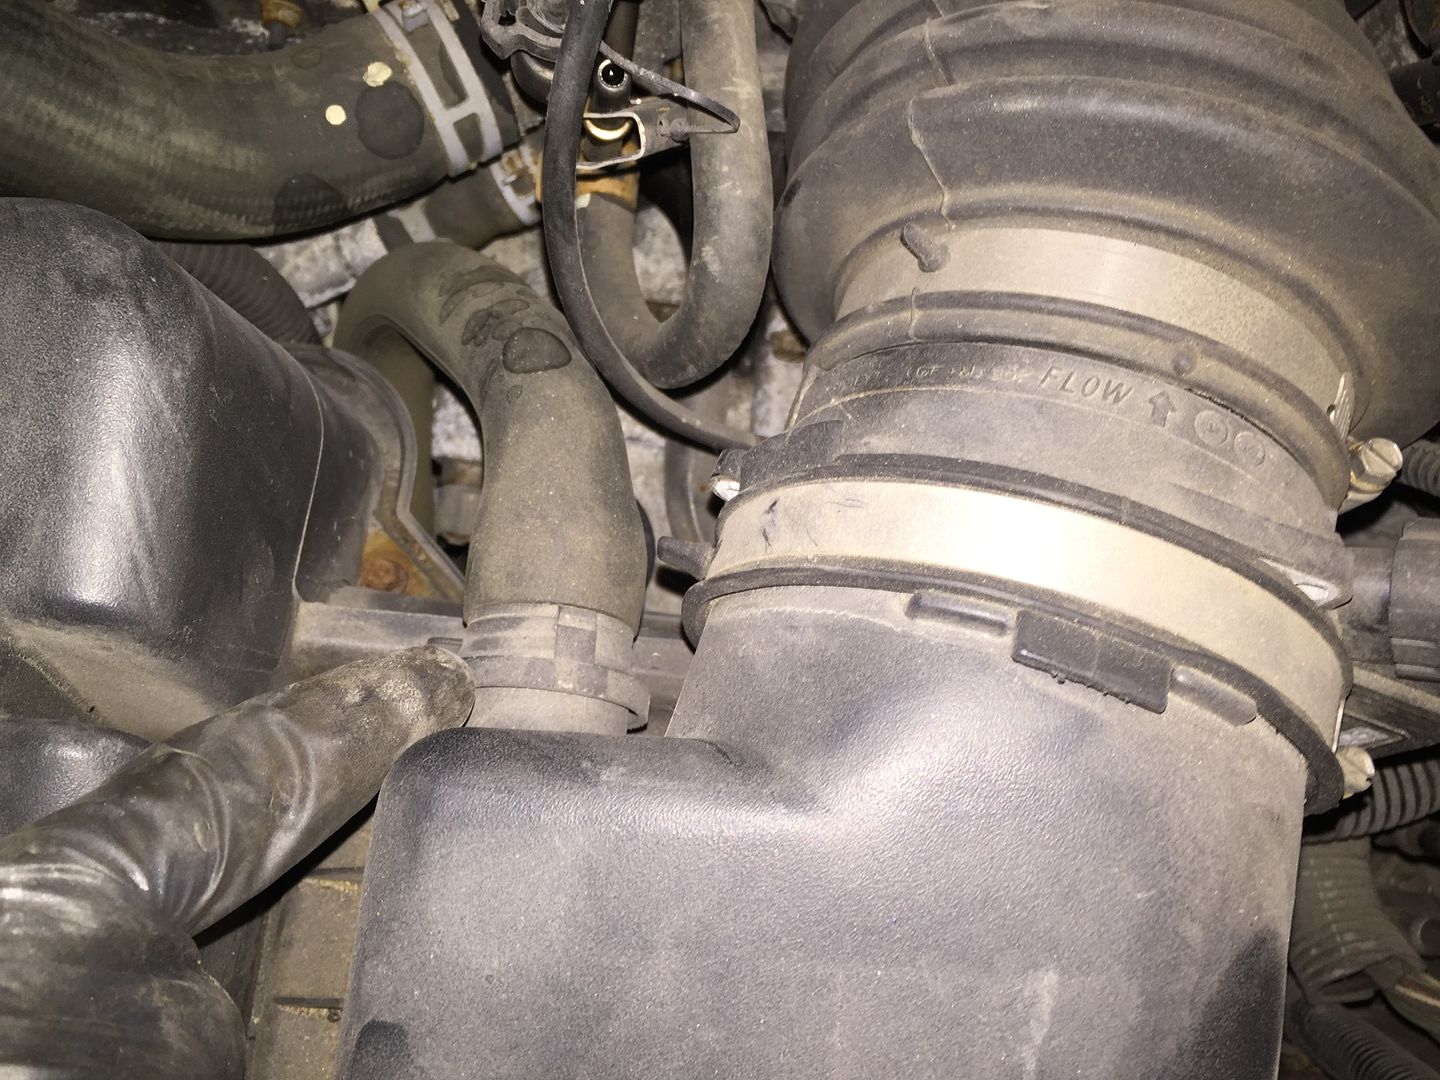
Then there will be a few screws around the perimeter of the box (8mm socket required) that you must remove to get the upper half of the box off. One can be seen next to my finger in the previous picture. Then you will end up with this.
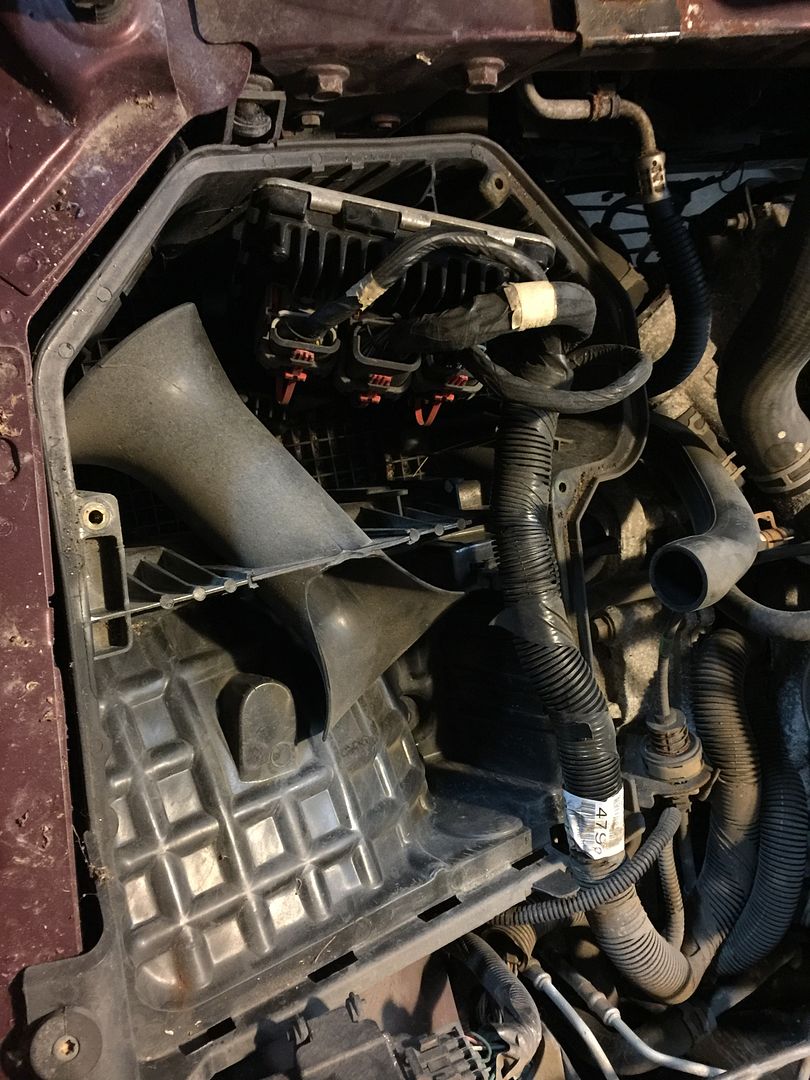
Pry the plastic about from the bolt in the fender and pull up on the back of the airbox and it should pop right out. Leaving you with this.....
8 & 9.) Remove plastic engine cover. For bonneville it should just pop off some older Northstars use nuts to hold it on.
10.) Remove the positive wires from the remote positive terminal. 13 mm socket will be required.

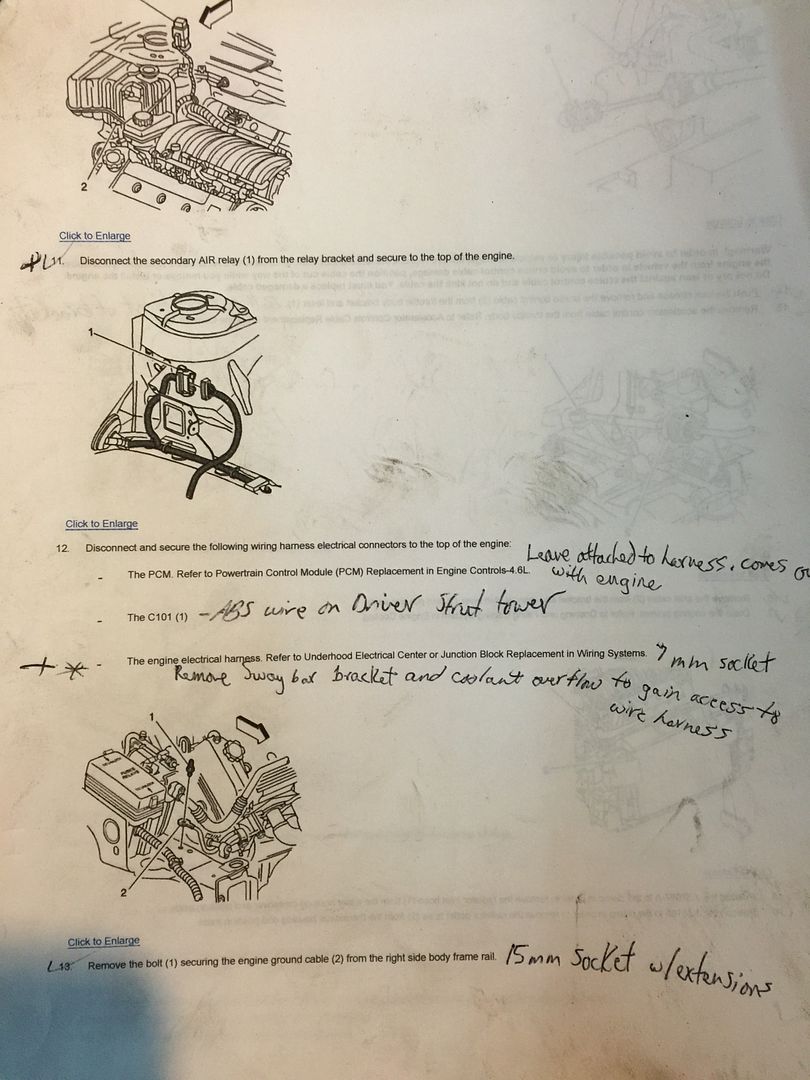
11.) Remove Secondary AIR Relay from Bracket.
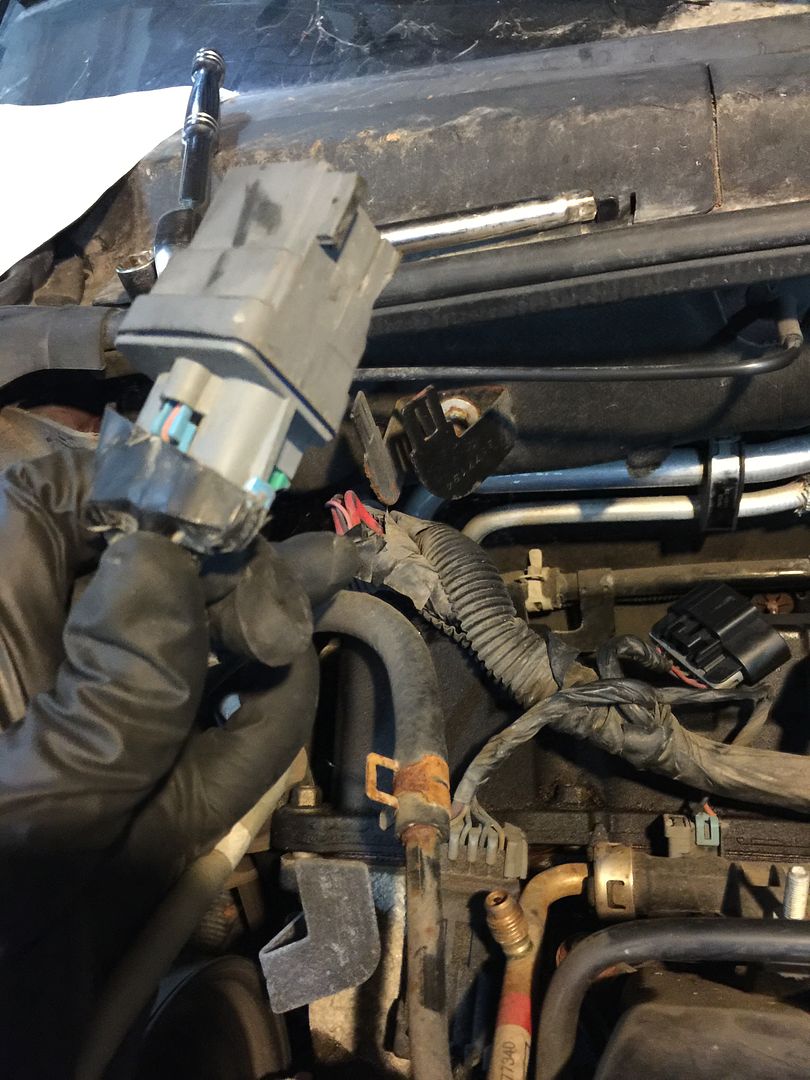
12.) a.) Disconnect ABS Connector.
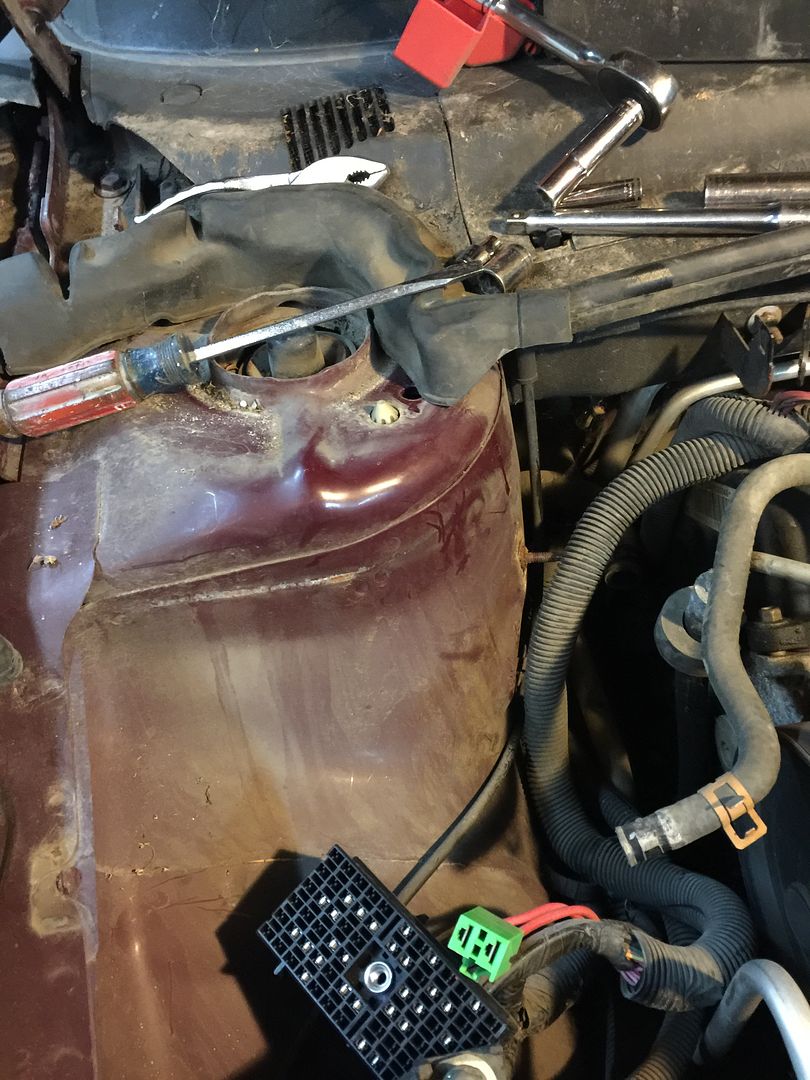
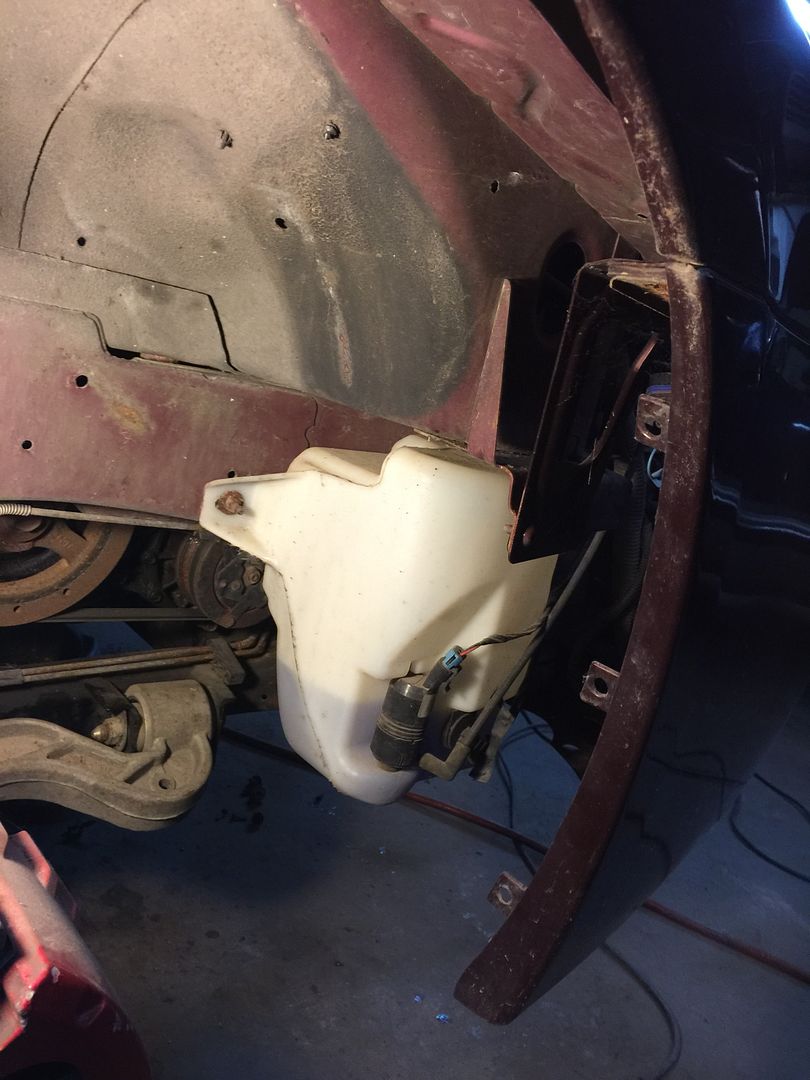
It was much easier to gain access to the wiring by removing the coolant reservoir and the strut tower bar bracket.
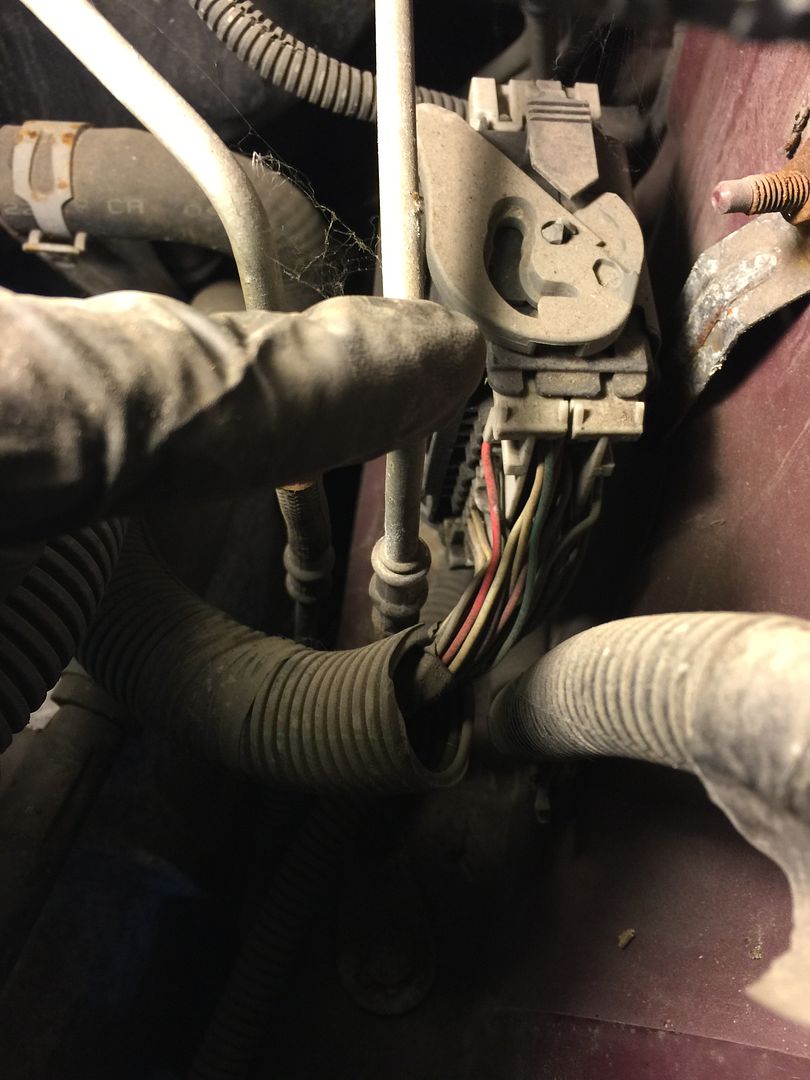
b.) Disconnect engine electrical harness from fuse box on passenger fender well. (7mm)
Pry these 4 tabs outward to get the box itself loose.
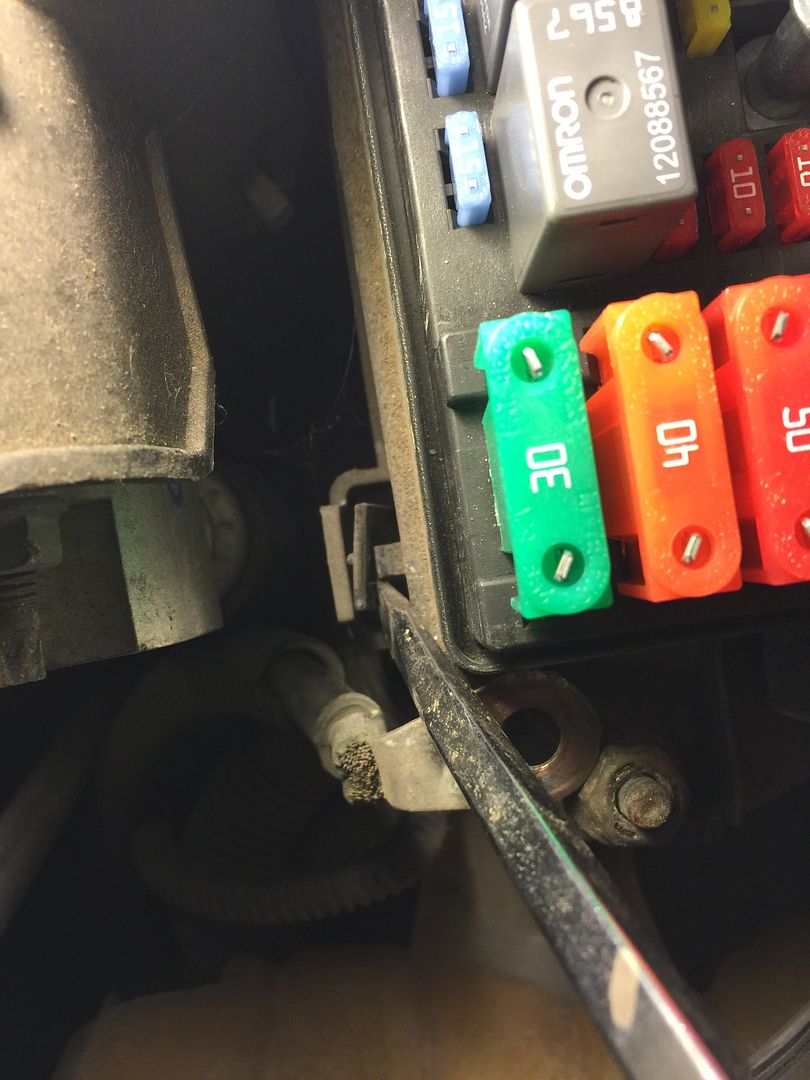
Use 7mm socket to loosen the farthest rearward bolt on the fuse box it will push the engine harness connector out of the fusebox.
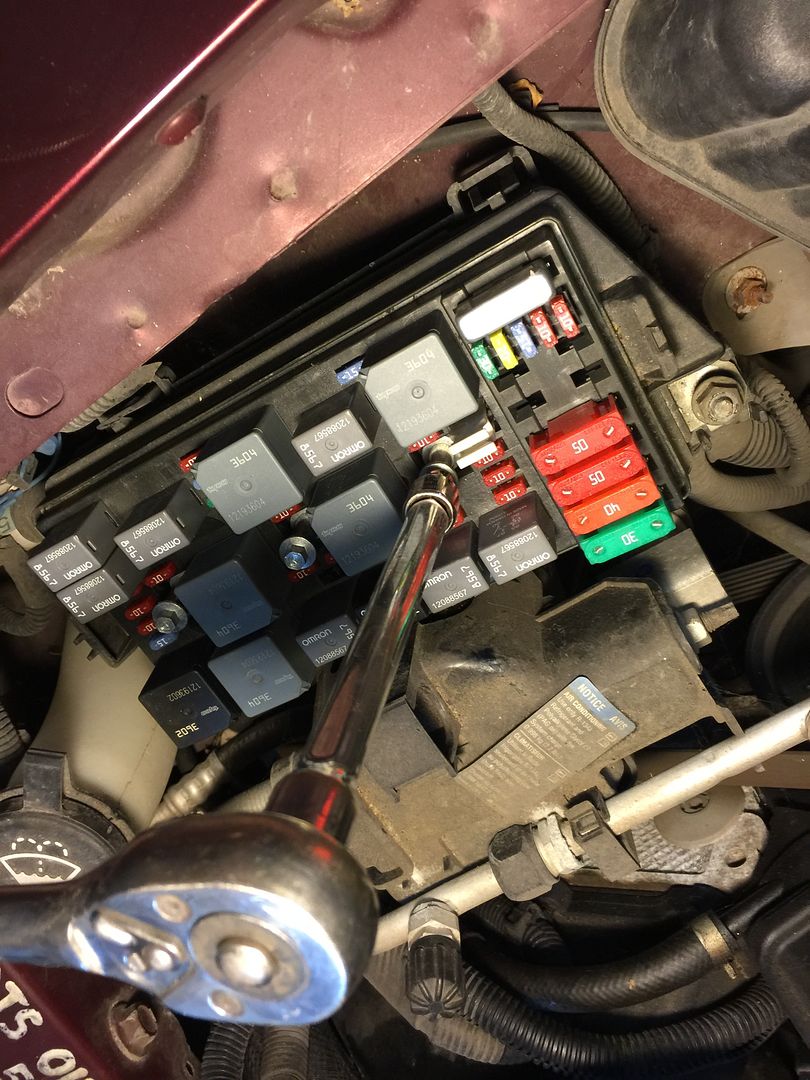
There is a little plastic shield under the 3 harness connectors that must be pried off and then the harness connector can be removed from the fusebox.
These two plugs are what you are trying to disconnect.
13.) Disconnect engine ground to body. (15mm)
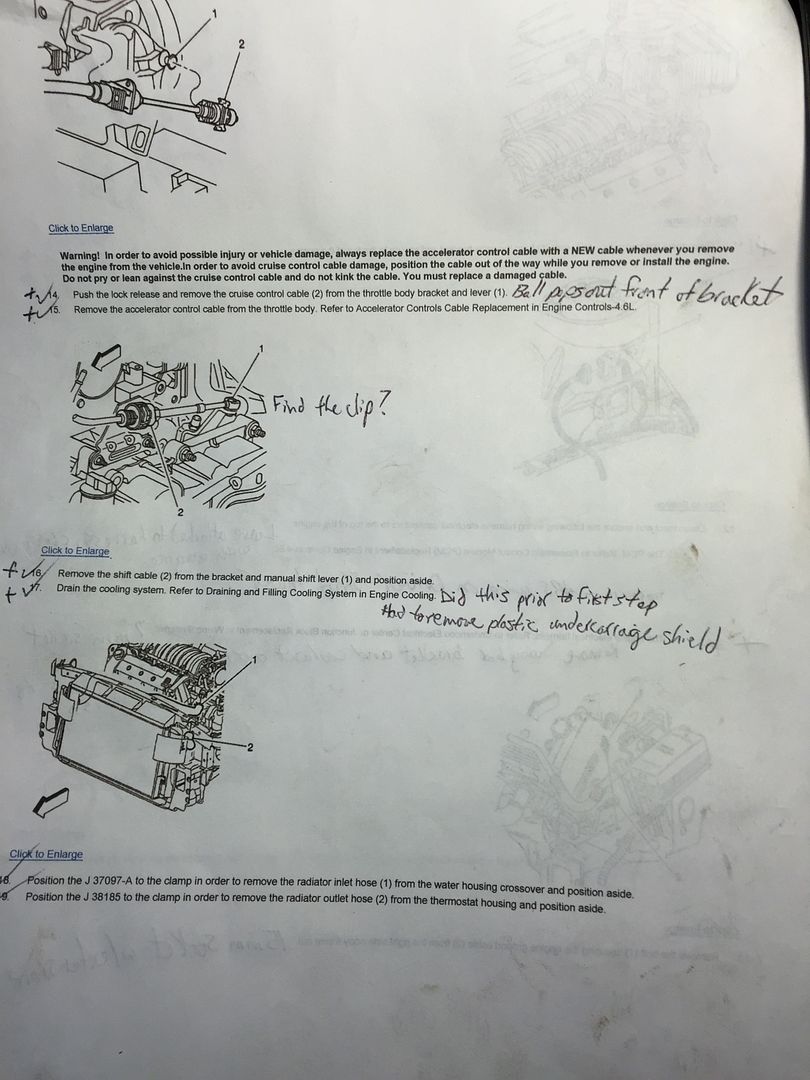
14.) Remove the cruise control cable.
15.) Remove the accelerator cable.
16.) Remove the shift cable.
17.) Drain cooling system. I did this at the very beginning.
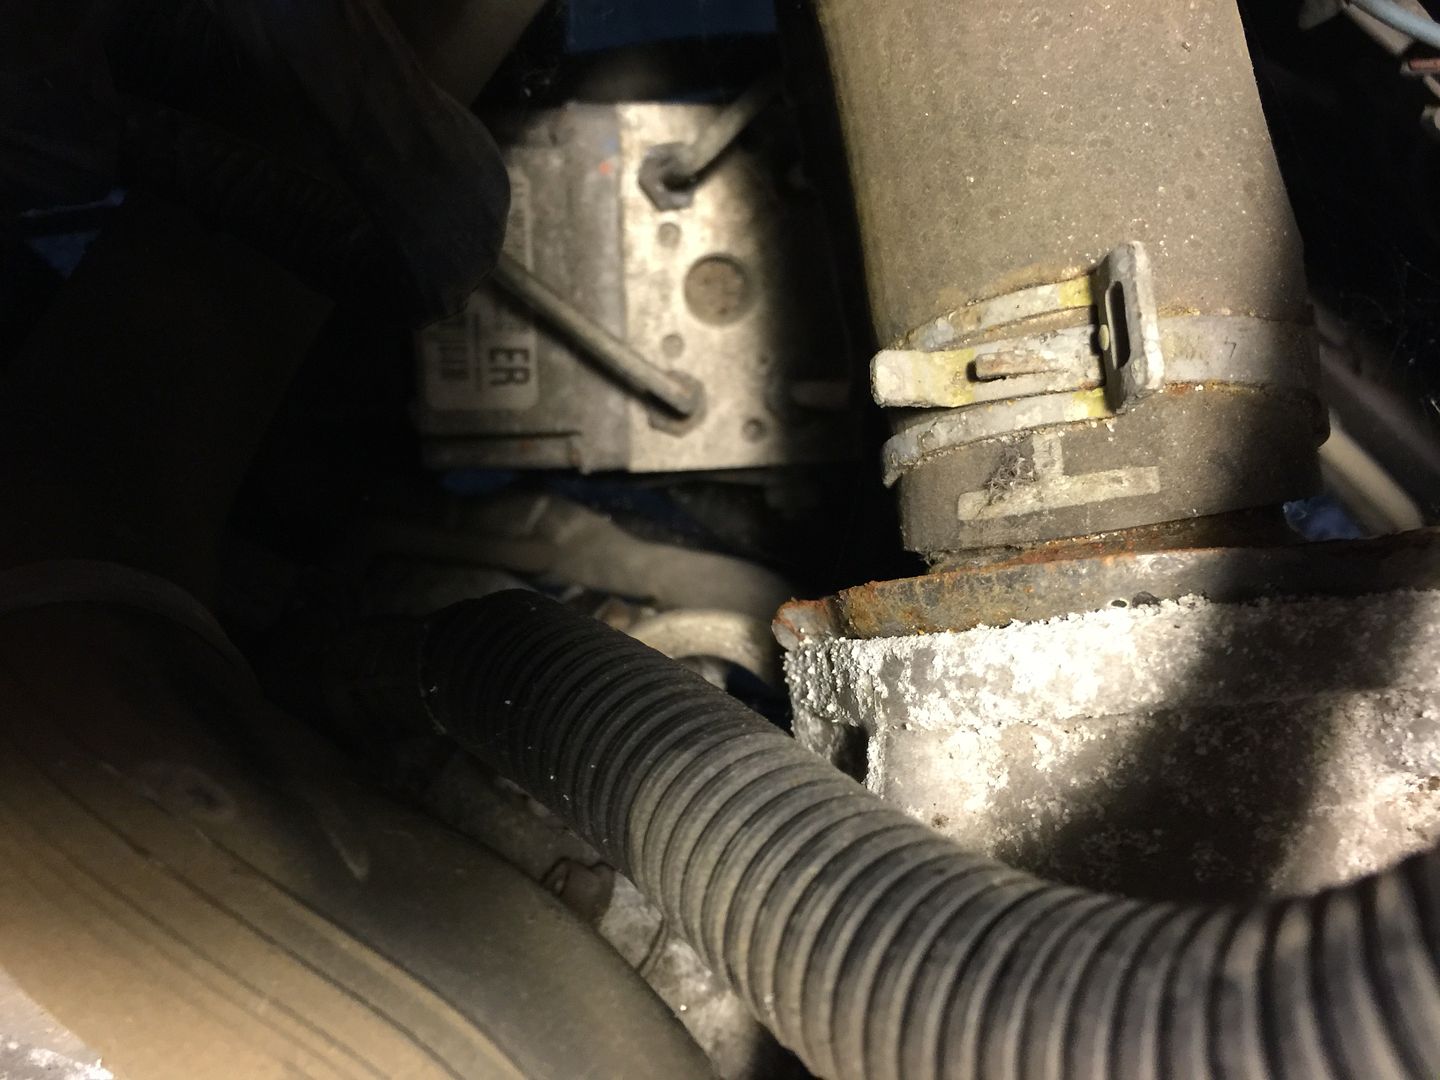
18.) Remove upper radiator hose from coolant crossover.
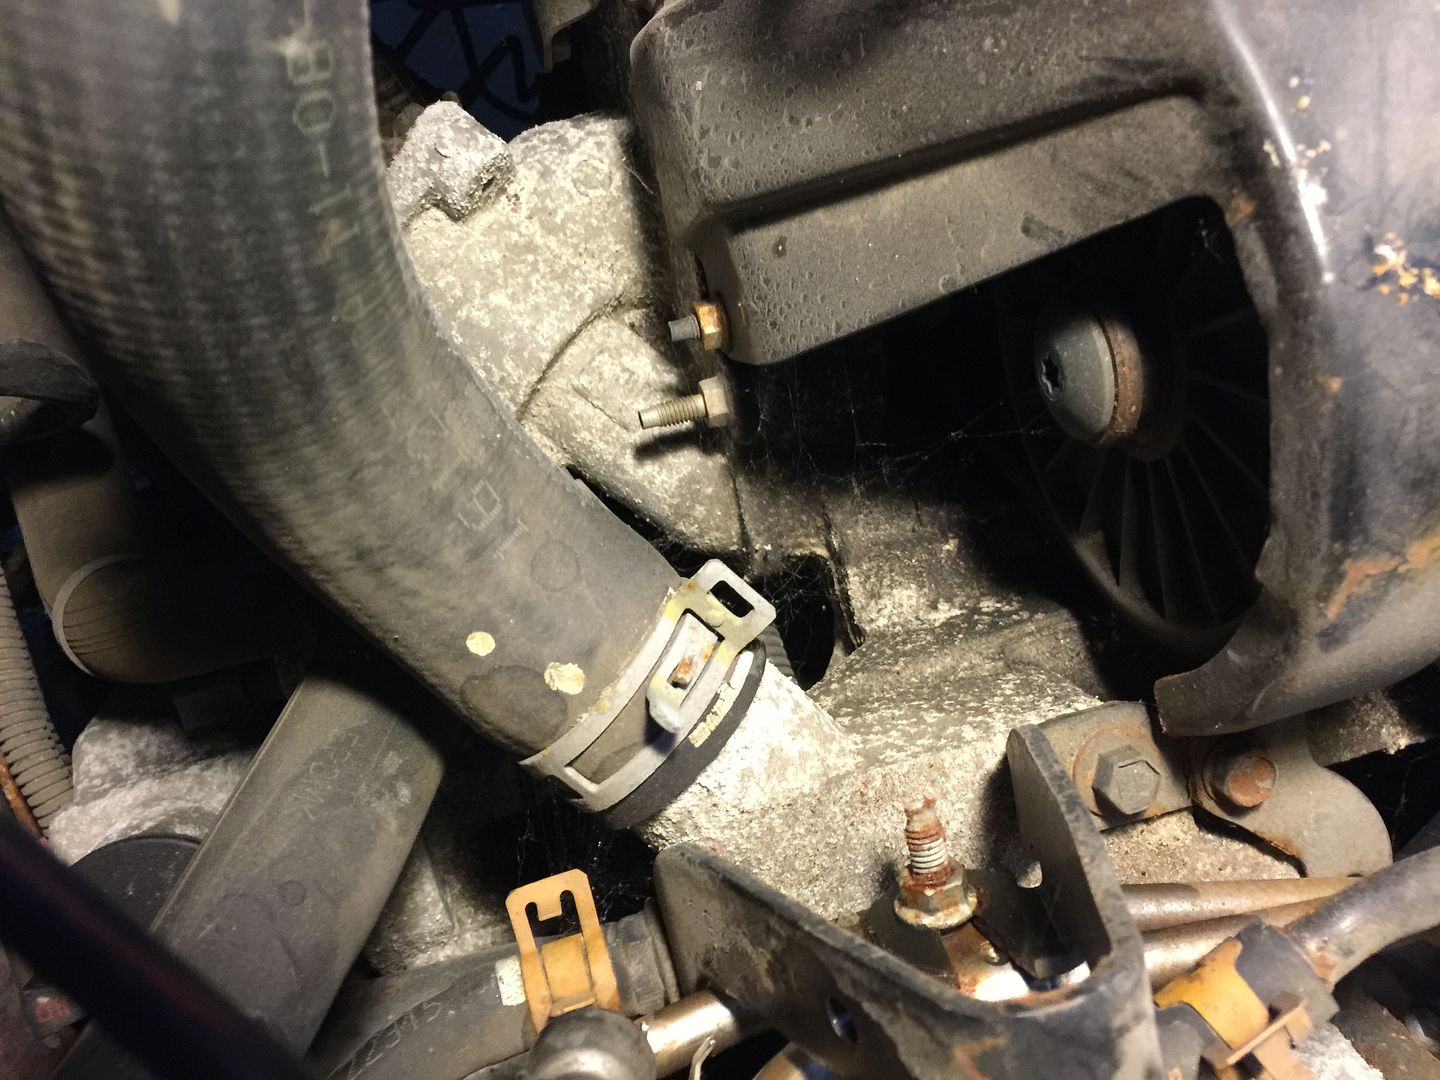
19.) Remove lower radiator hose from the thermostat. Do yourself a favor and remove the thermostat while your at it so all the coolant can be drained otherwise it will be dripping directly inside the EBCM for the next 5 hours.
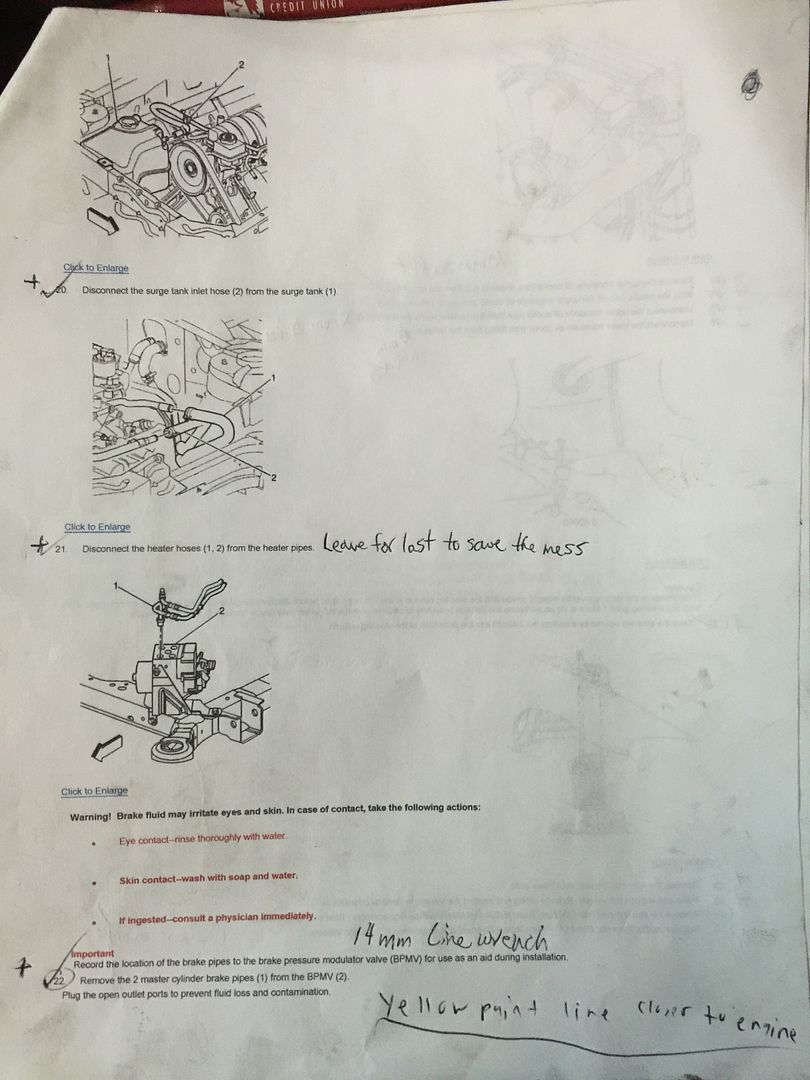
20.) Disconnect the surge tank. I did this previously as it was more convenient.
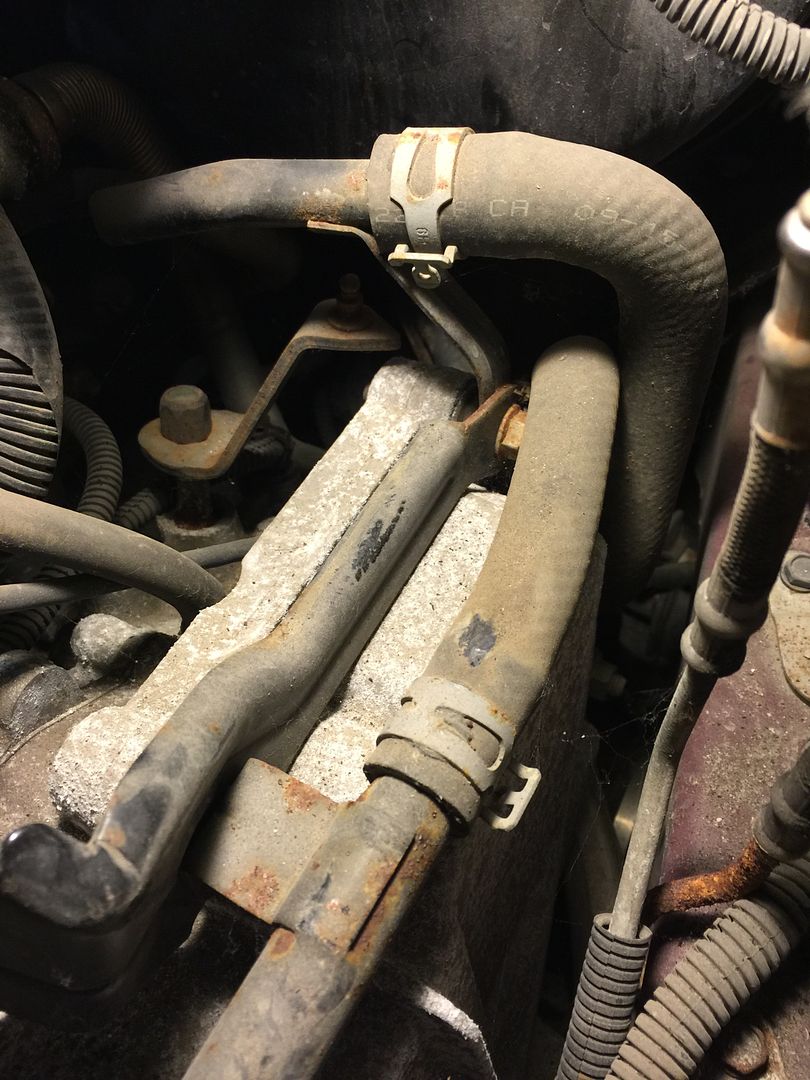
21.) Remove the heater hoses.
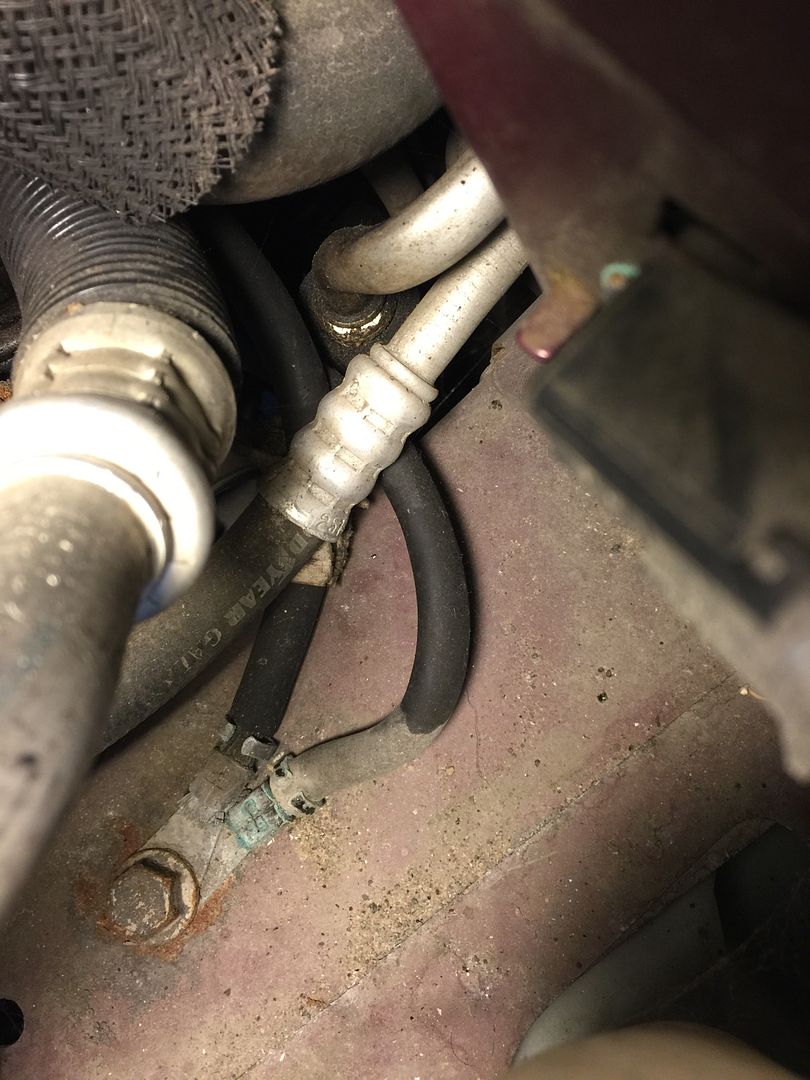
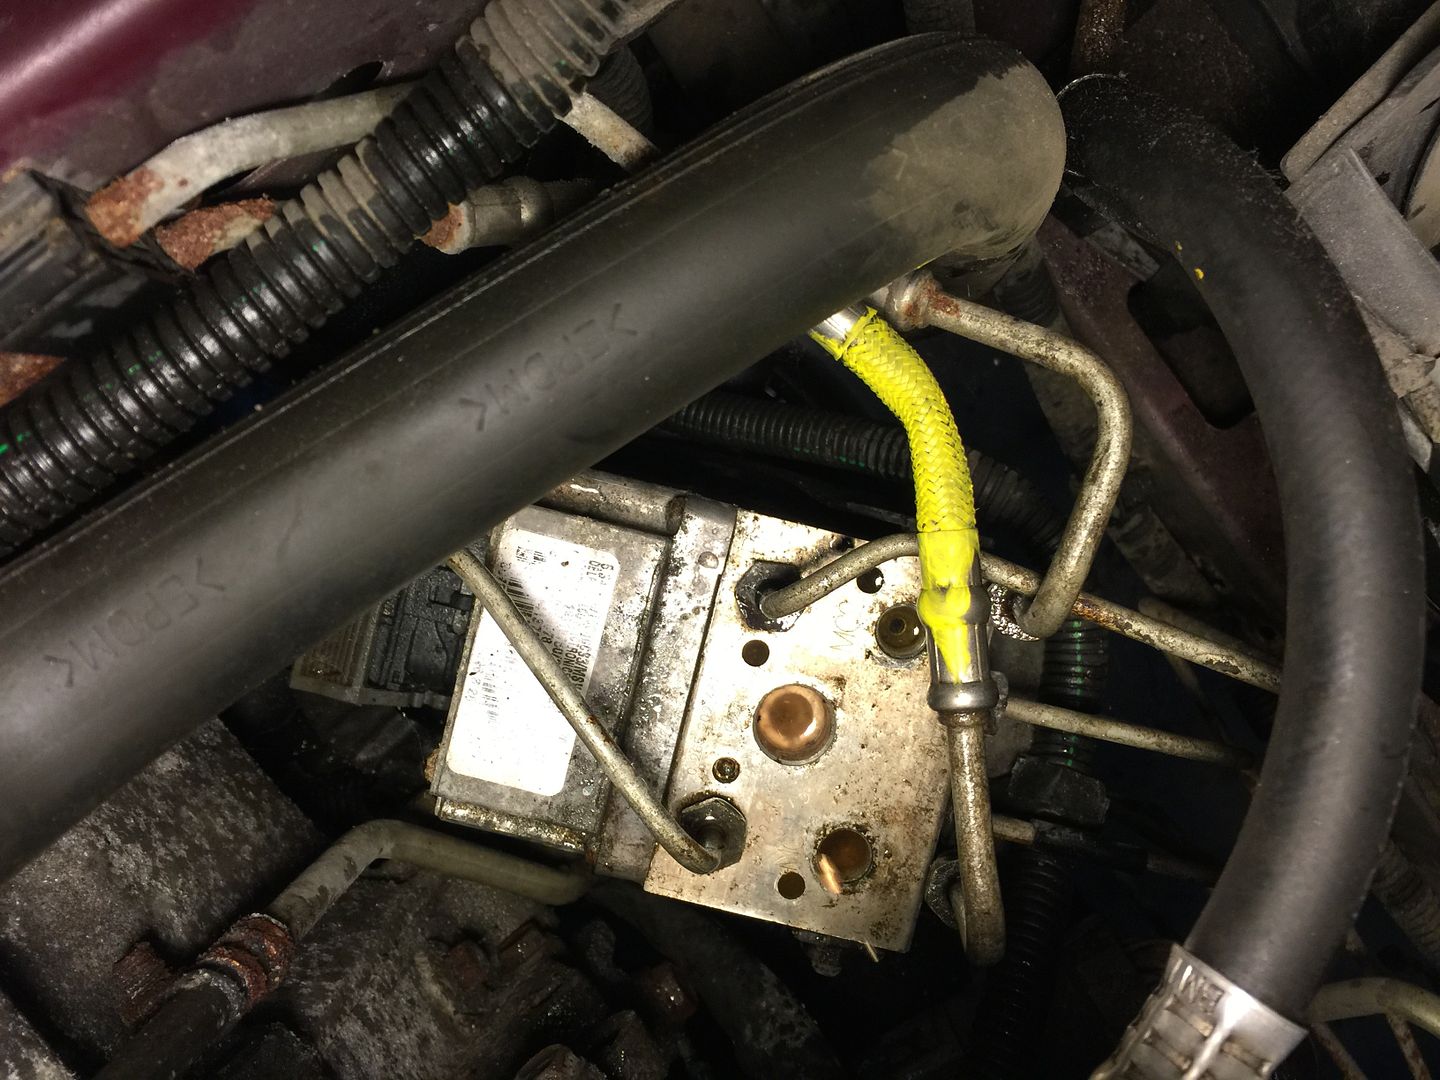
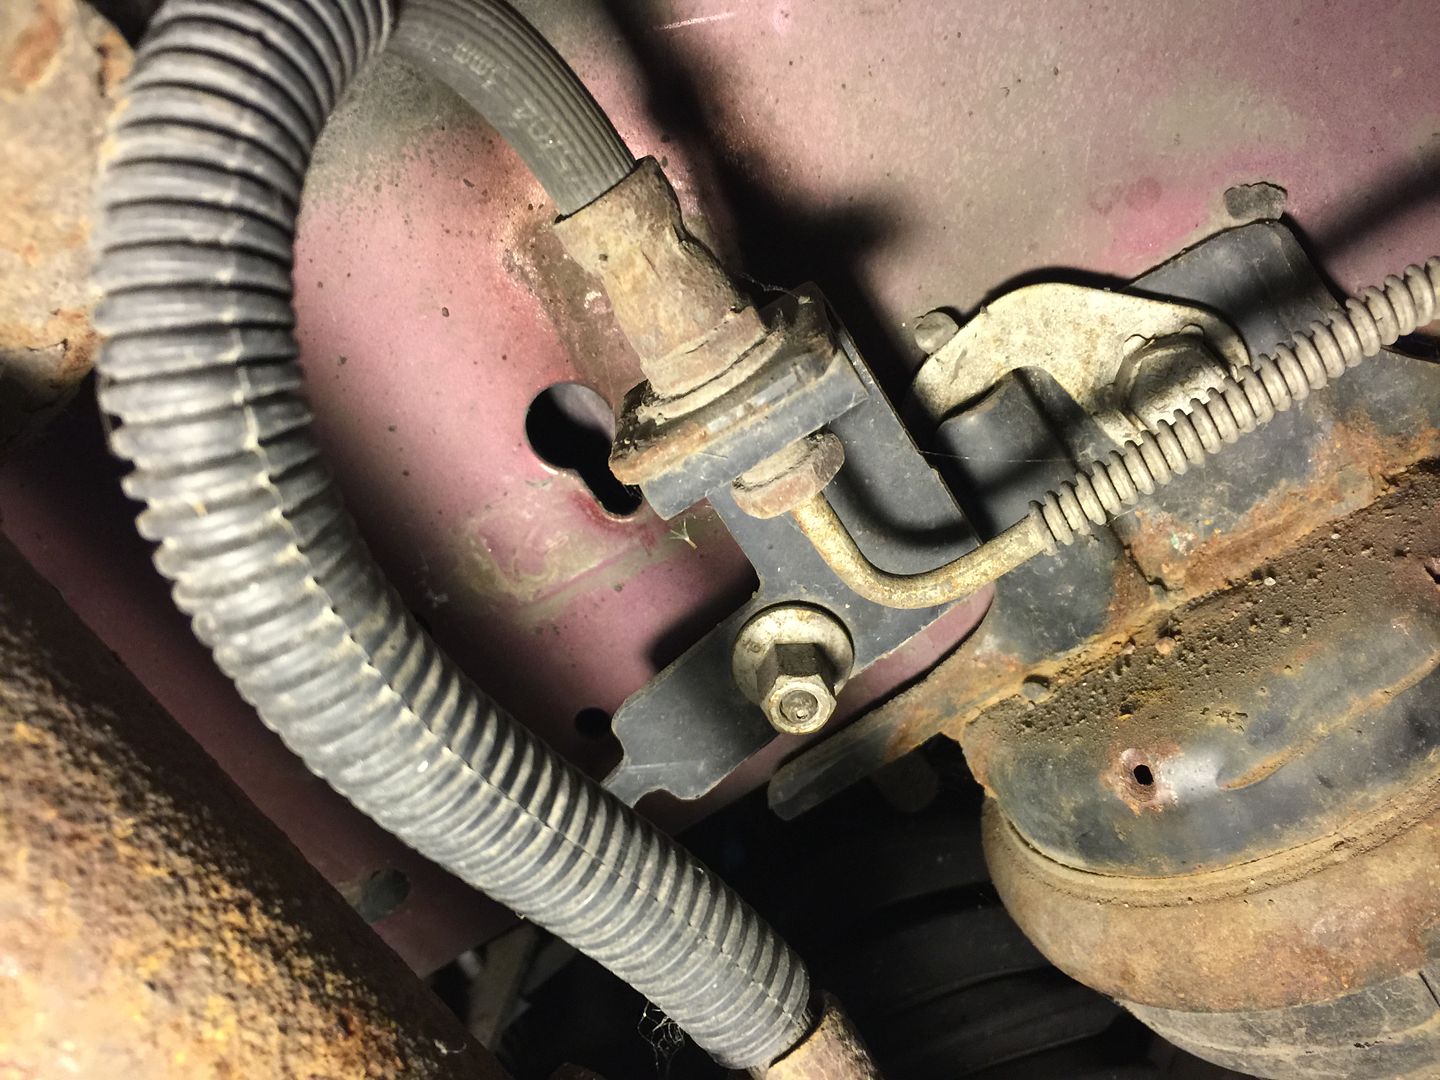
22.) Remove the two lines from the EBCM that come from the master cylinder. (14mm line wrench) I always mark the line closer to the engine so I don’t have to guess on reassembly.
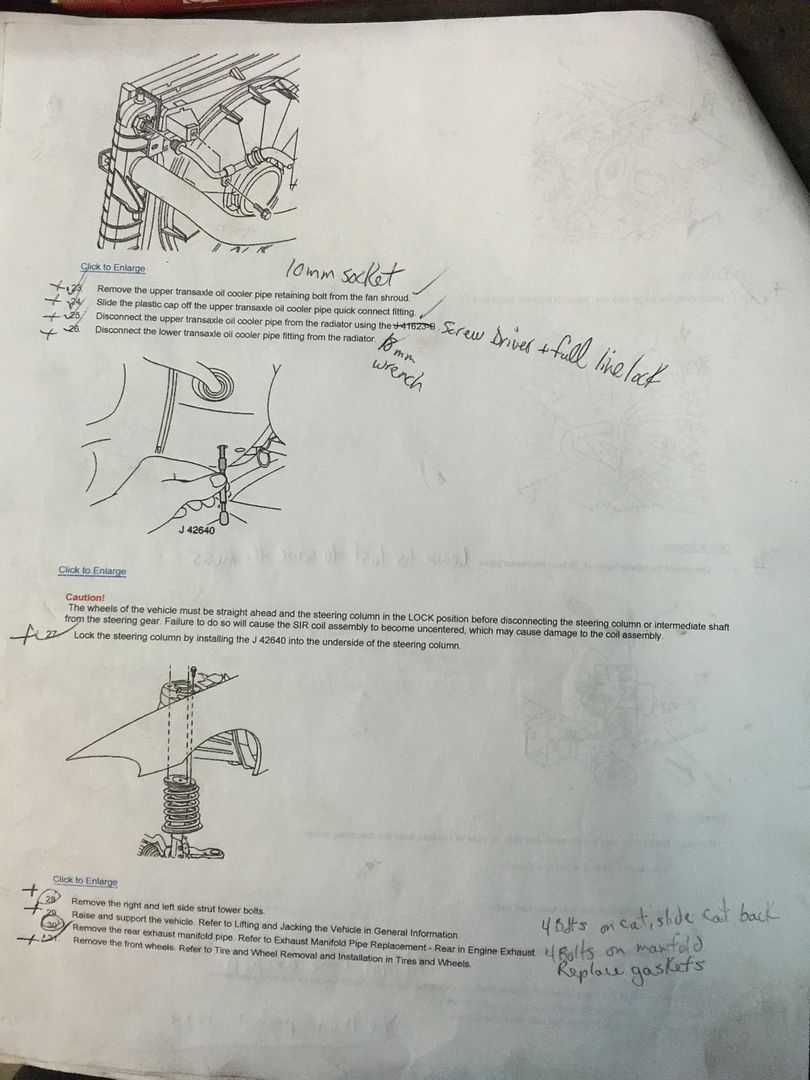
23.) Remove upper trans cooler line retaining bolt. (10mm)
24.) Slide plastic cap off quick connect fitting.
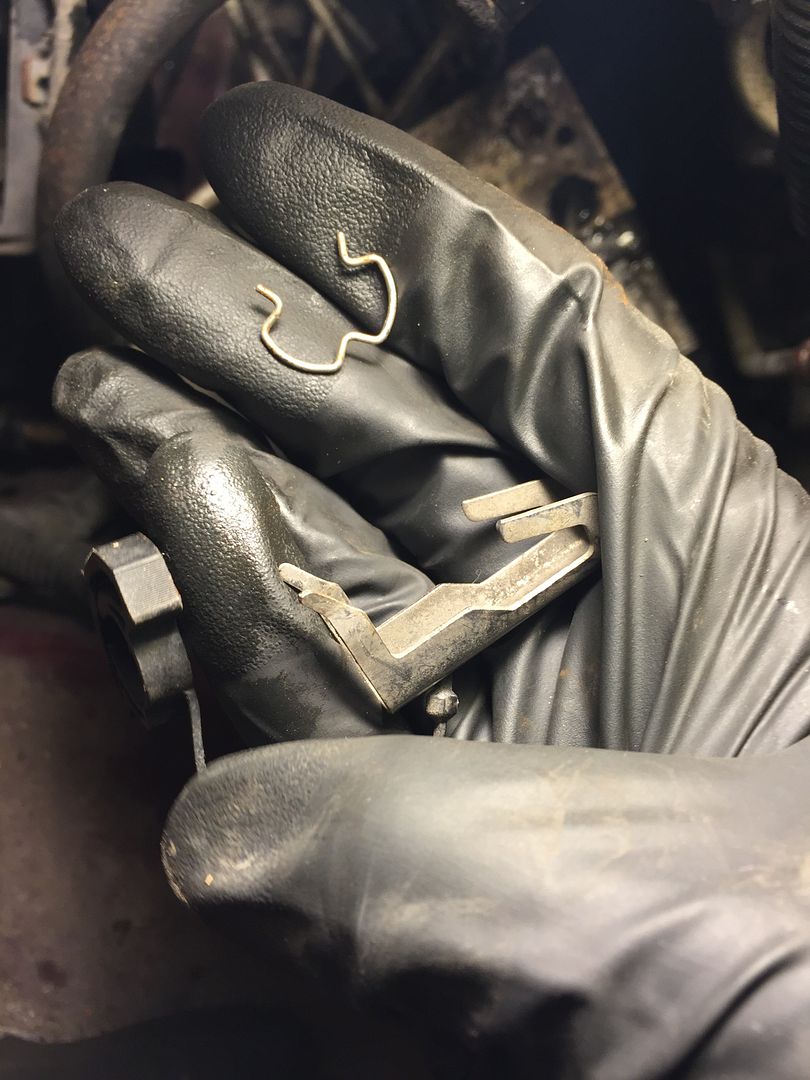
25.) Disconnect upper trans cooler line. There is another J-tool for this but I just used the fuel line lock to pop the clip out of the quick connector.
26.) Disconnect lower trans cooler line. (18mm wrench)

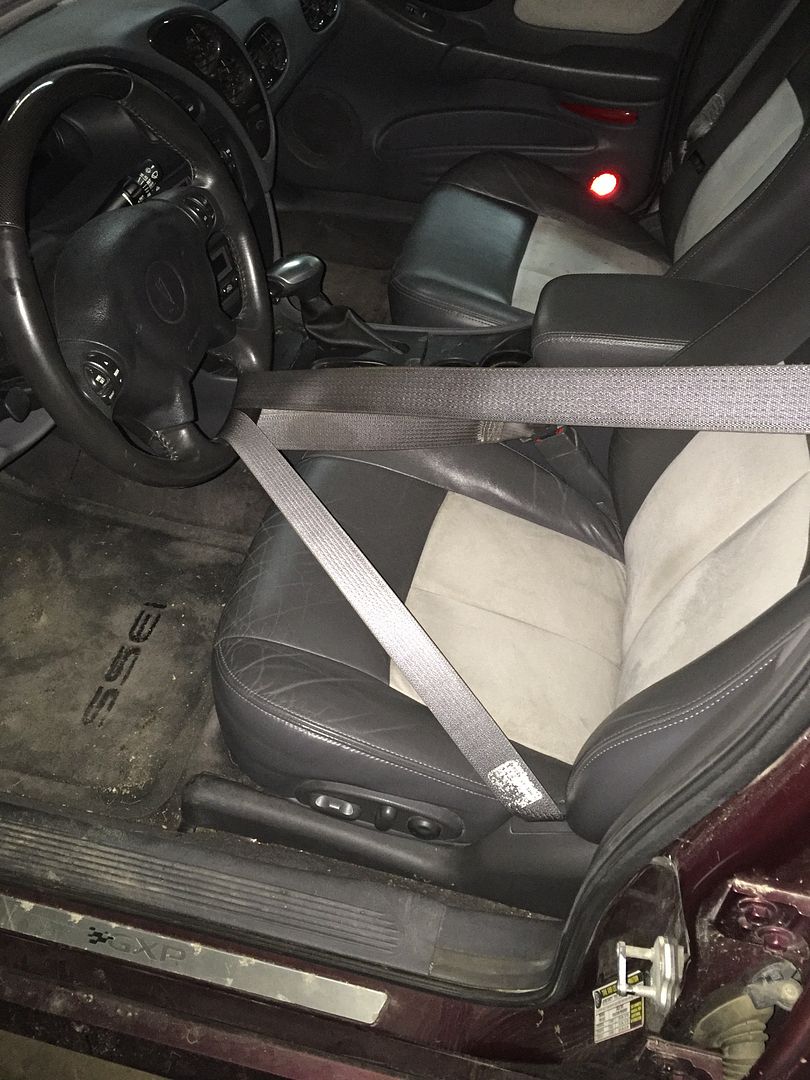
27.) Lock the steering wheel with your special J-tool.
28.) Remove 3 strut tower bolts from each side.
29.) Raise vehicle and put on jackstands (if not done at the beginning)
30.) Remove 4 nuts from the exhaust pipe that connects cat section to the forward flexpipe section. I had to use 14mm, then 13mm, then ½” and finally pounded a 12mm on the nuts to knock all the rust off and not strip them.
31.) Remove front wheels.
At this point I decided it was time for the front bumper cover to go, considering how expensive it is and the fact that I needed to use the bumper brackets as a lift point. On the Deville this can be done with the bumper in place but that is not so on the GXP.
First remove headlights, 2 10mm bolts from the top and they should pop right out and unplug the harness on the back of the headlight.
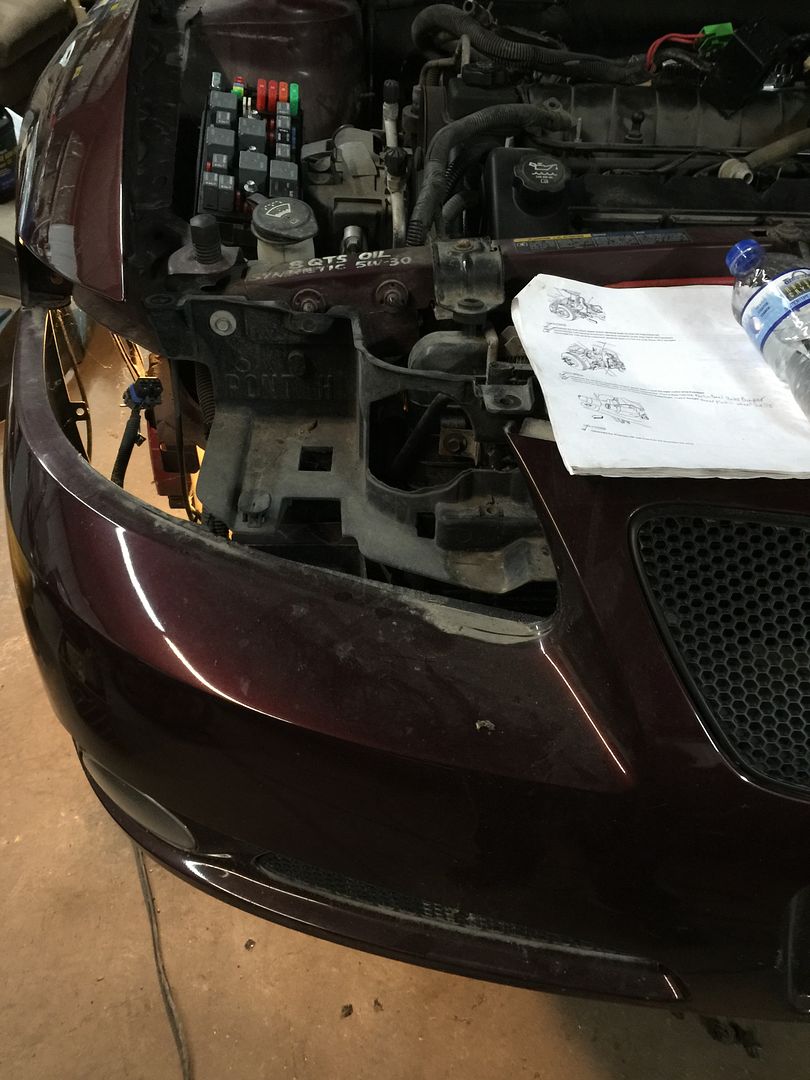
Remove all the plastic pins that hold the bumper cover to any mounting points. Now remove the 10mm bolt on each side on the bottom edge of the fender, and loosen the 10mm nut on each side. Give it a tap upwards and that will loosen the stud and you should be able to slide the bumper cover forward and off the car.
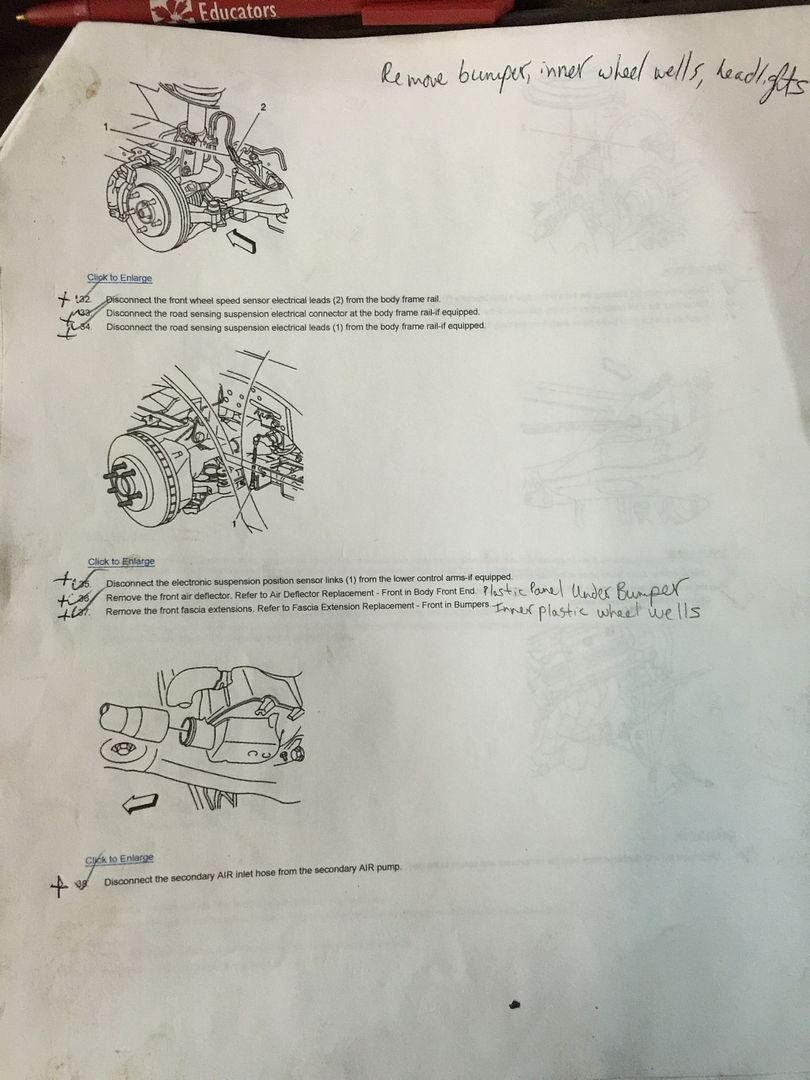
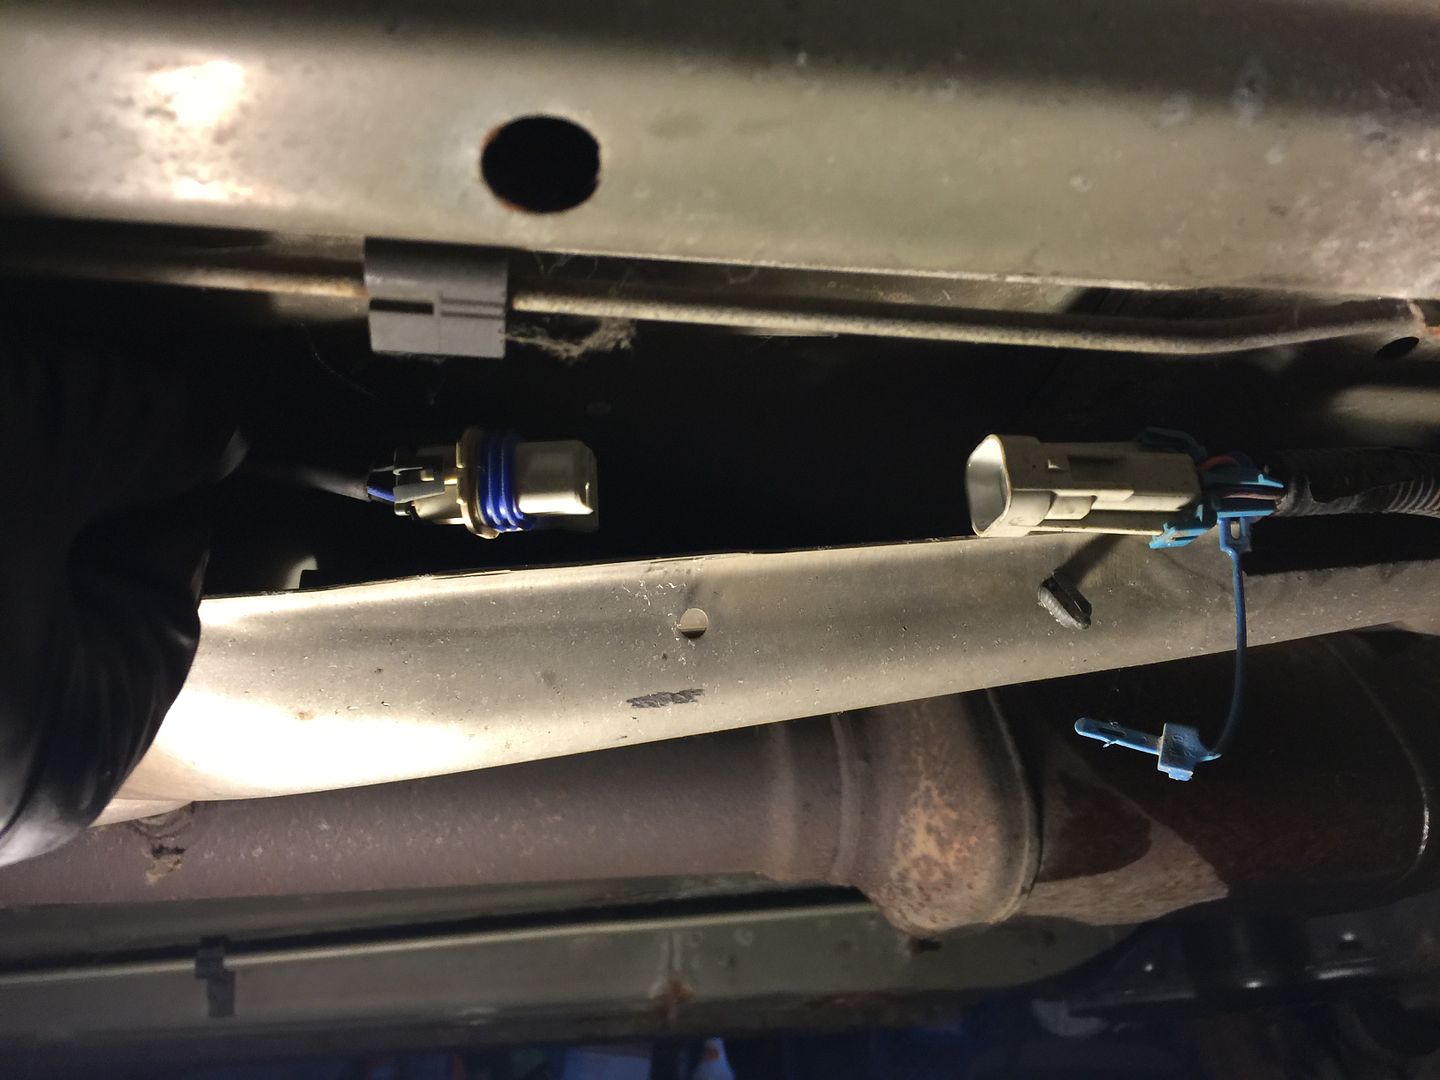
32.) Disconnect front wheel speed sensors
33,34,35.) Only for Cadillac with electronic suspension.
36.) Remove air deflector. I did this at the beginning before draining the coolant.
37.) Remove the front inner wheel wells.
38.) Disconnect secondary AIR hose.
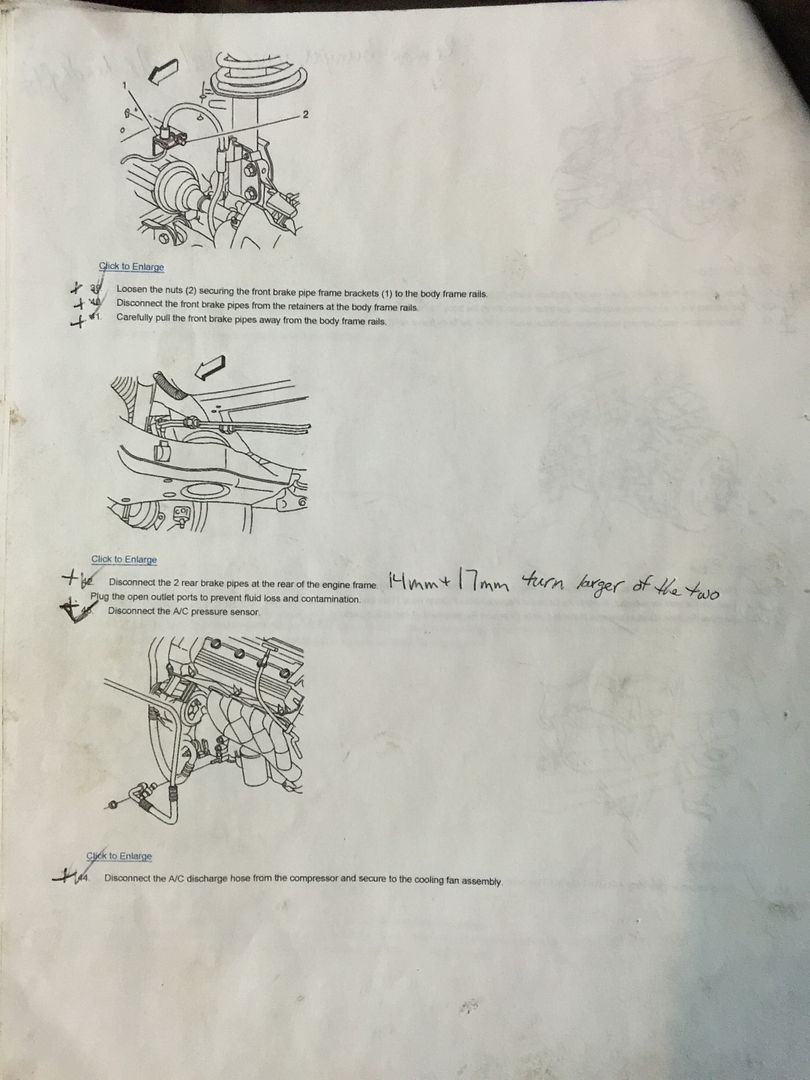
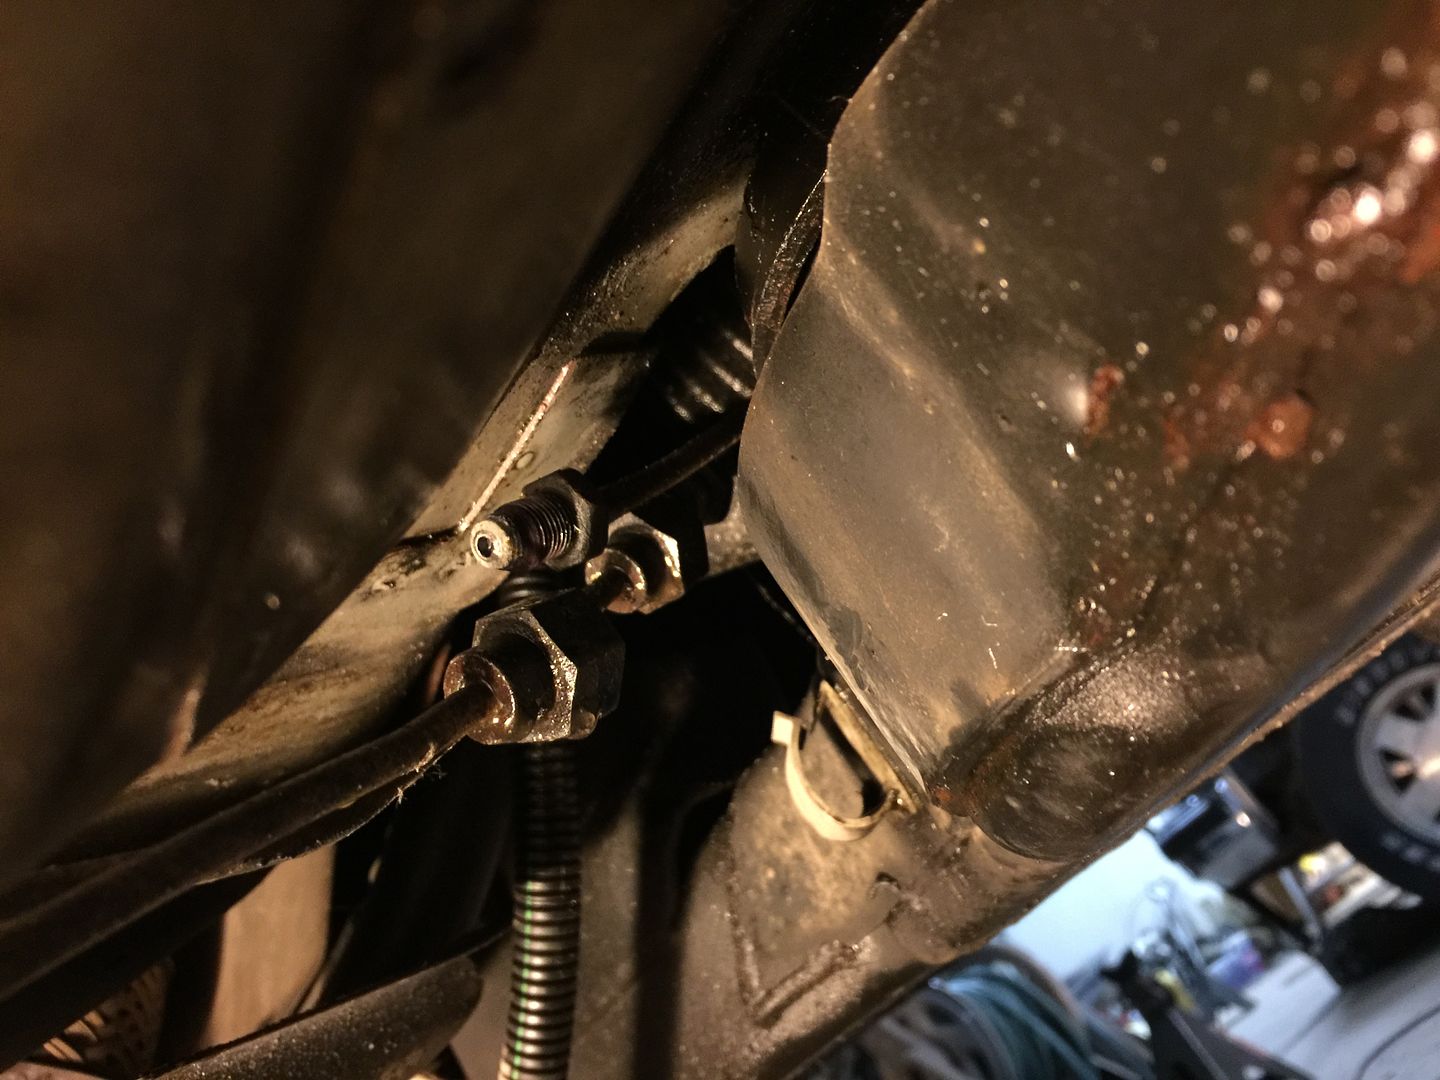
39,40,41.) Loosen the nuts holding the brake pipes to the frame rail. I found it easier to pry the little tab back on the bracket and lift them upwards to release then from the frame rails after loosening the nut.
42.) Disconnect the two brake pipes at the rear of the frame. (14mm & 17mm) I found it easier to loosen the larger nut fitting and just spin it off the smaller one.
43,44.) Disconnect AC pressure sensor and AC discharge hose.
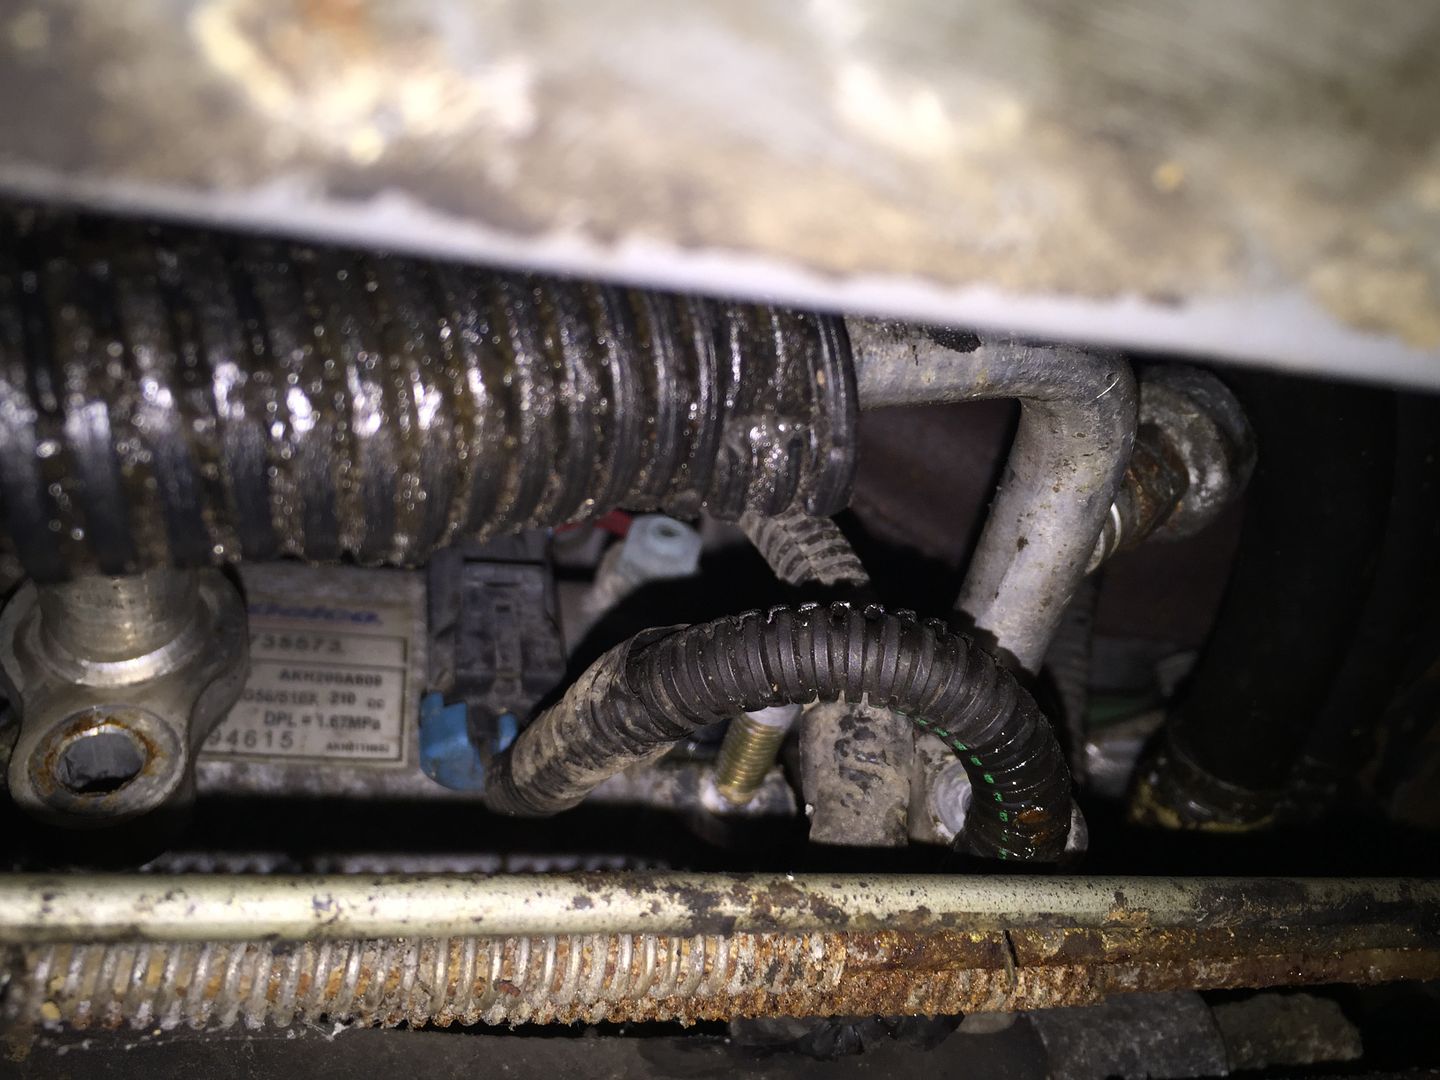

45.) Disconnect AC suction hose.
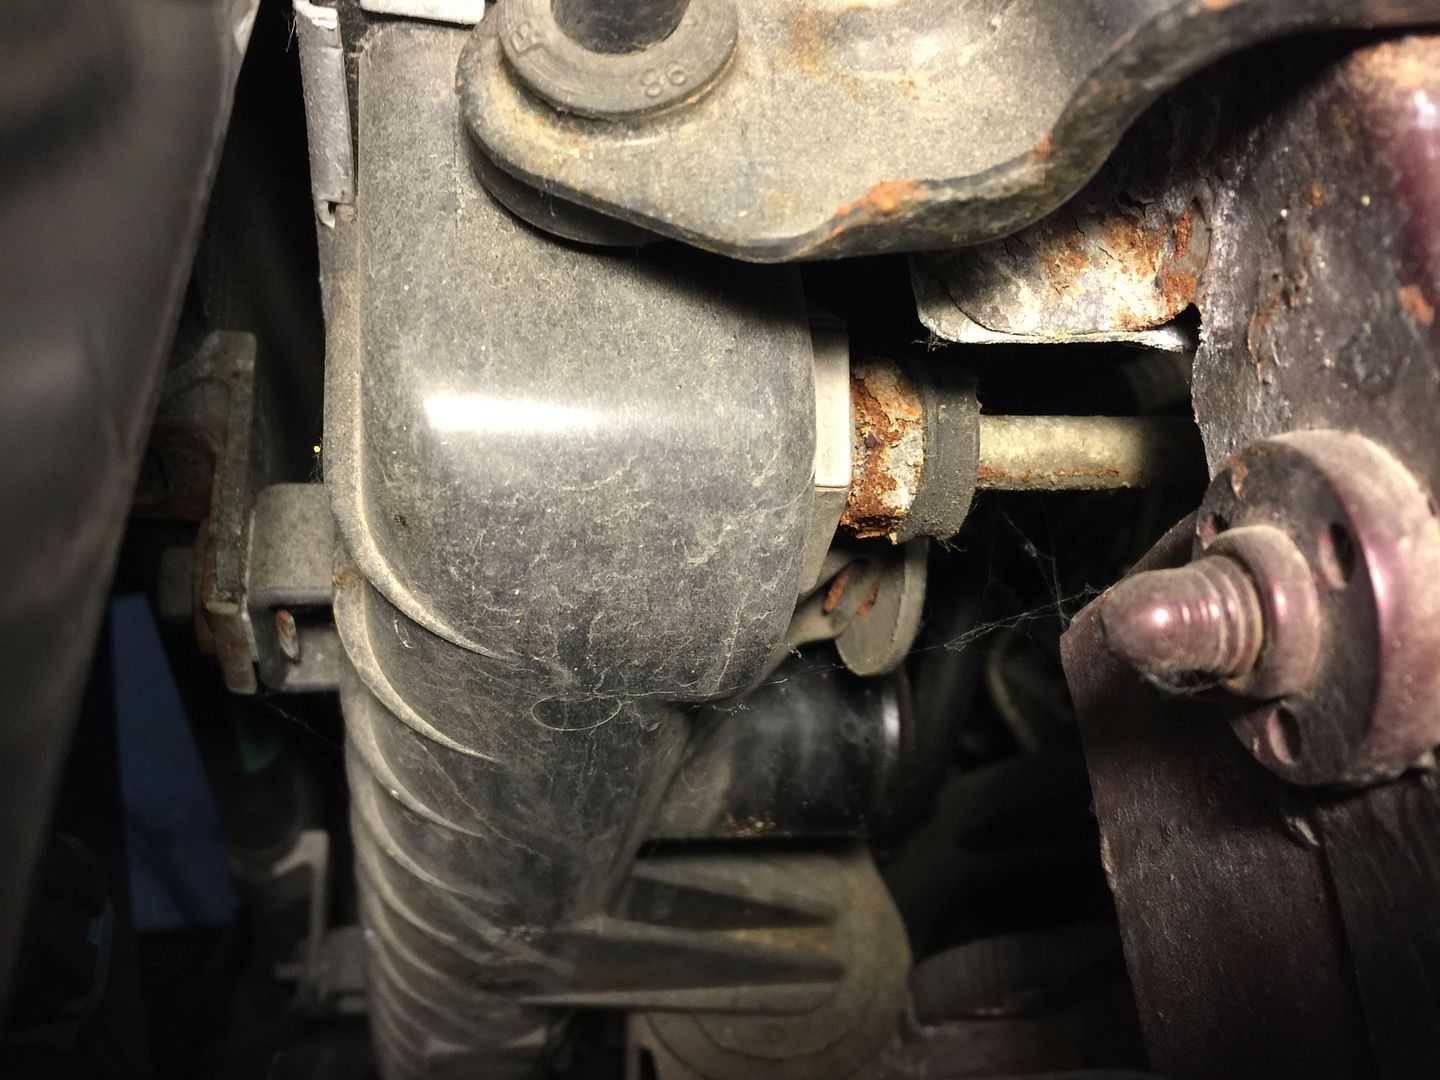
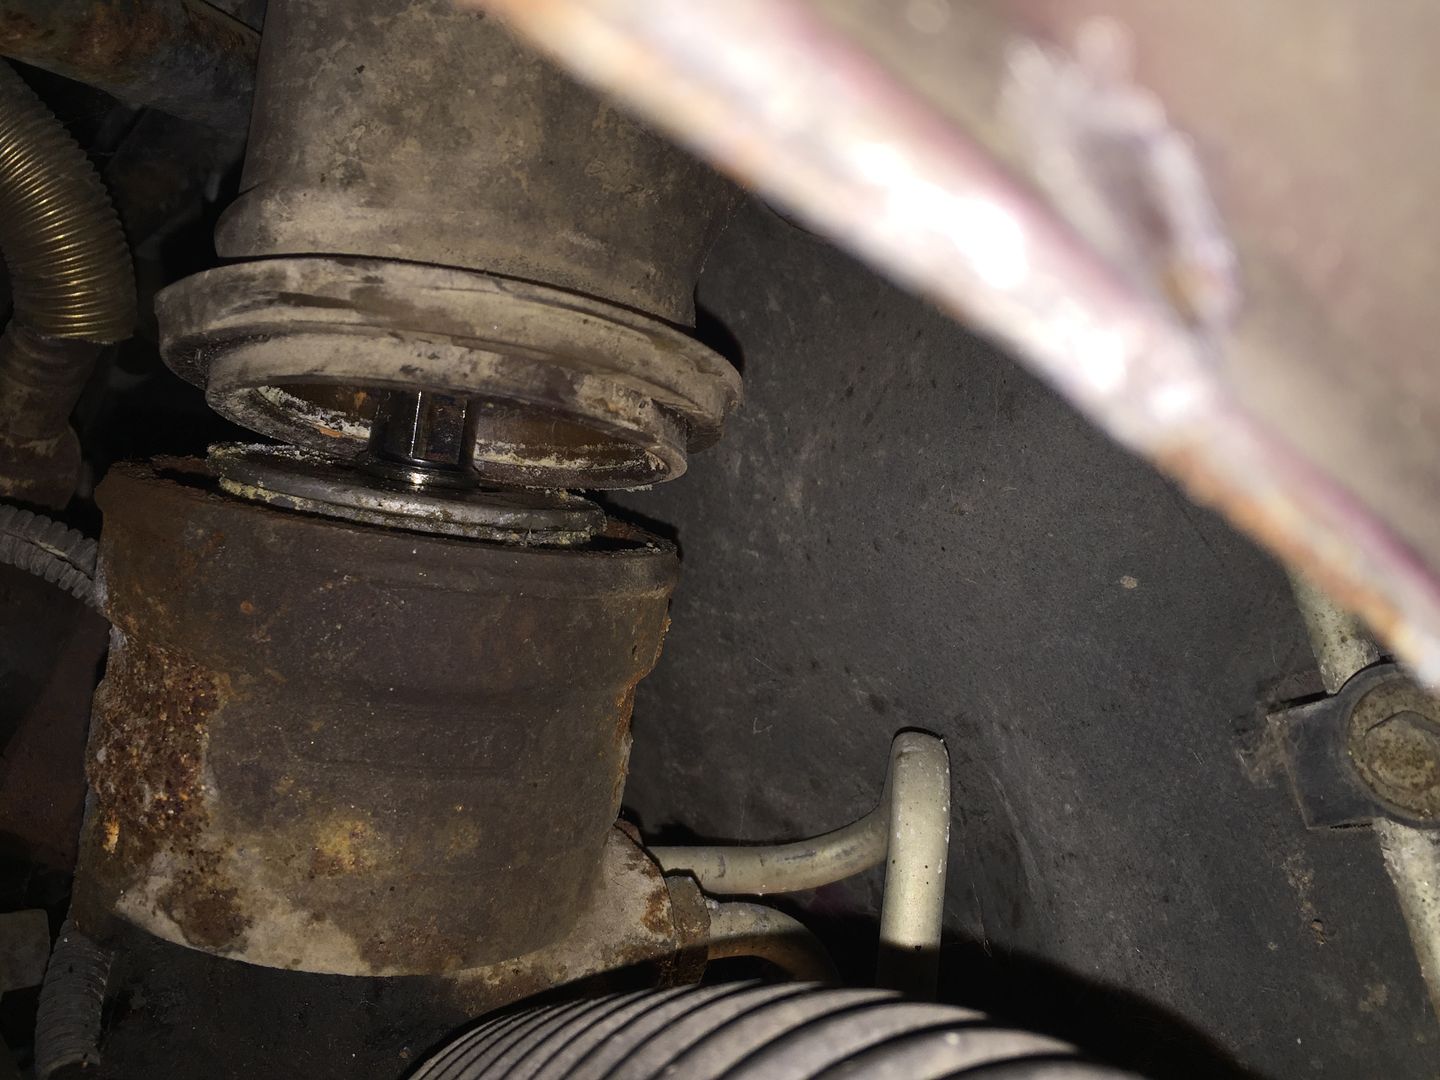
46, 47.) Remove intermediate steering shaft pinch bolt and thenpush the shaft upwards and off the steering gear. You must first pry the rubber boot up and off the steering rack, I found using a long flat screwdriver and a pry bar worked best.
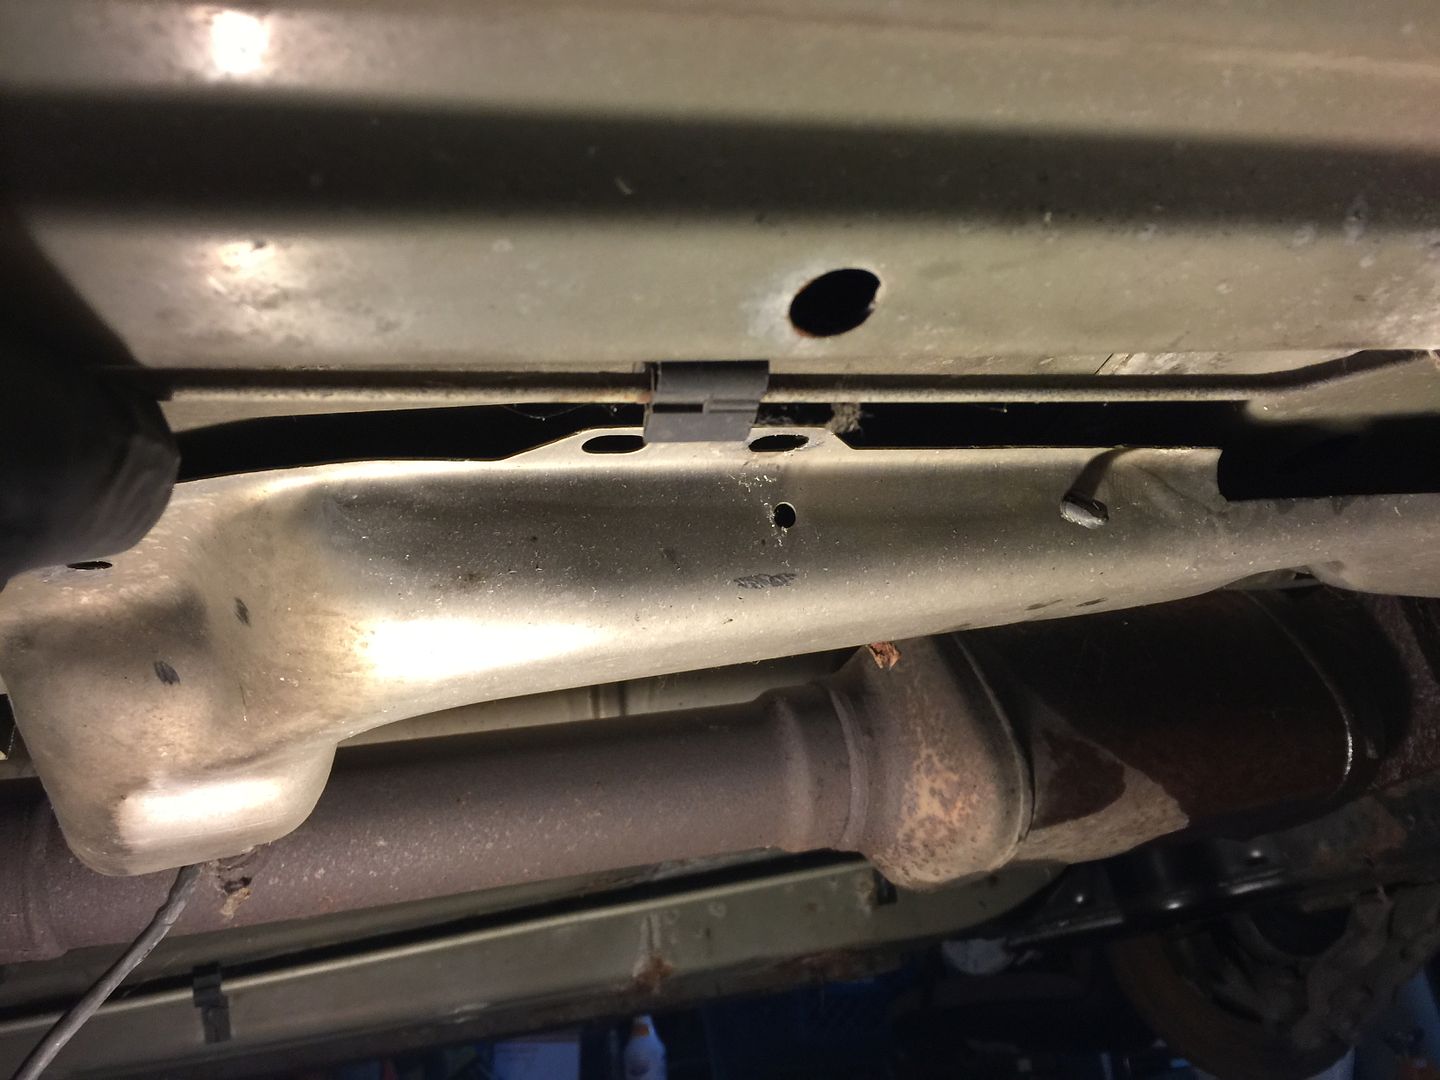
48.) Remove rear oxygen sensor wiring harness from inside heatshield. This is done by grinding the 3 rivets off the panel on the passenger side and then prying the panel down a little bit to show the sensor wiring.
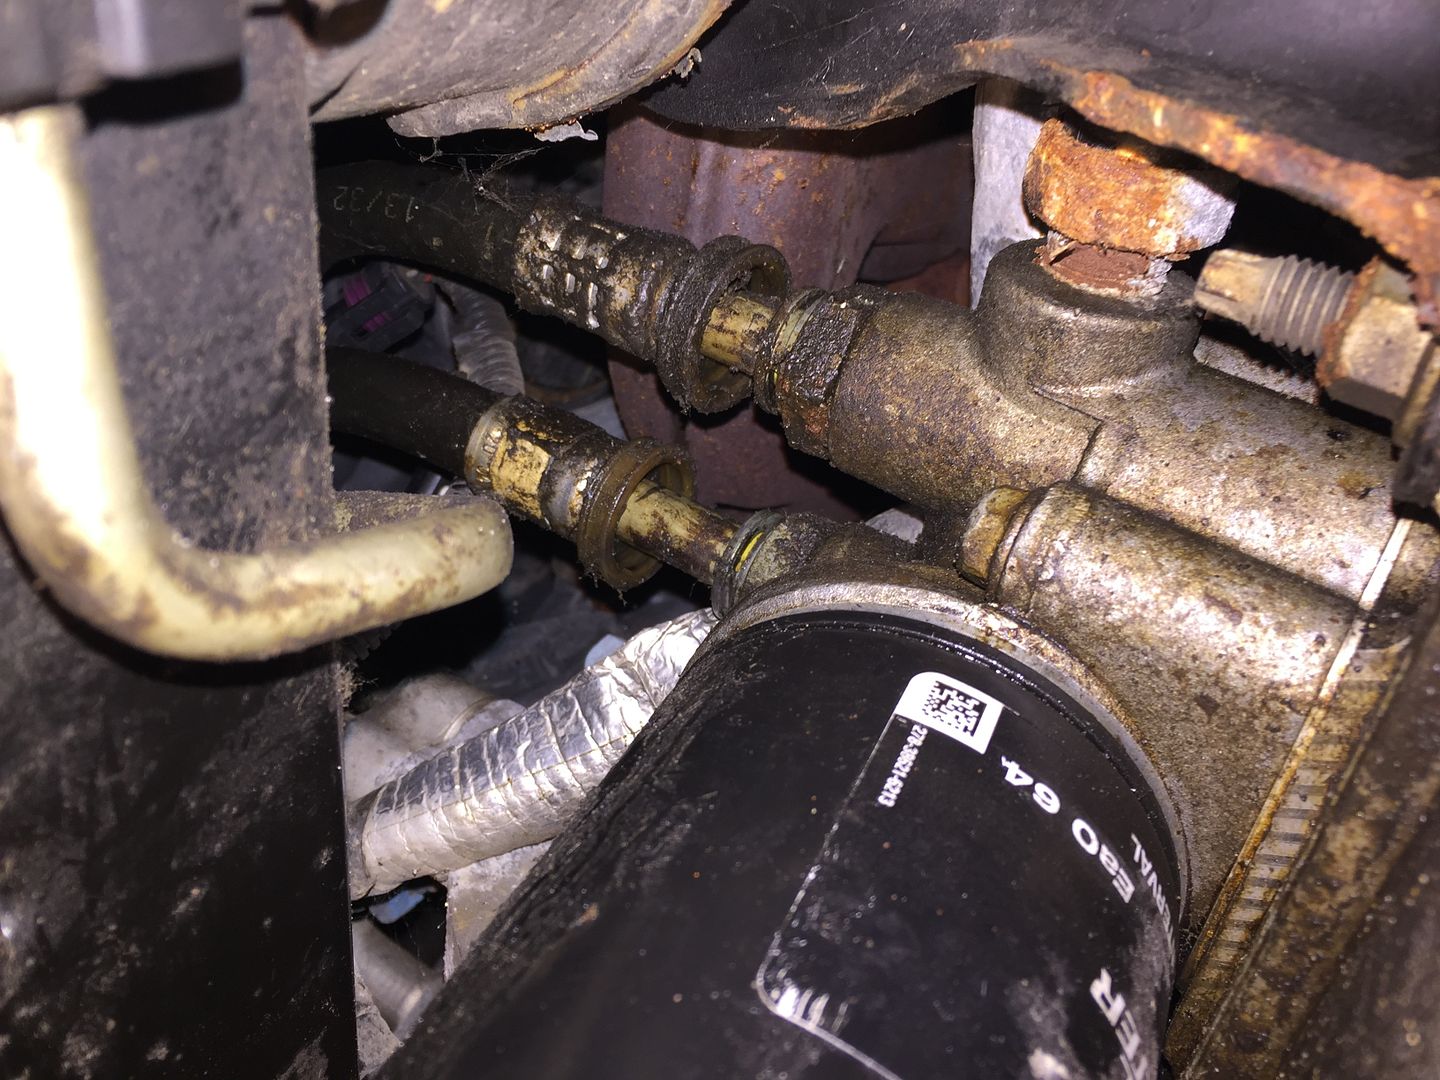
49.) Remove oil cooler lines. Same quick connect fittings with clips as the upper trans cooler line.
50.) Remove brace between engine and trans. (15mm, 4 bolts)
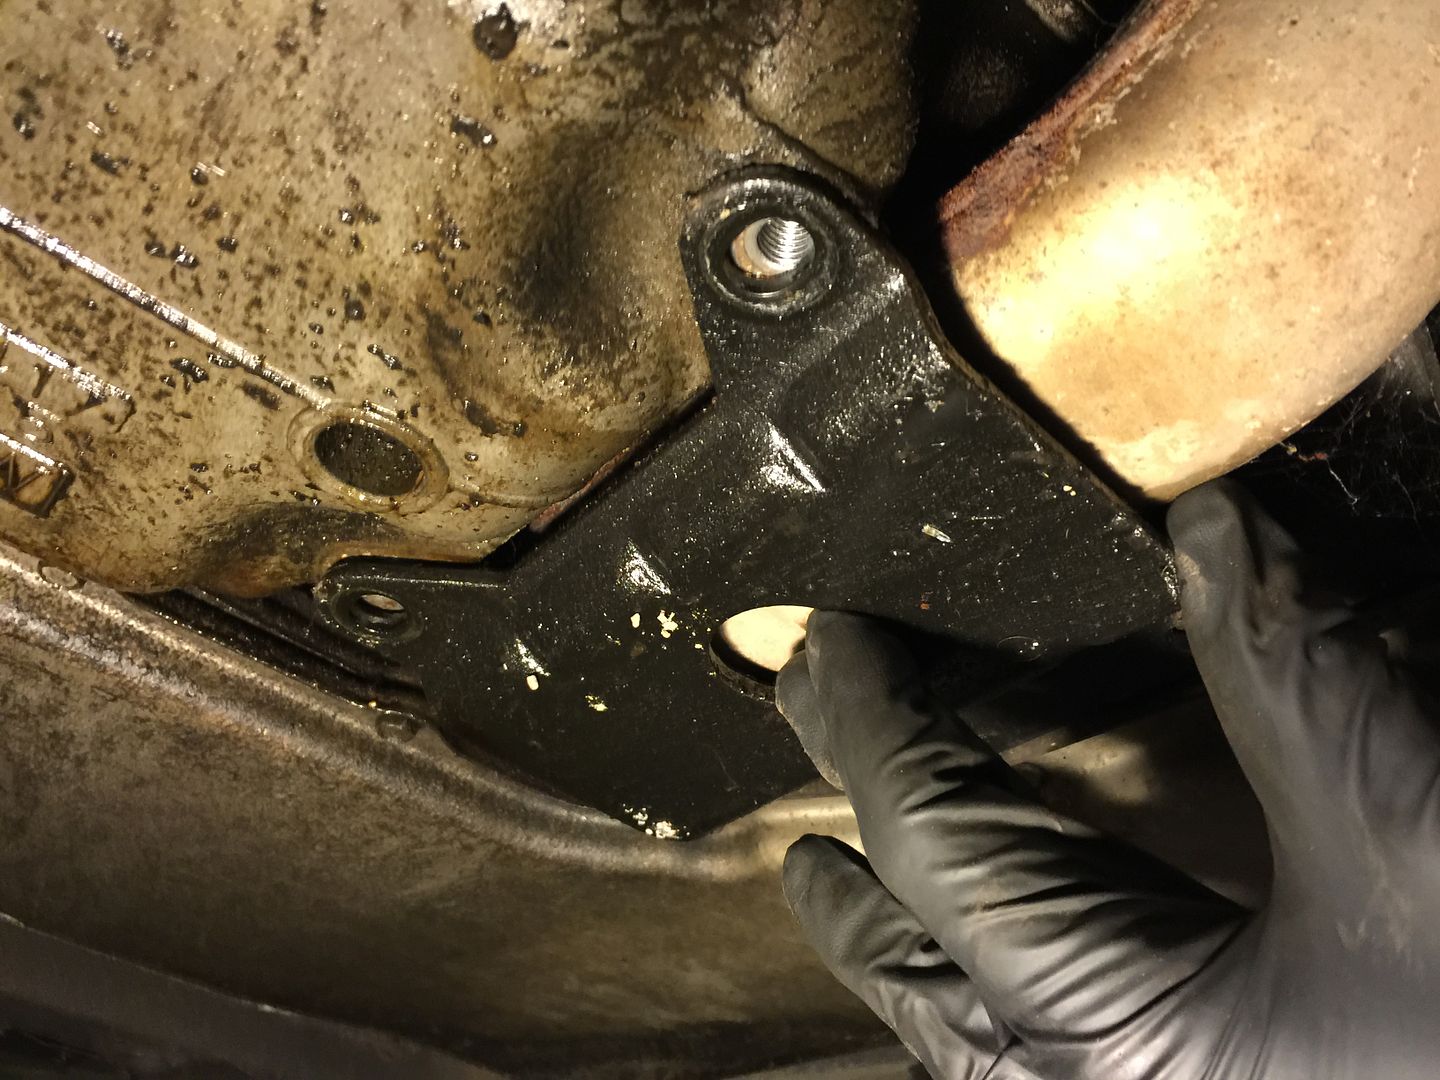
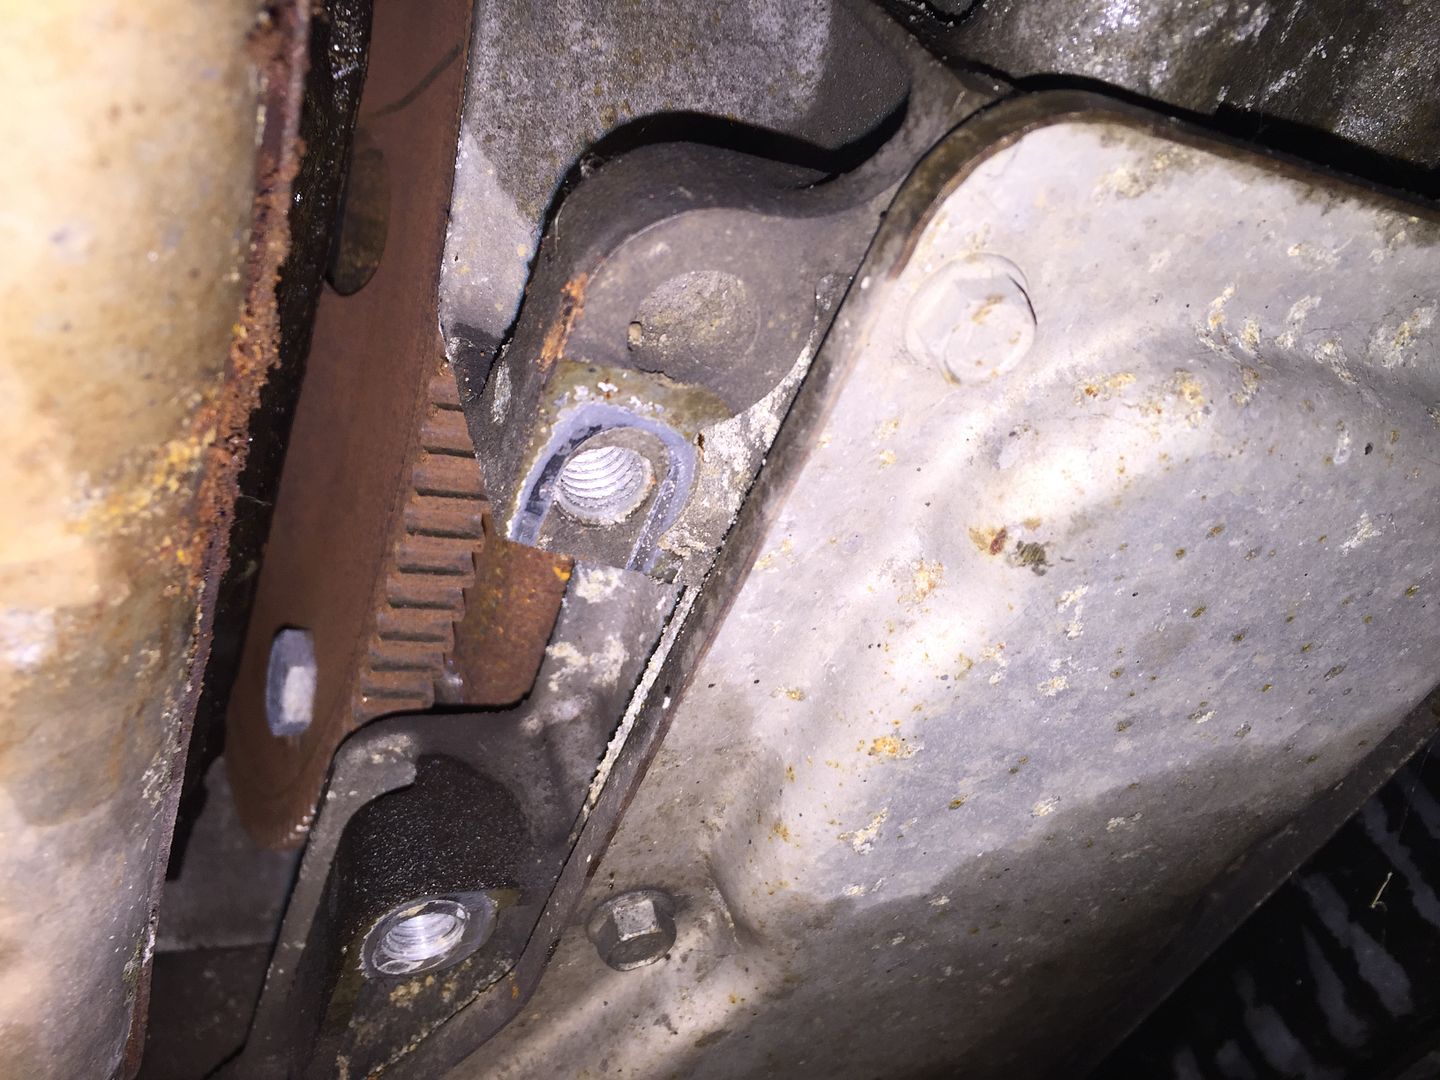
51.) Remove the torque converter cover. You can see what I have written on the directions in the photo above for this step. It is simply a 10mm bolt but that sucker is a pain to get out. The little bolt right next to the oxygen sensor plug.
52.) Remove torque converter to flywheel bolts. (18mm)
(Normally this would be a good time to do this but considering my situation with not being able to turn the engine off I can’t quite remove these bolts at this time.)
Stay tuned for more to come!!


