This contains two write-ups on the repair of the seat heaters on the 2000+ Bonnevilles. The first write-up is by Archon. The second by Harofreak00. It should get you through just about any problem found.
This is presented as a guide to assist you with the repair. Read the entire article before proceeding, and if at any time you feel this is beyond your capabilities, do not attempt the repair. The authors, staff, and members of the Pontiac Bonneville Club accept no responsibility for any damage or injury resulting from you following this guide.The seat heaters in the 2000+ Bonnevilles often quit working after a time. When the switch is depressed, the light comes on for a second or two, and then shuts off. The most common cause for this is an open circuit in one of the seat heaters. It usually opens where the supply wires connect to the heater wires. GM sells replacement seat heaters, but they are relatively expensive, and there have been comments that they don't get quite as warm. That's because they are installed under the seat cover's backing, which contains the original seat heater. This repair is fairly easy to do, and should not take longer than an hour or two. The seat generally does not have to be removed from the car, however removing the seat bottom will make the job easier.
If you notice one part of the seat heater getting warmer prior to the failure, that will give you a clue toward where to look first.
This repair has held for 3 years as of 2011.
Tools needed for this job are: Soldering gun, solder, solder wick, wire cutters, box cutter, hemostats or similar, and foam type weather stripping.
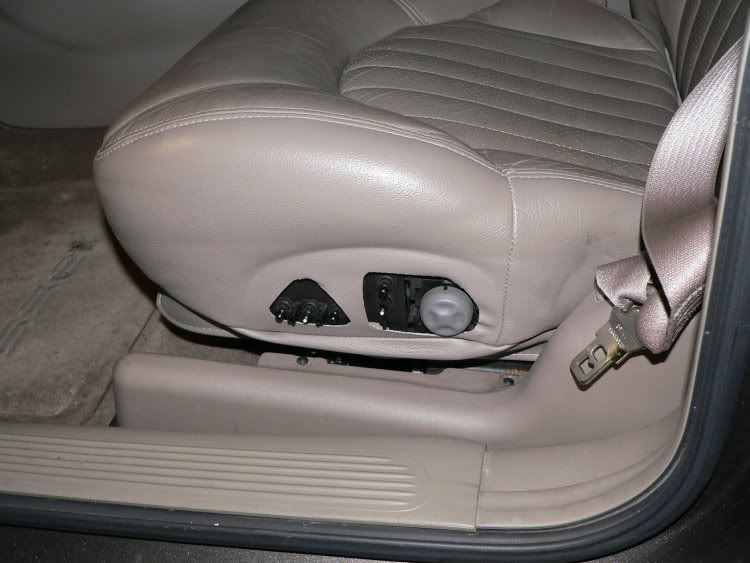
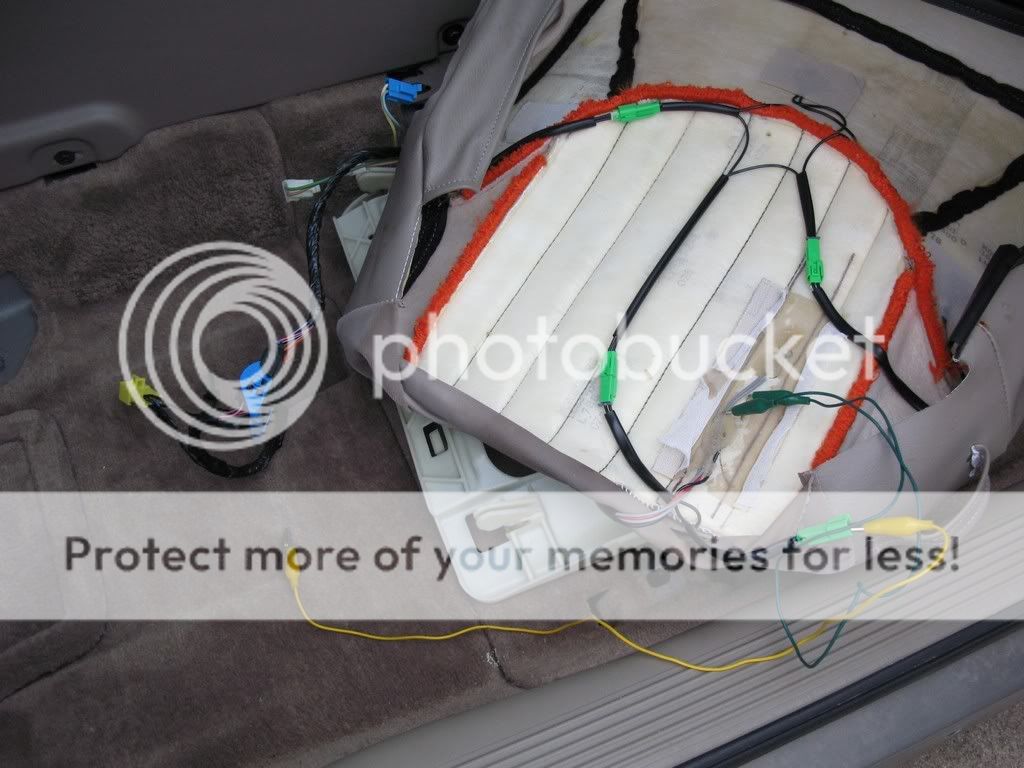
Start by raising the seat up to make things easier to reach. Then remove the covers for the seat switch. The round one does not need to be removed. The others just pry off. Then remove the cover attached to the seat. The cover has two plastic clips under the seat that holds it on. It is easier to get to those by removing the seat bottom, but with some effort can be removed with the seat still installed. Many times those clips are already broken. When you're done it should look like this.
The seat cover is held on with clips that attach to the bottom part of the seat. The long one in the front, and one in the corner are all that have to be removed for this.
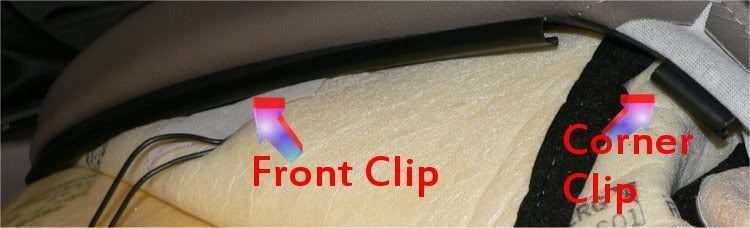
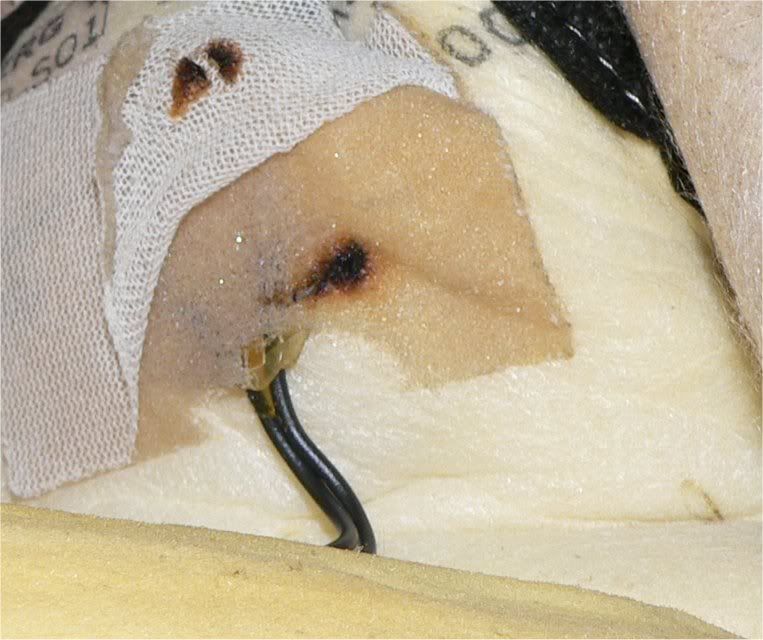
With the seat cover pulled back, it will look something like this.
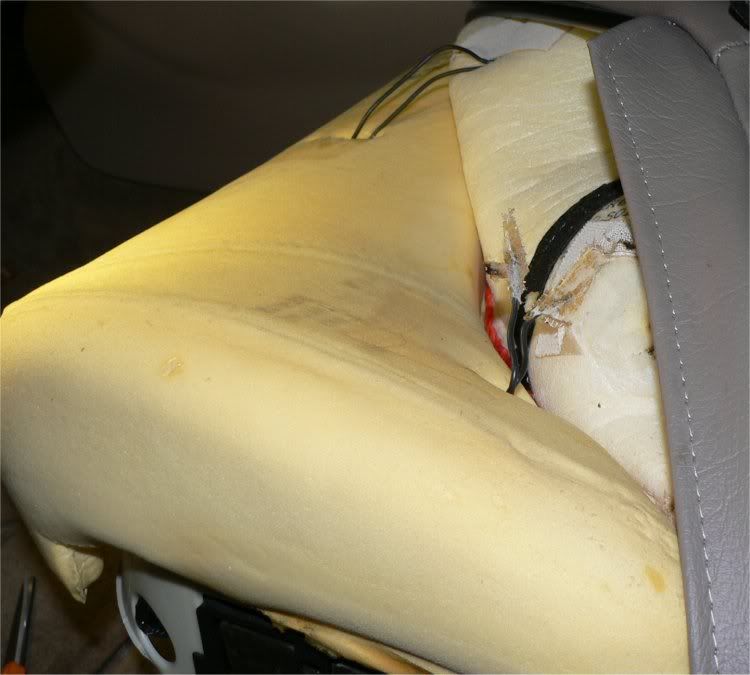
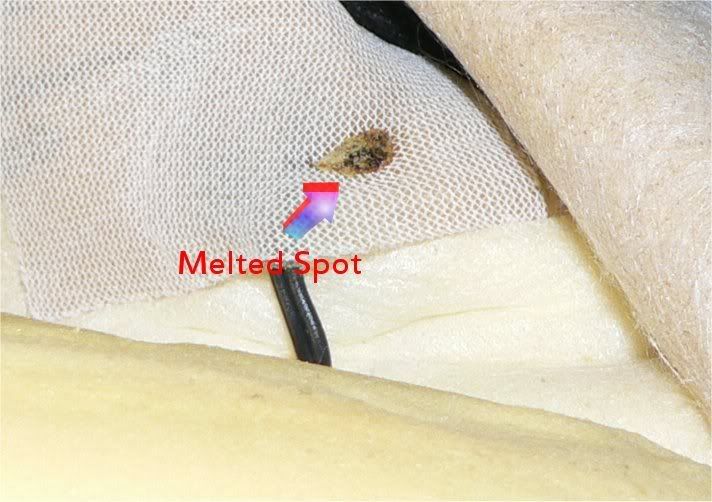
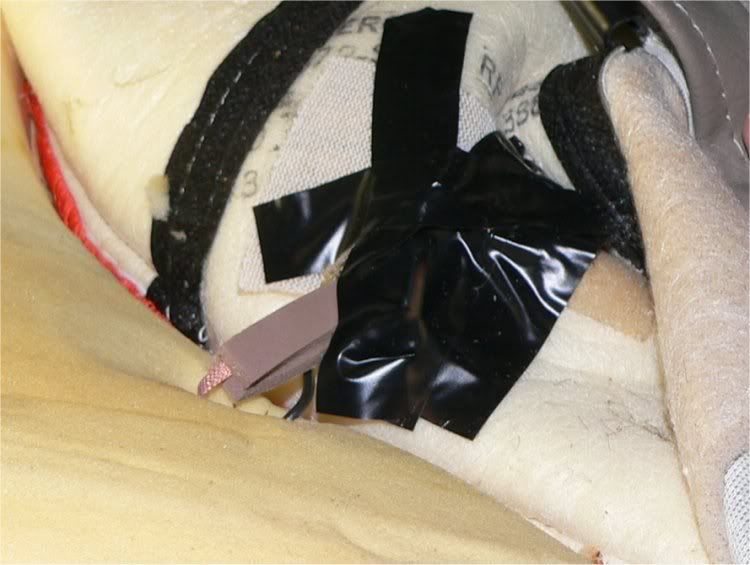
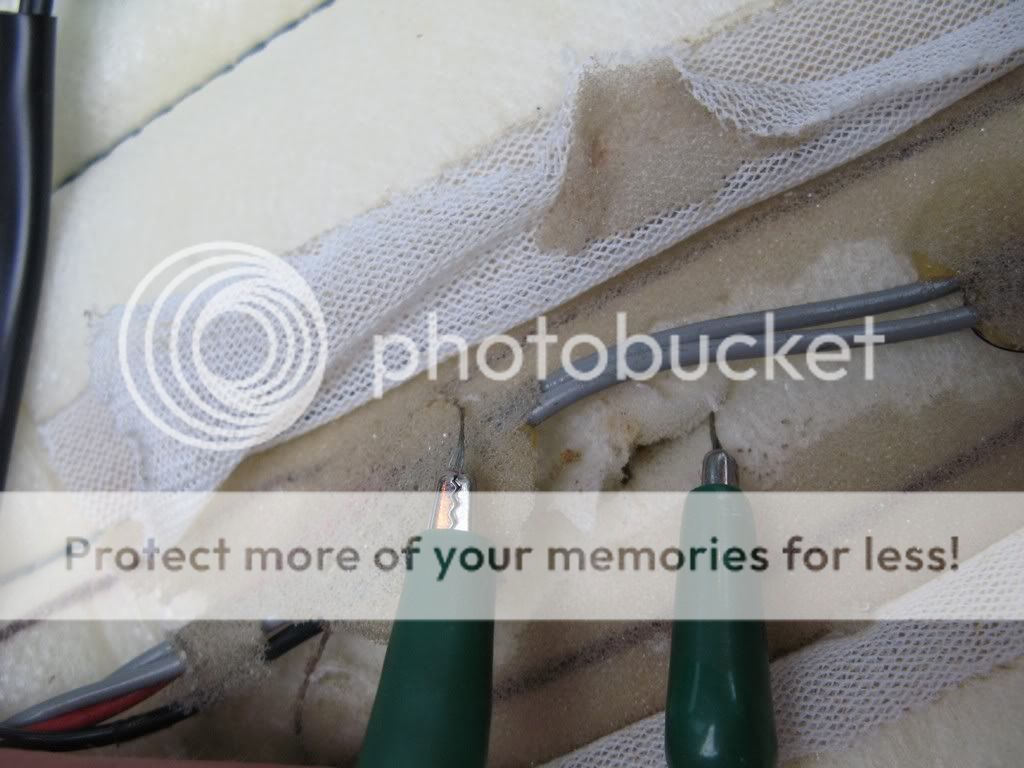
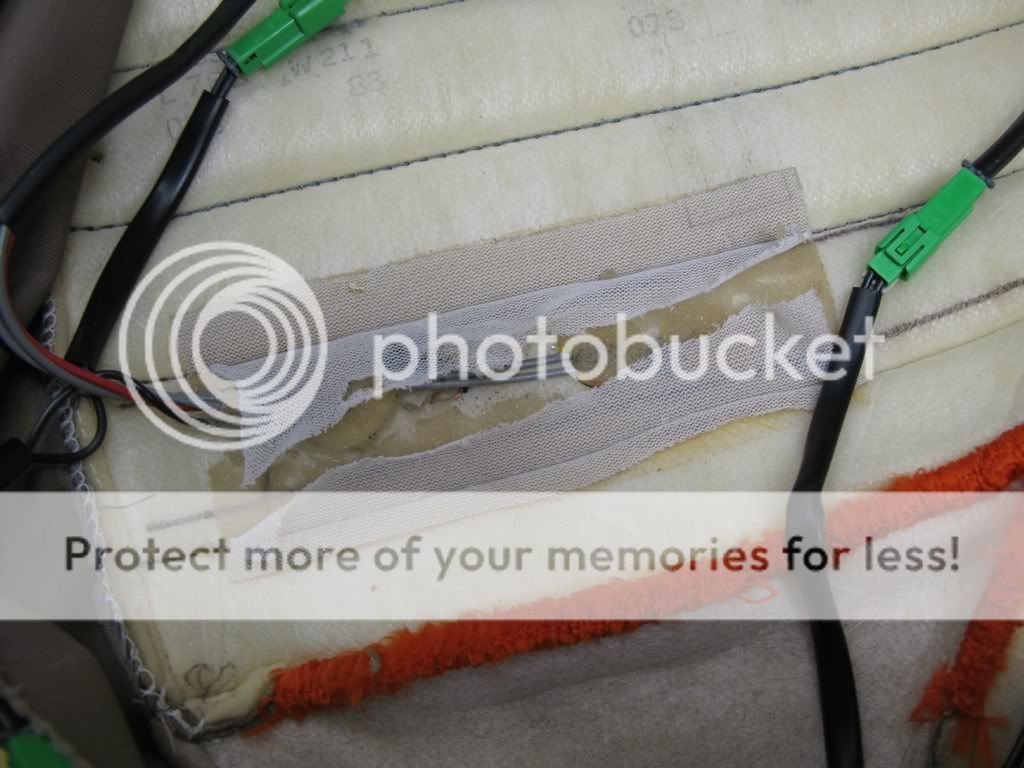
Looking at the underside of the seat cover, there will probably be a melted spot in the cloth type mesh covering the connections.
Peeling back that covering will reveal a burned mark in the hard fiberglass type covering that holds the wires and connections in place. This was likely used to try to keep the wires in place, and prevent them from breaking. However, it probably contributes more to the problem, instead of solving it.
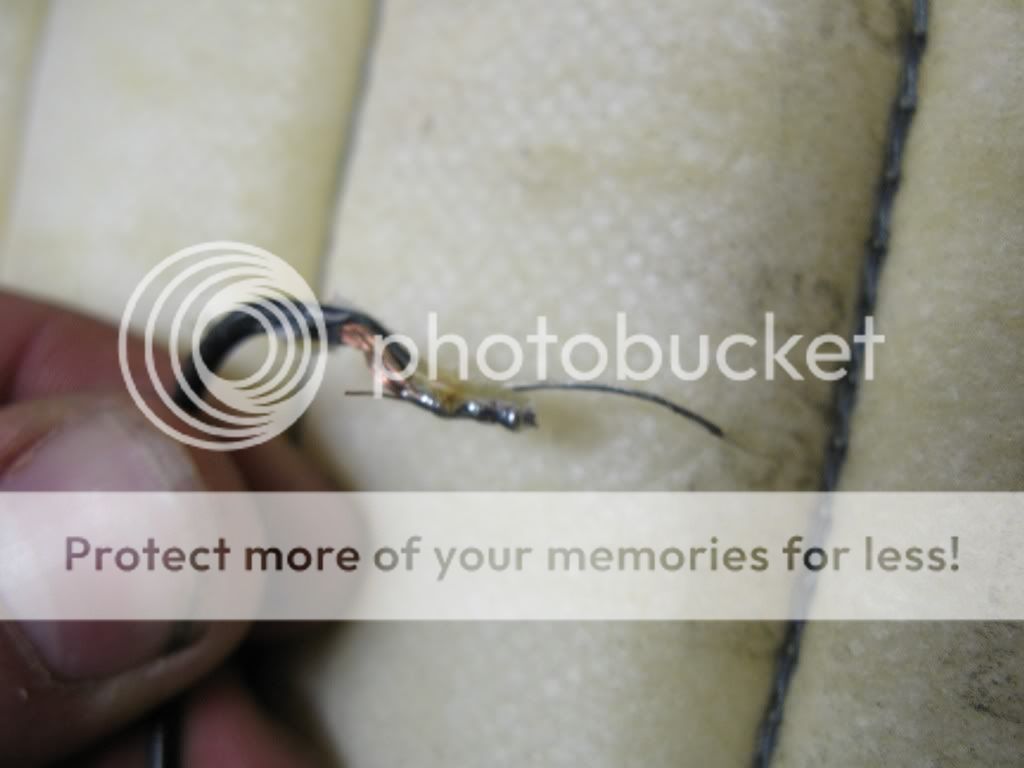
Dig into the seat cover some, until the heater wire that broke off is exposed. The rest of the wiring is still encased in the hard fiberglass type coating.
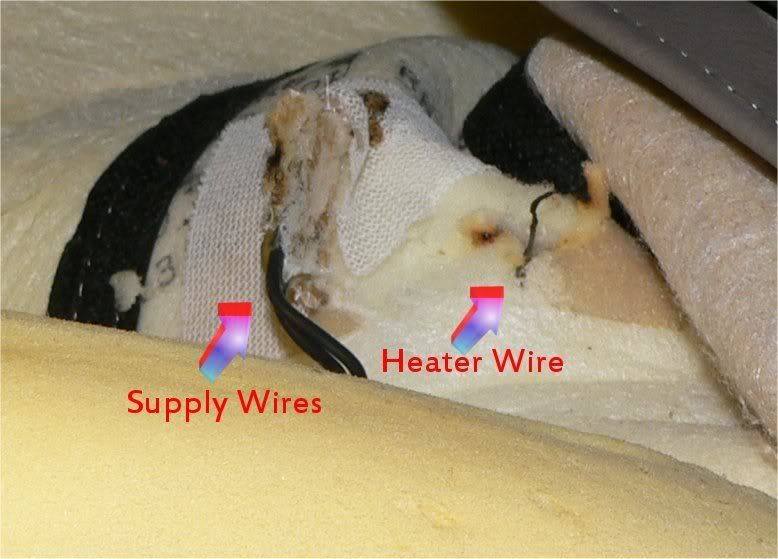
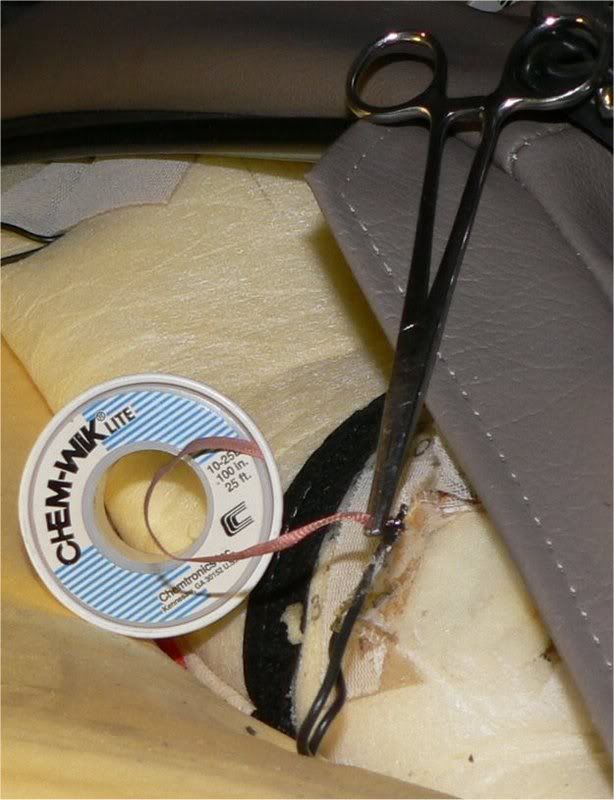
Using some wire cutters, cut between the two wires in the coating. Looking closely at the wire on the left in the picture, the burned spot jutting out to the left side shows where the heater wire at one time was attached.
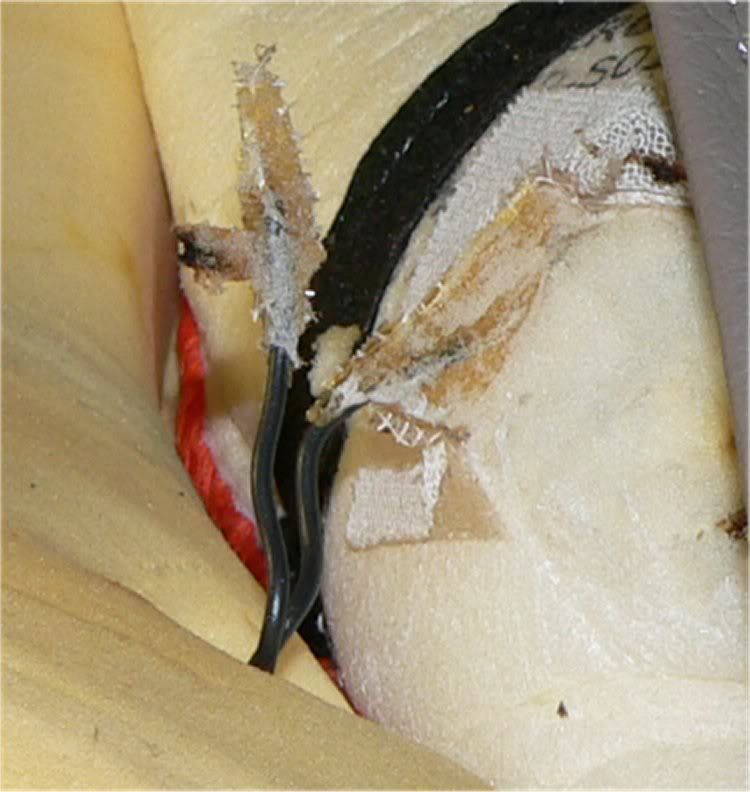
Using the wire cutters, and a box cutter or other sharp blade, clean off the supply wire until the solder covered end is exposed.
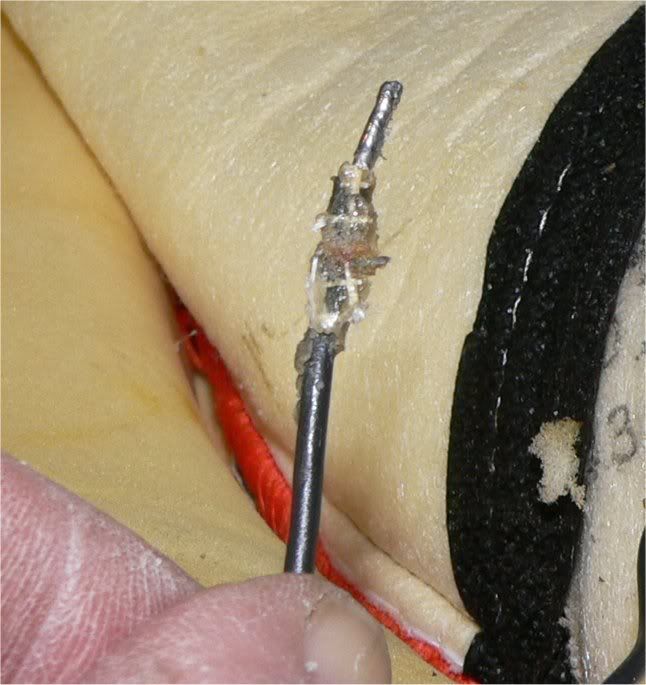
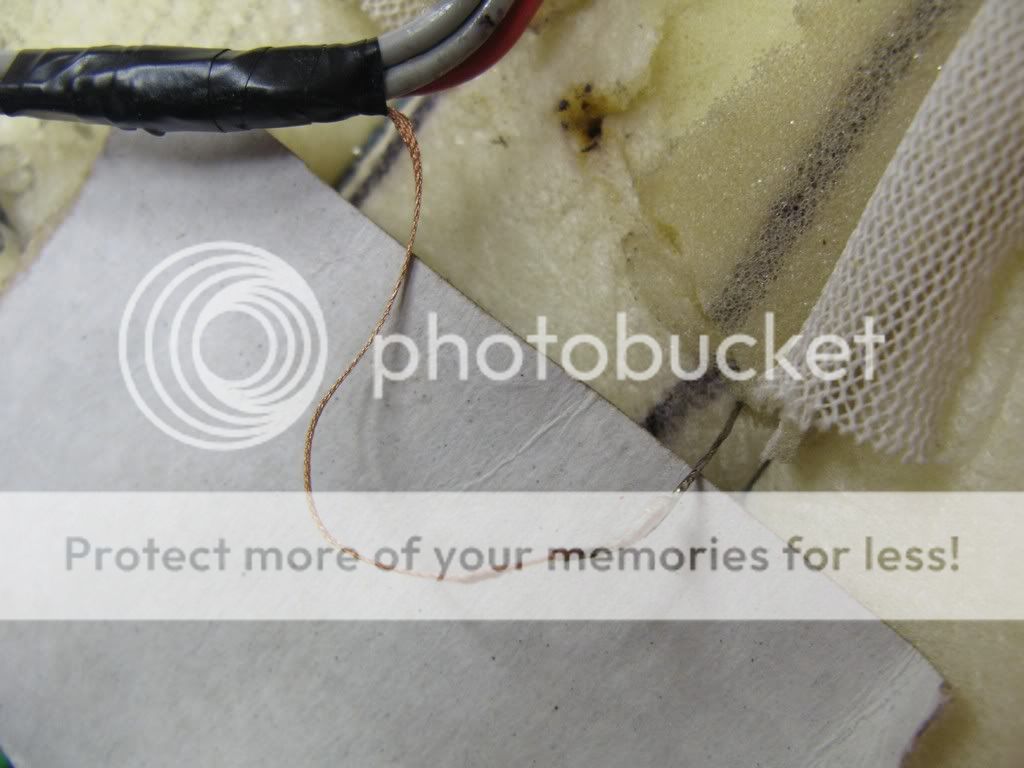
Solder wick was chosen for the repair, because it is flexible, and being made mostly of copper, conducts electricity well. Wrap the end of the solder wick around the supply line's exposed soldered end. To keep the solder from wicking up the solder wick, a set of hemostats was used as a heat sink right next to the connection. This will keep the rest of the wick flexible.
Bend the solder wick down the side of the wire, and then back over itself. This will provide a little extra strain relief. Tape the area tightly.
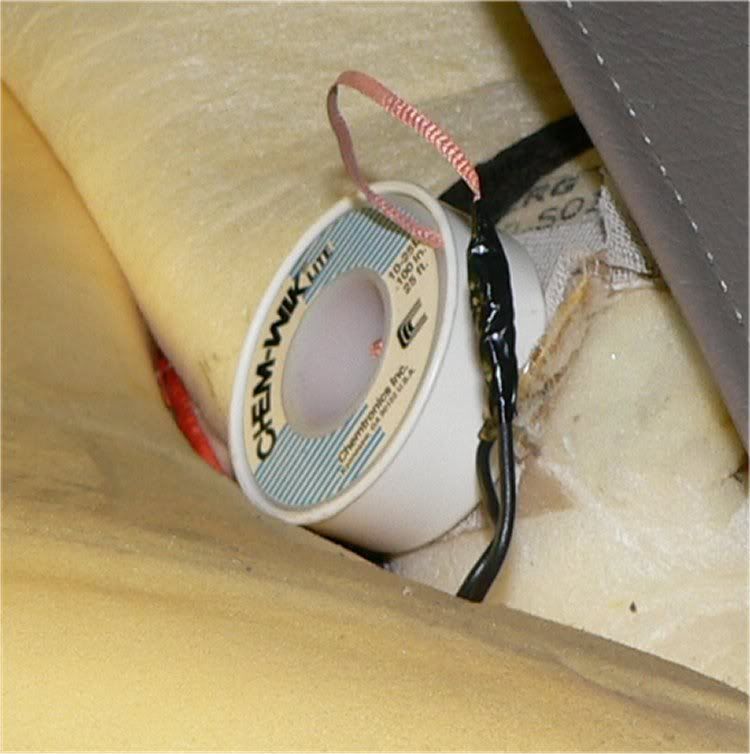
To protect the connection further, push it down inside the hole in the seat cushion.
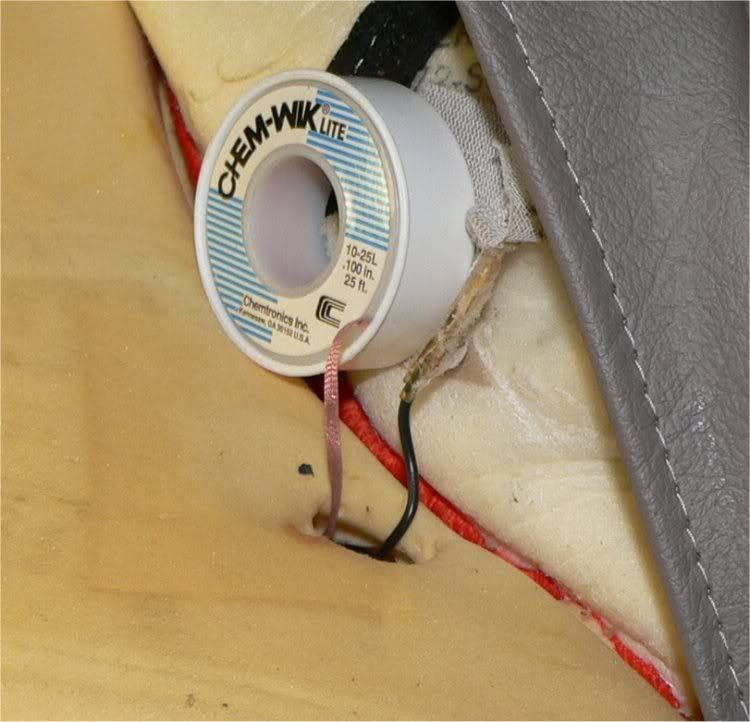
Pull out enough of the solder wick to easily reach the heater wire. Wrap the wick around the heater wire, attach the hemostat next to the connection, and apply solder.

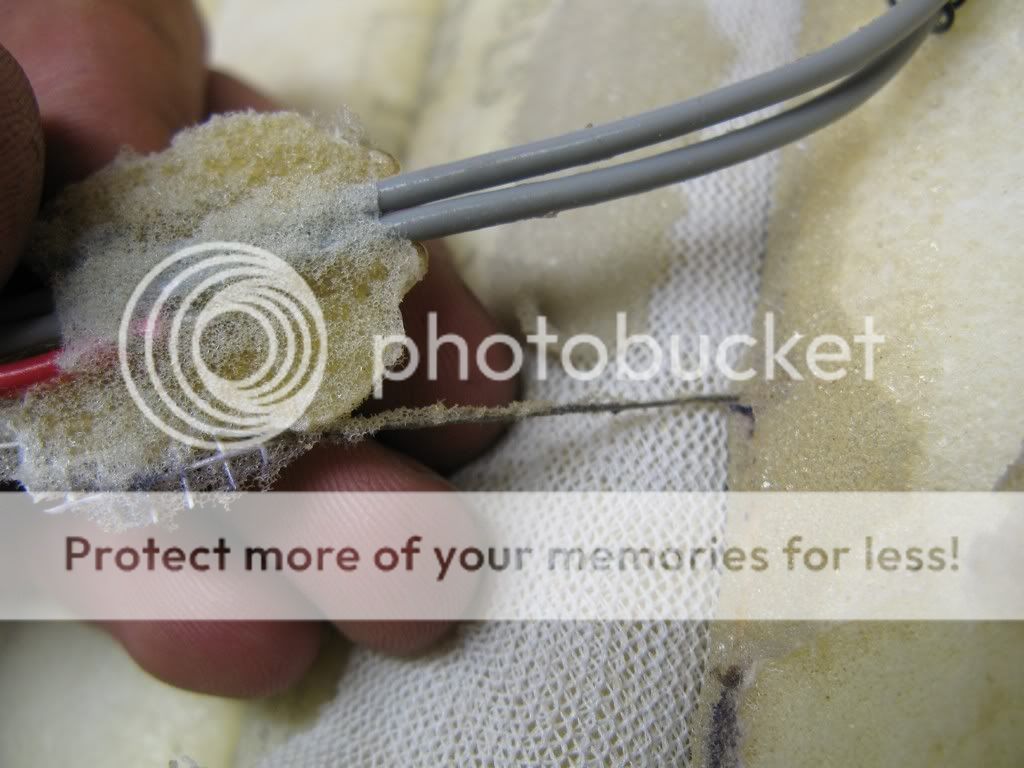
To add protection, apply strips of foam weather stripping to each side of the new wiring.
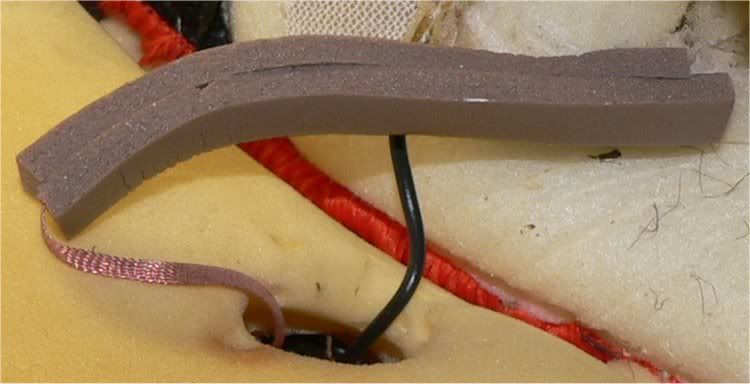
When the heater wire was dug out of the seat backing, it should have left a small hole. Push the end of the foam weather stripping containing the wires into that hole, and tape in place. GM automotive tape was used here, as it holds well. Any similar tape should do fine. It doesn't have to look pretty, just so it holds it in place. The other end will slide partially into the hole in the seat cushion.
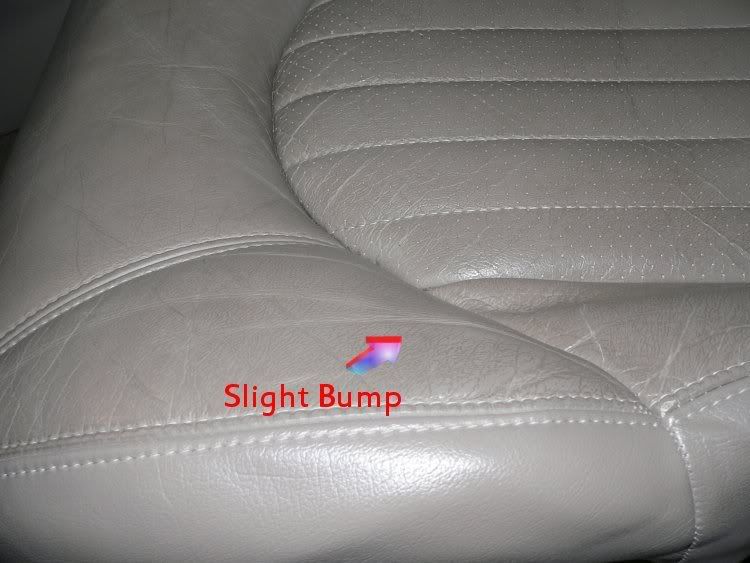
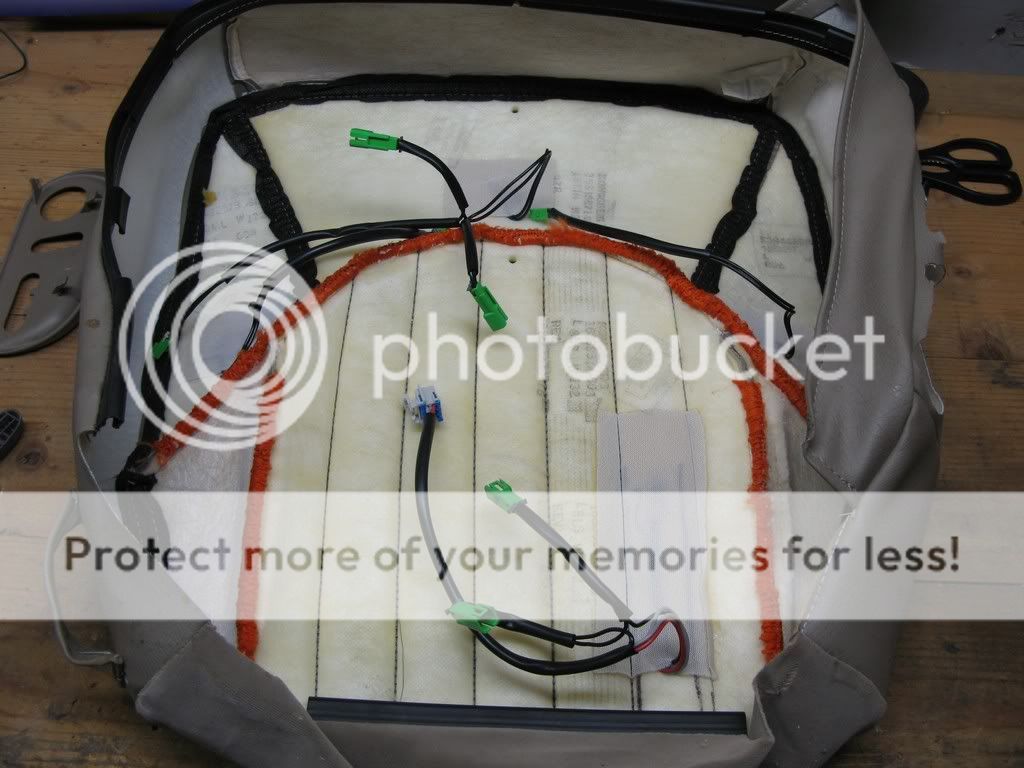
Pull the seat cover back into place, using care not to stress the new connections. Put the clips back on the lower part of the seat, and replace the switch covers. It's a little hard to see in this picture, but a slight bump may appear in the seat cover. This should soon go away.
 Procedure by Harofreak00
Today I decided to work on the heated seats. I based my work off of Archon’s writeup.
I pulled the front of the seat cover on both seats and didn’t see any burn marks. I put everything back together and threw in the towel. At that point, I was thinking it was either the seat back, the module, or some other small wire that I wouldn’t find.
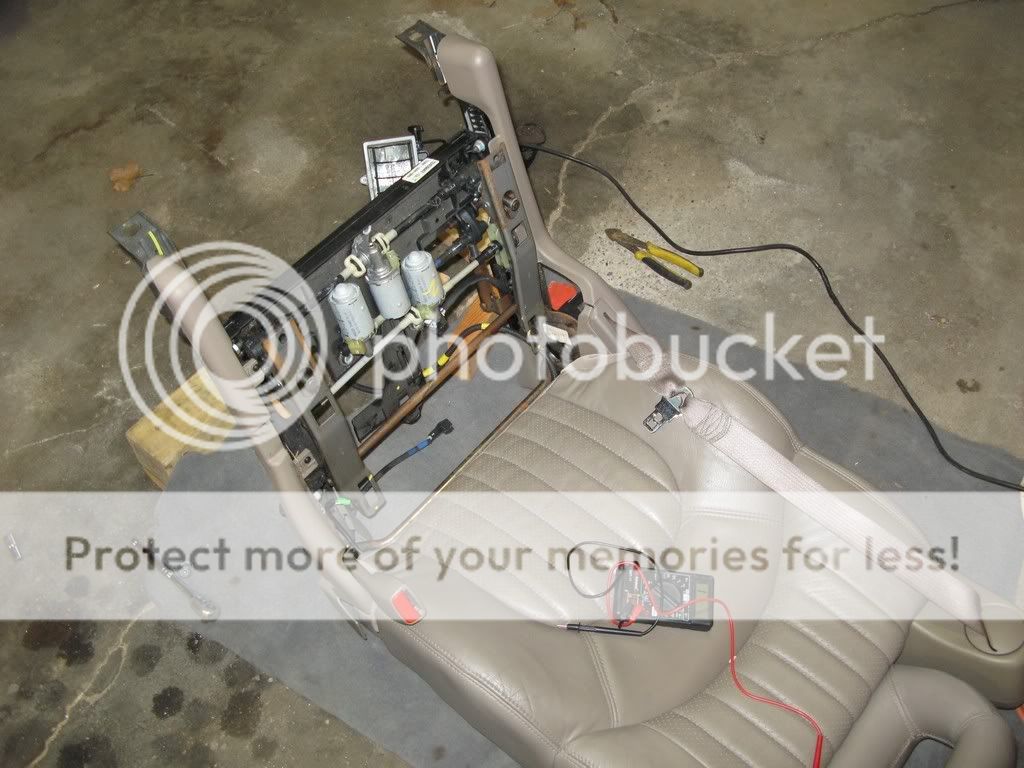
Then later in the day I got a second wind and pulled the entire seat out. I took off the bottom section.
I started with the biggest connection area and cut back some of the foam. I was pleasantly surprised to find a broken wire.

I took some alligator clips and put them on the wires.
And then closed off the circuit to the seat back connection.

And hooked it up in the car.
And what do you know… it works….

So then I soldered some solder wick onto the wires


And covered it up
Now to the drivers side. I decided that I wasn’t going to pull the whole seat out, just the bottom. Only 2 – 10mm nuts hold it in place.

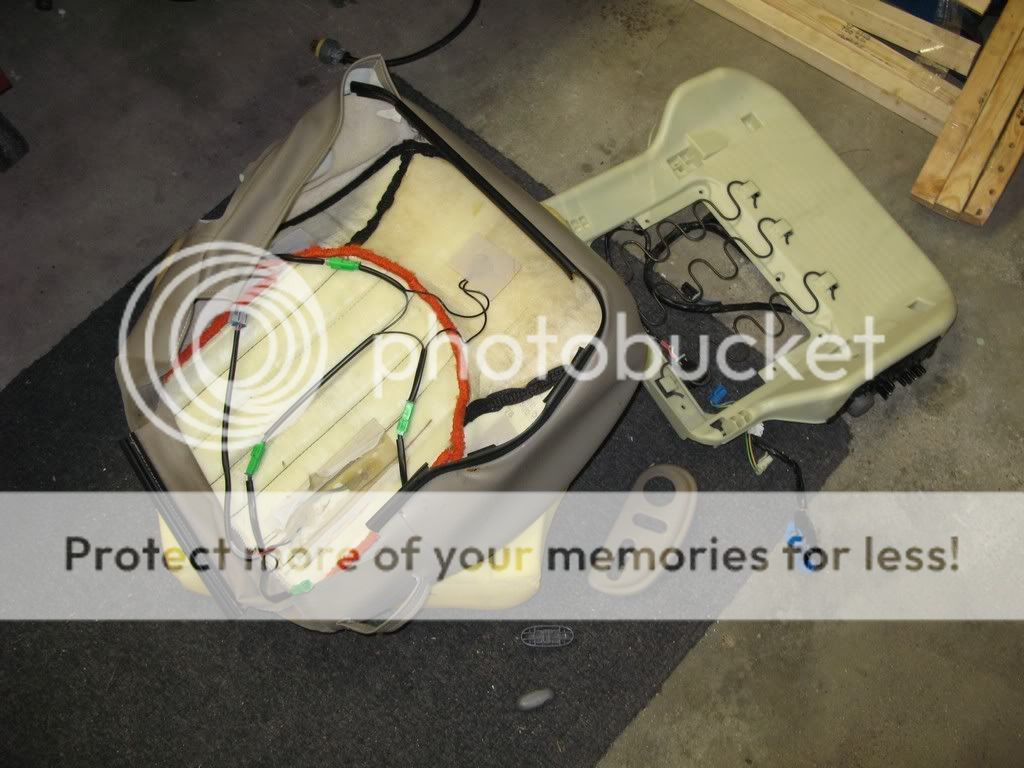
After disconnecting all the connections, you have the bare seat bottom.

Then remove the foam/leather from the base.

And the leather from the foam.
Here is the section that was bad on the passenger one…

And this one has the same problem.

Here is the burnt end of the wiring buried deep in the foam

The other connection was good still
Starting the soldering

Leave a little slack
Tape it up
Both seats work great!